mirror AUDI A5 COUPE 2016 Owners Manual
[x] Cancel search | Manufacturer: AUDI, Model Year: 2016, Model line: A5 COUPE, Model: AUDI A5 COUPE 2016Pages: 264, PDF Size: 66.92 MB
Page 11 of 264
.... N
0 Ico ....
@
®
©
®
®
(j)
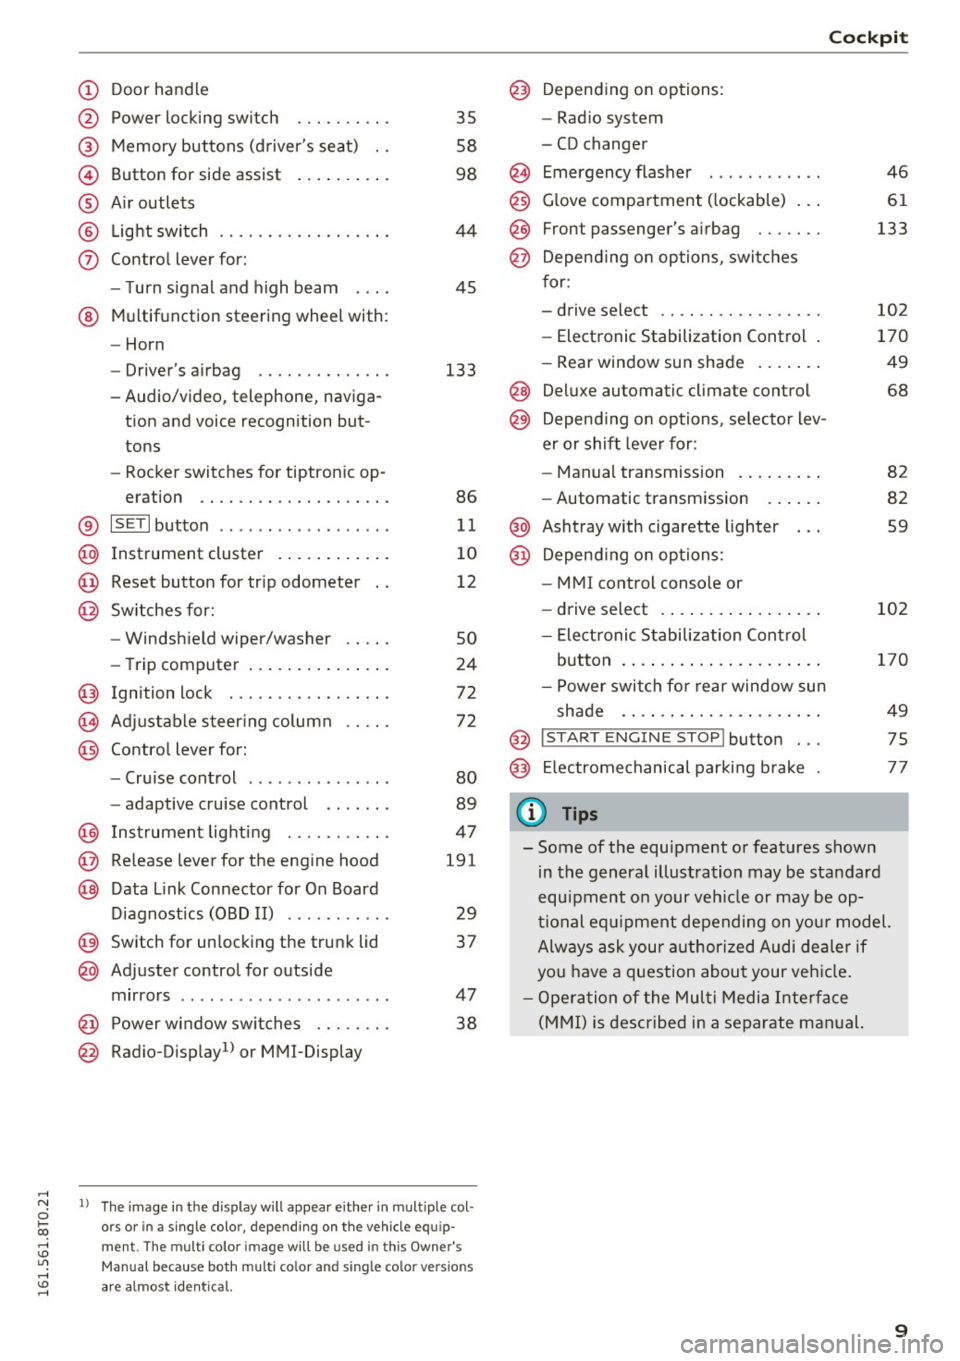
Door handle
Power locking switch
Memory buttons (driver's seat) . .
Button for side assist
A ir outlets
Light switch
Control lever for:
- T urn signal and high beam
® Multifunction steering wheel with :
- Horn
- Driver's airbag ......... .. .. .
- Audio/video, telephone, naviga-
tion and voice recognition but
tons
- Rocker switches for tiptron ic op-
eration .. ............... .. .
® IS ETI button ................. .
@ Instrument cluster .......... . .
@ Reset button for trip odometer
@ Sw itches for:
@
@
- Windshield wiper/washer
- Trip computer .............. .
Ignition lock . ... ..... ... .. .. .
Adjustable steer ing column
Contro l lever for:
- Cruise control .............. .
- adaptive cruise control
I nstrument lighting .......... .
Release lever for the engine hood
Data Link Connector for On Board
Diagnostics (OBD II) ..... ..... .
Switch for unlocking the trunk lid
Adjuster control for outside
mirrors ................ ..... .
Power window switches ..... .. .
Radio-Display
1> or MMI-Display
35
58
98
44
45
133
86
11
10
12
so
24
72
72
80
89
47
191
29
37
47 38
ll The image in t he d is pl ay wil l appear either in m ultiple c ol
o rs or in a single colo r, depending on the vehicle e quip
m ent. The mult i co lor im ag e will b e used in th is Owne r's
M an ua l bec ause both multi co lor and single co lo r v ersio ns
ar e al m ost identica l.
Cockpit
Depending on options:
- Radio system
- CD changer
Emergency flasher
G love compartment ( lockable) .. .
Front passenger's airbag ...... .
Depend ing on options, switches
for:
- drive select .. .............. .
- Electronic Stabilization Control .
- Rear window sun shade ...... .
@ Deluxe automatic climate control
@ Depending on options , se lector lev
er or shift lever for:
@
@
- Manual transmission ........ .
- Automatic transmission
Ashtray with cigarette lighter Depend ing on options:
- MM I control console or
- drive select . ... ............ .
- Electronic Stabilization Control
46
61
133
102
170
49
68
82
82
59
102
button . . . . . . . . . . . . . . . . . . . . . 170
- Power switch for rear window sun
shade . . . . . . . . . . . . . . . . . . . . . 49
@ I START ENGIN E STOP ! button . . . 75
@) Electromechanical parking brake 77
(D Tips
- Some of the equipment or features shown
in the general illustration may be standard
equipment on your veh icle or may be op
tional equipment depending on your model.
Always ask your authorized Audi dealer if
you have a question about your vehicle.
- Operation of the Multi Media Interface
(MMI) is described in a separate manual.
9
Page 49 of 264
,-1 N
0 1-CX)
,-1 I.Cl U"I
,-1 I.Cl ......
Interior Lighting
Front/rear interior lights
(• ' .,;,I
~~~
8 8
O. ~O
l
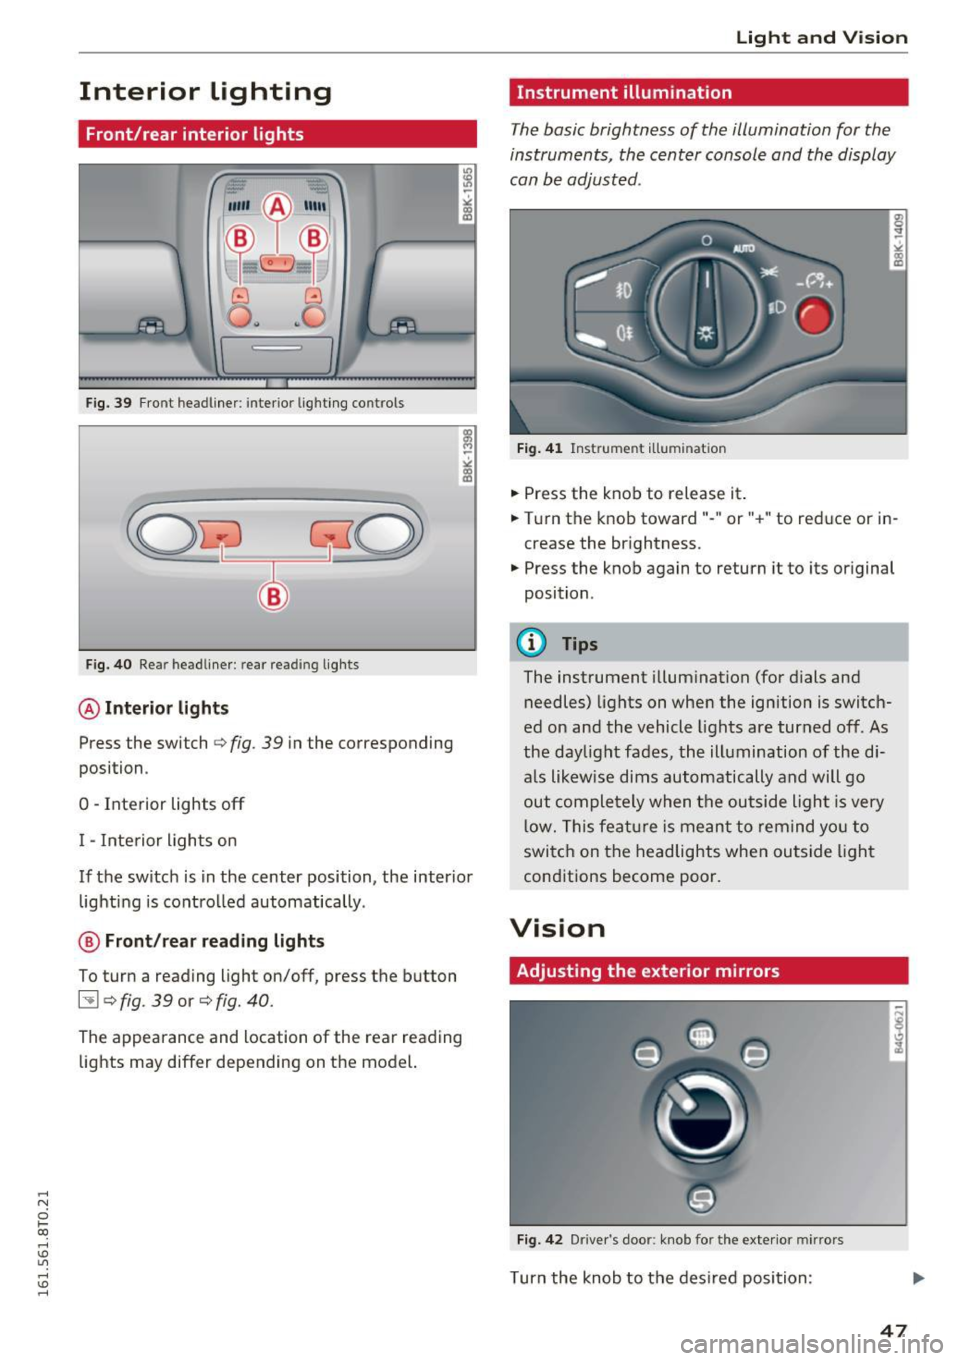
Fig. 39 Front headl iner : interio r lighting co ntrols
Fig. 40 Rear headliner : rear re ading lights
@Interior lights
Press the switch Qfig . 39 in the corresponding
position .
0 -Interior lights off
I - Interior lights on
If the switch is in the center position, the interior
lighting is controlled automatically .
@ Front/rear reading lights
To turn a reading light on/off, press the button
~ Q fig . 39 or Q fig. 40.
The appearance and location of the rear reading
lights may differ depending on the model.
Light and Vision
Instrument illumination
The basic brightness of the illumination for the
instruments, the center console and the display
can be adjusted .
Fig. 41 Instrume nt illumin atio n
• Press the knob to release it .
• Turn the knob toward"- " or"+" to reduce or in
crease the brightness .
• Press the knob again to return it to its original
position .
@ Tips
The instrument illumination (for dials and
needles) lights on when the ignition is switch
ed on and the vehicle lights are turned off. As
the daylight fades, the illumination of the di
a ls likewise dims automatically and will go
out completely when the outside light is very
low. This feature is meant to remind you to
switch on the headlights when outside light
conditions become poor.
Vision
Adjusting the exterior mirrors
Fig. 42 Driver 's doo r: kno b fo r the exterio r mirrors
Turn the knob to the desired position :
47
Page 50 of 264
Light and Vision
Q/P -Adjusting the left/right exter ior mir ror.
Move th e knob in the des ired direction.
(@. -Heat ing the m irro r glass depending on the
ou tside temperat ure*.
.9 -Folding exterior mirrors* . In the Infotain
men t system, you can select if the mirrors fold in
automatically when you lock the vehicle
¢ page 36.
Front passenger's exterior mirror tilt
function*
To help you see the curb when ba cking in to a
pa rking space , the surface of the mirror tilts
slightly. For this to happen, the knob must be in
the posit ion for the front passenger's outs ide
mirror.
You can adjust the ti lted mi rror sur fa ce by turn
ing the knob in the desired direction. When you
move out of reverse and into another gear, the
new mirror position is sto red and assigned to the
key yo u are using.
The mirror goes back into its o riginal position
once yo u drive forward faster than 9 mph
(15 km/h) or tu rn the ignition off .
A WARNING
Curved mirror surfaces (convex or spherical *)
increase your f ield of view. Remember that
vehicles or other objects will appear smaller
and fa rther away than when seen in a flat mir
ror. If you use t his mirro r to est imate distan
ces of following vehicles whe n cha ng ing
lanes, yo u co uld estimate incor rectly and
c ause an accident .
(D Note
-If the mir ror housing was moved by outs ide
fo rces (such as an impac t when maneuver
in g), y ou must use the powe r fo ldi ng func
tion to fold the mirro r all the way out . The
mirror housing must not be moved back in
to place by hand beca use this would impa ir
the function of the m irror mechanism.
- If you wash the ve hicle in an automatic car
wash, yo u m ust fold the exte rior m irrors i n
to reduce the risk of damage to the mirrors.
48
N ever fold power fold ing ex terior mirrors *
by hand . On ly fold them in and out using
the power controls .
(D Tips
-If the power adjusting function malfunc
tions, the glass in both mirrors can be ad
justed by p ressing on the edge of it by hand .
- The exte rior m irro r settings are sto red w it h
the memory function* ¢
page 58.
Dimming the mirrors
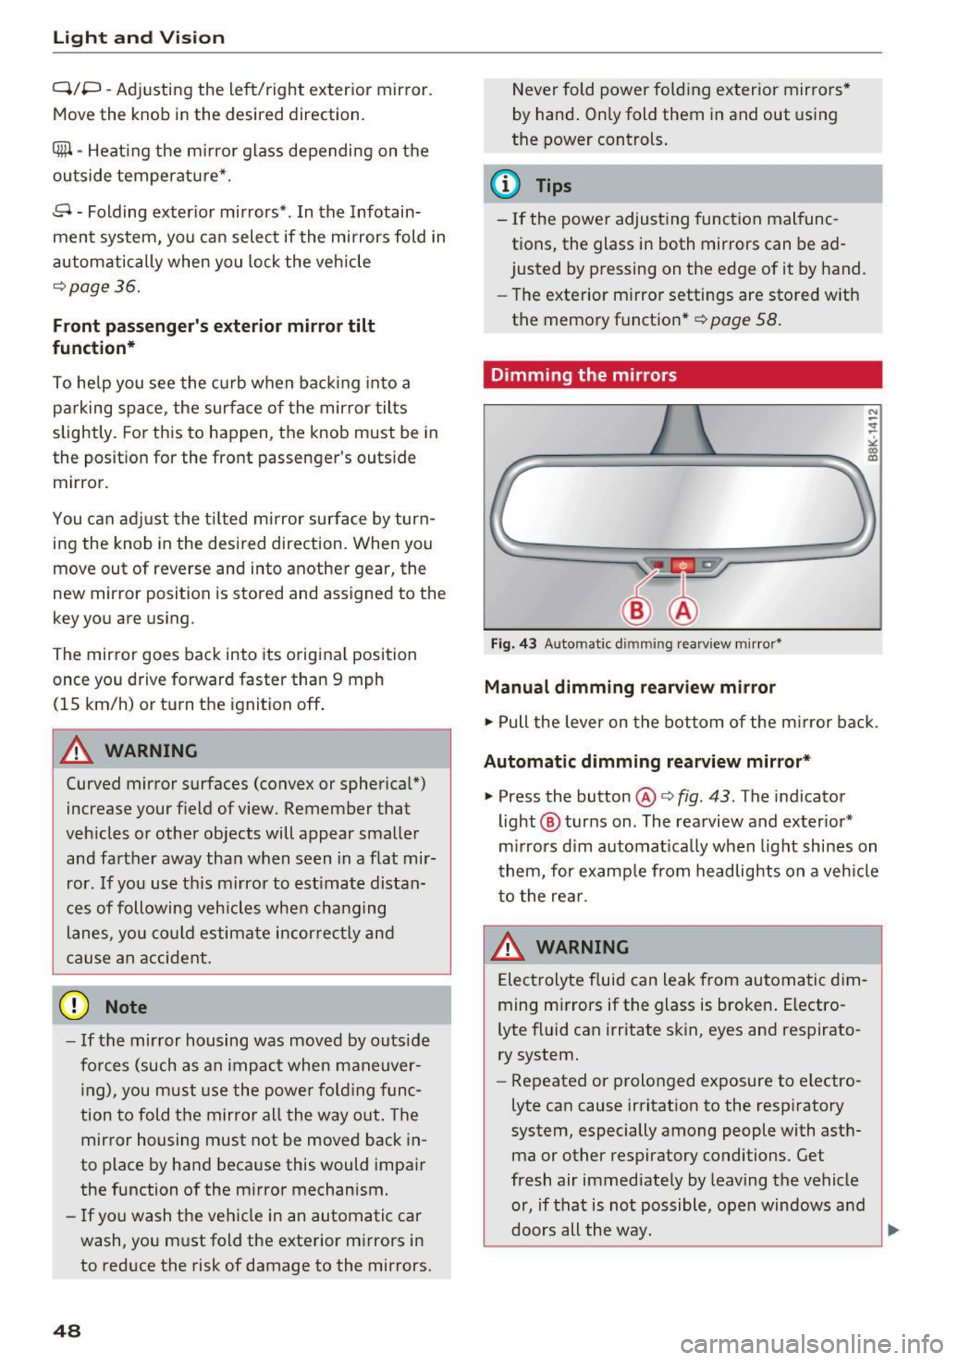
Fig. 4 3 Auto mat ic d immin g rear view m irro r•
Manual dimming rearview mirror
.,. Pull the lever on the bottom of the m irror ba ck .
Automatic dimming rearview mirror *
.,. Press the button@¢ fig. 43. The indicator
light @ turns on . The rearview and ex ter ior*
m irrors d im au tomat ica lly when light shines on
t hem, for e xamp le from headlig hts on a veh icle
to the re ar.
A WARNING
Electrolyte f luid can leak from automa tic di m
ming mi rrors if the glass is broken . Electro
lyte fl uid can irritate s kin, eyes and respirato
ry system.
- Repeated or prolonged exposure to electro
lyte ca n cause irritation to the respiratory
system, especially among people with asth ma or other respiratory conditions . Get
fresh air immediately by leaving the vehicle
or, if that is not possible, open windows a nd
doors all the way. ..,.
Page 51 of 264

,-1 N
0 1-CX)
,-1 I.Cl U"I
,-1 I.Cl ......
-If electrolyt e gets into the eyes, flush them
thoroughly with large amounts of clean
water for at least 15 minutes; medical at
tention is recommended.
- If electrolyte contacts skin, flush affected
area with clean water for at least 15 mi nutes and then wash affected area w ith
soap and water; medical attention is recom
mended . Thoroughly wash affected clothing
and shoes before reuse.
- If swallowed and person is conscious, rinse mouth with water for at least 15 m inutes.
Do not induce vomiting unless instructed to
do so by medical profession al. Get medical
attent ion immed iate ly.
(D Note
Liquid elect rolyte leaking from broken m irror
glass will damage any p lastic surfaces it
comes in co ntac t wi th. C lean up sp illed ele c
t rolyte immediately with clean water and a
sponge .
@ Tips
-Switch ing off the d imm ing f unction of the
i nside rear v iew m irror also deact ivates the
automat ic dimming function of the exterior
mirrors.
- Automat ic dimming for the m irror on ly op
erates properly if the sun shade* for the
rear window is not in use or the light strik
ing the ins ide mirror is not hindered by oth
er objects .
- The automatic d imm ing mirrors do not dim
when the interior lighting is turned on or
the reverse gear is selected .
Light and Vis ion
Sun visors
Fig. 44 Drive r's s ide: sun viso r
The sun visors for the dr iver and passenger can
be pulled out of their brackets in the center of
the vehicle and turned towards the doors
(D .
The m irro r light swi tches on when the cover over
t he va nity mirror @opens.
Sun shade
Applies to vehicles: with sun shade
The rear window is equipped with a sun shade.
F ig . 4 5 W ith MM I: Bu tton for re ar w in do w s un shade
F ig. 46 W ith out MMI : But ton for rear window sun s had e
"' To extend/retract the sun shade, press the 00
~ 0
0
I-' CD U)
button r=;, fig. 45 or r=;, fig. 46 . ""
49
Page 54 of 264
Light and Vision
_&. WARNING
For your safety, you should replace the wiper
blades once or twice a year. See your author
ized Audi dealer for replacement blades.
(D Note
-The windshield wiper blades must only be
replaced when in the service position! Oth
erwise, you risk damaging the paint on the hood or the windshield wiper motor.
- You should not move your vehicle or press
the windshield wiper lever when the wiper
arms are folded away from the windshield.
The windshield wipers would move back in
to their original position and could damage
the hood and windshield .
- To help prevent damage to the wiper sys
tem, always loosen blades which are frozen
to the windshield before operating wipers.
- To help prevent damage to wiper blades, do
not use gasoline , kerosene, paint thinner, or
other solvents on or near the wiper blades.
- To help prevent damage to the wiper arms
or other components, do not attempt to move the wipers by hand.
@ Tips
- Commercial hot waxes applied by automatic
car washes affect the how easily the glass
surface can be cleaned.
- You can also use the service position, for ex
ample, if you want to protect the windshield
from icing by using a cover.
52
Digital compass
Switching the compass on and off
App lies to ve hicles: w ith d ig ital compass
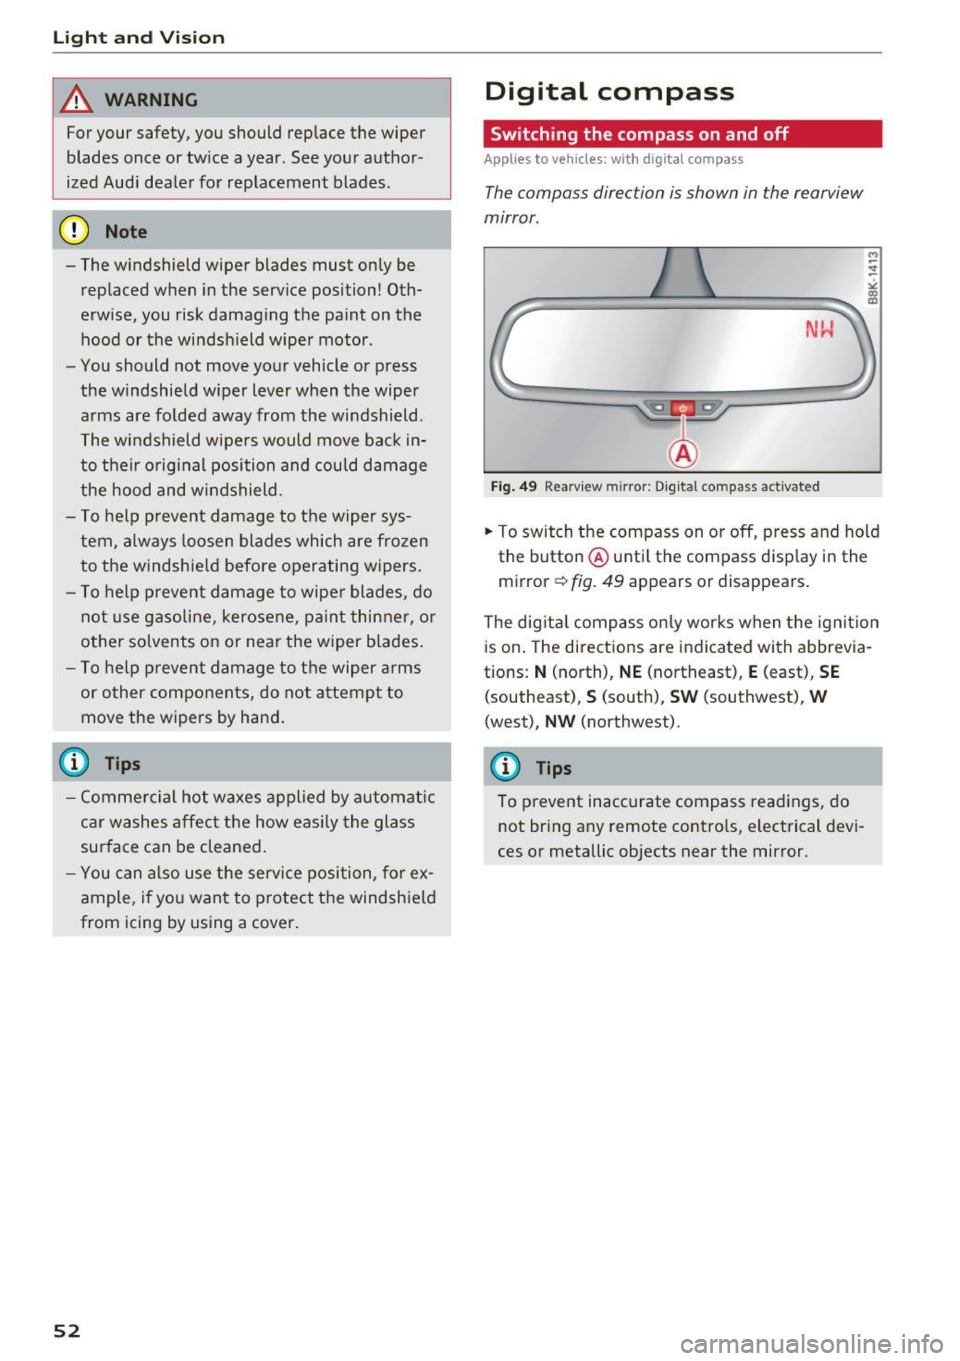
The compass direction is shown in the rearview
mirror.
Fig. 49 Rearv iew m irror: Digital compass activated
.. To switch the compass on or off, press and hold
the button @until the compass display in the
mirror
c:!:> fig. 49 appears or disappears.
The digital compass only works when the ignition
is on. The directions are indicated with abbrevia
tions:
N (north), NE (northeast), E (east), SE
(southeast), S (south), SW (southwest), W
(west), NW (northwest).
(D Tips
To prevent inaccurate compass readings, do not bring any remote controls, electrical devi
ces or metallic objects near the mirror.
Page 55 of 264
,-1 N
0 1-CX)
,-1 I.Cl U"I
,-1 I.Cl ......
Adjusting the magnetic zone
Appl ies to vehicles: with digital compass
The magnetic zone must be adjusted correctly
for the compass to read accurately .
®
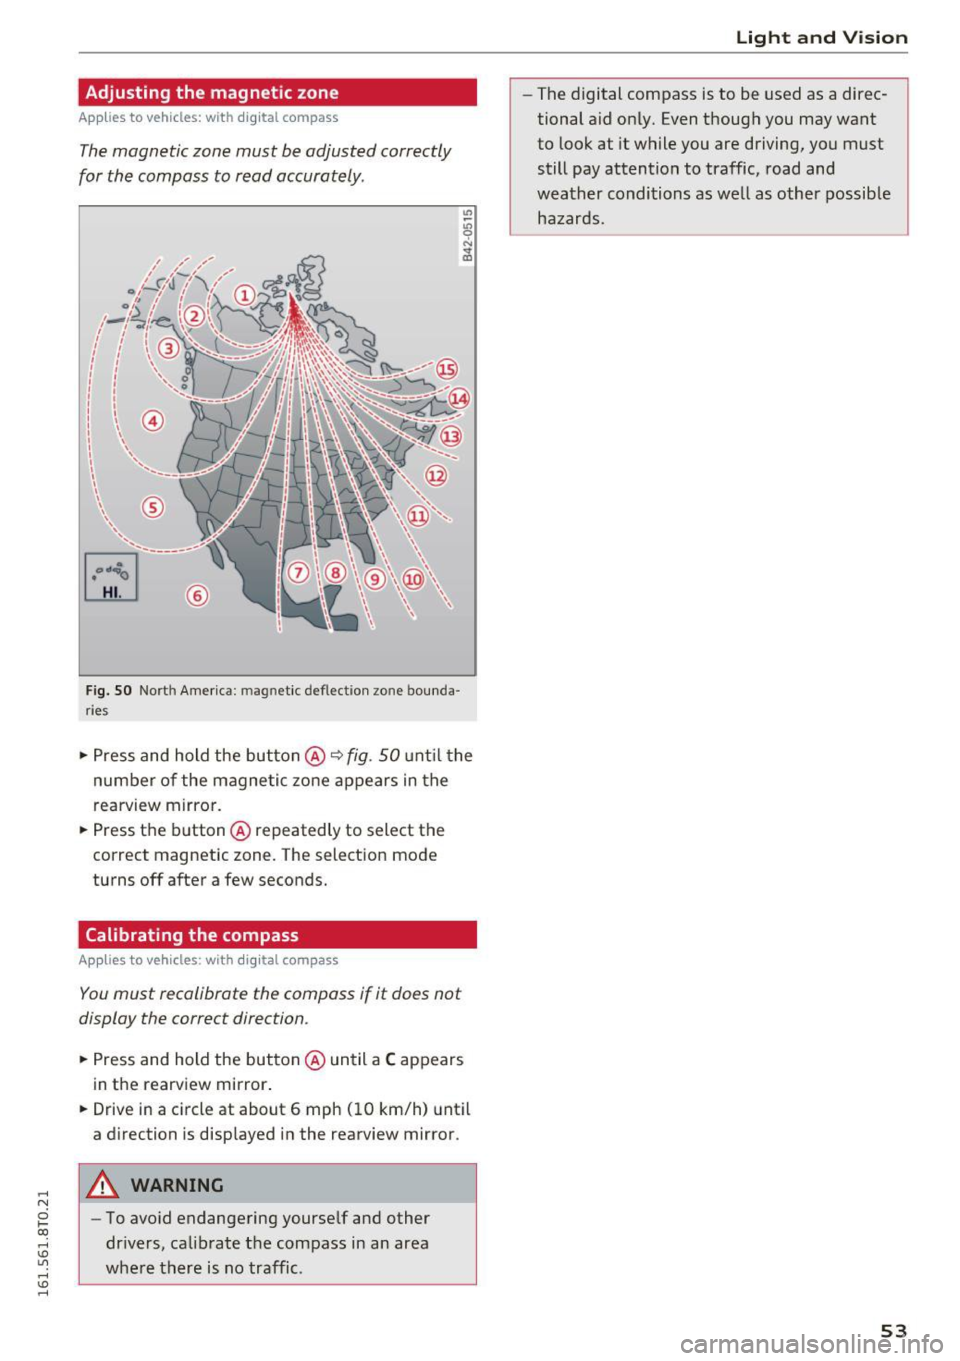
Fig. SO Nort h America: magnetic deflectio n zone bound a
ries
• Press and hold the button@~ fig. SO unt il the
number of the magnetic zone appears in the
rearvi ew mirror.
• Press the button @repeatedly to select the
correct magnetic zone. The selection mode
turns off after a few seconds.
Calibrating the compass
A ppl ies to vehicles: with digital compas s
You must recalibrate the compass if it does not
display the correct direction .
• Press and hold the button @ until a C appears
in the rearview mirror.
• Drive in a circle at about 6 mph (10 km/h) until
a direction is displayed in the rearview mirror .
A WARNING
-To avoid endangering yourself and other
drivers, calibrate t he compass in an area
where there is no traffic.
Light and Vision
-The digital compass is to be used as a direc
tional aid only. Even though you may want
to look at it while you are driving, you must
still pay attention to traffic, road and
weather conditions as well as other possible
hazards.
53
Page 61 of 264
..... N
0 1-CX)
..... I.Cl U"I
..... I.Cl ......
In addition to the driver 's seat settings, you can
also store and access the exterior mirror adjust
ment settings* using the remote control key or
memory button.
Remote control key
Ap plies to vehi cles: with seat memory
To assign the driver's seat settings to the remote
control key when locking the vehicle, the function
must be act ivated in the radio or MMI*
• Se lect :
ICAR I fu nction button> S eat adjus t
ment > Driver's seat > Remot e control ke y
>
on .Or
• Select :
I CARI fu nct ion button> Car sy stem s*
contro l button > Vehicle setting s > Seats>
Driver' s seat > Remot e control ke y > On.
@ Tips
If you do not want ano th er d river's settings to
be assigned to the remote key, switch off the
memory function us ing t he r adio or MMI* or
the
I O N/O FF I button ~ page 59.
Memory buttons
Applies to vehicles: with seat memo ry
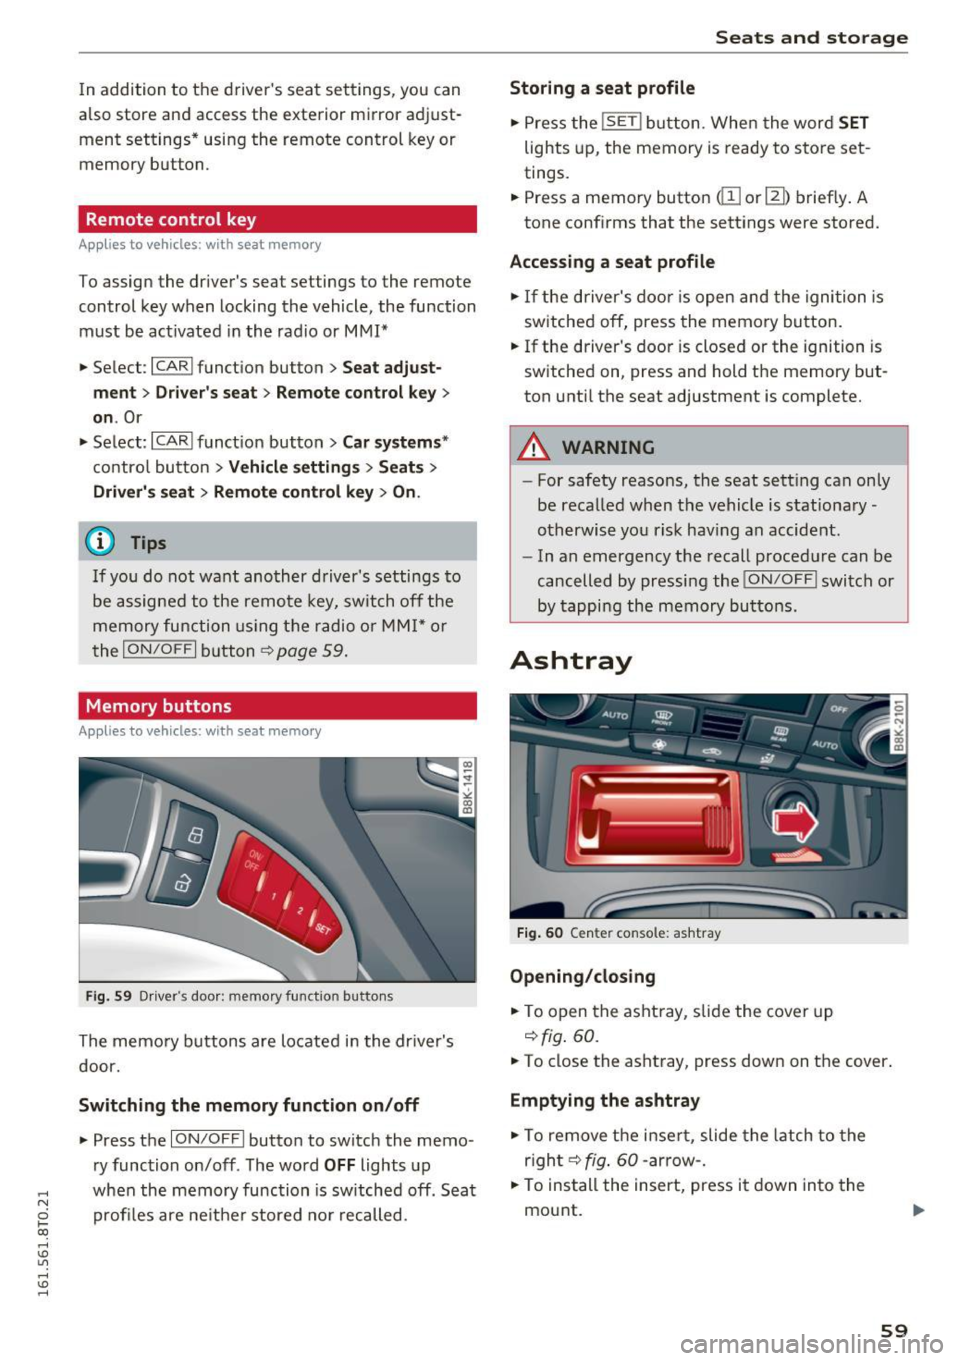
Fi g. 59 Drive r's doo r: m emory funct io n butto ns
The memo ry buttons are located in the dr iver's
door.
Switching the memory function on /off
• Press the ION/OF F I button to switch the memo
ry function on/off . The word
OFF lights up
when the memory function is sw itched off . Seat
profi les are ne ither stored no r recalled .
Seats and storag e
Storing a seat profile
• Press the ISE T! button. Whe n the word SET
lights up, the memory is ready to s tore set
tings.
• Press a memory button
dII or[ II) brief ly . A
tone conf irms that the settings were stored.
Acces sing a seat profile
• If the d river's doo r is open and the ignition is
sw itched off, press the memory button.
• If the driver's door is closed or the ignition is
switched on, press and hold the memory but
ton unti l the seat adjustment is complete.
A WARNING
- For safety reasons, the seat sett ing can on ly
be recalled when the vehicle is stationary
otherwise yo u risk hav ing an accident.
- In an emergency the recall proced ure can be
cancelled by pressing the
! ON/O FF I switch or
by tappi ng the memory buttons.
Ashtray
Fig. 60 Cen te r console : ash tray
Opening /closing
• To open the asht ray, s lide the cover up
~ fig . 60.
• To close the ashtray, press down on the cover .
Emptying the ashtray
• To remove the i nse rt, slide the latch to the
r igh t~
fig . 60 -arrow -.
• To ins tall the insert, press it down into the
mount.
59
Page 63 of 264

,-1 N
0 1-CX)
,-1 I.Cl U"I
,-1 I.Cl ......
Closing cupholders
• To close the cupholder, press on the center sec
tion between the two arms and push the cu
pholder in the slot as far as it will go.
.&_ WARNING
Spilled hot liquid can cause an accident and
personal injury.
- Never carry any beverage containers with
hot liquids, such as hot coffee or hot tea, in
the vehicle while it is moving. In case of an
accident, sudden braking or other vehicle
movement, hot liquid could spill, causing
scalding burns. Spilled hot liquid can also
cause an accident and personal injury.
- Use only soft cups in the cupholder. Hard
cups and glasses can cause injury in an acci
dent.
- Never use the cupholder or adapter as an
ashtray -risk of fire.
(y Note
Only drink containers with lids should be car
ried in the cupholder. Liquid could spill out
and damage your vehicle's electronic equip
ment or stain the upholstery, etc.
Glove compartment
The glove compartment is illuminated and can
be locked .
Fig. 64 Glove compartmen t
• To open the glove compartment, pull the han
dle in the direction of the arrow
c:,:. fig. 64 and
swing the cover down to open.
Seats and storage
• To close the glove compartment, push the
glove compartment lid upward until the lock
engages.
The glove compartment can be locked using the
mechanical key
c:,:. page 33 .
On the right side in the glove compartment is a
holder with the key body into which the emergen
cy key must be clipped to be able to start the ve
hicle.
A WARNING
-
To reduce the risk of personal injury in an acci-
dent or sudden stop, always keep the glove
compartment closed while driving.
Additional storage
There are a variety of storage compartments and
fasteners in various places in the vehicle .
- In the roof headliner above the rearview mirror.
- On the back of the front seat. The compart-
ment can hold a maximum weight of 1 kg.
- On the left and right of the luggage compart
ment, behind the side trim.
- Garment hooks on the pillars in the rear of the
vehicle.
A WARNING ,..___
- When driving, do not leave any hard objects
on the rear window shelf or allow your pet
to sit on the shelf. They could become a haz
ard for vehicle occupants in the event of
sudden braking or a crash .
- Always remove objects from the instrument
panel. Any items not stored could slide
around inside the vehicle while driving or
when accelerating or when applying the brakes or when driving around a corner.
- When you are driving make sure that any
thing you may have placed in the center con
sole or other storage locations cannot fall
out into the footwells. In case of sudden
braking you would not be able to brake or
accelerate.
- Any articles of clothing that you have hung
up must not interfere with the driver's view. .,_
61
Page 64 of 264
Sea ts and stor age
The coat hooks are designed only for light
weight cloth ing . Never hang any clothing
with hard, pointed or heavy objects in the
pockets on the coat hooks . Dur ing sudden
braking or in an accident - especia lly if the
airbag is dep loyed - these objects could in
jure any passengers inside the vehicle.
- To reduce the risk of pe rsonal inj ury in an
acc ident or sudden stop, always keep the
glove compa rtment closed while d riving .
- Read and follow all WARNINGS
q page 147, Important safety instructions
on the side airbag system.
- Hang clothes in such a way that they do not
impa ir the d rive r's v ision.
- The coat hooks must only be used for light
weight clot hing . Do not leave any heavy or
sharp edged obje cts in the pocke ts which
may in terfere w ith the side c urtain airbag
dep loyment and can cause pe rsonal injury in
a crash.
- Do not use coat hangers for hanging clo th
ing on the coat hooks as this can interfere
with prope r deployment of the side curtain
airbags in an accident.
- Do not hang heavy objects on the coat
hooks, as they could cause personal injury in
a sudden stop.
- Always keep the compartment above the
rearview mirror closed wh ile driving to re
duce the risk of injury in the event of sudden
braking maneuvers or a collision.
(D Note
Objects located on the rear shelf that r ub
against the rear window could damage the
heating wires for the rear window defogger.
(D Tips
- A vent slot is located between the shelf and
the rear w indow . Do not b lock the vent with
any items you may place on the rear window
shelf.
- Do not place bulky items on the rear window shelf as they could restr ict or block the driv
er's vision in t he rear view mirror .
62
Roof rack
Description and mounting locations
Additional cargo can be carried with a roof lug
gage rack.
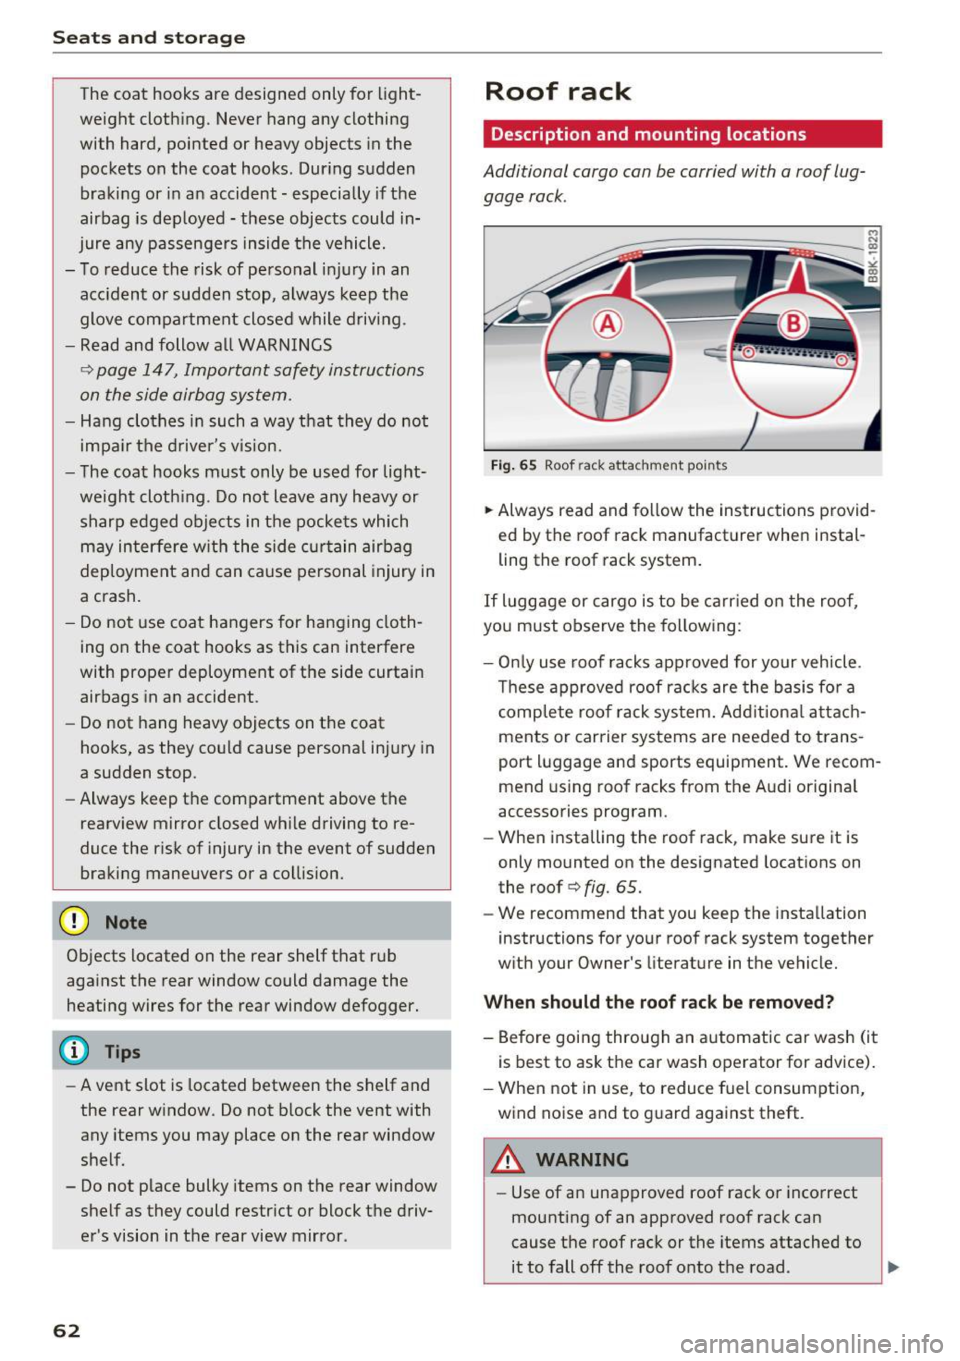
Fig. 65 Roof rack atta chment po in ts
.. Always read and fo llow the instruc tions provid
ed by the roof rack manufact urer when instal
ling the roof rack system .
If luggage or cargo is to be ca rried o n the roof,
you must observe the fo llowing :
- Onl y use roof racks approved for your veh icle .
Th ese approved roof racks are the basis fo r a
c omp le te roo f rack system. Add it iona l attach
ments or carrier systems are needed to trans
port luggage and sports equipment. We recom
mend us ing roof racks from the Audi original
accessories program .
- When installing the roof rack, make sure it is
only mounted on the designated locations on
the roof
q fig . 65.
- We recommend that you ke ep the installation
instructions for your roof rack system together
w ith your Owner 's literature in the vehicle.
When should th e roof rac k be remo ved?
- Before goi ng through an automatic ca r wash (it
i s best to ask the car wash operator for advice).
- When not in use, to reduce f uel consumption,
wind noise and to g uard against theft .
A WARNING
-Use of an unapproved roof rack or incorrect
mounting of an approved roof rack can
cause the roof rack or the items attached to it to fall off the roof onto the road . ...
Page 101 of 264
,-1 N
0 1-CX)
,-1
"' U"I
,-1
"' ......
General information
App lies to vehicles: with Audi side assist
®
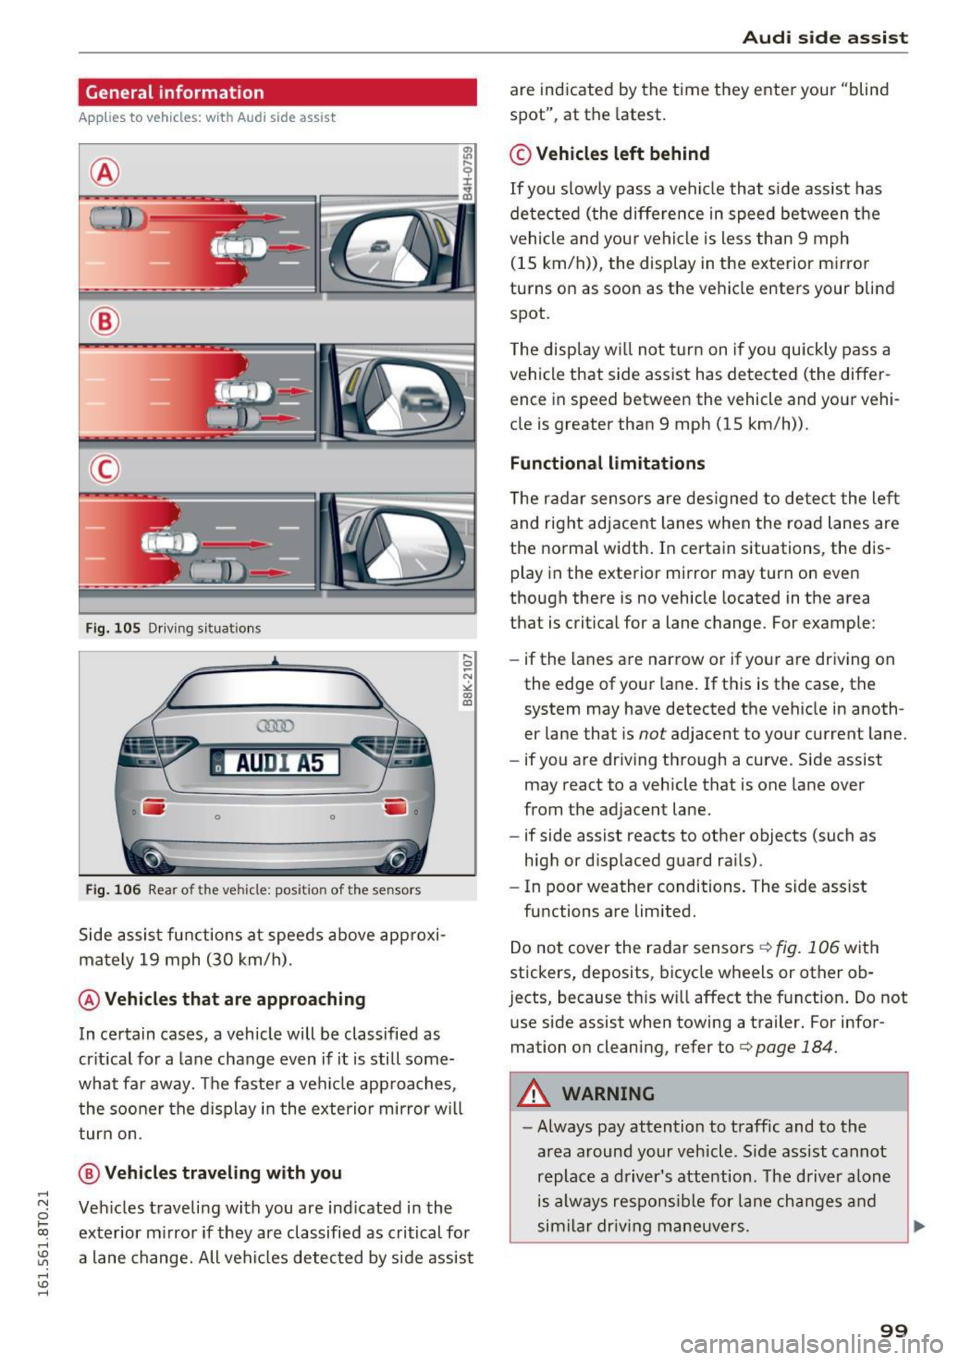
®
©
Fig. 105 Driving sit ua tio ns
AU DI A5
. .-0 0 iii .
Fig. 106 Rear of the vehicle: position of the senso rs
Side assist functions at speeds above approxi
mately 19 mph (30 km/h).
@ Vehicles that are approaching
In certain cases, a vehicle will be classified as
critical for a lane change even if it is still some
what far away. The faster a veh icle app roaches,
the sooner the display in the exterio r mirror w ill
turn on.
@ Vehicles traveling with you
Vehicles traveli ng with you are ind icated in the
exterior mi rror if they are classified as critical for
a lane change. All vehicles detected by side assist
Audi side assist
are indicated by the time they enter your "blind
spot", at the latest.
© Vehicles left behind
If you s low ly pass a vehi cle that side assist has
de tected (the difference in speed between the
vehicle and your vehicle is less than 9 mph
(15 km/h)), the display in the exterior mirror
turns on as soon as the vehicle enters your blind
spot.
T he display w ill not turn on if you quickly pass a
vehicle that side assist has detected (the differ ence in speed between the vehicle and your vehi
cle is greater than 9 mph (15 km/h)) .
Functional limitations
T he radar sensors are designed to detect the left
and right adjacent lanes when the road lanes are
the normal width . In certain situations, the dis
play in the exterior mirror may turn on even
though there is no vehicle located in the area
that is critical for a lane change. For example:
- if the lanes are narrow or if your are driving on
the edge of your lane. If this is the case, the
system may have detected the vehicle in anoth
er lane that is
not adjacent to your current lane.
- if you are driving through a curve. Side assist
may react to a vehicle that is one lane over
from the adjacent lane.
- if side assist reacts to other objects (such as
high or d isplaced guard rai ls) .
- In poor weather conditions. The side ass ist
functions are limited.
Do not cover the radar sensors
c:> fig. 106 with
stickers, deposits, bicycle wheels or other ob
j ects, because th is will affect the f unction . Do not
use side assist when towing a trailer. For infor
mation on cleaning, refer to
c:> page 184.
A WARNING
= -
-Always pay attention to traffic and to the
area around your vehicle. S ide assist cannot
replace a driver's attention. The driver alone
is always responsibl e for lane changes and
sim ilar drivin g maneuvers .
IJI,
99