roof AUDI A5 COUPE 2018 Owners Manual
[x] Cancel search | Manufacturer: AUDI, Model Year: 2018, Model line: A5 COUPE, Model: AUDI A5 COUPE 2018Pages: 409, PDF Size: 67.63 MB
Page 4 of 409
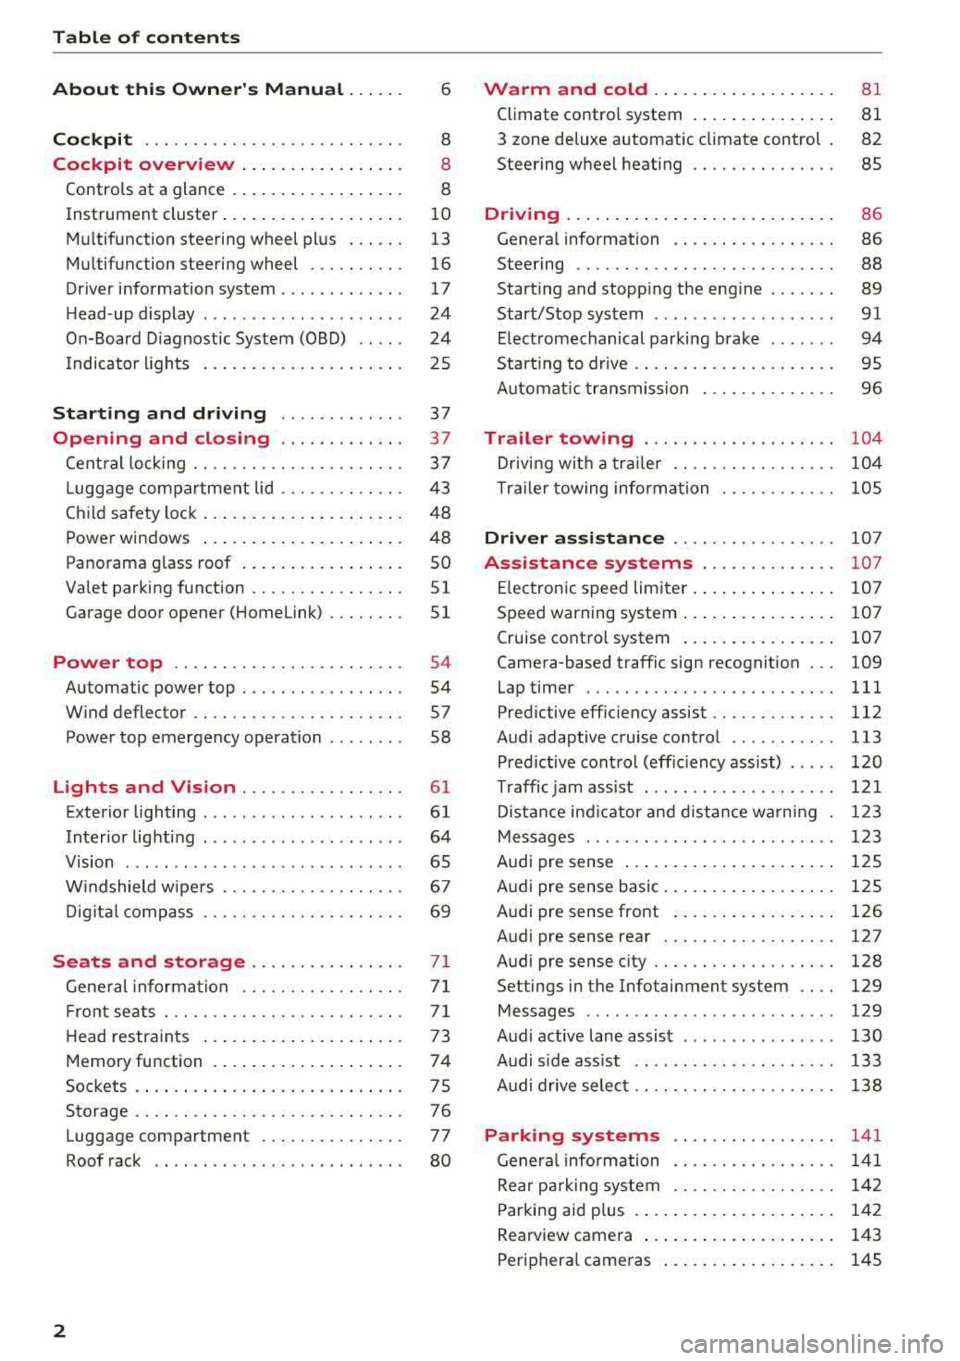
Table of content s
About this Owne r's Manual. . . . . .
6
Cockpi t . . . . . . . . . . . . . . . . . . . . . . . . . . . 8
Cockpit overview . . . . . . . . . . . . . . . . . 8
Controls at a glance . . . . . . . . . . . . . . . . . . 8
Instrument cluster . . . . . . . . . . . . . . . . . . .
10
Mu ltifunction steering wheel plus . . . . . . 13
Mu ltifunction steering wheel . . . . . . . . . . 16
Driver information system . . . . . . . . . . . . . 17
H ead-up display . . . . . . . . . . . . . . . . . . . . . 24
On-Board Diagnostic System (OBD) . . . . . 24
Indicator lights . . . . . . . . . . . . . . . . . . . . . 25
Starting and dri ving . . . . . . . . . . . . . 37
Opening and closing . . . . . . . . . . . . . 37
Cent ral locking . . . . . . . . . . . . . . . . . . . . . . 3 7
L ugg age compartment lid . . . . . . . . . . . . .
43
Ch ild safety lock . . . . . . . . . . . . . . . . . . . . . 48
Power windows . . . . . . . . . . . . . . . . . . . . . 48
Panorama glass roof . . . . . . . . . . . . . . . . . SO
Valet parking function . . . . . . . . . . . . . . . .
51
Garage door opener (Home link) . . . . . . . . 51
Power top . . . . . . . . . . . . . . . . . . . . . . . . 54
Automatic power top . . . . . . . . . . . . . . . . . 54
W ind deflector . . . . . . . . . . . . . . . . . . . . . . 57
Power top emergency operation . . . . . . . . 58
Lights and Vision . . . . . . . . . . . . . . . . . 61
Exterior lighting . . . . . . . . . . . . . . . . . . . . . 61
Interior lighti ng . . . . . . . . . . . . . . . . . . . . . 64
V1s1on . . . . . . . . . . . . . . . . . . . . . . . . . . . . .
65
W indshield wipe rs . . . . . . . . . . . . . . . . . . . 67
Dig it al c ompass . . . . . . . . . . . . . . . . . . . . . 69
Seats and storage................ 71
Gene ral information . . . . . . . . . . . . . . . . . 7 1
Fr ont seats . . . . . . . . . . . . . . . . . . . . . . . . . 71
H ead restra ints . . . . . . . . . . . . . . . . . . . . . 73
Memory function . . . . . . . . . . . . . . . . . . . . 7 4
Soc kets . . . . . . . . . . . . . . . . . . . . . . . . . . . . 75
Storage . . . . . . . . . . . . . . . . . . . . . . . . . . . . 76
Luggage compartment . . . . . . . . . . . . . . . 77
Roof rack . . . . . . . . . . . . . . . . . . . . . . . . . . 80
2
Warm and cold . . . . . . . . . . . . . . . . . . . 81
Climate contro l system . . . . . . . . . . . . . . . 81
3 zone deluxe automatic climate control 82
Steering wheel heat ing . . . . . . . . . . . . . . . 85
Driving ... .. .. .. .. .. ... .. ..... ... .. 86
Genera l information . . . . . . . . . . . . . . . . . 86
Steering . . . . . . . . . . . . . . . . . . . . . . . . . . .
88
Start ing and stopping the eng ine . . . . . . . 89
Start/Stop system . . . . . . . . . . . . . . . . . . .
91
E lectromechanical parking brake . . . . . . . 94
Starting to drive . . . . . . . . . . . . . . . . . . . . . 95
A utomat ic tra nsmission 96
Trailer towing . . . . . . . . . . . . . . . . . . . . 104
D riving with a tra ile r . . . . . . . . . . . . . . . . . 104
T ra ile r towing information . . . . . . . . . . . . 105
Driver assi stance . . . . . . . . . . . . . . . . . 10 7
Assistance systems . . . . . . . . . . . . . . 107
E lectronic speed limiter. . . . . . . . . . . . . . . 107
Speed warning system . . . . . . . . . . . . . . . . 107
Cruise contro l system . . . . . . . . . . . . . . . . 107
Camera-based traffic sign recognition . . . 109
Lap timer . . . . . . . . . . . . . . . . . . . . . . . . . . 111
Pred ictive effic iency assist........... .. 112
Audi adaptive cruise control . . . . . . . . . . . 113
Pred ictive cont rol (effic iency assist) . . . . . 120
T raffic jam assist . . . . . . . . . . . . . . . . . . . . 121
D ista nce ind icator and d ista nce wa rning 123
Messages . . . . . . . . . . . . . . . . . . . . . . . . . . 1 23
Audi pre sense . . . . . . . . . . . . . . . . . . . . . . 125
Audi pre sense basic . . . . . . . . . . . . . . . . . . 125
Audi pre sense front . . . . . . . . . . . . . . . . . 126
Audi pre sense rear . . . . . . . . . . . . . . . . . . 12 7
Audi pre sense city . . . . . . . . . . . . . . . . . . .
128
Settings in the Infotainment system . . . . 129
Messages . . . . . . . . . . . . . . . . . . . . . . . . . . 129
Audi active lane assist . . . . . . . . . . . . . . . . 130
Audi s ide ass ist . . . . . . . . . . . . . . . . . . . . . 133
Audi drive select . . . . . . . . . . . . . . . . . . . . . 138
Parking systems 141
General information . . . . . . . . . . . . . . . . . 141
Rear pa rking system . . . . . . . . . . . . . . . . . 142
Parking aid plus . . . . . . . . . . . . . . . . . . . . . 142
Rearview camera . . . . . . . . . . . . . . . . . . . . 143
Periphera l came ras . . . . . . . . . . . . . . . . . . 145
Page 50 of 409
Opening and closing
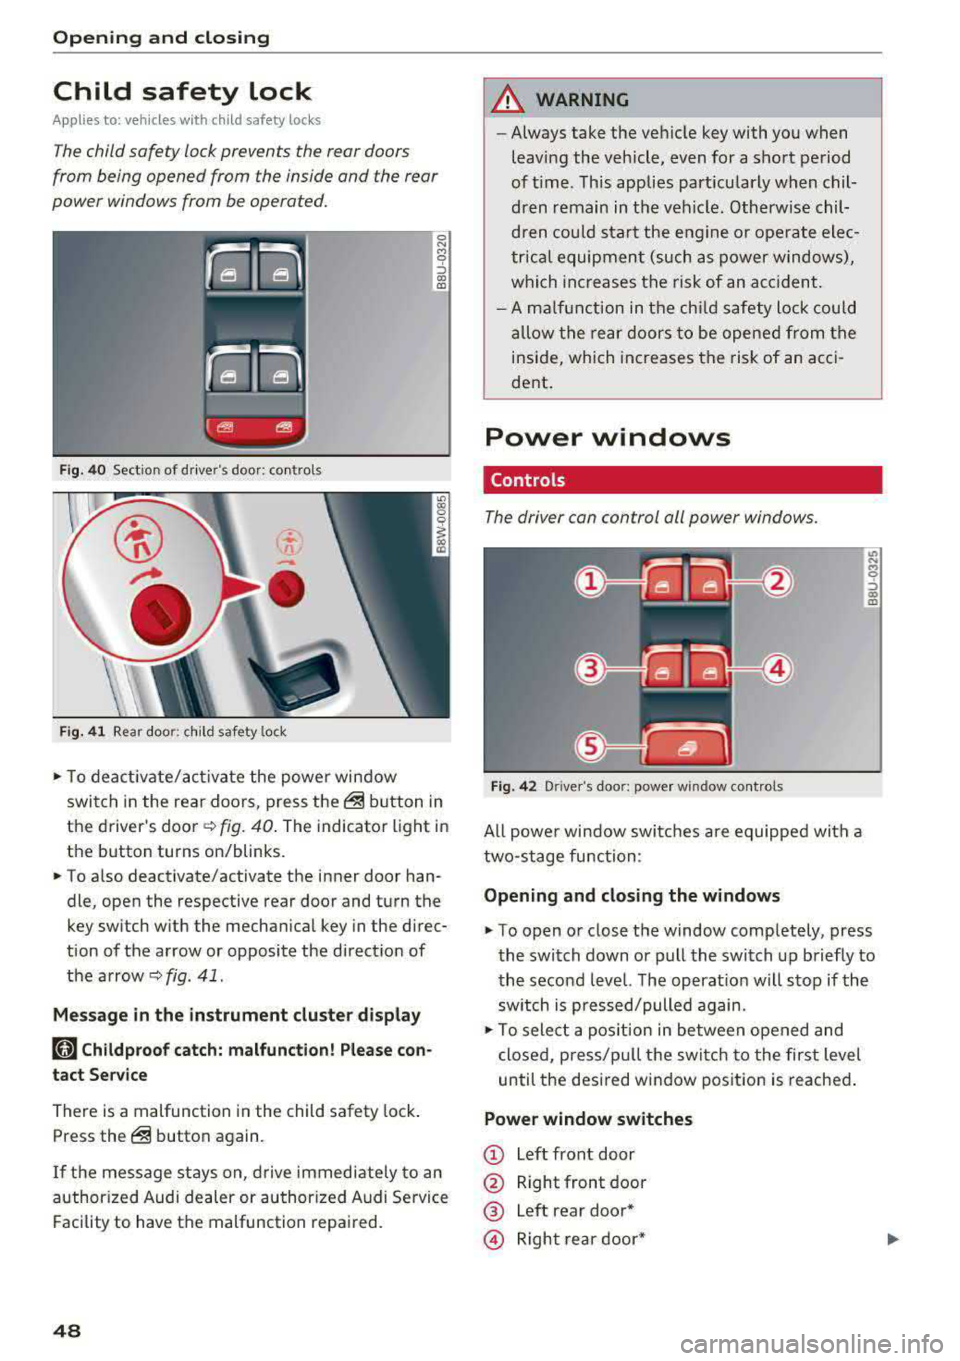
Child safety lock
Applies to: ve hicles w ith c hild safety locks
The child safety lock prevents the rear doors
from being opened from the inside and the rear
power windows from be operated.
Fig. 40 Section of driver's door: controls
Ci
-
-
Fig. 41 Rear door: chil d safety lock
0 N M 0 ::,
"' "'
• To deactivate/activate the power window
switch in the rear doors, press
the@ button in
the driver's
door ~ fig. 40. The indicator light in
the button turns on/blinks.
• To also deactivate/activate the inner door han
dle, open the respective rear door and turn the
key switch w ith the mechanical key in the direc
tion of the arrow or opposite the direction of
the
arrow~ fig . 41.
Message in the instrument cluster display
(tll Childproof catch: malfunction! Please con
tact Service
There is a malfunction in the child safety lock .
Press
the@ button again.
If the message stays on , drive immediately to an
authorized Audi dealer or authorized Audi Service
Facility to have the malfunction repaired.
48
A WARNING
-Always take the vehicle key with you when
leav ing the vehicle, even for a short period
of time . This applies particularly when chil
dren remain in the vehicle . Otherwise chil
dren could start the engine or operate elec
trical equipment (such as power windows),
which increases the risk of an accident.
- A malfunction in the child safety lock could
allow the rear doors to be opened from the
inside, which increases the risk of an acci
dent.
Power windows
Controls '
The driver can control all power windows .
Fig. 42 Driver's door: power win dow controls
All powe r window switches are equipped with a
two-stage function:
Opening and closing the windows
M 0 ::,
"' "'
• To open or close the window completely, press
the switch down or pull the switch up briefly to
the second level. The operat ion will stop if the
sw itch is p ressed/pulled again.
• To select a position in between opened and
closed, press/pu ll the switch to the first level
until the desired window position is reached.
Power window switches
CD Left front door
@ Right front door
® Left rear door*
© Right rear door*
Page 51 of 409
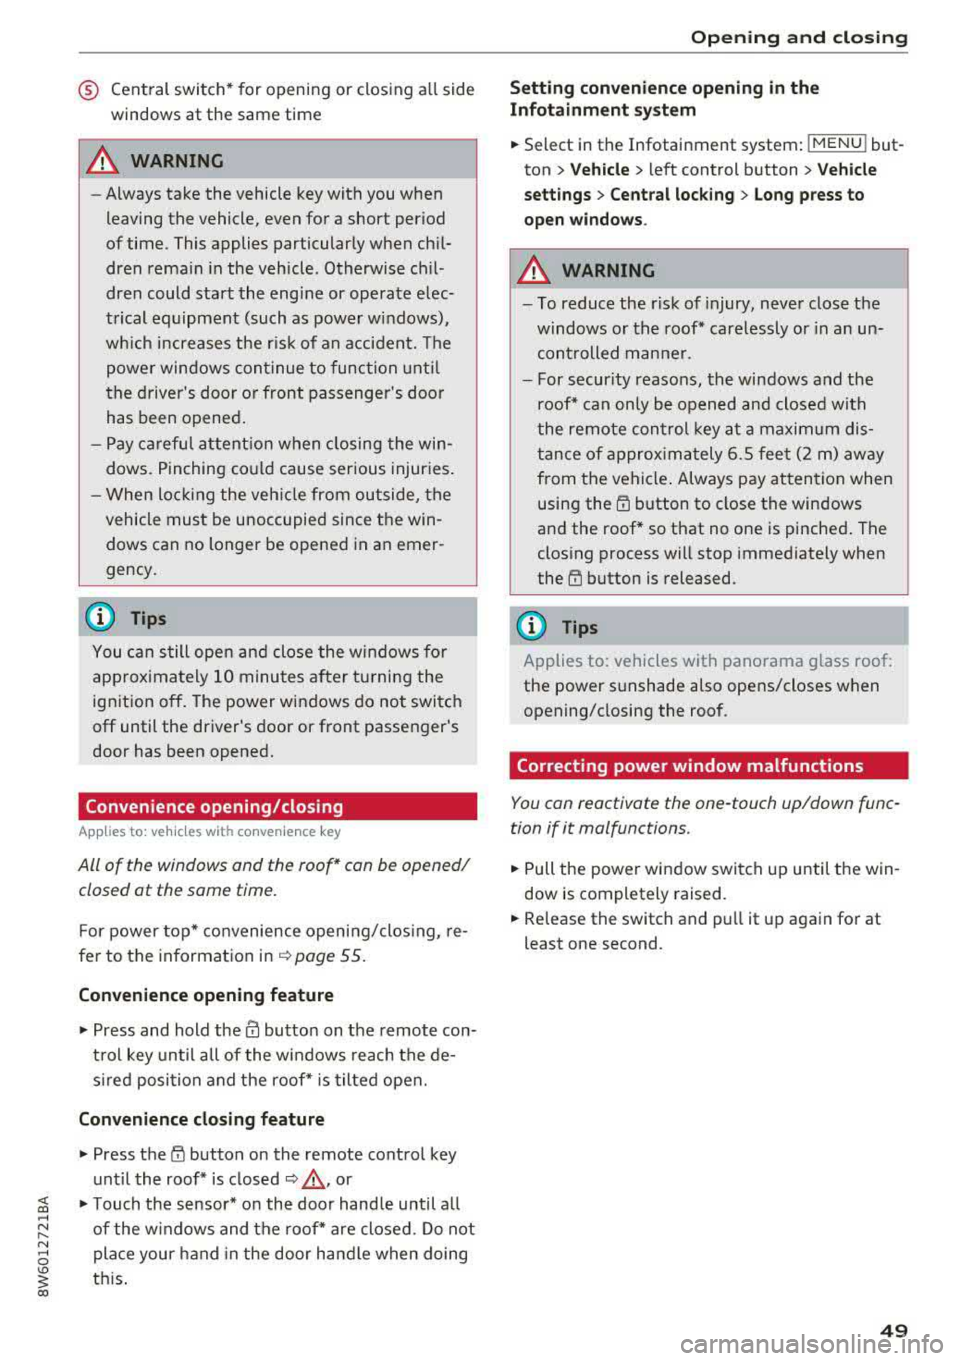
® Central switch* for opening or closing all side
windows at the same time
A WARNING
- Always take the vehicle key with you when
leaving the vehicle, even for a short period
of time. This applies particularly when chi l
dren rema in in the vehicle. Otherwise ch il
dren could start the engine or operate elec
trical equipment (such as power windows),
wh ich increases the r isk of an accident. The
powe r windows con tinue to function unt il
the driver 's door or front passenger 's door
has been opened .
- Pay ca reful attent ion when closing the win
dows. P inching co uld cause serious injuries .
- When loc king the veh icle from outside, the
vehicle must be unoccupied since the win
dows can no longer be opened in an emer
gency.
(D Tips
You ca n still open and close the w indows fo r
approxima tely 10 minutes after turning the
ign it ion off. T he power windows do no t switch
off until the driver's door or front passe nger's
door has been opened.
Convenience opening/closing
App lies to: vehicles with convenience key
All of the windows and the roof* con be opened/
closed ot the same time.
F or power top* convenience opening/clos ing, re
fer to the in formation
in ~ page 55.
Convenience opening feature
.,. Press and hold the IT! button on the remote con
t rol key until all of the windows reach the de
s ir ed position and the roof* is tilted open.
Con venience closing feature
.,. Press the ('.D button on the remote control key
until the roof* is closed
~ .&. , or
;;§ .,. Touch the sensor* on the doo r hand le until a ll
;::; of the windows and the roof* are closed. Do not ,....
8 place your hand in the door handle when doing
3 th is .
Sett ing conven ienc e op ening in the
Infota inm ent sy stem
.,. Select in the Infotainment system: I MENU ! but
ton
> Vehicle > left control b utton > V ehicle
setti ng s> C entral lock ing > Long p ress to
o pen windo ws.
A WARNING
= -- To reduce the r isk of injury, never close the
windows or the roof* carelessly or in a n un
con trolled man ner .
- For secur ity reaso ns, the windows and the
roof* can on ly be opened and closed with
the remote con trol key a t a maximum dis
tance of approx imately 6.S fee t (2 m) aw ay
from the vehicle . Always pay atten tion when
using the
tfJ button to close the windows
and the roof* so that no one is pinched . The
clos ing process will stop immediately when
the
tfl button is released.
(D Tips
Applies to: vehicles with panorama glass roof:
the power sunshade also opens/closes when
opening/closing the roof.
Correcting power window malfunctions
You can reactivate the one -touch up/down func
tion if it malfunctions.
.,. Pull the powe r window switch up until the win
dow is completely raised.
.,. Release the switch and pu ll it up again fo r at
least one second .
49
Page 52 of 409
Opening and clo sin g
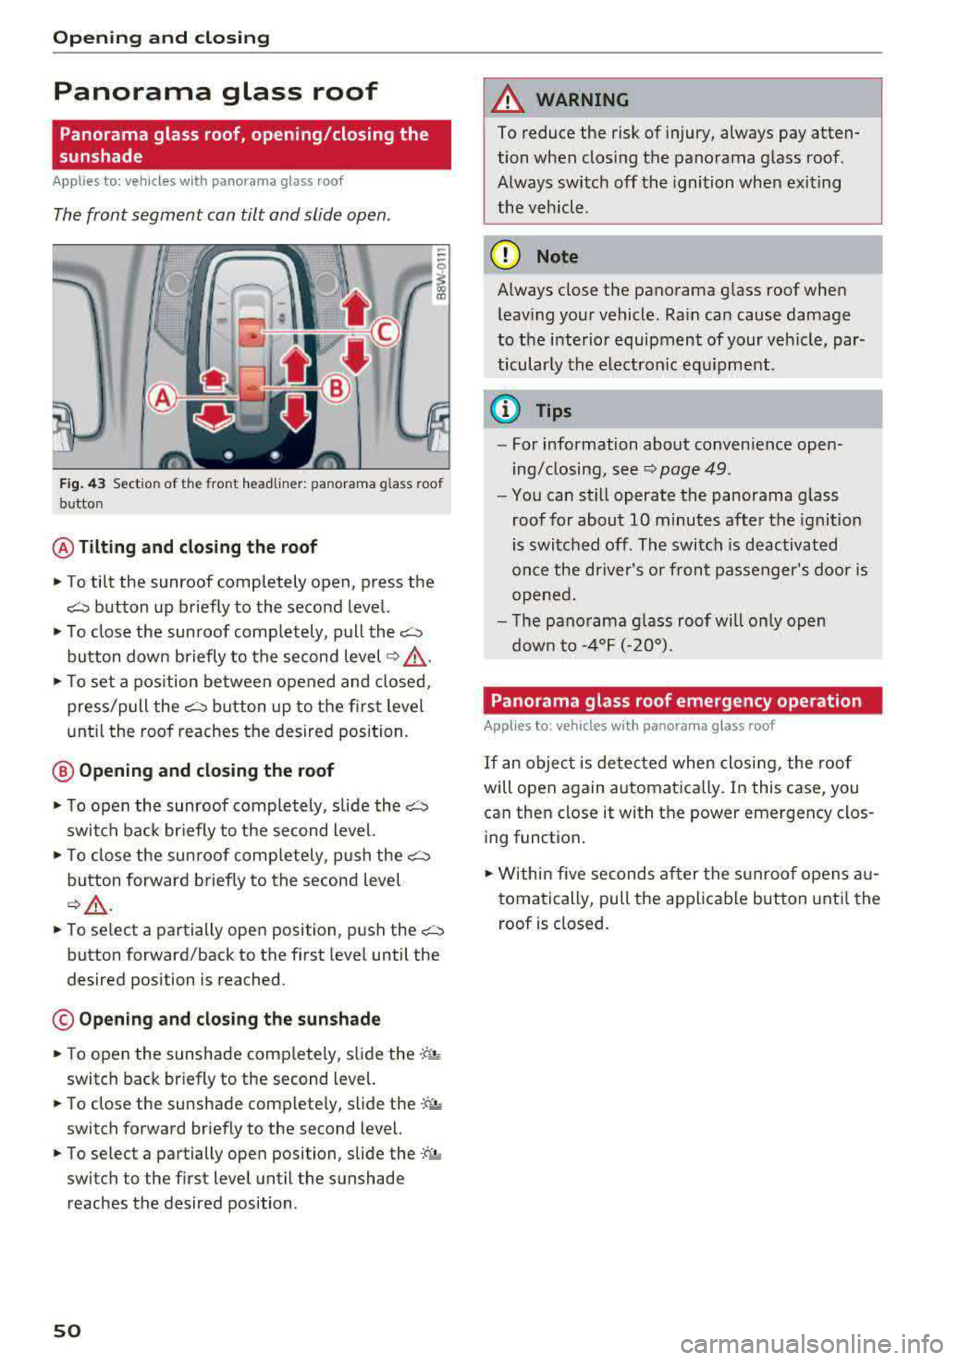
Panorama glass roof
Panorama glass roof, opening /closing the
sunshade
Applies to: vehicles with panorama glass roof
The front segment can tilt and slide open.
Fig . 43 Sect ion of the front headliner: panorama glass roof
button
@ Tilting and cl osing th e ro of
., To tilt the sunroof completely open, press the
~ button up briefly to the second level.
., To close the sunroof comp letely, pull the~
button down briefly to the second level ~ &
., To set a pos ition between opened and closed,
press/pull
the~ button up to the first level
unt il the roof reaches the desired position.
@ Opening and closing the roof
., T o open the sunroof completely, slide the~
switch back br iefly to the second level.
., To close the sunroof comp letely, push the~
button forward briefly to the second leve l
~A -
.. To se lect a partially ope n position, push the~
button forward/back to the first level until the
desired position is reached.
© Opening and clos ing the sunshade
., To open the sunshade comp letely, sli de the .;f",j,,
switch back briefly to the second level.
., To close the sunshade comp lete ly, slide the.-; ;, .
switch forward briefly to the second level.
., To select a partially open position, slide the -:a ,.
switch to the first level until the sunshade
reaches the desired position .
50
A WARNING
To reduce the risk of injury, always pay atten
tion when closing the panorama glass roof.
Always switch off the ignition when exit ing
the vehicle.
(D Note
Always close the panorama g lass roof when
leav ing your vehicle. Ra in can cause damage
to the i nterio r equipment of your veh icle, par
ticularly the electron ic equ ipment.
@ Tips
- For information about convenience open
ing/closing,
see~ page 49.
- You can still operate the panorama glass
roof for about 10 minutes after the ignition
is switched off. The switch is deactivated
once the dr iver's o r front passenger's door is
opened.
- T he pano rama g lass roof will on ly open
dow n to - 4°F (-20°).
Panorama glass roof emergency ope ration
Applies to : vehicles with panorama glass roof
If an object is de tected when clos ing, the roof
will open again automatica lly. In this case, you
can then close it with the power emergency clos
ing function .
., Within five seconds after the s unroof opens au
tomatically, pu ll the app licable button unti l the
roof is closed .
Page 56 of 409
Power top
Power top
Automatic power top
General information
Applies to: vehicles with power top
The power top opens and closes automat ically .
W hen open, the powe r top is stored comp lete ly
i n t he power top comp artmen t. T he power top
can be opened or closed at speeds up to 30 mph
(SO km/h).
Unde r no rma l condi tions, the powe r top is wind
and wa terp roof. In rare cases, small d rople ts of
water m ay form under ext reme wea ther condi
tions such as torrentia l or prolonged ra in. That is
norma l and no cause for concern .
F ollow t he care ins truct ions to keep the power
top free of leaks and to main tain i ts appearance
c::> page 362, Core and cleaning. Also observe the
following:
- Open and s tow t he power to p only whe n it is
cl ean and dry. Stowi ng the power top when it is
damp can create imp rints in it, and mi ldew and
othe r damage can res ult if it is left stowed
whi le damp for long periods of time. To prevent
scratc hing or damaging the power top, do not
use a ny sharp-edged objects to remove ice and
snow . The rear window may be clea red w ith a
standard ice scraper .
- Do not leave the power top open for several
weeks o r th e creases in it may become discol
o red .
- Do not ope n the power top when the tem pera
tu re is be low 32 °F (0 °C) . The fabric i n the
power top loses elast ic ity in s ub- zero tempera
tu res.
- The powe r top w ill not open when the tempera
tu re is be low- 5 °F (-1 5 °().
54
· Opening/closing the power top
Applies to: vehicles with power top
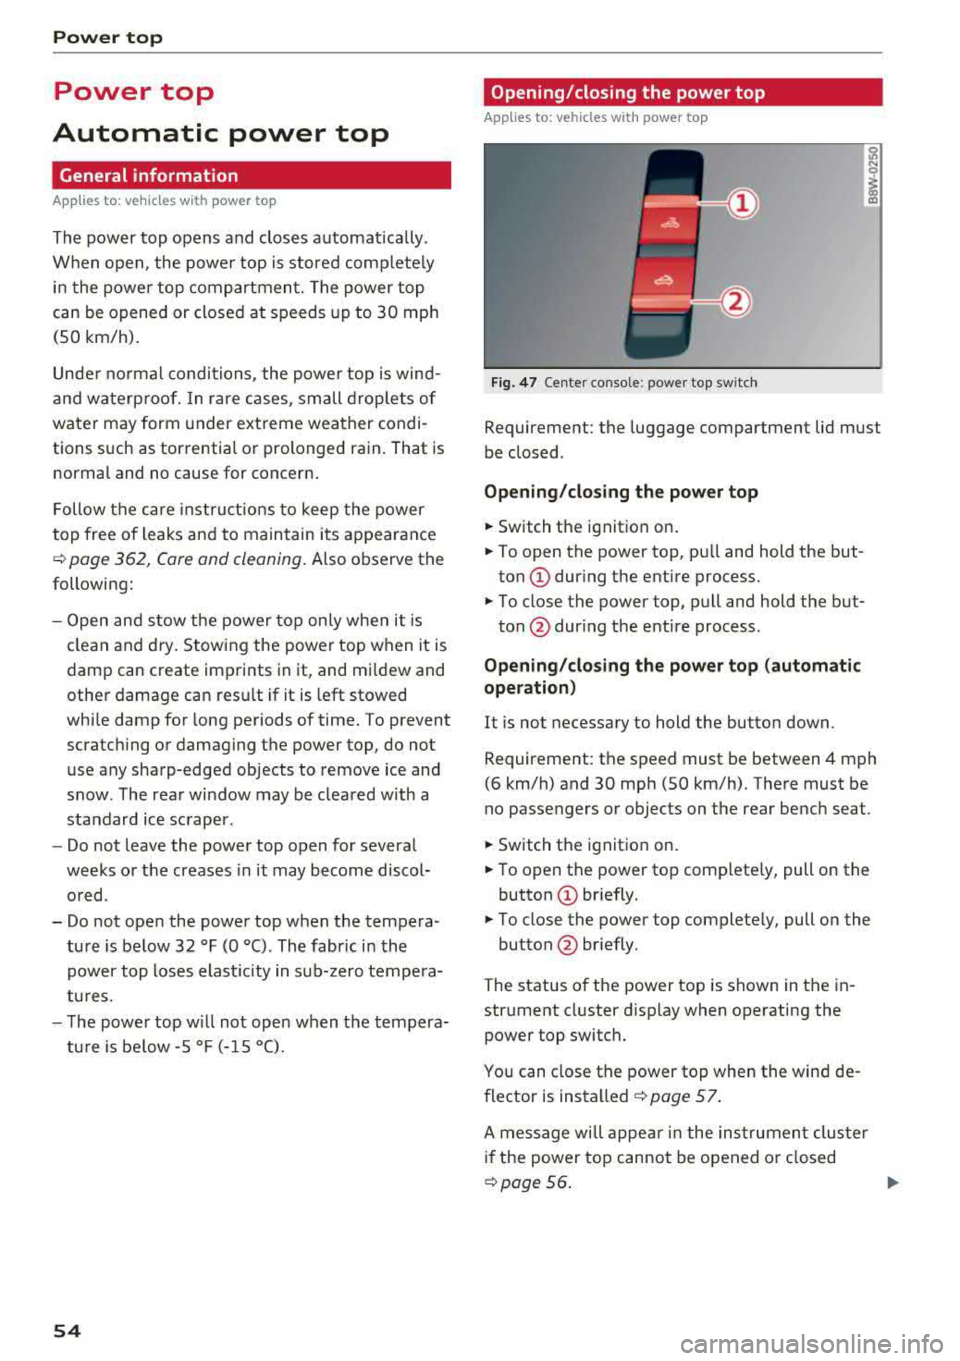
Fig. 47 Ce nte r co nso le : powe r top sw itc h
Requireme nt: the luggage compartment lid must
be closed .
Opening/closing the power top
.,. Switch the ignit io n on.
.,. To open the power top, pu ll and hold the but
ton
(D dur ing the entire process.
.,. To close the power top, pu ll and hold the but-
ton @dur ing the ent ire process .
Opening/cl osing the power top (automatic
operation)
It is not necessary to hold the butto n down.
Requirement: the speed must be between 4 mph
(6 km/h) and 30 mph (SO km/h). The re must be
no passengers or objects on the rear bench seat .
.,. Switch the ignition on.
.,. T o open the power top complete ly, pull on the
button
(D br iefly.
.,. To close the power top complete ly, pull on the
button @ briefly.
The status o f the power top is shown in the in
str ument cl uster d isplay when operating the
power top switch.
You can close the power top when the win d de
flector is installed
c::> page 57 .
A message wi ll appe ar in the ins trumen t clus te r
if the power top cannot be opened o r closed
c::> page 56. .,.
Page 61 of 409
Step 2: Lift the power top storage
compartment lid out
Applies to: vehicles with power top
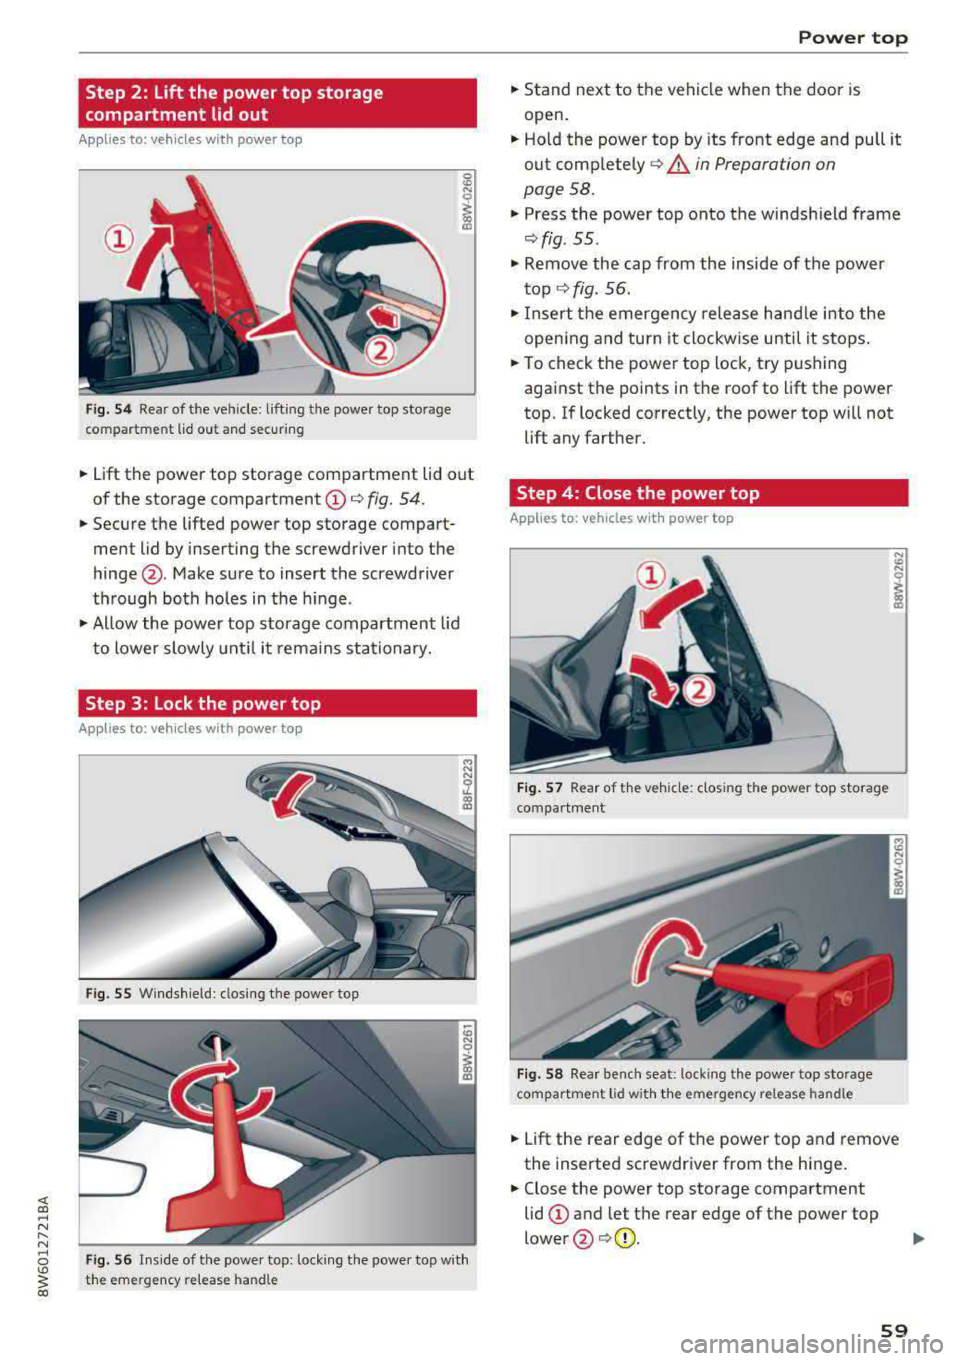
Fig. 54 Rear of the vehicle: lifting the power top storage
compartment lid out and secur ing
0
"' N 0
~ 00 CD
.. Lift the power top storage compartment lid out
of the storage compartment
(D q fig. 54.
.. Secure the lifted power top storage compart
ment lid by inserting the screwdriver into the
hinge @. Make sure to insert the screwdriver
through both holes in the hinge.
.. Allow the power top storage compartment lid
to lower slowly until it remains stationary.
Step 3: Lock the power top
Applies to: vehicles with power top
Fig. 55 Windsh ield: closi ng the power top
N N
5'. CX) Ill
Fig. 56 Inside of the powe r top: lock ing the powe r top wit h
the emergency relea se handle
Power top
.. Stand next to the vehicle when the door is
open .
.. Hold the power top by its front edge and pull it
out completely
q A in Preparation on
page 58.
.. Press the power top onto the windshield frame
qfig. 55 .
.. Remove the cap from the inside of the power
top
¢ fig. 56 .
.. Insert the emergency release handle into the
open ing and turn it clockw ise until it stops .
.. To check the power top lock, try pushing
against the points in the roof to lift the power
top. If locked correctly, the power top w ill not
lift any farther .
Step 4: Close the power top
Applies to: vehicles with power top
Fig. 57 Rear of t he vehicle: closing the power top storage
compartment
Fig . 58 Rear bench seat: locking the power top storage
compartment lid with the emergency release handle
N
"' N
~ 00 CD
.. Lift the rear edge of the power top and remove
the inserted screwdriver from the hinge .
.. Close the power top storage compartment
lid
(D and let the rear edge of the power top
lower @¢(D . ll>
59
Page 74 of 409
Sea ts and stor age
Operating
.. If you turn the m ultif unction bu tton CD
¢ page 71, fig . 72 to the left or to the right,
the possible seat settings @ are shown in the
Infotainment system
~ fig . 73 .
.. To se lect a seat setting, turn the multifunction
button
CD in the corresponding direction until
the des ired seat setting is outlined in red.
• The arrows @ represent the possible adjust
ments . Fo r example, to lower the lumbar sup
po rt, p ress the m ultifunction bu tton
CD down.
T he co rresponding arrow © lights up.
The fo llowing seat sett ings @ are possible :
Massage func tion * -select the massage type
Wave, St retch , Knead or Off . You can adjust the
i n tens ity of each massage from 1 to 3 . You can
sw itch the selected massage on/off using the
button @~ fig. 73 .
Lumb ar support -you can adjust t he lumbar sup
port up/down and to be stronger/weaker .
Side bolsters * -you can increase/decrease the
side support in the seat using the side bo lsters
on the seat backrest .
(I) Tips
-The massage function switches off a uto
matically after approx imately 10 minutes.
- The air in the side bo lsters* is released as
soon as the driver's door opens. This makes
i s possible to enter and exit the vehicle
mo re comfortab ly. As soon as you sta rt driv
i ng the veh icle, the s ide bo lsters fill.
1l Requ irem en t: the ve hicl e battery m ust have a suff icien t
c ha rge le v e l.
72
Easy seat entry
App lies to: vehicles with entry ass istance
Entry assistance makes it easier for the rear pas
sengers to enter and leave the vehicle .
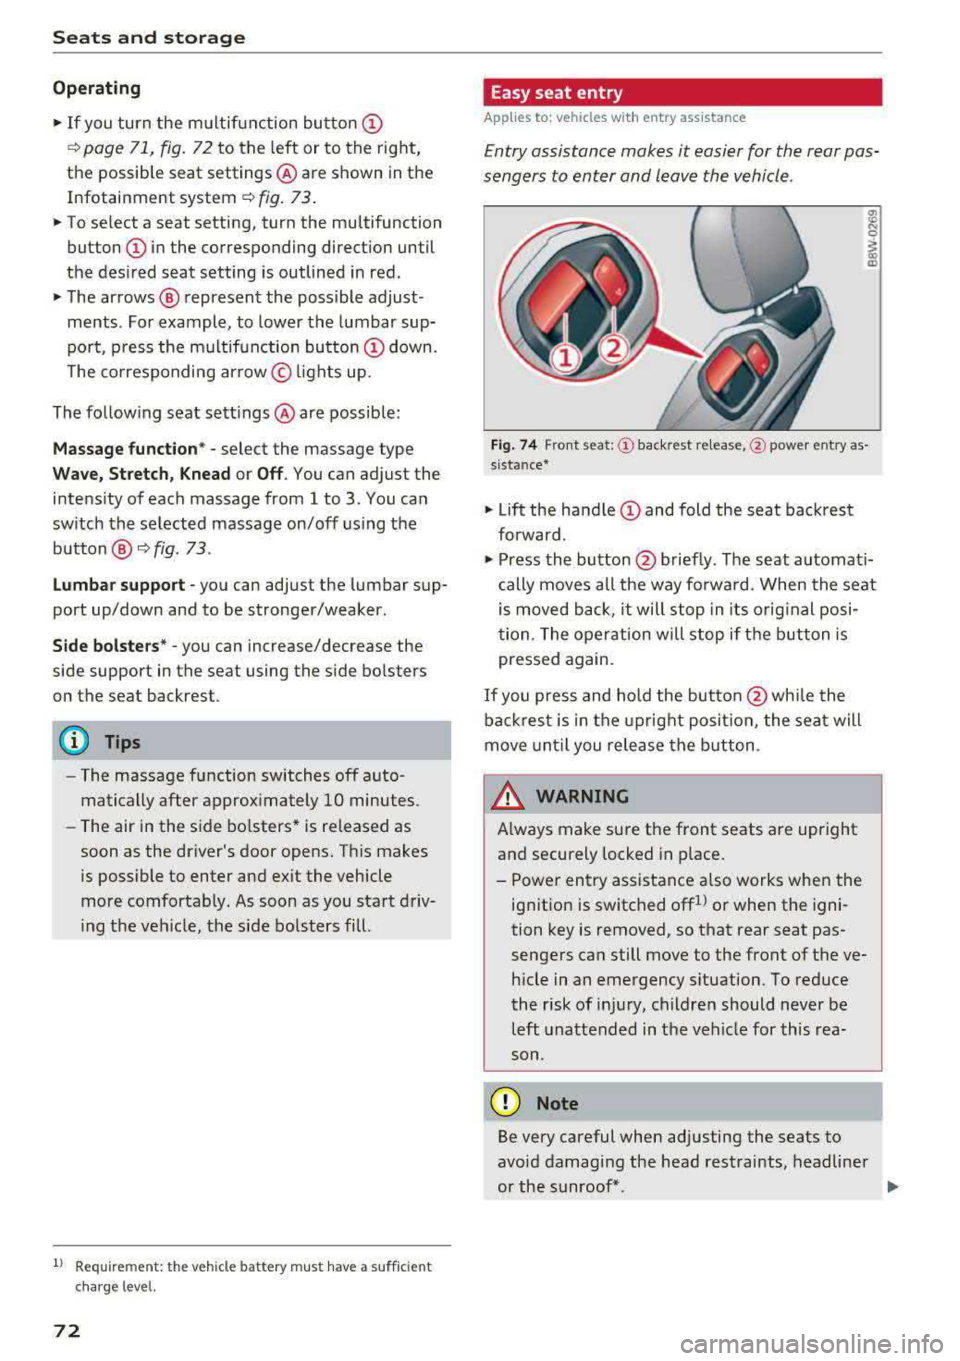
Fig . 7 4 Fro nt seat: © backrest re lease, @powe r entry as
s ista nce*
• Lift the hand le CD and fold the seat backrest
forward .
• Press the button@ briefly . T he seat automati
cally moves a ll the way fo rwa rd . When the seat
is moved back, it will stop in its o rig inal posi
tion . The operation will stop if t he b utton is
pressed again.
If you p ress and hold the butto n
@while the
bac kres t is in the upright posi tion, the sea t will
move unt il you release the b utton .
& WARNING
Always make su re the front seats are upright
and securely locked in p lace .
- Power entry assistance also works when the
ignit ion is switched off
1
) or when the igni
tion key is removed , so t hat rear seat pas
sengers can still move to the front of the ve
hicle in an emergency s ituation. To red uce
the risk of inj ury, childre n should never be
left unattended in the vehicle for this rea
son .
(D Note
Be very careful when adjusting the seats to
avo id damaging the head restraints, headline r
or the sunroof*.
Page 82 of 409
Sea ts and stor age
@ Tips
You can lock or unlock the pass-through
through the luggage compartment. This pre
vents any access to the luggage compartment
from the ve hicle interior .
Roof rack
Applies to: veh icles with roof rack
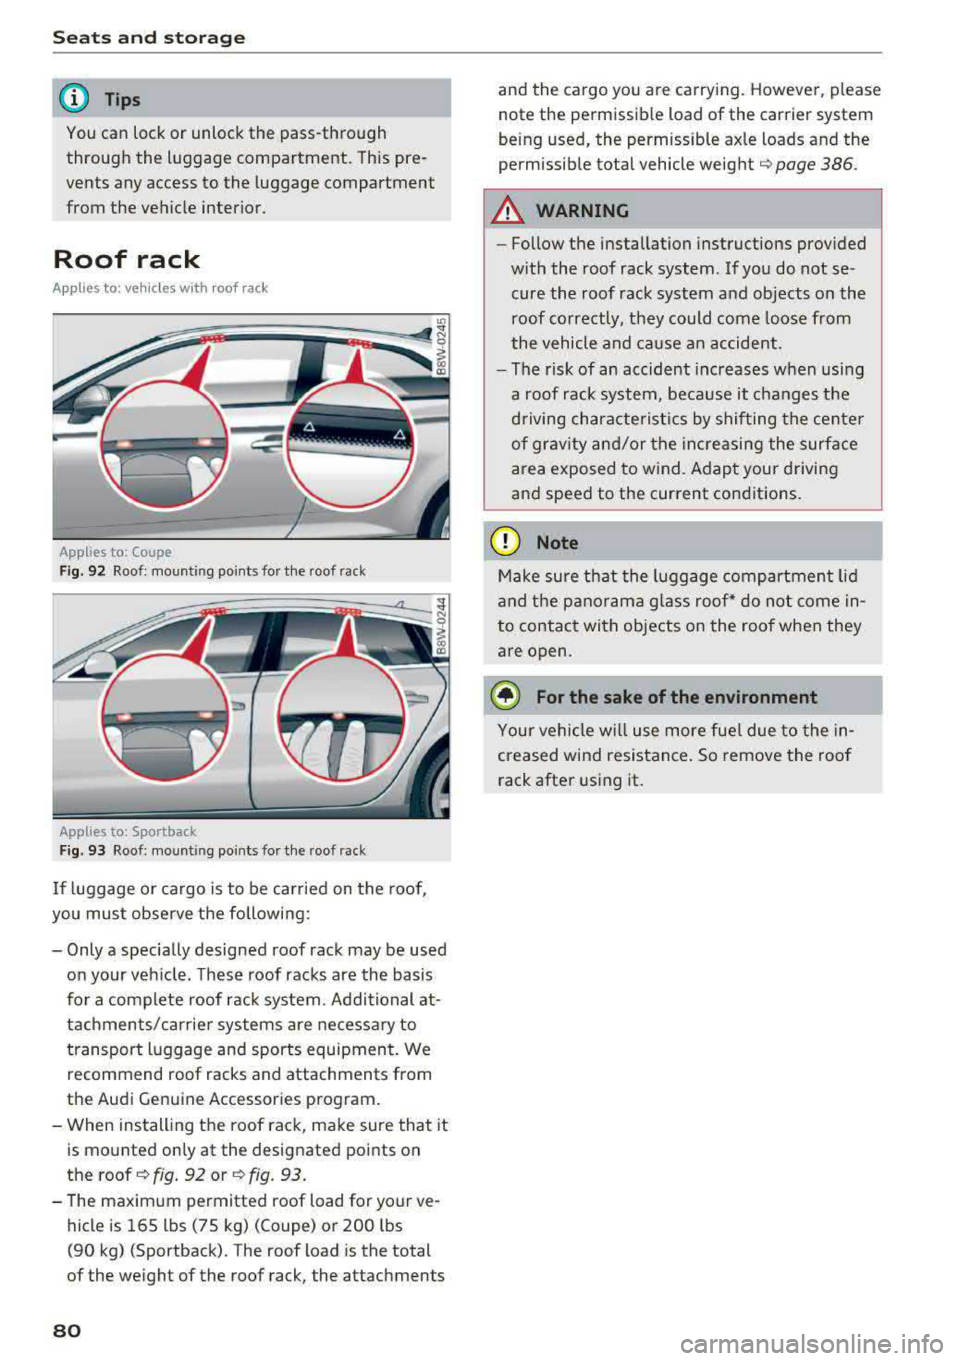
App lies to: Coupe
F ig . 9 2 Roof : mo untin g po int s fo r the roo f rack
Applies to: Sportback
F ig. 93 Roo f: mo unti ng po ints for the roof ra ck
If luggage or cargo is to be ca rried on the roof ,
you mus t observe the following:
- Only a specially designed roof rack may be used
on your veh icle . T hese roof racks are the basis
for a complete roof rack system. Additional at
tachments/car rier systems are necessa ry to
transport luggage and sports equipment. We
recommend roof racks and attachments from
the Audi Genuin e Accessories program .
- When installing the roof rack, make sure that it
is mounted only at the designated po ints on
the roof ¢
fig. 92 or¢ fig . 93.
- The maxim um permitted roof load for yo ur v e
hicle is 165 lbs (75 kg) (Coupe) or 200 lbs
(90 kg) (Spo rtback) . T he roof load is the total
of the we ight of the roof rack, the attachments
80
and the cargo you are carrying. However , please
not e the permissib le load of the carrier system
being used, the permissible axle loads and the
permissible total vehicle weight
q page 386 .
A WARNING
-Follow the installation instructions provided
w ith the roof rack system. If you do not se
cure the roof rack system and objects on the
roof correctly, they could come loose from
the vehicle and ca use an accident .
- The risk of an acc ident increases when using
a roof rack system, because it changes the
driving characterist ics by shifting the ce nter
of grav ity and/or the increasing the surface
area exposed to wind . Adapt your driving
and speed to the current conditions.
Q) Note
Make sure that the luggage compartment lid
and the p anorama g lass roo f* do not come in
to contact with objects o n the roof when they
are open .
@ For the sake of the environment
Your vehicl e wi ll use more fue l due to the in
creased wind resistance . So remove the roof
rack after using it.
Page 83 of 409
<( a, .... N ,....
N .... 0 \0
3 a,
Warm and cold Climate control system
Description
The climate control system warms , cools and re
moves humidity from the air in the vehicle interi
or. It is the most effective when the w indows and
sliding sun roof* or power top* are closed . If
there is a build-up of heat inside the vehicle, ven
tilation can help to speed up the cooling process.
I n all heating mode functions except for
defrost ,
the blower on ly switches to a higher speed once
the engine coolant has re ached a sufficient tem
perature .
Pollutant filter
The pollutant filter removes pollutants such as
dust and pollen from the air.
Key recognition
The climate control settings are automatically
stored and assigned to the remote control key
that is in use .
T hese settings are different when the power top*
is open or closed .
Warm and cold
{® For the sake of the environment
-If you would like to reduce fuel consump
tion, switch the air conditioning off . This
will also reduce emissions.
- In vehicles with a diesel engine, you can
switch the auxiliary heater off in the Info
tainment system.
(D Tips
- To prevent interference with the heating
and cooling output and to prevent the win
dows from fogging over, the air intake in
front of the windshield must be free of ice,
snow or leaves .
- Condensation from the cooling system can
drip and form a puddle of water under the
vehicle . This is normal and does not mean
there is a leak .
- The energy management system may tem
porarily switch off certain functions, such as
the seat heating* or rear window defogger.
These systems are available again as soon
as the energy supply has been restored.
81
Page 89 of 409
engaged, for example when you notice that the next traffic light is red . This produces an engine
braking effect, which helps to protect the brakes
and tires and reduces the emissions and fuel con
sumpt ion to zero (fuel shut-off dur ing decelera
tion) .
Shift efficiently
Upshifting earlier is an effective way to save fuel.
Staying in a gear too long uses fuel unnecessari
ly.
Applies to: vehicles with manual transmission
Shift as soon as possible from first to second
gear. S hifting to the next highest gear at approxi
mately 2,000 RPMs if poss ible is recommended.
Applies to: vehicles with automatic transmissions
Press down on the acce le rator peda l slowly and
avoid "kick -down".
Avoid full acceleration
You should rarely travel at the maximum vehicle
speed. High speeds cause a disproportionately
high increase in fuel consumption, emissions and
traffic noise. Driving more slowly saves fuel.
Reduce idling time
The Start/Stop system* he lps to reduce the idling
time automatically. In vehicles without the Start/
Stop system*, it is efficient to switch the engine
off when stopped at railroad cross ings and long
r ed lights. Stopping the engine for 30-40 sec
onds already saves more fuel than the amount of
extra fuel needed to restart the eng ine.
It takes a very long time in idle to warm the en
g ine up to operating temperature. Wear and
emissions are especially h igh in the wa rm-up
phase . Therefore, you should begi n driving im
mediately a fter starting the engine . Avoid high
RPMs while do ing this .
Have maintenance performed regularly
By having maintenance performed regu larly on
your veh icle, yo u ca n he lp to reduce f uel con-
<(
~ sumption before yo u even start to drive. The
N ~ maintenance condition of your vehicle not only
8 affects traffic safety and long-term value but a l
'° 3
so impacts fuel consumption . A poorly main
tained engine can lead to fuel consumption that is 10% higher than norma l.
Avoid short trips
The eng ine and exhaust cleaning system must
reach their optimal operat ing temperatu re to ef
f ectively reduce consumption and emissions.
A cold engine uses a disproportionately high
amount of fue l. The engine reaches operating
temperat ure and consumption normalizes on ly
after approximate ly 2.5 miles (4 km).
Check the tire pressure
To save fuel, make sure the tires are always in
flated to the correct press ure
~page 351. The
fuel consumption can increase by 5% if the pres
s u re is only 0.5 bar too low. Due to the increased
rolling resistance, low tire pressures wi ll also
l ead to greater tire wear and will affect driving
behavior.
Do not drive on winter tires year-round, as this
will consume up to 10% more fuel.
Eliminate unnecessary weight
S in ce eve ry po und of ext ra weight increases f uel
consumption, a quick inspection of the luggage
compartment may be worth it to avoid unneces
sary weight .
When not be ing used, a roof rack should be re
moved to decrease the wind resistance of the ve
hicle. This will save you approximately 12% fuel
at speeds from 62 -75 mph (100 - 120 km/h) .
Save energy
The eng ine drives the generator, which generates
electric ity; the fuel consumpt io n also incr eases
with the demand for electr icity. The refore, switch
electrical eq uipment off when you no longer
need it . Examples of equipment that uses a lo t of
energy are air blowers at a high setting, the rear
window defogger and seat heating* .
@ Note
Do not leave engine idling unattended after
starting. If warning lights shou ld come on to
indicate improper operation, they would go
87