check engine AUDI A6 2011 Service Manual
[x] Cancel search | Manufacturer: AUDI, Model Year: 2011, Model line: A6, Model: AUDI A6 2011Pages: 370, PDF Size: 87.15 MB
Page 288 of 370
lffll __ C_h_ e_c _k _i_n -=g ,.,__ a_n_ d_ f_ i_ l _li _n _,g:,_ __________________________________________ _
Engine cooling system
Coolant
The engine coolant performs two functions: it keeps the
engine from o ve rheat ing and it prote cts the engine from
free zing in the winter .
The cooling system is sealed and genera lly requ ires little attention .
Th e cooling system has been fi lled a t the factory w it h a permanent
coo lant which does not need to be changed. The coolant consists of a
mixture of water and the man ufacturer's glycol-basedcoo lant add i
tive Gl2++ a ntifreeze with ant i corrosion additives (50% for USA
mode ls; 60% for Canadian mode ls). This mixture bot h assures the
necessary frost protec tion and p rotects metal components i n the
engine's cooling system from corrosion and scaling . It a lso ra ises the
boiling point of the coolant.
Do not reduce the concentration of the coolant in the summer by
adding p lai n water . The proport ion of coolant additive must be at
least 50 % but not more than 60 % to maintain ant ifreeze protection
and coo ling efficiency. If the coolant frost protect ion is too low, the
coo lant co uld freeze and damage the veh icle heating and eng ine
cooling system .
For year-ro und d riving, antifreeze is added at t he factory for temper
atures down to:
• - 31°F( -35°C)USA
• - 40 °F ( -40 °C) Canada .
You can mix the G12 ++ coo lant additive with other add it ives (G12 + or
G 12) . Always check with yo ur a utho rized Aud i dea ler .
& WARNING
Before you check anything in the engine compartment, always
read and heed all WARNINGS=>
& in "Working in the engine
compartment " on
page 279.
0 Note
• Before winter sets in, have the coolant checked to see if the
coo lant additive in you r vehicle is s ufficient to meet the climate
condi tions. This is especially important if you live in a region where
the winter is extreme ly cold. If necessary, increase the proport ion of
c oo lan t add it ive to 60%.
• When adding coolant additive to your cooling system, remember:
- We recommend using only coo lant add it ive G 12++ (check the
label) for your vehicle . This coolant additive is available at autho
r ized A ud i deale rs. Othe r ty pes of antifreeze can s ignifica ntly
reduce corrosion protection. The resulting corrosion can cause a
loss o f coolant and serious engine damage .
• Do not add any type of radiator leak sealant to you r vehicle's
eng ine coolant. Adding rad iator repair fl uid may adversely affect the
function and performa nce of your coo ling system and could resu lt in
d a mage not covered by your New Vehicle Limi ted W arranty. •
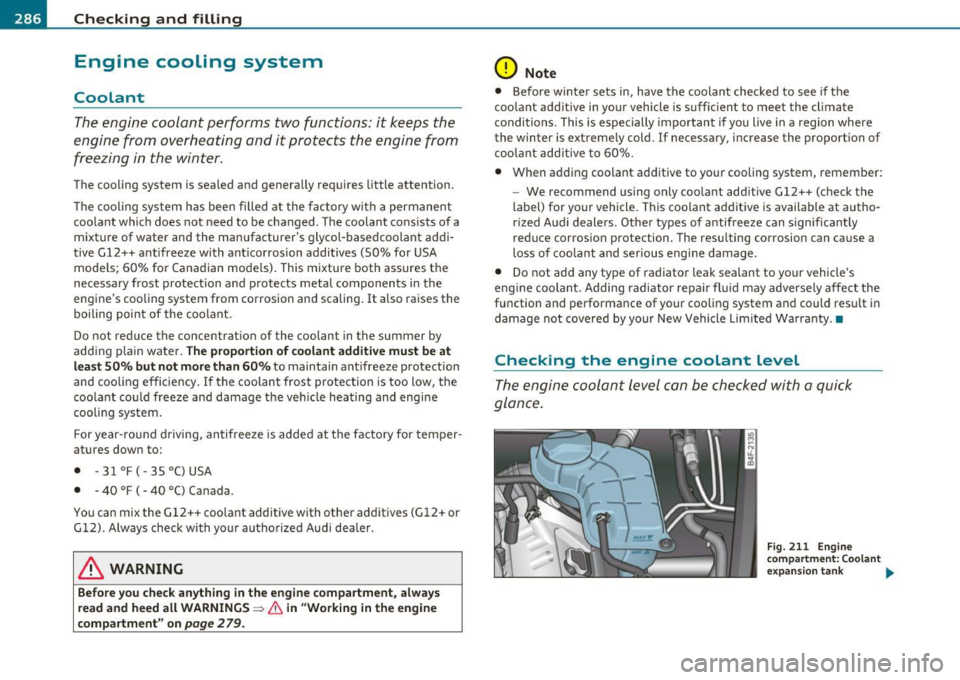
Checking the engine coolant level
The engine coolant level can be checked with a quick
glance .
Fig. 211 En gine
compa rtm ent : C oolant
ex pa nsio n tank ..
Page 289 of 370
___________________________________________ C_ h_e _c_ k_ i_ n -=g=-- a_ n_ d_ f_ i_ll _i_n -=g "-- _lffllll
Before you c hec k anythi ng in the engine compartment,
alwa ys r ead and heed all WARNINGS==> & in "Working in
the engine compartment" on
page 279.
- Turn off the ignition.
- Read the engine coolant level from the coolant expansion
tank==>
page 286, fig. 211. With a cold engine, the
coolant level should be between the "min" and "max"
markings . When the engine is wa rm, the level may be
sligh tly above the "max" marking .
The locat io n of the coolant expansion tank can be seen in the engine
compartment ill ustration ~
page 280.
To obta in an accurate reading, the engine must be sw itched off.
The expans ion tank in your vehicle is equ ipped with an electric coolant
level sensor .
When the coolan t level
is too low, the warn ing light i n th e Au to-Che ck
System ~
page 2 7 will blink until you add coo lant and the level has
bee n restored to normal. Even though the re is an elect ric coolan t
level sensor, we still recommend you check the coolant leve l from
time to time .
Coolant loss
Coolant loss may ind icate a leak in the cooling system. I n the even t of
coo lant loss, the cooling system should be inspected immed iately by
yo ur au tho rized A ud i dea le r.
It is not enough mere ly to add coolant.
In a
s ealed system, losses can occur only if the bo iling point of the
coo lant is exceeded as a resu lt of overheating .
0 Note
Do not add any type of radiator leak sealant to your vehicle's engine
coo lant. Add ing radiator repa ir fluid may adverse ly affect the func
tion and performance of your cooling system and could result in
damage not covered by your New Vehicle Limited Warra nty. •
Safety first
Adding coolant
Be very careful when adding engine coolant.
B efore you check a nything in t he engine compartment,
always read and heed all WARNINGS==> & in "Working in
the engine compartment" on
page 279.
- Turn off the engine.
- Let the engine cool down .
- Place a th ick rag over the coolant expansion tank
==>
page 286 , fig. 2 11 and carefully twist t he cap counter
clockw ise ==>& .
- Add coolant .
- Twist the cap on again
tightly .
Replacement eng ine coolant must conform to exact spec ifications
~ page 286, "Coolant". Even in an emergency, if coolant additive
G 12++, G12+ or G12 is not available, do
not use a different addi tive .
Use plain water instead until you can get the correct additive and can
restore the correc t ratio. This should be done as soon as possible.
If you have lost a considerable amount of coolant, then you should
add co ld antifreeze and cold water only when the eng ine is co ld .
Always use
new engine coo lant w hen refilling.
Do not fill coolant above the "MAX" mark. Excess coolant will be
forced ou t th rough the p ress ure relief v alve in the cap when the
engine becomes hot .
& WARNING
• The cooling sy stem i s under pres su re and can get very hot.
Reduc e the ri sk of scalding from hot coolant by following the se
steps.
-Tu rn off the engine and allow it to co ol down . _,.
Vehicle care Technical data
Page 291 of 370

___________________________________________ C_ h _ e_c _k _ i_n -=g .._ a_n _ d_ f_i _ll _i _ n -=g '-- ........
Brake fluid
Checking brake fluid level
The b rake f lu id l eve l can be checke d wit h a qui ck g lanc e.
Fig . 212 E ngine
compartment : Br ake
fluid re se rv o ir
Before you c heck a nythi ng in the eng ine compartment ,
always read and heed all WARNINGS~ & in "Working in
the e ngi ne comp art ment" on
page 279.
- Read t he bra ke flu id level from the bra ke fluid reservoir
~ page 289, fig . 212. The brake flu id level must be
between the " MIN" and " MAX" mar kings.
The brake fluid reservoir is locate d at the rear pa rtition of the engine
compartmen t on the left s ide=>
page 280 .
The f luid leve l may drop slightly after some time d ue to the auto
m atic a dju stment of t he b rake pads. This is not c ause for ala rm.
If the brake flu id level falls
considerably be low the "M IN" mark, the
brake warni ng/ind icator light (U .S. models :
BRAKE, Canadia n mo dels:
(0) ) will come on=> page 18 and=> page 26. Do not continue to
operate t he vehicle. The complete brake system sho uld be thoroug hly
chec ked by an au thor ized A ud i d eale r or othe r qualified fac ility and
the cause corrected.
If the brake fluid level is too low, the brake
Vehicle OP-eration
warning/ind icator light will illum inate . Contact an au thoriz ed Aud i
de aler
immediately .•
Changing brake fluid
H av e the b rake fluid chang ed by an expe rie nc ed t echni
CJ an.
B ra ke flui d abso rb s moi stur e from the air. If the wa te r c on ten t in t he
brake fl uid is too high, corros ion in the b rake system may res ult after
a pe riod of time. The boili ng po int of the brak e flu id will also decrea se
co nsiderab ly and decrease brak ing perfo rmance.
Th erefore, the brake f lui d m ust be c hanged
every two years . Always
use new brake fluid w hich conforms to Fede ral Motor Veh icle Stan
dard "F MVSS 1 16 DOT 4" .
Th e br ake f luid reserv oir can be diffi cult to rea ch, there fore, we
recommend that you have the brake fluid changed by your authori zed
Audi dealer . Your deal er h as th e correc t tools, the rig ht bra ke flui d
and the know-how to do th is for you.
& WARNING
• Brake fluid is poisonous. It must be stored only in the closed
original container out of the rea ch of children!
• Brake
failure can result from old or inappropriate brake fluid .
Observe these precaution s:
- Use only b rake fluid that meets SAE specification
J 1703 and
conforms to Federa l Motor Vehicle Standard 116. Alway s check
with you r authorized Audi dealer to make sure you are using
the correct brake fluid. The corre ct type of brake fluid is also
indicated on the brake fluid rese rvoir.
- The brake fluid must be new . Heavy use of the brakes can
c ause a vapor lo ck if the brake fluid is left in the system too
long . Thi s can seriously affect the efficiency of the brakes as
well as your safety. This could result in an accident .
~
Vehicle care Do-it-yourselt service Technical data
Page 292 of 370
-L~C~ h~ e~c ~k :..!_i ~ n ~g ~ a~n ~d~ f~il ~l~in ~ g[_ ________________________________________ _
0 Note
Brake fluid will damage the paint of your vehicle.
the special tools required and the necessary expertise, we recom
mend that you have the brake fluid changed by your authorized Audi
dealer. •
Battery
General information
Under normal operating condit ions, the battery in your Aud i does not
need any maintenance. With
high outside temperatures or long daily
drives we recommend that you have the electrolyte level checked by
a service facility. The electrolyte level should also be checked each
time the battery is charged~
page 292.
Have the battery checked when you take your vehicle in for service.
You are well advised to replace a battery that is older than 5 years.
With certain types of a irbag deployment, the battery is disconnected
from the vehicle electrical system for safety reasons=>
& in "Repair,
care and disposal of the airbags" on
page 211.
Disconnecting the battery terminals
Some vehicle functions (power window regulators, for example) are
lost if the battery terminals are disconnected. These functions have
to be relearned after the battery terminals are connected aga in. To
prevent this, the battery should only be disconnected from the
vehicle electrical system when absolutely necessary for repairs.
Vehicles not driven for long periods
If you do not drive your veh icle over a period of severa l days or weeks,
electrical components are gradually cut back or switched off. This
reduces energy consumption and maintains starting capability over a
longer period~
page 249.
Take into consideration that when you unlock your vehicle, some
convenience functions, such as the master key remote function or
power seat adjustment, may not be available. The convenience func
tions will be available again when you turn on the ign ition and start
the engine.
Winter operation
During the winter months, battery capacity tends to decrease as
temperatures drop. This is because more power is also consumed
while starting, and the headlights, rear window defogger, etc., are used more often .
Avoid unnecessary power consumpt ion, particu larly in city traffic or
when traveling only short distances. Let your authorized Audi dealer
check the capacity of the vehicle battery before w inter sets in
=> page 292. A well charged battery will not only prevent starting
problems when the weather is cold, but will also last longe r.
(I] Tips
If your veh icle is left standing for several weeks at extreme ly low
temperatures, the vehicle battery should be removed and stored
where it will not freeze. This will prevent it from being damaged and
having to be replaced.•
Page 296 of 370
___ C_h_ e_c _k _i_n -=g :a,__ a_n_ d_ f_ i_ l _li _n _,g;._ __________________________________________ _
Battery replacement
The new battery must have the same specifications and
dimensions as the original equipment battery.
Inte lligent energy management in your veh icle is responsible for
dis trib uti ng the elect ric al ene rgy throughout yo ur vehi cle
::} page 249. The intelligent energy management system will keep
t he e ngine battery charged be tter then vehicles withou t this system.
To make sure the additional e lectrical energy is available once again
after you have changed the ba tte ry, we recom mend that you in sta ll
batter ies of the same type and manufacture only (the same as those
installed at the t ime your vehicle was delivered). Specifications are
listed on the battery hous ing. You r authorized dealer must code the
battery in t he energy ma nageme nt system to enab le yo u to use the
energy management functions corre ct ly aft er replac ing the battery.
If it is not poss ible to use a battery of this type, the new battery must
have the same capacity, vo ltage ( 12 volts), ampe rage, co nstr uction
and plug sea ling.
When install ing the battery, make sure the ign it ion and a ll electrica l
c ons umers are tur ned off.
0 Note
Make s ure the ventilation hose on the sid e of the battery is
connected, otherwise fumes or battery acid ca n leak o ut.
<£> For the sake of the environment
Beca use of the problem of proper disposal of a battery, we recom
me nd your authorized Audi de aler change the ba ttery for you.
Batte ries contain sulfuric acid and lead and must always be d isposed
o f prope rly in com pliance wi th all environmen tal regula tions.
Disposing of vehicle batteries imprope rly is very dangerous to the
envi ro n ment .•
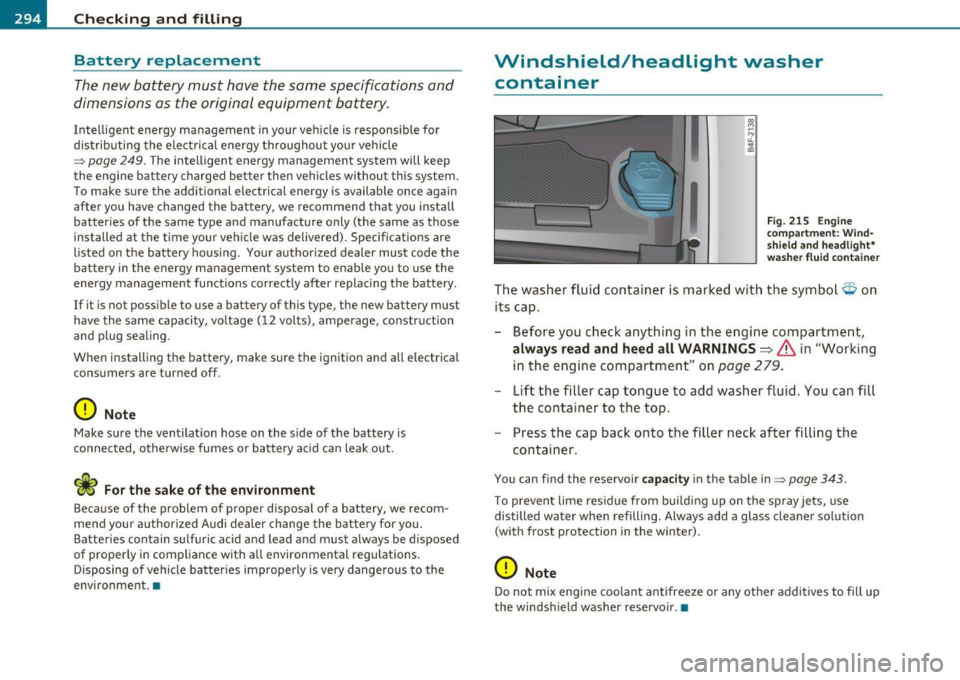
Windshield/headlight washer
container
Fig. 215 En gine
compartm ent: Wind
s hie ld and head lig ht *
w as her flu id co ntainer
Th e washe r fluid contain er is mark ed with the symb ol O on
its cap .
- Bef ore you check anything i n th e engin e compartm ent,
always read and heed all WARNINGS~ & in "Working
in th e e ngine com partme nt" on
page 279 .
-Lift t he filler cap tongue to add washe r fluid. You can fill
the conta iner to the top.
- Press the cap bac k onto the f iller neck af ter filling the
container .
You can find the reservoir capacity in the table in::} page 343.
To preven t lime res idue from bui ldi ng up on t he spray jets, use
distilled water when refilling. Always add a glass cleane r so lution
(with frost protection in t he winter).
0 Note
Do not mix engine coo lant antifreeze or any othe r additives to fi ll up
the windsh ield washe r rese rvo ir .•
Page 322 of 370

lffl!I.___W __ h_a_ t_ d_ o_ I_ d_ o_ n_ o_w_ ? _____________________________________________ _
- Disengage and lower the floor panel before you close the
luggage compartment lid again.
Storing the replaced wheel
-Place the replaced wheel inside the spare wheel well in the
luggage compartment.
Tighten the knurled retaining screw clockwise to secure
the wheel in place.
- Disengage and lower the floor panel before you close the
luggage compartment lid again.
& WARNING
Loose items in the passenger compartment can cause serious
personal injury during hard braking or in an accident.
• Never store the spare wheel or jack and tools in the passenger
compartment.
• Always store all jacking equipment, tools, and the spare wheel
in the luggage compartment.
• Tighten the knurled retaining screw for the spare wheel
securely.
[ i] Tips
Check the inflation pressure of the spare tire periodically to keep the
tire ready for use.•
Changing a wheel
Before changing a wheel
Observe the following precautions for your own and your
passenger's safety when changing a wheel.
- After you experience a tire failure, pull the car well away
from moving traffic and try to reach
level ground before
you stop :::> & .
- All passengers should
leave the car and move to a safe
location (for instance, behind the guardrail) :::>& .
- Engage the
parking brake to prevent your vehicle from
rolling unintentionally:::> &.
- Move
selector lever to position P :::> & .
- If you are towing a trailer: unhitch the trailer from your
vehicle.
- Take the
jack and the spare tire out of the luggage
compartment:::>
page 318.
& WARNING
You or your passengers could be injured while changing a wheel if
you do not follow these safety precautions:
• If you have a flat tire, move a safe distance off the road. Turn
off the engine, turn the emergency flashers on and use other
warning devices to alert other motorists.
• Make sure that passengers wait in a safe place away from the
vehicle and well away from the road and traffic.
• To help prevent the vehicle from moving suddenly and possibly
slipping off the jack, always fully set the parking brake and block
the wheel diagonally opposite the wheel being changed. When
one front wheel is lifted off the ground, placing the Automatic
~
Page 336 of 370
lffll.___E_ m_ e_r -=g =- e_ n_c -=y ;..._ s_i_t _u _a _ t_ i_ o _ n_ s ____________________________________________ _
Connect POSITIVE(+) to POSITIVE(+) (red)
- Open the red cover o n the posi tive po le => page 333,
fig . 237 .
1. Connect one end of t he positive cable (red) on the
jump
start bolt=>
page 333, fig. 238 (D (B olts under red cove r
= "positive") of t he vehicle to be star ted @.
2. Con nect t he ot her end to t he positive terminal @ of t he
booster battery @.
Connect NEGATIVE(-) to NEGATIVE(-)
(black)
3 . Co nnect one end to th e n egative t ermin al@ of t he
b oost er batter y@ .
4. Con nect the o ther e nd of th e nega tiv e cabl e (b la ck) to the
jump start bolt© (Bolts wi th hex hea d= "n ega tiv e") of
the v ehic le t o b e sta rted
@ .
Starting the engine
- S ta rt the e ngi ne of t he ve hic le with the booster battery.
R un the e ngi ne at a moderate speed.
- Star t engi ne wi th discha rged vehi cle battery in the usual
ma nner.
- If the engine fails to start: do not keep t he star ter
c ran kin g f or l onge r tha n 1 0 seco nds . W ait f or a bo ut
3 0 seco nds an d the n try aga in .
- Wi th eng ine ru nn ing , rem ove jum per cables from bot h
v ehic les i n the exact
re ve rs e orde r.
- C lose the red cover on the posi tive po le.
The battery is vented to the outside to prevent gases from enter ing
th e ve hicl e int erior. Ma ke sure th at th e jum per cl amp s are well
connected w ith t he ir
metal parts in full contact w ith the batte ry
terminals .
& WARNING
To avoid serious personal injury and damage to the vehicle, heed
all warnings and instructions of the jumper cable manufacturer. If
in doubt, call for road service.
• Jumper cables must be long enough so that the vehicles do not
touch.
• When connecting jumper cables , make sure that they cannot
get caught in any moving parts in the engine compartment .
• Before you check anything in the engine compartment, always
read and heed all WARNINGS~
page 271, "Engine compart
ment ".
0 Note
Improper hook-up of jumpe r cables can ruin the generator.
• Always connect POSI TIVE(+) to POSI TIV E(+ ), and NEGA TIVE( -)
to NEGATIVE( -) ground post of the batte ry manage r contro l unit.
• Check t hat all sc rew p lugs on the battery cells are screwed in
firmly . If not, tighten plugs prior to co nnecting clam p on negative
battery terminal.
• P lease note th at the p roce dure for connec ting a jumper cab le as
described
a bove ap pli es specifically to the case o f yo ur vehicle be ing
jump starte d. When you are giving a j ump sta rt to anot her vehicle, do
not con nect the negative (-) cab le to t he negat ive (-) termina l on the
discharged battery ©~
page 333, fig. 238. Instea d, secure ly
c o nnec t the neg ative (- ) cable to ei ther a soli d met al c o m ponen t that
is firm ly bolted to the eng ine b lock or to the eng ine b lock itself .
If the
b att ery th at is being ch arged does not
ven t to th e ou tside, es caping
battery gas could ignite and exp lode! •
Page 340 of 370
lffll.___E_ m_ e_ r-' g=- e_n_ c=-y _ s_it _ u _ a_t_ i_ o _ n_ s ______________________________________________ _
in. WARNING
• To reduce the risk of serious injury and vehicle damage.
-Always lift the vehicle only at the special workshop hoist and
floor jack lift points illustrated=>
page 337, fig. 243 and
=>
page 337, fig. 244.
- Failure to lift the vehicle at these points could cause the
vehicle to tilt or fall from a lift if there is a change in vehicle
weight distribution and balance. This might happen, for
example, when heavy components such as the engine block or
transmission are removed.
• When removing heavy components like these, anchor vehicle
to hoist or add corresponding weights to maintain the center of
gravity. Otherwise, the vehicle might tilt or slip off the hoist,
causing serious personal injury.
0 Note
• Be aware of the following points before lifting the vehicle :
-The vehicle should never be lifted or jacked up from under
neath the engine oil pan, the transmission housing, the front or
rear axle or the body side members. This could lead to serious
damage.
- To avoid damage to the underbody or chassis frame, a rubber
pad must be inserted between the floor jack and the lift points.
- Before driving over a workshop hoist, check that the vehicle
weight does not exceed the permissible lifting capacity of the hoist.
- Before driving over a workshop hoist, ensure that there is sufficient clearance between the hoist and low parts of the
vehicle. •
Page 349 of 370

_____________________________________________ C_o_ n_s _u_ m __ e_r _ I_ n_ f_o _r_ m_ a_ t_ i _o_ n __ __
• oil cha nges, and
• cl ea ning or re placing th e air fi lter.
W For the sake of the environment
By regu larly ma intaini ng yo ur vehicl e, y ou h elp m ake su re th at em is
sion standards a re mainta ined, t hus mi nimizing adverse effects o n
t he enviro nmen t. •
Important considerations for you and your
vehicle
Th e increas ing use of elect ronics, s ophistica ted fuel inje ct io n and
em ission cont rol systems, and t he generally increasing tec hnical
c omplex ity o f today' s automobile s, have s tea dil y re duced t he s cope
of maintena nce and repairs w hic h can be carr ied out by ve hicle
ow ners.
Also, safety and environmental c o nce rn s plac e very s trict
limits o n the nature of repa irs and adjustments to engine an d tra ns
mission parts w hich an owner can pe rform .
M ain te nance, ad justm ents and r epairs us ua lly re quir e spec ia l t ools,
test ing devices an d other e quipment availab le to s pecia lly trained
wo rksh op pe rsonnel in order to assure pro per perfor mance, re li
ability and safety of the vehicle and its many systems.
Impro per ma inte nance, adjustments and rep airs can im pa ir the ope r
ation and reliability of your ve hicle and even void your veh icle
wa rranty . Therefo re, p ro of of se rvicing in a ccordance wi th t he ma in
t enance sch edul e may be a co nd it io n fo r u phold ing a possib le
wa rranty claim made w it h in the wa rranty pe riod.
Above all, operat io nal safety ca n be adve rsely affec ted, c reat ing
unnecessary r is ks for you and your passe ngers.
If in doubt abou t any serv ic ing, have it done by your authorized Audi
dealer or a ny o ther pro perly equipped a nd qualified workshop . W e
st rong ly ur ge you to give yo ur auth oriz e d Aud i dea ler the opportu nity
t o pe rform all sc heduled mainte na nce and necessary repairs. Yo ur
Safety first
dealer has the facilities, o rigina l parts and trained spec ia lists to keep
your vehi cle runni ng properly.
Performing limited maintenance yourself
The foll ow ing page s descr ibe a lim ite d num ber of proced ures whi ch
can be perfo rmed on your vehicle w it h ordina ry tools, shou ld the need
ar ise and tr ained pe rsonnel be u navailabl e. Befo re pe rforming any of
t hese p rocedures, always t horoughly read all of the applicable text
and ca ref ull y follow the ins tru ction s given . Alw ays rigoro usly o bserve
t he
WARNINGS prov ided .
Before you check anything in the engine compartment, always read
and heed all WARNINGS=>
& and=> & in "W orking in the engine
compartment" on
page 279.
& WARNING
• Serious personal injury may occur as a result of improperly
performed maintenance, adjustments or repairs.
• Always be extremely careful when working on the vehicle.
Always follow commonly accepted safety practices and general
common sense . Never risk personal injury .
• Do not attempt any of the maintenance, checks or repairs
described on the following pages if you are not fully familiar with
these or other procedures with respect to the vehicle, or are uncer
tain how to proceed.
• Do not do any work without the proper tools and equipment .
Have the necessary work done by your authorized Audi dealer or
another properly equipped and qualified workshop .
• The engine compartment of any motor vehicle is a potentially
hazardous area. Never reach into the area around or touch the
radiator fan. It is temperature controlled and can switch on
suddenly -even when the engine is off and the ignition key has
been removed. The radiator fan switches on automatically when
the coolant reaches a certain temperature and will continue to run until the coolant temperature drops. ..
Do-it,yourself service Technical data
Page 350 of 370
___ C=-.:: o...:.n...:. s =-.:: u:..:m...:....:. e.::..:.. r:....: I:.. n:...:....:. f...:.o :....:r...:. m...:....:. a.::.:....:: t...:.io .::..:. n-=-----------------------------------------------
& WA RNING (conti nu ed )
• Always rem ove the ignition key before anyone get s under the
vehicle .
• Always support your vehicle with safety stands if it i s nece ssary
to work underneath the vehicl e. Th e jack supp lied with the vehicle
is not adequate for thi s purpose and could collap se causing
seriou s personal injury .
• If you must work underneath the vehicle with the wheels on
the ground, a lway s make sure the vehicle is on level ground, that
the wheels are alway s securely blocked and that the engine cannot
be started .
• Always make sure the transmi ssion selector lever (automatic
tran smission ) is in "P " (Park po sition ) and the park brake is firmly
applied.
For the sake of the environment
• Changing the engine settings will adversely affect emission levels .
Thi s is det rimenta l to the envi ronme nt and increases fue l co nsump
tion.
• Always observe enviro nmental regulations when disposing of old
engine oi l, used brake fl uid, dirty engine coo lant, spent batteries or
worn out t ires.
• Undep loyed a irbag modules an d pretens ioners migh t be classified
as Pe rchlorate Mater ia l -spec ial handling may apply, see
www.dtsc.ca.gov/hazardouswaste/perchlorate . When the vehicle or
parts of the rest raint system includ ing a irbag modu les safety belts
w ith pretens ioners are scrapped, all applicable laws and regulat ions
must be obse rved. Yo ur author ized Aud i dealer is f amiliar wi th t hese
req uirements and we recommend that you have your dealer perform
t his se rvi ce f or yo u.•
Additional accessories,
modifications and parts
replacement
Additional accessories and parts replacement
A lways consult an autho riz ed Au di dealer bef ore
purchasing access ories.
Your vehicle incorporates the latest safety desig n featu res ens uring a
hig h standard of active and passive safety .
Th is safety co uld be compromised by non-app roved changes to the
vehicle. Fo r this reaso n, if par ts have to be replaced, p lease observe
the following points when installing addit ional accessories :
Approved Audi accessories and genuine Aud i parts are available from
author ized Aud i dea lers.
T hese dea lers a lso have the necessary fac ilities, tools and tra ined
specialists to i nstall the parts and a ccessor ies p roperly.
& WARNING
Using the wrong spare parts or u sing non-approved acces sorie s
can cause damage to the vehicle and serious personal injury.
• Use only accessories expressly approved by Audi and genuine
Audi spare parts
• These parts and accessories have been specially designed to be
used on your vehicle .
• Never install accessories such as telephone cradles or beverage
holder s on airbag covers or within the airbag deployment zones .
Doing so will increase the r isk of injury if airbags are triggered in
an accident!
• Before you check anything in the engine compartment , always
read and heed all WARNINGS~
page 271. _..