warning AUDI A6 2012 Workshop Manual
[x] Cancel search | Manufacturer: AUDI, Model Year: 2012, Model line: A6, Model: AUDI A6 2012Pages: 298, PDF Size: 74.43 MB
Page 64 of 298
62 Seat s a nd s tor ag e
Op ening th e trunk p ass-through
.. Fold the center armrest in the rea r forward
and out .
.. Pull the release handle ¢
fig. 64 and fold
down the cover of the pass -through in the
vehicle interior .
.. Open the rear lid .
.. Push the ski sack* through the opening
from the luggage compartment .
Sec uring the sk i s a ck *
.. Insert the ski sack strap@¢ fig. 65 in the
center buck le @ .
.. Pull the safety belt taut on the free end of
the belt @.
A WARNING
-The ski sack is intended only for the
t ransportation of skis and other light ob
jects . To reduce the risk of serious per
sonal inj ury never t ransport heavy o r
pointed objects in the ski sack .
- When brak ing rapidly o r during an acci
dent the load cou ld be displaced and
cause injury to occupants .
- Sharp edges on the load must be covered
for protection . Always fasten the belt
tightly around the sack and its contents
¢ fig. 65.
(D Tips
- Never stow the sk i sack away when it is
still wet or damp (for example, snow
melting from skis). Allow it to dry com
plete ly before stowing it away.
- Position skis in the ski sack with the pointed ends facing the front and ski
po les with the pointed ends facing the
rear.
Page 65 of 298
Warm and cold Climate controls
Description
App lies to vehicles: with three -zone cl imate contro l or
four -zone a uto mat ic climate contro l
The climate control system warms, cools and
adds humidity to the air in the vehicle interior .
It is the most effective when the windows and
sunroof* are closed . If the temperature inside
the parked veh icle becomes very warm, open
i ng the w indow br iefly will speed up the cool
ing process.
In all heating mode functions except
defrost,
the blower on ly switches to a higher speed
once the engine coolant has reached a certain
temperature.
Condensat ion from the cooling system can
drip and form a puddle of wate r under the ve
h icle. This is normal and does not mean there
is a leak .
Pollutant filt er
The pollutant filter removes pollutants such
as dust and po llen from the air.
The air pollutants filter must be changed at
the intervals specified in your Warranty
&
Maintenance booklet, so that the air condi
tioner can properly work .
If you drive your vehicle in an area with high
a ir pollution, the filter may need to be
changed more frequently than specified in
your Aud i Warranty
& Ma intenance booklet. If
i n doubt, ask your authori zed Audi Service Ad
visor for adv ice.
K ey coded settings
Three-zone climate control: the blower set
ting and air distribution are stored automati
cally and ass igned to the remote control key
that you are using.
Four-zone automatic climate control: The cli
mate contro l settings are automatica lly stor
ed and assigned to the remote control key
that is in use .
Warm and c old 63
A WARNING
-
Reduced visibi lity is dangerous and can
cause acc idents .
- For safe driving it is very important that
all windows be free of ice, snow and con
densat ion.
- Comp letely fam il iarize yourse lf with the
proper use and funct ion of the heat ing
a nd ventilation system and especially
how to defog and defrost the w indows.
- Never use the windshield wiper/washer system in freez ing weathe r unt il you
have wa rmed the windshie ld first, using
the heating and ventilation system. The
washer sol ution may freeze on the wind
shie ld and red uce visibi lity.
CJ) Note
- If you s uspect that the air conditioner
has been damaged, switch the system
off to avoid furt her damage and have it
inspected by a qualified dea lership .
- Repairs to the Audi air conditioner re
quire specia l technical know ledge and
special tools. Contact an authorized Audi
dealer fo r ass istance.
@ For the sake of the envi ronment
By reducing the amount of f uel you use,
you also red uce the amount of pollutants
emitted into the air.
(D Tips
- Keep the air intake s lo ts ( in front of the
w indshield) free from ice, snow and de
bris in order to maintain the proper func
tion of the climate control system.
- The energy ma nagement system may
switch the seat heating* or rear window defroster off temporar ily. These systems
are available again as soon as the energy
balance has been restored .
- Air escapes through vents under the rear
window. When plac ing items of cloth ing
on the luggage compartment cover, en
sure that the openings are not covered.
Page 67 of 298
l
ed or cleared of condensation as quickly as possib le. The maximum amount of air flows
mainly from th e vents be low the windshield.
Recirculation mode switches off .
The
IAU TO I button switches the defroster off.
ICi@ REAR I Switching rear window heate r
on /off
The rear w indow heater only operates when
the engine is running. It switches off auto
matica lly after a few minutes, depending on
the outside temperature.
To prevent the rear w indow heater from
switching off automatically, press and hold
the ~ button for more than 2 seconds. This
remains stored unti l the ignition is switched
off.
[il A dj ustin g seat heat ing
Pressing the button swi tches the seat heating
on at the highest sett ing ( leve l 3) . The LEDs
indicate the temperature leve l. To reduce the
temp erature, press the button again. To
switch the seat heating off, press the button
repeatedly unt il the LED turns off .
After 10 minutes , the seat heating automati
cally switches from leve l 3 to level 2.
The seat heating for both outer rear sea ts* is
ad justed using the buttons in the cente r con
sole.
Warm and c old 65
Air vents
You can open or close the center and outer
vents in the cockpit and the vents in the rear
center console using the ridged thumbwheels.
The l evers adjust the dir ection of the airflow
from the vents.
T he air temperature in the rear can be adjust
ed so that it is warmer or co lder by turning
the knob to the r ed or blue area.
A WARNING
- Do not use this setting for extended peri
ods of time. The w indows could fog up
since no fresh air can enter the vehicle . If
the windows fog up, press the air rec ircu
lation button again immediate ly to
sw itch off the air reci rcu lation function
or select defrost .
- I ndividuals w ith reduced sensitivity to
pa in or tempera ture cou ld deve lop burns
when using the seat heating function . To
red uce the risk of i nju ry, these indiv idu
a ls sho uld not use seat heating.
(D Note
To avoid damage to the heat ing e lements
i n the sea ts, do not kneel on the seats or
place heavy loads on a small area of the
seat.
Page 69 of 298
IAUTO I Switching automatic mode on
Automatic mode mainta ins a constant tem
perature inside the vehicle . Air temperature,
airflow and air distribution are controlled au
tomatically.
Adjusting the temperature
Temperatu res between 60 °F (+16 °C) and
84 °F ( +28 °C) can be set. O uts ide of this
range,
lo or hi wi ll appear in the climate con
trol system disp lay. At both of these settings,
the climate control system runs continuously
at maximum cooling or heating power. There
is no temperature regulation.
~ Adjusting the airflow
You can adjust the airf low manually to suit
your needs . To have the airf low regulated au
tomatically, press the
I AU TOj button.
li!J Adjusting the air distribution
You can manually se lect the vents where the
air will flow. To have the air distribution regu
lated automatically, press the
IAUTOI button .
~I~ * Adjusting seat heating/
ventilation*
Pressing the button switches the seat heat
ing/ventilation on at the highest setting ( level
3). The LEDs indicate the heating/ventilation
level. To reduce the heating/venti lation, press
the button again. To switch the seat heating/
ventilation off, press the button repeatedly
until the LED turns off.
After 10 minutes, the seat heating automati
cally switches from level 3 to level 2.
I@ FRONT I Switch the defroster on/off
The windshield and side windows are defrost
ed or cleared of condensation as quickly as
possible. The maximum amount of air flows
mainly from the vents below the windshield.
Recircula tion mode switches off.
The
IAU TOI button switches the defroster off.
Warm and cold 67
liiii REAR! Switching rear window heater
on/off
The rear window heater only operates when
the engine is running. It switches off auto matically after 10 to 20 minutes, depending
on the outside temperature.
To prevent the rear window heater from
switching off automatically, press and ho ld
the~ button for more than 2 seconds. This
remains stored until the ignition is switched
off .
I SYNC I Synchronization*
When synchronization is switched on, the
same settings are applied to both the driver
and front passenger, except for the seat heat
ing/ventilation*. The rear zone is also
synchronized. Synchronization switches off
when the settings for the front passenger s ide
o r r ear are adjusted.
You can also switch synchronization on by pressing and holding a dial. For example, if
you press and hold the dial on the front pas
senger side, the settings for that side are
transferred to the driver side. The same ap
plies to the rear.
Air vents
You can open or close the center and outer
vents in the cockpit and the vents in the rear
cente r console and door pillars using the
ridged thumbwheels. The levers adjust the di
rection of the airflow from the vents.
&_ WARNING
-=
-Do not use this setting for extended peri-
ods of time . The windows could fog up
since no fresh air can enter the vehicle. If
the windows fog up, press the air recircu
lation button again immediately to
sw itch off the air recircu lation function
or select defrost.
- Individuals w ith reduced sensitivity to
pa in or temperature cou ld deve lop burns
when using the seat heating function . To
red uce the risk of injur y, these individu-
als should not use seat heating . ..,.
Page 71 of 298

On the road
Steering
Manually adjustable steering wheel
Applies to vehicles: with manu ally adjustable steering
w hee l
The height and reach of the steering wheel
can be adjusted.
Fig. 70 Lever on the steer ing co lumn
" Pull the lever <=> fig. 70 -arrow- <=>,&. .
" Move the steer ing wheel to the desired po
sition.
" Push the lever against the steering column
u ntil it locks.
There must be at least 10 inches (25 cm) be
tween your chest and the center of the steer
ing wheel.
If you cannot sit more than 10 in
ches (25 cm) from the steer ing whee l, see if
adaptive equipment is available to help you
reach the pedals and increase the distance
from the steering whee l.
F or detailed information on how to adjust the
driver's seat, see <=>
page 51.
_& WARNING
Improper use of steering wheel adjust
ment and improper seating position can
cause serious personal injury.
- Adjust the steering whee l column only
when the vehicle is not moving to pre
vent loss of veh icle control.
-
- Adjust the driver's seat or steering wheel
so that there is a minimum of 10 inches
(25 cm) between your chest and the
steering wheel
<=> page 124 , fig . 131 . If
you cannot maintain this minimum dis-
On the road 69
tance, the airbag system cannot protect
you properly.
- If physical limitations prevent you from
sitting 10 inches (25 cm) or more from
the steering wheel, check with your au
thorized Audi dealer to see if adaptive
equipment is available.
- If the steering wheel is aligned with your
face, the supplementa l driver's a irbag
cannot provide as much protection in an
accident . Always make sure that the
steering wheel is aligned with your
chest .
- Always hold the steering wheel w ith your
hands at the 9 o'clock and 3 o'clock posi
tions to reduce the risk of personal injury
if the driver's airbag deploys.
- Never hold the steering wheel at the 12
o'clock position or wi th your hands inside
the stee ring wheel rim or on the steering
wheel hub. Holding the steering wheel
the wrong way can cause serious injuries
to the hands, arms and head if the driv
er's airbag deploys.
Electrically adjustable steering wheel
App lies to vehicles: wi th electrica lly ad justable stee ring
w heel
The steering wheel position can be electrically
adjusted for height and reach.
Fig. 71 Switc h fo r steering w heel adju stment
" To adjust the height, press the swit ch up/
down. The steer ing column w ill cont inue
moving as long as you are pressing the
switch .
" To move the steer ing whee l forward or
back, press the switch forward/back. The
Page 72 of 298
70 On the road
steering column will continue moving as
l ong as you are pressing the switch.
There must be at least 10 inches (25 cm) be
tween your chest and the center of the steer
ing whee l.
If you cannot sit more than 10 in
ches (25 cm) from the steering whee l, see if
adaptive equipment is available to help you reach the pedals and increase the distance
from the steer ing wheel.
For detai led information on how to adjust the
driver's seat, see
<::> page 51 .
In vehicles with the memory f unction* , the
steering column settings are stored together
with the seat position.
A WARNING
Improper use of steering wheel adjust
ment and improper seating position can
cause se rious personal injury.
- Adjust the steer ing whee l column on ly
when the vehicle is not moving to pre
vent loss of veh icle control.
-
- Adjust the driver's seat or steering wheel
so that the re is a min imum of 10 inches
(25 cm) between your chest and the
steering wheel ¢
page 124, fig. 131. If
you can not maintain this min imum dis
tan ce, the airbag system cannot protect
yo u properly.
- If phys ica l limitations prevent you from
sitting 10 in ches (25 cm) o r more from
the steering wheel, check with yo ur au
tho rized Aud i dealer to see if adaptive
equipment is availab le .
- If the steering wheel is aligned with you r
face, the supp lemental driver's airbag
cannot provide as much protect ion in an
acc ident. A lways make sure that the
steering wheel is aligned with your
chest.
- Always hold the steering wheel with your
hands at the 9 o'clock and 3 o'clock posi
t ions to reduce the risk of pe rsonal injury
if the d river 's airbag deploys.
- Never hold the steering whee l at the 12
o'clock posit ion or w ith your hands i nside the steering wheel rim or on the steering
wheel hub. Hold
ing the steer ing wheel
the wrong way can cause serious injuries
to the hands, arms and head if the driv
er 's airbag deploys.
Easy entry feature
Applies to vehicles: with electrically adjustable steering
wheel
The easy entry feature makes it easier to en
ter and exit the vehicle by automatically ad
justing the steering wheel.
.. Select in the MM I: ICARlfunction button>
Car system s control button > Vehicle set
ting s
> Seats > D rive r's seat > Easy entry >
On .
When the easy ent ry feature is turned on, the
steering wheel moves up to the park position
when you switch
off the ignition. After you en
ter the veh icle, the steering wheel moves to
the stored position as soon as you sw itch on
the ignit ion.
Starting and stopping
the engine
Starting the engine
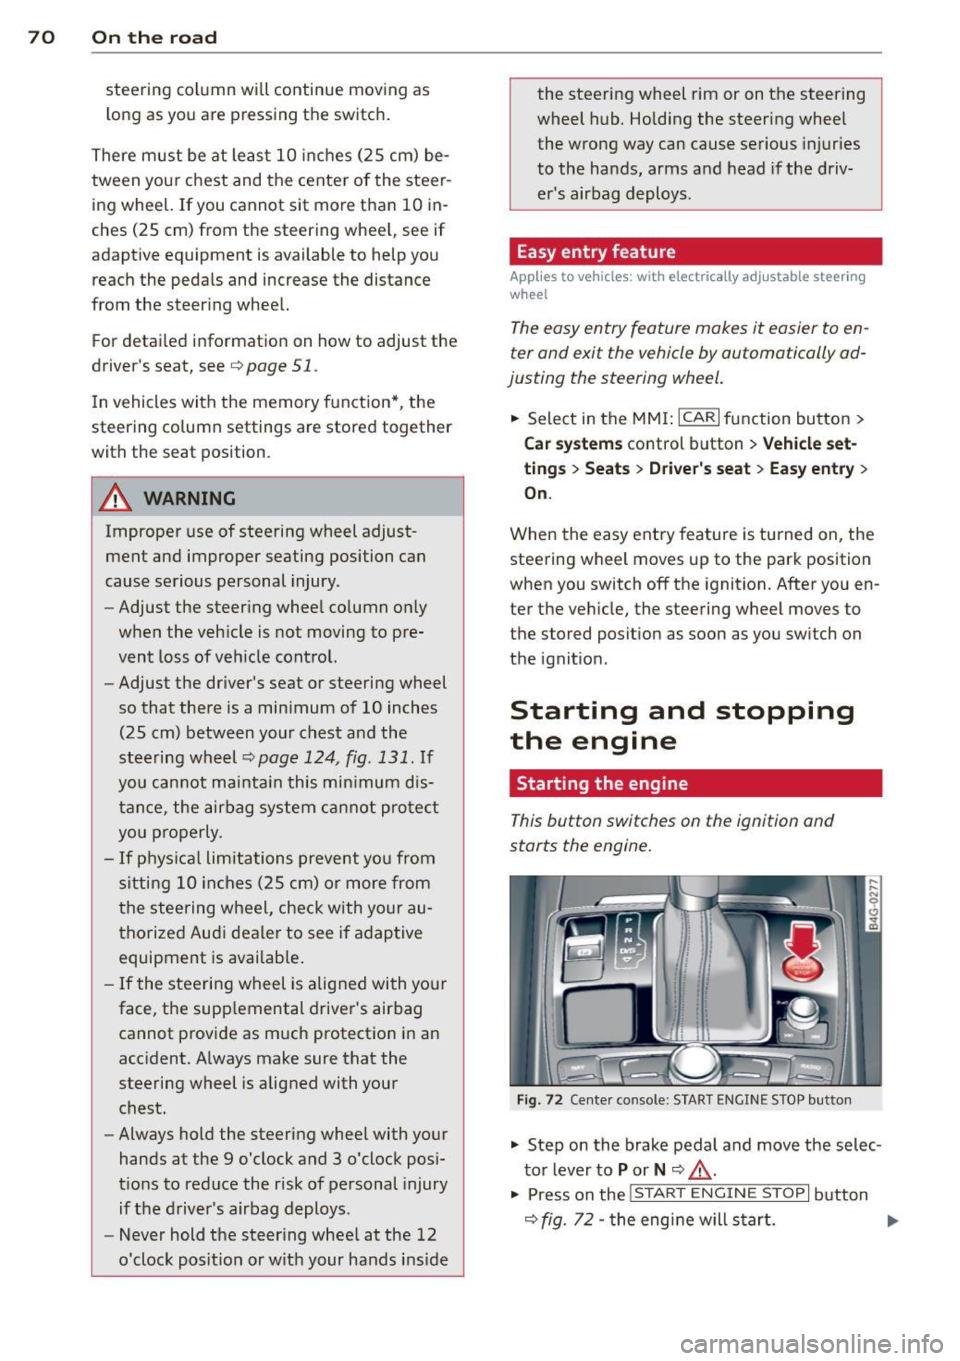
This button switches on the ignition and
starts the engine.
Fig . 72 Center console: S TART ENGINE S TOP butto n
"' Step on the brake pedal and move the selec
tor lever to
P or N <::> .&_ .
"' Press on the ~ ,s_T_A_R_T_E_N_G_I_N_E_S _T_ O_P~I button
<::> fig. 72 -the engine will start. ..,.
Page 73 of 298
By pressing the I START ENGINE STOPI button
without depressing the brake peda l, the igni
tion is on and switched
off by pressing it
again.
After a cold engine is started, the re may be a
brief period of increased noise because oil
pressure must first bui ld up in the hydraulic
va lve adjusters. This is normal and not a cause
for concern.
If the engine should not start immediately,
the starting process is automatically stopped
after a short time. Repeat starting procedure.
Driv er m essag e in th e in strument clu ste r
disp lay
Pr ess br ak e p ed al to start engin e
This message appears if you press the
I START ENGINE STOP ! button to start the en
g ine and do not depress the brake peda l. The
engine can on ly be started if the brake pedal
is depressed.
!!I C o nv enience ke y: I s ke y not in th e vehi
cle ?
This message appea rs a long with the !!I sym
bol if the maste r key is removed from the ve
hicle with the engine r unning . It is intended
to remind you (e .g . when changing drivers)
not to continue the journey witho ut the mas
ter key.
I f the master key is no longer in the vehicle,
you cannot sw itch on the ignition after stop
ping the engine and yo u also cannot start the
engine again. Moreover, you cannot lock the
veh icle from the outside with the key.
Shift to P , other wis e vehicle c an roll away.
Doo rs do not lock if le ver i s not in P.
This message appears for sa fety reasons
a long with an audib le warning tone if the
P
selector lever position is not engaged when
stopping the eng ine with the
I STAR T ENGINE STOP ! button. Select the P se
lector lever posit ion. Otherwise the veh icle
could roll and it can not be locked .
On th e ro ad 71
Ke y not r ecogni sed . Hold bac k of ke y again st
ma rked area. See owne r's manual.
If the indica tor l ight turns on and this mes
sage appears, there is a malf unct ion
¢ page 72.
Steering lock
The steering locks when you turn the engine
off using the I START ENGINE STOP ! button
and open the d river's doo r. T he locked steer
i ng helps p revent vehicle theft.
& WARNING ~
- Never allow the engine to run in confined
spaces -danger of asphyxiation .
- Never turn
off the engine un til the vehi
cle has come to a complete stop .
- The brake booster and power steering
only work when the eng ine is r unning . If
the engine is
off, you have to use more
force when steering or braking. Because
you cannot steer and brake as you usual ly would, this cou ld lead to crashes and
serious injuries.
(CT) Note
- Avo id h igh engine rpm, full thrott le and
heavy engine loads until the engine has
reached operating temperature -other
w ise you risk engine damage .
- The engine cannot be started by pushing
or towing the vehicle.
- If the engine has been under heavy load
for an extended per iod, heat builds up in
the engine compa rtment afte r the e n
gine is switched
off -there is a risk of
damaging the engine. Allow the engine
to run at idle fo r about 2 minutes before
switching it
off.
(D Tips
- If you open the d river 's doo r with the ig
nition on, a buz ze r sounds and the mes
sage
Ignition i s on appears in the instr u
ment cl uste r display . Sw itch the ignition
off . Ill-
Page 74 of 298
7 2 On the road
-If yo u leave the vehicle wi th the ignition
switched on, the ignition will switch off
after a certa in period of time . Please
note that e lectrica l equipment such as
exter ior lights w ill switch off as well
when that happens .
Stopping the engine
.,. Bring your vehicle to a complete stop .
.,. Move the selector lever to the
P o r N posi
t ion.
.,. Press the
!S TAR T ENGINE S TOPI button
9 page 70, fig. 72 .
Emergency off
If necessary, the eng ine can be sw itched off
with the selector leve r in the
R or D /S posi
tion . The engine stops if you press the
I START ENGINE STOP! button at speeds below
6 mph (10 km/h) and press the brake pedal.
A WARNING
- Never turn off the engine unti l the vehi
cle has come to a complete stop.
- The brake booster and power steering
only work when the engine is running. If
the engine is off, you have to use more
force when steering or braking. Because
you cannot steer and brake as you usua l
ly wou ld, this could lead to crashes and
serious injur ies.
- For safety reasons, you should always
park your vehicle with the selector lever
in P. Othe rwise, the veh icle could inad
vertent ly roll away.
- After the engi ne has been switched off,
the radiator fan can continue to run fo r
up to 10 m in utes - even with the ig nitio n
swit ched off.
It can a lso switch on ag ain
afte r some time if the coolant tempera"
t u re rises as the result of a heat buildup
or if the engine is hot and the engine compartment is addit ionally heated by
the sun's rays.
(D Note
Do not stop the eng ine immediately after
hard or extended driving . Keep the engine
running for approximate ly two minutes to
prevent excessive heat bu ild-up .
Starting the engine if there is a
malfunction
It may not be possible to start the engine un
der certain circumstances, for example if the battery in the vehicle key is drained, if inter
ference is affe cted the key or if there is a sys
tem malfunction.
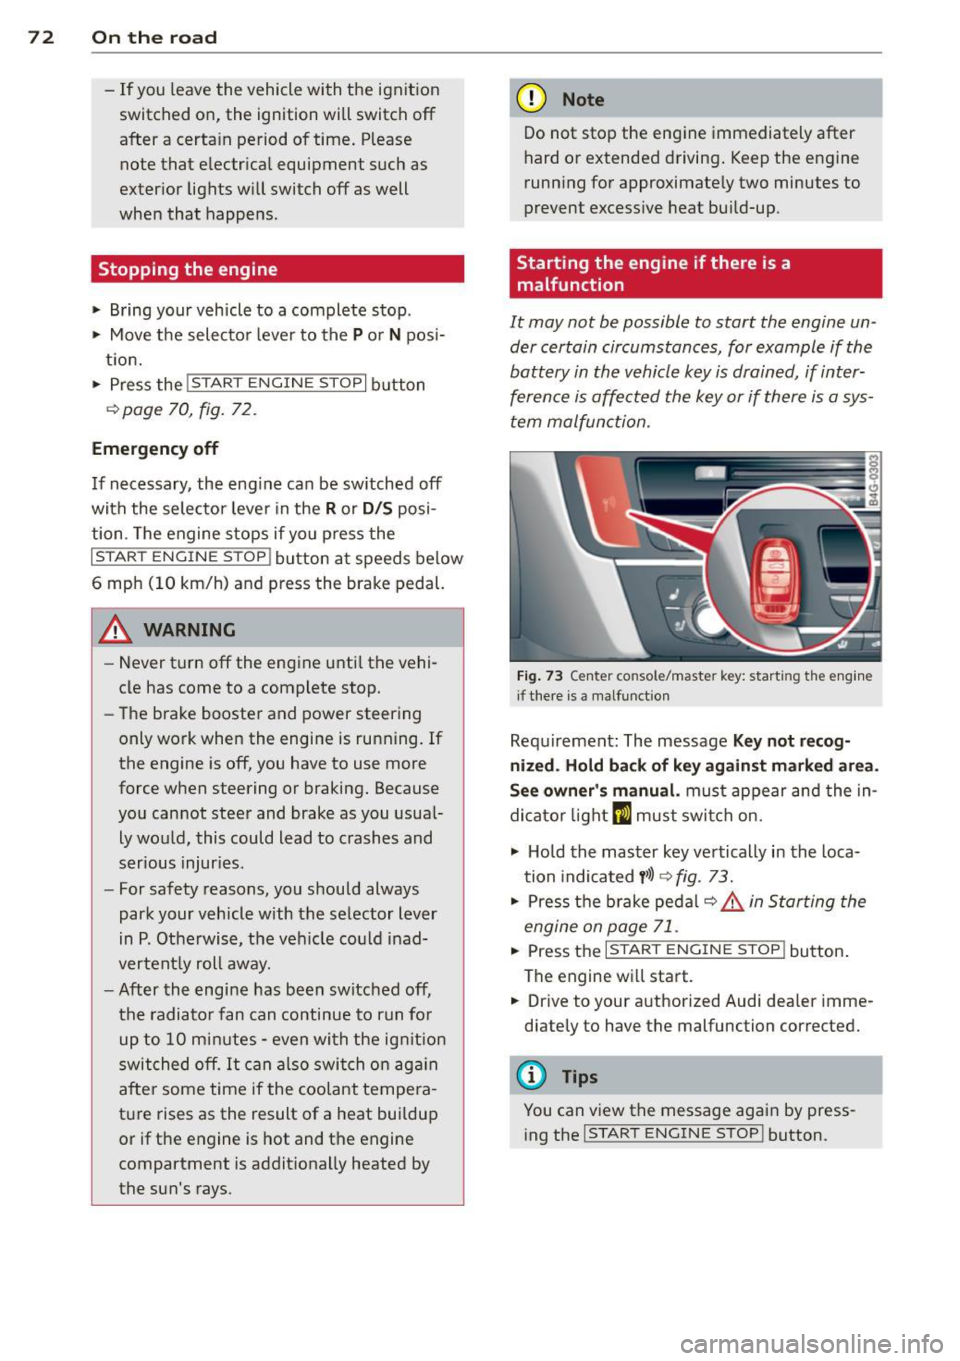
F ig. 73 Center co nsole/master key: start ing the eng ine
i f there is a malfunct io n
Requ irement: The message Key not r ecog
nized . H old back of key ag ainst marked are a.
See owner 's manual.
must appear and the in
dicator light
m must swi tch on.
.,. Ho ld the mas ter key vertically in the loca
tion indicated
y >l) 9 fig. 73.
.,. Press t he b rake pedal ~ .&. in Starting the
engine on page 71 .
... Press the ..., IS"'T :,-,A -,,R "'T ,.., E"" N...,..,,, G""IN ,-,-: E-,s"'T ,...,O ,.., P,..,I button .
The engine wi ll start.
.,. Dr ive to your authorized Audi dea ler imme
diately to have the malfunction corrected.
(D Tips
You can v iew the message again by press
ing the
I STAR T ENGINE STOP ! button.
Page 75 of 298
Electromechanical
parking brake
Operation
The electromechanical parking brake replaces
the hand brake.
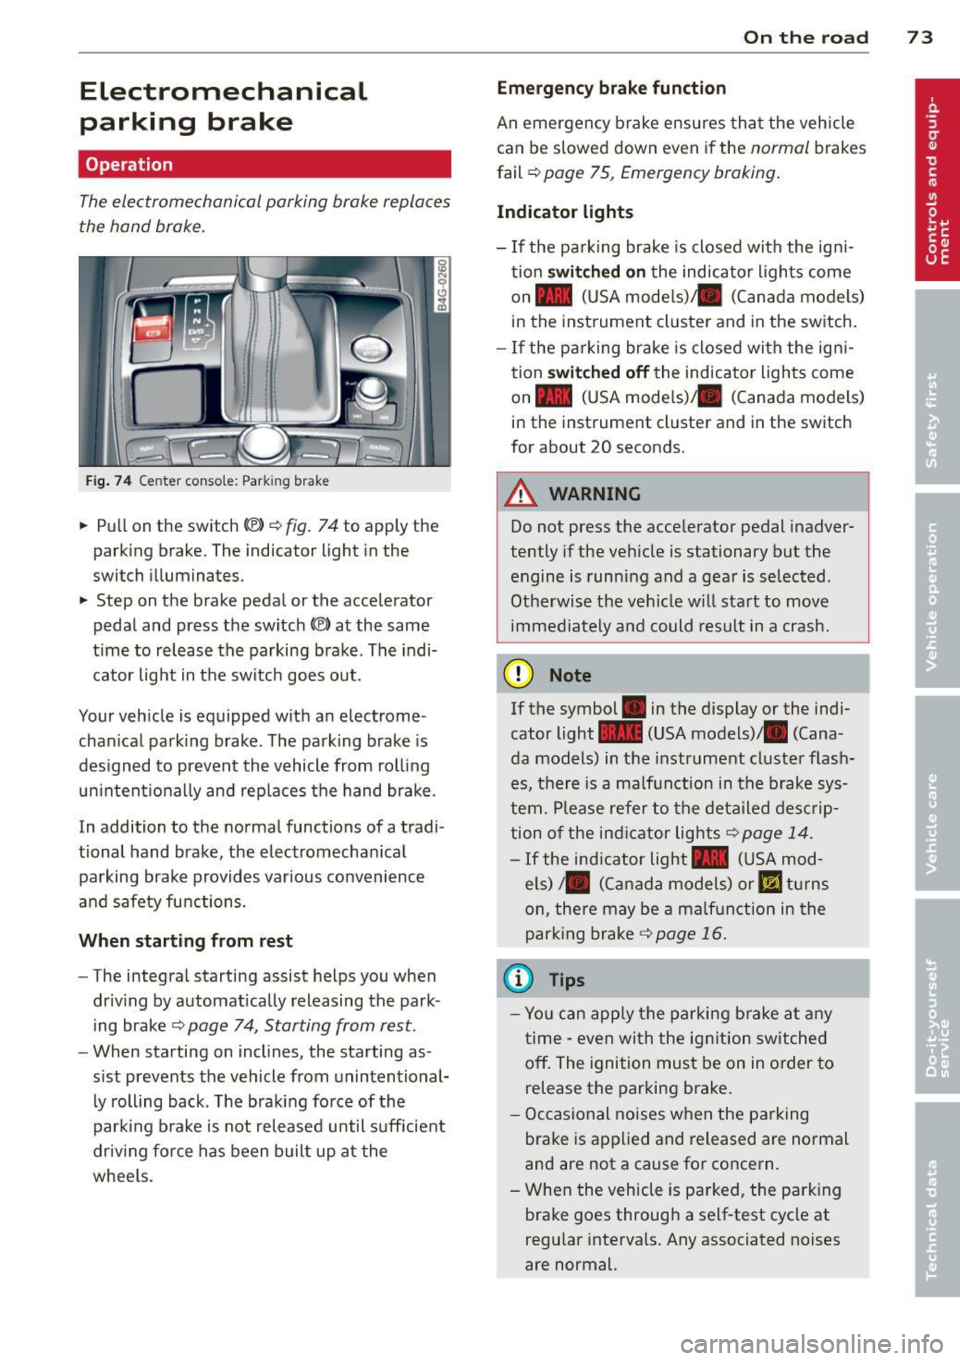
Fig. 74 Center conso le: Park ing brake
.. Pull on the switch<®> Q fig. 74 to apply the
parking brake. The indicator light in the
switch illuminates.
.. Step on the brake pedal or the accelerator
pedal and press the switch
(®) at the same
t ime to release the parking brake. The indi
cator light in the switch goes out.
Your vehicle is equipped with an electrome
chan ical park ing brake . The parking brake is
designed to prevent the vehicle from rolling
un intent ionally and rep laces the hand brake.
In addition to the normal functions of a tradi
tional hand brake, the electromechan ical
parking brake provides var ious convenience
and safety functions.
When starting from rest
-The integral starting assist helps you when
driving by automat ically releasing the park
ing brake ¢
page 74, Starting from rest.
-When starting on inclines, the starting as
sist prevents the vehicle from unintentional
ly rolling back . The braking force of the
parking brake is not released until suff icient
driv ing force has been built up at the
wheels.
On the road 73
Emergency brake function
An emergency brake ensures that the vehicle
can be slowed down even if the
normal brakes
fail ¢
page 75, Emergency braking.
Indicator lights
-If the parking brake is closed with the ign i
tion
switched on the indicator lights come
on - (USA mode ls)/ . (Canada models)
in the instrument cluster and in the switch.
- If the parking brake is closed with the ign i
tion
switched off the indicator lights come
on - (USA mode ls)/ . (Canada models)
in the instrument cluster and in the switch
for about 20 seconds.
A WARNING
Do not press the accelerator pedal inadver
tently if the veh icle is stationary but the
engine is running and a gear is selected .
Otherwise the vehicle w ill start to move
immediately and could result in a crash.
(D Note
If the symbol . in the display or the indi
cator light
1111 (USA models)/ . (Cana
da models) in the instrument cluster flash
es, there is a malf unction in the brake sys
tem. Please refer to the deta iled desc rip
tion of the indicat or lights¢
page 14.
-If the ind icator light - (USA mod-
els)/ . (Canada models) or
I.I turns
on, there may be a ma lfunction in the
parking brake
Q page 16.
(0 Tips
-Yo u can apply the parking brake at any
time -even with the ignition switched
off. The ignition must be on in order to
release the parking brake.
- Occasional noises when the parking
brake is applied and released are normal
and are not a cause for concern .
- When the vehicle is parked, the parking
brake goes through a self-test cycle at
regu lar intervals. Any associated noises
are normal.
Page 76 of 298

74 On the road
Parking
Various rules apply to prevent the parked ve
hicle from rolling away accidentally.
P a rking
.. Stop the vehicle with the foot brake .
.. Pu ll the switch <®l to apply the park ing
brake.
.. Se lect the
P se lector lever position
~ page 101.
• Turn the eng ine off ~.&.
In addition on incline s and grade s
.. Turn the steering wheel so that your vehicle
will roll against the curb in case it should
start to move .
A WARNING
-When you leave your veh icle - even if on
ly b rief ly - always take the ignition key
with you. This app lies par ticu la rly when
children remain in the veh icle . Otherw ise
the ch ildren could start the engine, re
lease the parking brake or ope rate e lec
trical equipment (e.g. power windows) .
There is the risk of an accident .
- When the vehicle is locked, no one - par
t icu larly not ch ildren should remain in
the vehicle. Locked doors make it more
difficult for emergency workers to get in
to the vehicle -putt ing lives at risk .
Starting from rest
The starting assis t function ensures tha t the
parking brake is released automatically upon
starting .
Stopping and appl ying park ing br ake
.. Pull the switch(®) to apply the parking
brake.
Starting and automatically releasing the par king brake
.. When you start to drive as usua l, the park
ing brake is automatically re leased and your
vehicle begins to move. When stopping at a traffic signal or stopping
in city t raffic, the parking brake can be ap
plied . T he vehicle does not have to be he ld
with the footbrake . The parking brake elimi
nates the tendency to creep w ith a dr ive range
engaged . As soon as you d rive off as usual,
the pa rking brake is released automat ically
and the vehicle starts to move .
Starting on slopes
When starting on inclines, the starting assist
prevents the vehicle from u nintent ionally roll
ing back . The braking force of the parking
brake is not released until suff ic ient driving
force has been built up at the wheels .
(D Tips
For safety reasons, the parking brake is re
leased automatically o nly when the d riv
er's safety belt is engaged in the buckle.
Starting off with a trailer
To prevent rolling back unintentionally on an
incline, do the following:
.. Keep the sw itch <®l pulled and depress the
accelerator. The parking brake stays applied
and prevents the vehicle from roll ing back
ward .
.. You can release the switch
<®l once you are
sure that you are developing enoug h for
ward momentum at the whee ls as you de
press the acce lerator .
Depend ing on the we ight of the rig (vehi cle
and t railer) and the severity of the incline, yo u
may ro ll backwards as yo u start . You can pre
vent rolling backwards by holding the parking
brake switch <®l pulled out and accelerating -
just as you wou ld when starting on a hill with
a conventiona l hand brake.