buttons AUDI A6 2014 User Guide
[x] Cancel search | Manufacturer: AUDI, Model Year: 2014, Model line: A6, Model: AUDI A6 2014Pages: 304, PDF Size: 76.32 MB
Page 96 of 304
94 Audi active lane assist
Activating and deactivating
A pp lies to vehicles: with active lan e assis t
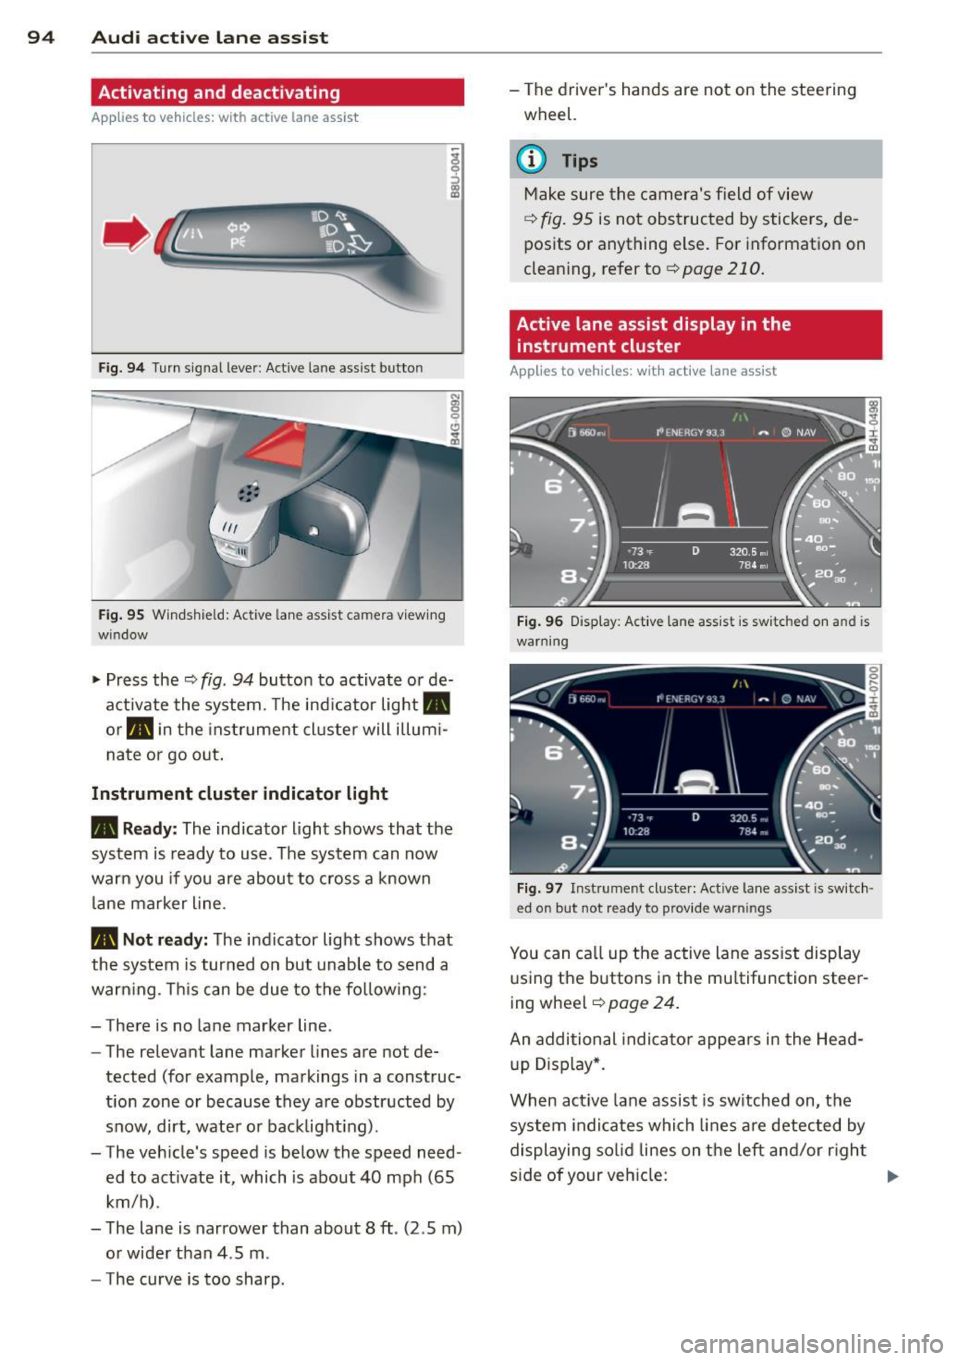
Fig. 94 Turn signal leve r: Active lane ass ist butto n
Fig. 95 Windshie ld: Active lane assist ca mera viewing
wi ndow
-
I
~ Press the ¢ fig. 94 button to activate or de
activate the system. The indicator light.
or . in the instrument cluster will illumi
nate or go out.
Instrument cluster indicator light
• Ready: The indicator light shows that the
system is ready to use . The system can now
warn you if you are about to cross a known
lane marker line .
• Not ready: The indicator light shows that
the system is turned on but unable to send a
warning . This can be due to the following :
- There is no lane marker line .
- The relevan t lane marker lines are not de-
tected (for example, markings in a construc
tion zone or because they are obstructed by
snow, dirt, water or backlight ing) .
- The vehicle 's speed is below the speed need
ed to activate it, which is about 40 mph (65
km/h) .
- The lane is narrower than about 8 ft . (2 .5 m)
or wider than 4 .5 m .
- The curve is too sharp . - The driver's hands are not on th
e steering
wheel.
(D Tips
Make sure the camera's field of view
¢
fig. 95 is not obstructed by stickers, de
posits or anything else. For information on
cleaning, refer to¢
page 210.
Active lane assist display in the
instrument cluster
App lies to vehicles: wit h act ive lane assist
Fig. 96 Display : Active lane ass is t is sw itc hed on and is
warning
Fig. 97 Instrume nt cl ust er: Act ive lane a ssist is sw itch ·
ed o n but no t re ady to p rovid e wa rning s
You can call up the active lane assist display
using the buttons in the multifunction steer
ing wheel ¢
pag e 24.
An additional indicator appears in the Head
up Display*.
When active lane assist is switched on, the
system indicates which lines are detected by
displaying solid lines on the left and/or right
side of your vehicle: .,..
Page 105 of 304
Night vision assistant
Night vision assistant
with detected pedestrian marking
Description
App lies to vehicles: with night v isio n assistant
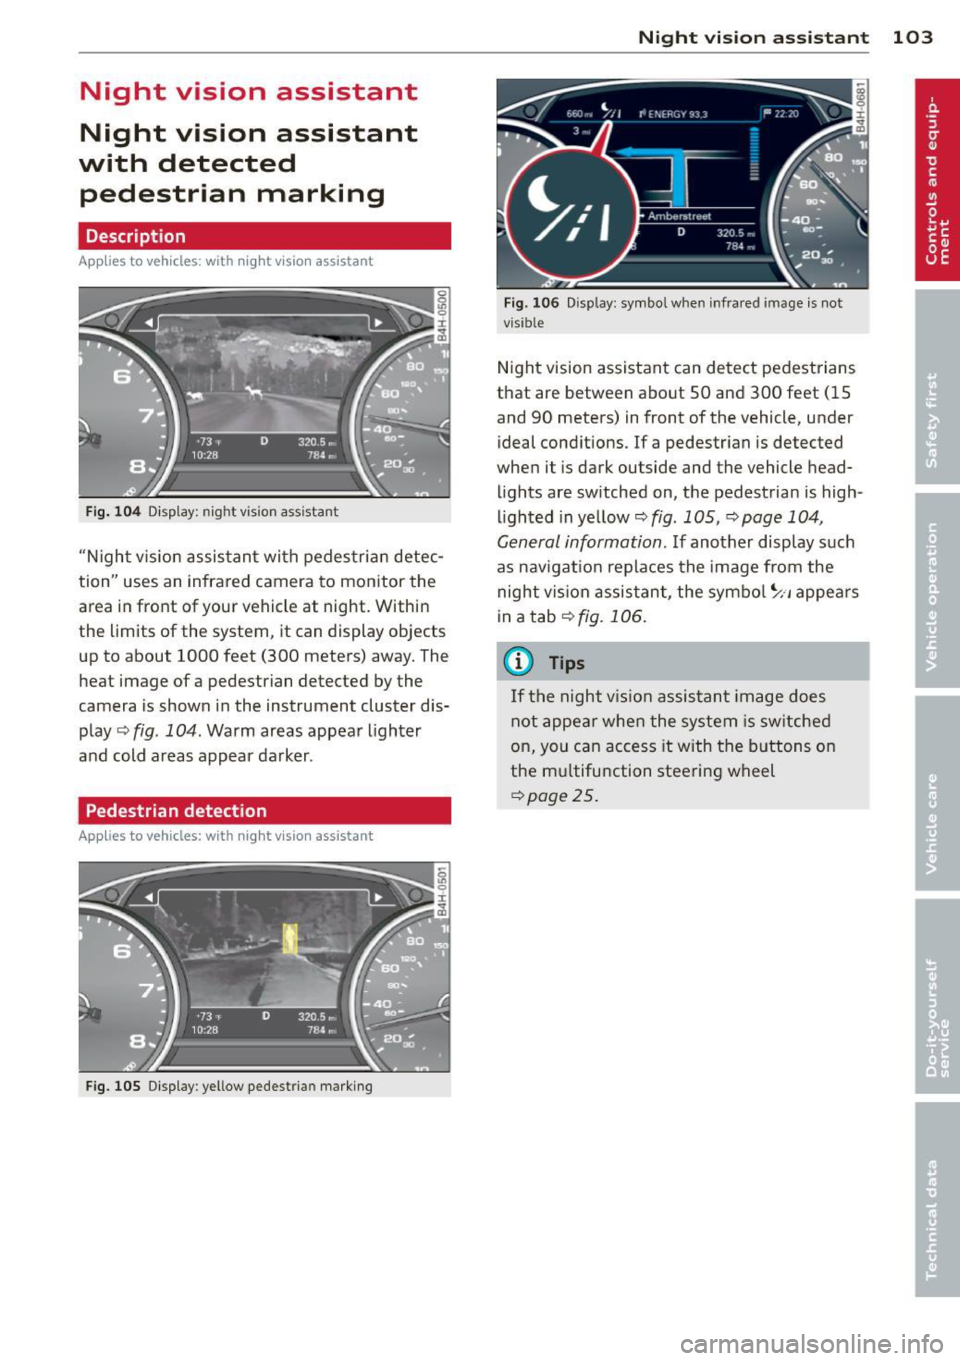
Fig . 104 Display: nig ht v is ion assistant
"N ight v is ion assistant with pedestrian detec
tion" uses an infrared camera to monitor the
area in front of your vehicle at night. Within
the limits of the system , it can display objects
up to about 1000 feet (300 meters) away. The
heat image of a pedestrian detected by the
camera is shown in the instrument cluster dis
play
Q fig . 104 . Warm areas appear lighter
and cold areas appear darker .
Pedestrian detection
Applies to vehicles: with n ig ht v ision ass istant
Fig. 105 Display : yellow pedestrian marking
Night vision assistant 103
Fig. 1 06 D isp lay: symbo l w hen infrare d image is not
visi ble
Night vision assistant can detect pedestrians
that are between about 50 and 300 feet (15
and 90 meters) in front of the vehicle, under
ideal conditions .
If a pedestrian is detected
when it is dark outside and the vehicle head
lights are switched on, the pedestrian is high
lighted in yellow
Qf/g . 105, Qpage 104,
General information.
If another display such
as navigation replaces the image from the
night vision assistant, the symbo l~,, appears
in a tab
Q fig. 106.
(D Tips
If the night vision assistant image does
not appear when the system is sw itched
on, you can access it with the buttons on
the multifunction steering wheel
Q page25.
Page 113 of 304
and technical limitations. If may still be necessary to adjust the speed with the brakes.
H ill descent control switches off once the de
cline levels out or you press the accelerator
pedal.
On vehicles w ith the c ruise control system*
c::> page 82, hill descent con trol is also activat
ed when the speed is set.
A WARNING
-
Hil l descent control cannot overcome
physical limitations, so it may not be able
to maintain a constant speed under all
conditions. Always be ready to app ly the
brakes.
Manual shift program
App lies to vehicles: with multitron ic/S tronic/t iptronic
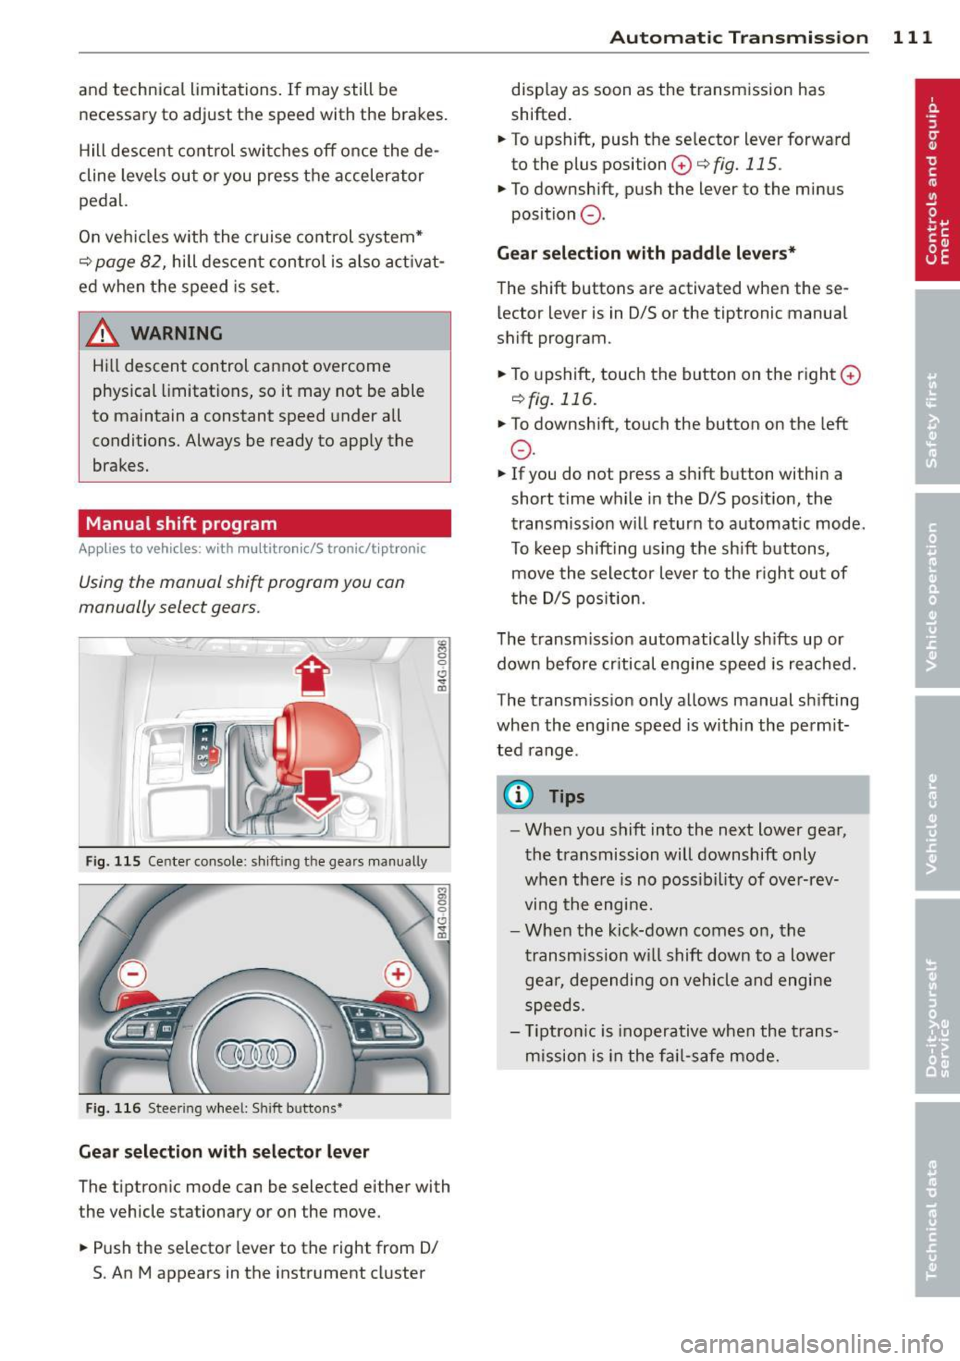
Using the manual shift program you can
manually select gears.
Fig . 115 Center co nsole: sh ift ing the gears manually
Fig . 116 Steering wheel: S hift b uttons*
Gear selection with selector lever
The tiptron ic mode can be selected either with
the vehicle stationary or on the move .
.,. Push the selector lever to the right from D/
5. An M appears in the instrument cluster
Automatic Transmission 111
display as soon as the transmission has
shifted.
.,. To upshift, push the selector lever forward
to the plus position
0 c::> fig. 115 .
.,. To downshift, push the lever to the minus
position
0 .
Gear selection with paddle levers*
The shift buttons are activated when the se
lector lever is in D/S or the tiptronic manual
shift program.
.,. To upshift, touch the button on the right
0
c::>fig. 116.
.,. To downshift, touch the button on the left
0 .
.,. If you do not press a shift button within a
short time while in the D/S posit ion, the
transmission will return to automatic mode.
To keep shifting using the shift buttons,
move the selector lever to the r ight out of
the D/S position.
The transm iss ion automatically sh ifts up or
down before cr itical engine speed is reached.
The transmission only allows manual shifting
when the engine speed is with in the permit
ted range .
(D Tips
-When you shift into the next lower gear,
the transmission will downshift only
when the re is no possibility of over-rev
ving the engine.
- When the kick-down comes on, the
transmission will shift down to a lower
gear, depending on vehicle and engine
speeds.
- T iptron ic is inoperative when the trans
mission is in the fail-safe mode.
Page 128 of 304
126 Homelink
Homelink
Universal remote
control
General information
Applies to vehicles: with Homelink u nive rsal remote con
tro l
The HomeLink universal remote control can
be programmed with hand-held transmitters
from existing equipment.
With Homelink, you can control devices such
as the garage door, security systems, house
lights, etc. comfortably from the inside of you
vehicle.
Homelink makes it possible for you to replace
three different remote controls from devices in your home with one universal remote . Th is
feature works for most garage door and exte
rior door motor signals. Programming the in
d iv idual remo te control fo r your remote con
trol takes p lace near the center of the radiator
grille. There is a control module attached at
this location .
A one-t ime programm ing of the sensor mus t
be performed before you are able to use sys
tems w ith Homelink.
A WARNING
- Never use the Homelink transmitter
with any garage door opener that does
have not the safety stop and reverse fea
ture as requ ired by federal safety stand
ards. Th is includes any garage door open
er model manufactured before April 1, 1982.
- A garage door opener which cannot de
tect an object, signaling the door to stop
and reverse does not meet current feder
al safety standards . Us ing a garage doo r
opener witho ut these fea tures increases
risk of serious injury or death.
- For safety reasons never release the
parking brake or start the engine while
anyone is standing in front of the vehicle .
- A garage door or an estate gate may
sometimes be set in motion when the Homelink remote control is being pro
grammed. If the device is repeatedly ac
tivated, this can overstrain motor and
damage its electrical components -an
overheated motor is a fire hazard!
- To avo id possible injuries or property
damage, please always make absolutely
certa in that no persons or objects are lo
cated in the range of motion of any
equ ipment being operated.
(0 Tips
- If you would like additional information
on the Homelink Un iversal Transceiver,
Homelink compatible products, or to
purchase other accessories su ch as the
Homelink Lighting Package, please con
tact Homelink at 1 -800-355-3515 or on
the Internet at www.homelink.com.
- For Declara tion of Comp liance to United
States FCC and Ind ustry Canada reg ula
tions¢
page 286 .
-For security reasons, we recommend that
you clear the programmed b uttons be
fore selling the ve hicle .
Operation
Appl ies to vehicles: wit h Ho melink
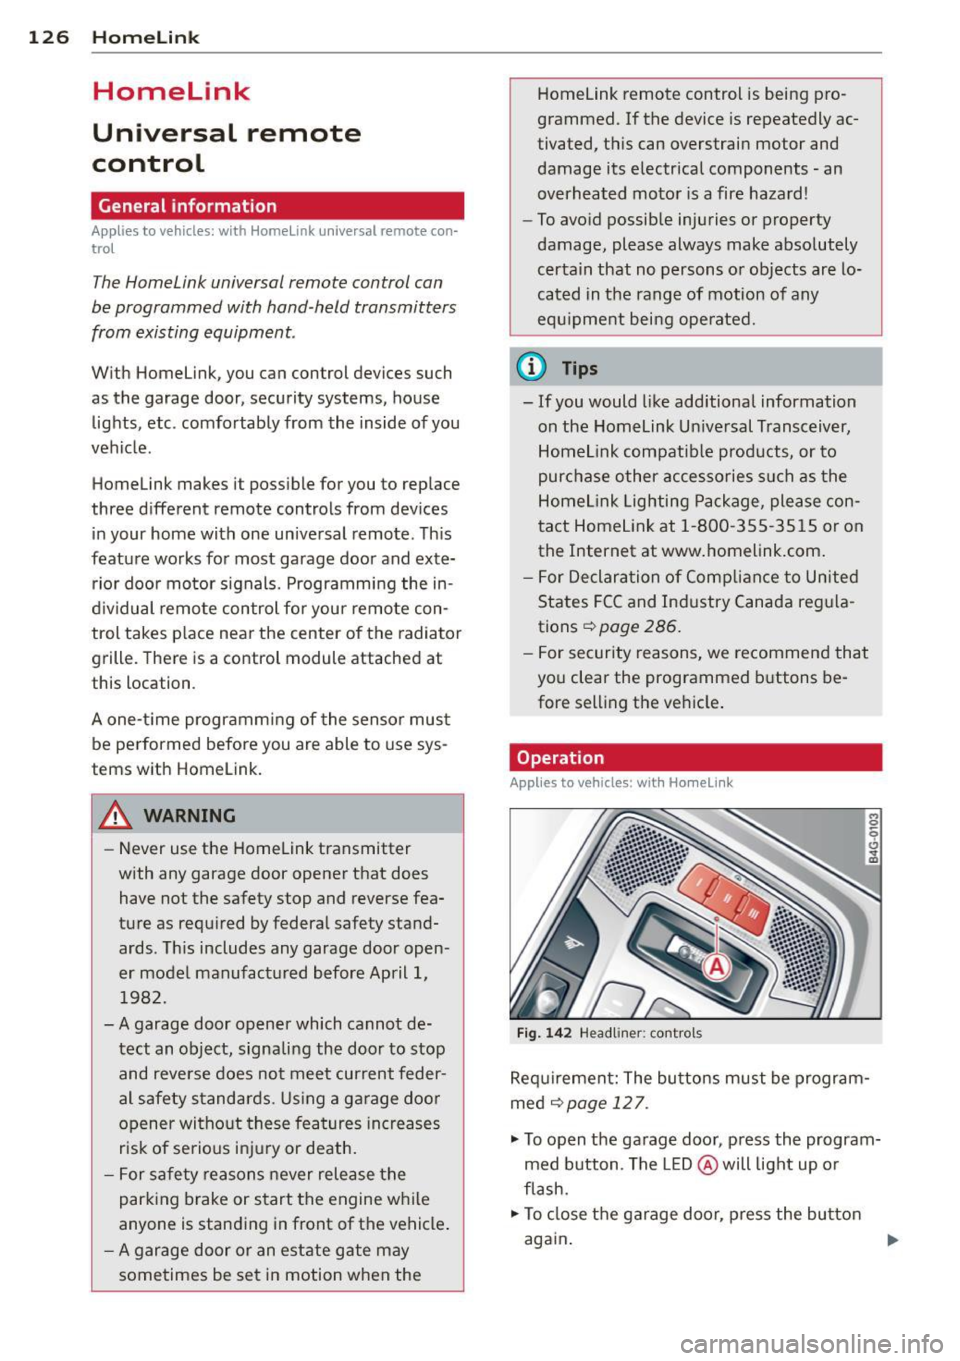
Fig . 14 2 Headliner: controls
M 0
9 (!)
~
Requirement: The buttons must be program
med
¢page 127.
"'To open the garage door , press the program
med b utton . The LED @ will light up o r
flash.
"' To close the garage door, press the button
again .
Ill>
Page 129 of 304
@ Tips
To open the garage door, p ress the button,
but do not press it for longer ten seconds
or the Homeli nk modu le w ill switch to
programming mode .
Programming the transmitter
Applies to vehicles : with Home Link
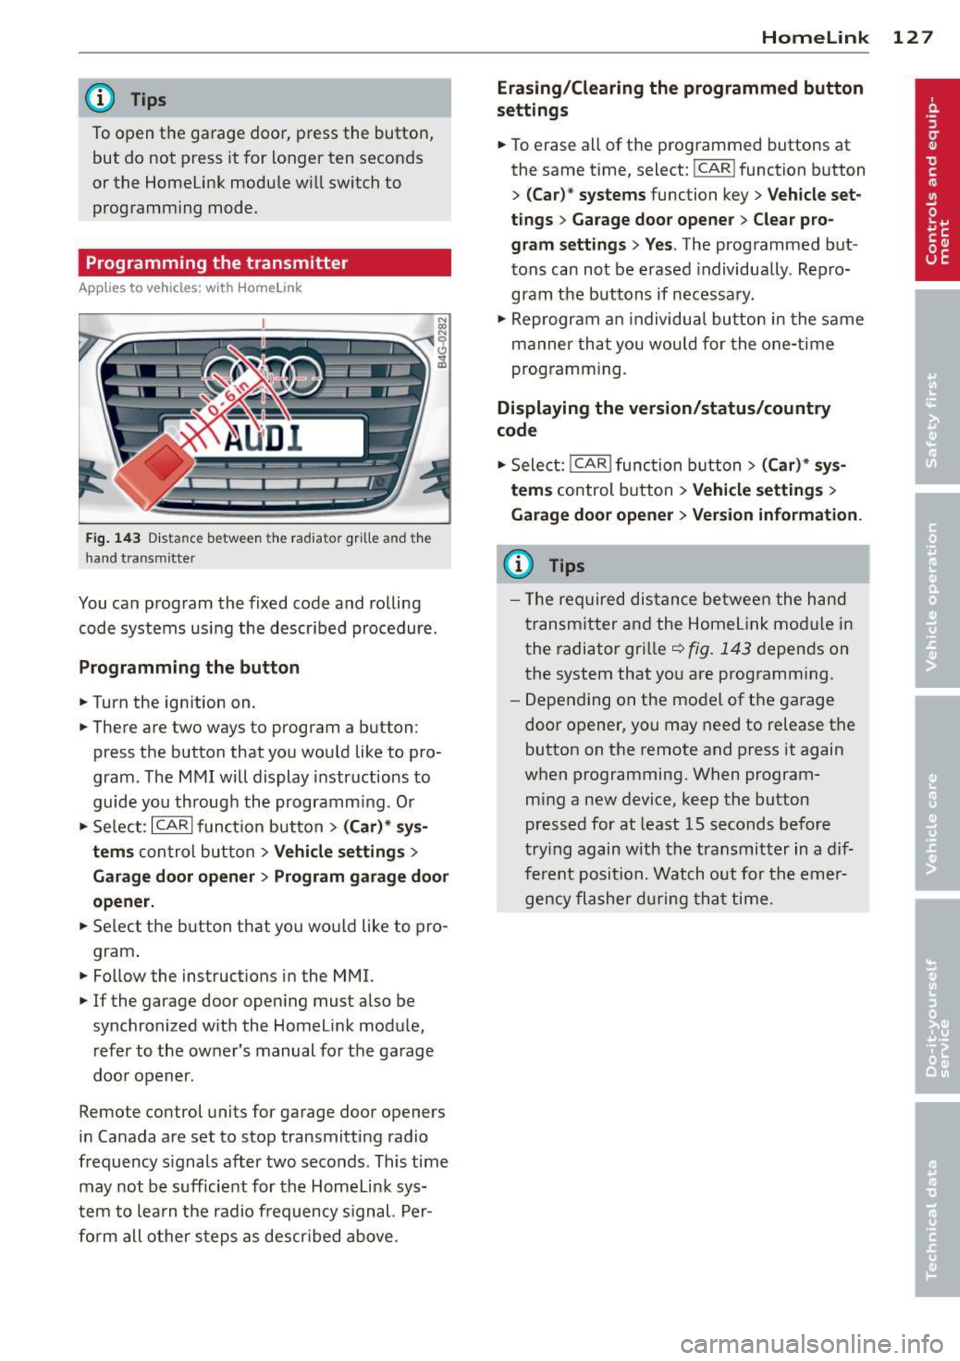
F ig. 14 3 Dist an ce be tween t he ra diato r gr ille a nd the
hand t ransm itte r
You can p rogram the fixed code and ro lling
code systems usi ng the descr ibed procedure.
Programming the button
.. Turn the ign ition on .
.. There are two ways to program a button :
press the button that yo u wo uld like to p ro
gram . The M MI will display instruc tions to
guide yo u throug h the programm ing. O r
.. Se lect :
I CARI f u n ct ion but ton> (Car) * sys
tems
c o n trol but ton > Vehicle settings >
Garage door opener > Program garage door
opener .
.. Se lect the button t hat yo u wo uld like to pro
gram .
.. Fo llow the instructions in the MMI.
.. If the garage door open ing must also be
synchronized w ith the Homelink modu le,
refer to the owner's manual for t he ga rage
doo r open er.
Remote control units for garage door openers
in Canada are set to stop transmitti ng radio
frequency s ignals after two seconds . This time
may not be suff icient for th e Homelin k sys
t em to lea rn the radi o frequency s ignal. Per
f o rm all other s teps as descr ibed above .
Homelink 12 7
Erasing/Clearing the programmed button
settings
.. To erase all of the p rog rammed buttons at
the same time, select:
! CAR ! function b utton
>
( Car )* systems function key> Vehicle set
tings
> Garage door opener > Clear pro
gram settings > Yes .
The prog rammed but
tons can not be erased individua lly . Repro
g ram the buttons if n ece ssa ry .
.. Reprogram an individua l bu tton in the same
manner th at y ou wou ld for the o ne-time
prog ramm ing.
Displaying the version/status/country
code
.. Select: !CAR I func tion button> (Car) * sy s
tems
control button > Vehicle settings >
Garage door opener > Version information .
(D Tips
- The re qu ired dis tance be twee n the h an d
t ransm it t er and the Homel ink mo dule in
the radiato r gr ille~
fig . 143 depen ds on
t he system that yo u are prog ramm ing .
- Depending o n the mo del of t he garage
doo r op ener, you may need to release t he
button on t he rem ote and press it again
w hen programming. When program
m ing a new device, keep the button
pressed for at least 15 seconds bef ore
t ry ing again with the t ransmitter in a di f
fe re nt posit io n. W atch o ut for th e eme r
gen cy fla sher during th at time.