sensor AUDI A6 2014 Owners Manual
[x] Cancel search | Manufacturer: AUDI, Model Year: 2014, Model line: A6, Model: AUDI A6 2014Pages: 304, PDF Size: 76.32 MB
Page 16 of 304
14 Instruments and w . . arn1ng/indicator lights
I
•
• •
•
rl1
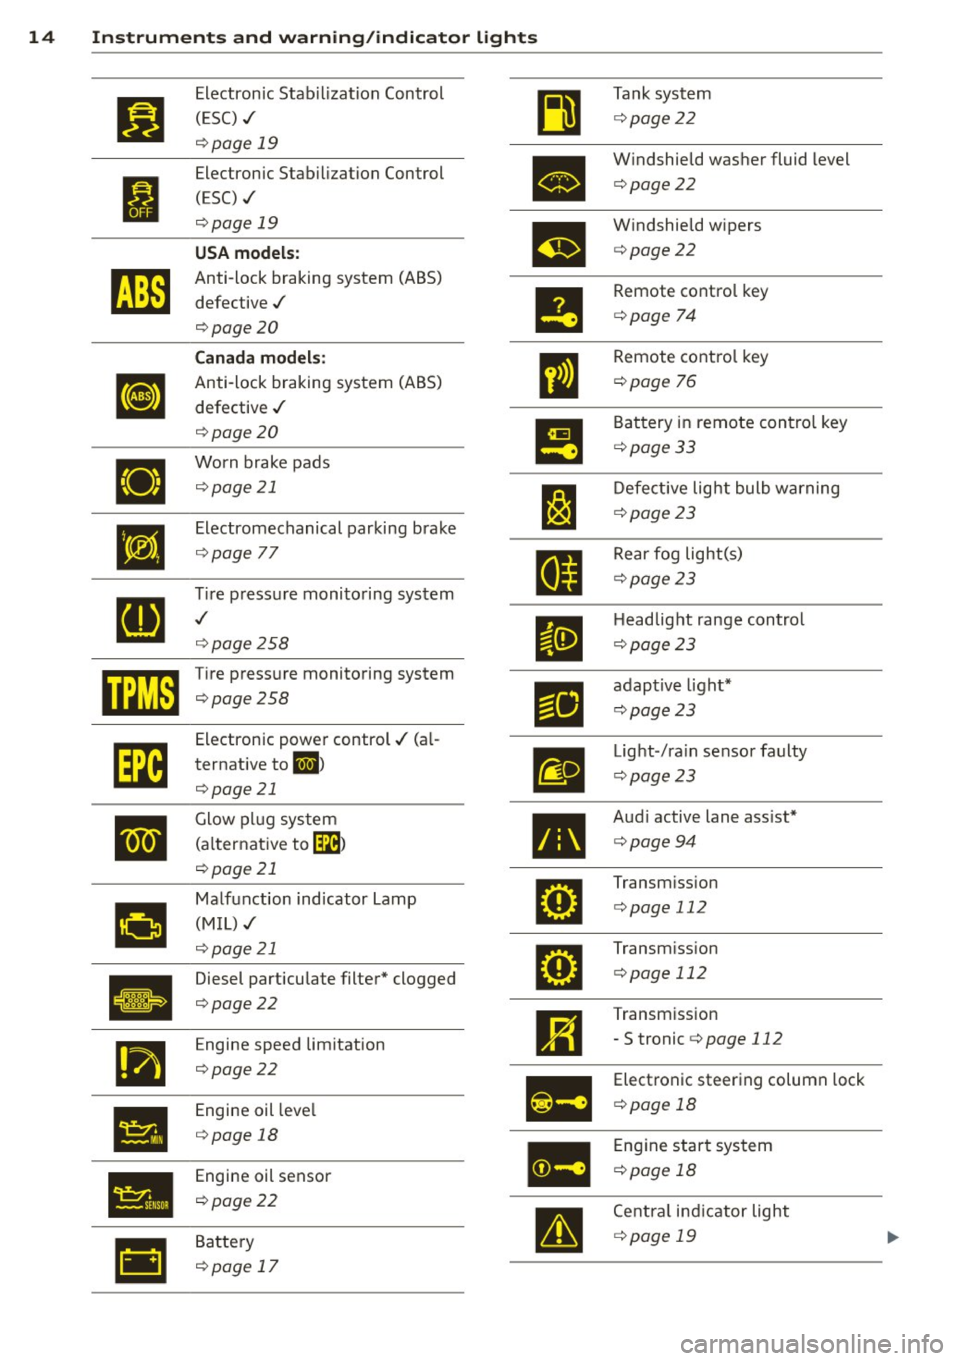
Electronic Stab ilization Control
(ESC) ,/
c:> page 19
Electronic Stab ilization Control
(ESC) ./
c:> page 19
USA models:
Anti-lock braking system (ABS)
defective ,/
c:>page 20
Canada models:
Anti-lock braking system (ABS)
defective ,/
c:> page 20
Worn brake pads c:>page 21
Electromechanical parking brake
c:> page 77
~re pressure monitoring system
c:> page258
Tire pressure monitoring system
c:>page 258
Electronic power control./ (al
ternative to
ml >
c:>page 21
Glow plug system
(a lternative to~ )
c:> page 21
Malfunction indicator La
(MIL),/ mp
c:>page 21
Diesel particulate filter* clogged
c:>page 22
Engine speed limitation
c:>page 22
Engine oil leve l
c:> page 18
Engine oil sensor
c:> poge 22
Battery
c:> page 17
•
m
•
•
g
Tank system
c:> page22
W indshield washer fluid level
c:>page22
Windshield wipers
c:> page22
Remote control key
c:> page 74
Remote control key
c:> page 76
Battery in remote contro l key
c:>page 33
Defective light bulb warnin
c:> page 23
g
Rear fog light(s)
c:> page23
Headlight range control
c:> page23
adaptive light*
c:>page 23
Light -/ra in sensor faulty
c:> page23
Audi active lane ass ist*
c:> page94
Transmiss ion
c:> page 112
Transm iss ion
c:> page 112
Transmission
- S tronic c:>page
112
Electronic steering column lock
c:> page 18
Engine start system
c:> poge 18
Centra l ind icator light
c:> poge 19
Page 24 of 304
22 Instruments and warning/indicator lights
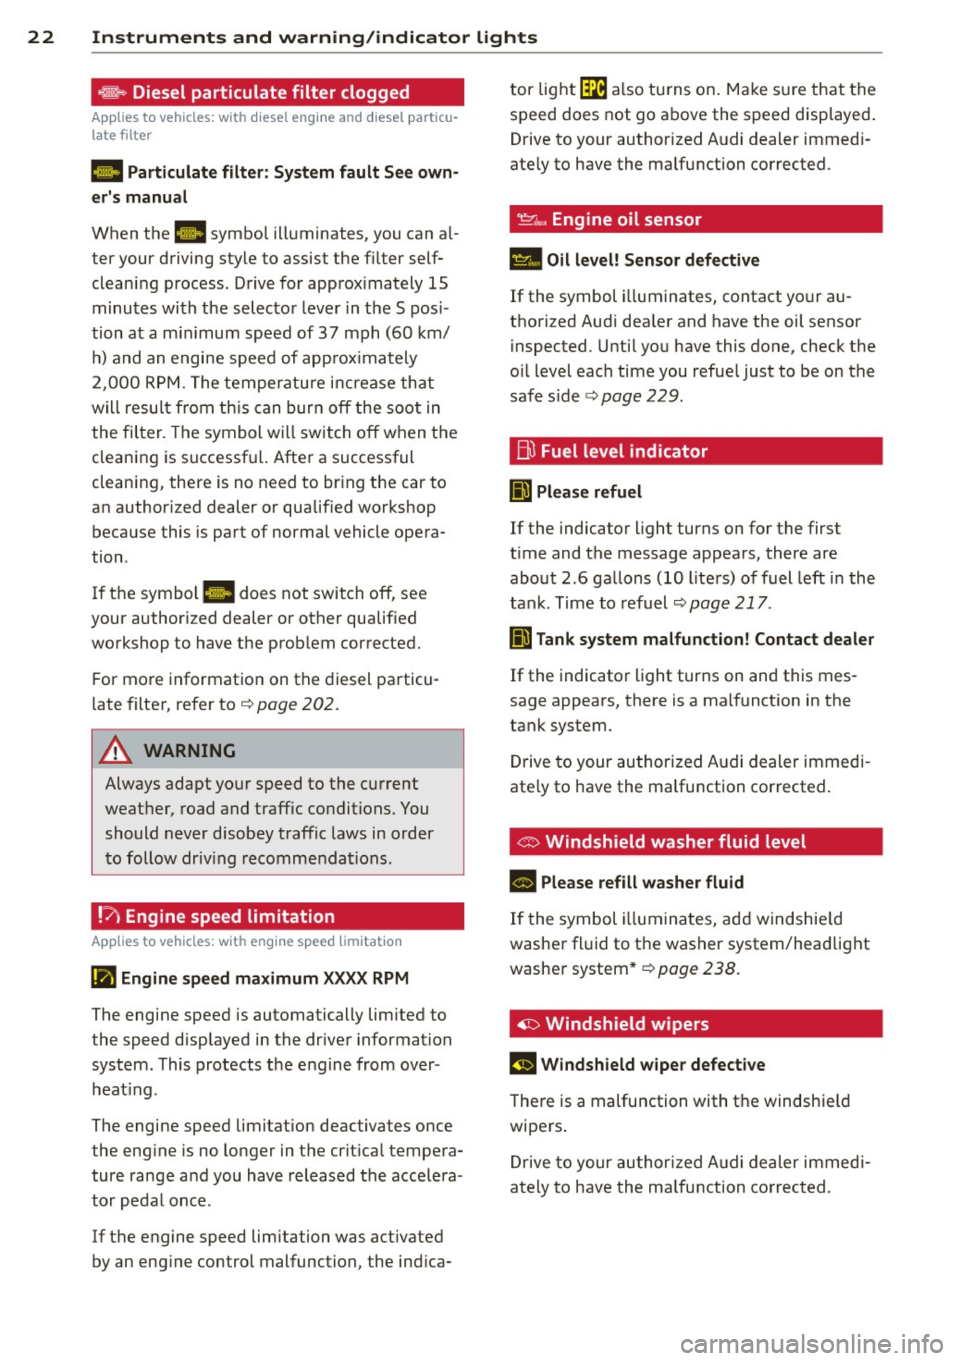
®'-Diesel particulate filter clogged
Applies to vehicles: with diesel engine and diesel particu
late filter
II Particulate filter: System fault See own
er's manua l
When the. symbol ill uminates, you can a l
ter your driving style to assist the fi lter self
clean ing p rocess . D rive for approx imately 15
minu tes wi th the sel ector leve r in the S pos i
tion at a m inimum speed of 37 mph (60 km/
h ) a nd an engine speed of app rox imately
2, 000 R PM. The tempe ratu re i ncrease th at
will resu lt fro m t his can bur n off t he soo t in
the fil ter. The symbol wi ll switch off when the
clean ing is successf ul. Afte r a successful
cleaning, there is no need to br ing the car to
an author ized dealer or qualif ied worksh op
beca use this is part of normal vehicle opera
ti on .
I f the symbo l
Ill does not switch off, see
your author ized dealer or other qualified
workshop to have the prob lem cor rected.
For more in format io n on the diesel pa rticu
l ate filte r, refer to
¢ page 202.
A WARNING
Always adapt yo ur s peed to the cu rrent
weat her, road and traffic conditions. Y ou
sh ould never disobey t raffic laws in order
t o follow driv ing recomm endations .
!'7i Engine speed limitation
Applies to vehicles: with engine speed limitat ion
Ill Engine speed maximum XXXX RPM
-
The engine speed is automatically lim ited to
the speed disp layed in the dr ive r information
system. This protects t he e ng ine from over
h eat ing.
The engine speed limitation deactivates once
the eng ine is no longer in the crit ica l tempera
ture range and you have released the acce lera
tor peda l once.
If t he engine speed limitation was act ivated
by an eng ine control malfunction, the ind ica- tor
light ~ also tu rns on . Ma ke s ure that the
s p eed does not go a bove the s peed disp layed .
Drive to y our authorized A udi dealer immedi
ate ly to have the ma lfunction corrected.
~"" Engine oil sensor
l!I Oil level! Sensor defective
If the symbol illuminates, contact yo ur au
t h orized Audi dea ler and have the oil sensor
i nspected . U ntil yo u have this done, check t he
o il level each time you refue l just to be on the
saf e side
c> page 229.
EltJ Fuel level indicator
Ii] Please refuel
If the indicato r light turns on f or the first
t ime and the message appea rs, there are
abo ut 2.6 ga llons (10 lite rs) o f fuel left in the
tan k. Time to refu el
<=> page 217 .
llD Tank system malfunction! Contact dealer
If the indicator light turns on and this mes
sage a ppears, there is a malf unct ion in the
tank system.
D rive to your au thori zed A udi dealer immedi
ate ly to have the ma lfu nction corrected.
Co Windshield washer fluid level
• Please refill washer fluid
If the symbol illum ina tes, ad d windshie ld
washe r fl ui d to t he washer system/headlight
washe r system *
¢ page 238 .
4J:> Windshield wipers
£~$ Windshield wiper defective
T he re is a malfunction with t he windshie ld
wipe rs .
Dr ive to your au th o riz ed A udi de aler i mme di
ately to have the m alfunction correc ted.
Page 25 of 304
Instrument s and warnin g/indic ator ligh ts 23
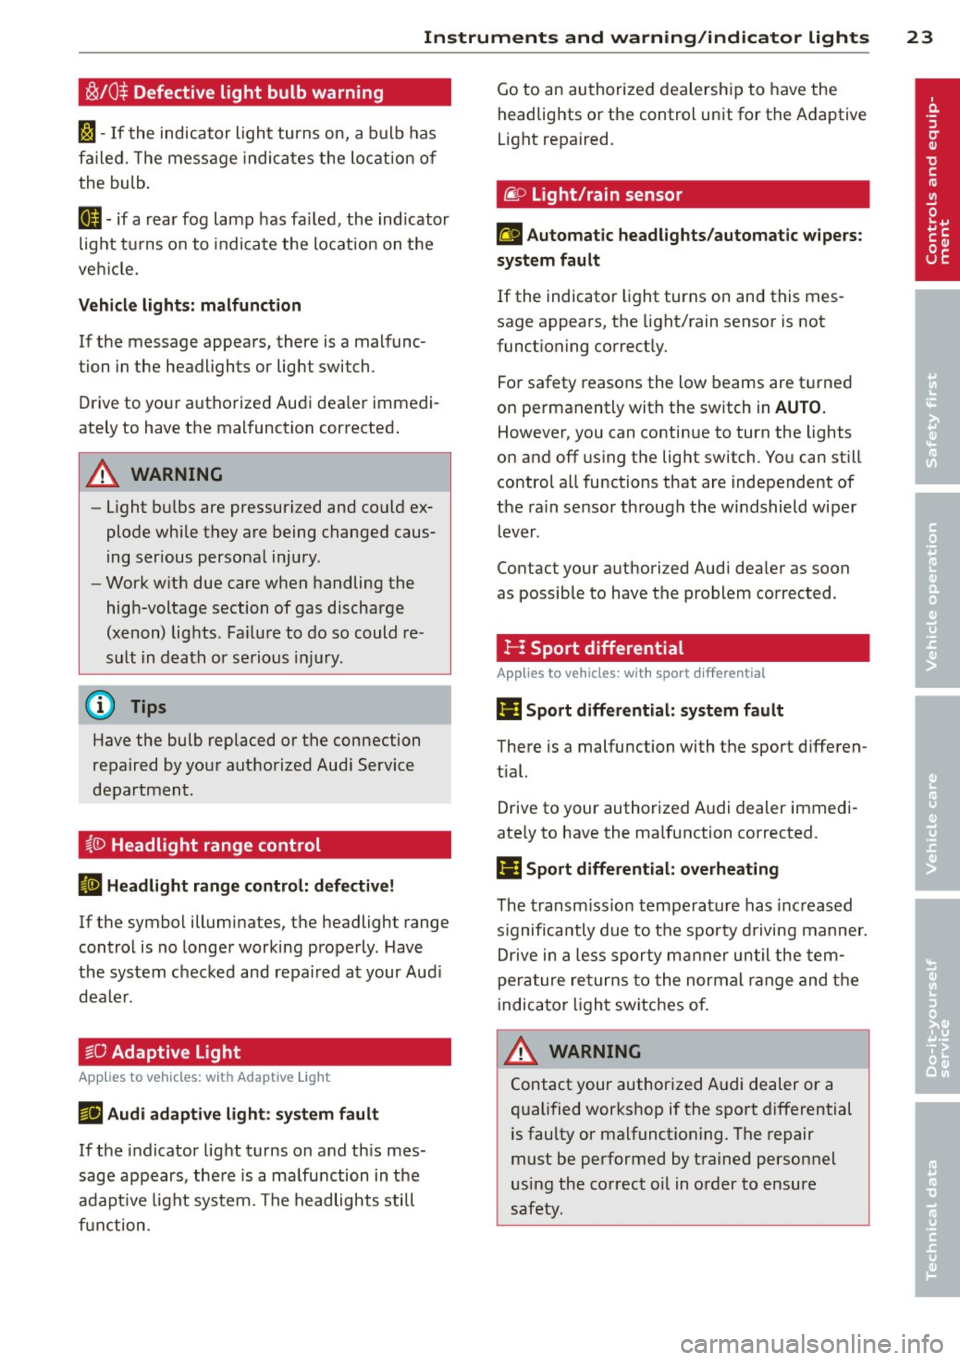
!§!10 $ Defective light bulb warning
II -If the indicator light turns on, a bulb has
fa iled. The message indicates the location of
the bulb .
[!ll-if a rear fog lamp has fa iled, the indicator
l ight tu rns on to indicate the location on the
veh icle.
Vehicle light s: malfunc tion
If the message appears, there is a malfunc
tion in the headlights or light switch .
Drive to your authorized Audi dea ler immedi
ately to have the malfunction corrected .
A WARNING
-Light bu lbs are pressurized and could ex
plode while they are being changed caus
ing serious persona l injury.
- Work w ith due care when handling the
high-voltage section of gas discharge
(xenon) lights. Fa ilure to do so could re
sult in death or se rious inj ury.
(D Tips
Have the bulb replaced or the connection
repaired by you r aut horized Aud i Service
department.
~(D Headlight range control
II H eadl ight range c ontr ol: d efective!
If the symbol illuminates, the headlight range
control is no longer working properly . Have
the system checked and repa ired at your Aud i
dealer .
~O Adaptive Light
Appl ies to vehicles: with Ada ptive Light
m;J Audi adaptiv e ligh t: sy stem fault
If the indicator light turns on and th is mes
sage appears, the re is a malfunction in the
adapt ive l ight system. The headlights still
function. Go to an authorized dealersh
ip to have the
headlights or the control unit for the Adaptive
Light repaired.
@) Light/rain sensor
II A utomatic headlights /automatic wipers :
s y ste m fault
If the indicator light turns on and this mes
sage appears, the light/rain sensor is not
funct ioning correct ly.
Fo r safety reasons the low beams are t urned
on pe rmanently with the switch in
AUTO.
However, you can continue to turn the lights
on and off us ing the light switch. You can st ill
control all functions that are independent of
the ra in sensor through the w indshield wiper
lever .
Contact your authorized Audi dealer as soon
as possible to have the problem corrected .
rI Sport differential
App lies to vehicles: wit h sport differential
(II Sport differential: sy stem f ault
There is a malfunction with the sport d ifferen
tial.
Drive to your authorized A udi dealer immedi
ate ly to have the malfunction corrected.
(II Sport differ ential: o verhea ting
The transm iss ion tempe rature has increased
s ignifica ntly due to the sporty d riving manner.
D rive in a less sporty ma nner un til the tem
perature re turns to the normal range and the
indicator light switches of.
A WARNING
Contact your author ized Audi dealer or a
q ualified workshop if the spo rt differential
is faulty or malfunct ioning. The repair
must be performed by trained personnel
using the correct oil in order to ensure
safety .
-
Page 37 of 304
-Applies to vehicles with power side door
closer*:
- When closing a door, make sure noth ing can interfere w ith the door. This
could cause ser ious personal inj ury.
- You can stop the door from clos ing at
any time by pulling on the inside or
outside doo r handle.
(D Tips
- In the event of a crash with airbag de
ployment a ll locked doors will be auto
ma tically unlocked to g ive access to the
vehicle occupants from the outside .
- If the power locking system should ma l
f unct ion, you can lo ck the dr iver's door
us ing the mechanical key¢
page 38.
-If the power lo cking system should fail,
you can still open the fuel tank flap in a n
emergency ¢
page 220.
- You are we ll advised not to keep valua
bles inside an unattended vehicle, visib le
or not. Even a properly locked vehicle
cannot provide the security of a safe.
- If the L ED in the upper edge o f the driv
er's door panel comes on for abo ut 30
seconds after the vehicle is locked, there
is a ma lfunction in the power locking or
the anti-theft warning system. Have the
malfunction corrected by an author ized
Audi dealersh ip or qua lified repair fac il i
ty.
Setting power locking
The driver can determine the functions for
power locking in the MMI.
• Select : I CARI function button > (C ar)* sy s
tems
control button > Vehicle se tti ngs >
Central lock ing .
Unlock door s -You can decide if All doors or
only the
Driv er should unlock . The rear lid al
so unlocks when
All is selected . If you select
Driv er in a vehicle with a convenience key*,
only the door whose handle you pull will un l ock.
Op enin g an d clos ing 35
If you select Driver , all the doors and rear lid
will unlock if you press the
ffi button on the re
mote control master key twice.
Loc k exterior trunk handl e -If yo u se lect On ,
the rear lid handle is locked . In this case the
rear lid can be opened with the b utton
cs on
the master key or with the
cs button in the
driver's door. In veh icles with a convenience
key*, you can still open the rear lid using the
handle if an authorized master key is near the
proxim ity sensor.
Fold m irrors * -If you select On, the exterior
rearview mirrors fold in automatically when
you press the
ff! button on the remote control
master key or touch the sensor* in the ha ndle.
To ne when lock ing -When you select On, a
confirmation tone sounds when you lock the
vehicle .
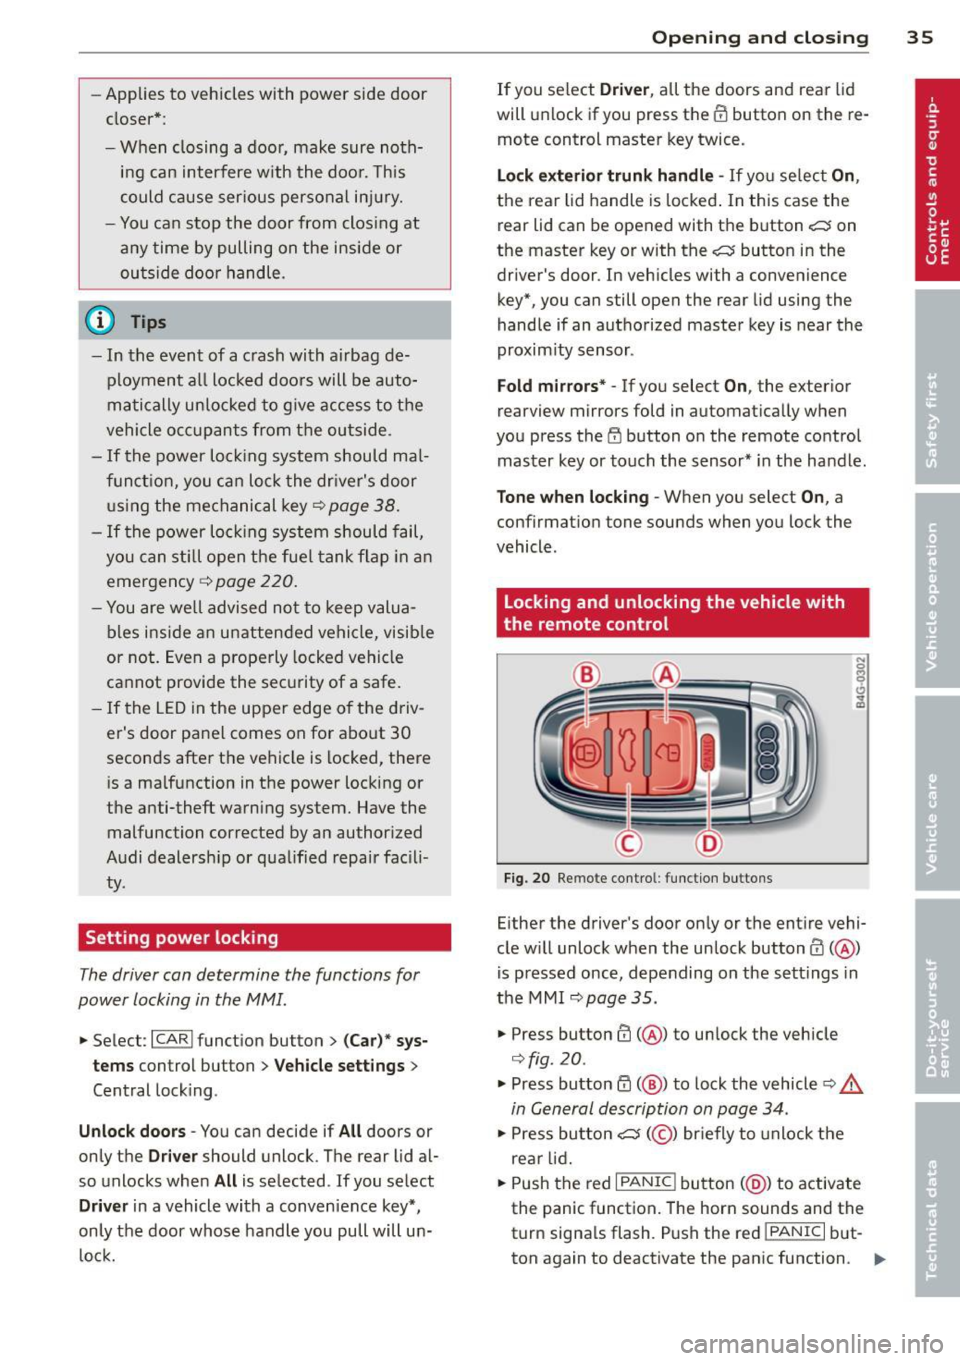
locking and unlocking the vehicle with
the remote control
Fig. 20 Remote cont rol : function buttons
Either the driver's door only or the entire vehi
cle w ill unlock when the unlock button
ffi ( @ )
is pressed once, depending on the sett ings in
the MMI
¢page 35.
• Press button ffi (@ ) to unlock the vehicle
¢fig . 20 .
• Press button ff! (@ ) to lock the vehicle ¢ &.
in General description on page 34.
• Press button cs( @) briefly to unlock the
rear lid.
• Push the red
I PANIC ! button (@ ) to activate
the panic function. The horn sounds and the
turn signa ls flash . P ush the red
!PANIC I but
ton again to deactivate the panic function. ..,.
Page 38 of 304
36 Openin g and clo sing
If the vehicle is unlocked and no door, the rear
lid or the hood is opened within 60 seconds ,
the veh icle locks itse lf aga in automatically.
This feature prevents the veh icle from be ing
accidentally left unlocked over a long period
of time.
It depends on the sett ings in the MMI wheth
er the entire veh icle is unlocked or on ly cer
tain doors
<=) page 35.
A WARNING
Read and follow all WARNINGS Q .&. in
General description on page
34.
(D Tips
- In order to make sure the locking func
tion is working, you should always keep
your eye on the vehicle to make sure it is
proper ly locked.
-
- Do not use the remote control if you are
i nside the car, otherwise you may unin
tentionally lock the vehicle, and then you
would set off the anti-theft ala rm when
you try to start the engine or open a door. In c ase this happens anyhow, push
the un lock button@ .
- The vehicle can on ly be locked when the
se lector lever is in the P posit ion .
- Use the panic funct ion only if you are in
an emergen cy situa tion.
Locking and unlocking with convenience
key
App lies to vehicles: with co nve nience key
The doors and the rear lid can be unlocked
and locked without operating the master key.
Fig. 2 1 Conve nience key : Lock ing the vehicle
Unlocking vehicle
.,. Take ho ld of the door handle . T he door is un-
loc ked automatically .
.,. Pull the handle to open the door .
Locking vehicle
.,. Select the P se lecto r lever posit ion. Othe r
w ise the veh icle cannot be locked.
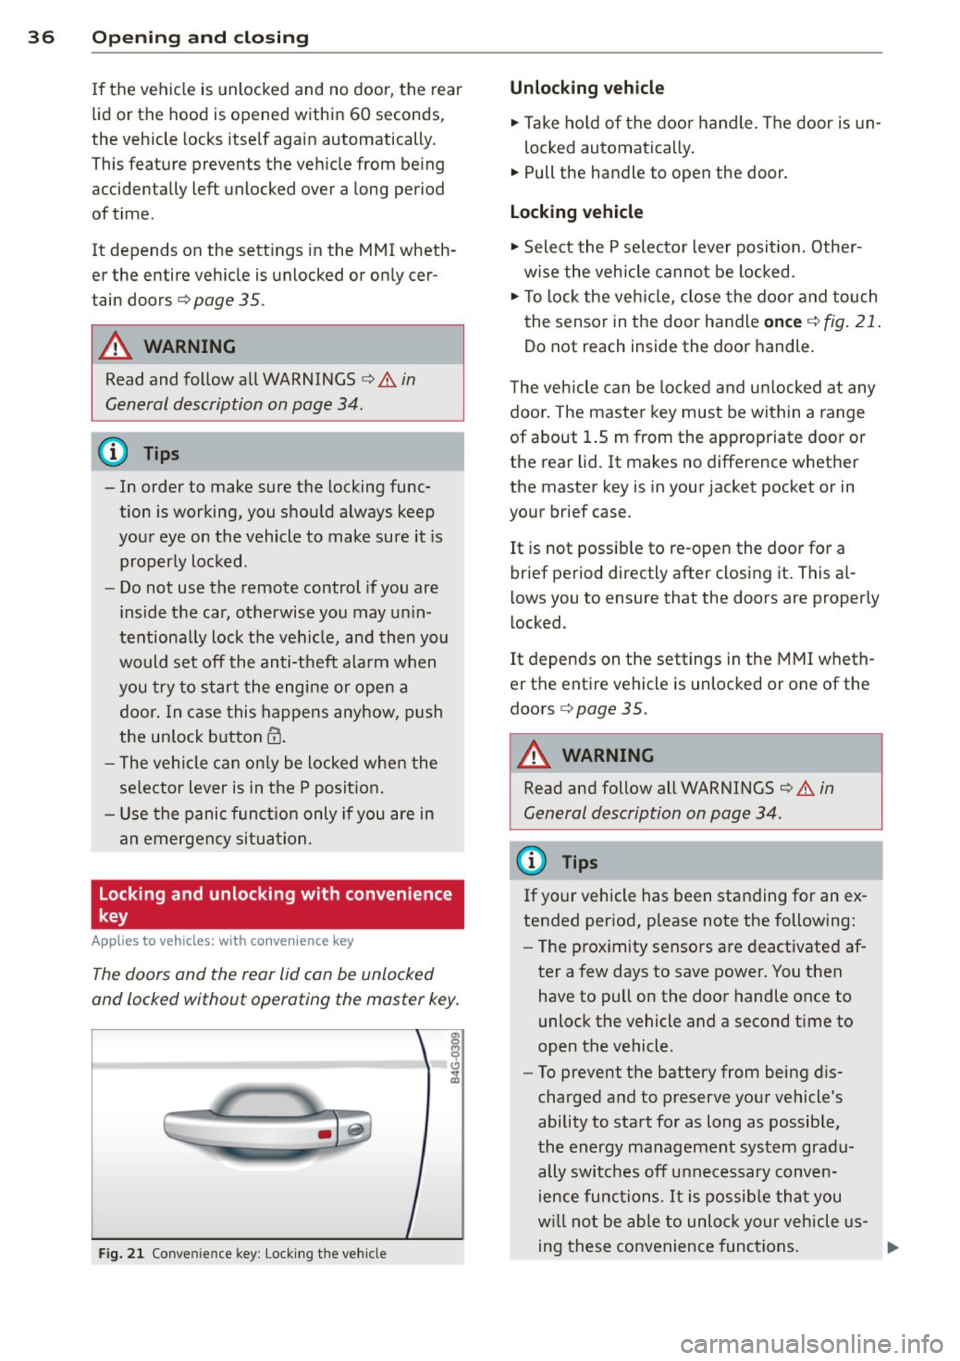
.,. To lock the ve hicle, close the door and touch
the sensor in the door handle
on ce Q fig . 21 .
Do not reach inside the door handle.
T he veh icle can be locked a nd u nlocked at any
doo r. The master key must be within a range
of about 1.5 m from the appropriate door or
the rear lid. It makes no difference w hether
the master key is in your jacket pocket or in
your brief case.
It is not possib le to re -open the door for a
brief period directly after closing it. This a l
l ows you to ensure that the doors are proper ly
locked.
It depends on the settings in t he MMI wheth
er the entire vehicle is unlocked or one of the
doors
<=) page 35.
A WARNING
Read and follow all WARNINGS ¢.&. in
General description on page
34.
(D Tips
If your vehicle has been standing for an ex
tended per iod, please note the following:
- The p roximity sensors are deactivated af-
ter a few days to save power. You then have to pull on the door handle once to
unlock the vehicle and a second t ime to
open the vehicle.
- To prevent the battery from being d is
charged and to preserve your vehicle's
ability to start for as long as possib le,
the energy management system gradu
ally switc hes off unnecessary conven
ience func tion s. It is possib le tha t you
w ill not be able to unloc k your vehicle us
ing these convenience func tions.
Page 41 of 304
-Always ensure that no one is with in
range of the rear lid when it is mov ing, in
particular close to the hinges -fingers or
hands can be pinched.
(D Tips
When the vehicle is locked, the rear lid can
be opened separately by pressing the but
ton
l a ! on the master key. When you close
the rear lid again, it locks automatically.
Luggage compartment with movement
activated opening
Applies to vehicles : with convenience key and sensor-con
trolled luggage compartment lid
Fig . 28 Rear of vehicle: foot movement
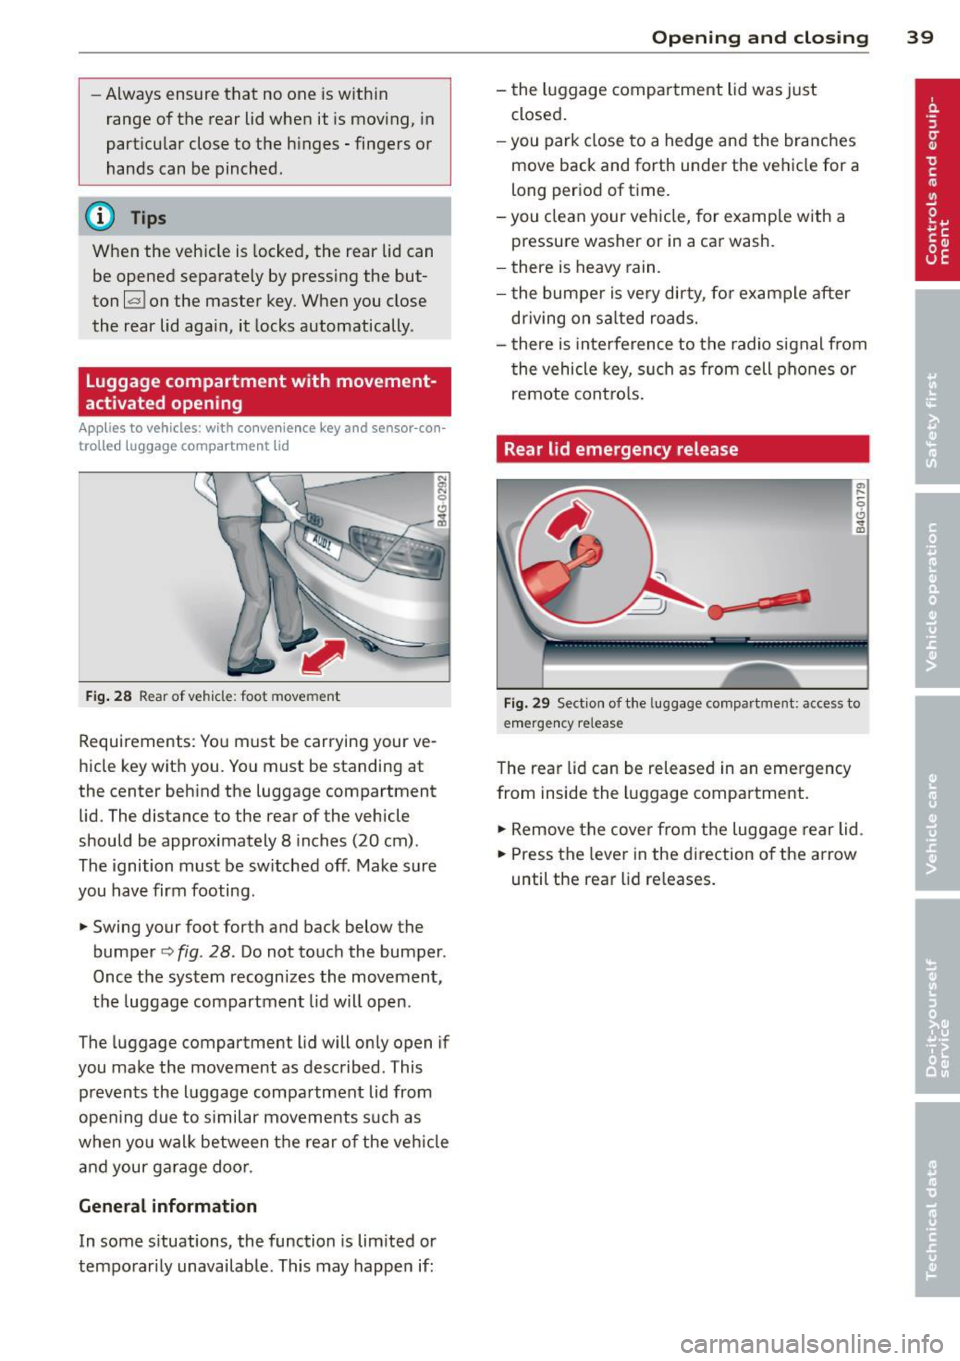
Requirements: You must be carrying your ve
hicle key with you . You must be standing at
the center beh ind the luggage compartment
lid. The distance to the rear of the vehicle
should be approximately 8 inches (20 cm).
The ignition must be sw itched off. Make sure
you have firm footing .
.. Swing your foot forth and back below the
bumpe r<=>
fig . 28. Do not touch the bumper.
Once the system recognizes the movement,
the luggage compartment lid wil l open.
The luggage compartment l id will only open if
you make the movement as described. This prevents the luggage compartment lid from
opening due to s imilar movements such as
when yo u walk between the rear o f the ve hicle
and your ga rage doo r.
General information
In some s ituations, the function is limited or
temporarily unavailable. This may happen if:
Opening and closing 39
- the luggage compartment lid was just
closed.
-you park close to a hedge and the branches
move back and forth under the vehicle for a
long period of time.
-you clean your vehicle, for example with a
pressure washer or in a car wash.
- there is heavy rain.
- the bumper is very dirty, fo r example after
driving on sa lted roads.
- there is interference to the radio signal from
the vehicle key, such as from cell phones or
remote contro ls.
Rear lid emergency release
Fig. 29 Section of the luggage compartment: access to
emerge ncy release
The rear lid can be released in an emergency
from inside the luggage compartment.
.. Remove the cover from the luggage rear lid.
.. Press the leve r in the direction of the arrow
until the rear lid releases.
Page 46 of 304
44 Clear vision
& WARNING
-Automatic headlights are only intended
to assist the driver . They do not relieve
the driver of his responsibility to check
the headlights and to turn them on man
ually according to the current light and
visibility conditions. For example, fog
cannot be detected by the light sensors.
So always switch on the headlights
io
under these weather conditions and
when driving in the dark.
- Crashes can happen when you cannot see
the road ahead and when you cannot be
seen by other motorists. Always turn on
theheadlightssothatyoucanseeahead and so that others can see your car from
the back .
- Please observe legal regulations when
using the lighting systems described .
(D Note
The rear fog lights should only be turned
on in accordance with traffic regulation, as
the lights are bright for following traffic.
{D) Tips
- The light sensor* for automatic head
light range control* is located in the rear
view mirror mount . You should therefore
not apply any stickers to the windshield
in this area in order to prevent malfunc
tions or failures .
- In the event of a light sensor malfunc
tion, the driver is notified in the instru
ment cluster display ~
page 23 .
-You will hear a warning tone if you open
the driver door when the exterior lights
are switched on.
- In cool or damp weather, the inside of
the headlights, turn signals and tail lights can fog over due to the tempera
ture difference between the inside and
outside. They will clear shortly after
switching them on. This does not affect
the service life of the lighting.
Emergency flasher
The emergency flasher makes other motorists
aware that you or your vehicle are in an emer
gency situation .
Fig. 35 Ce nte r co nso le: em erg en cy flash er sw itc h
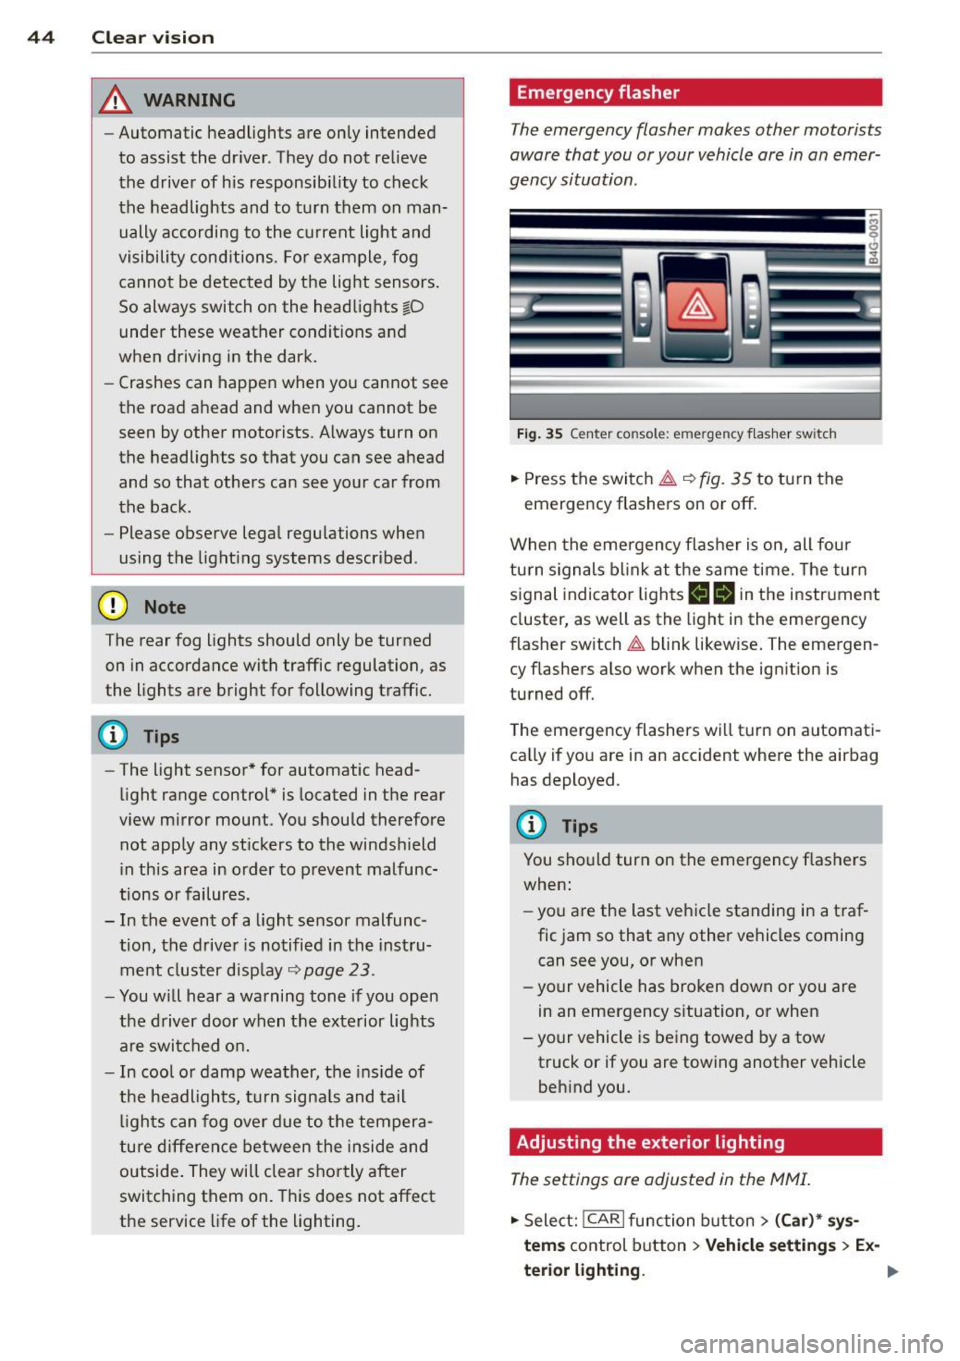
.. Press the switch~~ fig. 35 to turn the
emergency flashers on or off.
When the emergency flasher is on, all four
turn signals blink at the same time. The turn
signal indicator lights
B Nin the instrument
cluster, as well as the light in the emergency
flasher switch
~ blink likewise. The emergen
cy flashers also work when the ignition is
turned off.
The emergency flashers will turn on automati
cally if you are in an accident where the airbag
has deployed.
@ Tips
You should turn on the emergency flashers
when:
- you are the last vehicle standing in a traf
fic jam so that any other vehicles coming
can see you, or when
- your vehicle has broken down or you are
in an emergency situation, or when
-your vehicle is being towed by a tow
truck or if you are towing another vehicle
behind you.
Adjusting the exterior lighting
The settings ore adjusted in the MMI.
.. Select: !CARI function button> (Car)* sys
tems
control button > Vehicle settings > Ex-
terior lighting.
Ill>
Page 47 of 304
Automatic headlights
You can adjust the following settings in the
Automatic headlights menu:
Headlights activation time -You can adjust if
the headlights switch on
Early, Med . or Late
according to the sensitivity of the ligh t sensor.
Audi adaptive light* -You can switch adaptive
light
On and Off.
Daytime running lights
USA models:
You can switch the dayt ime run
n ing lights
on and off .
Canada models :
The function cannot be
turned off . It is activated automatically each
time the ignition is switched on. This menu
item is shown "greyed out" .
Coming home, Leaving home
The coming home function illuminates the
area outside the vehicle when you switch the
ignition off and open the driver's door. To turn
the function on, select
Lights when leaving
car > On .
The leaving home function illuminates the
area outside the vehicle when you un lock the
vehicle. To turn the funct ion on, select
Lights
when unlocking car > On .
The coming home and leaving home functions
only operate when it is dark and the light
switch is in the
AUTO position. Clear
vision 45
Turn signals and high beam lever
The lever on the left side of the steering col
umn is used to operate the turn signals and
the high beam as well as
the headlight flash
er.
Fig. 36 Tu rn signal and high beam lever
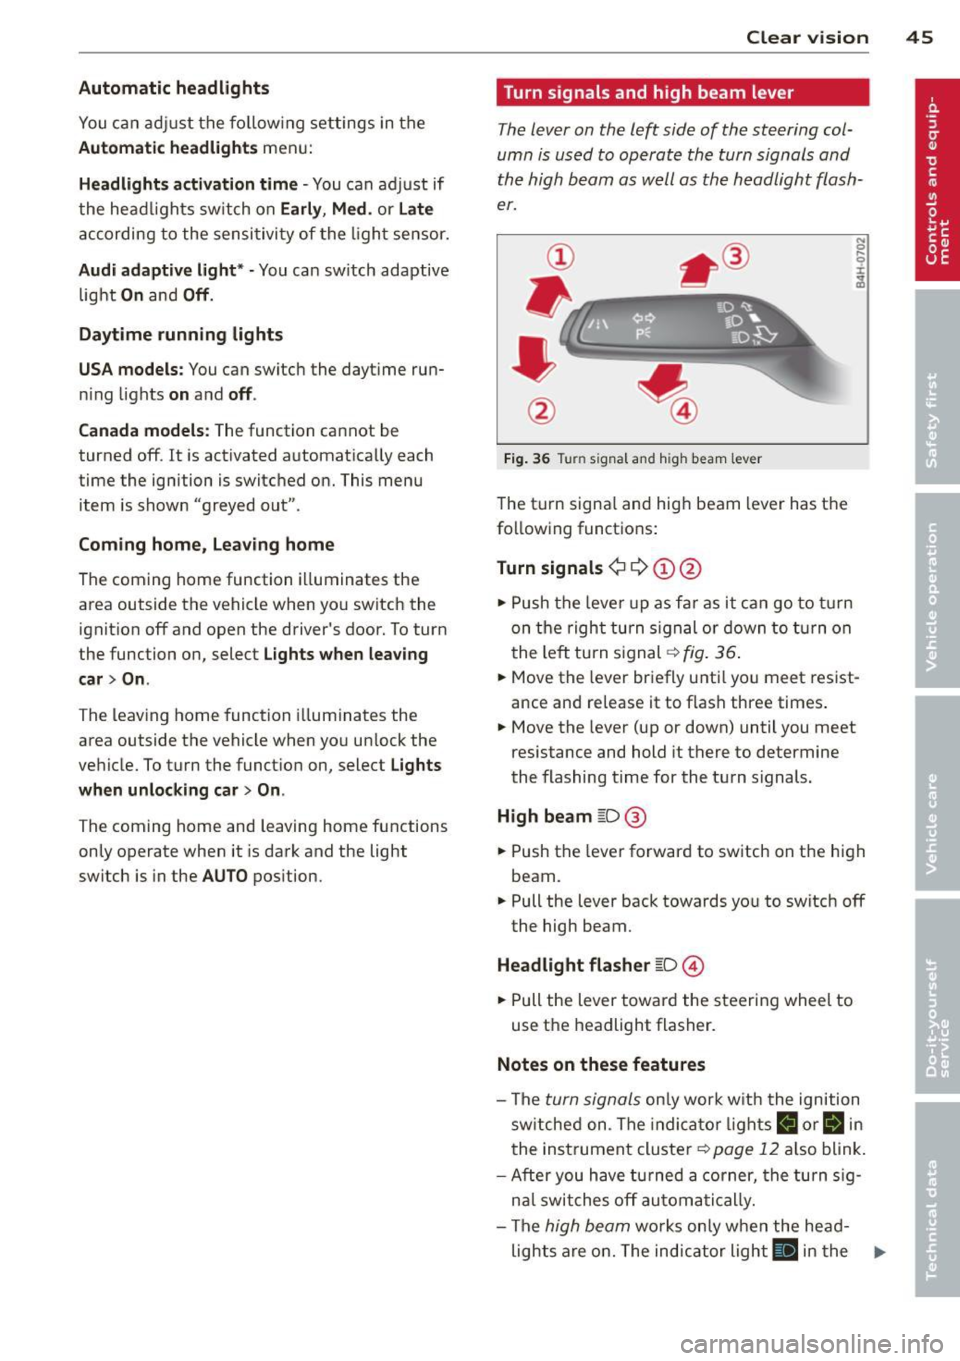
The turn signal and high beam lever has the
following functions:
Turn signals ¢ 9 ©@
.,. Push the lever up as fa r as it can go to turn
on the right turn signa l or down to turn on
the left tu rn s ignal ¢
fig. 36.
.. 0 ....
~
... Move the lever briefly unti l you meet resist
ance and re lease it to flash three times.
.,. Move the lever (up or down) until you meet
resistance and hold it there to determine
the flashing time for the turn signals.
High beam ~D @
... Push the lever forward to switch on the high
beam .
.,. Pull the lever back towards you to switch off
the high beam.
Headlight flasher ~D ©
... Pull the lever toward the steering wheel to
use the headlight flasher.
Notes on these features
-The turn signals on ly work w ith the ignition
sw itched on. The indicator l ights
B or Bin
the instrument cluster¢ page 12 also blink.
-After you have turned a corner, the turn sig-
n al switches off automatically.
- The
high beam works only when the head-
lights are on. The indicator light
El in the .,.
Page 50 of 304
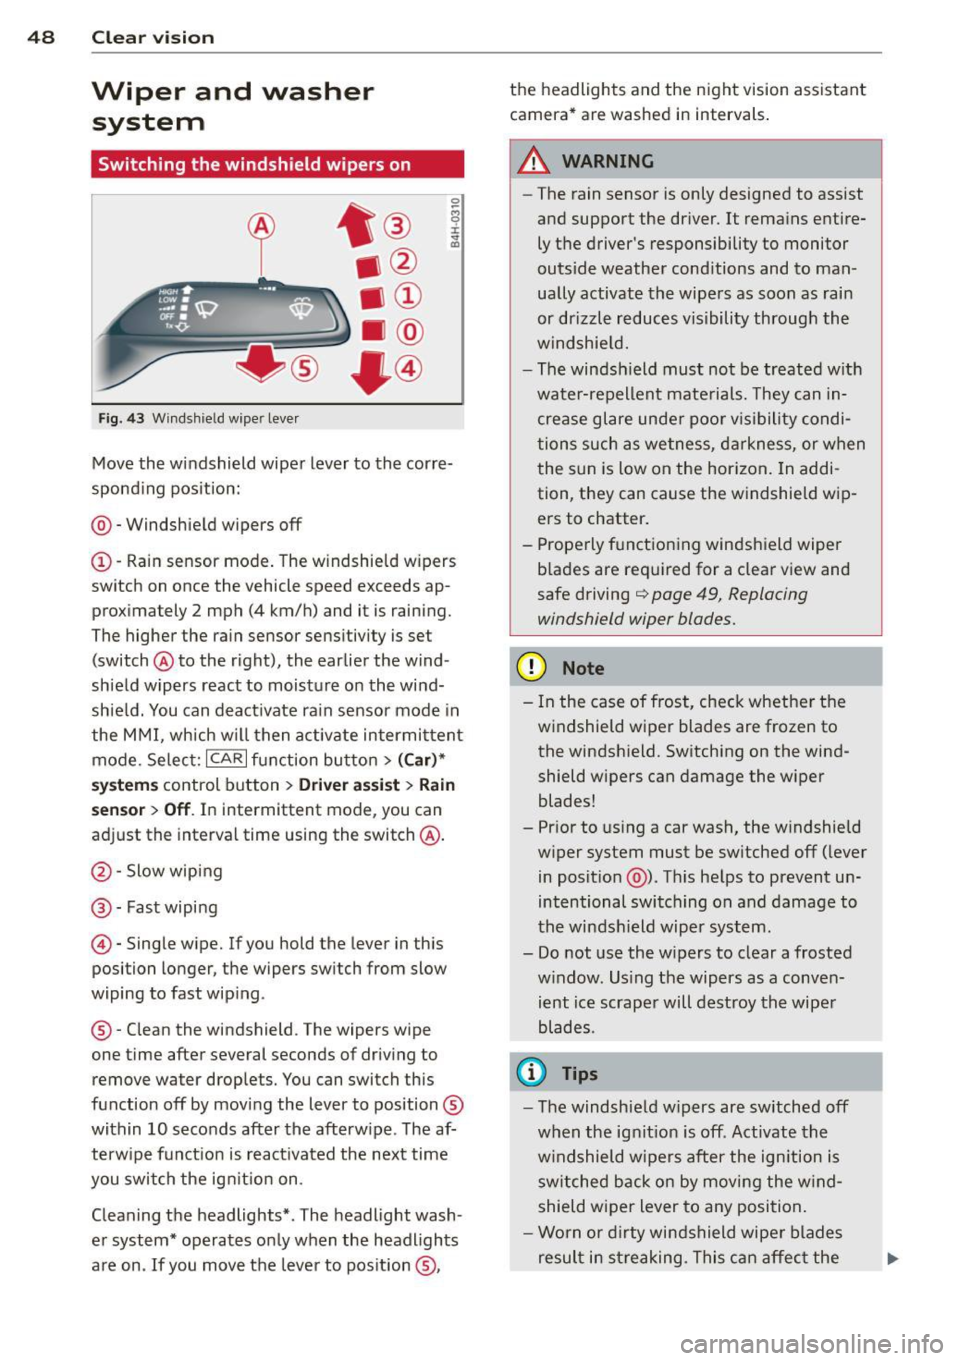
48 Clear vis ion
Wiper and washer
system
Switching the windshield wipers on
F ig. 43 Wind sh ie ld wipe r lever
Move the windshield wiper lever to the corre
sponding pos ition:
@ - Windshie ld wipers off
(I) -Rain sensor mode . The windshield w ipers
switch on once the vehicle speed exceeds ap
proximately 2 mph (4 km/h) and it is raining.
The higher the rain sensor sens itivity is se t
(switch @to the right), the earlier the wind
shield wipers react to moisture on the wind
shie ld. You can deact ivate rain sensor mode in
the MMI, which w ill then activate intermi ttent
mode. Selec t:
ICAR I function bu tton > ( Car )*
system s control button > Driver ass is t > Rain
se nsor
> Off . In intermittent mode, you can
adjust the interval time using the switch @.
@-Slow wiping
@-Fast wiping
© -Single wipe. If you hold the lever in this
posi tion longer, the wipers sw itch from slow
wiping to fast wip ing .
® - Clean the windshield . The wipers wipe
one time after several seconds of driv ing to
remove water drop le ts. You can switch this
function off by mov ing the lever to position ®
within 10 seconds after the afterw ipe . The af
terw ipe fun ct ion is react ivated the next time
you swit ch the ig nition on .
Cleaning the headlights* . The headlight wash
e r system* operates only when the headlights
are on . If you move the lever to pos ition ®, the headlights and the night vision assistant
camera* are washed in intervals .
.&_ WARNING
-
-The rain sensor is only designed to assist
and support the driver.
It remains entire
ly t he driver's responsibility to monitor
outside weather cond itions and to man
ually activate the wipe rs as soon as rain
or drizzle reduces v isibility through the
windshie ld.
- The windsh ield must no t be treated w ith
wate r-repellent mate rials. They can in
crease glare unde r poo r vis ibility condi
tions such as wetness, d arkness, or when
the sun is low on the hor izon. In addi
tion, they can cause the w indshield w ip
ers to chatter .
- Prope rly f unctioning windshield wiper
b lades are required for a clear view and
safe driving
q page 49, Replacing
windshield wiper blades.
(D Note
- In the case of frost, check whethe r th e
windshield wiper blades are frozen to
the windsh ield. Switching on the wind
shield wipers can damage the wiper
blades!
- Pr ior to us ing a car wash, the w indshield
w iper system must be sw itched off ( lever
in posit ion @). Th is he lps to prevent un
intentional switching on and damage to
the winds hield wiper system.
- Do not use the w ipers to clear a frosted
w indow . Us ing the wipers as a conven
ient ice scrape r will destroy the wipe r
blades .
(D Tips
-The windshie ld w ipers are switched off
w hen the ignit ion is off . Activate the
w indshield wipers after the ign ition is
switched back on by moving the w ind
shield wiper lever to any position.
- Worn or dirty windshield wipe r blades
result in streaking. This can affect the
Page 51 of 304

rain sensor function. Check your
windshield wiper b lades regularly.
- The washer fluid nozzles of the wind
sh ield washer system are heated at low
temperatures when the ignit ion is on .
- When stopping temporarily, e .g . at a
traffic light , the set speed of the wind
shield wipers is automatically red uced by
one speed.
Cleaning windshield wiper blades
Clean the wind shield wiper bl ades when they
begin to leafe streaks .
~ Place the windshield wiper arms in the serv
ice position . Re fer to
q page 49 .
~ Use a soft clo th and gl ass cleaner to clean
the windsh ield w iper blades .
A WARNING
Dirty windshie ld w iper blades can impa ir
your view. This can lead to a cc idents.
Replacing windshield wiper blades
F ig. 44 Removing wi nds hield w ipe r blades
-
-
-
~
I
Wiper se rvice po sition /blade replac ement
po sit ion
~ Switch the ign ition off and move the w ind
shield wiper lever to posit ion ©
q page 48,
fig. 43 . The windshield wipers move into the
serv ice position .
~ To bring the wipe rs back into the orig inal
pos ition, switch the ignition on and press
the windshie ld wiper lever .
You ca n also turn the service pos it ion on o r off
in the
MM I:
Clear v is ion 49
~ Switch the windshie ld wipers off (position
@ ¢page 48, fig. 43) .
~ Select: !CAR ! function button > (Car)* s ys
tems
cont rol button > Se rvicing & checks >
Wiper ser vice position > On .
Remo ving the wiper blade
~ Lift the windshield wiper arm up from the
windshie ld.
~ Press the locking knob@ q fig. 44 on the
wiper blade. Hold the wiper blade firmly.
~ Remove the wiper bl ade in the direction of
the arrow .
Attaching the w iper blade
~ Insta ll the new wiper blade in the retainer
on the wiper arm @unti l you hear it click in
to place on the w iper a rm .
~ Place the wiper arm back on the windshield.
~ Turn the service position off .
A WARNING
-
For your safety, you should rep lace the
wiper b lades once o r twice a yea r. See your
a uthorized Audi de aler fo r repla cement
b lades .
(D Note
- The windshie ld w iper blades must on ly
be folded away when i n the service posi
t ion! Otherwise, yo u ris k damaging the
paint on the hood o r the windshie ld wip
er motor.
- Yo u should not move your vehicle or
press the windsh ield wiper lever when
the wiper arms are folded away from the
windshield. The windshield wipers wou ld
move back into their original position
and could damage the hood and wind
shield.
- To help prevent damage to the w iper sys
tem, always loosen blades wh ich are fro
zen to the windshield before operating
w ipers .
- To help prevent damage to wiper blades,
do not use gasoline, kerosene, paint
thinne r, or other solvents on o r near the
w iper blades.