remote control AUDI A6 2014 Owners Manual
[x] Cancel search | Manufacturer: AUDI, Model Year: 2014, Model line: A6, Model: AUDI A6 2014Pages: 304, PDF Size: 76.32 MB
Page 5 of 304
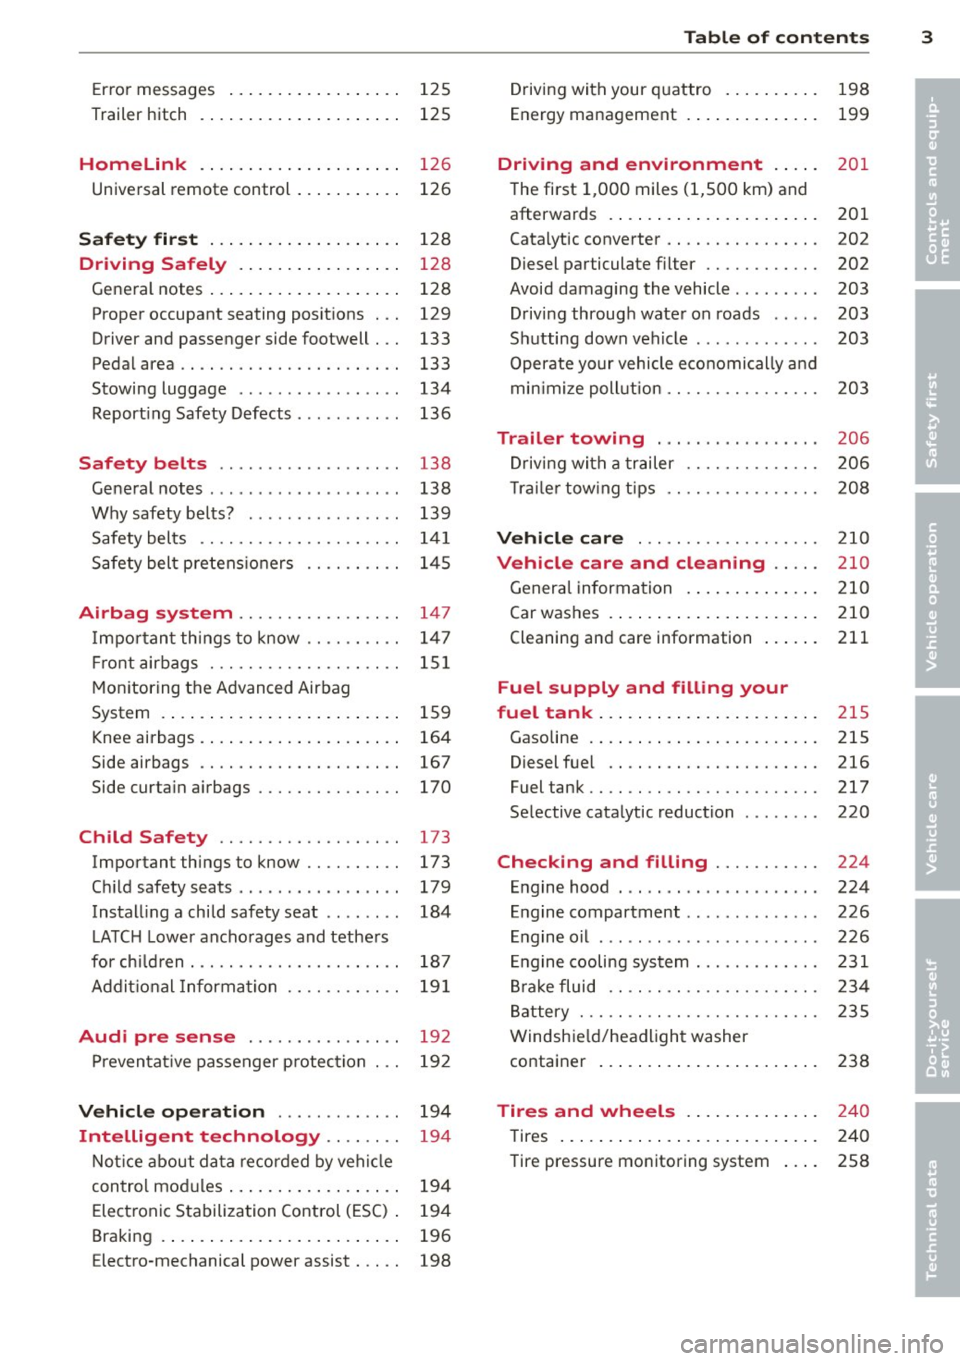
Error messages . . . . . . . . . . . . . . . . . . 125
Trailer hitch . . . . . . . . . . . . . . . . . . . . . 125
Homelink
Universal remote control ... .. .. .. . .
S afet y fir st ... ...... ... .. .. .. . .
Dri ving Safely ...... ... .. .. .. . .
Gene ral notes ..... .... ... .. .. .. . .
Proper occupant seating posit ions . . .
Driver and passenger side footwell . . .
Pedal area .. ................. .. . .
Stowing luggage ............. ... .
Report ing Safety Defects .......... . 126
126
12
8
128
128
129
133
133
1 34
136
Safety belts . . . . . . . . . . . . . . . . . . . 138
Ge neral notes . . . . . . . . . . . . . . . . . . . . 138
Why safety be lts? . . . . . . . . . . . . . . . . 139
Safety belts . . . . . . . . . . . . . . . . . . . . . 1 41
Safety bel t pre tens io ners . . . . . . . . . . 1 45
Airbag system ........... .. .. .. 147
I mpo rtant th ings to know . . . . . . . . . . 147
Fr ont airbags . . . . . . . . . . . . . . . . . . . . 1 51
M on itoring the Advanced Airbag
System . . . . . . . . . . . . . . . . . . . . . . . . . 159
Knee airbags . . . . . . . . . . . . . . . . . . . . . 164
Side airbags . . . . . . . . . . . . . . . . . . . . . 167
Side curta in a irbags . . . . . . . . . . . . . . . 170
Child Safety ............... .. . .
Important things to know .. .. .. .. . .
C hi ld safety seats ... ...... .... .. . .
Install ing a child safety seat .. .. .. . .
L ATC H Lower ancho rages and tethe rs
for ch ild ren . ............. .... .. . .
Addit ional Information
Audi pre sense ..... ... .. .. .. . .
P reven tat ive passenger p rotection
Vehicle operat ion ..... .. .. .. . .
Intelligent technology .. .. .. . .
Not ice about da ta re cor ded by veh icle
control mod ules ... .... ... .. .. .. . .
Elect ronic Stabilization Control (ESC) .
Braking .... .. .... .. .... ... .. .. . .
E lectro-mechanical power assist . .. . . 173
173
179
184
187
19
1
192
19 2
194
194
194
194
196
198
Table of contents 3
Driving with your q uattro . . . . . . . . . . 198
Energy management . . . . . . . . . . . . . . 199
Driving and environment . . . . . 201
The first 1,000 miles (1,500 km) and
afterwards . . . . . . . . . . . . . . . . . . . . . . 201
Catalytic converter . . . . . . . . . . . . . . . . 202
Diesel particulate f ilter . . . . . . . . . . . . 202
Avoid damaging the vehicle . . . . . . . . . 203
Drivi ng throug h wate r on roads . . . . . 203
Sh utting down vehicle . . . . . . . . . . . . . 203
Operate your vehicle economically a nd
min imi ze poll ution . . . . . . . . . . . . . . . . 203
Trailer towing . . . . . . . . . . . . . . . . . 206
Drivi ng with a trailer . . . . . . . . . . . . . . 206
T rail er tow ing t ips . . . . . . . . . . . . . . . . 208
Vehicle care . . . . . . . . . . . . . . . . . . . 210
Vehicle care and cleaning . . . . . 210
Genera l informa tion . . . . . . . . . . . . . . 210
Car was hes . . . . . . . . . . . . . . . . . . . . . . 210
Cleaning and care information . . . . . . 211
Fuel supply and filling your
fuel tank ... .... .. . .. .. ..... ... .
215
Gasoline . . . . . . . . . . . . . . . . . . . . . . . . 215
Diesel f uel . . . . . . . . . . . . . . . . . . . . . . 216
Fuel tank.. .. .. .. ... ............ . 217
Se lective cata lytic reduction . . . . . . . . 220
Checking and filling . . . . . . . . . . . 224
E n gine hood . . . . . . . . . . . . . . . . . . . . . 224
E n gine compartment . . . . . . . . . . . . . . 226
Engine oil . . . . . . . . . . . . . . . . . . . . . . . 226
En gine cooling system . . . . . . . . . . . . . 231
Br ake fluid . . . . . . . . . . . . . . . . . . . . . . 234
B attery . . . . . . . . . . . . . . . . . . . . . . . . . 235
Windsh ie ld/headligh t washer
container . . . . . . . . . . . . . . . . . . . . . . . 238
Tires and wheels . . . . . . . . . . . . . . 24 0
Tires . . . . . . . . . . . . . . . . . . . . . . . . . . . 240
Tire pressure monitoring system . . . . 258
•
•
Page 16 of 304
14 Instruments and w . . arn1ng/indicator lights
I
•
• •
•
rl1
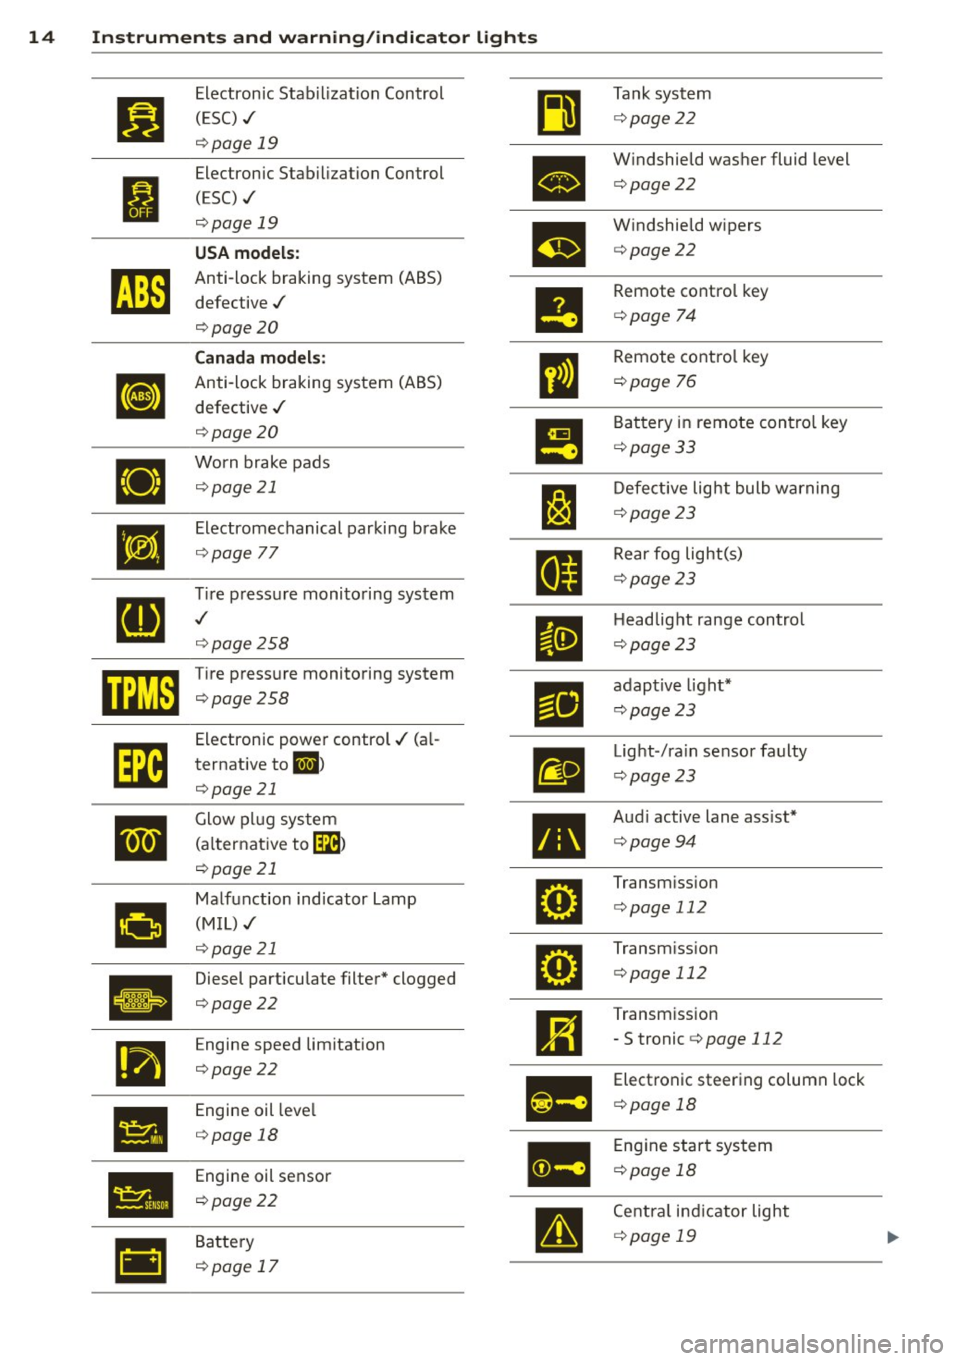
Electronic Stab ilization Control
(ESC) ,/
c:> page 19
Electronic Stab ilization Control
(ESC) ./
c:> page 19
USA models:
Anti-lock braking system (ABS)
defective ,/
c:>page 20
Canada models:
Anti-lock braking system (ABS)
defective ,/
c:> page 20
Worn brake pads c:>page 21
Electromechanical parking brake
c:> page 77
~re pressure monitoring system
c:> page258
Tire pressure monitoring system
c:>page 258
Electronic power control./ (al
ternative to
ml >
c:>page 21
Glow plug system
(a lternative to~ )
c:> page 21
Malfunction indicator La
(MIL),/ mp
c:>page 21
Diesel particulate filter* clogged
c:>page 22
Engine speed limitation
c:>page 22
Engine oil leve l
c:> page 18
Engine oil sensor
c:> poge 22
Battery
c:> page 17
•
m
•
•
g
Tank system
c:> page22
W indshield washer fluid level
c:>page22
Windshield wipers
c:> page22
Remote control key
c:> page 74
Remote control key
c:> page 76
Battery in remote contro l key
c:>page 33
Defective light bulb warnin
c:> page 23
g
Rear fog light(s)
c:> page23
Headlight range control
c:> page23
adaptive light*
c:>page 23
Light -/ra in sensor faulty
c:> page23
Audi active lane ass ist*
c:> page94
Transmiss ion
c:> page 112
Transm iss ion
c:> page 112
Transmission
- S tronic c:>page
112
Electronic steering column lock
c:> page 18
Engine start system
c:> poge 18
Centra l ind icator light
c:> poge 19
Page 34 of 304
32 Opening and clo sing
Opening and closing
Keys
Key set
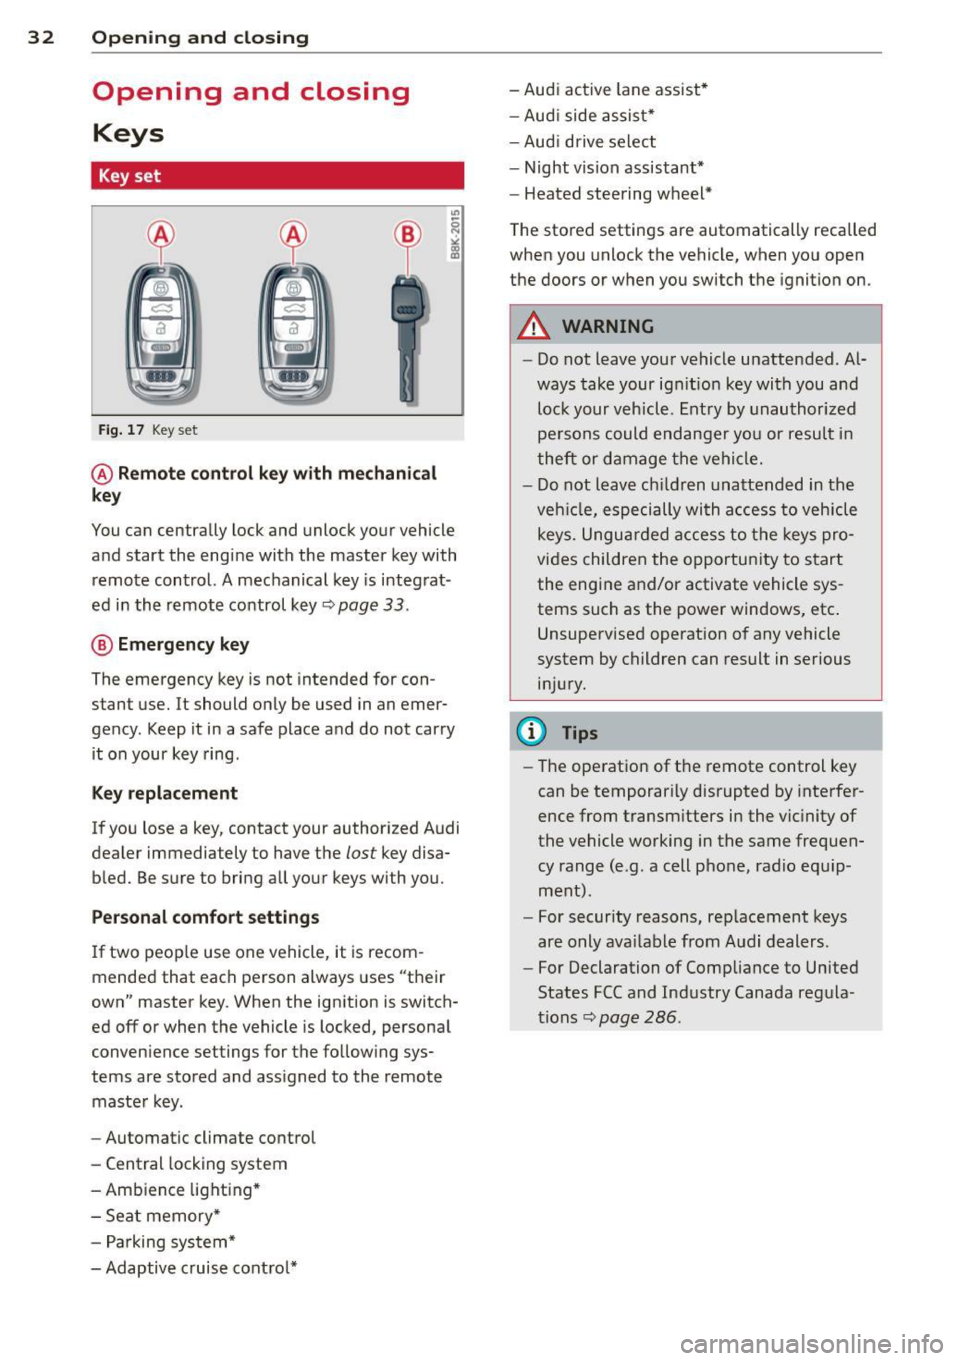
Fig . 17 Key set
@ Remot e control k ey w ith m echan ical
ke y
You can centrally lock and unlock your vehicle
and start the engine with the master key with
remote control. A mechanical key is integrat
ed in the remote control key
r:::;, page 33 .
@ Eme rgenc y ke y
The emergency key is not intended for con
stant use.
It should only be used in an emer
gency. Keep it in a safe place and do not carry it on your key ring .
Key replac em ent
If you lose a key, contact your authorized Audi
dealer immediately to have the
lost key disa
bled. Be sure to bring all your keys with you.
P er sonal c omfo rt se ttin gs
If two peop le use one vehicle, it is recom
mended that each person always uses "their
own" master key . When the ignition is switch
ed off or when the vehicle is locked, personal
convenience settings for the follow ing sys
tems are stored and assigned to the remote master key .
- Automatic climate control
- Central locking system
- Amb ience light ing*
- Seat memory*
- Parking system*
- Adaptive cruise control* - Audi active
lane assist *
- Aud i side assist*
- Aud i drive select
- Night vision assistant*
- Heated steering wheel*
The stored settings are automatically recalled
when you unlock the vehicle, when you open
the doors or when you switch the ignition on.
A WARNING
-- Do not leave your vehicle unattended . Al-
ways take your ignit ion key with you and
lock your vehicle . Entry by unauthorized
persons could endanger yo u or resu lt in
theft or damage the vehicle.
- Do not leave ch ildren unattended in the
veh icle, especially with access to vehicle
keys. Unguarded access to the keys pro
vides children the opportunity to start the engine and/or activate vehicle sys
tems such as the power windows, etc .
Unsupervised operation of any vehicle
system by children can result in serious
injury.
(1) Tips
- The operation of the remote control key
can be temporar ily disrupted by interfer
ence from transm itters in the vic inity of
the vehicle working in the same frequen
cy range (e.g. a cell phone, radio equip
ment).
- For security reasons, rep lacement keys
are only ava ilable from Audi dealers.
- For Declaration of Compliance to United
States FCC and Industry Canada regula
tions
r:::;, page 286.
Page 37 of 304
-Applies to vehicles with power side door
closer*:
- When closing a door, make sure noth ing can interfere w ith the door. This
could cause ser ious personal inj ury.
- You can stop the door from clos ing at
any time by pulling on the inside or
outside doo r handle.
(D Tips
- In the event of a crash with airbag de
ployment a ll locked doors will be auto
ma tically unlocked to g ive access to the
vehicle occupants from the outside .
- If the power locking system should ma l
f unct ion, you can lo ck the dr iver's door
us ing the mechanical key¢
page 38.
-If the power lo cking system should fail,
you can still open the fuel tank flap in a n
emergency ¢
page 220.
- You are we ll advised not to keep valua
bles inside an unattended vehicle, visib le
or not. Even a properly locked vehicle
cannot provide the security of a safe.
- If the L ED in the upper edge o f the driv
er's door panel comes on for abo ut 30
seconds after the vehicle is locked, there
is a ma lfunction in the power locking or
the anti-theft warning system. Have the
malfunction corrected by an author ized
Audi dealersh ip or qua lified repair fac il i
ty.
Setting power locking
The driver can determine the functions for
power locking in the MMI.
• Select : I CARI function button > (C ar)* sy s
tems
control button > Vehicle se tti ngs >
Central lock ing .
Unlock door s -You can decide if All doors or
only the
Driv er should unlock . The rear lid al
so unlocks when
All is selected . If you select
Driv er in a vehicle with a convenience key*,
only the door whose handle you pull will un l ock.
Op enin g an d clos ing 35
If you select Driver , all the doors and rear lid
will unlock if you press the
ffi button on the re
mote control master key twice.
Loc k exterior trunk handl e -If yo u se lect On ,
the rear lid handle is locked . In this case the
rear lid can be opened with the b utton
cs on
the master key or with the
cs button in the
driver's door. In veh icles with a convenience
key*, you can still open the rear lid using the
handle if an authorized master key is near the
proxim ity sensor.
Fold m irrors * -If you select On, the exterior
rearview mirrors fold in automatically when
you press the
ff! button on the remote control
master key or touch the sensor* in the ha ndle.
To ne when lock ing -When you select On, a
confirmation tone sounds when you lock the
vehicle .
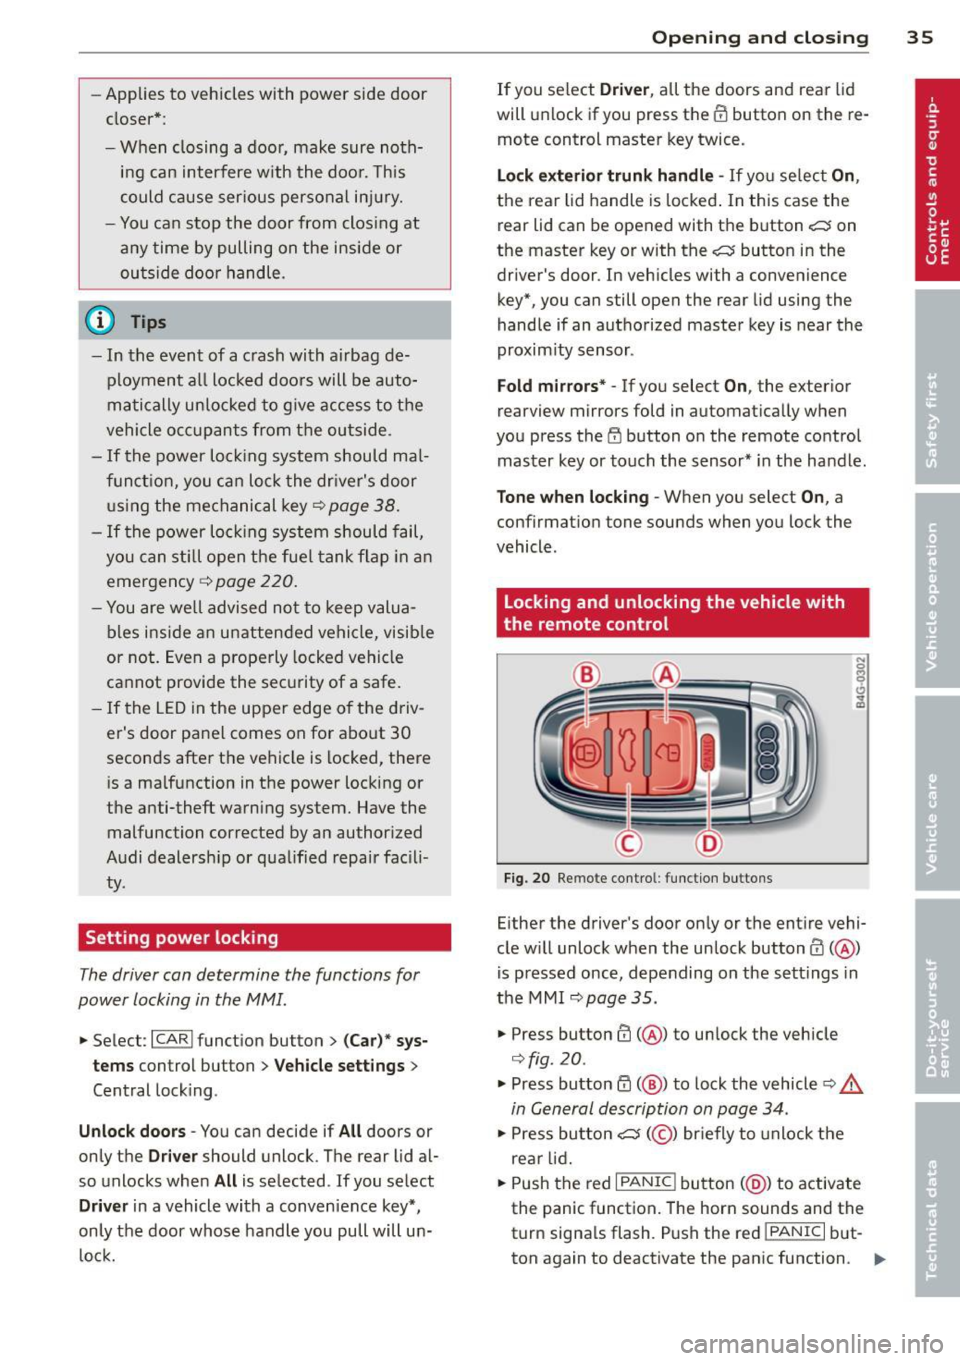
locking and unlocking the vehicle with
the remote control
Fig. 20 Remote cont rol : function buttons
Either the driver's door only or the entire vehi
cle w ill unlock when the unlock button
ffi ( @ )
is pressed once, depending on the sett ings in
the MMI
¢page 35.
• Press button ffi (@ ) to unlock the vehicle
¢fig . 20 .
• Press button ff! (@ ) to lock the vehicle ¢ &.
in General description on page 34.
• Press button cs( @) briefly to unlock the
rear lid.
• Push the red
I PANIC ! button (@ ) to activate
the panic function. The horn sounds and the
turn signa ls flash . P ush the red
!PANIC I but
ton again to deactivate the panic function. ..,.
Page 38 of 304
36 Openin g and clo sing
If the vehicle is unlocked and no door, the rear
lid or the hood is opened within 60 seconds ,
the veh icle locks itse lf aga in automatically.
This feature prevents the veh icle from be ing
accidentally left unlocked over a long period
of time.
It depends on the sett ings in the MMI wheth
er the entire veh icle is unlocked or on ly cer
tain doors
<=) page 35.
A WARNING
Read and follow all WARNINGS Q .&. in
General description on page
34.
(D Tips
- In order to make sure the locking func
tion is working, you should always keep
your eye on the vehicle to make sure it is
proper ly locked.
-
- Do not use the remote control if you are
i nside the car, otherwise you may unin
tentionally lock the vehicle, and then you
would set off the anti-theft ala rm when
you try to start the engine or open a door. In c ase this happens anyhow, push
the un lock button@ .
- The vehicle can on ly be locked when the
se lector lever is in the P posit ion .
- Use the panic funct ion only if you are in
an emergen cy situa tion.
Locking and unlocking with convenience
key
App lies to vehicles: with co nve nience key
The doors and the rear lid can be unlocked
and locked without operating the master key.
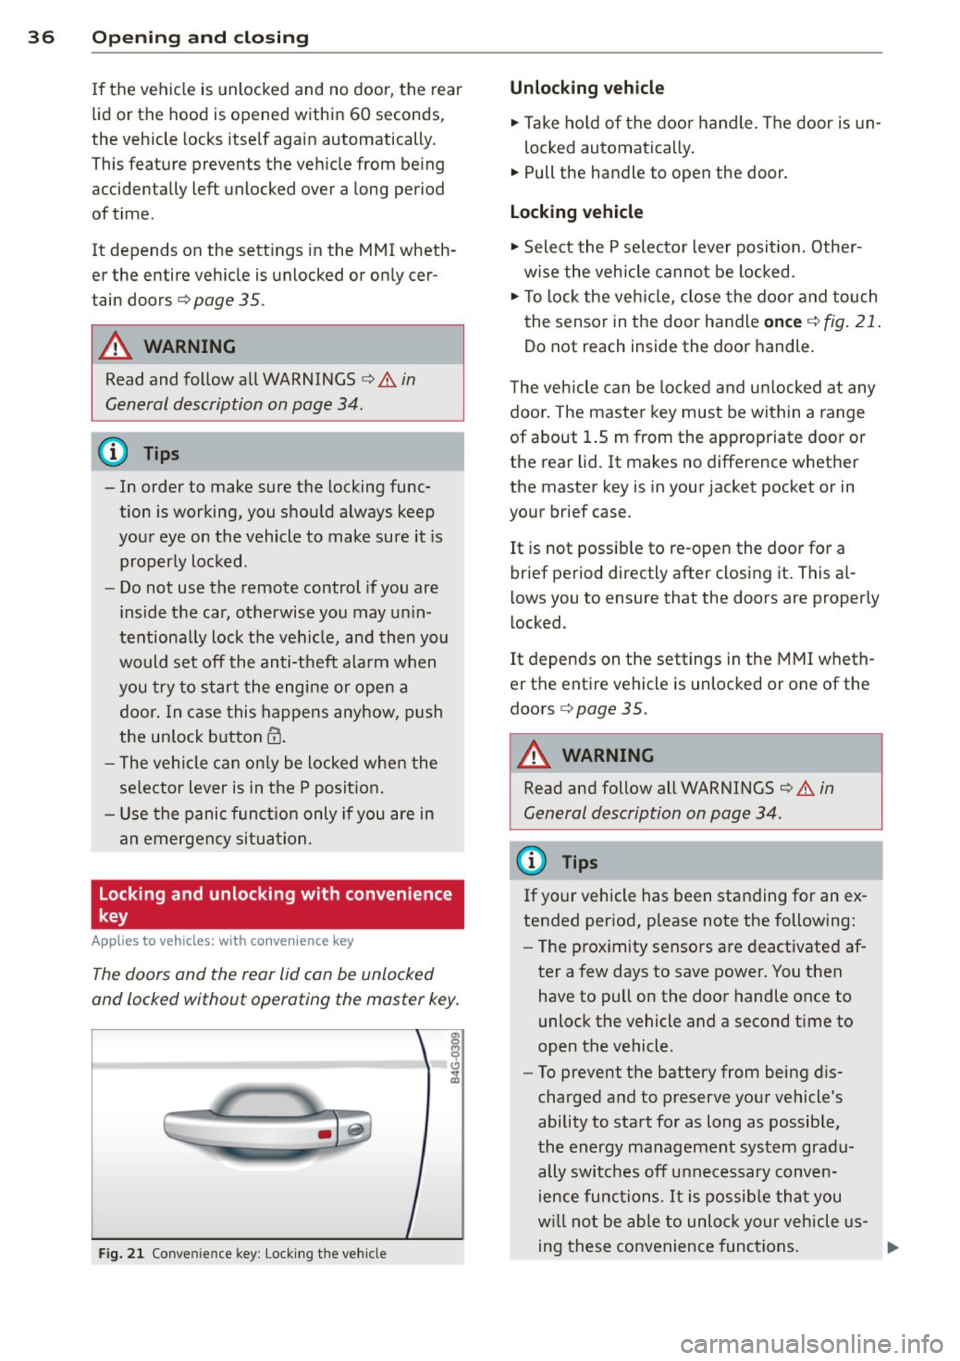
Fig. 2 1 Conve nience key : Lock ing the vehicle
Unlocking vehicle
.,. Take ho ld of the door handle . T he door is un-
loc ked automatically .
.,. Pull the handle to open the door .
Locking vehicle
.,. Select the P se lecto r lever posit ion. Othe r
w ise the veh icle cannot be locked.
.,. To lock the ve hicle, close the door and touch
the sensor in the door handle
on ce Q fig . 21 .
Do not reach inside the door handle.
T he veh icle can be locked a nd u nlocked at any
doo r. The master key must be within a range
of about 1.5 m from the appropriate door or
the rear lid. It makes no difference w hether
the master key is in your jacket pocket or in
your brief case.
It is not possib le to re -open the door for a
brief period directly after closing it. This a l
l ows you to ensure that the doors are proper ly
locked.
It depends on the settings in t he MMI wheth
er the entire vehicle is unlocked or one of the
doors
<=) page 35.
A WARNING
Read and follow all WARNINGS ¢.&. in
General description on page
34.
(D Tips
If your vehicle has been standing for an ex
tended per iod, please note the following:
- The p roximity sensors are deactivated af-
ter a few days to save power. You then have to pull on the door handle once to
unlock the vehicle and a second t ime to
open the vehicle.
- To prevent the battery from being d is
charged and to preserve your vehicle's
ability to start for as long as possib le,
the energy management system gradu
ally switc hes off unnecessary conven
ience func tion s. It is possib le tha t you
w ill not be able to unloc k your vehicle us
ing these convenience func tions.
Page 49 of 304
@ Tips
The instrument illumination (for dials and
needles) lights on when the ign it ion is
sw itched on and the vehicle lig hts are
turned off. As the daylight fades, the illu
m ination of the dials likewise dims auto
mat ically and w ill go out comp lete ly when
the o utside lig ht is ve ry low. This fea ture is
meant to remi nd you t o swit ch on the
headl igh ts when o utside light condi tions
become poor.
Vision
Sun visors
( J
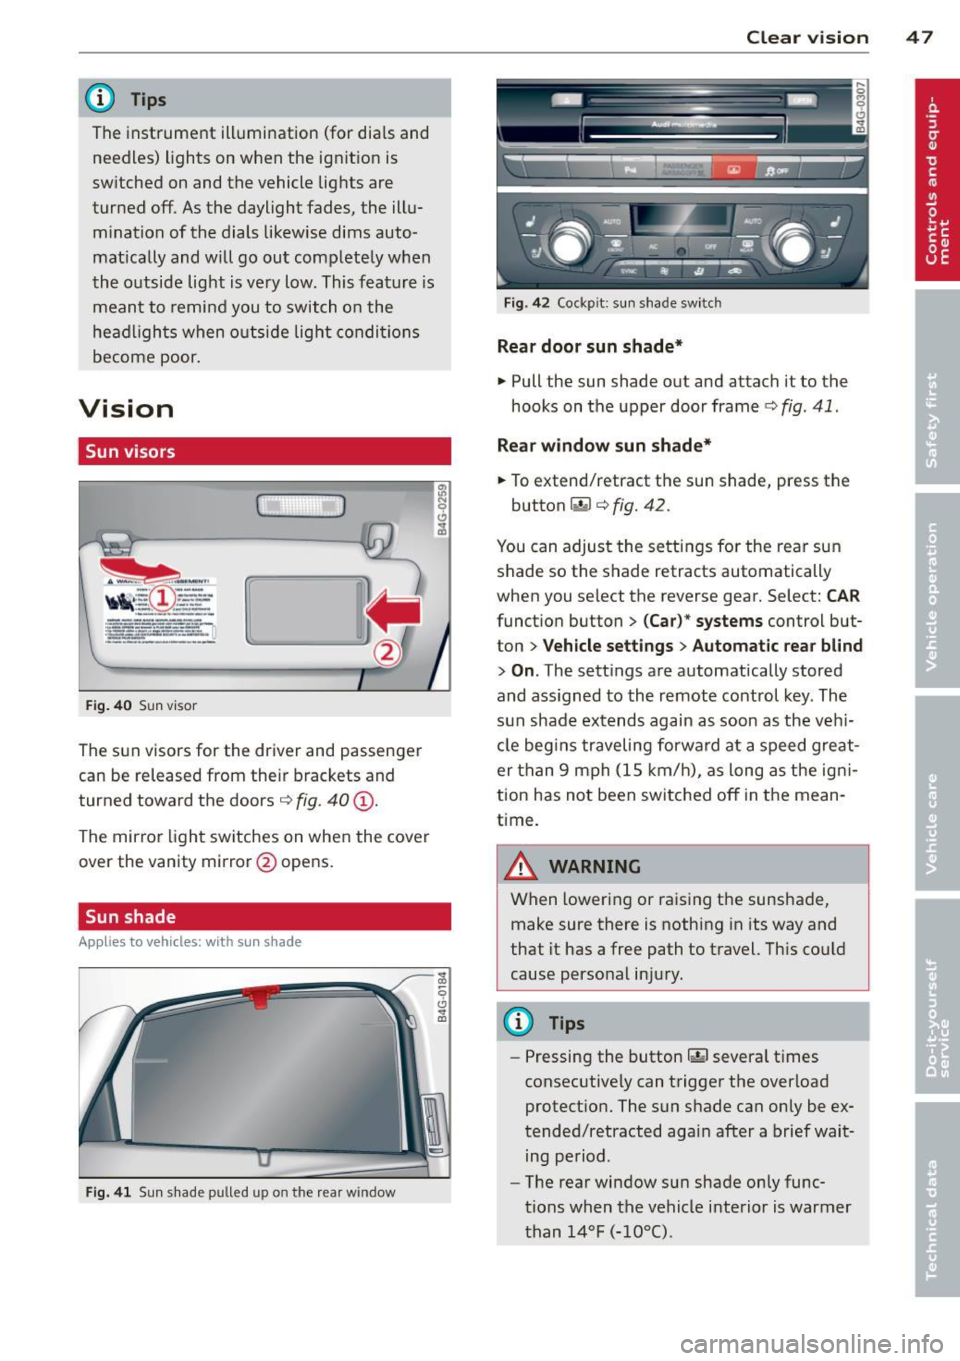
F ig . 40 Sun visor
The sun visors for the driver and passenger
can be released from their brackets and
turned toward the doors¢
fig. 40@.
The mirror light switches on when the cover
over the vanity mirror @opens.
Sun shade
Applies to vehicles: with sun shade
F ig . 41 Sun shade pulled up on the rea r window
Clear vi sion 4 7
Fig . 4 2 Cockp it: sun shade switch
Rear door sunshade*
.. Pull the sun shade out and attach it to the
hooks on the upper door frame¢
fig. 41 .
Rear window sun shade*
.. To extend/retract the sun shade, press the
button~ ¢
fig. 42.
You can adjust the settings for the rear sun
shade so the shade retracts automatically
when you select the reverse gear. Select:
CAR
function button > (Car )* systems control but
ton >
V ehicle settings > Automatic rea r bl ind
> On .The sett ings are automatically stored
and ass igned to the remote control key . The
s u n shade extends again as soon as the v ehi
cle beg ins traveling forwa rd at a speed gre at
er than 9 mph (1S km/h), as long as the ig ni
tion has not been switched off in the mean
time.
A WARNING
When lowering or raising the sunshade, make sure there is nothing in its way and
that it has a free path to t ravel. Th is cou ld
cause perso nal inju ry.
@ Tips
-
- Pressing the button rn severa l t imes
consec utive ly can trigger the overload
protect ion. The sun s hade can only be ex
tended/retracted again after a brief wait ing period.
- The rear window sun shade only func
tions when the vehicle i nterior is warmer
than
1 4°F ( -10°() .
Page 59 of 304
Remote Memory button control master
key
Driver Driver Front passen-
ger
Seat X X X
Stee ring X X
wheel*
Both exterior
X X
rearview mir-
rors*
Remote control key
Applies to vehicles: with memory function
To assign the d river 's sea t settings to the re
mote cont ro l key w hen locking the vehicle, the
function must be swi tc h ed on .
~ Select: I CARI funct io n button > (Car )* sys
tems
con trol button > Vehicle settings >
Seats > Driver seat > Remote control key >
On .
@ Tips
If you do not wa nt ano ther d river' s set
t ings to be a ssigned to the remote control
key, switch off the memory f unction usin g
the MMI or the
! OFF ! button ce:> page 57.
Memory buttons
Applies to vehicles: with memory function
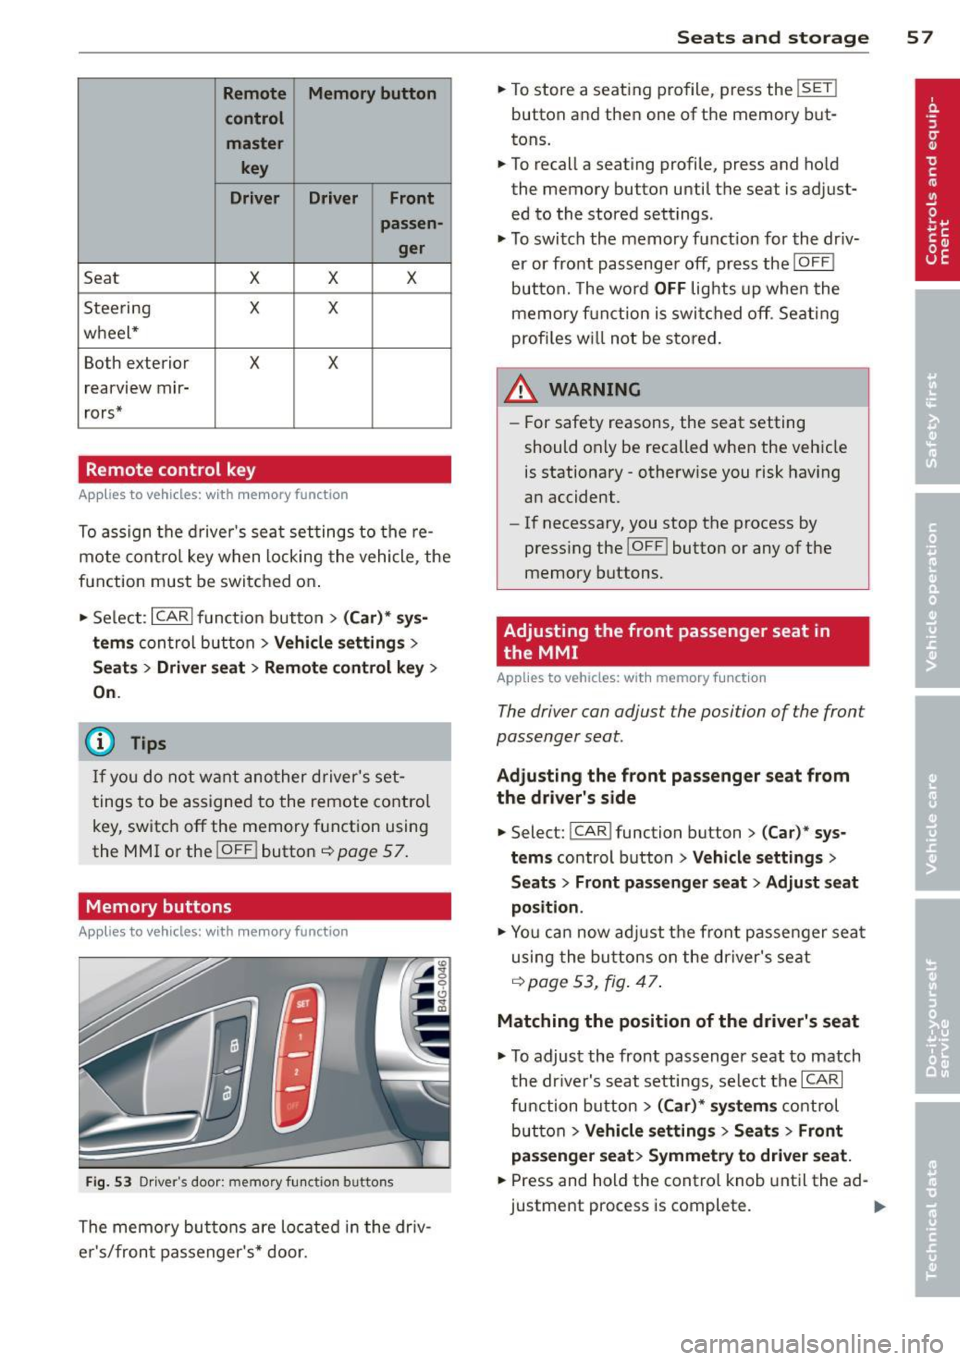
Fig. 53 Dr iver·s door: memory fu n ct io n buttons
The memo ry but tons are located in the dr iv
e r's/fron t passenger 's * door.
Seats and storage 5 7
~ To store a seating profile, p ress the !SET !
button and then one of the memory but
tons.
~ To recall a seating profile, press and ho ld
the memory button until th e seat is adjust
ed to the stored settings.
~ To swi tch the memory funct ion for the dr iv
er or fro nt pa sse nge r off, pre ss the
!OFF I
button. The wo rd OFF lights up whe n the
mem ory f unction is swi tched off . Sea ting
prof iles w ill not be stored.
WARNING
-For safety reasons, the seat setting
should only be recalled when the veh icle
is stationary -otherw ise you risk hav ing
an accident.
- If necessary, you stop the process by
press ing the
!OF F! button or any of the
memory buttons.
Adjusting the front passenger seat in
the MMI
Applies to vehicles: with memory function
The driver can adjust the position of the front
passenger seat.
Adjusting the front pas senger seat from
the driver's side
~ Select: ! CAR I function button > (Car) * sy s
tem s
control button > Vehicle settings >
Seats > Front passenger seat > Adjust seat
position .
~ You ca n now ad just the fron t passe nger sea t
using the bu ttons o n the dr iver's se at
q page 53, fig. 47 .
Matching the position of the driver's seat
~ To adjust th e front passenger seat to match
the dr ive r's seat settings, select t he
ICARI
function button > (Car )* system s cont rol
but ton
> Vehicle settings > Seats > Front
pa ssenger seat > Symmetry to driver seat.
~ Press and hold the contro l knob unti l the ad
justment process is complete.
Page 69 of 304
Warm and cold Climate controls
Description
App lies to vehicles: with three -zone cl imate contro l or
four -zone a uto mat ic climate contro l
The climate control system warms, cools and
adds humidity to the air in the vehicle interior .
It is the most effective when the windows and
sunroof* are closed . If the temperature inside
the parked veh icle becomes very warm, open
i ng the w indow br iefly will speed up the cool
ing process.
In all heating mode functions except
defrost,
the blower on ly switches to a higher speed
once the engine coolant has reached a certain
temperature.
Condensat ion from the cooling system can
drip and form a puddle of wate r under the ve
h icle. This is normal and does not mean there
is a leak .
Pollutant filt er
The pollutant filter removes pollutants such
as dust and po llen from the air.
The air pollutants filter must be changed at
the intervals specified in your Warranty
&
Maintenance booklet, so that the air condi
tioner can properly work .
If you drive your vehicle in an area with high
a ir pollution, the filter may need to be
changed more frequently than specified in
your Aud i Warranty
& Ma intenance booklet. If
i n doubt, ask your authori zed Audi Service Ad
visor for adv ice.
K ey coded settings
Three-zone climate control: T he b lower set
ting and air d istribution are stored automati
cally and ass igned to the remote control key
that is in use .
Four-zone automatic climate control: The cli
mate contro l settings are automatica lly stor
ed and assigned to the remote control key
that is in use .
Warm and c old 67
A WARNING
-
Reduced visibi lity is dangerous and can
cause acc idents .
- For safe driving it is very important that
all windows be free of ice, snow and con
densat ion.
- Comp letely fam il iarize yourse lf with the
proper use and funct ion of the heat ing
a nd ventilation system and especially
how to defog and defrost the w indows.
- Never use the windshield wiper/washer system in freez ing weathe r unt il you
have wa rmed the windshie ld first, using
the heating and ventilation system. The
washer sol ution may freeze on the wind
shie ld and red uce visibi lity.
CJ) Note
- If you s uspect that the air conditioner
has been damaged, switch the system
off to avoid furt her damage and have it
inspected by a qualified dea lership .
- Repairs to the Audi air conditioner re
quire specia l technical know ledge and
special tools. Contact an authorized Audi
dealer fo r ass istance.
@ For the sake of the envi ronment
By reducing the amount of f uel you use,
you also red uce the amount of pollutants
emitted into the air.
(D Tips
- Keep the air intake s lo ts ( in front of the
w indshield) free from ice, snow and de
bris in order to maintain the proper func
tion of the climate control system.
- The energy ma nagement system may
switch the seat heating* or rear window defroster off temporar ily. These systems
are available again as soon as the energy
balance has been restored .
- Air escapes through vents under the rear window. When plac ing items of cloth ing
on the luggage compartment cover, en
sure that the openings are not covered.
Page 74 of 304
7 2 Warm and cold
(D Note
To avoid damage to the heating e lements
in the seats, do not kneel on the seats or
place heavy loads on a small area of the
seat .
Setup
Applies to vehicles: with four-zone a utomat ic clima te con·
tro l
The climate control system setup is accessed
through the MMI .
.,. Se lect : I CAR I func tion button> (Car )* sys·
terns
con trol but ton > AC .
Rear cabin settings*
When th is fu nction is selected, all sett ings for
the rear can be adjusted through the climate
control sys tem in the cockpit. The cl imate
con trol sys tem se tt ings cannot be adjusted in
the rea r seat at the same time. This func tion
switches
o ff after a certain period of time or
when one of the dia ls in the cockp it is press
ed .
Auto recirculation*
The sensit ivity level of the au tomatic rec ircu
lation mode can be set at vario us leve ls from
off to sensit ive. The recirculation mode is con
trolled a utomat ica lly. You must p ress the ~
button if fog forms on the windows.
Footwell temperature
You can adju st the footwell temperat ure so
that it is cooler or wa rme r.
Supplementary heater*
The supplementary heater warms the interio r
of veh icles with diesel engines * mo re quick ly .
T he s upplementa ry he ater is cont ro lled au to
mat ic all y in the
Aut o setting .
Steering wheel heating
App lies to vehicles: wi th hea ted s tee rin g whe el
The steering wheel rim can be heated .
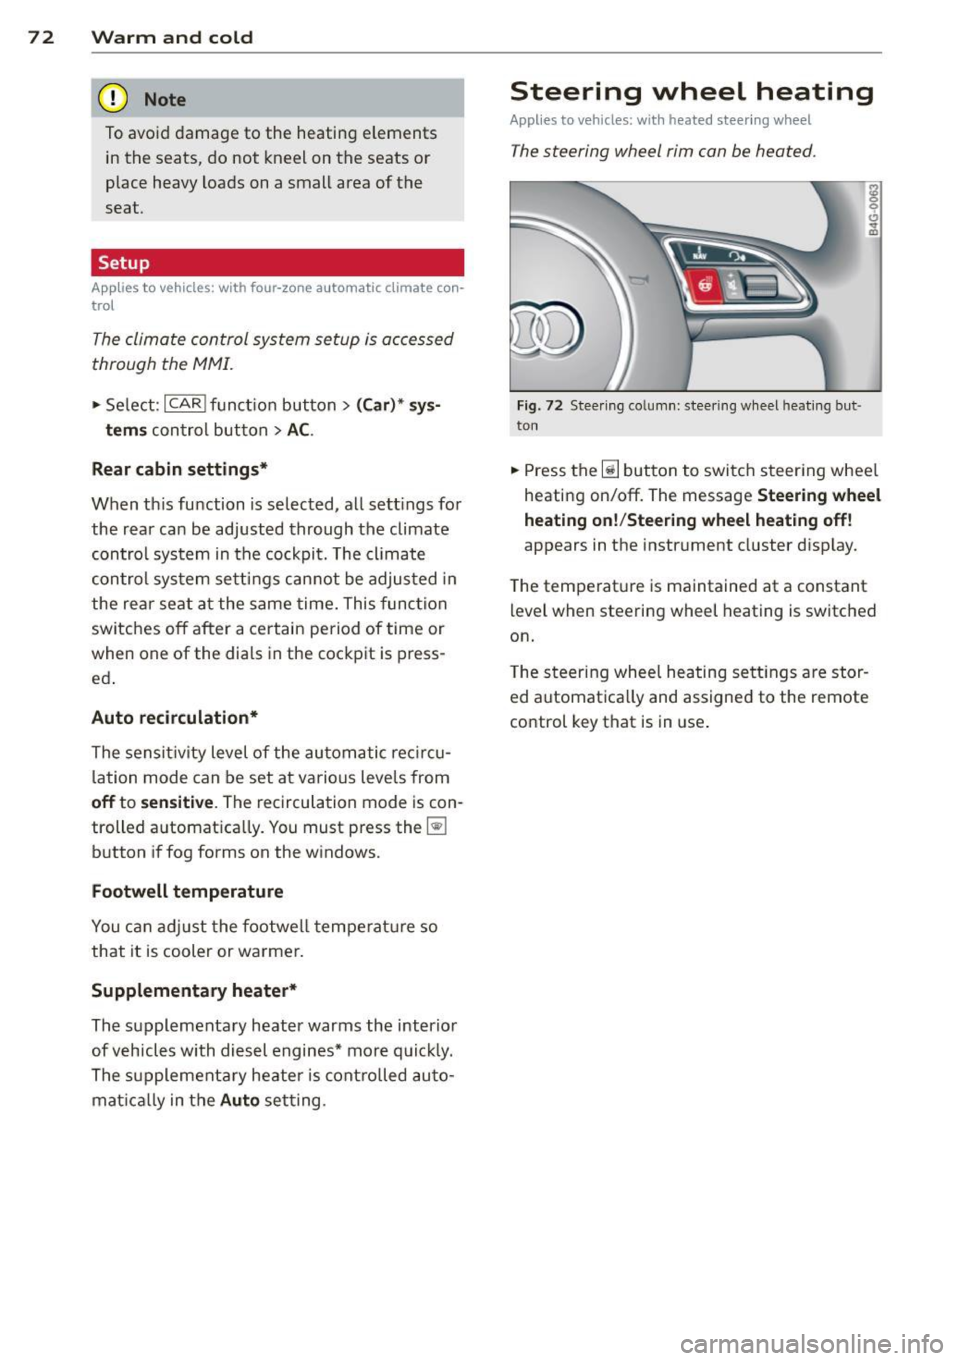
Fig. 72 Stee ring co lu mn : stee rin g w heel hea tin g but ·
ton
.,. Press the~ button to switch steering whee l
heating on/off. The message
Steering wheel
heating on !/Steering wheel heating off !
appears in the instrument cluster d isp lay.
T he temperat ure is maintained at a constant
l evel when steering wheel heating is switched
on.
T he steering wheel hea ting se tt ings are stor
ed automat ica lly and assigne d to the remote
control key that is in use .
Page 78 of 304
76 On the road
switched off. It can a lso switch on again
after some time if the coolant tempera
ture rises as the result of a heat buildup
or if the engine is hot and the engine
compartment is addit ionally heated by
the sun's rays.
(D Note
D o not stop the engine immediate ly afte r
hard or extended driving . Keep the engine
running for approximately two minutes to
prevent excessive heat build-up.
Driver message in the instrument
cluster display
Turn off ignition b efo re leaving car
This message appears and a war ning tone
sounds if yo u open the dr ive r's door when the
ignition is switched on.
Pres s brake pedal to start en gine
This message appears if you press the
I STAR T ENGINE ST OP ! button to start the en
g ine and do not depress the brake pedal. The
engine can on ly be started if the brake pedal
i s depressed.
!I ls k ey in the vehicle ?
If the indicator light turns on and the mes
sage appears, the remote control key was re
moved from the vehicle while the engine was
running . If the ignit ion key is not in the vehi
cle you w ill not be ab le to switch on the ig ni
tion o r restart the eng ine after it has been
switched off. Yo u wi ll also not be able to lock
the vehicle from the outside.
Shift to P , otherwise vehicle can roll away .
Doors do not lo ck if le ver i s not in P .
This message appears for safety reasons
along w ith an audib le warn ing tone if the P
selecto r lever posit io n is not engaged when
stopping the eng ine with the
I START ENGINE STOP! button. Select the P se
lector lever posit io n. Otherw ise the veh icle
could roll and it cannot be locked.
mJ Ke y is not re cogni zed . H old back of ke y
a ga in st marked are a. See owner' s manual.
If the indicator ligh t turns on and this mes
sage appears, there is a malf unct ion
r::!;> page 76.
Tu rn off ignition before l ea v ing car. B attery
i s d isc harging
This message appears if the driver's door is
opened wh ile the ignition is switched on. Al
ways switch off the igni tion if you are leaving
the vehi cle. See also
r::¢,page 81.
Shift to P and turn off ignition before l eav
ing car, oth erwi se v ehicl e can roll away
This message appears if the driver's door is
opened wh ile the ignition is switched on and
t h e selecto r lever is not in the P posi tion. Shift
the selecto r lever into the P pos ition and
switch off the ignit ion when you exit the vehi
cl e. Otherw ise the vehicle cou ld roll. See also
r::¢,page 81.
Starting the engine if there is a
malfunction
It may not be possible to start the engine un
der certain circumstances, for example if the
battery in the vehicle key is drained, if inter
ference has affected the key or if there is a
system malfunction.
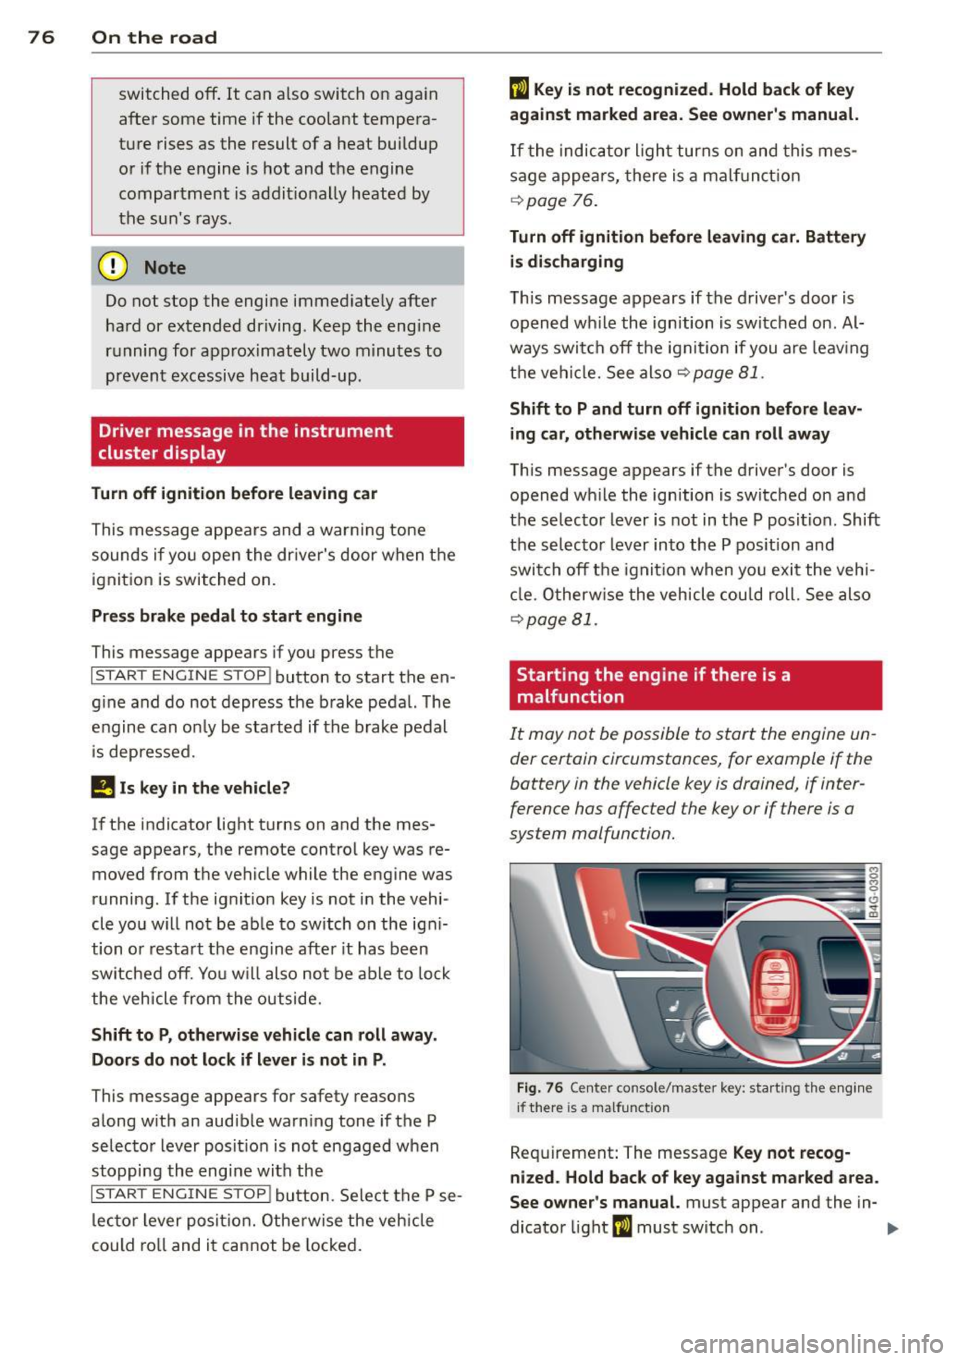
F ig . 76 Center console/master key: starting the eng ine
i f there is a malfunct ion
Requirement: The message Key not recog
nized . Hold back of ke y against marked are a.
See o wne r's manual.
must appear and the in-
dicator light
ml must switch on. .,..