windshield wipers AUDI A6 2014 Owners Manual
[x] Cancel search | Manufacturer: AUDI, Model Year: 2014, Model line: A6, Model: AUDI A6 2014Pages: 304, PDF Size: 76.32 MB
Page 16 of 304
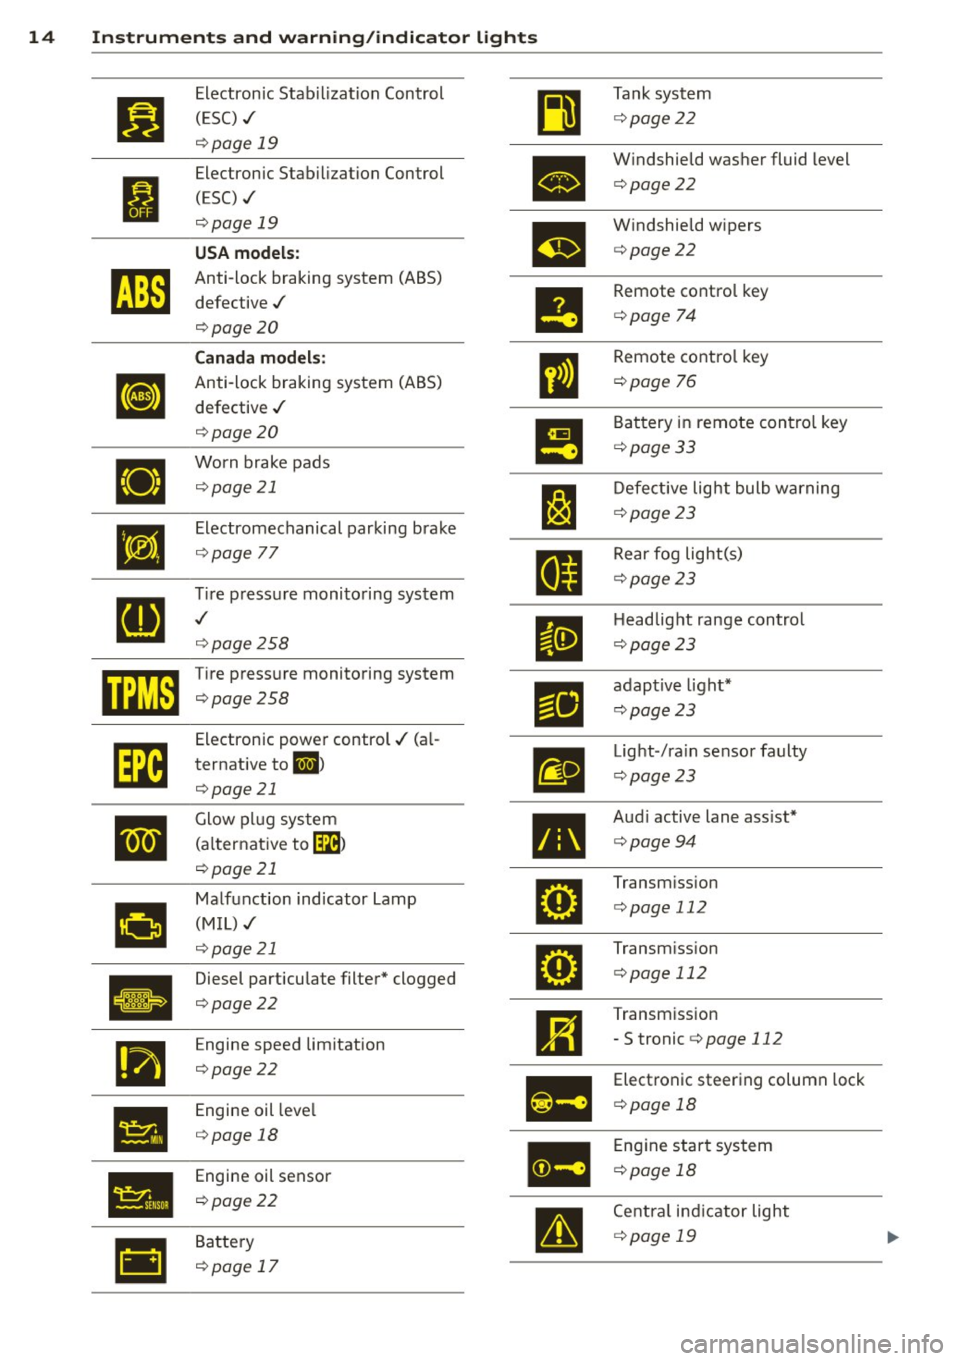
14 Instruments and w . . arn1ng/indicator lights
I
•
• •
•
rl1
Electronic Stab ilization Control
(ESC) ,/
c:> page 19
Electronic Stab ilization Control
(ESC) ./
c:> page 19
USA models:
Anti-lock braking system (ABS)
defective ,/
c:>page 20
Canada models:
Anti-lock braking system (ABS)
defective ,/
c:> page 20
Worn brake pads c:>page 21
Electromechanical parking brake
c:> page 77
~re pressure monitoring system
c:> page258
Tire pressure monitoring system
c:>page 258
Electronic power control./ (al
ternative to
ml >
c:>page 21
Glow plug system
(a lternative to~ )
c:> page 21
Malfunction indicator La
(MIL),/ mp
c:>page 21
Diesel particulate filter* clogged
c:>page 22
Engine speed limitation
c:>page 22
Engine oil leve l
c:> page 18
Engine oil sensor
c:> poge 22
Battery
c:> page 17
•
m
•
•
g
Tank system
c:> page22
W indshield washer fluid level
c:>page22
Windshield wipers
c:> page22
Remote control key
c:> page 74
Remote control key
c:> page 76
Battery in remote contro l key
c:>page 33
Defective light bulb warnin
c:> page 23
g
Rear fog light(s)
c:> page23
Headlight range control
c:> page23
adaptive light*
c:>page 23
Light -/ra in sensor faulty
c:> page23
Audi active lane ass ist*
c:> page94
Transmiss ion
c:> page 112
Transm iss ion
c:> page 112
Transmission
- S tronic c:>page
112
Electronic steering column lock
c:> page 18
Engine start system
c:> poge 18
Centra l ind icator light
c:> poge 19
Page 24 of 304
22 Instruments and warning/indicator lights
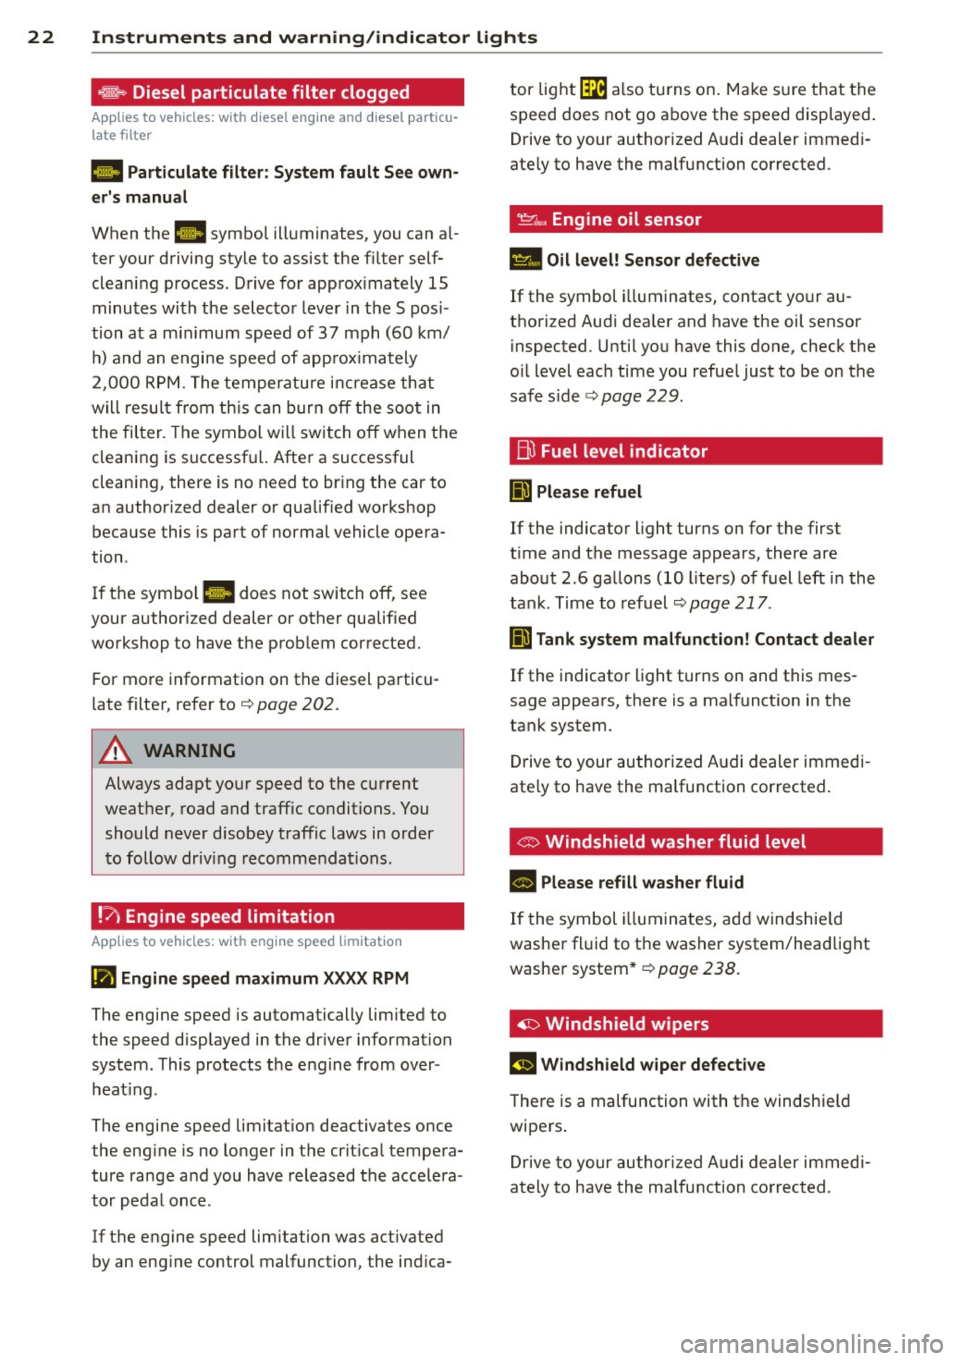
®'-Diesel particulate filter clogged
Applies to vehicles: with diesel engine and diesel particu
late filter
II Particulate filter: System fault See own
er's manua l
When the. symbol ill uminates, you can a l
ter your driving style to assist the fi lter self
clean ing p rocess . D rive for approx imately 15
minu tes wi th the sel ector leve r in the S pos i
tion at a m inimum speed of 37 mph (60 km/
h ) a nd an engine speed of app rox imately
2, 000 R PM. The tempe ratu re i ncrease th at
will resu lt fro m t his can bur n off t he soo t in
the fil ter. The symbol wi ll switch off when the
clean ing is successf ul. Afte r a successful
cleaning, there is no need to br ing the car to
an author ized dealer or qualif ied worksh op
beca use this is part of normal vehicle opera
ti on .
I f the symbo l
Ill does not switch off, see
your author ized dealer or other qualified
workshop to have the prob lem cor rected.
For more in format io n on the diesel pa rticu
l ate filte r, refer to
¢ page 202.
A WARNING
Always adapt yo ur s peed to the cu rrent
weat her, road and traffic conditions. Y ou
sh ould never disobey t raffic laws in order
t o follow driv ing recomm endations .
!'7i Engine speed limitation
Applies to vehicles: with engine speed limitat ion
Ill Engine speed maximum XXXX RPM
-
The engine speed is automatically lim ited to
the speed disp layed in the dr ive r information
system. This protects t he e ng ine from over
h eat ing.
The engine speed limitation deactivates once
the eng ine is no longer in the crit ica l tempera
ture range and you have released the acce lera
tor peda l once.
If t he engine speed limitation was act ivated
by an eng ine control malfunction, the ind ica- tor
light ~ also tu rns on . Ma ke s ure that the
s p eed does not go a bove the s peed disp layed .
Drive to y our authorized A udi dealer immedi
ate ly to have the ma lfunction corrected.
~"" Engine oil sensor
l!I Oil level! Sensor defective
If the symbol illuminates, contact yo ur au
t h orized Audi dea ler and have the oil sensor
i nspected . U ntil yo u have this done, check t he
o il level each time you refue l just to be on the
saf e side
c> page 229.
EltJ Fuel level indicator
Ii] Please refuel
If the indicato r light turns on f or the first
t ime and the message appea rs, there are
abo ut 2.6 ga llons (10 lite rs) o f fuel left in the
tan k. Time to refu el
<=> page 217 .
llD Tank system malfunction! Contact dealer
If the indicator light turns on and this mes
sage a ppears, there is a malf unct ion in the
tank system.
D rive to your au thori zed A udi dealer immedi
ate ly to have the ma lfu nction corrected.
Co Windshield washer fluid level
• Please refill washer fluid
If the symbol illum ina tes, ad d windshie ld
washe r fl ui d to t he washer system/headlight
washe r system *
¢ page 238 .
4J:> Windshield wipers
£~$ Windshield wiper defective
T he re is a malfunction with t he windshie ld
wipe rs .
Dr ive to your au th o riz ed A udi de aler i mme di
ately to have the m alfunction correc ted.
Page 50 of 304
48 Clear vis ion
Wiper and washer
system
Switching the windshield wipers on
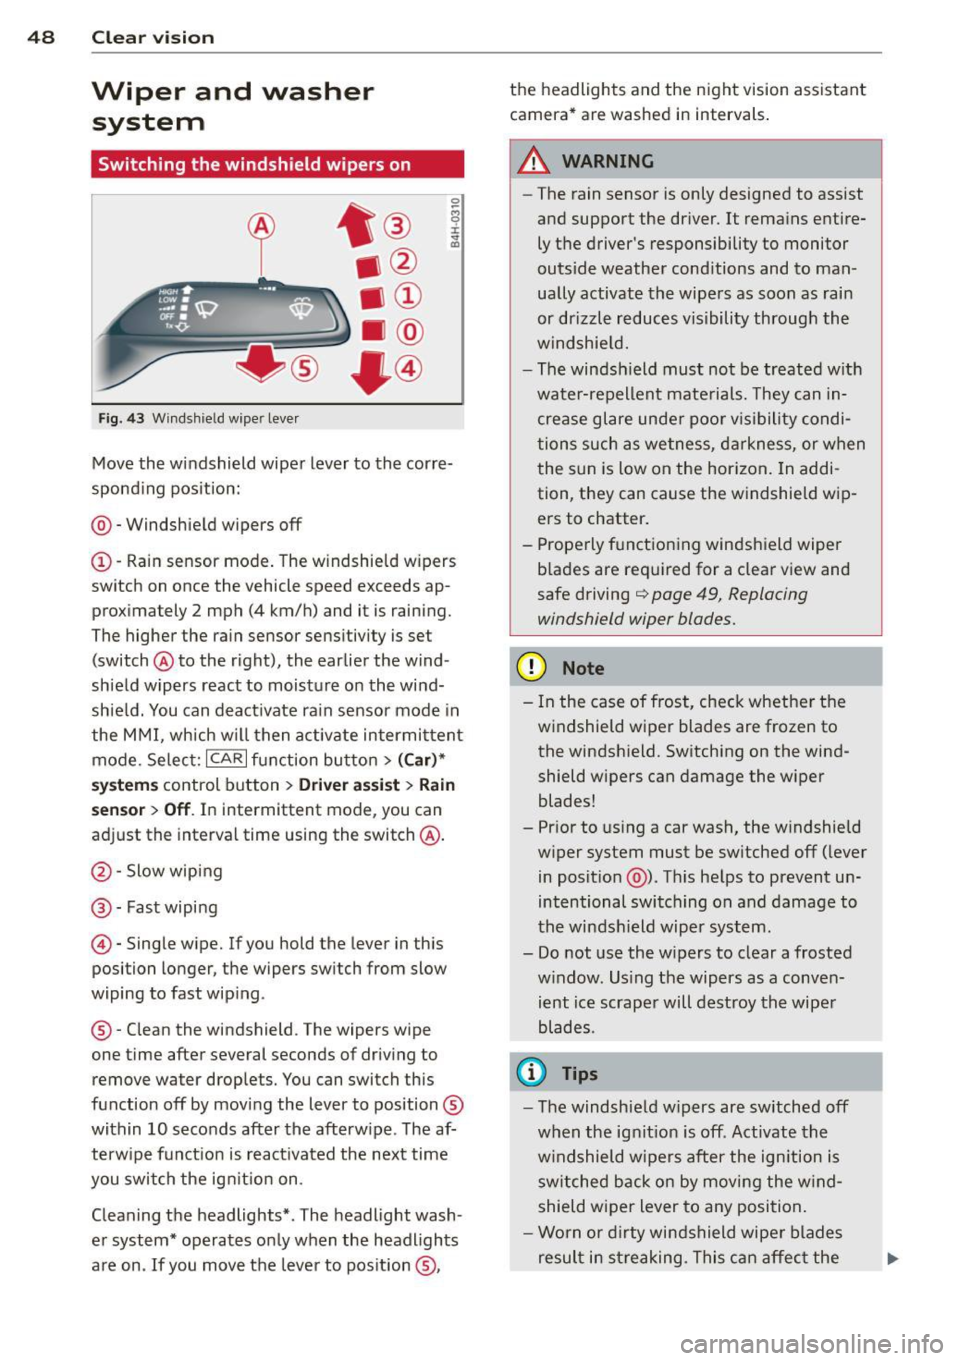
F ig. 43 Wind sh ie ld wipe r lever
Move the windshield wiper lever to the corre
sponding pos ition:
@ - Windshie ld wipers off
(I) -Rain sensor mode . The windshield w ipers
switch on once the vehicle speed exceeds ap
proximately 2 mph (4 km/h) and it is raining.
The higher the rain sensor sens itivity is se t
(switch @to the right), the earlier the wind
shield wipers react to moisture on the wind
shie ld. You can deact ivate rain sensor mode in
the MMI, which w ill then activate intermi ttent
mode. Selec t:
ICAR I function bu tton > ( Car )*
system s control button > Driver ass is t > Rain
se nsor
> Off . In intermittent mode, you can
adjust the interval time using the switch @.
@-Slow wiping
@-Fast wiping
© -Single wipe. If you hold the lever in this
posi tion longer, the wipers sw itch from slow
wiping to fast wip ing .
® - Clean the windshield . The wipers wipe
one time after several seconds of driv ing to
remove water drop le ts. You can switch this
function off by mov ing the lever to position ®
within 10 seconds after the afterw ipe . The af
terw ipe fun ct ion is react ivated the next time
you swit ch the ig nition on .
Cleaning the headlights* . The headlight wash
e r system* operates only when the headlights
are on . If you move the lever to pos ition ®, the headlights and the night vision assistant
camera* are washed in intervals .
.&_ WARNING
-
-The rain sensor is only designed to assist
and support the driver.
It remains entire
ly t he driver's responsibility to monitor
outside weather cond itions and to man
ually activate the wipe rs as soon as rain
or drizzle reduces v isibility through the
windshie ld.
- The windsh ield must no t be treated w ith
wate r-repellent mate rials. They can in
crease glare unde r poo r vis ibility condi
tions such as wetness, d arkness, or when
the sun is low on the hor izon. In addi
tion, they can cause the w indshield w ip
ers to chatter .
- Prope rly f unctioning windshield wiper
b lades are required for a clear view and
safe driving
q page 49, Replacing
windshield wiper blades.
(D Note
- In the case of frost, check whethe r th e
windshield wiper blades are frozen to
the windsh ield. Switching on the wind
shield wipers can damage the wiper
blades!
- Pr ior to us ing a car wash, the w indshield
w iper system must be sw itched off ( lever
in posit ion @). Th is he lps to prevent un
intentional switching on and damage to
the winds hield wiper system.
- Do not use the w ipers to clear a frosted
w indow . Us ing the wipers as a conven
ient ice scrape r will destroy the wipe r
blades .
(D Tips
-The windshie ld w ipers are switched off
w hen the ignit ion is off . Activate the
w indshield wipers after the ign ition is
switched back on by moving the w ind
shield wiper lever to any position.
- Worn or dirty windshield wipe r blades
result in streaking. This can affect the
Page 51 of 304

rain sensor function. Check your
windshield wiper b lades regularly.
- The washer fluid nozzles of the wind
sh ield washer system are heated at low
temperatures when the ignit ion is on .
- When stopping temporarily, e .g . at a
traffic light , the set speed of the wind
shield wipers is automatically red uced by
one speed.
Cleaning windshield wiper blades
Clean the wind shield wiper bl ades when they
begin to leafe streaks .
~ Place the windshield wiper arms in the serv
ice position . Re fer to
q page 49 .
~ Use a soft clo th and gl ass cleaner to clean
the windsh ield w iper blades .
A WARNING
Dirty windshie ld w iper blades can impa ir
your view. This can lead to a cc idents.
Replacing windshield wiper blades
F ig. 44 Removing wi nds hield w ipe r blades
-
-
-
~
I
Wiper se rvice po sition /blade replac ement
po sit ion
~ Switch the ign ition off and move the w ind
shield wiper lever to posit ion ©
q page 48,
fig. 43 . The windshield wipers move into the
serv ice position .
~ To bring the wipe rs back into the orig inal
pos ition, switch the ignition on and press
the windshie ld wiper lever .
You ca n also turn the service pos it ion on o r off
in the
MM I:
Clear v is ion 49
~ Switch the windshie ld wipers off (position
@ ¢page 48, fig. 43) .
~ Select: !CAR ! function button > (Car)* s ys
tems
cont rol button > Se rvicing & checks >
Wiper ser vice position > On .
Remo ving the wiper blade
~ Lift the windshield wiper arm up from the
windshie ld.
~ Press the locking knob@ q fig. 44 on the
wiper blade. Hold the wiper blade firmly.
~ Remove the wiper bl ade in the direction of
the arrow .
Attaching the w iper blade
~ Insta ll the new wiper blade in the retainer
on the wiper arm @unti l you hear it click in
to place on the w iper a rm .
~ Place the wiper arm back on the windshield.
~ Turn the service position off .
A WARNING
-
For your safety, you should rep lace the
wiper b lades once o r twice a yea r. See your
a uthorized Audi de aler fo r repla cement
b lades .
(D Note
- The windshie ld w iper blades must on ly
be folded away when i n the service posi
t ion! Otherwise, yo u ris k damaging the
paint on the hood o r the windshie ld wip
er motor.
- Yo u should not move your vehicle or
press the windsh ield wiper lever when
the wiper arms are folded away from the
windshield. The windshield wipers wou ld
move back into their original position
and could damage the hood and wind
shield.
- To help prevent damage to the w iper sys
tem, always loosen blades wh ich are fro
zen to the windshield before operating
w ipers .
- To help prevent damage to wiper blades,
do not use gasoline, kerosene, paint
thinne r, or other solvents on o r near the
w iper blades.
Page 52 of 304
50 Clear vis ion
- To he lp prevent damage to the wiper
arms or other components, do not at
tempt to move the wipers by hand .
@ Tips
-Commercial hot waxes applied by auto
matic car washes affect the cleanability
of the windshield .
- You can a lso use the service position, for
example, if you want to protect the
windshield from icing by using a cover .
- You cannot activate the service position
when the hood is open.
Mirrors
Adjusting the exterior mirrors
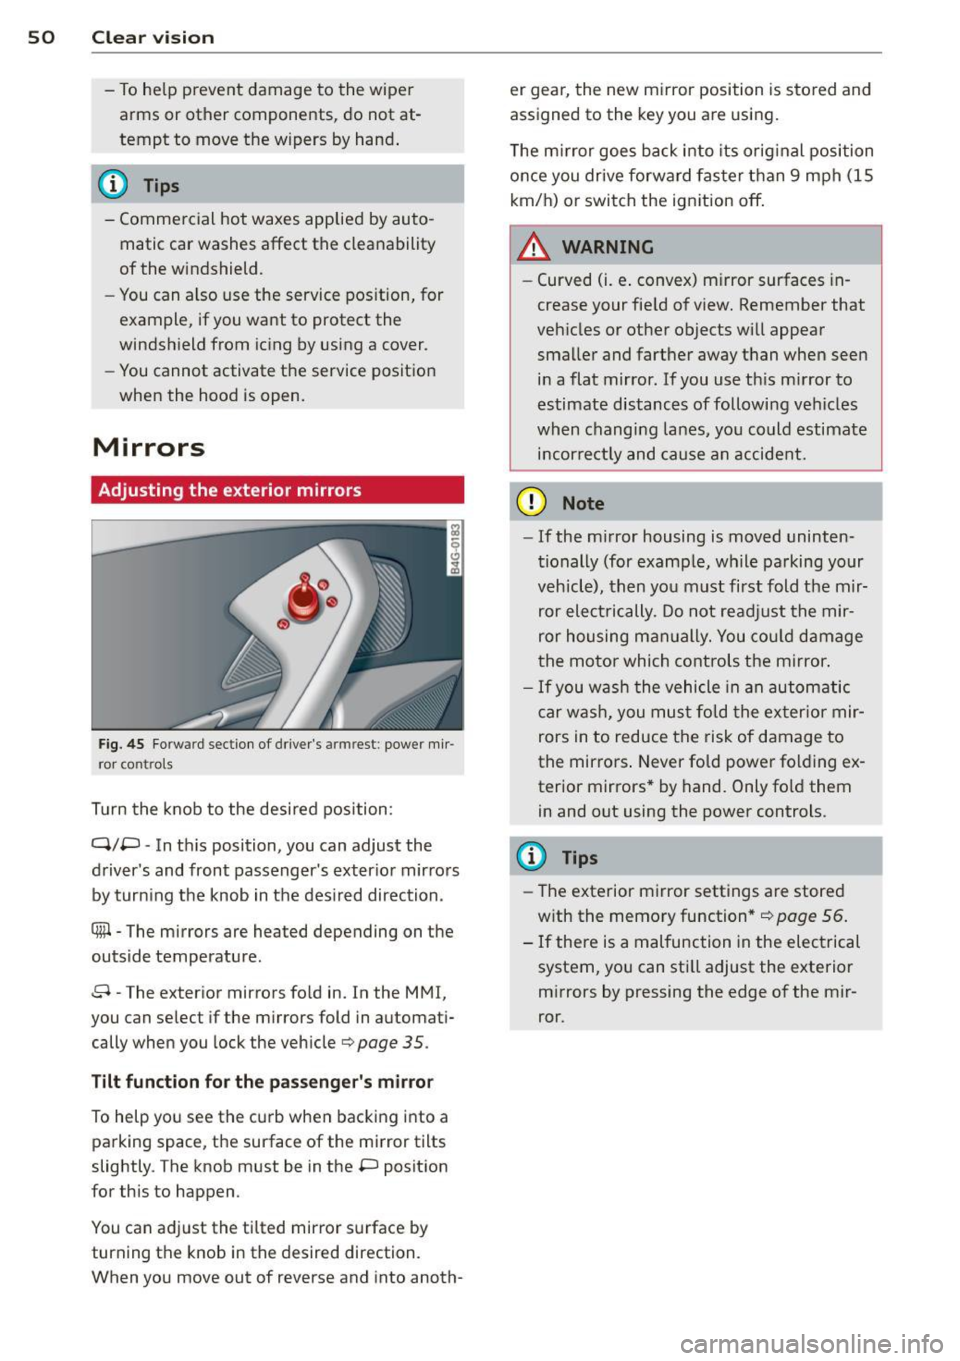
Fig. 45 Fo rwa rd section of driver's a rmrest: powe r mir
ror controls
Turn the knob to the desired position :
Q/P -In t his position, you can adjust the
driver's and front passenger's exter ior mirrors
by turning the knob in the des ired direction.
Ciiil-The mirrors are heated depending on the
outside temperature.
8 -The exterior mirrors fo ld in. In the MMI,
you can select if the mirrors fold in automati cally when you lock the vehicle
c> page 35 .
Tilt function for the passenger's mirror
To help you see the curb when backing into a
parking space, the surface of the mirror tilts
slightly . The knob must be in the P position
for this to happen .
You can adjust the tilted mirror surface by turning the knob in the desired direction .
When you move out of reverse and into anoth- er gear,
the new mirror position is sto red and
assigned to the key you are using.
T he m irror goes back into its orig inal position
once you drive forward fas ter than 9 mph (15
km/h) or switch the ignition off.
A WARNING
-Curved (i.e . convex) m irror surfaces in
crease your fie ld of view. Remember that
vehicles or other objects will appear smaller and farther away t han when seen
in a flat mirror . If you use th is m irror to
estimate distances of following vehicles
when changing lanes, you could estimate
incor rectly and cause an accident.
(D Note
-
-If the m irror housing is moved uninten
tionally (for examp le, while parking your
vehicle), then you must first fold the mir ror electrically. Do not readjust the mir
ror housing manually. You could damage
the motor which controls the mirror.
-If you wash the vehicle in an automatic
car was h, you must fold the exter ior mir
rors in to reduce the risk of damage to
the mir rors . Never fold power folding ex
terior mirrors * by hand. Only fo ld them
in and out using the power controls.
@ Tips
- The exterior mirror settings are stored
w ith the memory function* ¢page
56.
-If there is a malfunction in the electrical
system, you can sti ll adjust the exterior
mirrors by pressing the edge of the mir
ror.
Page 295 of 304
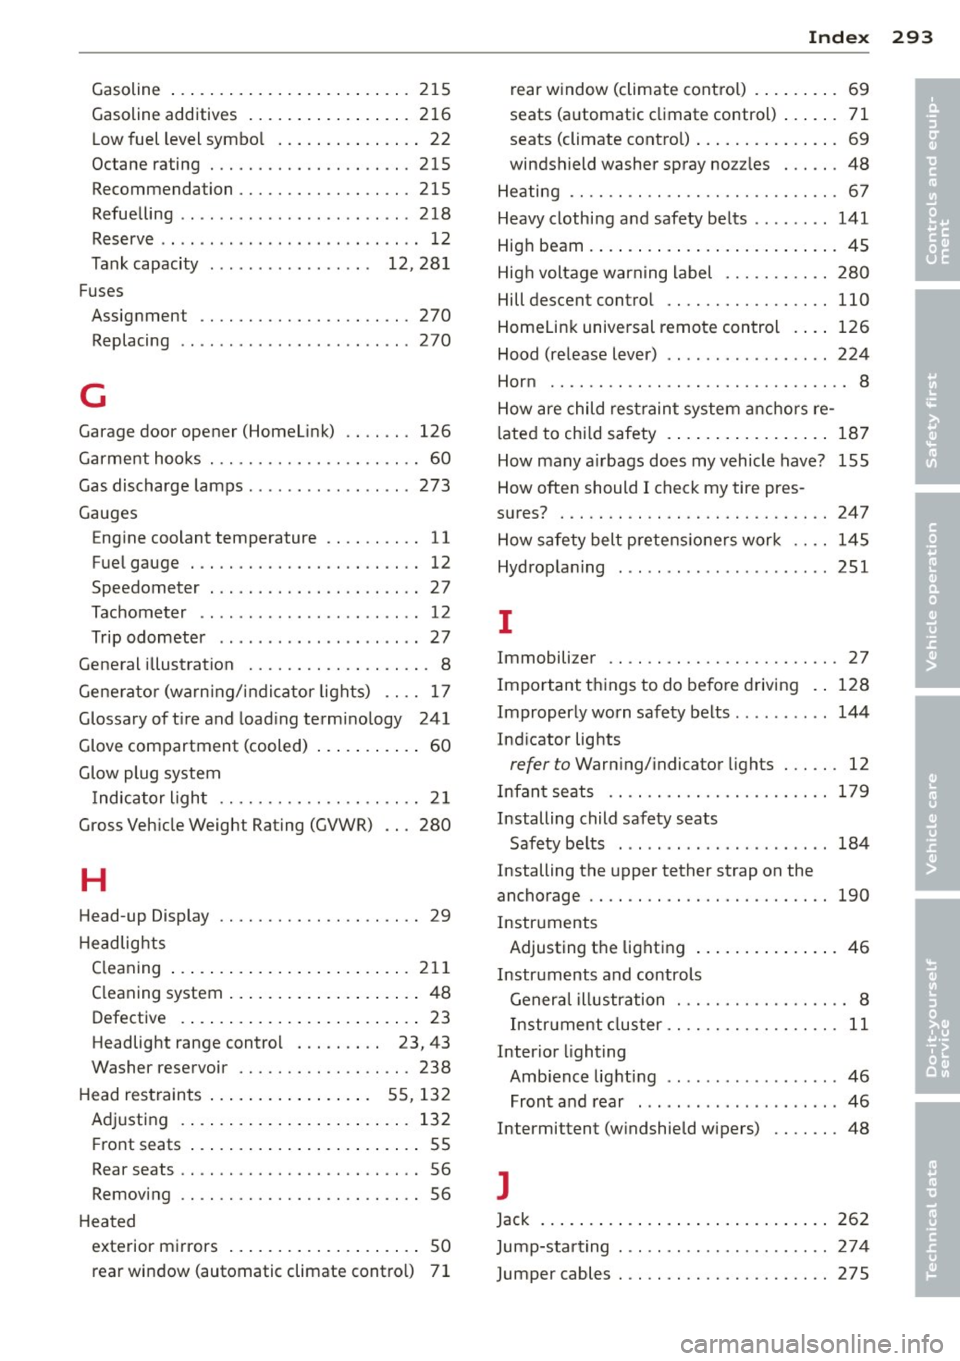
Gasoline ... .. .... .... ... .. .. .. ... 215
Gasoline additives ..... ... .. .. .. .. . 2 16
L ow fuel level symbo l .. ... .. .. .. .. .. 22
Octane rating ............ .... .. ... 215
Recommendation ......... .. .. .. .. . 215
Refue lling .. ................ ... ... 218
Reserve . ... ... .. .. ...... .. .. .. .. .. 12
Tank capacity . . . . . . . . . . . . . . . . . 12, 28 1
Fuses Assig nment ............. .... .. ... 270
Replacing ............ ...... .... .. 270
G
Garage door opener (Homel ink) .. .. .. . 126
Garment hoo ks . . . . . . . . . . . . . . . . . . . . . . 60
Gas discharge lamps ........... .... .. 273
Gauges Engine coolant temperature .. .. .. .. .. 11
F uel gauge . .. .. ......... .. .. .. .... 12
Speedometer ... .... ... .. .. .. .. .. .. 27
Tac hometer .. ........ ...... ... ... . 12
Trip odometer ........ .... ... ... ... 27
Gene ral illustration . . . . . . . . . . . . . . . . . . . 8
G ene ra to r (wa rn ing/ indic ator lights) .. .. 17
Glossary of t ire and load ing termi no logy 241
Glove com partment (cooled) . . . . . . . . . . . 60
G low plug system
Indicator ligh t . . . . . . . . . . . . . . . . . . . . . 21
Gross Veh icle Weight Rating (GVWR) .. . 280
H
Head -up Display . . . . . . . . . . . . . . . . . . . . . 29
H eadlights
C leaning ... .. ... ..... ... .. .. .. ... 211
C leaning system ... .... ... .. .. .. .. .. 48
Defective . ... .... .... ... .. .. .. .... 23
Headlig ht range contro l . . . . . . . . . 23, 43
Washer reservoir ......... .. .. .. .. . 238
H ead res train ts . . . . . . . . . . . . . . . . . 5 5, 13 2
A dju sting . ... .. ... . .. ... .. .. .. ... 132
Fr ont seats . . . . . . . . . . . . . . . . . . . . . . . . 55
Rear seats .. .. .. ......... .. .. .. .... 56
Removing .. ............. .... .. .. .. 56
H ea ted
exte rior m irrors ... .... ... .. .. .. .. .. 50
rear window (automatic climate cont ro l) 7 1
Index 293
rear w indow (climate cont rol) . ... .. .. . 69
seats (a utomatic climate control) ... .. . 71
seats (climate cont ro l) . . . . . . . . . . . . . . . 69
windshield washer spray no zzles ... .. .
48
He ating .... .. .. .. ................. . 67
Heavy clothi ng a nd safety be lts ... .... .
141
High beam . ... .. .... . ... ...... ... .. . 45
Hig h voltage warn ing label ....... .. .. 280
Hill descent contro l .... ............. 110
Homelin k unive rsal remote con trol . ... 126
Hood (re lease lever) .. .............. . 224
Hor n .......... .. .... ............. .. 8
How are child rest raint syste m anchors re-
lated to ch ild safety . .. .. .. ..... ... .. 18 7
How many a irbags does my vehicle have? 155
How ofte n should I check my tire pres -
s u res? ..... .. .. .. .. .. ........... .. 247
H ow safety belt pretens io ne rs wor k . . . . 1 45
Hydrop la ning ..... .. ..... .......... 251
I
Immobilize r . . . . . . . . . . . . . . . . . . . . . . . . 27
Impo rtant t hings to do be fore driving . . 128
Improperly worn safe ty belts .. ... ... .. 144
Ind icator lights
refer to Warn ing/ indicator lights . .. .. . 12
Infan t seats . . . . . . . . . . . . . . . . . . . . . . . 17 9
Installing child safety seats Safety be lts . . . . . . . . . . . . . . . . . . . . . . 184
Installing the upper tether strap on the
anchorage .... .. ...... ............. 190
Instruments Adjusting the light ing .. ..... ... .. .. . 46
Instrum ents and controls
Genera l illustration . . . . . . . . . . . . . . . . . . 8
Instr ument cluster . . . . . . . . . . . . . . . . . .
11
Interior lighting
Amb ience lighti ng .. .. .. ...... .... .. 46
Front and rear .... ................. 46
Intermittent (w indshie ld wipers) ...... . 48
J
Jack 262
Jump-starting . .. ................... 274
Jumper cables . .. ................... 275
•
•
Page 298 of 304
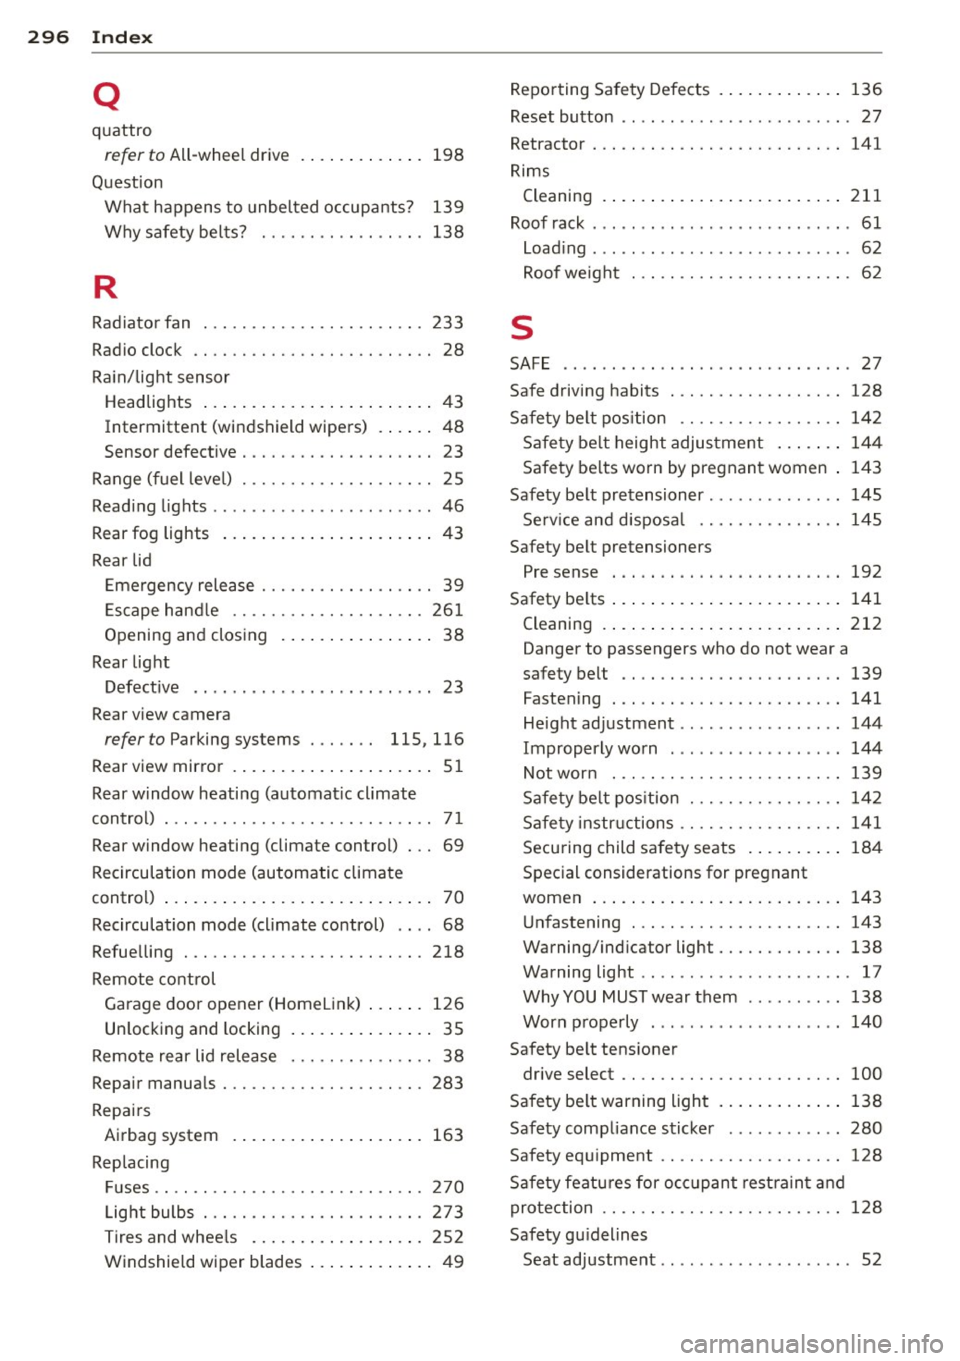
29 6 Index
Q
quattro
refer to All-wheel drive
198
Question What happens to unbe lted occupants? 139
Why safety be lts? . ....... .. .. .. .. . 138
R
Radiato r fan ... ........ ..... .. .. .. . 233
Radio clock .... ........ ..... .. .. .. .. 28
Ra in/light sensor
Headlights ........... ... .. .. .... .. 43
Intermittent (windshield wipers) .. .. . . 48
Senso r defective . . . . . . . . . . . . . . . . . . . . 23
Range (fuel leve l) .......... ...... .. .. 25
Reading lights ... ... .... ... ... ... .. .. 46
Rear fog lights .. .. ..... ... .. .. .... .. 43
Rear lid Emergency release . . . . . . . . . . . . . . . . . . 39
E scape hand le .................... 261
Opening and closing . ... .. .. .. .... .. 38
Rear light Defective . . . . . . . . . . . . . . . . . . . . . . . . . 23
Rear view camera
refer to Parking systems . . . . . . . 115, 116
Rear view mir ror ... ..... ... .. .. .... .. 51
Rear w indow heating (automat ic cl imate
contro l) . . . . . . . . . . . . . . . . . . . . . . . . . . . . 7 1
Rea r window heating (climate control) . . . 69
Recirculation mode (automatic climate
control) . . . . . . . . . . . . . . . . . . . . . . . . . . . . 70
Recirculation mode (climate control) . . . . 68
Refue lling . ...... ........... .. .. .. . 218
Remote control Garage door opener (HomeL ink) ... .. . 126
Unlocking and locking ... .. .. .. .... .. 35
Remote rear lid release ..... .. .. .. .. . . 38
Repair manuals ............ .. .. .. .. . 283
Repai rs
Airbag system . ....... ... .. .. .... . 163
Replacing Fu ses .. .. ............... .... .... . 270
L ight bulbs ... ........... .. .. .. .. . 273
Tires and whee ls .... ... .. .. .. .... . 252
Windshield wiper blades ... .. .. .... .. 49 Reporting Sa
fety Defects . ..... .... . .. 136
Reset button . . . . . . . . . . . . . . . . . . . . . . . . 2 7
Retractor . .. .. .. .. ... .......... .... 141
Rims Cleaning .. .... .. .. ... ..... ... .. .. 211
Roof rack ....... .................. .. 61
Load ing .... ... .................. .. 62
Roof weight ... .. ............. .... . 62
s
SAFE ......... .... ............... .. 27
Safe driving habits .............. .... 128
Safety be lt pos ition . . . . . . . . . . . . . . . . . 142
Sa fe ty be lt height adjus tment ... .. .. 144
Safety be lts worn by pregnant women . 143
Safety be lt pretensioner . . . . . . . . . . . . . . 145
Se rv ice and disposal ........... .. .. 145
Safety belt pretensioners
Pre sense ... .. .. ...... .... ... ... .
Safety be lts ..... .. .. .... .... ... .. . .
Cleaning
Danger to passengers who do not wear a 192
141
212
sa
fety belt .. .. .. ............. .... 139
Fastening ... ... . ... ... .... ... .. .. 141
Height adj ustment ................ . 144
Improperly worn ................. . 144
Not worn . .... .. ............. .... 139
Safety be lt pos ition . . . . . . . . . . . . . . . . 142
Safe ty instr uctions . . . . . . . . . . . . . . . . . 141
Securing child safety seats .. .. .. .. .. 184
Special considerations for pregnant
women . . . . . . . . . . . . . . . . . . . . . . . . . . 143
U nfastening ... ... ................ 143
Warning/ind icator light ............. 138
w . l" h arnmg 19 t . ... .. ... ....... ... .. . 17
WhyYOUMUSTwearthem .......... 138
Worn p roperly 140
Safety belt tens ioner
drive select .... .. ............. .... 100
Sa fety belt warning light .... ... .. .. .. 138
Safety comp liance sticker ........... . 280
Safety eq uipment ............... .... 128
Safety featu res for occ upant rest ra in t and
protection .. .. .. .. ... .......... .... 128
Safety gu idelines
Seat ad justment . . . . . . . . . . . . . . . . . . . . 52