ECO mode AUDI A6 2016 User Guide
[x] Cancel search | Manufacturer: AUDI, Model Year: 2016, Model line: A6, Model: AUDI A6 2016Pages: 294, PDF Size: 73.88 MB
Page 70 of 294

Warm and cold
Three-zone climate control
Operating
Applies to vehicles: w ith three zo ne cl imate contro l
Fig. 74 T hree-zone climate co ntrol: contro ls
P ress the buttons to tur n the func tions on or off.
The dial adj usts t he temperatu re and the blower.
The LED in a button will light up when the func
tion is sw itche d on.
IAUTO I Switching automatic mode on
Automatic mode ma inta ins a constant tempera
ture inside the vehicle . Air tempe rature, airflow
and a ir distribution are controlled automatically.
Adjusting the temperature
The temperatu re can be adjusted individually fo r
the dr iver and front passenger us ing t he dials
(D
and @.
Adjust ing the blower 8f?
Using the dial@, you can manually adjust the
amount of air generated by the blower to suit
your preferences. To have the blowe r regu lated
automatically, p ress the
IAUTO ! button.
~. ~ .~ Adjusting air distribution
You can manually select the vents where the air
will flow. To have the air distribution regulated
automatically, press the
IAUTO! button.
l""" I Switch ing recirculation m ode on/off
In recirculation mode, the air inside the vehicle is
circulated and filtered. This prevents the unfil-
68
tered air outs ide the ve hicle from entering the
vehicle interior. We recommend sw itching recir
cu lation mode on when driving through a tu nnel
or when sitting in traffic ~.&. .
The
! AUTO I button or I@ FRONT ! button switches
recircu lation mode off .
IOFFI Switching the climat e control system
on /off
The !OFF ! button switches the climate con trol
system on or off.
It a lso switches on when you
press the b lower control. Airflow from outside is
blocked when the climate control system is
switched off.
IA/Cl Switching cooling mode on/off
The air is not coo led and humidity is not removed
whe n coo ling mode is switched off . This can
cause fog on the windows. The cooling mode
switches off automatically when there are cold
outside temperatures.
l«w FRONT I Switching the defr oster on /off
The w indshield and side w indows a re defrosted
or cleared of condensation as quick ly as poss ible .
The maximum amount of air flows mainly from
the vents below the windshield. Recircu lation .,.
Page 71 of 294
mode switches off. The temperature shou ld be
set to approximate ly 72 °F (22 °C).
The
IAU TOI button switches the defroster off.
IQiD REAR I Switching the rea r window defo gger
on /off
The rear window heate r o nl y operates when the
engine is running. It sw itches off automatical ly
afte r a few minutes, depend ing on the outs ide
temperature.
To prevent the rear w indow heater from switch
ing off automatically , press and ho ld the
llliil R EAR I
button fo r more than 2 seconds . T his remains
stored until the ignition is switched off.
~ Ad justing seat h eating *
Pressing the button switches the seat heating on
at the highest setting (level 3) . The L EDs ind icate
the temperature level. To reduce the tempera
ture, press the button aga in. To switch the seat
heating off, p ress the button repeated ly until the
LED turns off.
Afte r 10 minutes, the seat heating automatically
switches from level 3 to level 2.
Air vents
You can open or close the center and rear vents in
the cockpit and the vents in the rear center con
sole using the r idged thumbwhee ls . T he levers
adj ust the d irection of the airflow from the ven ts.
Warm and c old
A WARNING
- You shou ld not use the recircu lation mode
for an extended period since no fres h air is
drawn in. With the a ir-conditioning switch
ed off, the windows can fog up, which in
creases the risk of an accident.
- Individuals w ith reduced sensit ivity to pa in
or temperature could develop b urns when
using the seat heat ing funct ion. To red uce
the risk of i njury, these individu als sho uld
not use seat heating.
(!;) Note
To avoid damage to the heating elements in
the seats, do not knee l on the seats o r place
heavy loads on a small area of the sea t.
Basic settings
Applies to vehicles: with three-zo ne climate control
The climate control system basic settings are ac
cessed in the Infotainment system.
~ Select : the I CAR I functio n button > (Car) * Sy s-
tem s
contro l button > A C.
Auxiliary he ater*
In veh icles with diesel engines, the auxiliary
heater helps to warm the vehicle interior more
quickly . T he auxiliary heater is controlled auto
matically in the
Auto setting .
69
Page 72 of 294
Warm and cold
Four-zone automatic climate control
Operating
Applies to vehicles: with four-zone automatic climate control
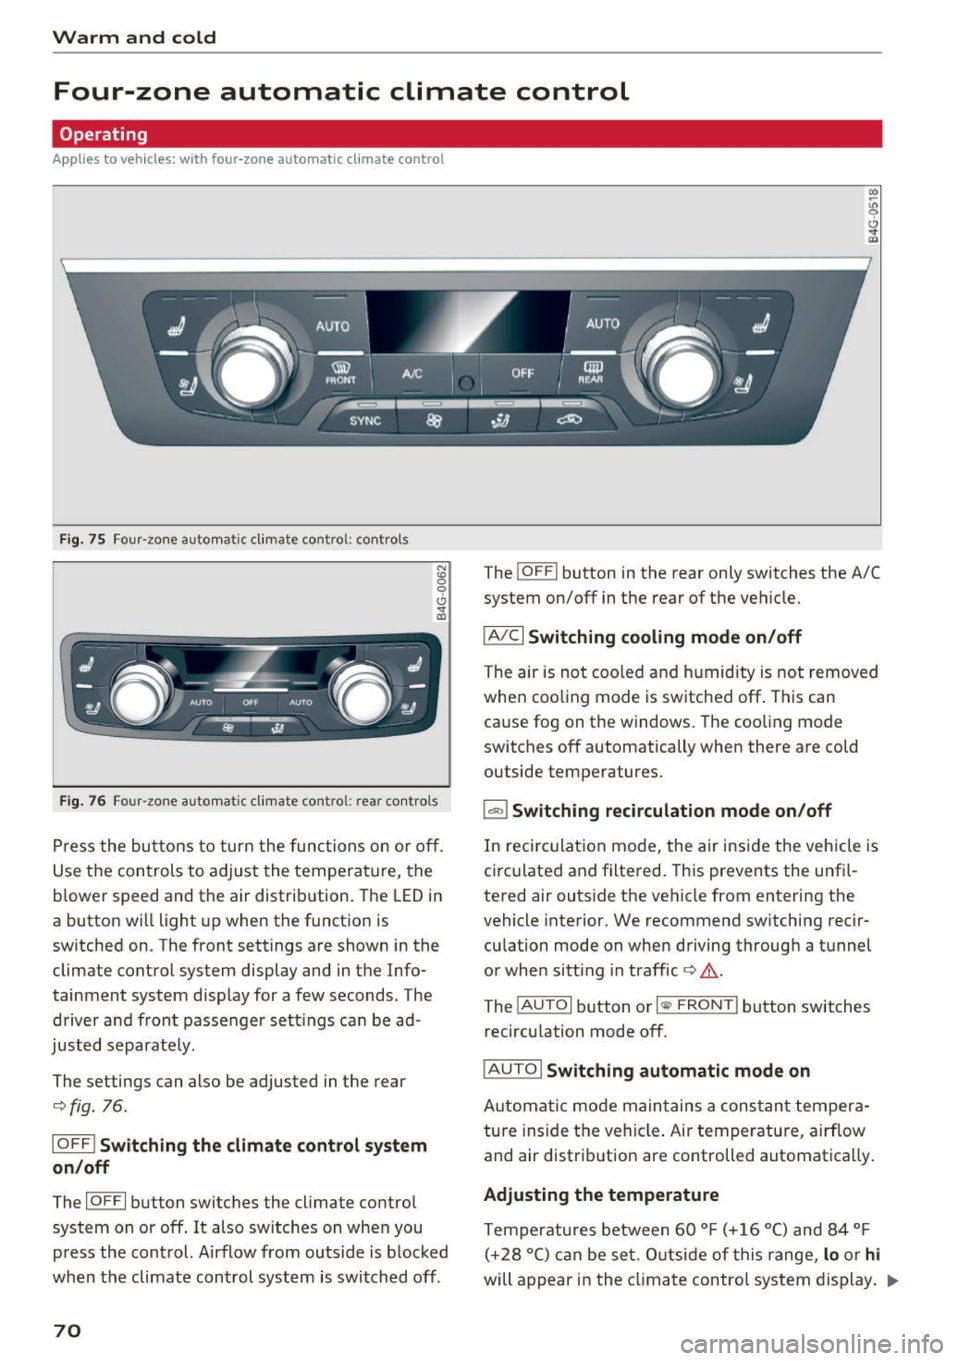
F ig . 75 Four -zone automa tic cl imate contro l: co ntro ls
N :g 0 t'.)
" a,
Fig. 76 F our -zone automa tic cl imate co ntro l: rea r co ntrols
Press the butto ns to turn the functions on or off _
Use the controls to adjust the tempe ra ture, the
b lower speed and the air distribution. The LED in
a button will light up when the function is
sw itched on. The front sett ings are shown in the
climate control system display and in the Info
tainment system display for a few seconds. The
driver and front passenger sett ings can be ad
justed separate ly.
The settings can also be adjusted in the rear
¢ fig. 76 .
IOFF ! Switching the climate control system
on/off
The IO FF I button switches the cl imate control
system on or off. It also switches on when you press the control. A irflow from outside is b locked
when the climate control system is switched off .
70
The !OFF ! button in the rear only switches the A/C
system on/off in the rear of the vehicle.
IAJCI Switching cooling mode on/off
The air is not cooled and humidity is not removed
whe n coo ling mode is switched off . This can
cause fog on the windows. The coo ling mode
switches off automatically when there are cold
outside temperatures.
1 -=I Switching recirculation mode on/off
In reci rculation mode, the air inside the vehicle is
circulated and filtered. This prevents the unfi l
tered air outside the veh icle from entering the
vehicle interior. We recommend sw itching recir
culation mode on when driving through a tunnel
or when sitt ing in traffic ¢,&. .
The
! AU TO I button or I <111> FRONT I button switches
recirculation mode off.
I AUTO I Switching automatic mode on
Automat ic mode main tains a constan t tempera
ture inside the vehicle . Air temperature , a irflow
and air distribution are controlled automatically.
Adjusting the temperature
Temperatures between 60 °F (+ 16 °C) and 84 °F
( +2 8 ° C) can be set. O utside of this range,
lo or hi
will appear in the climat e control system display . .,.
Page 73 of 294
At both of these settings, the climate control sys
tem runs continuously at maximum cooling or heating power. T here is no temperature regula
tion .
Adjusting the blower~
You can adjust the volume of air generated by the
b lower to your preference. To have the blower
r e gulated automatica lly, press the
IAUTO I but
ton .
~ Adjusting air distribution
You can manually select the vents where the air
will flow. To have the air distribution regu lated
automatically , p ress the
IAU TO ! button.
~ Adjusting seat heating*/seat ventilation*
Pressing the button switches the seat heating/
seat ventilat ion on at the highest setting (leve l
3). The LEDs indicate the temperature level. To
r educe the temperature, press the button again .
To switch the seat heating/seat venti lation off,
press the button repeatedly until the LED turns
off.
Afte r 10 minutes, the seat heating automatically
switches from level 3 to level 2.
l
or cleared of condensation as quickly as possible.
The maximum amount of air flows mainly from
the vents below the windshield. Recirculation
mode switches off . The temperature shou ld be
set to approximate ly 22
° C.
The IAU TOI button sw itches the defroster off.
IQ:il REAR I Switching the rear window defogger
on/off
The rear window heate r o nl y operates when the
engine is running. It sw itches off automatically
after a few minutes, depending on the outs ide
temperature.
To prevent the rear w indow heater from switch
ing off automatically, press and hold the
lljjjl REAR I
button for more than 2 seconds. This remains
stored until the ignition is switched off.
Warm and cold
I SYNC ! Synchronization
When synchronization is switched on, the set
tings for the driver's s ide are applied to the front
passenger's side (except for seat heating/ventila
tion *). The s ettings in the rear are also synchron
i z ed. Synchronization switches off if the settings
are adjusted on the front passenger's side or in
the rear.
You can synchronize the settings in a row by
pressing and holding a control. For example, to
apply the settings for the front passenge r's side
to the driver's side, press and hold the control on
the front passenger's s ide . The same applies to
the rear.
Residual heat*
With the ign ition turned off, you can activate the
residual heat function by pressing the~ button
<=> fig. 75. The residual heat from the coolant is
used to heat the veh icle inter ior . The residual
heat function sw itches off automat ica lly after
about 30 minutes.
Air vents
You can open or close the center and rear vents in
the cockpit and the vents in the rear center con
sole and door pillars using the ridged thumb
whee ls. Th e levers adjust the direction of the air
flow from the vents.
_&. WARNING
-You should not use the recirculation mode
for an extended period since no fresh air is
drawn in. With the air-conditioning switch
ed off, the windows can fog up, which in
creases the risk of an accident.
- Individuals with reduced sensitivity to pain
or temperature could develop burns when
using the seat heat ing funct ion. To reduce
the risk of injury, these individuals should
not use seat heating .
(D Note
To avoid damage to the heating elements in
the seats, do not kneel on the seats or place
heavy loads on a small area of the seat.
71
Page 81 of 294
..... N
0 CJ '
the associated components (ABS, ASR, EDL)
cannot overcome the laws of physics. In cor
ners and when road or weather conditions are
bad, a full brake applicat ion can cause the ve
hicle to s kid or the rea r end to break away,
w hic h inc reases the r isk of an a cc iden t.
Start-Stop-System
Description
Applies to vehicles: with Sta rt-Stop-System
T he Sta rt-Stop -System can help increase fuel
economy and reduce CO2 emissions .
I n Start -Stop mode , the eng ine sh uts
off auto
mat ica lly when the veh icle is stopped , such as at
a traffic light. The ignition remains switched on
during this stop phase. The eng ine will restart
automatically when needed.
Vehicles with 6 -cylinder-eng ine: The Start-Stop
System is a utomatically activated each time you
switch on the ignit ion.
Vehicles with 4-cylinder -eng ine, 5-mode l: Th e
l ast Start -Stop-System setting will be restored
when the ignition is switched on .
Basic requirements for Start -Stop mode
- T he driver's door is closed.
- T he driver' seat belt is la tched .
- The hood is closed .
- The veh icle must have been dr iven faster than
2.5 mph (4 km/h) since the last stop .
- A tra iler is not hitched to t he vehicle.
(D Note
Always sw itch the Start-Stop-System off
when dr iv ing th rough water
c:> page 79.
(D Tips
The e ngine sto ps shortly before the vehicle
comes to a stop
1l. The full funct io n of the
brake booster and the power steering is still
ava ilab le.
M ~ ll de pend ing on e ngine
D rivi ng
Stopping/starting the engine
Applies to vehicles: with Start-Stop -System
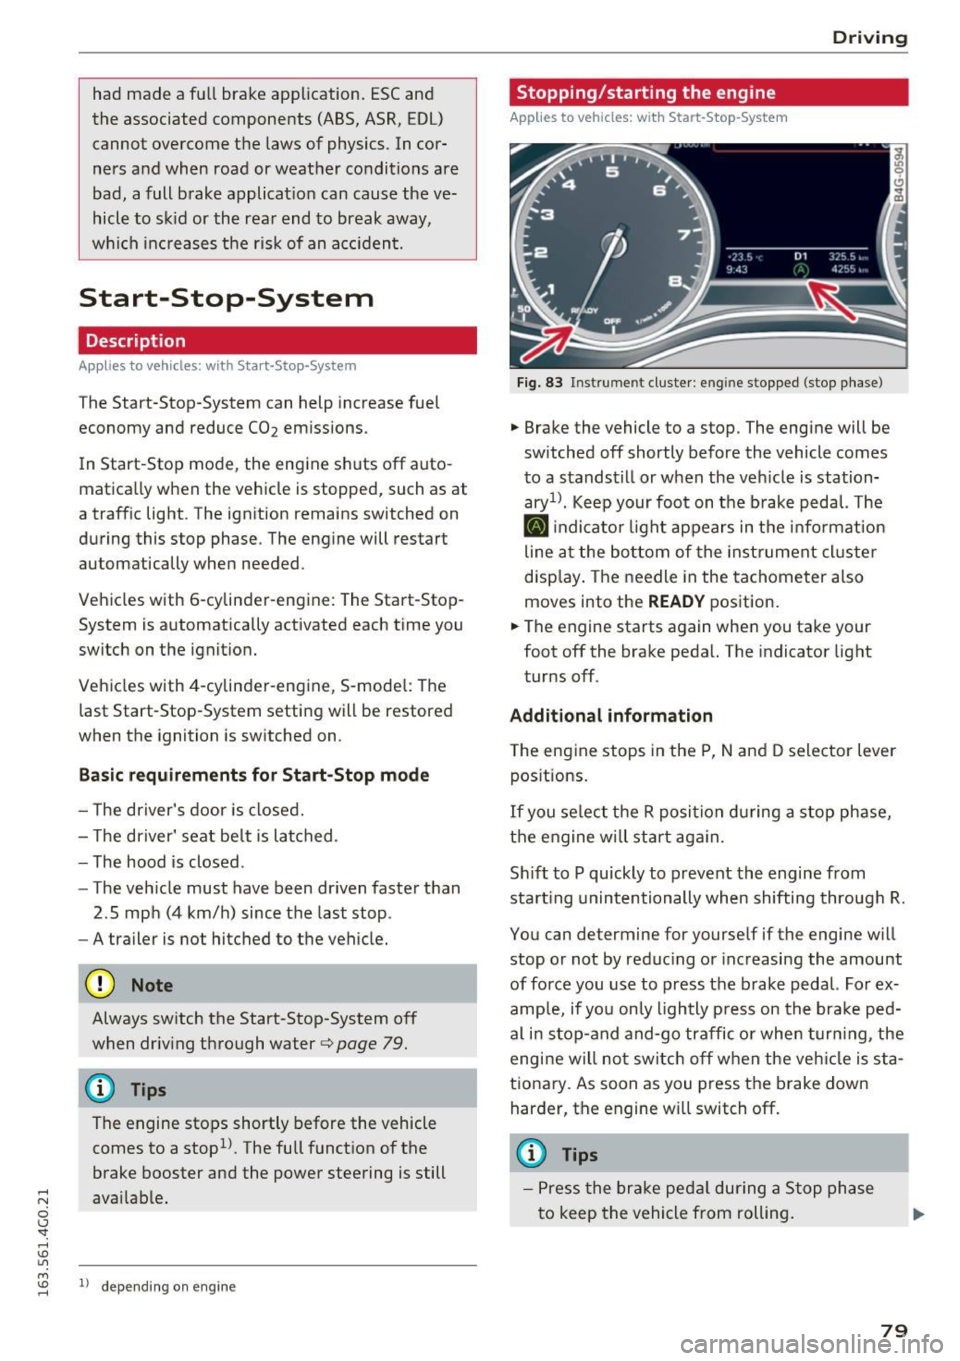
Fi g. 83 Inst rume nt c lu ste r: en gin e stopped (stop p hase )
"' Brake the vehicle to a stop. The engine will be
sw itched
off shortly before the vehicle comes
to a stands till or when the veh icle is station
aryn. Keep your foo t on the b rake pedal. The
II indicato r light appears in the info rmat ion
line a t the bo ttom of the instrument cl uste r
disp lay . T he needle in the tachometer a lso
moves into the
READY pos ition.
"' The engine sta rts again whe n you take your
foot
off the bra ke pedal. The indicator light
turns
off.
Additional information
T he engine stops in the P, N and D selector lever
pos itions.
If you se lect t he R posi tion d uring a stop phase,
t h e e ngine will sta rt aga in.
Sh if t to P quickly to p revent the engine from
sta rt ing unintentionally when shifting through R.
You can determine for yourse lf if the engine w ill
stop or not by reduc ing or increasing the amount
of force you use to press the b rake pedal. For ex
amp le, if yo u only ligh tly p ress on the bra ke pe d
al i n stop- and and -go traffic o r whe n turning, the
engi ne will no t sw itch
off w hen the ve hicle is sta
tiona ry. As soon as you press the brake down
harder, the engine w ill switch
off .
(D Tips
- P ress the brak e pe dal during a Stop ph ase
t o keep the vehicle from rolling.
79
Page 82 of 294
Driving
-The ignition will turn off if you press the
I STAR T ENGINE STOP! button during a stop
phase. The needle in the tachometer moves
into the
OFF position.
General information
Applies to veh icles: with Start-Stop-System
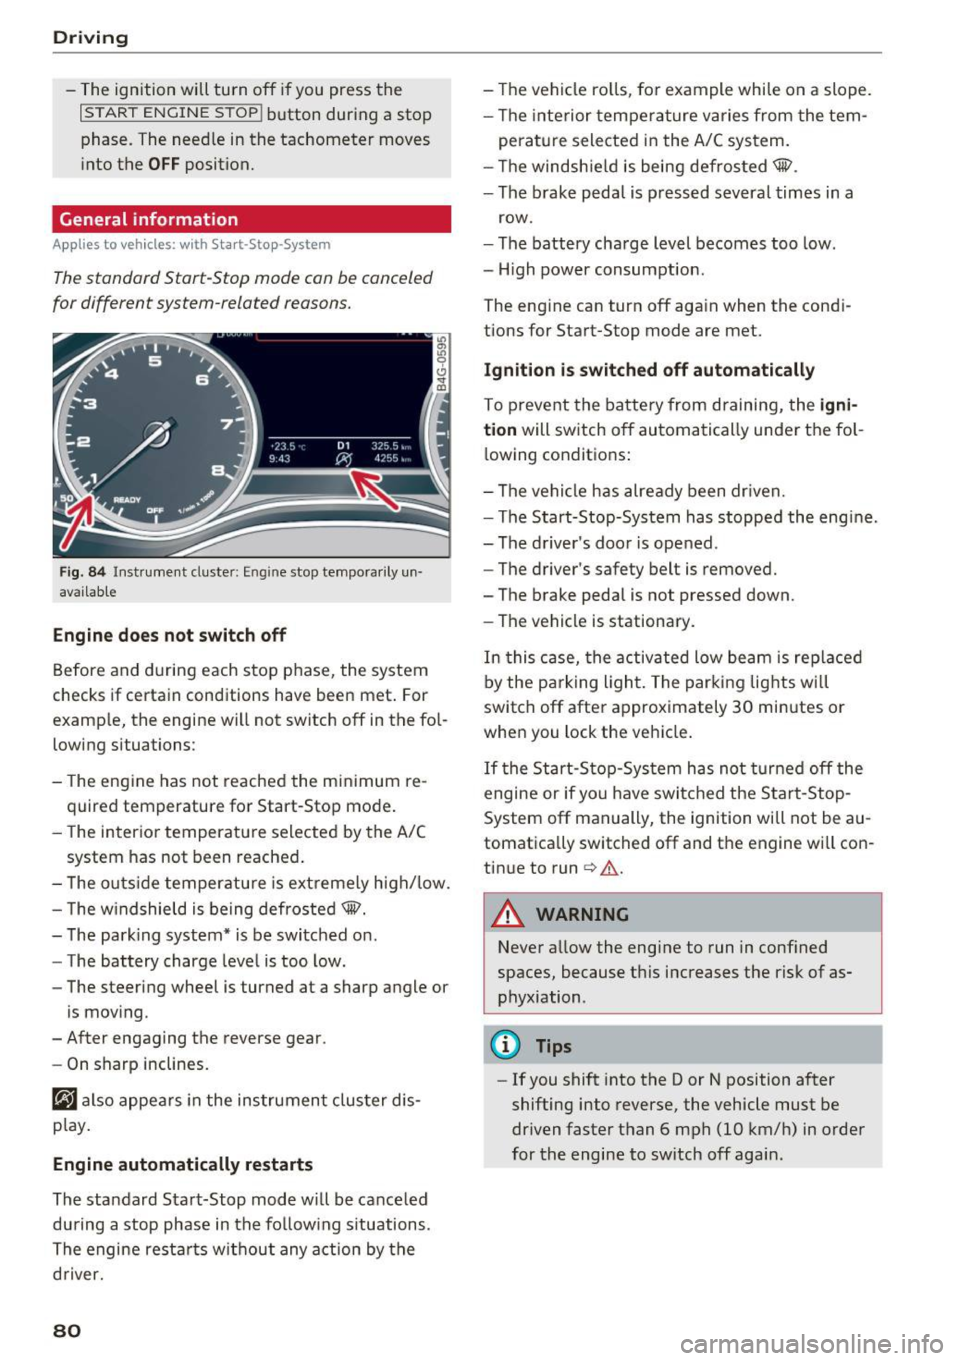
Th e standard Start-Stop mode con be canceled
for different system-related reasons.
Fig. 84 Instrument cluste r: En gin e stop temporarily un·
available
Engine does not switch off
Before and during each stop phase, the system
checks if certain conditions have been met. For
example, the engine will not switch
off in the fol
lowing situations :
- The engine has not reached the minimum re
quired temperature for Start-Stop mode.
- The interior temperature selected by the A/C
system has not been reached.
- The outside temperature is extremely high/low.
- The windshield is being defrosted®.
- The parking system* is be switched on.
- The battery charge level is too low.
- The steering wheel is turned at a sharp angle or
is moving .
- After engaging the reverse gear .
- On sharp inclines.
@j also appears in the instrument cluster dis
play.
Engine automatically restarts
The standard Start-Stop mode will be canceled
during a stop phase in the following situations .
The engine restarts without any action by the
driver.
80
- The vehicle rolls, for example while on a slope.
- The interior temperature varies from the tem-
perature selected in the A/C system.
- The windshield is being defrosted®.
- The brake pedal is pressed several times in a
row.
- The battery charge level becomes too low.
- High power consumption.
The engine can turn
off again when the condi
tions for Start-Stop mode are met.
Ignition is switched off automatically
To prevent the battery from draining, the igni
tion
will switch off automatically under the fol·
lowing conditions:
- The vehicle has already been driven.
- The Start-Stop-System has stopped the engine.
- The driver's door is opened.
- The driver's safety belt is removed.
- The brake pedal is not pressed down .
- The vehicle is stationary.
In this case, the activated low beam is replaced
by the parking light. The parking lights will
switch
off after approximately 30 minutes or
when you lock the vehicle.
If the Start-Stop-System has not turned off the
engine or if you have switched the Start-Stop
System
off manually, the ignition will not be au
tomatically switched
off and the engine will con
tinue to run
cc> .&. .
A WARNING
Never allow the engine to run in confined
spaces, because this increases the risk of as
phyxiation .
(D Tips
-If you shift into the D or N position after
shifting into reverse, the vehicle must be
driven faster than 6 mph (10 km/h) in order
for the engine to switch off again .
Page 83 of 294
..... N
0 CJ '
Switching the Start-Stop-System on/off
manually
Applies to vehicles: with Start-Stop-System
If you do not wish to use the system, you can
switch it off manually .
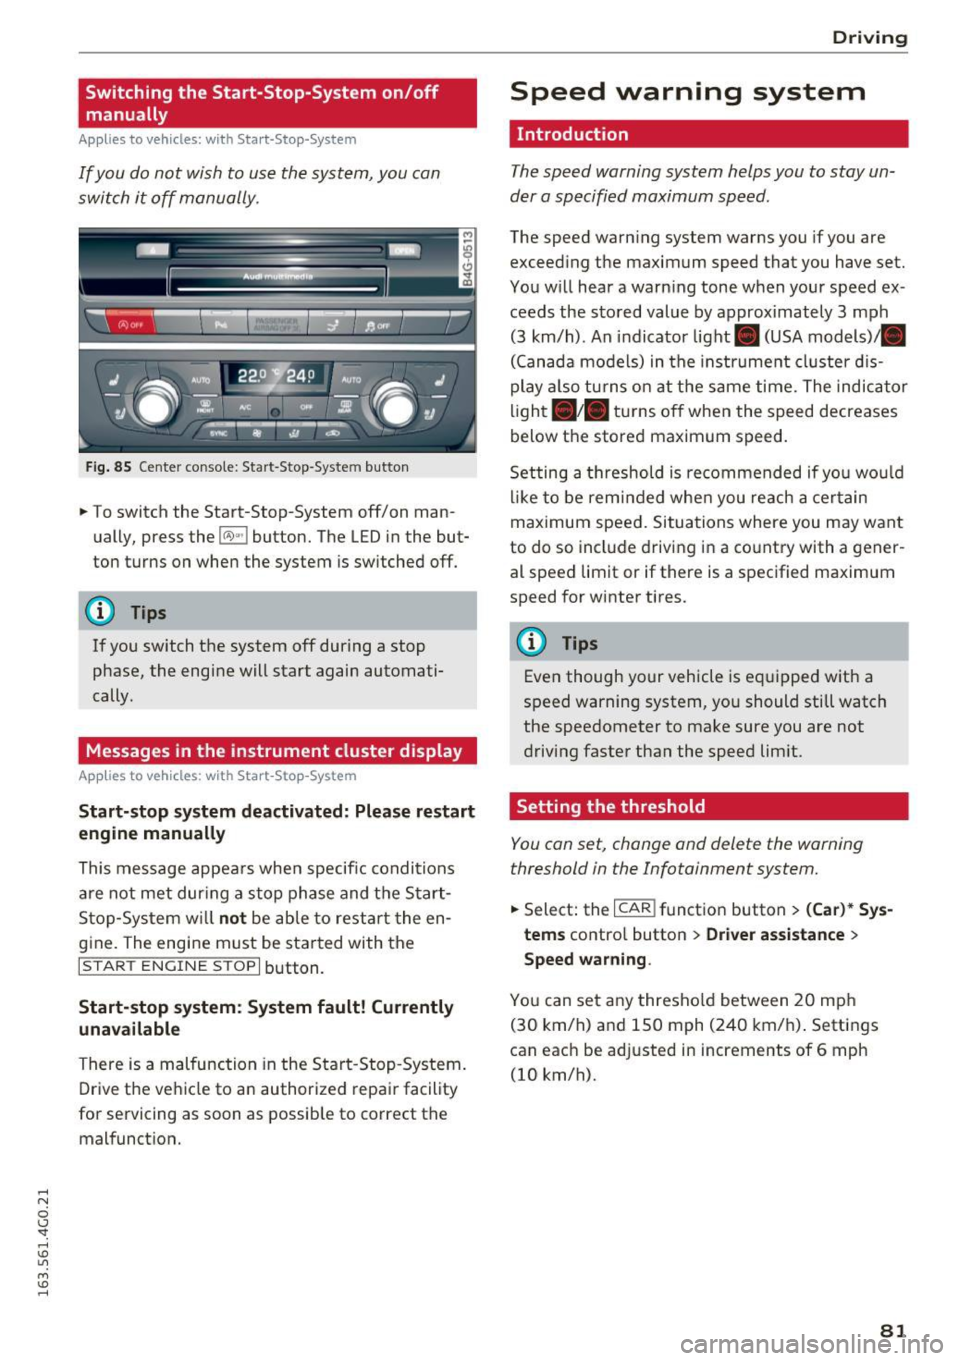
Fig. 85 Center co nso le: Start -S top -Syste m but ton
.. To switch the Start -Stop-System off/on man
ually, press the
l(A)••I button. The L ED in the but
ton turns on when the system is sw itched off.
@ Tips
I f you switch the system off during a stop
phase, the engine will start again automati
cally.
Messages in the instrument cluster display
Applies to vehicles: with Start-Stop-Sys tem
Start-stop system deactivated: Please restart
engine manually
This message appea rs when specifi c condi tions
are not met dur ing a stop phase and t he S tart
S top -Sy stem w ill
not be able to resta rt the en
gine. The engine must be sta rted with the
I START ENGINE ST OPI button.
Start-stop system : System fault! Currently
unavailable
There is a mal function in the Start -Stop -System .
Drive the ve hicl e to an authorized repa ir facility
for servicing as soon as possible to correct the malfunct ion .
D rivi ng
Speed warning system
Introduction
The speed warning system helps you to stay un
der a specified maximum speed.
The speed warn ing system warns you if you are
exceed ing the maximum speed that you have set.
You will hear a warn ing tone when your speed ex
ceeds the s tored value by approx imately 3 mph
(3 km/h) . An indicator light . (USA models)/ .
(Canada models) in the instrume nt cl uste r d is
play a lso tu rns on at t he same time. The indicator
lig ht •• tur ns off when the speed decreases
below the stored maximum speed.
Setting a th reshold is recommended if yo u wo uld
lik e to be rem inded whe n you reach a cer tain
ma ximum speed. Situations where you may want
to do so incl ude driving in a co untry with a gener
al speed limit or if there is a spec ified maximum
speed for winter tires.
@ Tips
Eve n though your vehicle is eq uipped w ith a
speed warning system, yo u should still watch
the speedometer to make sure you are not
driving faster than the speed lim it.
Setting the threshold
You can set, change and delete the warning
threshold in the Infotainment system.
.. Select: the I CAR ! funct ion button > (Car) * Sys
tems
contro l button > Driver as sistance >
Speed warning .
You can set a ny thresho ld between 20 mp h
(30 km/h) and 150 mph (240 km/ h). Settings
can eac h be adjusted in increments of 6 mph
(10 km/h).
81
Page 91 of 294
.... N
0 CJ '
M
"' ......
Audi ada pti ve c ruise contr ol and br akin g gu ard
The highe r the speed, the greater the distance in
yards (meters) ¢&. .The
Distance 3 setting is
recommended .
The distan ces p rovided are specified values. De
pending on the driving situation and the how the
vehicle ahead is driving, the actual distance may
be more or less than these target d istances.
The various symbols fo r the time increments ap
pear br ie fly in the information line @ ¢
page 86,
fig. 93 when you change the settings.
c:::, _c:::, ___ Dis tan ce 1: This setting corresponds
to a distance of 92 fee t/28 meters when travel
ing at 62 mph (100 km/h), o r a time interval of 1
second.
c:::, __ c:::, __ Distan ce 2 : This setting corresponds
to a distance of 118 feet/36 meters whe n travel
ing at 62 mph (100 km/h), or a time interval of
1.3 seconds.
c:::, ___ c:::,_ Distanc e 3: This setti ng corresponds
to a distance of 164 feet/SO meters when travel ing at 62 mph (100 km/h), o r a time interval of
1.8 seconds.
c:::, __ __ c:::, Di stance 4 : This setti ng corresponds
to a distance of 210 feet/64 meters when travel ing at 62 mph (100 km/h), or a time interval of
2 .3 seconds.
A WARNING
Following other vehicles too closely increases
the risk of collisions and ser ious personal in
jury.
- Setting short distances to the traffic ahead reduces the t ime and distance available to
br ing your vehicle to a safe stop a nd makes
it even more necessary to pay close atten
t ion to traffic .
- Always obey applicable traff ic laws, use
good judgment, and select a safe following distance for the traffic, road and weathe r
condit io ns.
(D Tips
- Di stance 3 is set automatically each time
you switch the ignition on . -
Your standard settings are automatically
stored and assigned to the remote control
key being used.
Selecting the driving mode
Applies to vehicles: with Aud i adapt ive cru ise control
.,. Select the desired driving mode in drive select
¢page 100.
{!) Tips
Your settings are automatically stored and as
s igned to the remote control key being used.
Prompt for driver intervention
Applies to vehicles: with Aud i adapt ive cru ise control
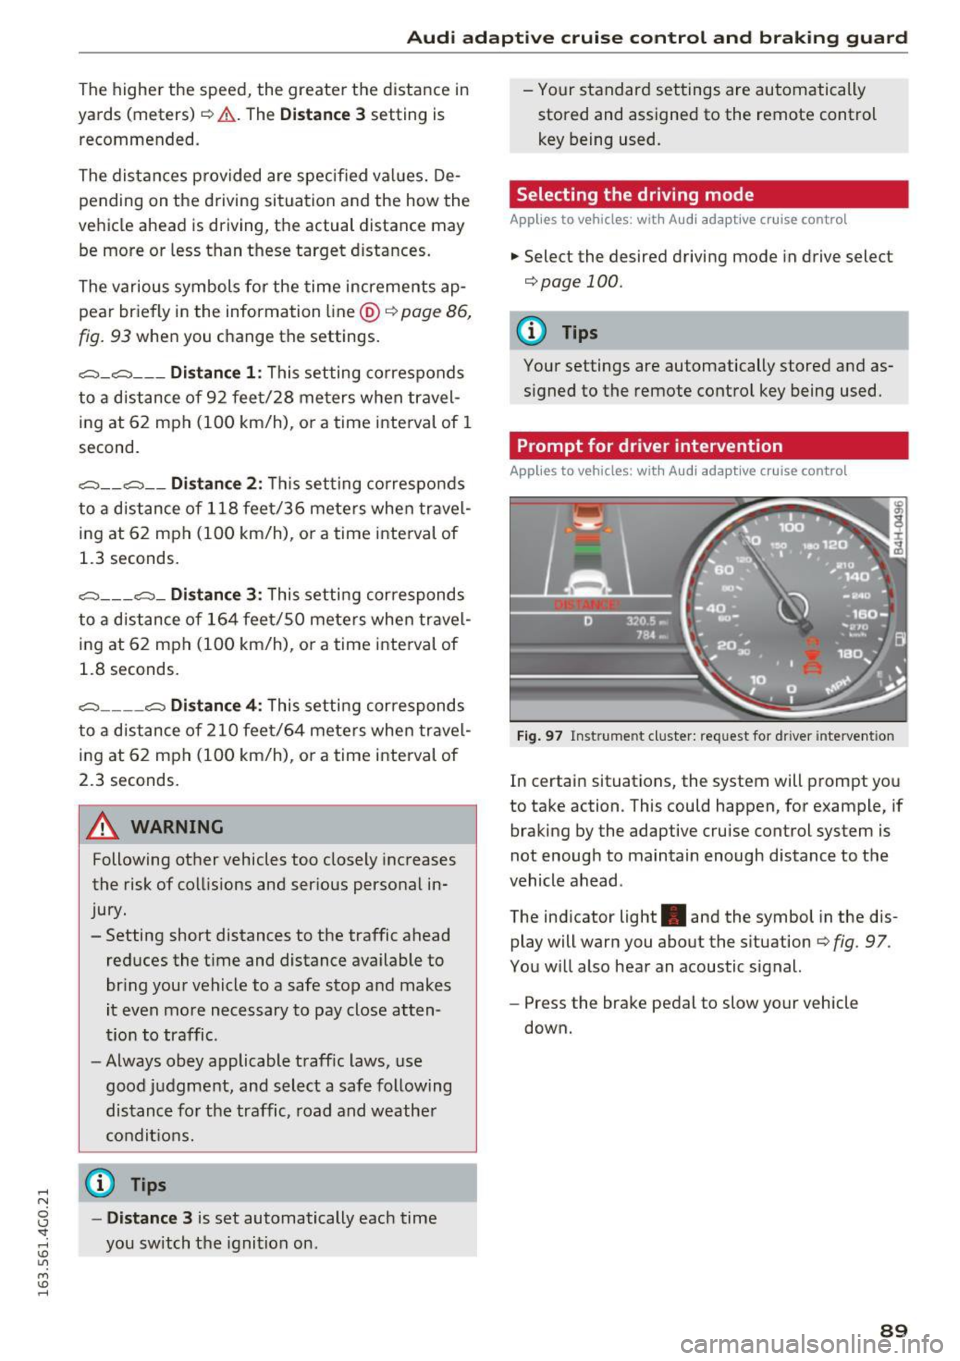
F ig . 97 Inst rume nt cluster: request for d river in tervention
In certain situations, the system will prompt you
to take action . This could happen, for example, if
braking by the adaptive cru ise control system is
not enough to maintain enough distance to the
vehicle ahead .
The ind icator light . and the symbol in the dis
play will warn you about the situation ¢
fig. 97 .
You w ill also hear an acoustic signal.
- Press the brake pedal to slow yo ur vehicle
down.
89
Page 102 of 294
Audi drive select
Audi drive select
Driving settings
Introduction
Drive select makes it possible to experience d if
ferent types of vehicle settings in one vehicle.
The driver can select
Comfort, Auto and Dynami c
modes in the Infotainment system to switch be
tween a sporty and a comfortable driving mode.
In the
Individual mode, the settings can be ad
justed to your personal preferences. This makes it possible to combine settings such as a sporty
engine tuning with light steering.
A WARNING
-
Improper use of the Audi dr ive select can
cause collisions, other accidents and serious
personal injury.
Description
The follow ing systems are affected by drive se
lect:
Engine and transmission
Depending on the mode, the eng ine and the
transmission respond quicker or in a more bal
anced manner to acce lerator pedal movements.
I n the sporty dynamic mode, the transmission
shifts at h igher RPMs.
Air suspension*
The adaptive air suspension/adaptive air suspen
sion sport*
(Air suspension in the MMI) is an
e lectronically controlled air suspens ion and
damping system. They are adjusted depend ing
on the selected dr iv in g mode, the driver's steer
ing, braking and acceleration input and the road
surface, vehicle speed and load. A sporty setting
is generally used in vehicles with adaptive air sus
pension sport*.
The vehicle clearance varies depending on these
lected mode and the speed.
The highway setting is activated automatically
when yo u drive above 75 mph (120 km/h) for
mo re than 30 seconds in the
Auto or Dynamic
100
mode. The ground clea rance is increased auto
matically if the speed drops below 44 mph (70
km/h) for more than 120 seconds.
Steering
The steering adapts in terms of steering effort
and steering ratios. Indirect stee ring that moves
easily, like the steering in comfort mode, is best
suited to long drives on a highway. In contrast,
dynamic mode provides sporty, direct steering.
The following applies to vehicles with dynamic
steering*: the steering ratio changes based on
vehicle speed in order to maintain optimum
steering effort for the driver at a ll times . This
sets the steering to be less sensitive at higher
speeds in order to provide improved vehicle con
trol. At reduced speeds, however, steering is
more direct in order to keep the steering effort as
min imal as possible when the dr iver is maneuver
i ng the vehicle. At low and average speeds, dy
namic steering additionally provides more re
sponsive steering performance.
Sport differential*
As a component of the all wheel dr ive system
(quattro)
c::;> poge 191, the Sport differentia l*
distributes the d riving powe r to the rear axle de
pending on the situation . T he distr ibutio n of
power varies depending on the selected mode,
from ba lanced (comfort) to agile (dynamic). The
goal is a high level of agility and ability to accel
erate on curves. The vehicle is very responsive to
steering.
Curve light*
The curve light adapts to driving on curves. The
pivoting action and the lighting are also adapted
to the mode.
Adaptive cruise control*
The behav ior when accelerating can be adjusted
from comfortable to sporty, depending on the
drive select mode. Adaptive cruise control also
responds to the driving behavior of the vehicle
ahead in a more conservative or sporty manner . .,..
Page 108 of 294
Automatic transmission
Automatic transmission S tronic, tiptronic
Introduction
The automatic transmission is controlled elec
tronically. The transmission upshifts or down
shifts automatically depending on which drive
program is selected.
When a
moderate driving style is used, the
transmission selects the most economical driving
mode. The transmission upshifts at a lower RPM
and downshifts at a higher RPM to improve fuel
efficiency.
The transmission switches to a sporty mode after
a kick-down or when the driver uses a
sporty
driving style
characterized by quick accelerator
pedal movements, heavy acceleration, frequent
changes in speed and traveling at the maximum
speed.
If desired , th e driver can also select the gears
manually (tiptronic mode) 9 page 110.
Various automatic transmissions may be instal
led, depending on the model:
S tronic transmission
The S tronic is a dual-clutch transmission. Power
is transferred using two clutches that work inde
pendently from one another. They replace the
torque converter used in conventional automatic
transmissions and allow the vehicle to accelerate
without a noticeable interruption in traction.
tiptronic transmission
In the tiptronic transmission, power is transfer
red by a torque converter.
106
Selector lever positions
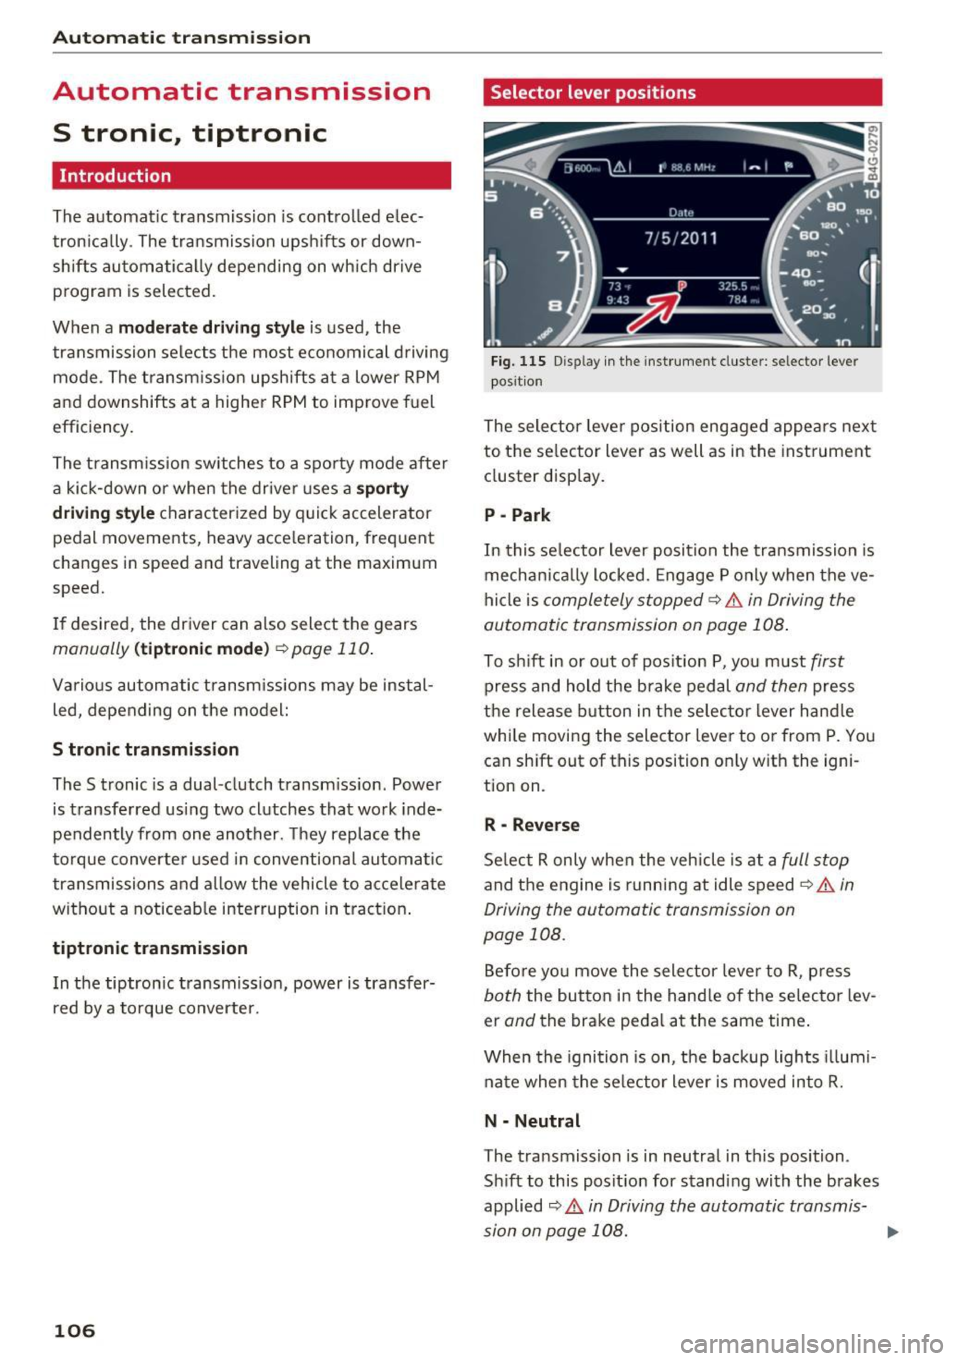
Fig. 115 Display in the instrument cluster: selector lever
position
The selector lever position engaged appears next
to the selector lever as well as in the instrument
cluster display.
P -Park
In this selector lever position the transmission is
mechanically locked. Engage P only when the ve
hicle is
completely stopped¢&. in Driving the
automatic transmission on page 108.
To shift in or out of position P, you must first
press and hold the brake pedal and then press
the release button in the selector lever handle
while moving the selector lever to or from P. You
can shift out of this position only with the igni
tion on.
R -Reverse
Select R only when the vehicle is at a full stop
and the engine is running at idle speed¢&. in
Driving the automatic transmission on
page 108.
Before you move the selector lever to R, press
both the button in the handle of the selector lev
er
and the brake pedal at the same time.
When the ignition is on, the backup lights illumi
nate when the selector lever is moved into R.
N -Neutral
The transmission is in neutral in this position.
Shift to this position for standing with the brakes
applied
9 A in Driving the automatic transmis
sion on page 108.
...