interior lights AUDI A6 2017 Owners Manual
[x] Cancel search | Manufacturer: AUDI, Model Year: 2017, Model line: A6, Model: AUDI A6 2017Pages: 280, PDF Size: 70.24 MB
Page 4 of 280
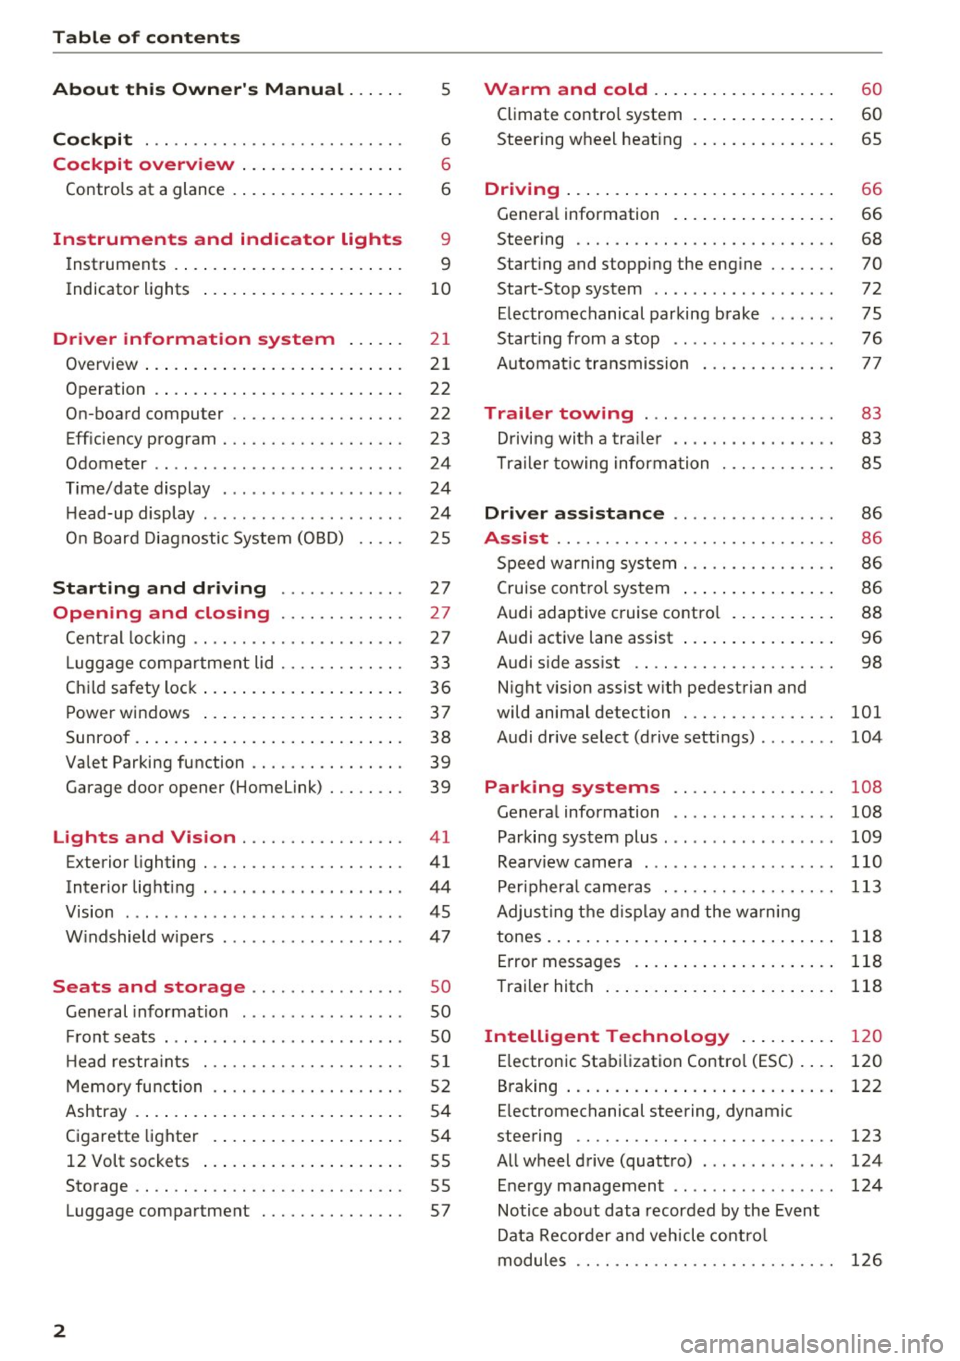
Table of contents
About this Owner's Manual ... .. .
Cockpit ... .. ............... .... .. .
Cockpit overview ................ .
Controls at a glance ... .......... .. .. .
Instruments and indicator lights
Instruments .... ... .......... .. .. .. .
Indicator lights .. .. .......... .. .. .. .
Driver information system ... .. .
Overview ... .... ... .......... ...... .
Operation .... .. ... .......... .. .. .. .
On-board computer ........... .... .. .
Eff iciency program . ........... .. .. .. .
Odometer .. .. .. ............ .... ... .
T ime/date display ........... .... ... .
He ad-up display .... .. .. ..... ... .. .. .
On Board Diagnostic System (OBD) .. .. .
Starting and driving ...... .. .. .. .
Opening and closing .......... .. .
Central locking ... ............ .... .. .
L uggage compartment lid ...... .... .. .
Child safety lock .... .......... .. .. .. .
Power windows ...... ..... ... .. .. .. .
Sunroof . ... .... .. ........... .. .. .. . 5
6
6
6
9
9
10
2 1
21
22
22
23
24
24
24
25
27
27
27
33
36
37
38
Valet Parking function . . . . . . . . . . . . . . . . 39
Garage door opener (Home link) . . . . . . . . 39
Lights and Vision . . . . . . . . . . . . . . . . . 41
Exterior lighting . . . . . . . . . . . . . . . . . . . . . 41
Interior lighting . . . . . . . . . . . . . . . . . . . . . 44
V1s1on . . . . . . . . . . . . . . . . . . . . . . . . . . . . . 45
Windshield wipers . . . . . . . . . . . . . . . . . . . 47
S eats and storage . . . . . . . . . . . . . . . . 50
Gene ral information . . . . . . . . . . . . . . . . . 50
Fro nt seats . . . . . . . . . . . . . . . . . . . . . . . . . 50
H ead restraints . . . . . . . . . . . . . . . . . . . . .
51
Memory function . . . . . . . . . . . . . . . . . . . . 52
Ashtray . . . . . . . . . . . . . . . . . . . . . . . . . . . . 54
Cigarette lighter . . . . . . . . . . . . . . . . . . . . 54
12 Volt sockets . . . . . . . . . . . . . . . . . . . . . 55
Storage . . . . . . . . . . . . . . . . . . . . . . . . . . . . 55
Luggage compartment . . . . . . . . . . . . . . . 57
2
Warm and cold .. .. ... .......... . .
Climate contro l system . ............ . .
Steering wheel heating .. . .......... . .
Driving ..... .. .. .. .. ... .......... . .
General information . .... .......... . .
Steering .. .. .. .. .. .. ............. . .
Start ing and stopping the eng ine ..... . .
Start-Stop system .. .. ... .. ..... ... . .
E le ctromechanical parking brake ..... . .
Start ing from a stop .. .............. .
Automatic transmission
Trailer towing ..... .............. .
Driving with a trailer .. ... .. ... ... .. . .
T ra iler towing information .......... . .
Driver assistance .. ........ ..... . .
Assist ...... .. .. .. .. .. ........... . .
Speed warning system . ............. . .
Cruise control system ... ........... . .
Audi adaptive c ruise contro l .......... .
Audi active lane assist ... ........... . .
Audi s ide ass ist .. .. .. ............. . .
Night vision assist w ith pedestrian and
wild animal detection ............... .
Audi drive select (drive settings) ....... .
60
60
65
66
66
68
70
72
75
76
77
83
83
85
86
86
86
86
88
96
98
101
104
Park ing systems . . . . . . . . . . . . . . . . . 108
Genera l information . . . . . . . . . . . . . . . . . 108
Parking system plus . . . . . . . . . . . . . . . . . . 109
Rearviewcamera . ......... ....... ... 110
Peripheral cameras . . . . . . . . . . . . . . . . . . 113
Adjus ting the display and the warning
tones..............................
118
Error messages . . . . . . . . . . . . . . . . . . . . . 118
Trailer hitch . . . . . . . . . . . . . . . . . . . . . . . . 118
Intelligent Technology . . . . . . . . . . 120
E lectronic Stabilization Control (ESC) . . . . 120
B raking . . . . . . . . . . . . . . . . . . . . . . . . . . . . 122
E lectromechanical steering, dynamic
steering . . . . . . . . . . . . . . . . . . . . . . . . . . .
123
All wheel drive (quattro) . . . . . . . . . . . . . . 124
Energy management . . . . . . . . . . . . . . . . . 124
Notice about data recorded by the Event
Data Recorder and vehicle control
modules . . . . . . . . . . . . . . . . . . . . . . . . . . .
126
Page 30 of 280
Opening and clo sin g
@ Tips
- Do not leave valuables unattended in the ve
hicle . A locked vehicle is not a safe!
- The LED in the driver 's door rail blinks when
you lock the vehicle . If the LED lights up for
approximately 30 seconds after locking,
there is a ma lfunction in the central locking
system. Have the problem corrected by an
authorized Audi dealer or authorized Audi Service Fac ility.
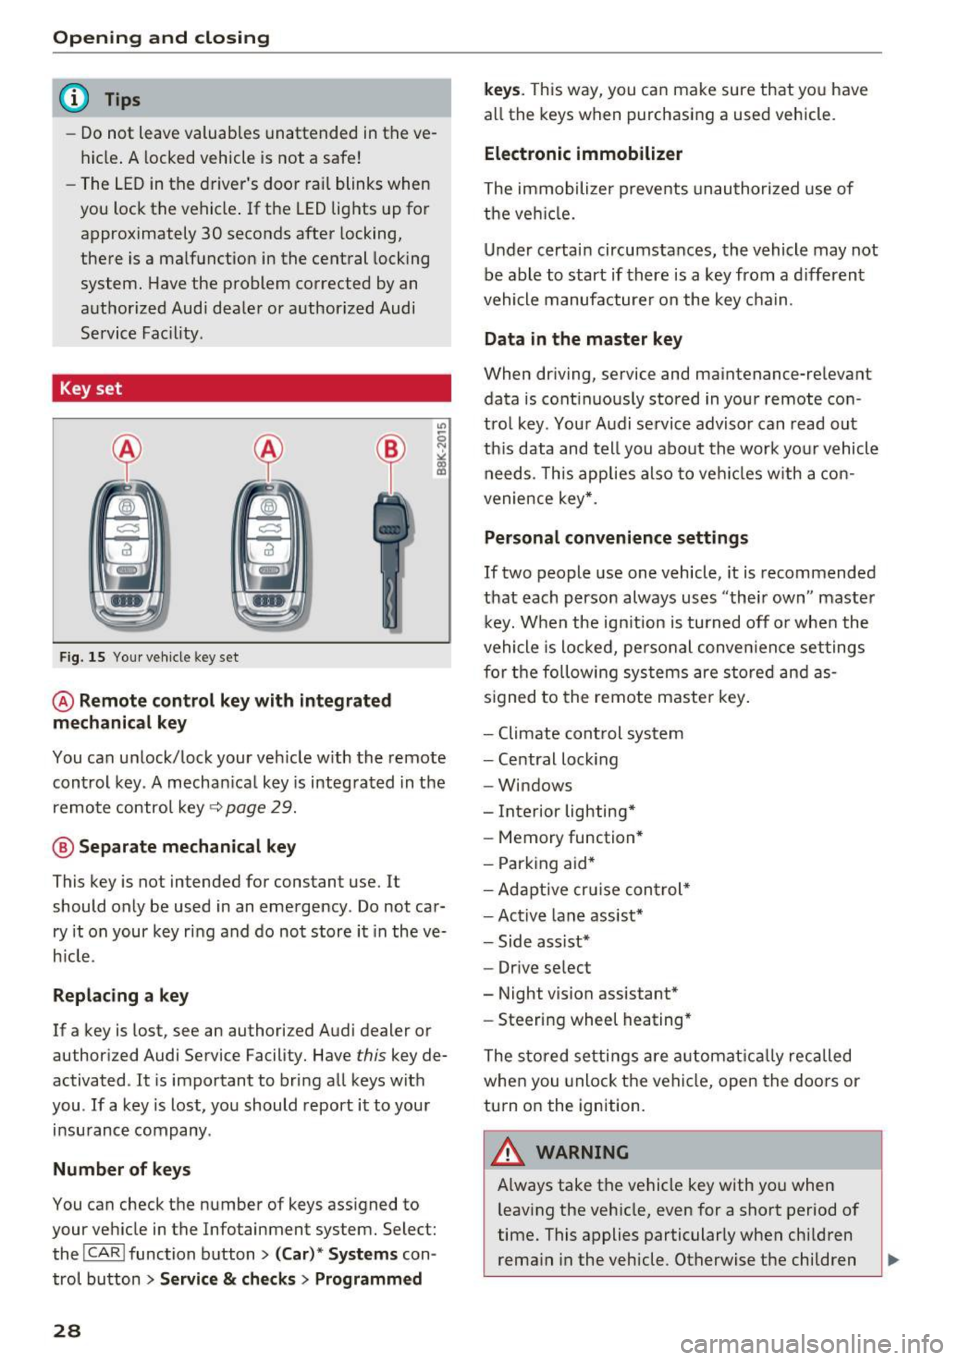
Key set
Fig. 15 You r veh icle key set
@ Remote control ke y with integr ated
mechanica l key
You can unlock/lock your veh icle w ith the remote
control key . A mechan ical key is integrated in the
remote control key~
page 29.
@ Separate mechanical ke y
This key is not intended for constant use. It
should only be used in an emergency . Do not car
ry it on your key ring and do not store it in the ve
h icle.
Replacing a ke y
If a key is lost, see an authorized Audi dealer or
authorized Audi Service Facility. Have
this key de
activated . It is important to bring all keys with
you . If a key is lost, you should report it to your
insurance company.
Number of key s
You can check the number of keys ass igned to
your veh icle in the Infotainment system. Select:
the !CAR !function button>
(C ar )* S yst e m s con
trol button
> Service & che cks > Programmed
28
k ey s. T his way, you can make sure that you have
all the keys when purchasing a used vehicle.
El ectronic immobiliz er
The immobilizer p revents unauthorized use of
the ve hicle.
Under certain circumstances, the vehicle may not
be able to start if there is a key from a d ifferent
vehicle manufacturer on the key chain.
Da ta in th e master key
When dr iving, service and maintenance-relevant
data is cont inuous ly stored in your remote con
trol key. Your A udi se rvice advisor can read out
th is data and tell you about the work yo ur vehicle
needs . This applies also to veh icles with a con
venience key *.
Personal convenience sett ings
If two people use one vehicle, it is recommended
that each person always uses "their own" master k ey. When the ign ition is turned off o r whe n the
vehicle is locked, personal conve nience set tings
for the following systems are stored and as
s igned to the remote maste r key .
- Climate cont rol system
- Central lock ing
- Windows
- Interior lighting*
- Memory function*
- Park ing aid*
- Ad aptive cru ise con trol *
- Ac tive lane assist*
- Side ass ist*
- Drive select
- Night vision assistant*
- Steering wheel heating *
The stored settings a re a utomat ica lly recalled
whe n you unlock t he vehi cle, open the doors or
turn on the ignition.
A WARNING
A lways take the vehicle key with you when
leaving the vehicle, even for a short period of
time. This applies particularly when child ren
rema in in the vehicle . Otherwise the children
-
Page 41 of 280
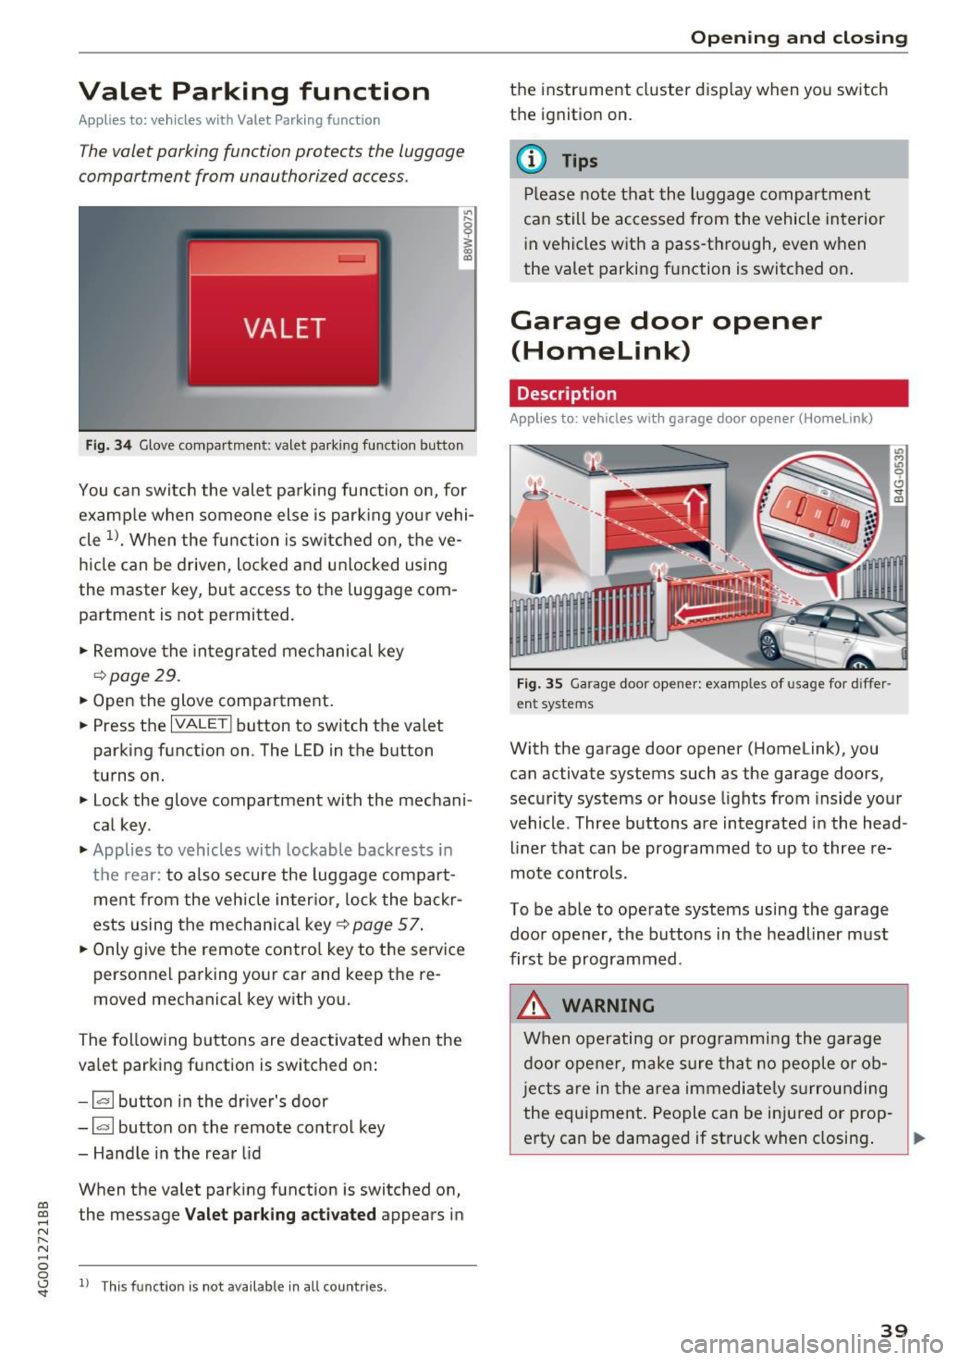
Valet Parking function
Applies to: veh icles wit h Valet Parking function
The valet parking function protects the luggage
comportment from unauthorized access .
Fig. 34 Glove compartment: valet park ing function button
You can switch the valet parking function on, for
example when someone else is parking your vehi
cle
l)_ When the function is switched on, the ve
hicle can be driven, locked and unlocked using
the master key, but access to the luggage com
partment is not permitted .
.,. Remove the integrated mechanical key
r::!:>poge 29.
.,. Open the glove compartment.
.,. Press the
IVALET I button to switch the valet
parking function on. The LED in the button
turns on.
.,. Lock the glove compartment with the mechani
cal key .
.,. Applies to vehicles with lockable backrests in
t h e rear: to also secure the luggage compart
ment from the vehicle inter ior, lock the backr
ests using the mechanica l key ¢
page 57.
.,. Only giv e the remote control key to the service
personnel parking your car and keep the re
moved mechanical key with you.
The following buttons are deactivated when the
va let parking function is switched on:
- 1""' 1 button in the driver's door
-la l button on the remote control key
- Handle in the rear lid
When the valet parking function is switched on,
co ~ the message Valet parking activated appears in
N
" N .... 0 0
~ ll This func tion is not available in all co untries .
Open ing and closing
the instrument cluster display when you switch
the ignition on.
(D Tips
Please note that the luggage compartment
can still be accessed from the vehicle interior
in vehicles with a pass-through, even when
the valet parking function is switched on .
Garage door opener
(Homelink)
Description
Applies to: veh icles with garage door opener (Home link)
Fig . 35 Garage door opene r: examples of usage for diffe r
ent systems
With the garage door opener (Homelink), you
can activate systems such as the garage doors ,
security systems or house lights from inside your
vehicle. Three buttons a re integrated in the head
liner that can be programmed to up to three re
mote controls.
To be able to operate systems using the garage
door opener, the buttons in the headliner must
first be programmed .
_&. WARNING
When operating or programming the garage
door opener, make sure that no people or ob
j ects are in the area immediate ly surrounding
the equipment. People can be injured or prop-
erty can be damaged if struck when closing. .,.
39
Page 45 of 280
Messages in the instrument cluster display
Headlight a ssist: System fault !
Drive to an authorized Aud i dealer or a uthorized
Aud i Service Facility immediately to have the
malfunct ion cor rected. You can still switc h the
hi gh beams on or off manually.
Headlight as sis t: Unavailable No camera view
The camera view is blocked, for example by a
sticker or debris.
The sensor is located between the interior rear
v iew mirror and the windshield . Do not p lace any
stickers in this area on the windshield.
A WARNING
H igh beam assistant is only intended to assist
the drive r. The dr iver is still responsible for
con troll ing the headlights a nd sw itch ing
them manually depend ing on light and v is ibil
i t y cond itions .
It may be neces sary to operate
t hem manually in situ at ions such as:
- In adverse weathe r co nd itions s uch as fog,
heavy r ain, b low ing snow o r sp raying wate r.
- On roads whe re oncoming traffic may be
partia lly obs cured, su ch as exp ressways .
- Whe n there are road users that do not have
s ufficient lighting, s uch as bi cycler s or
vehicles wi th dirty ta il lamps .
- In tight cu rv es and on steep hills.
- In poor ly l it areas.
- With strong reflectors, such as s igns.
- If the area of the windsh ield near the sensor
is fogged over, dirty, icy or covered w ith a
st icker.
Adjusting the exterior lighting
The functions ore adjusted in the Infotainment
system.
.,. Se lect : I CARI fu nction button> (Car )* Systems
contro l button > Vehicle setting s> Exterior
lighting .
co Automatic headlights co ....
~ You can adjust the fo llowing settings in the Au-N
8 tomatic headlight s menu: 0 <.,;) 'SI"
Lights and Vision
A cti vation sensitivity -you can adjust if the
headlights switch on
Early , Medium or Late ac
cording to the sensitivity of the light sensor .
Auto-dimming high beams* -yo u can sw itch the
high beam assistant*
On and Off .
Daytime running lights*
USA mode ls:
the daytime running lights can be
swit ched on/off. Select
On or Off .
Canada models:
this function cannot be switched
off . They act ivate automatically each time the ig
ni tion is switched on.
Coming home , Leaving home
The coming home function illuminates the area
outside the vehicle when you turn the ignit ion off
and open the driver 's doo r. To turn the function
o n, select
Light s when leaving car > On .
The leaving home illum inates the area outside
the vehicle when you unlock the vehicle . To turn
the function on, se lect
Li ghts when unlocking
car > On .
The coming home and leav ing home functions
only operate when it is dark and the light switc h
is in the
AUTO pos ition .
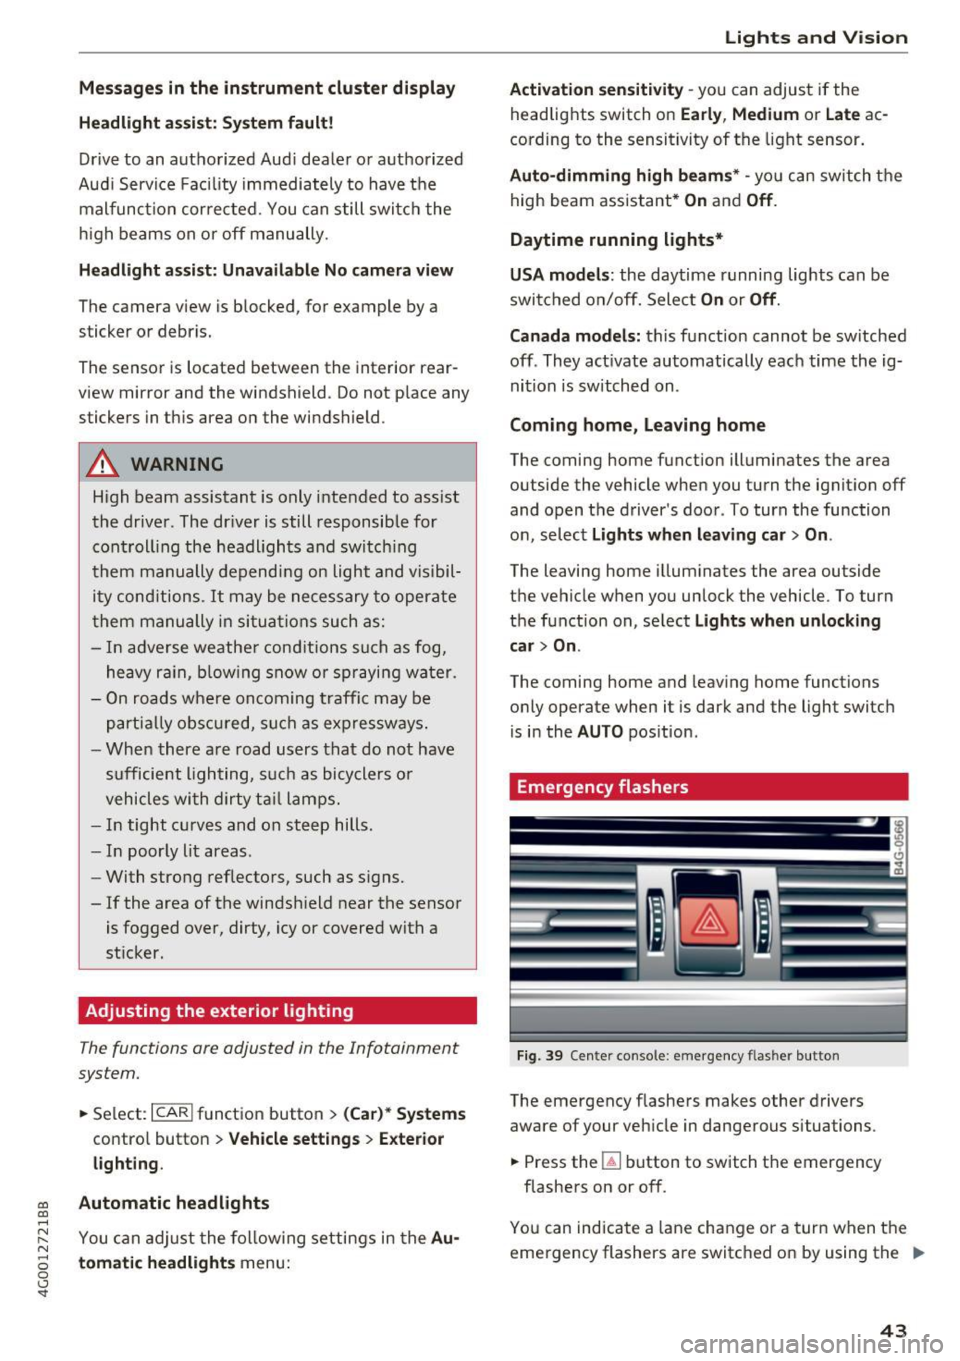
Emergency flashers
Fi9. 39 Cente r console : emergency f las her button
The emergency flashe rs makes other drivers
aware of your vehicle in dangerous situations .
.,. Press the~ button to switch the emergency
flashe rs on or off.
You can indicate a lane change or a turn w hen the
eme rgency flashers are switched on by using the .,.
43
Page 46 of 280
Lights and Vision
turn signal lever . The emergency flashers stop
temporarily .
The emergency flashers also wo rk when the igni
tion is turned off.
Interior lighting
Front and rear interior lighting
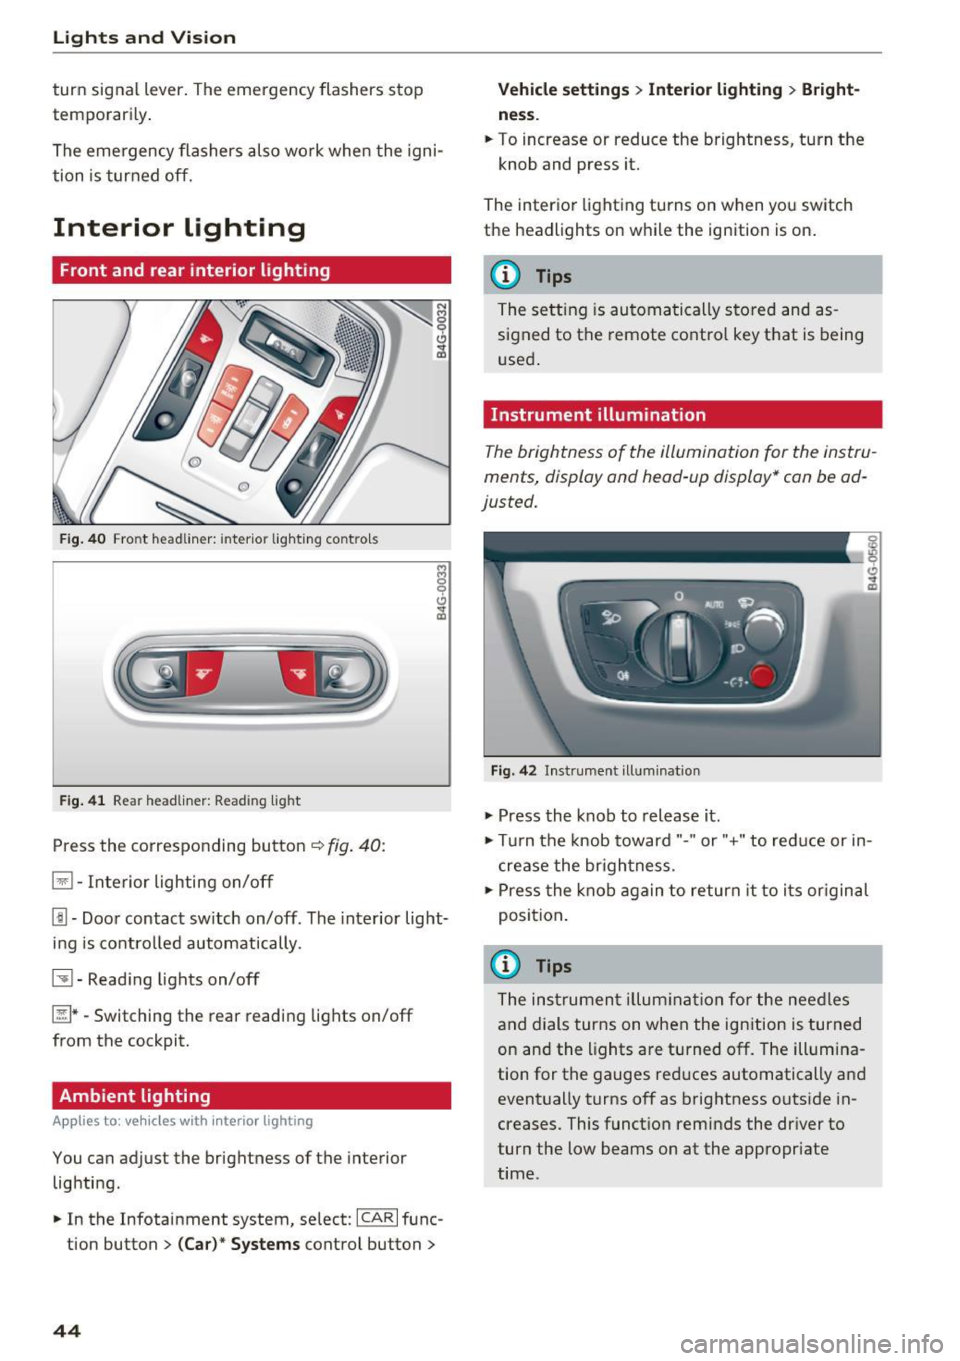
Fig . 4 0 Fro nt headli ner: inter io r lig hting co ntro ls
F ig . 4 1 Rea r headliner: Read ing light
Press the corresponding button ~ fig. 40:
El -Interior lighting on/off
Jjj -Door contact sw itch on/off. The interior light
ing is contro lled automatically.
~ - Read ing lights on/off
~ *·Switching the rear reading lights on/off
from the cockpit.
Ambient lighting
Ap plies to: vehicl es w ith i nterio r lighting
You can adjust the brightness of the interior
lighting .
.. In the Infotainment system , select:
ICAR I func
tion button
> ( Ca r)* Sy stems control button >
44
Vehicle setting s> Interior lighting > Bright
ne ss .
.. To increase or reduce the brightness, turn the
knob and press it.
The inter ior lighting turns on when yo u switch
the headlights on w hile the ignition is on .
(D Tips
The setting is automa tically stored and as
s igned to the remote contro l key that is being
u sed .
Instrument illumination
The brightness of the illumination for the instru
ments, display and head -up display* can be ad
justed.
F ig. 42 In strument illuminat ion
.,. Press the knob to release it .
.,. Tur n the knob toward"." or"+" to reduce or in
c rease the br ightness.
.,. Press the knob again to return it to i ts or iginal
position .
(i} Tips
The ins trumen t illum ina tion for the nee dles
and dials turns on when the ign ition is turned
on and the lights are turned off. The illum ina
tion for the gauges red uces automatically and
event ually turns off as brightness outside in
creases. This funct ion reminds the dr iver to
turn the low beams on at the appropriate
time.
Page 48 of 280
Lights and Vision
Automatic dimming rearview mirror*
.. Press the button@~ fig. 44. The indicator
light @ turns on. Interior and exterior mirrors*
will dim when there is incoming light (such as h eadlights from the rear).
A WARNING
If the glass on an automatic dimming mirror
breaks, electrolyte can leak out . This liquid
can irritate the skin, eyes and respiratory sys
tem .
If there is contact with the fluid, flush
immediately with plenty of water . Consult a
physician if necessary.
- Repeated or long-term exposure to electro
lyte fluid can lead to irritation of the air
ways, especially in people with asthma or
other respiratory conditions. Take deep
breaths immediately after leaving the vehi
cle or, if this is not possible, open all of the doors and windows as wide as possible.
- If electrolyte fluid enters the eyes, flush
them thoroughly with a large amount of
clean water for at least 15 minutes and then
seek medical attention.
- If electrolyte fluid comes into contact with
the skin, flush the affected area with clean
water for at least 15 minutes and then clean
with soap and water and seek medical at
tention. Clean affected clothing and shoes
thoroughly before wearing again .
- If the fluid was swallowed and the person is conscious, flush the mouth with water for at
least 15 minutes. Do not induce vomiting
unless this is recommended by medical pro
fessionals. Seek medical attention immedi
ately.
(D Note
If the glass on an automatic dimming mirror
breaks, electrolyte can leak out. This liquid
damages plastic surfaces and paint. Clean
this liquid as quickly as possible, for example
with a wet sponge.
46
@ Tips
- If the light reaching the rearview mirror is
obstructed, the automatic dimming mirror
will not function correctly,
- The automatic dimming mirrors do not dim
when the interior lighting is turned on or
the reverse gear is selected.
Sun visors
[ __ ____,}
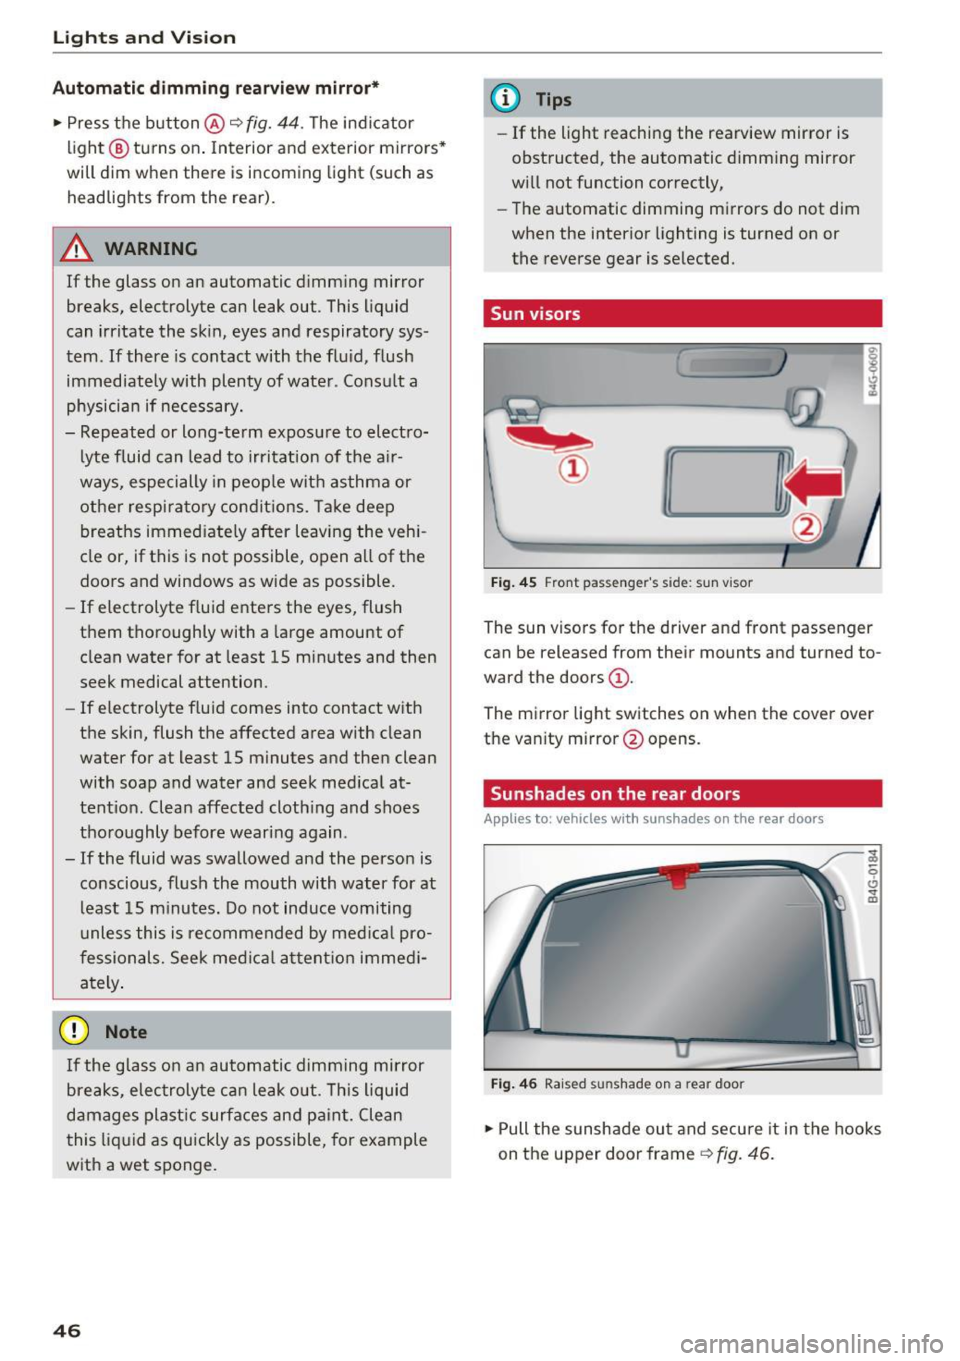
Fig. 45 Front pas seng er's side: sun vis or
The sun visors for the driv er and front passenger
can be released from their mounts and tu rned to
ward the doors
(D .
The mirror light switches on when the cover over
the vanity mirror @opens .
Sunshades on the rear doors
Applies to : vehicles with sunshades on the rear doors
Fig. 46 Rai sed sunshade on a rear doo r
.. Pull the sunshade out and secure it in the hooks
on the upper door frame
~ fig. 46.
Page 49 of 280
co
co
.... N
" N .... 0 0 <..:l 'SI'
Sunshade on the rear window
Applies to: vehicles with a sunshade on the rear window
Applies to: sedan
F ig. 4 7 Center console: button for rear window su nshade
~ To raise/lower the sunshade, press the~ but-
ton
¢ fig. 47 in the cockpit .
The rear window sunshade can be set so that it
retracts automatically when driving in reve rse. To
do this, select: ICARlfunction button>
(Ca r)* sys
tems
control button > Vehicle settings > Auto
matic rear blind > On .
The sunshade is extended
again as soon as the vehicle is trave ling forward
at a speed greater than
9 mph (15 km/h) if the
ignition has not been switched off in the mean
time.
& WARNING
-
N ever operate the rear window sunshade
w ith out paying attention or in an uncon trol
led manner. Pinching could cause serious inju
r ies .
(0 Tips
-Pressing the~ button several times in a
row can trigger the overload protection . The
sunshade can on ly be extended/retracted
again after a brief waiting period.
- The rear window sunshade only functions
when the vehicle interior is warmer than
14° F (-1 0°C) .
Lights and V ision
Windshield wipers
Switching the windshield wipers on
Fig. 48 W inds hield w iper leve r
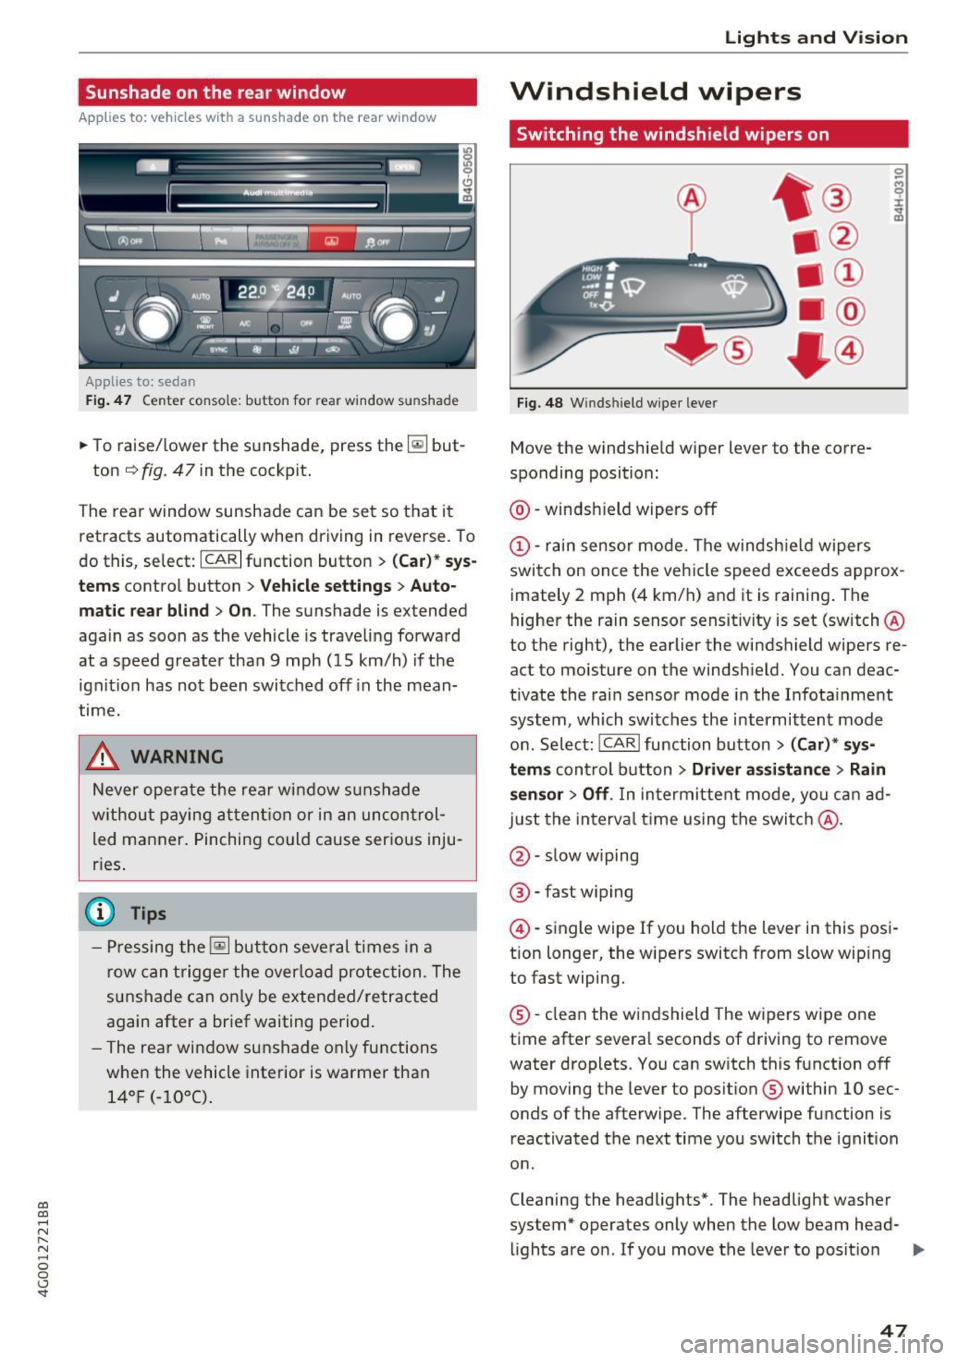
Move the windshie ld wiper lever to the corre
sponding position:
@ -windsh ield wipers off
@ -rain sensor mode. The windsh ield wipers
switch on once the vehicle speed exceeds approx imately 2 mph (4 km/h) and it is raining . The
higher the rain sensor sensit ivity is set (switch @
to the right), the earlier the windshield wipers re
act to moisture on the windshie ld. You can deac
tivate the rain sensor mode in the Infota inment
system, which switches the intermittent mode
on. Select: ICARI function button>
(Car)* sys
tems
con trol button > Driver assistance > Rain
sensor> Off.
In intermittent mode, you can ad
just the interval time using the switc h@ .
@-slow wiping
®-fast w iping
@ -single wipe If you hold the lever in this posi
t ion longer, the wipers switch from slow wip ing
to fast wiping.
® -clean the windshield The wipers wipe one
time after several seconds of driving to remove
water droplets. You can sw itch this function off
by moving the lever to posit ion ® within
10 sec
onds of the afterwipe . The afterwipe function is
reactivated the next time you switch the ignit ion
o n .
Cleaning the headlights*. The headlight washer
system* operates only when the low beam head- lights are on. If you move the lever to posit ion
II>-
47
Page 252 of 280
Emergency situations
@ Tips
The discharged battery must be properly con
nected to the vehicle's electrical system .
When jump starting or charging the battery,
never connect the negative ground cable to
the battery negative post because the battery
manager system must be able to detect the
battery's state of charge . Always connect the
negat ive ground cable to the negative ground
pos t of the battery manager control unit.
Use of jumper cables
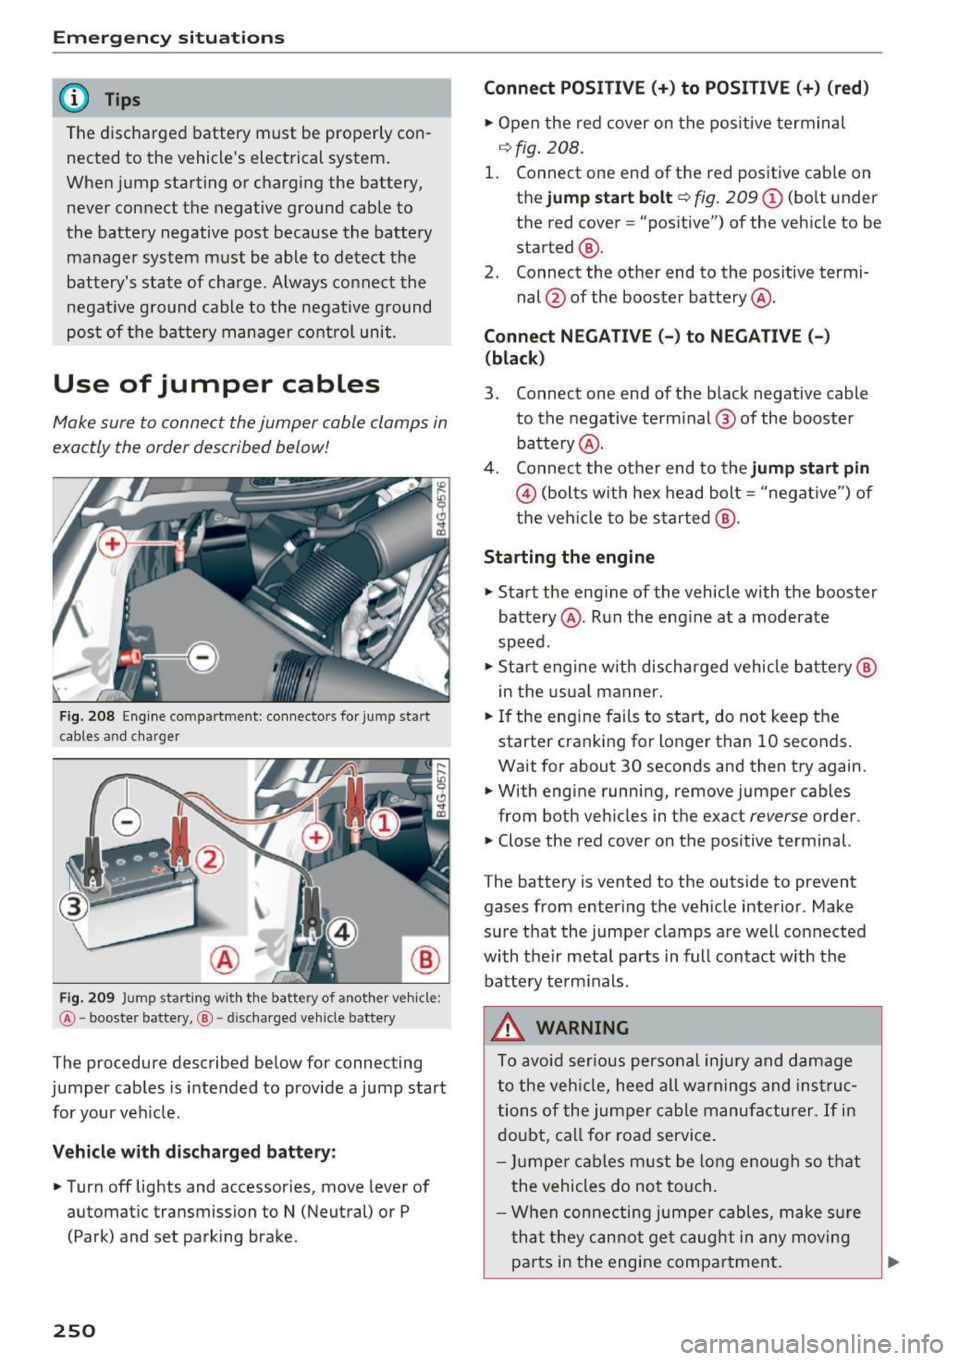
Make sure to connect the jumper cable clamps in
exactly the order described below!
Fig. 208 Engine compartmen t: connecto rs for ju mp start
cables a nd charger
@
Fig. 209 Ju mp starting w ith the battery of another vehicle :
@-booster battery, @- discharged vehicle batte ry
The procedure described below for connecting
jumper cables is intended to provide a jump start
for your veh icle.
Vehicle with discharged battery:
.. Turn
off lights and accessories, move lever of
automatic transmission to
N (Neutral) or P
(Park) and set park ing brake .
250
Connect POSITIVE(+) to POSITIVE (+) (red)
.. Open the red cover on the positive terminal
o::> fig.
208.
1. Connect one end of the red positive cable on
the jump start bolt
Q fig. 209 (i) (bolt under
the red cover= "positive") of the vehicle to be
started @.
2. Connect the other end to the positive termi-
nal@ of the booster battery @.
Connect NEGATIVE(-) to NEGATIVE(-)
(black)
3. Connect one end of the black negative cable to the negative terminal ® of the booster
battery @.
4. Connect the other end to the jump start pin
© (bolts with hex head bolt= "negat ive") of
the vehicle to be started @.
Starting the engine
"' Start the eng ine of the vehicle with the booster
battery @. Run the eng ine at a moderate
speed.
"' Start engine w ith discharged vehicle battery@
in the usual manner.
"' If the engine fails to start, do not keep the
starter cranking for longer than 10 seconds.
Wait for about 30 seconds and then try again.
"' With engine running, remove jumper cables
from both vehicles in the exact
reverse order.
"' Close the red cover on the positive terminal.
The battery is vented to the outside to prevent gases from entering the vehicle interior . Make
sure that the jumper clamps are well connected
with their metal parts in full contact w ith the
batte ry terminals.
A WARNING
To avoid serious personal inju ry and damage
to the veh icle, heed all warnings and instruc
tions of the jumper cable manufacturer.
If in
doubt, call for road service.
- Jumper cables must be long enough so that
the vehicles do not touch .
- When connecting jumper cables, make sur e
that they cannot get caug ht in any moving
pa rts in the engine compartment. ..,.
Page 271 of 280
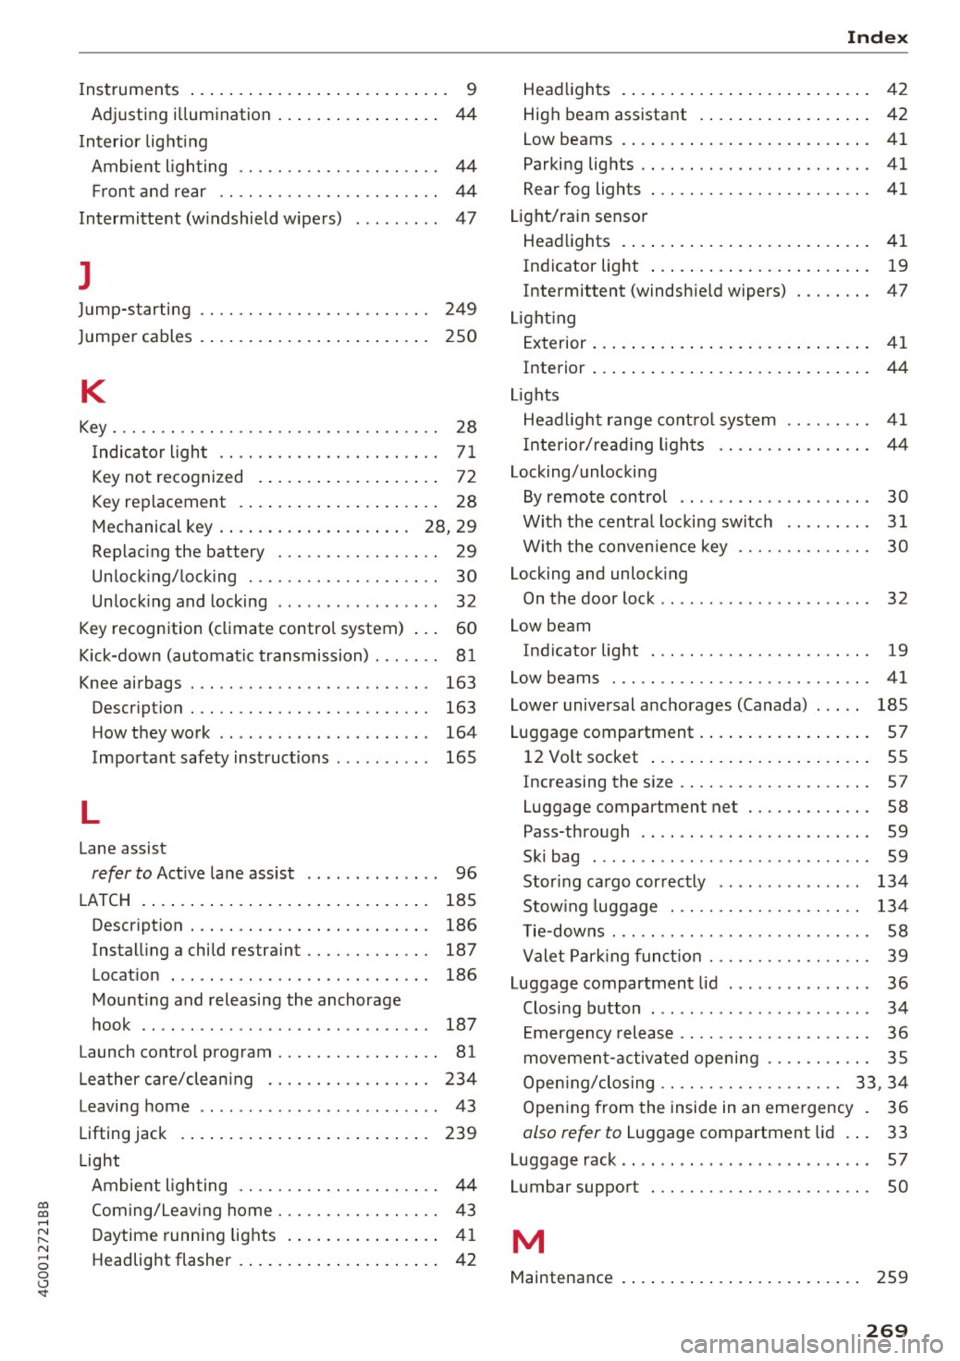
co
co
.... N
" N .... 0 0 <..:l -
Adjusting i llumination . . . . . . . . . . . . . . . . .
44
Inter ior lighting
Ambie nt l igh ting . . . . . . . . . . . . . . . . . . . . .
44
Fr ont and rear . . . . . . . . . . . . . . . . . . . . . . . 44
Intermittent (w indshield wipers) . . . . . . . . . 47
]
Jump-starting 249
J umpe r cables . . . . . . . . . . . . . . . . . . . . . . . . 250
K
Key... .. .. .. .. .. ............. .. .. .. .. 28
Indicator ligh t . . . . . . . . . . . . . . . . . . . . . . . 7 1
Key not recognized . . . . . . . . . . . . . . . . . . .
72
K ey replacement . . . . . . . . . . . . . . . . . . . . . 28
M echanical key . . . . . . . . . . . . . . . . . . . . 28, 29
Replac ing the battery . . . . . . . . . . . . . . . . . 29
Unlock ing/ locking . . . . . . . . . . . . . . . . . . . . 30
Unlock ing and locking . . . . . . . . . . . . . . . . .
32
Key recognition (climate control system) . . . 60
Kick-down (automat ic transmission) . . . . . . . 8 1
Knee airbags . . . . . . . . . . . . . . . . . . . . . . . . . 163
Descr ipt ion . . . . . . . . . . . . . . . . . . . . . . . . .
163
H ow they work . . . . . . . . . . . . . . . . . . . . . . 164
Important safety instructions . . . . . . . . . . 165
L
Lane assist
refer to Active lane assist . . . . . . . . . . . . . . 96
L ATCH . . . . . . . . . . . . . . . . . . . . . . . . . . . . . . 185
Descr ipt ion . . . . . . . . . . . . . . . . . . . . . . . . . 186
Install ing a child restraint . . . . . . . . . . . . . 187
Locat ion . . . . . . . . . . . . . . . . . . . . . . . . . . . 186
M ou nting and releasing the anchorage
hook . . . . . . . . . . . . . . . . . . . . . . . . . . . . . . 187
Launch contro l program . . . . . . . . . . . . . . . . . 81
L eather care/clean ing . . . . . . . . . . . . . . . . . 234
Leaving home . . . . . . . . . . . . . . . . . . . . . . . . .
43
Lifting jack . . . . . . . . . . . . . . . . . . . . . . . . . . 239
Light
Ambie nt ligh ting . . . . . . . . . . . . . . . . . . . . . 44
Coming/Leav ing home . . . . . . . . . . . . . . . . . 43
D aytime running lights . . . . . . . . . . . . . . . . 41
Headlig ht flasher . . . . . . . . . . . . . . . . . . . . . 42
Index
Head lights . . . . . . . . . . . . . . . . . . . . . . . . . . 42
High beam assistant . . . . . . . . . . . . . . . . . . 42
Low beams . . . . . . . . . . . . . . . . . . . . . . . . . . 41
Parking lights . . . . . . . . . . . . . . . . . . . . . . . . 41
Rear fog lights . . . . . . . . . . . . . . . . . . . . . . . 41
L ight/rain senso r
Head lights . . . . . . . . . . . . . . . . . . . . . . . . . . 41
Indicator light . . . . . . . . . . . . . . . . . . . . . . .
19
Intermittent (windshie ld wipers) . . . . . . . . 47
Li ght ing
E xterior . . . . . . . . . . . . . . . . . . . . . . . . . . . . . 41
Interior . . . . . . . . . . . . . . . . . . . . . . . . . . . . .
44
Li ghts
Head light range cont ro l sys tem . . . . . . . . . 41
Interio r/ re a d ing l ig ht s . . . . . . . . . . . . . . . . 44
Locking/unlocki ng
By remo te control . . . . . . . . . . . . . . . . . . . . 30
Wi th the cen tra l locking switch . . . . . . . . .
31
Wi th the conven ien ce key . . . . . . . . . . . . . . 30
Locking and unlock ing
On the door lock . . . . . . . . . . . . . . . . . . . . . .
32
Low beam
Indicator light . . . . . . . . . . . . . . . . . . . . . . .
19
Low beams . . . . . . . . . . . . . . . . . . . . . . . . . . . 41
Lower universal anchorages (Canada) . . . . . 185
Luggage compartment . . . . . . . . . . . . . . . . . . 57
12 Vo lt socket . . . . . . . . . . . . . . . . . . . . . . . 55
Increasing the size . . . . . . . . . . . . . . . . . . . . 57
Luggage compartment net . . . . . . . . . . . . . 58
Pass-through . . . . . . . . . . . . . . . . . . . . . . . . 59
Ski bag . . . . . . . . . . . . . . . . . . . . . . . . . . . . . 59
Stor ing ca rgo cor rectly . . . . . . . . . . . . . . .
134
Stow ing luggage . . . . . . . . . . . . . . . . . . . . 134
T ie -downs . . . . . . . . . . . . . . . . . . . . . . . . . . . 58
Valet Par king fun ct io n . . . . . . . . . . . . . . . . .
39
Luggage compartment lid . . . . . . . . . . . . . . . 36
Clos ing b utton . . . . . . . . . . . . . . . . . . . . . . . 34
Emergency release . . . . . . . . . . . . . . . . . . . . 36
move men t-a ctivated openi ng . . . . . . . . . . . 35
Open ing/clos ing . . . . . . . . . . . . . . . . . . . 33, 34
Open ing from the inside in an eme rgency . 36
olso refer to Luggage compartment lid . . . 33
Luggage rack .. .. .... .. ... ..... ... .... . 57
Lumbar support . . . . . . . . . . . . . . . . . . . . . . . SO
M
Maintenance . . . . . . . . . . . . . . . . . . . . . . . . . 259
269