park assist AUDI A6 2017 Owners Manual
[x] Cancel search | Manufacturer: AUDI, Model Year: 2017, Model line: A6, Model: AUDI A6 2017Pages: 280, PDF Size: 70.24 MB
Page 4 of 280
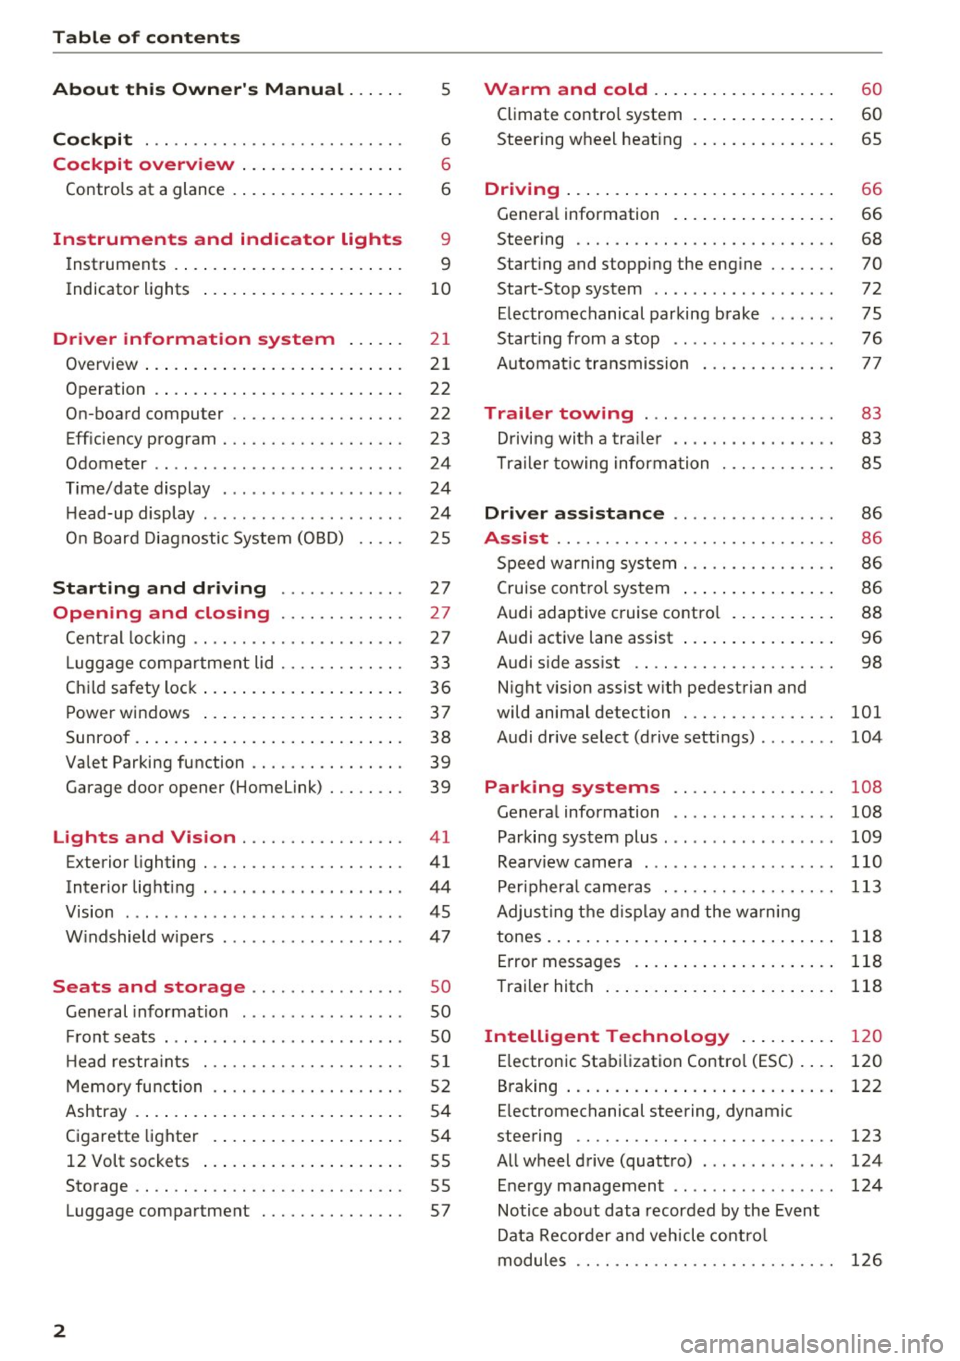
Table of contents
About this Owner's Manual ... .. .
Cockpit ... .. ............... .... .. .
Cockpit overview ................ .
Controls at a glance ... .......... .. .. .
Instruments and indicator lights
Instruments .... ... .......... .. .. .. .
Indicator lights .. .. .......... .. .. .. .
Driver information system ... .. .
Overview ... .... ... .......... ...... .
Operation .... .. ... .......... .. .. .. .
On-board computer ........... .... .. .
Eff iciency program . ........... .. .. .. .
Odometer .. .. .. ............ .... ... .
T ime/date display ........... .... ... .
He ad-up display .... .. .. ..... ... .. .. .
On Board Diagnostic System (OBD) .. .. .
Starting and driving ...... .. .. .. .
Opening and closing .......... .. .
Central locking ... ............ .... .. .
L uggage compartment lid ...... .... .. .
Child safety lock .... .......... .. .. .. .
Power windows ...... ..... ... .. .. .. .
Sunroof . ... .... .. ........... .. .. .. . 5
6
6
6
9
9
10
2 1
21
22
22
23
24
24
24
25
27
27
27
33
36
37
38
Valet Parking function . . . . . . . . . . . . . . . . 39
Garage door opener (Home link) . . . . . . . . 39
Lights and Vision . . . . . . . . . . . . . . . . . 41
Exterior lighting . . . . . . . . . . . . . . . . . . . . . 41
Interior lighting . . . . . . . . . . . . . . . . . . . . . 44
V1s1on . . . . . . . . . . . . . . . . . . . . . . . . . . . . . 45
Windshield wipers . . . . . . . . . . . . . . . . . . . 47
S eats and storage . . . . . . . . . . . . . . . . 50
Gene ral information . . . . . . . . . . . . . . . . . 50
Fro nt seats . . . . . . . . . . . . . . . . . . . . . . . . . 50
H ead restraints . . . . . . . . . . . . . . . . . . . . .
51
Memory function . . . . . . . . . . . . . . . . . . . . 52
Ashtray . . . . . . . . . . . . . . . . . . . . . . . . . . . . 54
Cigarette lighter . . . . . . . . . . . . . . . . . . . . 54
12 Volt sockets . . . . . . . . . . . . . . . . . . . . . 55
Storage . . . . . . . . . . . . . . . . . . . . . . . . . . . . 55
Luggage compartment . . . . . . . . . . . . . . . 57
2
Warm and cold .. .. ... .......... . .
Climate contro l system . ............ . .
Steering wheel heating .. . .......... . .
Driving ..... .. .. .. .. ... .......... . .
General information . .... .......... . .
Steering .. .. .. .. .. .. ............. . .
Start ing and stopping the eng ine ..... . .
Start-Stop system .. .. ... .. ..... ... . .
E le ctromechanical parking brake ..... . .
Start ing from a stop .. .............. .
Automatic transmission
Trailer towing ..... .............. .
Driving with a trailer .. ... .. ... ... .. . .
T ra iler towing information .......... . .
Driver assistance .. ........ ..... . .
Assist ...... .. .. .. .. .. ........... . .
Speed warning system . ............. . .
Cruise control system ... ........... . .
Audi adaptive c ruise contro l .......... .
Audi active lane assist ... ........... . .
Audi s ide ass ist .. .. .. ............. . .
Night vision assist w ith pedestrian and
wild animal detection ............... .
Audi drive select (drive settings) ....... .
60
60
65
66
66
68
70
72
75
76
77
83
83
85
86
86
86
86
88
96
98
101
104
Park ing systems . . . . . . . . . . . . . . . . . 108
Genera l information . . . . . . . . . . . . . . . . . 108
Parking system plus . . . . . . . . . . . . . . . . . . 109
Rearviewcamera . ......... ....... ... 110
Peripheral cameras . . . . . . . . . . . . . . . . . . 113
Adjus ting the display and the warning
tones..............................
118
Error messages . . . . . . . . . . . . . . . . . . . . . 118
Trailer hitch . . . . . . . . . . . . . . . . . . . . . . . . 118
Intelligent Technology . . . . . . . . . . 120
E lectronic Stabilization Control (ESC) . . . . 120
B raking . . . . . . . . . . . . . . . . . . . . . . . . . . . . 122
E lectromechanical steering, dynamic
steering . . . . . . . . . . . . . . . . . . . . . . . . . . .
123
All wheel drive (quattro) . . . . . . . . . . . . . . 124
Energy management . . . . . . . . . . . . . . . . . 124
Notice about data recorded by the Event
Data Recorder and vehicle control
modules . . . . . . . . . . . . . . . . . . . . . . . . . . .
126
Page 9 of 280
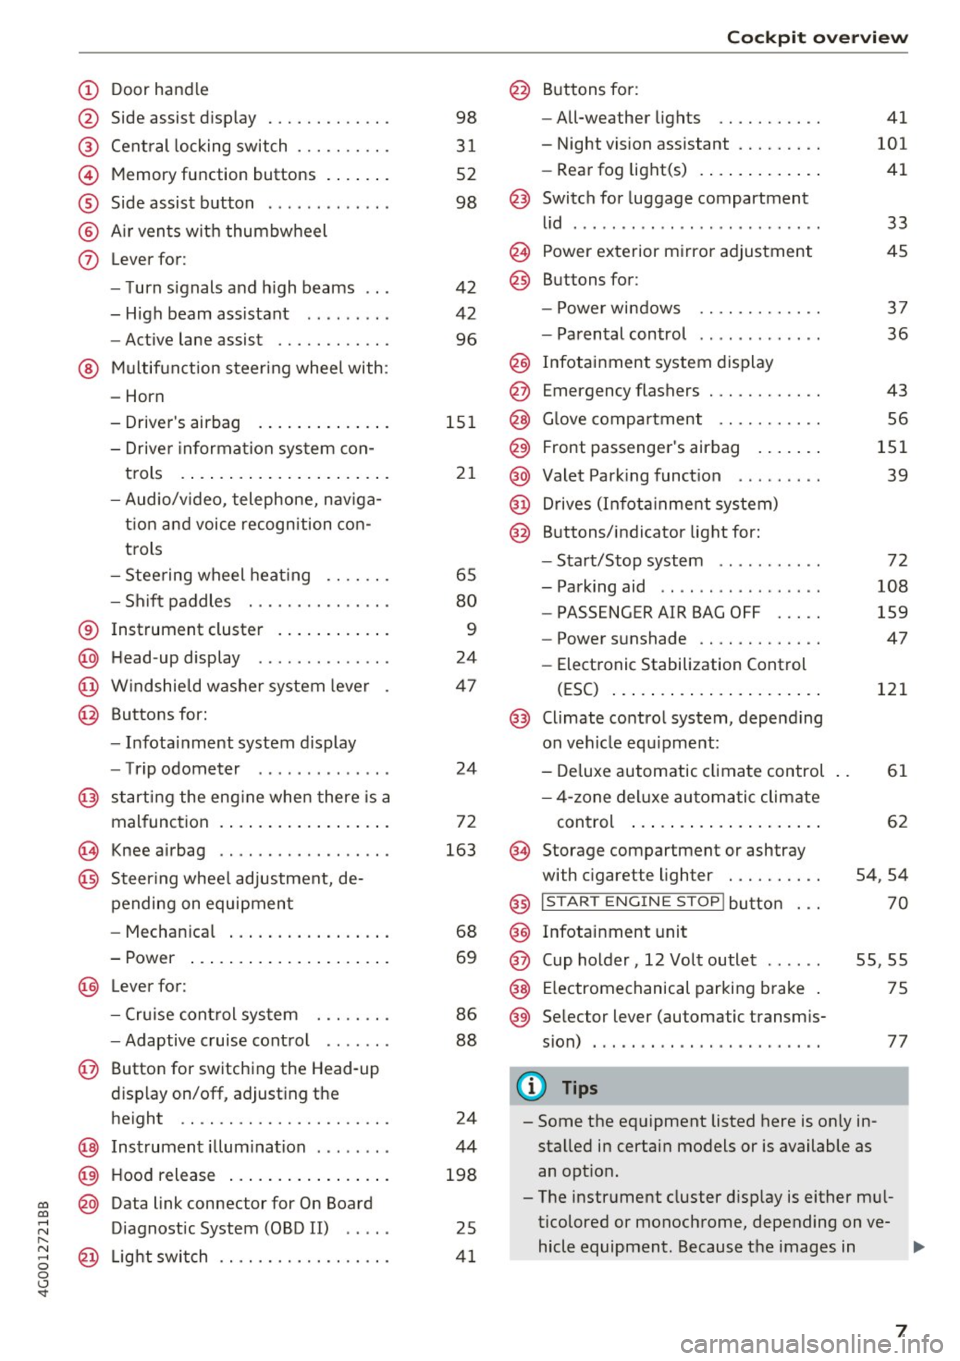
(!) Door handle
@
®
©
®
®
(j)
Side assist display
Cent ral locking switch ....... .. .
Memory function buttons . ... .. .
Side assist button ... ..... ... . .
A ir ven ts wit h thumbwheel
Lever for:
- T urn s ignals and h igh beams
- H igh beam assistant .. .. ... . .
- Active lane assist ......... .. .
@ M ultifunction steer ing wheel with:
- Horn
- Drive r's airbag . ..... ... .. .. .
- Drive r informa tion sys tem con-
t rols . ... ... .. ..... ... .. .. .
- Audio/v ideo, telephone, nav iga
t ion an d voice recognition con
trols
- Stee ring wheel heat ing .... .. .
- Sh ift paddles ............ .. .
® Instrument cluster .... ... .. .. .
@ H ead-up display ............. .
@ W indshield w ashe r system leve r
@ Buttons for:
- Infota inment system display
- Trip odometer ............. .
@ starting the eng ine when there is a
malfunc tion . ... .. .... ... .. .. .
~ Knee airbag .. ............. .. .
@ Steer ing whee l adjustment, de
pending on equipment
- Mechan ica l . ... ..... ... .. .. .
- Power ... .. .. .. .... ... .. .. .
@ Lever for:
- Cruise cont rol system ... .. .. .
- Adaptive c ruise cont rol ...... .
@ Button for switching the Head-up
d isplay on/off , adjust ing the
height .. .. ............... .. .
@ Instrument illum ination ....... .
@ Hood release .. .. ..... ... .. .. .
~ @ Data link connector for On Board
;:::: Diagnostic System (OBD II) .....
,..._
8 @ Light switch ............. .. .. .
0 <..:l -
3 1
52
98
42
42 96
15 1
21
65
80
9
24
47
24
72
163
68
69
86
88
24
44
198
25
4 1
Coc kpit o ve rv iew
@ Buttons for :
- All-weather lights
- Night vision assistant ........ .
- Rea r fog light(s) . ... . ..... .. .
@ Switch for luggage compartment
li d ...... ... .. .. ... ......... .
@ Power exterior m irro r adjustment
@ Buttons for :
- P owe r wi ndows
- Parental control
@ Infotai nment system display
@ Emergency flashers ........... .
@ G love compartment .......... .
@) Front passenger's airbag .... .. .
@ Valet Park ing funct ion .. ..... . .
@ Drives (Infot ainment system)
@ Buttons/ indicator light for:
- Start/Stop system .......... .
- Parking aid .. .. .... .. ... .. . .
- PASSENGER AIR BAG OFF .... .
- Power s unshade ............ .
- Elect ronic Stabilization Control
(ESC) ... .. .. .. .... . ..... .. .
@) Climate control system, depending
on vehicle equ ipment:
- De luxe automatic climate control
- 4-zone del uxe au tomatic climate
con trol ... .. ... .. .. ..... .. .
@ Storage compartment or ashtray
with c igarette lighter ... ...... .
@ I S TAR T EN GINE ST OP I butto n
@ Infotainment unit
@ Cup holder, 12 Vo lt outlet
41
101 41
33
45
3 7
36
43
56
151 39
72
108
159
47
121
61
62
54,54
70
55,55
@ E lectromechanical parking b rake 75
@ Se lector lever (automatic transm is-
sion) . . . . . . . . . . . . . . . . . . . . . . . .
77
(!) Tips
- Some the eq uipment listed here is on ly in
sta lled in certain models or is available as
an opt io n.
- The instr ument cluster d isp lay is either m ul
ticolored or monochrome, depending on ve-
hicle equipment. Because t he images in .,..
7
Page 13 of 280
co
co
.... N
" N .... 0 0 <..:l '
description for •.
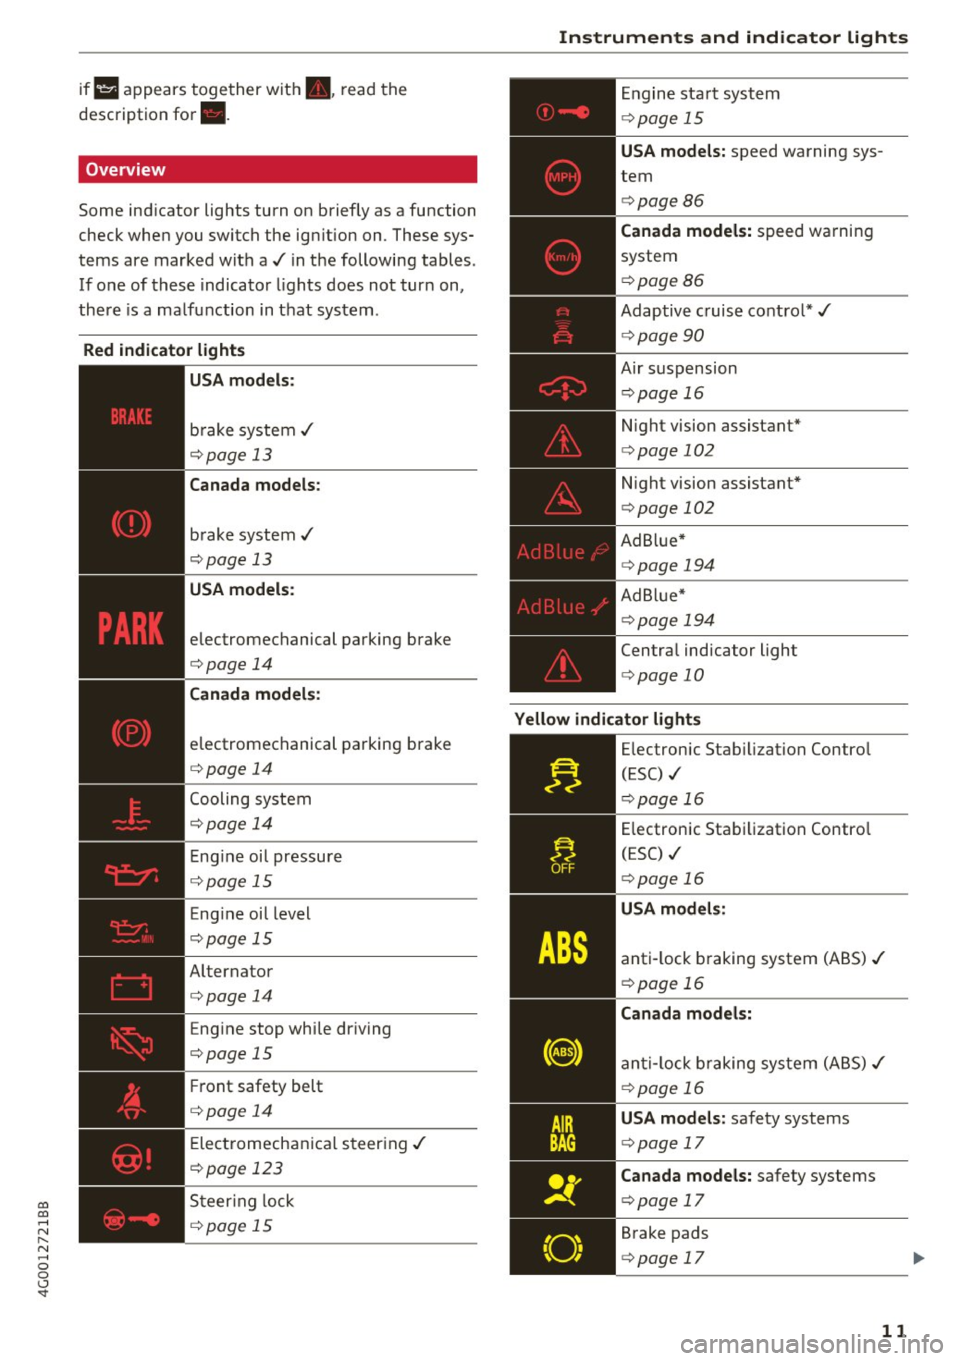
Overview
Some ind icator lights turn on briefly as a function
check whe n you switch the ig nition on . These sys
tems are marked with a../ in the following tables .
If o ne of these indicator lights does not turn on,
there is a ma lfu nction in t hat sys tem .
Red indicator lights
--------------
US A models:
brake syste m ../
¢page 13
Canada models:
brake system ../
¢pag e 13
USA models:
electromechanical parking brake
¢page 14
Canada models:
electromechanical parking brake
¢ page 14
Cooling system
¢page 1 4
Eng ine oi l pressure
¢ page 15
Eng ine oil level
¢ page 15
Alternator
¢page 14
Eng ine stop while dr iv ing
¢page 15
Fr ont safety belt
¢page 14
Ele ct romechani ca l st eer ing ../
¢page 123
Steer ing lock
¢ page 15
Instruments and ind icator lights
En gine sta rt syste m
¢page 15
USA models: speed warning sys
tem
¢ page 86
Canada model s: spee d wa rni ng
system
¢ page 86
Adap tive c ruise contro l* ../
¢ page 90
A ir suspension
¢ page 16
Night vision assistant*
¢ page 102
Night vision assistant *
¢page 102
Ad B lue*
¢ page 194
Ad Blu e*
¢page 19 4
Centra l indicator light
i=> page 10
Yellow indicator lights
.....
.,.I._
"O~ I I
" 1
--------------
Electronic Stab ilization Contro l
(ESC) ./
¢page 16
Electronic Sta bilization Contro l
(ESC) ../
¢page 16
USA models :
anti-lock braking system (ABS) ../
¢page 16
Canada models:
an ti-lock braking sys tem (A BS) ../
¢page 16
USA models: safety systems
¢ page 17
Canada models: safety systems
¢page 17
Brake pads
¢ page 17
11
Page 14 of 280
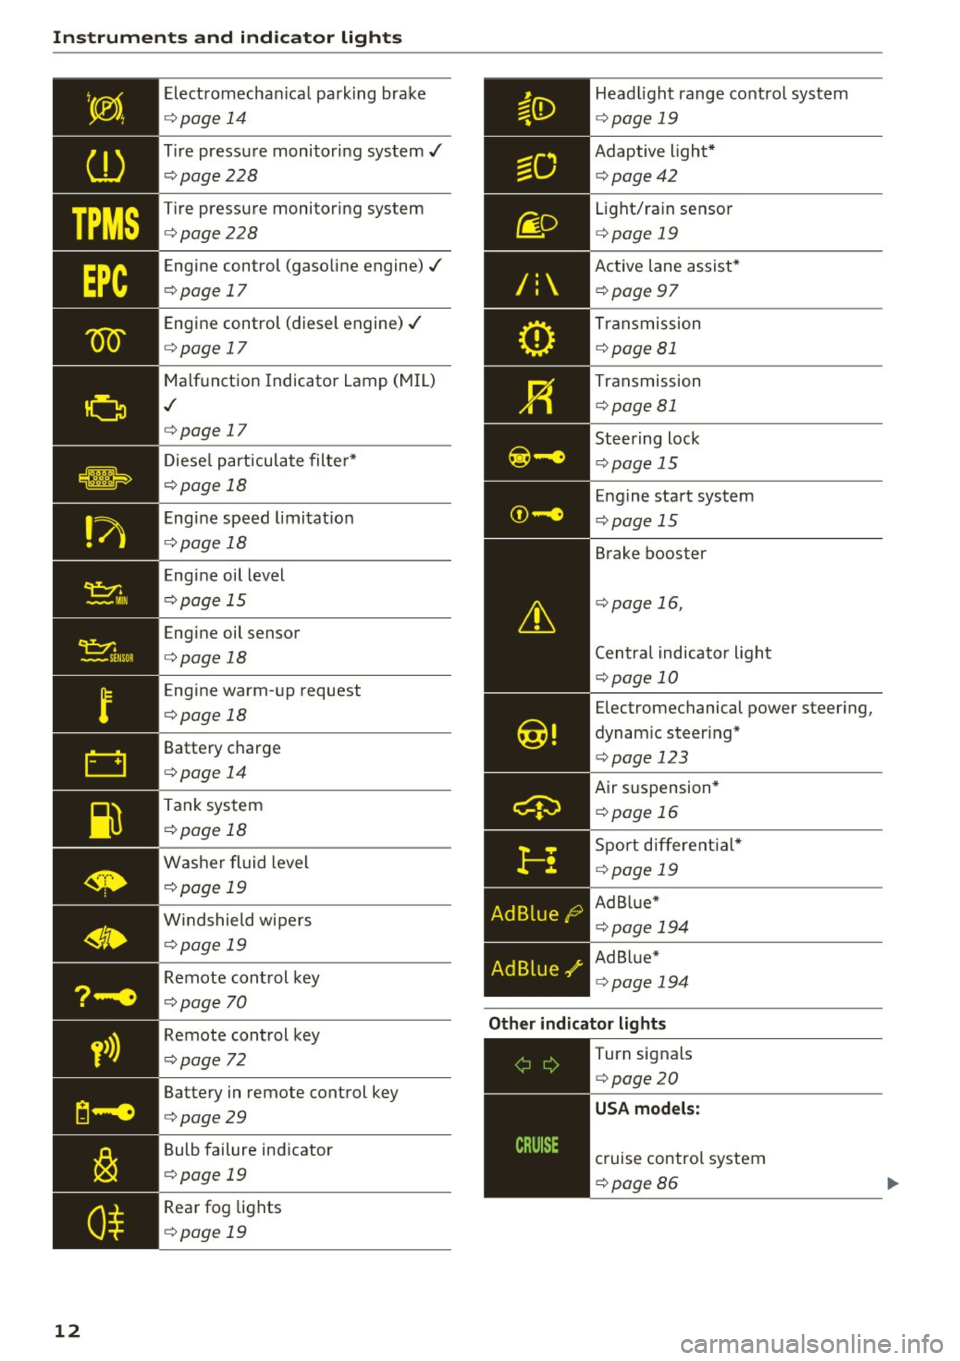
Instruments and indicator lights
12
Electromechanical parking brake
¢page 14
Tire pressure monitoring system./
¢page228
Tire pressure monitoring system
¢page228
Engine control (gasoline engine)./
¢page 17
Engine control (diesel engine)./
¢page 17
Malfunction Indicator Lamp (MIL)
./
¢page 17
Diesel particulate filter*
¢page 18
Engine speed limitation
¢page 18
Engine oil level
¢page 15
Engine oil sensor
¢page 18
Engine warm-up request
¢page 18
Battery charge
¢page 14
Tank system
¢page 18
Washer fluid level
¢page 19
Windshield wipers
¢page 19
Remote control key
¢page 70
Remote control key
¢page 72
Battery in remote control key
¢page29
Bulb failure indicato r
¢page 19
Rear fog lights
¢page 19
Headlight range control system
¢page 19
Adaptive light*
¢page42
Light/rain sensor
¢ page 19
Active lane assist*
¢page 97
Transmission
¢page 81
Transmission
¢page 81
Steering lock
¢page 15
Engine start system
¢page 15
Brake booster
¢page 16,
Central indicator light
¢page 10
Electromechanical power steering,
dynamic steering*
¢ page 123
Air suspension*
¢page 16
Sport different ial*
¢ page 19
Ad Blue*
¢page 194
Ad Blue"
¢page 194
Other indicator lights
--------------
Turn signals
¢page20
USA models:
cruise control system
¢page 86
Page 15 of 280
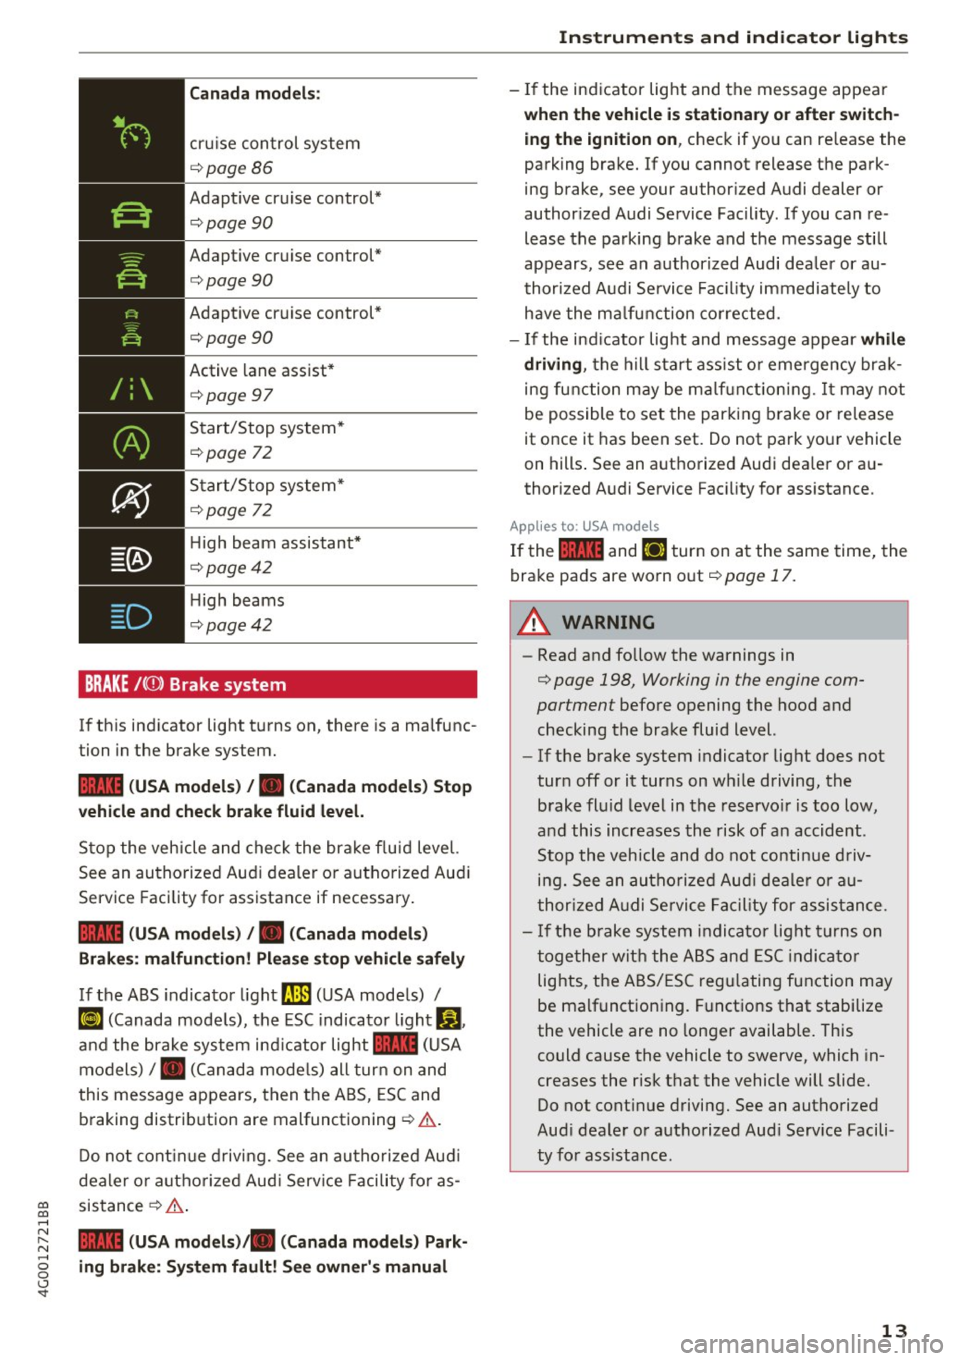
D
Canada models:
cruise control system
c:::>page86
Adaptive cruise control*
c:::>page90
Adaptive cruise control*
c:::> page 90
Adaptive cruise control*
c:::> page 90
Active lane assist*
c:::>page 97
Start/Stop system*
c:::> page 7 2
Start/Stop system*
c:::> page 72
High beam assistant*
c:::> page 42
High beams
c:::> page 42
BRAKE /(0 ) Brake system
If this indicator light turns on, there is a malfunc
tion in the brake system.
1111 (USA models) /. (Canada models) Stop
vehicle and check brake fluid level.
Stop the vehicle and check the brake fluid level.
See an authorized Audi dealer or authorized Audi
Service Facility for assistance if necessary.
1111 (USA models) /. (Canada models)
Brakes: malfunction! Please stop vehicle safely
If the ABS indicator light
rJ]l (USA models) /
Ke) (Canada models), the ESC indicator light Dl.
and the brake system indicator light 1111 (USA
models) /. (Canada models) all turn on and
this message appears, then the ABS, ESC and
braking distribution are malfunctioning
c:::> ,& .
Do not continue driving. See an authorized Audi
dealer or authorized Audi Service Facility for as-
~ sistance c:::> ,& .
.....
~ 1111 (USA models)/ . (Canada models) Park· .....
g ing brake: System fault! See owner's manual
<..:l '
- If the indicator light and the message appear
when the vehicle is stationary or after switch
ing the ignition on, check if you can release the
parking brake. If you cannot release the park
ing brake, see your authorized Audi dealer or
authorized Audi Service Facility . If you can re
lease the parking brake and the message still
appears, see an authorized Audi dealer or au
thorized Audi Service Facility immediately to
have the malfunction corrected.
- If the indicator light and message appear while
driving, the hill start assist or emergency brak
ing function may be malfunctioning.
It may not
be possible to set the parking brake or release
it once it has been set. Do not park your vehicle
on hills. See an authorized Audi dealer or au
thorized Audi Service Facility for assistance.
Applies to USA mode ls
If the 1111 and l'IJ turn on at the same time, the
brake pads are worn out
c:::> poge 17.
_8 WARNING
-Read and follow the warnings in
~ page 198, Working in the engine com
partment before opening the hood and
checking the brake fluid level.
- If the brake system indicator light does not
turn off or it turns on while driving, the brake fluid level in the reservoir is too low,
and this increases the risk of an accident.
Stop the vehicle and do not continue driv
ing. See an authorized Audi dealer or au
thorized Audi Service Facility for assistance.
- If the brake system indicator light turns on
together with the ABS and ESC indicator
lights, the ABS/ESC regulating function may
be malfunctioning. Functions that stabilize
the vehicle are no longer available. This
could cause the vehicle to swerve, which in
creases the risk that the vehicle will slide.
Do not continue driving. See an authorized
Audi dealer or authorized Audi Service Facili
ty for assistance.
13
Page 16 of 280
Instruments and indicator lights
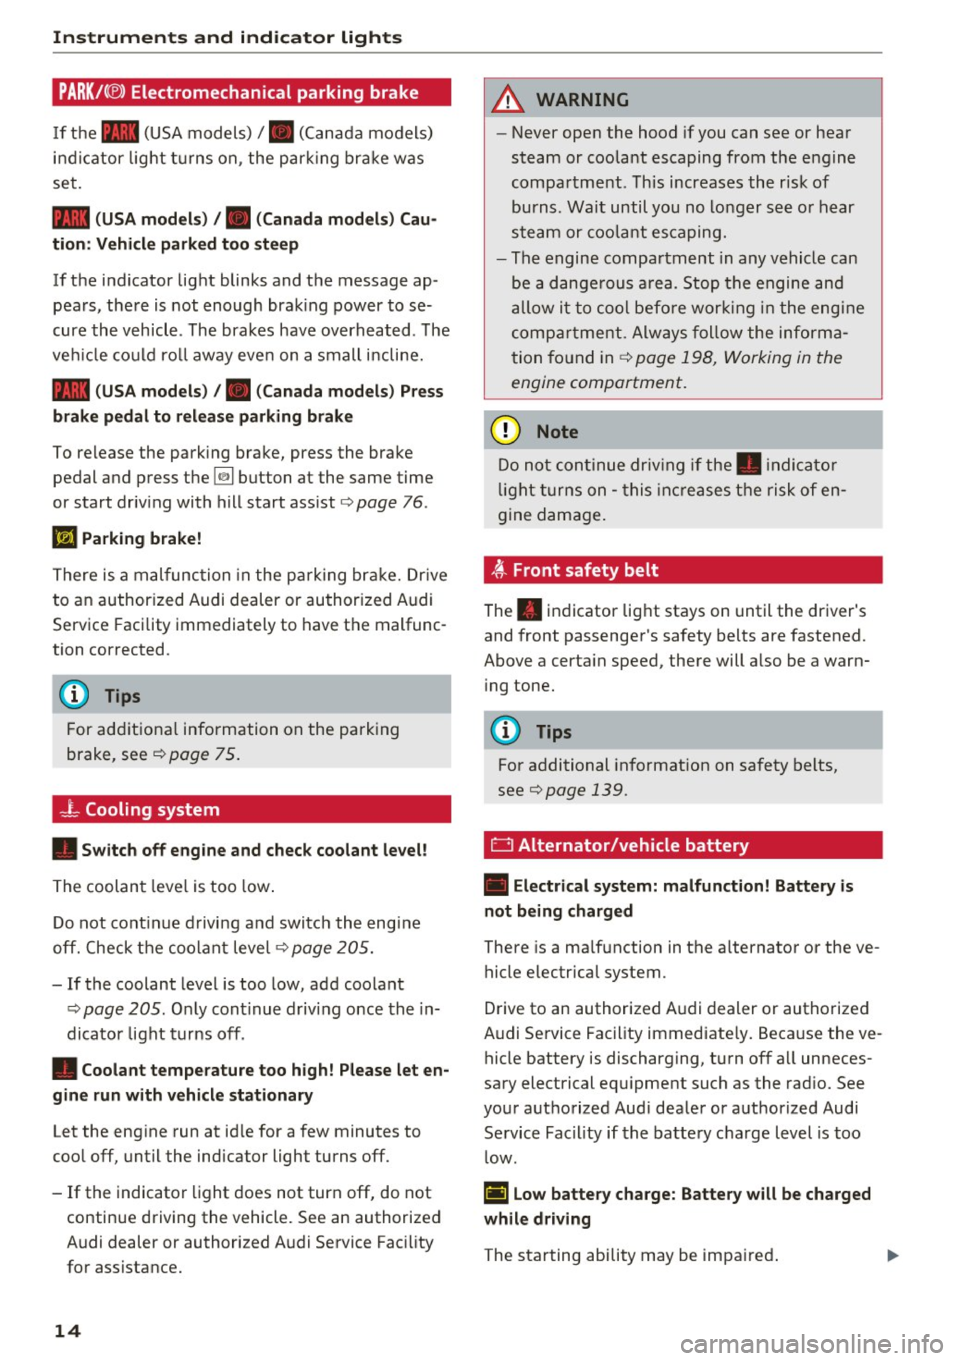
PARK/(®) Electromechanical parking brake
If the - (USA models) /. (Canada models)
i n dicator light t urns on , the par king bra ke was
set.
- (USA model s) /. (Cana da models) Cau
tion: Vehi cle parked too ste ep
If the indicator light blinks and the message ap
pears, the re is not enough brak ing power to se
cure the vehicle . The bra kes have overheated. The
ve hicl e co uld ro ll away eve n on a small incline.
- (USA mod els) /. (Canada models) Pr ess
brake pedal to rel ease parking brake
To release the park ing brake, press the brake
pedal and press the
[21 button at the same time
or start driv ing with hill start ass ist
r=> page 76.
II Parking brake!
There is a malfunc tion in the park ing bra ke. Dr ive
to an author ized Audi dealer or author ized Audi
Service Facility immediately to have the malfunc
tion corrected .
(D Tips
For additional information on the parking
brake, see
r=:> page 75.
-L Cooling system
• Switch off engine and check coolant level!
The coolan t leve l is too low .
Do not cont inue d rivin g and switch the engi ne
off. Check the coolant leve l
r=>page 205.
-If the coolant level is too low, add coolant
r=:> page 205 . Only cont inue driving once the in
dicator light turns off .
• Coolant temperature too high! P lease let en
gine run with vehicle st a tionary
Let the eng ine run at id le for a few minutes to
coo l off, until the indicator light turns off.
- If the indicator light does not turn off, do not
continue driving the vehicle. See an authorized
Audi dealer or authorized A udi Service Fac ility
for assistance.
14
A WARNING
-
- Never ope n the hood if you can see or hear
steam or coola nt escaping from t he engine
compar tment . This increases the risk of
burns. Wa it until you no longer see o r hear
stea m or coola nt es caping.
- The engine compartment in any vehicle can
be a dange rous a rea. Stop t he engine and
allow it to cool befo re wor king i n the e ng in e
comp artme nt. Always follow the informa
tion fo und in
r=:> page 198, Working in the
engine compartment.
Q) Note
D o not con tinue driv ing if the . indi ca to r
li ght turn s on -this in cr eases the risk of en
gine damage.
~ , Front safety belt
The . indicator lig ht stays on until the driver 's
and front passenger's safety belts are fastened.
Above a certa in speed, there will a lso be a warn
i ng tone.
(D Tips
For additional informat ion on sa fety belts,
seer=;,
page 139.
D Alternator/vehicle battery
• Electrical system: m alfunction! Battery is
not being charged
There is a ma lfunction in the a lternato r or the ve
hicle electrical system.
D rive to an authorized A udi dealer or authorized
Audi Se rvice Facility immediate ly. Beca use the ve
hicle battery is discharging, turn off a ll unneces
sa ry electrical equ ipment such as the rad io. See
your authorized Audi dea ler or authorized Audi
Service Facility if the batte ry charge level is too
l ow .
(•) Low battery charge: Battery will be charged
while driving
The starting ability may be impa ired . ...
Page 30 of 280
Opening and clo sin g
@ Tips
- Do not leave valuables unattended in the ve
hicle . A locked vehicle is not a safe!
- The LED in the driver 's door rail blinks when
you lock the vehicle . If the LED lights up for
approximately 30 seconds after locking,
there is a ma lfunction in the central locking
system. Have the problem corrected by an
authorized Audi dealer or authorized Audi Service Fac ility.
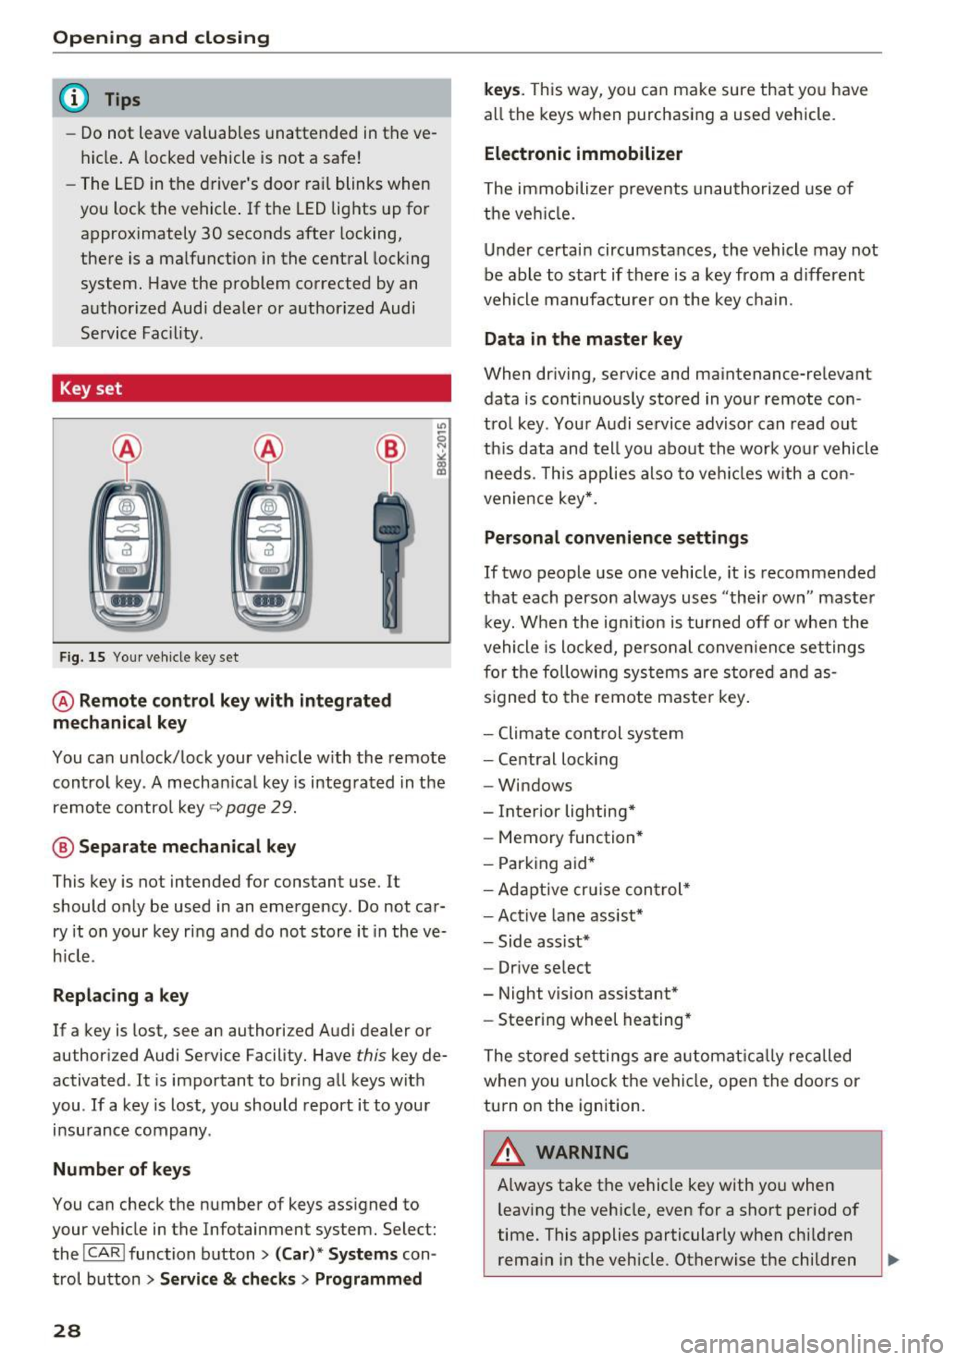
Key set
Fig. 15 You r veh icle key set
@ Remote control ke y with integr ated
mechanica l key
You can unlock/lock your veh icle w ith the remote
control key . A mechan ical key is integrated in the
remote control key~
page 29.
@ Separate mechanical ke y
This key is not intended for constant use. It
should only be used in an emergency . Do not car
ry it on your key ring and do not store it in the ve
h icle.
Replacing a ke y
If a key is lost, see an authorized Audi dealer or
authorized Audi Service Facility. Have
this key de
activated . It is important to bring all keys with
you . If a key is lost, you should report it to your
insurance company.
Number of key s
You can check the number of keys ass igned to
your veh icle in the Infotainment system. Select:
the !CAR !function button>
(C ar )* S yst e m s con
trol button
> Service & che cks > Programmed
28
k ey s. T his way, you can make sure that you have
all the keys when purchasing a used vehicle.
El ectronic immobiliz er
The immobilizer p revents unauthorized use of
the ve hicle.
Under certain circumstances, the vehicle may not
be able to start if there is a key from a d ifferent
vehicle manufacturer on the key chain.
Da ta in th e master key
When dr iving, service and maintenance-relevant
data is cont inuous ly stored in your remote con
trol key. Your A udi se rvice advisor can read out
th is data and tell you about the work yo ur vehicle
needs . This applies also to veh icles with a con
venience key *.
Personal convenience sett ings
If two people use one vehicle, it is recommended
that each person always uses "their own" master k ey. When the ign ition is turned off o r whe n the
vehicle is locked, personal conve nience set tings
for the following systems are stored and as
s igned to the remote maste r key .
- Climate cont rol system
- Central lock ing
- Windows
- Interior lighting*
- Memory function*
- Park ing aid*
- Ad aptive cru ise con trol *
- Ac tive lane assist*
- Side ass ist*
- Drive select
- Night vision assistant*
- Steering wheel heating *
The stored settings a re a utomat ica lly recalled
whe n you unlock t he vehi cle, open the doors or
turn on the ignition.
A WARNING
A lways take the vehicle key with you when
leaving the vehicle, even for a short period of
time. This applies particularly when child ren
rema in in the vehicle . Otherwise the children
-
Page 43 of 280
co
co
.... N
" N .... 0 0 <.,;) 'SI"
Lights and Vision
Exterior Lighting
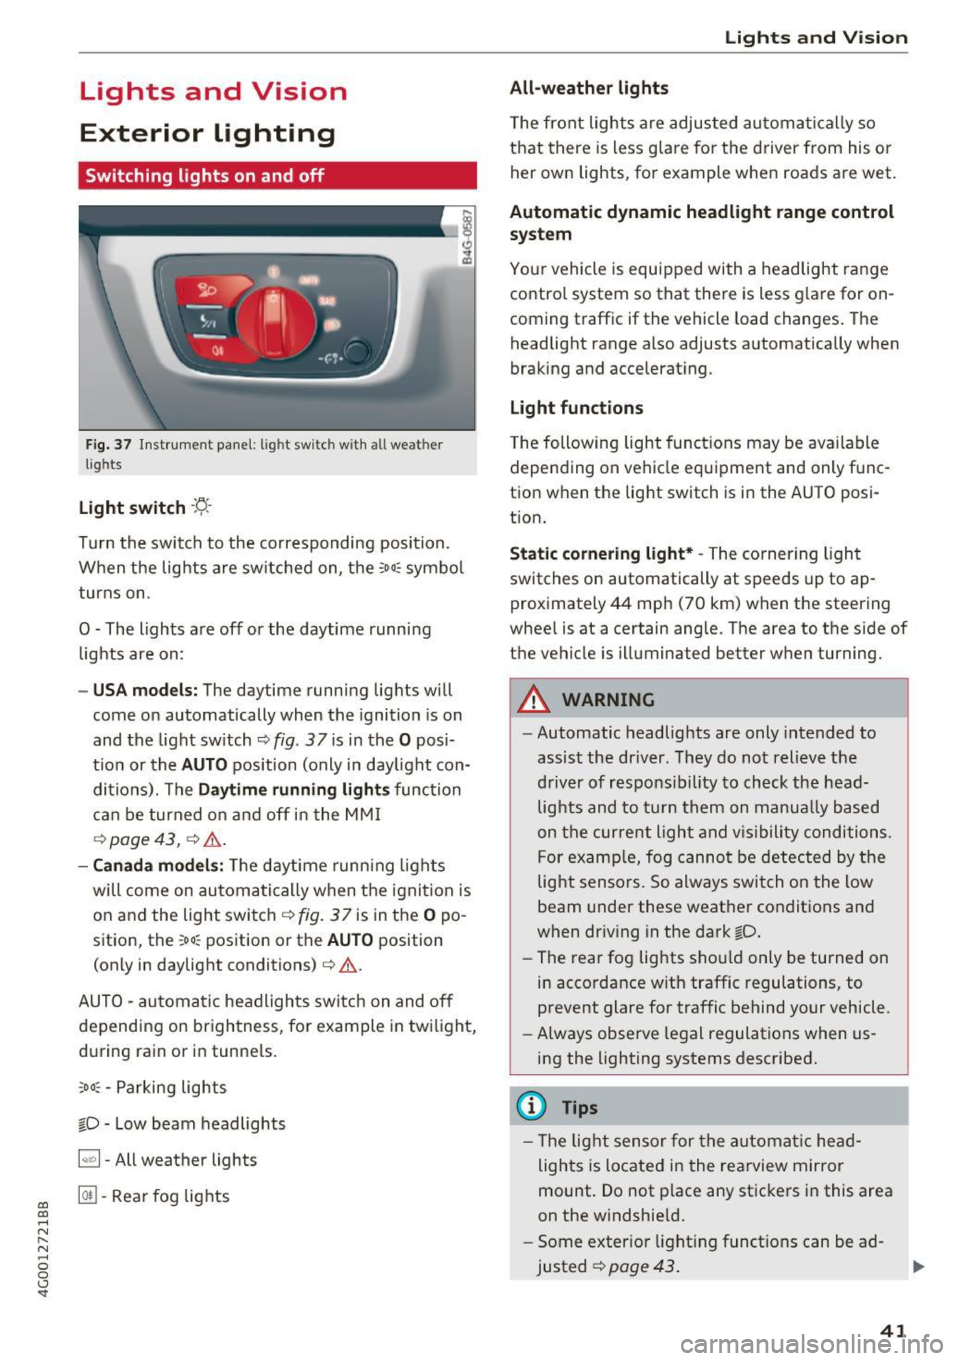
Switching lights on and off
Fig. 37 In strument pane l: l ig ht sw itc h w ith all weather
lights
Light switch -r;..-
T u r n the switch to the co rresponding posi tion.
When the lights are sw itched on, the
:oo: symbo l
turns on.
0 · The lights are off or the daytime running
l ights are on:
- USA models: The daytime running lig hts will
come on automatically when the ignition is on
and the light sw itch
c::> fig . 37 is in the O posi
t io n or the
AUTO pos ition (only i n day light con
di tions). The
Daytime running lights func tion
c an be turned o n and off in the MM I
c::> page 43, ¢ ,&. .
-Canada models : The daytime runn ing ligh ts
will come on au toma tically when t he ig nit ion is
on a nd the light swi tch <=?
fig . 37 is in the O po
sition, the
: oo: position or the AUTO position
(only in daylig ht conditions)
c:> ,&. .
AUTO -au toma tic headligh ts sw itc h on and off
depending on br igh tness, for example in tw ilight,
d ur ing ra in or in tunne ls.
,oo : -Parking lights
io · Low beam headlights
~ -All weather lights
@II -Rea r fo g lig hts
Lights and V ision
All-weather lights
T he front lights a re adju sted au toma tic a lly so
t h at there is less glare for the driver from his o r
her own lights, fo r example whe n roads a re wet.
Automatic dynamic headlight range control
system
Yo ur vehicle is equip ped with a headlight r ange
contro l system so that there is less g lare for on
coming traff ic if the vehicle load changes . The
headlight range also adjusts automatically when
braking and accelerat ing.
Light functions
T he following light funct ions may be ava ilable
depending on vehicle eq uipme nt and only f unc
tion when the lig ht switch is in the AUTO posi
t ion.
Static cornering light* -The corner ing ligh t
switches on automatically at speeds up to ap
prox imately 44 mph (70 km) when the steering
whee l is at a certain ang le. The area to t he side of
the vehicle is illuminated better when turning.
A WARNING
-
- Automatic headlights are only intended to
assist the driver. They do no t relieve t he
d river of respons ibi lity to check the head
light s and to t urn them on manua lly based
o n t he curre nt light and v is ib ility conditi ons .
Fo r examp le, fog canno t be de tec ted by the
light sensors. So always switch o n the low
beam under these weat her co nditions a nd
when driving in the dark
io.
- The rear fog lights s ho ul d only be turned on
i n acco rdance w ith traffic regulations, to
prevent glare for traffic behind your vehicle.
- Always observe le g al regulations when us
i n g the lighting systems desc ribed.
(D Tips
- T he lig ht sensor for the automa tic head
lights is located in the rea rview mirror
mount. Do not p lace a ny st icke rs i n this are a
on the windshie ld .
- Some exter io r l ight ing funct io ns can be ad
justed
c::> page 43 .
41
Page 78 of 280
Driving
During emergency braking, your vehicle will
brake similar to heavy braking. ESC and the
associated components (ABS, ASR, EDL)
cannot overcome the laws of physics. In cor
ners and when road or weather conditions
are bad, a full brake application can cause
the vehicle to skid or the rear end to swerve,
which increases the risk of an accident.
- If the power supply fails, you cannot set the
parking brake if it is released. In this case,
park the vehicle on level ground and secure
it by placing the selector lever in the P posi
tion. See an authorized Audi dealer or au
thorized Audi Service Facility for assistance.
- Always take the vehicle key with you when leaving your vehicle, even for a short period
of time. This applies particularly when chil
dren remain in the vehicle . Otherwise chil
dren could start the engine, release the
parking brake or operate electrical equip
ment such as power windows, which in
creases the risk of an accident.
- No one should remain in the vehicle when it is locked -especially children. Locked doors
make it more difficult for emergency work
ers to get into the vehicle, which puts lives
at risk.
(D Tips
When stopping at a traffic signal or stopping in city traffic, you can set the parking brake
manually. The vehicle does not have to be
held with the brake pedal. The parking brake
eliminates the tendency to creep when a se
lector lever position is engaged. As soon as
you press the accelerator pedal, the parking brake releases automatically and your vehicle
starts to move ¢
page 76.
(D} Tips
-Occasional noises when the parking brake is
set and released are normal and are not a
cause for concern.
- The parking brake goes through a self-test
cycle at regular intervals when the vehicle is
stopped. Any noises associated with this are normal.
76
- If there is a power failure, the parking brake
will not set if it is released, and it will not release if it is set ¢&. . See an authorized
Audi dealer or authorized Audi Service Fa cility for assistance .
Starting from a stop
Various convenience and safety functions may be
available when the vehicle begins driving, de
pending on vehicle equipment .
Starting on hills with the parking brake set
Requirement: the driver's door must be closed
and the driver's safety belt must be fastened.
.,. To start driving comfortably when on a hill, set
the parking brake and begin driving as usual.
The braking force of the parking brake does not
release automatically until the wheels build up
enough driving force.
Starting on hills with hill hold assist
Hill hold assist makes it easier to start on hills.
Requirement: the driver's door must be closed
and the engine must be running.
.,. To activate hill hold assist, press and hold the
brake pedal for several seconds. The vehicle
must be in an uphill direction of travel.
After releasing the brake pedal, the braking pow er is maintained for a brief moment¢&. to pre
vent the vehicle from rolling back when starting.
During this time, you can easily begin to move
your vehicle.
&_ WARNING
- If you do not begin driving immediately or
the engine stalls after releasing the brake
pedal, your vehicle may begin to roll back-
ward. Press the brake pedal or set the park- ing brake immediately.
- The intelligent technology of hill hold assist
cannot overcome the limitations imposed by
natural physical laws. The increased comfort
offered by hill hold assist should not cause
.
you to take safety risks . ~
Page 79 of 280
co
co
.... N
" N .... 0 0 <.,;) 'SI"
-Hill hold assist cannot hold the veh icle in
place on all h ills (for example, if the ground
is slippery or icy).
- To reduce the risk of an accident, always
make sure the vehicle is situated safely
wh ile stat io nary.
Automatic transmission
Introduction
The automat ic transmission is cont rolled e lec
tron ica lly. The tra nsmission shifts up or down au
tomatically depending on which drive program is
selected.
When a
moderat e driving style is used, the
transmission selects the most economical driving mode. The t ransmission upshifts at a lower RPM
and downshifts at a higher RPM to improve fuel
efficiency .
The transmission sw itches to a sporty mode a fter
a kick-down or when the driver uses a
s po rt y
driving st yle
characterized by quick accelerator
pedal movements, heavy acce leration, frequent
changes in speed and traveling at the maximum
speed .
If desired, the driver can also select the gears
manually ( tiptronic mode) q page 80 .
Appl ies to : ve hicles w ith S tro nic t ran smi ssio n
The 5 tronic is a dual-clutch transmiss ion . Powe r
is transferred using two cl utches that work inde
pendently from one another. They replace the
torque converter used in conventional automat ic
transmissions and allow the vehicle to accelerate
without a noticeab le interruption in tract ion.
A ppl ies to: ve hicles with a t iptro nic tr ansmi ssio n
Power is transfer red using a torque conver ter.
D rivi ng
Selector lever positions
Fig. 83 Instrument cl uster: selector leve r pos itions
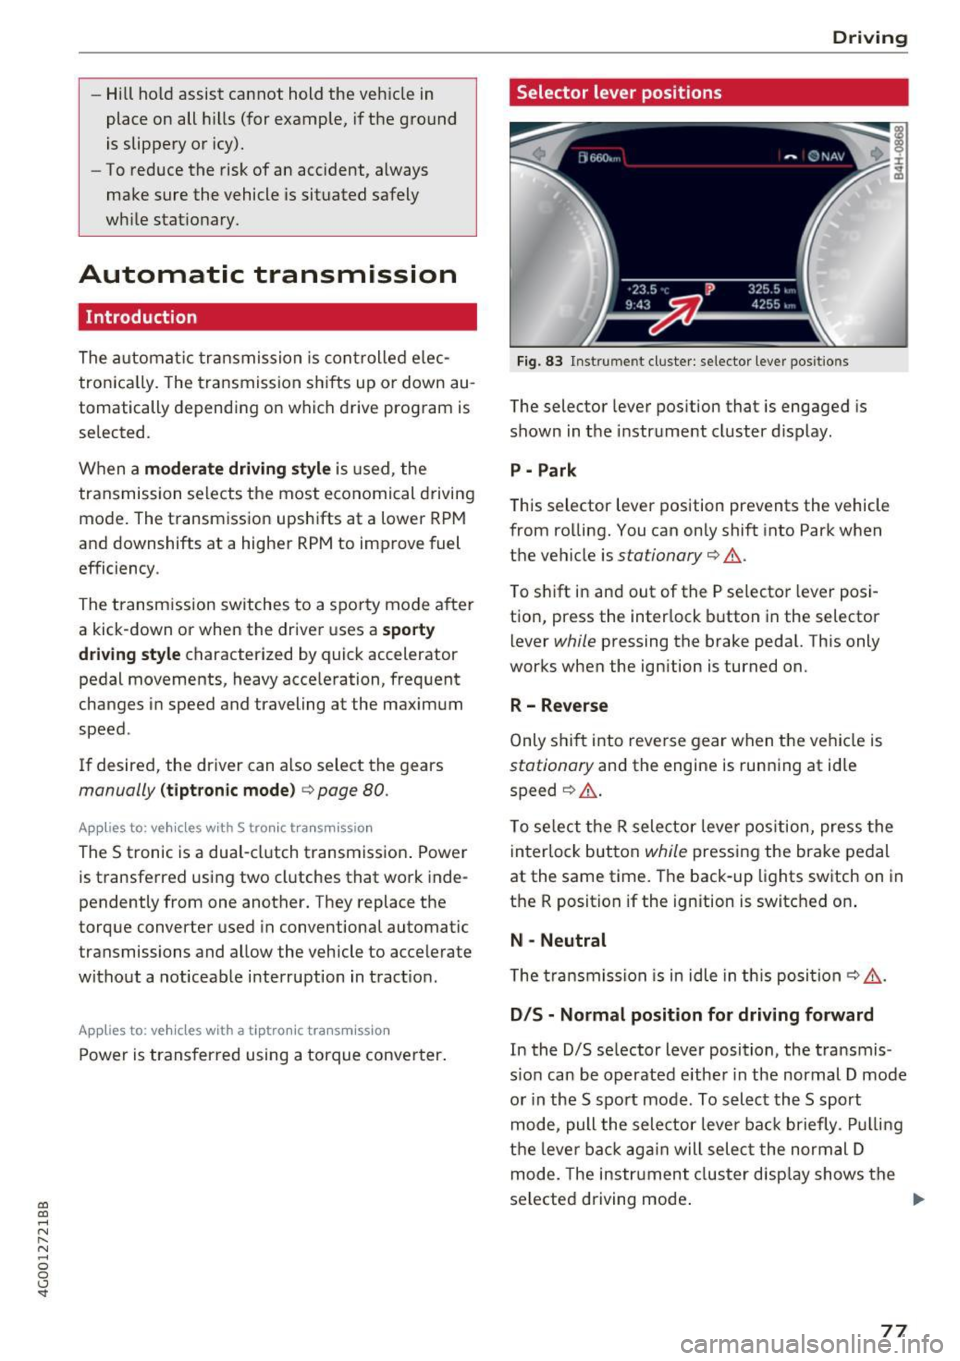
The selector lever position that is engaged is
shown in the instrume nt cluster display .
P - Park
This selector lever position prevents the vehicle
from rolling. You can only shift into Park when
the vehicle is
stationary q &. .
To shift in and out of the P selector lever posi
tio n, press the inter lock b utton in the selector
lever
while pressing the brake peda l. Th is only
works when the ign ition is turned on.
R- Reverse
Only s hift into reve rse gear when t he vehicle is
stationary and the engine is running at idle
speed
q &. .
To se lect the R selector leve r pos ition, press the
in terlo ck button
while pressing the brake pedal
at the same time. The back-up lights switch on in
the R position if the ignition is switched on .
N -Neutral
T he tra ns m ission is in idle in th is posi tion
q &_ .
DIS -Normal position for driving forward
In the D/S se lector lever position, the t ransmis
s io n can be operated e ither in the normal D mode
or in the 5 spo rt mode . To select the 5 sport
mode, pull the selector leve r ba ck briefly . Pu llin g
t h e lever ba ck aga in will selec t the normal D
mode. The instr ument cluster disp lay shows the
selected driving mode .
77