spare tire AUDI A6 2018 Owners Manual
[x] Cancel search | Manufacturer: AUDI, Model Year: 2018, Model line: A6, Model: AUDI A6 2018Pages: 266, PDF Size: 41.38 MB
Page 211 of 266

0 0)
-N ,.... N
-0
s ..
differently even if they are the
same
size ¢,&. .
.,,. If you would like to equip your
vehicle with a tire/rim combina
tion that is different from what
was installed at the factory, con
sult with an authorized Audi
dealer or authorized Audi Service
Facility before making a pur
chase¢ ,&..
Because the spare tire* is differ
ent from the regular tires instal
led on the vehicle (such as winter
tires or wide tires), only use the spare tire* temporarily in case of
emergency and drive carefully
while it is in use. It should be re
placed with a regular tire as soon
as possible.
Applies to: vehicles with all wheel drive : all four wheels must be
equipped with tires that are the
same brand and have the same
construction and tread pattern so
that the drive system is not dam aged by different wheel speeds.
For this reason, in case of emer
gency, only use a spare tire* that
is the same circumference as the
regular tires .
Wheels
A WARNING
-Do not use steel rims that are
17 inches or larger. Other
wise, damage to the vehicle and an accident could result.
-Only use tire/rim combina
tions and suitable wheel bolts
that have been approved by
Audi. Otherwise, damage to
the vehicle and an accident
could result.
-For technical reasons, it is not
possible to use tires from oth
er vehicles
-in some cases,
you cannot even use tires from
the same vehicle model.
-Make sure that the tires you
select have enough clearance
to the vehicle. Replacement
tires should not be chosen
simply based on the nominal
size, because tires with a dif
ferent construction can differ
greatly even if they are the
same size. If there is not
enough clearance, the tires or
the vehicle can be damaged
and this can reduce driving
safety and increase the risk of
an accident.
...
209
Page 213 of 266
Ti re rotation
Rotating the tires regularly is rec
ommended to ensure the tires
wear evenly. To rotate the t ires,
install the tires from the rear axle
on the front axle and vice versa.
This will allow the tires to have
approximately the same length of
service life.
For unidirectional tires , make
sure the tires are installed accord i ng to the running direction indi
cated on the tire sidewall
¢page 231.
Hidden damage
Damage to tires and rims can of
ten occur in locations that are hidden. Unusual vibrations in the
vehicle or pulling to one side may indicate that there is tire damage.
Reduce your speed immediately.
Check the tires for damage. If no
damage is visible from the out
side, dr ive slowly and carefully to
the nearest authorized Audi deal er or authorized Audi Service Fa
cility to have the vehicle inspect
ed.
A WARNING , ~ -
o Tread that has worn too low or co ...
~ different tread depths on the
... 0 0 Q '
tires can reduce driving safety.
This can increase the risk of an accident because it has a nega
tive effect on handling, driving
through curves, and braking, and because it increases the
risk of hydroplaning when driv
ing through deep puddles.
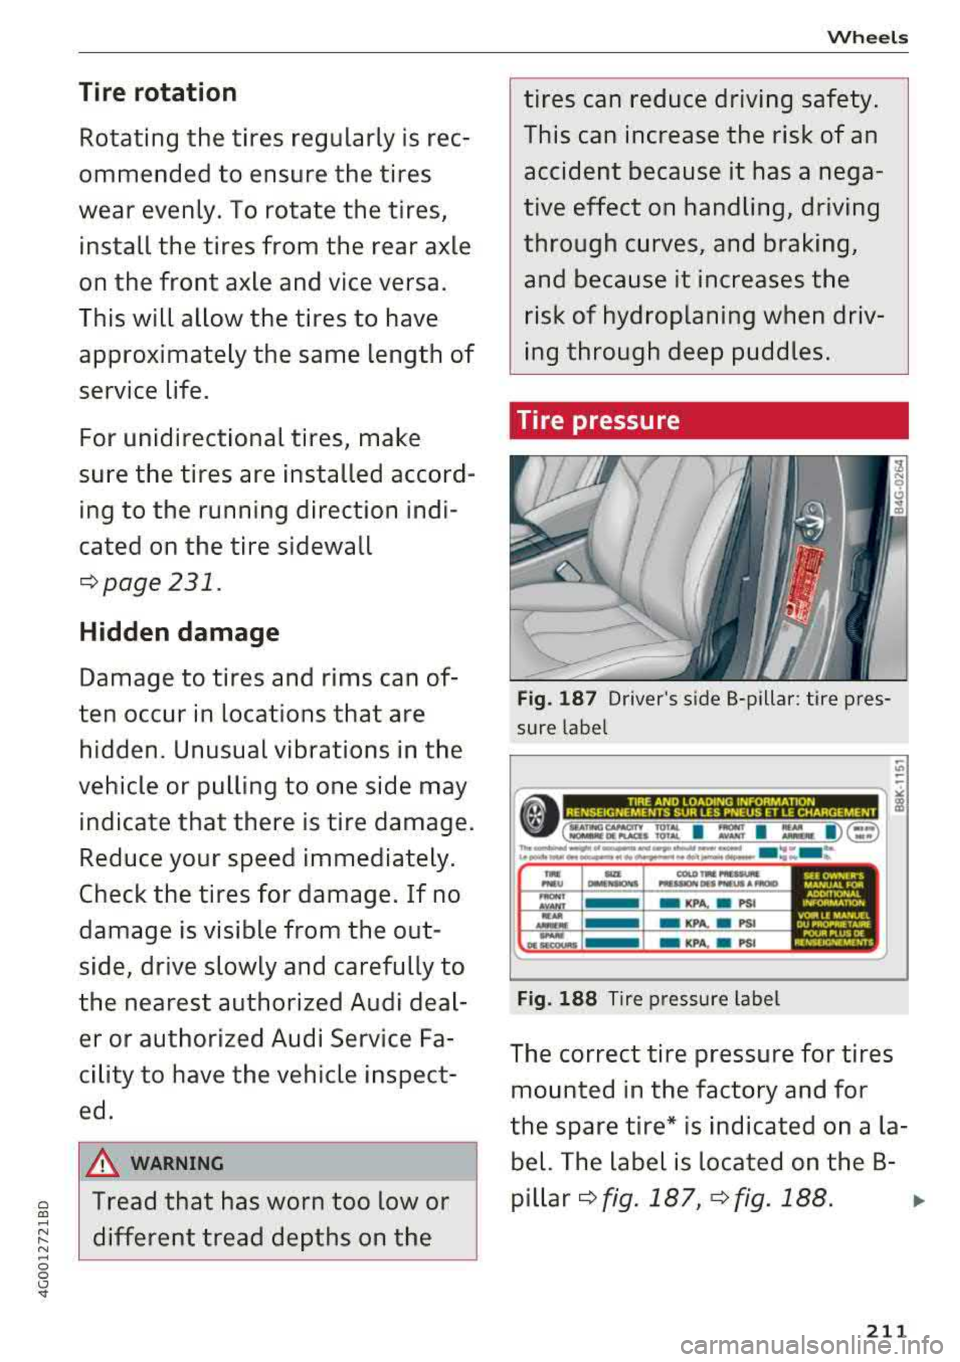
Tire pressure
Fig. 187 Driver's side 8-pillar : tire pres
sur e label
;;;
--------------- -
(. c ==. ~:t I : I :,. I ) (':~ ) l ~
1111..-... ............................ -.. ..... ..... _ .... "" ................ .. .,_...._,. ..... .............. ... .
-KPA. . PSI
-KPA. . PSI
-KPA. . PSI
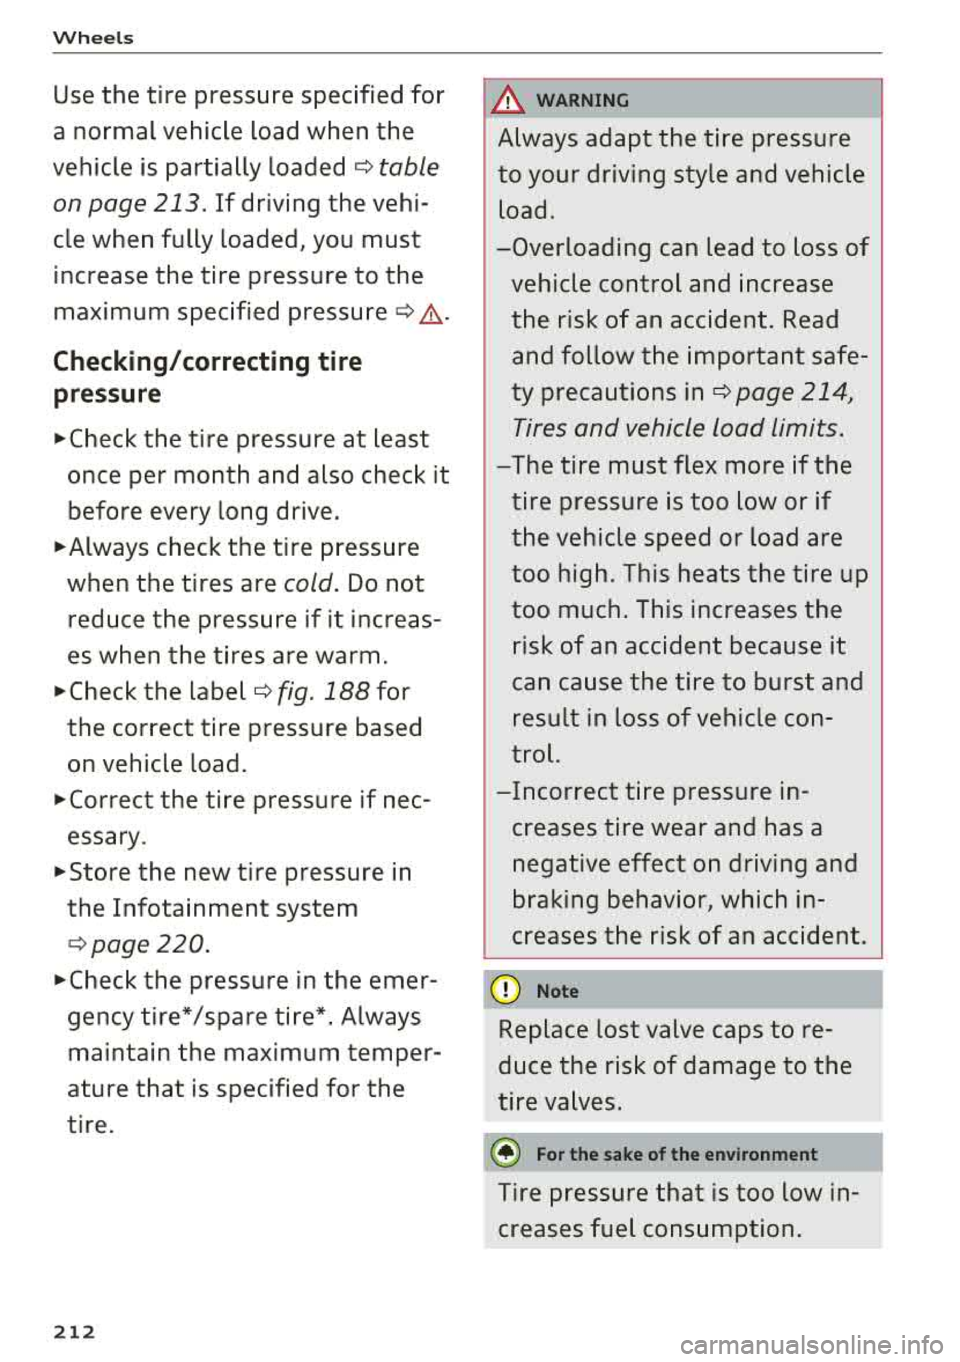
Fig. 188 Tire pressur e label
The correct tire pressure for tires
mounted in the factory and for
the spare tire* is indicated on a la
bel. The label is located on the B-
p illar
¢ fig. 187, ¢ fig. 188. ..,
211
Page 214 of 266
Wheels
Use the tire pressure specified for
a normal vehicle load when the
vehicle is partially
loaded ¢ table
on page 213 .
If driving the vehi
cle when fully loaded, you must
increase the tire pressure to the
maximum specified
pressure ¢.&. -
Checking/correcting tire
pressure
~check the tire pressure at least
once per month and also check it
before every long drive .
~Always check the tire pressure
when the tires are
cold. Do not
reduce the pressure if it increas
es when the tires are warm.
~check the label¢ fig . 188 for
the correct tire pressure based
on vehicle load.
~correct the tire pressure if nec
essary .
~store the new tire pressure in
the Infotainment system
¢ page 220.
~check the pressure in the emer
gency tire*/spare tire*. Always
maintain the maximum temper
ature that is specified for the
tire.
212
& WARNING
Always adapt the tire pressure
to your driving style and vehicle
load .
-Overloading can lead to loss of
vehicle control and increase
the risk of an accident. Read and follow the important safe
ty precautions
in¢ page 214,
Tires and vehicle load limits.
-The tire must flex more if the
tire pressure is too low or if
the vehicle speed or load are
too high . This heats the tire up
too much. This increases the
risk of an accident because it
can cause the tire to burst and
result in loss of vehicle con
trol.
-Incorrect tire pressure in creases tire wear and has a
negative effect on driving and
braking behavior, which in
creases the risk of an accident.
{tfj) Note
Replace lost valve caps to re
duce the risk of damage to the
tire valves.
@ For the sake of the environment
Tire pressure that is too low in
creases fuel consumption.
Page 220 of 266
Wheels
For example: Tr ead wea r 200, Traction AA, Tem
pe rature
A .
All passenge r ca r tires m ust conform to Federa l
Safety Requi rements in addition to these g rades.
Tread wear
The tread wear grade is a comparat ive rat ing
based on the wear rate of the t ire when tested
unde r contro ll ed conditions o n a specified gov
e rnmen t test co urse.
For example, a tire graded 150 would wear one
and one ha lf ( 11/2) t imes as well on the gove rn
ment course as a tire g raded 1 00.
The relative performance of t ires depends upon
the actual condi tions of their use, howeve r, and
may depart s ignificant ly from the norm d ue to
va ria tions in driving hab its, service pra ctices and
d ifferences in road ch aract eris tics and clim ate.
Traction
The traction grades, from highest to lowest, are
AA, A, Band
C. T hose grades represent the t ire's
ab ility to stop on wet pavement as meas ured un
de r contro lled condi tions o n specified gove rn
men t tes t su rfa ces of asp ha lt and conc re te. A tire
mar ked C m ay have poor trac tion pe rforma nce
q _&. ,
Temperature
The temperature grades a re A (t he highest), B,
and C, rep resent ing the tire' s resistan ce to t he
gener ation o f heat and it s abili ty to d iss ipate
heat when tested unde r controlled condi tions on
a specified in door laboratory test whee l.
Susta ined hig h tem perature can cause t he ma te
r ial of the t ire to dege nerate and re duce tire life,
an d excess ive temperatu re can lead to sudden
tire fai lure
q .&. .
The gr ade C co rresponds to a leve l of perfor m
a nce wh ich all passenge r car tir es mus t mee t un
der t he Fede ra l Mo tor Vehicle Safety Standar d
No . 109 . Grades Band A represent higher leve ls
of perfo rmance on the labo rato ry test w heel than
the min imum required by law.
218
A WARNING -
The tract io n grade assigned to this t ire is
based on straight-a head braking traction
tes ts, a nd does no t in clude acceleration, cor
ne ring, hy droplaning or pea k traction cha rac
teris tics.
A WARNING
The tem perat ure grade fo r thi s tire is estab
lishe d fo r a t ire th at is p roperl y infl ated and
n ot overloaded . Excessive s peed, under infla
tion, o r excessive loa ding, either separate ly or
i n comb inat io n, can cause heat bu ildup and
possib le t ire fai lure.
A WARNING
-
-
Tempe rature grades app ly to t ires that are
proper ly inflated a nd not over or under inflat
ed .
Tire pressure monitoring
system
ill General notes
Each tire, including the spare (if prov ided),
shou ld be checked monthly when cold and inflat
ed to the i nflat ion press ure recommended by the
vehicle manufacture r on the veh icle placard or
ti re infla tion p ressure labe l. (If your ve hicle has
t ir es of a diffe rent size t han the si ze ind icated on
t h e ve hicle placard or tire i nflat io n press ure la
bel, you sho uld dete rm ine the proper tire in fla
tion press ure for those tires) .
As a n ad ded safety featu re, you r vehicle has been
equipped wi th a t ire p ress ure mon itor ing system
(TPMS) t hat ill umi nates a low tire p ressure tell
ta le w hen one or mo re of your tires is s ignificant
l y under -inflated. According ly, w hen the low ti re
pressure telltale illum inates, you sho uld stop and
c h eck your t ires as soon as possible, and inflate
them to the proper pressure. Dr iv ing on a sign ifi
cant ly under -inflated t ire ca uses the t ire to over
heat and ca n lead to tire fa ilu re . U nder-inflation
also red uces fue l eff ic iency a nd tire tread life,
and may affect t he ve hicl e's handling a nd s top-
ping ability.
II>-
Page 221 of 266
a co ,...,
N
" N ,...,
0 0 \,;J '
proper tire maintenance, and it is the driver's re
sponsib ility to ma intain correct tire pressure,
even if under-inf lation has not reached the level
to trigger illum ination of the TPMS low tire pres
sure telltale .
Your veh icle has also been equ ipped w ith a TPMS
malfunct ion indicator to indicate when the sys
tem is not operating properly. The TPMS mal
function indicator is combined w ith the low tire
pressure telltale. Whe n the system detects a
malfunct ion, the telltale will flash for approxi
mately one minu te and then remain cont inuous ly
i llum inated. This sequence wi ll continue upon
subseq uen t veh icle start -ups as long as the ma l
function exists.
When the malfunct ion i ndicator is ill uminated,
the system m ay not be ab le to detec t or sig nal
l ow tire press ure as intended. TPMS ma lfunctions
may occur for a var iety of reasons, incl uding the
installation of replacement or alternate tires or
wheels on the vehicle that prevent the TPMS
from functioning properly. Always check the TPMS malfunction telltale after rep lacing one or
more t ires or whee ls on your vehicle to ensu re
that t he replacement or alternate ti res and
wheels allow the TPMS to cont inue to func tion
p roperly.
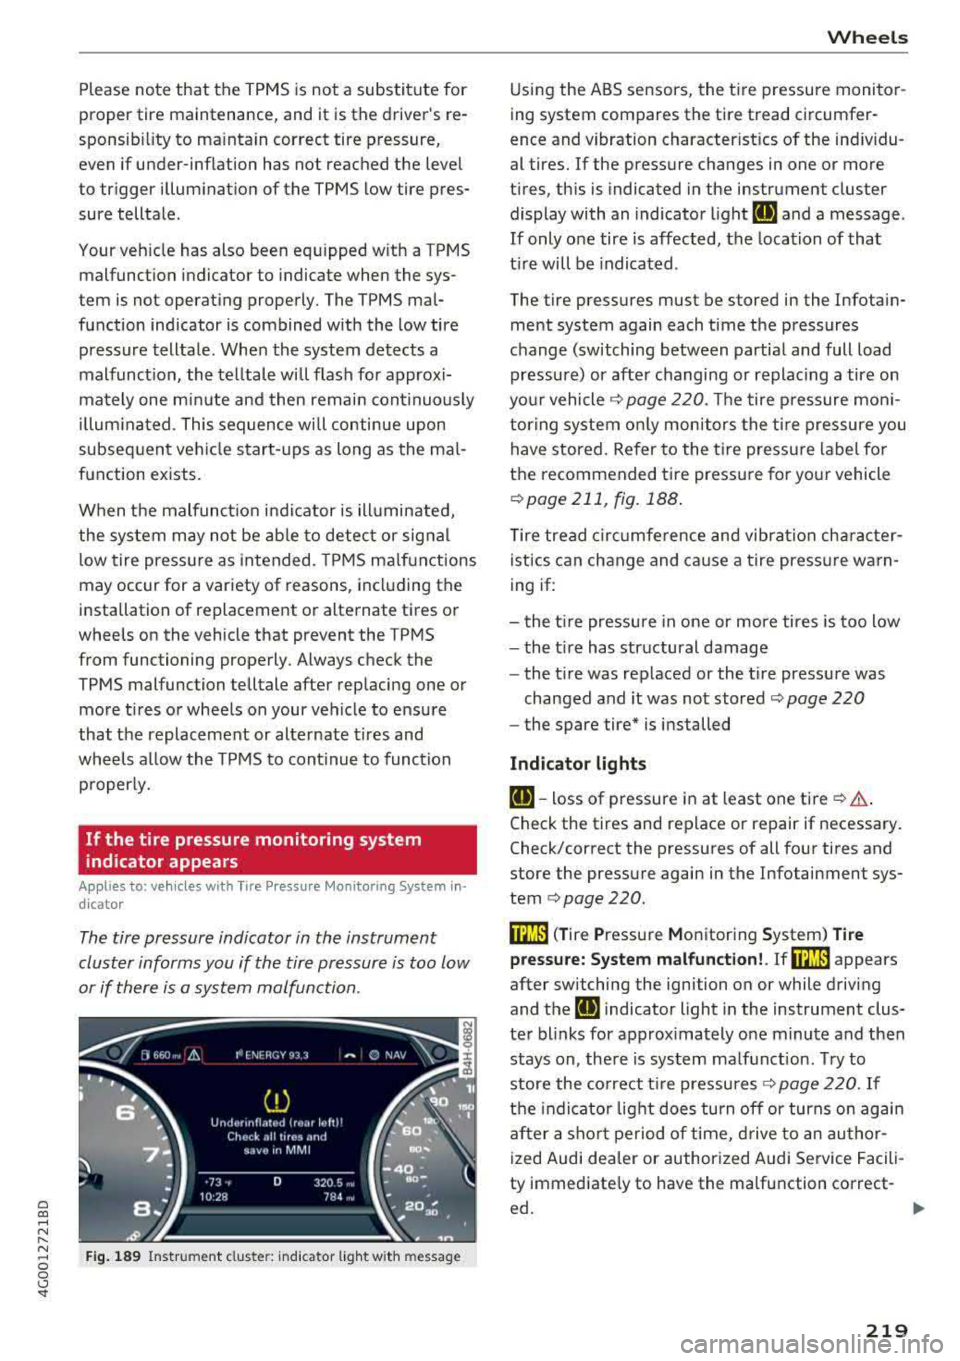
If the tire pressure monitoring system
indicator appears
A ppl ies to: ve hicles with Tire Pressure Moni toring System in
di cato r
The tire pressure indicator in the instrument
cluster informs you if the tire pressure is too low
or if there is a system malfunction .
Fig. 1 89 Instrument cl uste r: in dicator l ight w it h m essage
Wheels
Using the ABS sensors, the tire pressure monito r
ing system compares the tire tread circumfer
ence and vibration characterist ics of the ind ividu
al tires. If the pressure changes in one or more
t ires, th is is indicated in the instrument cluster
display with an indicator l ight
IE and a message .
If only o ne tire is affected, the location of tha t
t ir e will be indicated .
The tire pressures must be stored in the Infotain ment system again each time the pressures
change (switching between partial and full load
pressure) or afte r changing or replac ing a tire on
yo ur vehicle
Q page 220. The tire p ressure mon i
tor ing system on ly mon itors the t ire pressure you
have stored. Refer to the t ire press ure label fo r
the recommended ti re pressure for yo ur vehicle
Q page 211, fig. 188 .
Tire tread c ircu mfe rence and vibr ation cha racter
istics can change and ca use a tire press ure warn
ing if:
- the t ire pressure in one or more tires is too low
- the t ire has str uctural damage
- the t ire was replaced or the t ire pressure was
changed and it was not stored
Q page 220
- the spare tire* is i nstalled
Indicator light s
IE-toss of pressure in at least one tire Q & .
Check the tires and replace or repair if necessary .
Check/correct the pressures of all four tires and
store the pressu re again in the Infotainment sys
tem
Q page 220.
m ( T ire Pressure Monitoring System) Ti re
pressure: System malfunction!.
If rn:m appears
after switching the ignition on or while driving
and the
IE indicator light in the instrument clus
te r blinks for approx imately one minute and then
stays on, the re is system malf unct ion . Try to
store the co rrect t ire pressu res
Q page 220. If
t h e indicat or light does turn off or turns on agai n
af ter a sho rt pe riod o f time, d rive to an au thor
ized Audi dea ler or authorized Audi Service Facili
ty immediate ly to have the ma lfunction correct-
ed.
~
219
Page 228 of 266

Emergency assistance
Emergency assistance
General information
.,. Park the vehicle as far as possible from moving
traffic in the event of a breakdown. In the event
of a flat tire, park the vehicle on a level surface .
It you are on a steep hill, be especially careful.
.,. Set the parking brake .
.,. Switch the emergency flashers on .
.,. Set up the warning triangle r=;,page 226 .
.,. Have the passengers exit the vehicle . They
should move to a safe place, for example be
hind a guard rail.
A WARNING
Follow the steps given above. This is for your
protection and the for the safety of other driv
ers.
Equipment
Warning triangle
A pplies to: ve hicles w ith warning triangle
Fig. 190 Luggage compa rtment lid : wa rnin g triangle
The warning triangle placed in the vehicle at the
factory is located in the luggage compartment.
.,. To remove the warning triangle, press the re-
tainer in the direction of the arrow
r:;, fig . 190
and fold the holder down.
The luggage compartment lid is only designed to
hold the warning triangle offered by the Audi
Genuine Accessories program.
226
Vehicle tool kit
Fig. 191 Luggage compartment: vehicle tool kit
The vehicle tools and vehicle jack* are stored in
the luggage compartment under the floor cover.
.,. Lift the cargo floor by the plastic handle.
.,. Hook the handle into the luggage compartment
weather strip.
.,. Turn the handle counter-clockwise and remove
the cover or the spare tire* .
.,. Unhook the cargo floor before clos ing the lug
gage compartment lid.
A WARNING
I mproper use of the veh icle jack can cause se
rious personal injuries.
- Never use the screw driver hex head to
tighten wheel bolts, since the bolts cannot
attain the necessary tightening torque if yo u
use the hex head, potentially causing an ac
cident.
- The factory-supplied jack is intended only
for your vehicle model. Under no circum
stances should it be used to lift heavy
vehicles or other loads; you risk injuring
yourself.
- Never start the engine when the vehicle is
raised, which could cause an accident .
- Support the vehicle securely with appropri ate stands if work is to be performed under
neath the vehicle; otherwise, there is a po
tential risk for injury .
- Never use the jack supplied with your Audi
on another vehicle, particularly on a heavier
one. The jack is only suitable for use on the
vehicle it came with.
Page 229 of 266
a co .... N
" N .... 0 0 \.J '
The vehicle jack* in your vehicle is mainte
na nee-free.
Replacing wheels
Before changing a wheel
Observe the following precautions for your own
and your passenger's safety when changing a
wheel .
'"After you experience a tire failure, pull the car
well away from moving traff ic and try to reach
le ve l ground before you stop ¢,&. .
'"All passe ngers should le ave the car and move
to a safe location (for instance, be hind the
guardra il) ¢ ,&. .
.. Engage the parkin g brake to p revent your vehi
cle from rolling
unintentionally ¢,&. .
'"Move selecto r lev er to p osition P ¢ ,&. .
'"If you are towing a trailer, unh itch the trailer
from your veh icle.
'" Take the jac k and the sp are tir e* out of the lug
gage compartment
i::> page 226 .
A WARNING
You or your passengers cou ld be inju red w hile
chang ing a wheel if you do not follow these
safety precautions :
- If you have a flat t ire, move a safe distance
off t he road. Tur n off the engine, t urn the
emergency flashers on and use other warn
ing devices to alert other motorists .
- Make s ure tha t pa ssengers w ait in a sa fe
place away from the vehicle and we ll away
from the road and traffic.
- T o help prevent the vehicle from moving
sudden ly and possibly slipping o ff th e jack,
always fully set the parking brake and b lock
the front and back of the wheel diagonally opposite the wheel be ing changed. When
one front whee l is lifted off the ground,
placing the Automatic Transm ission in P
(Park) w ill
not prevent the veh icle from
moving.
Em ergenc y ass is tanc e
-Before you change a whee l, be sure the
ground is level and firm . If necessary, use a
sturdy board under the jack.
- Always store the vehicle too l kit, the jack
and the replaced tire in the luggage com
partment
¢ page 130.
(D Tips
Before changing the wheel, you must activate
the jacking mode, so that the automatic con
tro ls for the Adaptive Air Suspension* do not
make it more difficult to lift the vehicle with
the
jack ¢ page 229 .
Changing a wheel
When you change a wheel , follow the sequence
described below step-by-step and in exactly that
order .
l. Activate the vehicle jack mode* ¢ page 229.
2. Remove the deco rati ve wheel co ver* or the
wheel bolt c aps *. For more details see also
¢ page 228, Decorative wheel covers or
¢ page 228, Wheels with wheel bolt caps .
3. Loosen the wheel bolt s ¢page 229.
4. Locate t he p roper mount ing point for the
jack and align the jack be low that poin t
¢page 229 .
S. R ais e the car with the jack ¢ page 229 .
6. Remove the wheel with the fl at tir e and then
install
the spare ¢ page 231.
7. Tig hte n all wheel bolts lightly .
8 .
Lower the vehicle with the jack .
9 . Use the wheel bolt wrench and
firml y tighten
all wheel
bo lts ¢ page 229.
10. Replace t he decorat ive wh eel cover * or the
wheel bolt cap s*.
11. Deactivate the vehicle jack mode* in t he
MMI :
ICAR I function button > (Car )* sys tem s
contro l button > Ser vicing & che cks > Air
s usp.: jack mod e> Off.
The vehicle jack mode * switches off automatica l-
ly at speeds abov e 6 mph (10 km/h).
.,.
227
Page 230 of 266
Emergency assistance
A WARNING
Always read and follow all WARNINGS and in
formation
c:> & in Raising the vehicle on
page 230
and c:> page 232.
After changing a wheel
A wheel change is not complete without the do
ing the following .
.. Always store the vehicle tool kit, the jack* and
the replaced tire in the luggage compartment
c:> page 130 .
.. Check the tire pressure on the spare wheel im
med iate ly after mount ing it .
.. As soon as possible, have the tightening tor
ques
on all wheel bolts checked with a torque
wrench. The correct tightening torque is 90 ft
lb s (120 Nm) .
.. Have the flat tire replaced as soon as possible.
@ Tips
-If you notice that the wheel bolts are cor
roded and difficu lt to turn while changing a
tire, they should be replaced before you
check the tightening torque.
-Drive at reduced speed until you have the
tightening torques checked.
-After changing a wheel, the tire pressure in
a ll four tires must be checked/corrected and
the tire pressure monitoring indicator must
be stored in the MMI
<=> page 220.
Decorative wheel covers
App lies to: vehicl es w ith decorative wheel covers
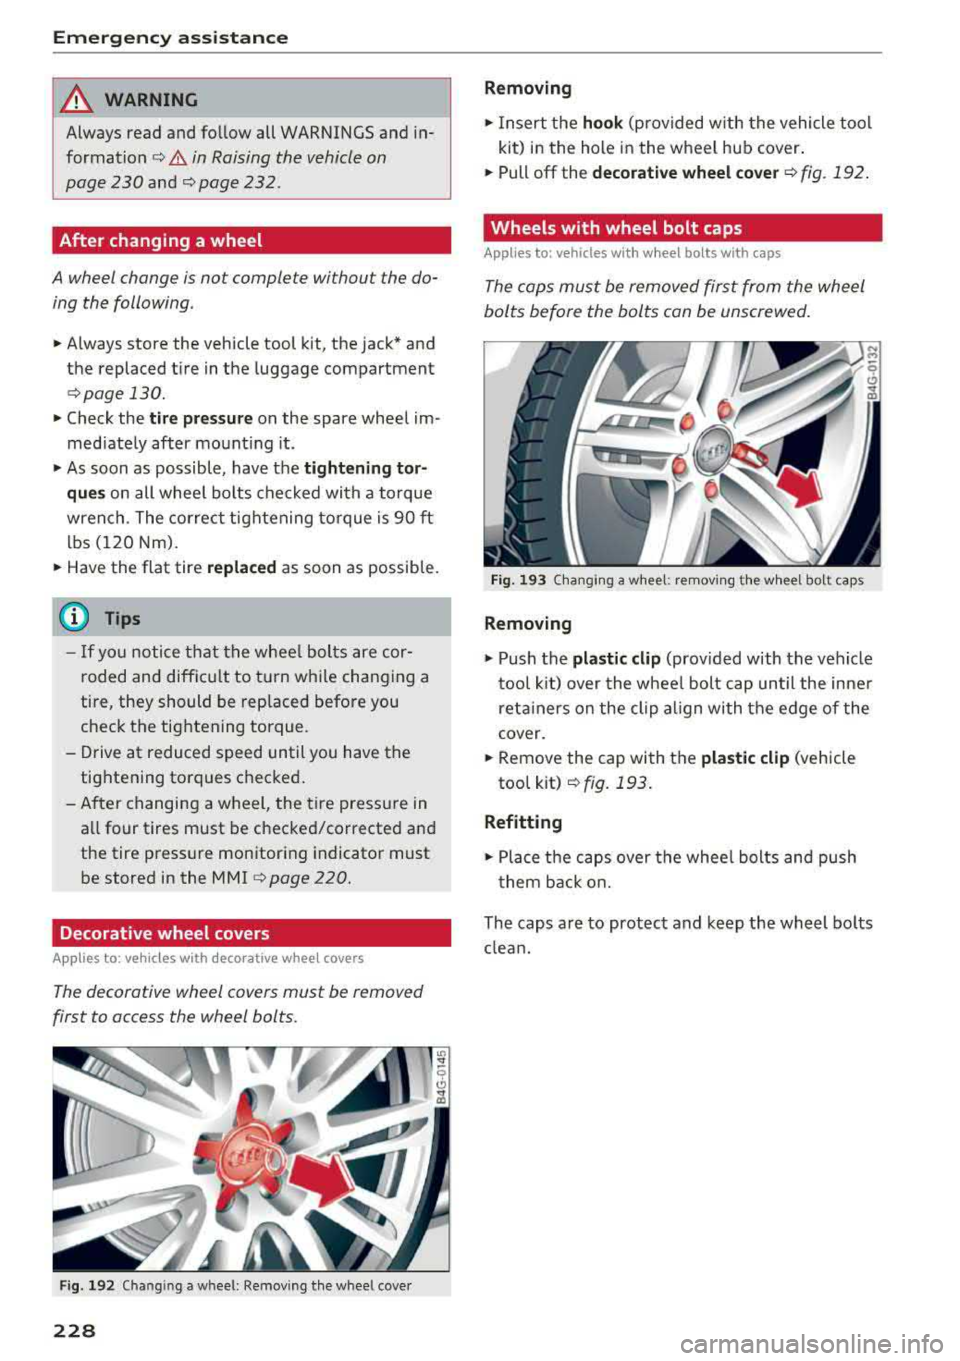
The decorative wheel covers must be removed
first to access the wheel bolts.
Fig. 192 Changing a wheel: Remov in g the whee l cove r
228
Removing
.,. Insert the hook (provided w ith the vehicle tool
kit) in the hole in the wheel hub cover.
.. Pull off the decorative wheel cover c:> fig. 192 .
Wheels with wheel bolt caps
Applies to: vehicles with wheel bolts with caps
The caps must be removed first from the wheel
bolts before the bolts can be unscrewed .
Fig. 193 C hanging a wheel: remov ing the w heel bolt caps
Removing
.,. Push the plastic clip (provided with the vehicle
tool kit) over the whee l bolt cap until the inner
reta iners on the clip align with the edge of the
cover.
.. Remove the cap with the plastic clip (vehicle
tool kit)
c:> fig. 193.
Refitting
.,. Place the caps over the whee l bolts and push
them back on.
The caps are to protect and keep the wheel bo lts
clean.
Page 233 of 266

a co ,...,
N
" N ,...,
0 0 \,;J '
Follow these instructions step-by-step for chang
ing the wheel .
Fig. 198 Changing a wheel: us ing the screwdriver hahd le
(with the blade removed} to turn the bolts
F ig. 199 C h ang ing a whee l: alig nme nt pin ins ide the top
hole
Afte r you have loosened all wheel bolts and
raised the vehicle off the ground, remove and re
p lace the whee l as follows:
Removing th e wheel
.,. Use the hexagon al so cket in the screwdri ver
handle
to completely remove the topmost
whee l bolt and set it aside on a
clean surface
¢ fig. 198 .
... Screw the threaded end of the alignment pin
from the tool k it hand-tight into the empty bolt
hole¢ fig. 199 .
... Then remove the other wheel bolts as described
above .
... Take off the wheel leaving the a lignment pin in
the bolt ho le
¢ 0.
Putting on the spa re wh eel
... Lift the spare wheel and carefully slide it over
the alignment pin to guide it in place
¢ 0 .
Em ergen cy as sis tanc e
... Use the hexagonal socket in the screwdr iver
handle to screw in and tighten all wheel bolts
slightly.
... Remove the alignment pin and insert and t ight
en the remaining wheel bo lt slight ly like the
rest .
.,. Turn the jack handle counter-clockw ise to lower
the vehicle unt il the jack is fully released .
.,. Use the wheel bolt wrench to tighten a ll wheel
bolts
firmly¢ page 229. Tighten them cross
wise,
from one bo lt to the (approx imately) op
posite one, to keep the wheel centered.
(D Note
When removing o r installing the wheel, the
rim could h it the brake rotor and damage t he
rotor . Work carefully and have a second per
son help you .
(D Tips
Never use the hexagonal socket in the hand le
of the screwdrive r to loosen or t ighten the
whee l bolts.
- Pull the reversible blade from the screwdriv
er before you use the hexagona l socket in
the handle to turn the whee l bolts.
- When mounting tires with
unidirect ional
tread de sign
make sure the tread pattern is
pointed the right
way ¢ page 231 .
-The wheel bolts shou ld be clean and easy to
t u rn. Check for dirt and corrosion on the
mating surfaces of both the wheel and the
hub. Remove all dirt from these surfaces be
fore remounting the wheel.
Tires with unidirectional tread design
Tires with unidirectional tread design must be
mounted with their tread pattern pointed in the
right direction .
Using a spare t ire w ith a tread patte rn
in tended for u se in a specific direction
When using a spare tire w ith a tread pattern in
tended for use in a specific direction, please note
the following:
- The direction of rotation is marked by an arrow
on the side of the tire.
""
2 31
Page 234 of 266
Emergency assistance
-If the spare tire has to be installed in the incor
rect direction, use the spare tire only tempora
rily s ince the tire w ill not be able to achieve its
optimum performance character istics with re
gard to aquaplaning, noise and wear.
- We recommend that you pay particular atten tion to this fact during wet weather and that
you ad just your speed to match road condi
tions .
-Replace the f lat t ire with a new one and have it
installed on yo ur vehicle as soon as possible to
restore the handling advantages of a unidirec
tiona l tire .
Notes on wheel changing
Please read the info rm at ion ~ page 208, New
t ires or wheels
if you are going to use a spare tire
whi ch is d ifferent from the tires on yo ur vehicle.
Afte r you change a tire:
-Check the tire pressure on the spare tire im
mediately after installation.
-Have the wheel bolt tightening torque
checked with a torque wrench as soon as pos
sible by your authorized Audi dealer or a
qualified service station .
-With steel and alloy wheel rims, the wheel
bolts are correctly tightened at a torque of 90
ft lbs (120 Nm) .
-If you notice that the whe el bolts are corroded
and difficult to turn while changing a tire,
they should be replaced before you check the
tightening torque.
-Replace the flat tire with a new one and have
it installed on your vehicle as soon as po ssi
ble. Remount the wheel cover.
Until then, drive with extra care and at reduced
speeds .
_& WARNING
-If you a re g oin g to equip your ve hicle wit h
tir es o r rims w hich dif fer from t hose whi ch
were fa ctory inst alled, t hen be s ure t o re ad
t h e informat ion
~ page 2 08, New tires or
wheels .
232
-Always make sure the damage d wheel or
even a flat tire and the jack and tool kit are
proper ly secured in the luggage compart
ment a nd are not loose in the passenger
compartment .
-In an accident or sudd en maneuver they
could f ly forward, i njuring anyo ne i n the ve
h icl e.
-Always sto re damaged w hee l, jack and tools
secure ly in the luggage co mpart men t. Ot h
erwise, in an acciden t or sudden maneuve r
they cou ld fly forw ard , causing i nju ry t o p as
s en gers i n the veh icle.
Spare tire
Space-saving spare tire
App lies to: vehicles wit h spare tire
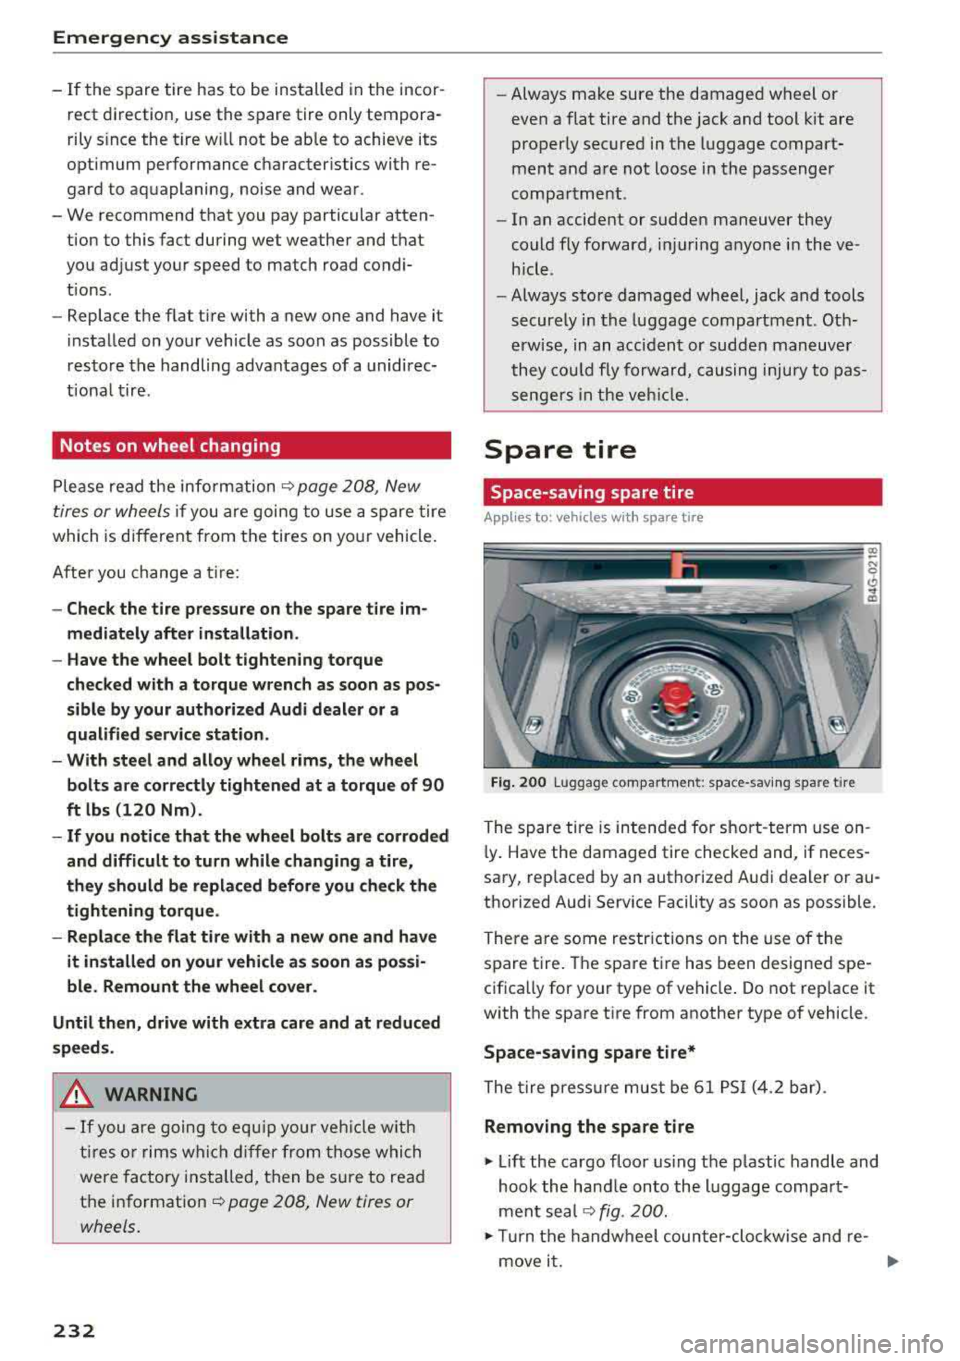
Fig. 200 L uggage com part ment: space-sav ing spa re tire
The sp are tire is in ten ded for short -term use on
l y . Have the damaged tire checked and, if neces
sary, rep laced by an authorized A udi d ealer or au
thorized Audi Serv ice Facility as soon as possible.
There are some restr ictions o n the use of the
spare t ire . Th e spa re t ire has been designed spe
cifica lly for your type of vehicle . Do not rep lace it
with t he spa re t ire from another type of vehicle .
Space-saving spare tire*
The tire press ure mus t be 61 PS I (4.2 bar).
Removing the spare tire
"" Lift the cargo floor us ing the p lastic handle and
hoo k the han dle on to the l uggage comp art
ment sea l
~fig . 200.
""Tur n the han dw heel coun ter-clo ckwise and re
move it.