ECO mode AUDI A6 2018 Owners Manual
[x] Cancel search | Manufacturer: AUDI, Model Year: 2018, Model line: A6, Model: AUDI A6 2018Pages: 266, PDF Size: 41.38 MB
Page 9 of 266
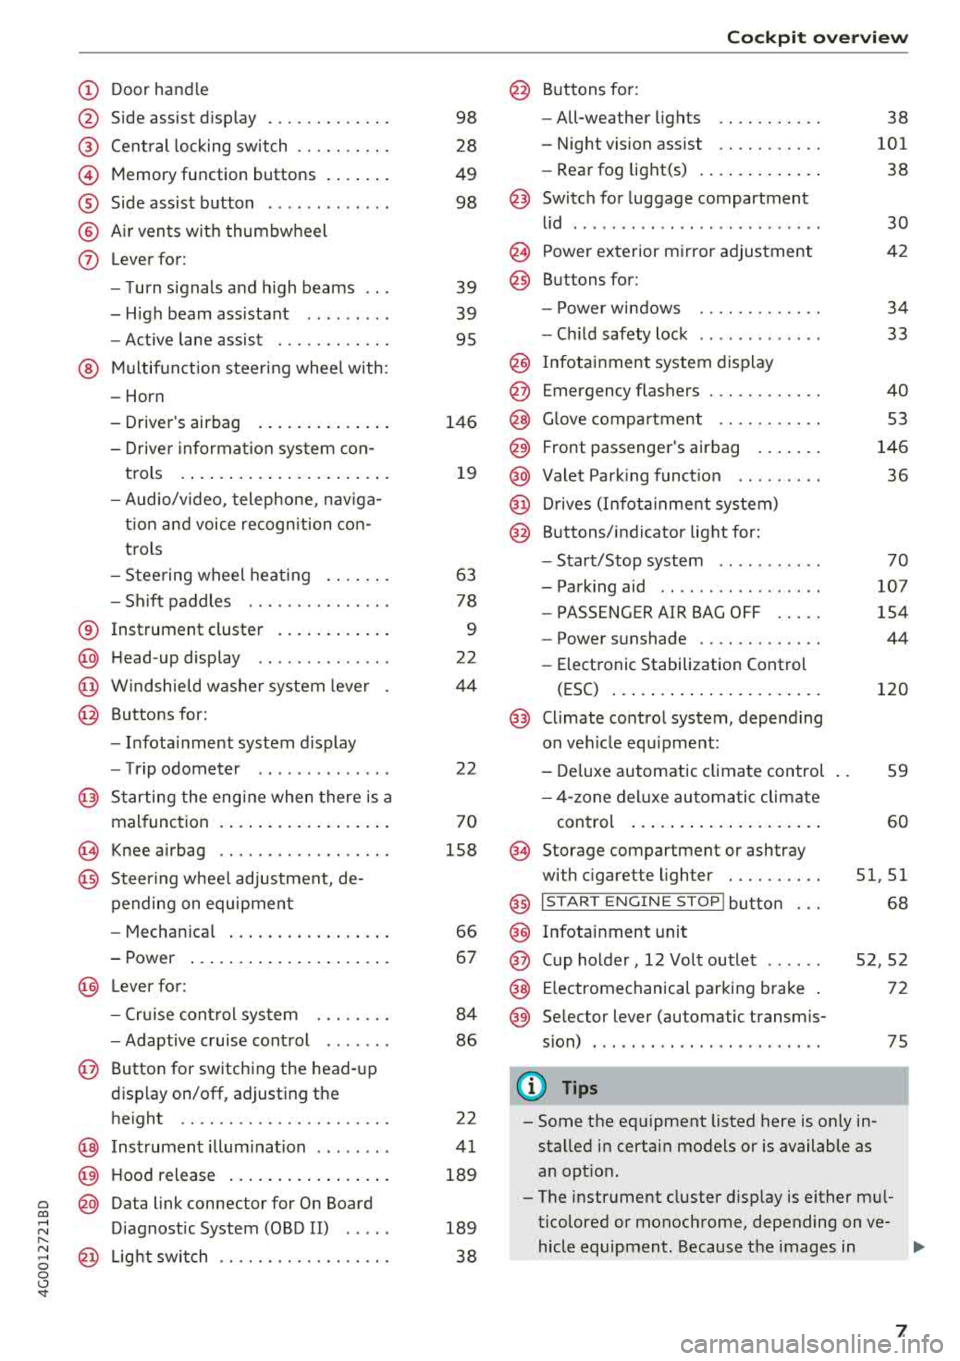
a co .... N
" N .... 0 0 \,;J '
@
®
©
®
®
0
Side assist d isplay
Cent ral locking swit ch ..... .. .. .
M emory function buttons . ... .. .
Side assist button ............ .
A ir ven ts wit h thumbw heel
Lever for:
- T urn s ignals and h igh beams
- High beam assistant ........ .
- Active lane assist ......... .. .
@ Mul tifunct ion steer ing whee l with:
- Horn
- Drive r's airbag . ..... ... .. .. .
- Drive r informat ion sys tem con -
t rols .... ... .. ..... ... .. .. .
- Audio/v ideo, telephone, nav iga
t io n and voice recogn ition con
t rols
- Stee ring wheel heat ing .. .. .. .
- Sh ift paddles .......... .. .. .
® Instrument cluster .... ... .. .. .
@ H ead-up display ............. .
@ W indshield w ash er system leve r
@ Buttons for:
- In fota inment system display
- Tr ip odometer ............ . .
@ Starting the eng ine when there is a
mal func tion . .. .. ..... ... .. .. .
(9) Knee airbag ............... .. .
@) Steer ing whee l adjustment, de
pendi ng on equipmen t
- Mechan ica l . ... ..... ... .. .. .
- Power ... ... .. ..... ... .. .. .
@) Lever for :
- Cru ise cont rol sys tem ... .. .. .
- Adaptive c ruise cont rol ..... . .
@ Button for switching the head- up
disp lay on/off , adjusting the
height .. .. ............... .. .
@ Inst rument illum ination ....... .
@ H ood release .. .. ..... ... .. .. .
@ Data link connector for On Board
D iagnostic System (OBD II) .... .
@ Lig ht switch ............. .. .. .
98
28
49
98
39
39
95
1 46
1 9
63
78
9
22
44
22
70
158
66
6 7
84
86
22
41
189
189
38
Coc kpit o ver view
@ Buttons for :
- All-weather lights
- Night vision assist .......... .
- Rear fog light(s) . .. .. ..... .. .
@) Switch for luggage compartment
l id ...... ... .. .. ............ .
@ Power exterior m irro r adjustment
@ Buttons for :
- P owe r wi ndows
- Chil d safety lock
@ Infot ain ment system display
@ Emergency flashers ........... .
@ G love compartment .......... .
@) Front passenger's airbag .... .. .
@ Valet Park ing funct ion ........ .
@ Drives (In fot ainment system)
@ Buttons/indicator light for:
- Sta rt/Stop system .......... .
- Park ing aid .. .. ............ .
- PASSENGER AIR BAG OFF .... .
- Powe r su nshade ............ .
- Electronic Stabilization Control
(ESC) ... .... .. ... .. ..... .. .
@) Climate control system, depe nd ing
on veh icle eq uipme nt:
- De luxe automatic climate control
- 4- zone deluxe au toma tic climate
con trol ..... .. ... .. ..... .. .
I§ Storage compartment or ashtray
with c igarette lighter . ...... .. .
@ I S TAR T EN GIN E ST OP I butto n
@
@
Infotainment unit
Cup holder , 12 Vo lt outlet
38
101
38
30
42
34
33
40
53
146
36
70
107
154
44
120
59
60
51,51
68
52,52
@ E lectromechanical parki ng b rake 72
@ Se lector lever (automatic transm is-
s ion) . . . . . . . . . . . . . . . . . . . . . . . . 75
{!) Tips
- Some the eq uipment listed here is o nly in
stalled in certai n models or is available as
an opt io n.
- The instr ument cluster d isp lay is either m ul
tico lored or monoc hrome, depending on ve-
hicle equipment. Because t he images in
.,,.
7
Page 46 of 266

Lights and Vision
Sunshade on the rear window
Applies to: vehicles with a sunshade on the rear window
Applies to: sedan
F ig . 4 6 Ce nte r co nsole: butto n fo r r ea r w indow s unsh ad e
.,. To raise/lower the sunshade, press the ~ but-
ton
¢ fig. 46 in the cockpit.
The rear window sunshade ca n be set so that it
retracts automatically when driving in reverse. To
do this, select: ICARlfu nction button>
(Car )* sys
tem s
contro l button > Vehicle settings > Auto
matic rear blind > On .
The sunshade is extended
again as soon as the vehicle is trave ling forwa rd
at a speed greater than
9 mph (15 km/h) if the
ignit ion has not been switched off in the mean
time.
,& WARNING
-
N ever operate the rear wi ndow su nsh ade
w ithou t paying a ttent io n or in an uncon trol
led manner. Pinching could cause serious inju
r ies .
@ Tips
-Pressing the~ but ton seve ral times in a
r ow can trigge r the ove rload pro tection. The
su nsh ade c an on ly be exten ded/re trac ted
again after a brief waiting period .
-The rea r win dow suns hade o nly functions
whe n the vehicle interior is warmer tha n
14°F (-10°C) .
44
Windshield wipers
Switching the windshield wipers on
Fig. 47 Wind shi eld w iper l eve r
Move the windshie ld w iper lever to the co rre
sponding posit ion:
@ -Windshie ld w ipers o ff
(D -Rain senso r mode. The w indshield w ipers
swi tch on on ce the veh icle speed exceeds a pprox
imately 2 mp h (4 km/h) and it is ra ining . The
higher the sensitivity of the ra in se nsor that is set
(switch @to the rig ht), the ea rlier the wind
shield wipers react to mo isture on the wind
shield . You can deact ivate the ra in sensor mode
i n the Info ta inmen t sys tem, wh ic h sw itches the
i nte rm itte nt mode on . Se lect: ICARI f unct ion but
ton
> (Car) * systems con trol b utton > Driver as
sistan ce > Rain sensor > Off .
In in termi ttent
mode, yo u can adjust the interval time usi ng the
swi tc h @ .
@-Slow w ip ing
@ -Fast w iping
© -Sing le w ipe. If you ho ld the lever in th is posi
tion longer, the wipers switch from slow wiping
to fast wiping.
® -Clean the w indshield . T he wipers w ipe o ne
time a fter several seconds of driving to remove
water droplets. You can sw itch thi s function off
by moving the leve r to posit ion ® within
10 sec
o nds of t he afte rwipe . T he afterwipe fu nction is
r eac tiva ted t he nex t time you sw itch t he ignit io n
on.
Clean the headlight s*. The he adlight washer sys
tem* operates only whe n the low beam head -
li gh ts are on. If you move the leve r to pos it io n
Ill>
Page 55 of 266
_& WARNING
-Do not put any hot beverages in the cup
holder while the vehicle is moving. Hot bev
erages could spill, which can cause injury.
- Do not use any breakable beverage contain
ers (for example, made out of glass or por
celain). You could be injured by them in the
event of an accident.
(D Note
Beverage containers in the cup holders should
always have a lid. If not, beverages could spill
and cause damage to vehicle equipment, such
electronics or seat covers.
Cooled glove compartment
Appl ies to: vehicles with cooled glove compartment
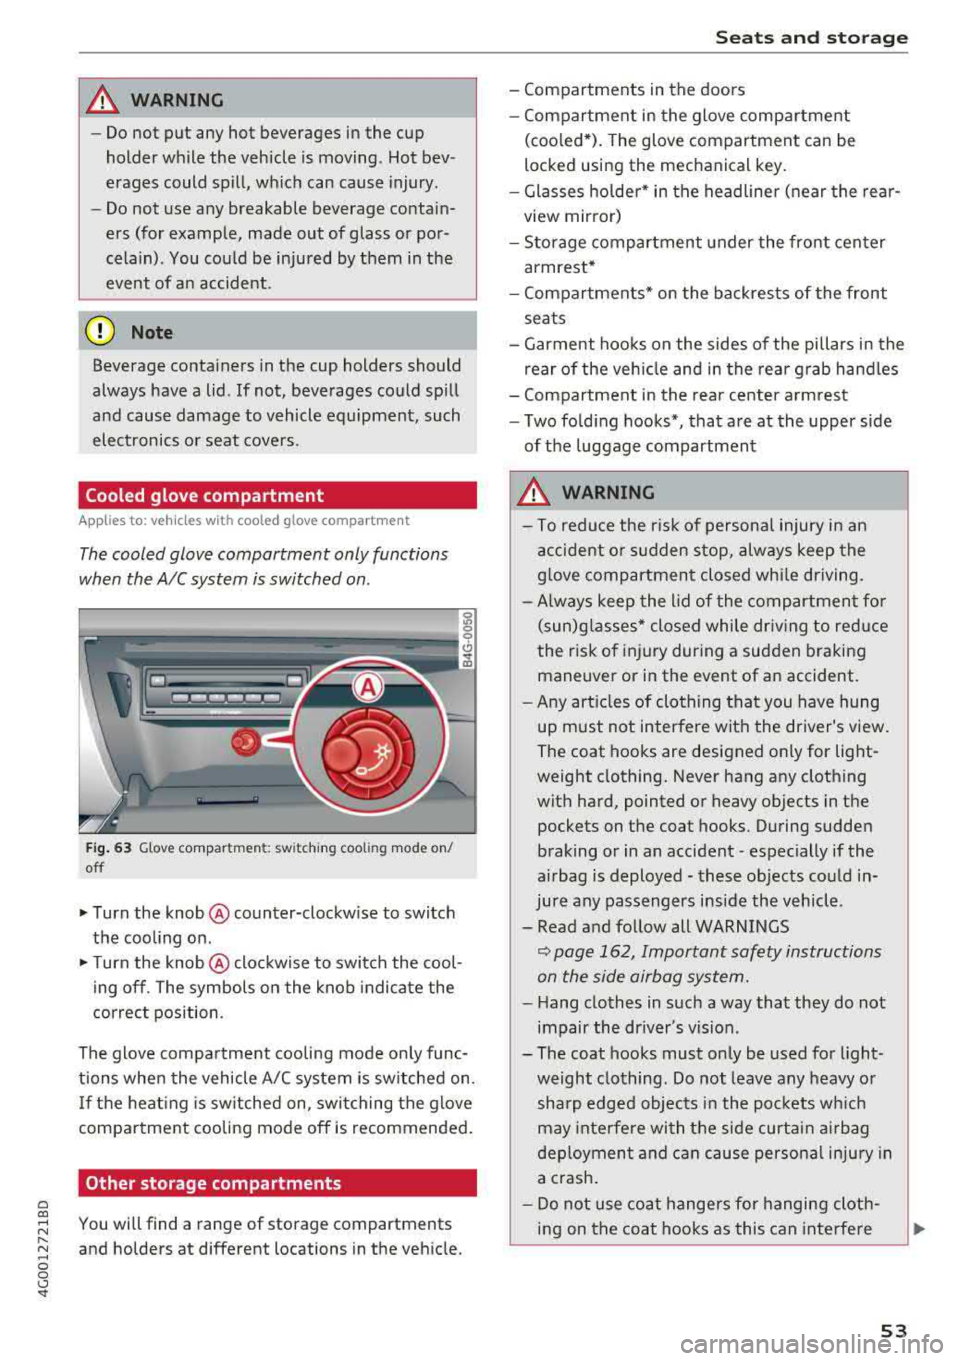
The cooled glove compartment only functions
when the
AIC system is switched on.
Fig. 63 Glove compartment: sw itching cooling mode on/
off
... Turn the knob@ counter-clockwise to switch
the cooling on.
""Turn the knob @ clockwise to switch the cool
ing off. The symbols on the knob indicate the
correct position.
The glove compartment cooling mode only func
tions when the vehicle A/C system is switched on.
If the heat ing is switched on, switching the glove
compartment cooling mode off is recommended.
Other storage compartments
a co
;::j You will find a range of storage compartments
:::, and holders at different locations in the vehicle .
.... 0 0 <..:l '
- Compartments in the doors
- Compartment in the glove compartment
(coo led*). The glove compartment can be
locked using the mechanical key.
- Glasses holder* in the headliner (near the rear
view mirror)
- Storage compartment under the front center
armrest*
- Compartments* on the backrests of the front
seats
- Garment hooks on the sides of the pillars in the
rear of the vehicle and in the rear grab handles
- Compartment in the rear center armrest
- Two folding hooks*, that are at the upper side
of the luggage compartment
_& WARNING
- To reduce the risk of personal injury in an
accident or sudden stop, always keep the
glove compartment closed while driving.
- Always keep the lid of the compartment for
(sun)glasses* closed while driving to reduce
the risk of injury during a sudden braking
maneuver or in the event of an accident.
- Any articles of clothing that you have hung
up must not interfere with the driver's view.
The coat hooks are designed only for light
weight clothing. Never hang any clothing
with hard, pointed or heavy objects in the pockets on the coat hooks. During sudden
braking or in an accident -especially if the
airbag is deployed - these objects could in
jure any passengers inside the vehicle .
- Read and follow all WARNINGS
~ page 162, Important safety instructions
on the side airbag system.
- Hang clothes in such a way that they do not
impair the driver's vision .
-
- The coat hooks must only be used for light
weight clothing. Do not leave any heavy or sharp edged objects in the pockets which
may interfere with the side curtain airbag
deployment and can cause personal injury in
a crash.
- Do not use coat hangers for hanging cloth
ing on the coat hooks as this can interfere
53
Page 60 of 266
Warm and cold
Warm and cold
Climate control system
Description
The climate control system warms, cools and re moves humidity from the air in the vehicle interi
or. It is the most effective when the windows and
sunroof* are closed. If there is a bui ld-up of heat
inside the vehicle, ventilation can he lp to speed
up the cooling process.
I n all heating mode functions, except for defrost,
the blower only switches to a higher speed once
the engine coolant has reached a sufficient tem
perature.
Pollutant filt er
The po llutant filter removes poll utants such as
dust and pollen from the a ir .
Ke y re cognition
A pp lies to: ve hicles w ith de luxe au toma tic clima te co ntrol
The blower sett ing and air distribution are stored
automatically and ass igned to the remote control
key that you are using.
A pp lies to: ve hicles w ith 4 -zo ne del uxe automatic c limate
co ntrol
The climate control set tings are automatically
stored and assigned to the remote control key
that is in use.
A WARNING
Poor visibility can lead to accidents.
- For safer driving, keep all windows free of
ice, snow and fog .
- Become familiar as quickly as possible with
the correct use and function of the climate contro l system, especially with the defrost
ing and defogg ing function.
58
- When the temperature is below freezing,
only use the windshield washer system after
the windshield has been warmed by the cli mate control system . The washer fluid could
freeze on the w indsh ield and impair v isib il i
ty .
@ Note
-If you suspect that the climate contro l sys
tem is damaged, switch the system
off to
prevent further damage and have it checked
by an authorized Aud i dea ler or authorized
Audi Serv ice Facility.
- Repa irs to t he Aud i climate control system
require special techn ical know ledge and
special tools. See an aut ho rized Aud i dea le r
or authorized Aud i Serv ice Fac ility .
@) For the sake of the environment
To save fue l, turn off cooling mode by press
i ng the
IA/Cl button. This will a lso reduce
emissions.
(D Tips
- T o prevent i nterference with t he heat ing
and cooli ng outpu t and to p revent the win
dows from fogging over, the a ir intake in
front of the windshie ld must be free of ice,
snow or leaves.
- C ondensation from the coo ling system can
drip and form a pudd le o f water under the
vehicle . This is norma l and does not mean
there is a leak.
- Th e energy management system may tem
porarily switc h
off certain functions, such as
the seat heating* or rear window defogger.
These systems are ava ilable again as soon
as the energy supply has been restored.
Page 61 of 266
a co ,...,
N
" N ,...,
0 0 \,;J '
Automatic climate control
Applies to: ve hicles with deluxe a utoma tic climate co ntro l
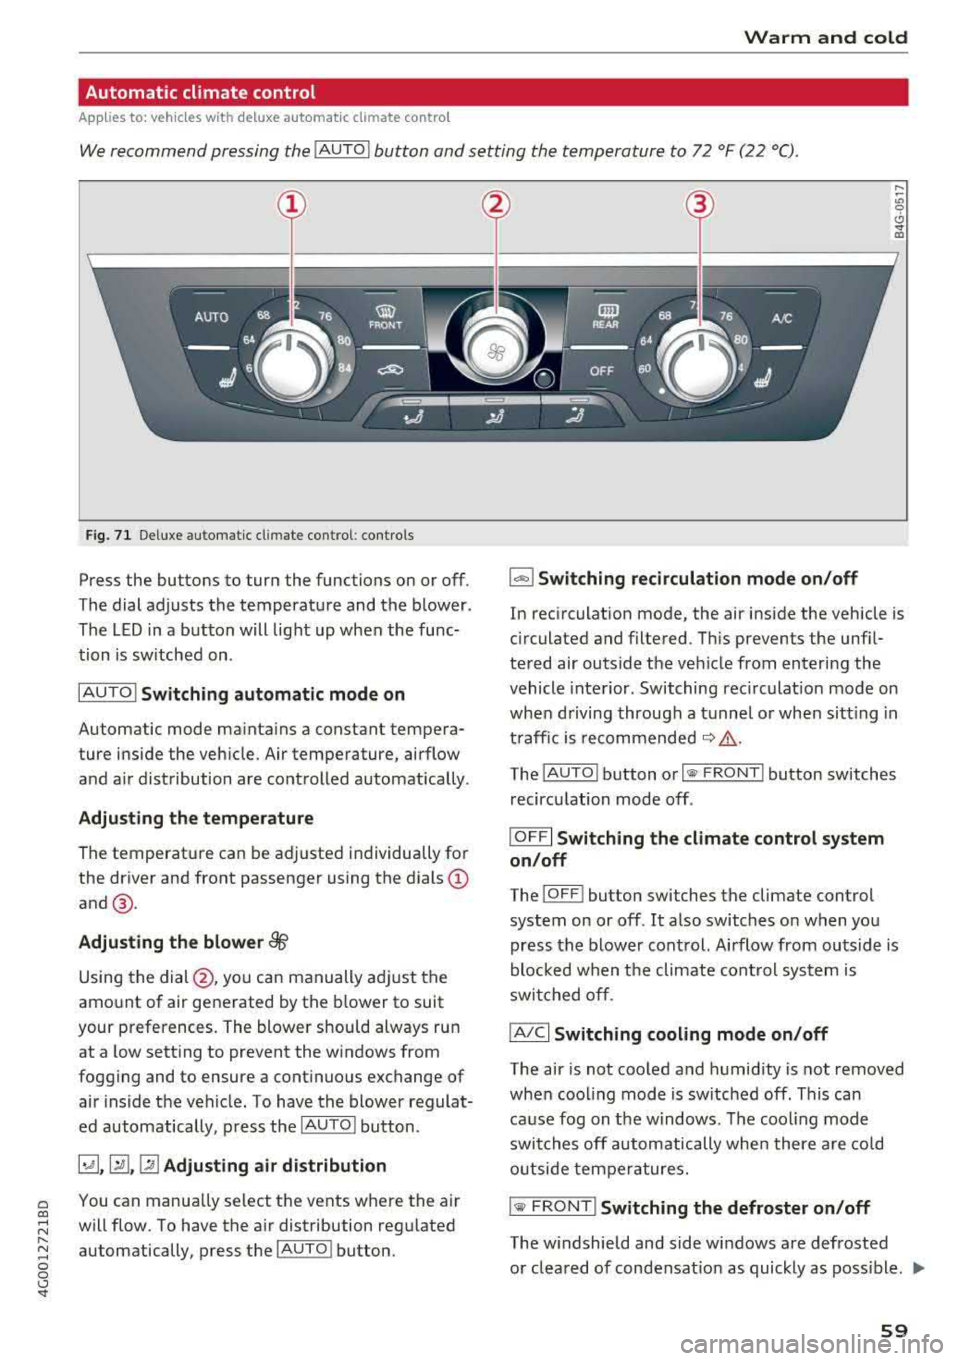
We recommend pressing the !AUTO ! button and setting the temperature to 72 °F (22 °C) .
Fig. 71 Deluxe automatic cl imate cont rol: contro ls
Press the buttons to turn the functions on or off .
The dial adjusts the temperature and the blower.
The LED in a button will light up when the func
tion is sw itched on .
IAUTO I
Switching automatic mode on
Automatic mode mainta ins a constant tempera
ture inside the veh icle. Air temperature, airflow
and a ir distribution are controlled automatically .
Adjusting the temperature
The temperature can be adjusted individua lly for
the driver and front passenger using the dials
(D
and@.
Adjusting the blower ~
Using the dial @, you can manually adjust the
amount of air generated by the blower to suit
your preferences. The blower should always run at a low setting to prevent the windows from
fogging and to ensure a cont inuous exchange of
air inside the vehicle. To have the blower regulat
ed automatically, p ress the
!AUTO ! button.
~.rill ,~ Adjusting air distribution
You can manua lly se lect the vents where the air
will flow. To have the air distribution regulated
automatically, press the
IAUTO ! button.
1- 1 Switching recirculation mode on/off
In recirculation mode, the air inside the vehicle is
c ir culated and filtered. Th is prevents the unf il
tered air outside the vehicle from entering the
vehicle interior . Switching rec irculat ion mode on
when driving through a tunnel or when sitting in
t raffic is recommended
c::> .&_ .
The !AUTO I button or!
recirculation mode off .
IOFFI Switching the climate control system
on/off
The ! OF F! button sw itches the climate control
system on or off. It also switches on when you press the blower cont rol. Airflow from outside is
blocked when t he climate cont rol system is
switched off.
IA/C l Switching cooling mode on/off
The air is not cooled and humidity is not removed
when cooling mode is switched off. This can
cause fog on the windows . The cooling mode
switches off automatically when there are cold
outside temperatures.
is;,i, FRONT I Switching the defroster on/off
The w indshield and side windows are defrosted
or cleared of condensat ion as quickly as poss ible .
.,,_
59
Page 62 of 266
Warm and cold
The maximum amo unt of air flows ma inly from
the vents below the windshield. Recircu lation
mode switches off . The temperature should be
set to approximately 72
°F (22 °() .
The IAUTO I button switches the defroster off .
IClill REAR I Switching the rear window defogger
on /off
T he re a r window heate r on ly operates when t he
engine is r unning . It sw itches of f automat ica lly
afte r a few minutes, depe nding on the outs ide
temperature .
T o preven t the rear w indow hea ter from swit ch
i n g off automatically, p ress and ho ld the
I Qiil REARI
button fo r more than 2 seconds . This is stored
until the ignit io n is switched o ff.
[i] Adjusting seat heating*
P ress ing t he b utton swi tches the se at heati ng on
at the highes t set ting (level 3). The LEDs indicate
the tempe ra tu re level. To reduce the tempera
ture, press the button again. To switch the seat heating off, press the butto n repeatedly until the
LED turns off.
After 10 minutes, t he seat hea ting au tomatically
sw itches from leve l 3 to leve l 2 .
4-zone deluxe automatic climate control
A pp lies to: ve hicles with 4-zo ne deluxe auto matic cl imate cont rol
Air vents
You can open o r close the center and re a r ve nts in
t h e co ckpit and the vents in the rear center con
so le using the ridged thumbw heels . The leve rs
adjust the direction of the airflow from the vents .
.&_ WARNING
- You sho uld not use the recirc ulation mode
for an extended period of time since no
fresh air is drawn in . W ith the air-condition
ing sw itched off, the windows can fog up,
which inc reas es th e risk of an acc ident.
- Individ uals with red uced sensit iv ity to pa in
or temperature could develop b urns when
using the seat h eating f unction. To re duce
t he risk of injur y, t hese i ndividu als s ho uld
no t u se se at h eating .
(D Note
To avoid damage to the hea ting elements in
th e se ats , d o no t kne el on th e seats or place
h eavy lo ad s on a small a rea of the se at.
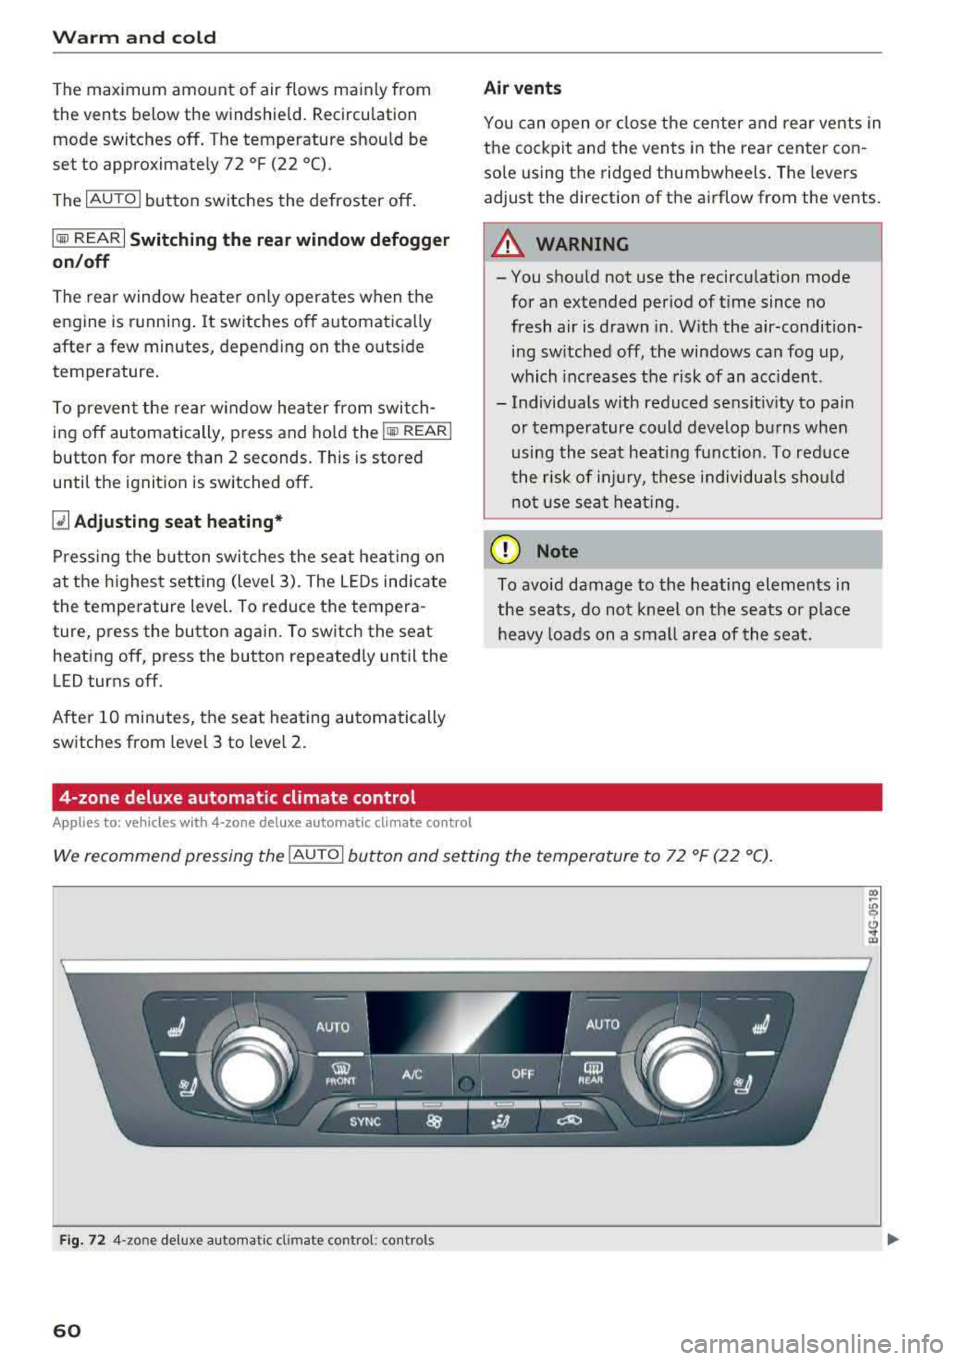
We recommend pressing the !AU TO I button and se tting the temperatu re to 72 ° F (2 2 °C).
Fig. 72 4-zo ne deluxe a uto mat ic cl imate contro l: cont rols
60
Page 63 of 266
a co .... N
" N .... 0 0 \.J '
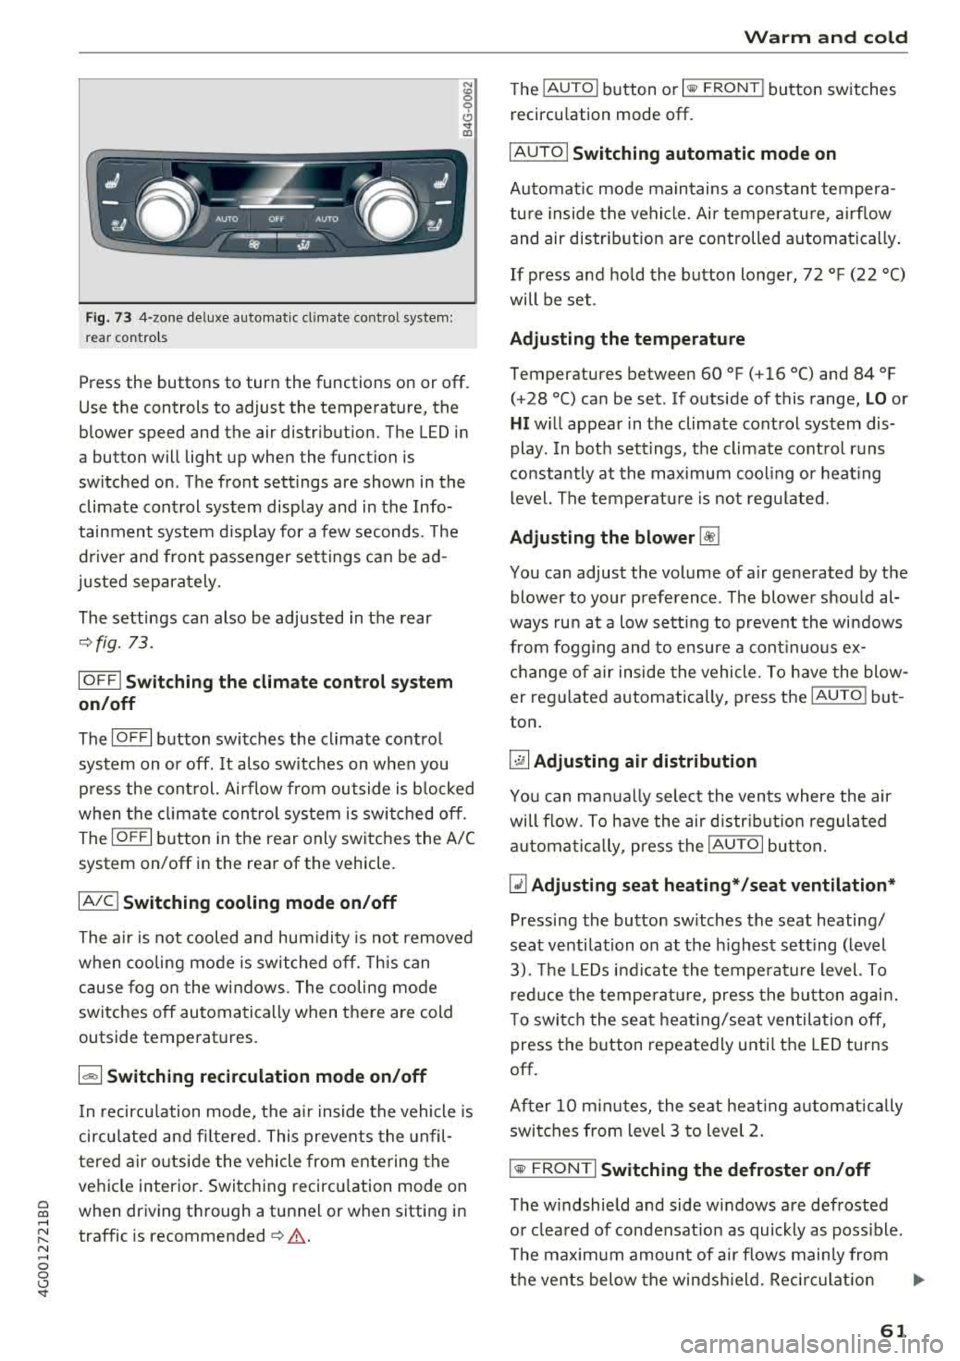
rear contro ls
N :g 0 C)
" a,
Press the buttons to turn the functions on or off .
Use the controls to adjust the temperature, the
blower speed and the air distribution. The LED in
a butto n will light up when the function is
sw itched on . The front sett ings are shown in the
climate control system display and in the Info
tainment system d isp lay for a few seconds. The
d river and front passenger sett ings can be ad
justed separately.
The settings can also be adjusted in the rear
~ fig. 73.
IOFF I Switching the clim ate control s ystem
on /off
The IO FFI button switches the cl imate control
system on or off. It also sw itches on when you
p ress the cont rol. A irflow from outside is b locked
when the climate con trol sys tem is swi tched off .
The
IOF FI button in the rear only switc hes the A/C
system on/off in the rear of the vehicle .
IAJCI Switching cooling mode on /off
The a ir is not cooled and hum idity is not removed
when cooling mode is switched off. This can
cause fog o n the w indows . The cooling mode
switches off automatically when there are cold
outside temperatures.
1 "9:) 1 Switching recirculation mode on /off
In recircu lation mode, the a ir inside the vehicle is
circu lated and fi ltered. This preven ts the unfil
t ered a ir outside the vehicle from ente ring the
ve hicle interior. Switc hing recircu lation mode on
when driving t hrough a tunnel or when sitting in
traffic is recommended
~ .&. .
Warm and c old
The IAUTO I button or I llW F RONT I button switches
recircu lation mode off.
IAUTOI Switching automatic mode on
Automat ic mode main tains a cons tant tempera
tu re inside the vehicle. Ai r temperatu re, a irflow
and air distr ib ution are controlled automa tica lly .
If press and hold the button longer,
72 °F (22 °C)
will be set .
Adjusting the temperature
Temperatures between 60 °F (+ 16 °() and 84 °F
(+28 °() ca n be set . If outside of this range, LO or
HI w ill appea r in the climate control system dis
play . In bot h sett ings, the climate cont rol runs
constantly at the max imum cool ing or heat ing
level. The temperat ure is no t regu lated.
Adjusting the blower ~
You can adjust the volume of a ir generated by the
blower to your p reference . T he blower s hould al
ways ru n at a low sett ing to prevent the wi ndows
from fogg ing and to ensure a cont inuo us ex ·
ch ange of air inside the vehicle. To have th e blow
er reg ulated automatically , press t he
IAU TO I bu t
ton .
~ Adjusting air distribution
You can ma nually select the ven ts where the air
will flow. To h ave the air d istr ib utio n regula ted
a utomat ica lly, press the
IAUTOI button.
~ Adjusting seat heating* /seat ventilation *
Pressing the button sw itches the seat heating/
seat venti lation o n at the h ighest sett ing (level
3). The LE Ds i nd icate the tempe ratu re level. To
r ed uce the temperat ure, press the b utton agai n.
T o switc h the seat heat ing/seat ventilation off,
press the button repeatedly unti l the LED turns
off.
After
1 0 m in utes, the seat heat ing automat ically
swi tches from level 3 to level 2.
l
T he w indshield and side windows a re defrosted
o r clea red of condensat ion as quickly as poss ible.
T he maxim um amount of a ir flows mainly from
t h e vents below the winds hield. Rec ircu lat io n
..,..
61
Page 64 of 266
Warm and cold
mode switches off . The temperature shou ld be
set to approximate ly 72 ° F (22 °C).
The
IAUTOI button sw itches the defroster off.
IQill REAR I Switching the rear window defogger
on /off
The rear window heate r on ly operates when the
e ng ine is r unni ng.
It sw itches off a utomat ica lly
afte r a few minutes, depend ing on the o utside
temperature .
To prevent the rear w indow heater from swit ch
i n g off automatically, p ress and ho ld the
l lliil REAR I
button fo r more than 2 seconds . This is s tored
until the ignition is switched off.
I SYNC I Synchronization
When synchronization is switched on, the set
tings for the dr ive r's side are appl ied to the front
p a ssenger's s ide (except for se at heating/ventila
tion*) . The settings in t he rear are a lso synchron
ized. Synchronization switches off when the set
tings are adj usted individually for the front pas
senger 's side or for the rear.
You can sync hronize the settings in a row by
p ressing and holding a contro l. For example, to
app ly the settings for the front passenger 's side
to the driver's side, press and ho ld the contro l on
the front passenger's side. The same applies to
the rear .
Residual heat *
With the ignition turned off, yo u can activate the
residual heat function by pressing the
Iii button
c:> fig. 72. The residual heat from the coolant is
used to heat the vehicle interior. The residual
heat function switches off automatically after
about 30 m inutes .
Air vents
You can open or close the center and rear vents in
the cockpit and the vents in the rear center con
sole and door p illars using the r idged thumb
wheels . The levers adjust the direct ion of the a ir
flow from the vents .
62
A WARNING
-You shou ld not use the recircu lation mode
for an extended period of time since no
fresh air is drawn in . W it h the air-condition
ing sw itched off, the windows ca n fog up,
whi ch inc reases the risk of an acc ident.
- Individ uals w ith reduced sensit iv ity to pa in
or tempe rature co uld develop b urns when
using the sea t heat ing f unct io n. T o re duce
t he r isk of injury, t hese individua ls sho uld
no t u se sea t hea ting.
@ Note
T o avoid damage to the heating elements in
the seats, do no t knee l on t he se ats o r pla ce
h eavy lo ads on a small area of the seat.
Basic settings
The climate control system basic settings are ac
cessed in the Infotainment system.
~ Select: the I CARI funct ion button > (Car )* Sys-
tems
contro l butto n > AC.
Rear seat settings *
When this function is se lected, all settings for
the rear can be adjusted through the climate con
trol system in the cockp it . T he climate control
system settings cannot be ad justed in the rear
seat at the same time. This f unct io n sw itches off
after a ce rtain per iod of t ime o r whe n one of t he
con tro ls in t he coc kp it is pressed.
Automatic recirculation*
The sensitivity level of t he automatic recircula
tion mode can be set at various levels from
Off to
Sen sitive . Recircul at io n mode is cont ro lled auto
matically. If the w indows fog up, p ress t he
l
Footwell temperature*
You can adjust the footwell temperature so that
i t is cooler or wa rme r.
Page 66 of 266
Drivin g
Driving
General information
Breaking in
A new vehicle must be broken in for the first 1,000 mi les (1,500 km). Do not dr ive at speeds
t hat will exceed 2/3 of the max imum pe rm itted
engine speed (RPM) for the first 600 miles
(1,000 km), and avoid fu ll acceleration during
this period . You may gradually start increasing
the RPM and the speed between 600 miles
(1,000 km) and 1,000 miles (1,500 km) .
During the first hours of use, the engine has a
higher internal friction than later on when all
moving parts have settled into place with each
other.
How the vehicle is driven d uring the first 1,000
miles (1 ,500 km) a lso affects the engine quality .
Drive at moderate engine speeds after the initial
break-in per iod, part icu larly when running a cold
eng ine . Th is will reduce eng ine wear and improve
the m ileage .
Do not drive at too
low of an engine speed (RPM).
Shift down if the engine stops running "smooth ly". Extremely high eng ine speeds are automati
cally reduced .
Reducing the risk of vehicle damage
@ Note
When driving on poo r roads, by cu rbs and on
s teep ramps, make su re t hat low-hang ing
compone nts such as the spo ile r and exha ust
system do not come into contact with these
or they could be damaged. This especially ap
plies to vehicles with low ground clearance
and veh icles that are heavily loaded.
Warming up/cooling down
Applies to: S models
By warming up/cooling down the engine carefu l
ly, you can help red uce unnecessary stra in o n
your veh icle when driving in a sporty sty le .
64
The eng ine speed is lim ited when the engine is
cold - the full engine output is not availab le.
When the engine is at operat ing temperatu re,
the engine speed limitation moves to a h igher
RPM range. A lso, cold t ires may not have full
road gr ipping capab ilities until they have warmed
up .
Your vehicle a lso has an after-run cooling fea
ture . However, cooling down is still important.
The eng ine and the brakes as well as the exhaust
system and the transmission become very hot
whe n driving in a spo rty style . Before you shut
t h e ve hicle off, you should cool down the vehicle
by d rivi ng a few miles at low speeds with l igh t ac
ce leration.
Driving through water on roads
Note the following to reduce the risk of vehicle
damag e when driving throug h water, for exampl e
on f looded roads:
- The water must not be any higher t han the bo t
tom of the vehicle body.
- Do not dr ive faster tha n wal king speed .
& WARNING
After driving th ro ugh water or m ud, the effec
tiveness of the brakes may be red uce d due to
mo isture on the brake rotors and brake pads.
A few careful brake app lications shou ld dry
off the brakes and restore the full braking ef
fect .
@ Note
-Vehicle components such as the engine,
t ransmiss ion, suspens ion or elect rical sys
tem can be seve rely damaged by drivi ng
throug h water .
- Always switch the Start/Stop system* off
when driving through water
¢ page 70 .
(D Tips
- Determine the depth before driving throug h
water.
- Do not stop the vehicle, drive in reverse or
switch the engine off when driving through
water.
Page 72 of 266
Driving
Starting the engine when there is a
malfunction
It may not be possible to start the engine under
certain circumstan ces, for example if the battery
in the vehicle key is drained, if interference is af
fected the key or if there is a system malfunc
tion .
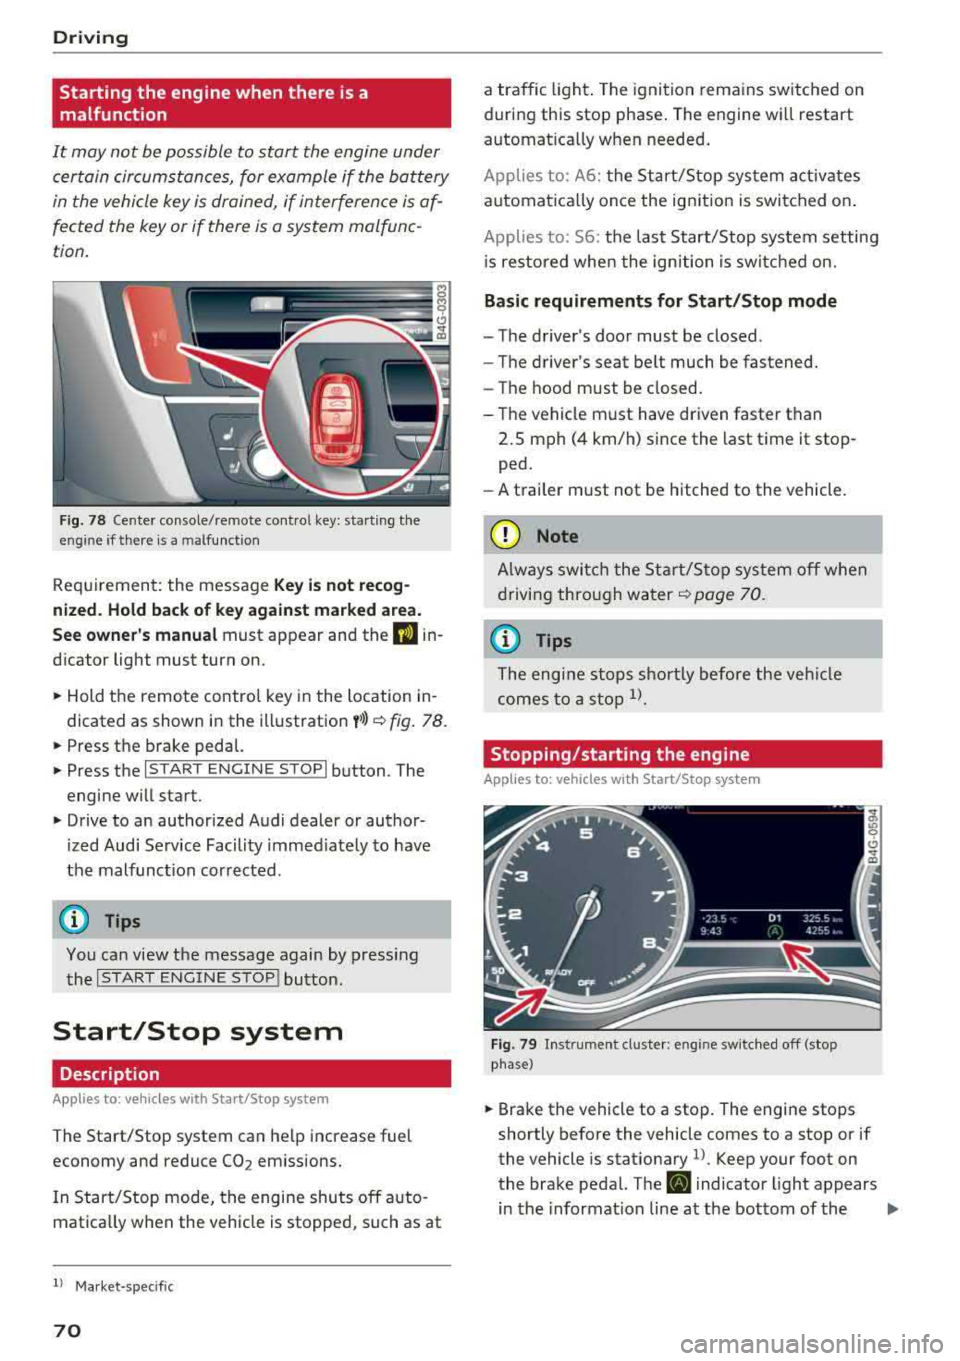
Fig . 78 Cen te r co nsole /rem ote co ntro l key : sta rt ing t he
en gine if th ere is a m alfu nction
Req uiremen t: the messa ge Key i s no t recog
nized . Hold back of key against marked a rea.
See owner's manual
must app ear and the DJ in
dicator light must tu rn on .
,.. Hold the remo te contro l key in the loc ation in
dicated as shown in the illustration
y >l) c::> fig . 78.
,.. Press the b rake pedal.
,.. Press the I S TAR T ENGINE STOPI button . The
engine will start.
,.. Drive to an authorized Audi dealer or author
ized Audi Service Facility immed iately to have
the malfunc tion cor rected .
(D Tips
You can view the message again by pressing
the
I START ENGINE STOP ! button.
Start/Stop system
Description
Applies to: veh icles with Sta rt/Stop system
The Start/Stop system can help increase fuel
economy and reduce
CO 2 em issions.
I n Start/Stop mode, the engine shuts off a uto
mat ica lly w hen the veh icle is stopped, such as at
ll Ma rket -spe cifi c
70
a traffic light . The ignition remains sw itched on
during this stop phase . The engine wi ll restart
automat ica lly w hen needed .
Applies to: A 6: the Sta rt/Stop system activates
automat ica lly once the ig nition is switched on .
Applies to: 56: the last S tart/Stop system setting
i s re stored whe n the ignition is switc hed on.
Basic requirements for Start/Stop mode
- The driver's doo r must be closed .
- The driver 's seat be lt much be fastened.
- The hood must be closed.
- T he vehicle m ust have driven faster than
2.5 mph (4 km/h) since the last t ime it stop
ped.
- A t railer m ust not be hitched to the vehicle.
(D Note
A lways swi tch the Start/Sto p system o ff whe n
drivi ng thro ugh wa ter
<::> page 70.
(D Tips
The engi ne s tops s hortly before the ve hicle
comes to a sto p
ll.
Stopping/starting the engine
Applies to: vehicles with Start/Stop sys tem
F ig. 79 In str umen t cl uste r: en gin e sw it ch ed off (stop
p hase )
,.. Brake the vehicl e to a stop. The engine stops
shortly before the vehicle comes to a stop or if
the vehicle is stationary
1> . Keep your foot on
the brake pedal. The
D] i ndicator light appears
in the informat ion line at the bottom of the
.,..