ESP AUDI A7 2012 User Guide
[x] Cancel search | Manufacturer: AUDI, Model Year: 2012, Model line: A7, Model: AUDI A7 2012Pages: 294, PDF Size: 73.33 MB
Page 33 of 294
@ Tips
-The vehi cle ca nnot be sta rte d if an unau
thorized key is used. The vehicle may not
start if another radio device such as a key
for another vehicle or a transponder is
l ocated on the key ring.
- For Declarat ion of Compliance to United
States FCC and Industry Canada regula
tions ¢
page 2 76.
Power locking system
General description
The power l ocking system locks or unlocks all
doors and the rear lid simultaneously.
You ca n lock and un lock the v eh icle cent rally.
You have the following choices:
- Remote master key¢
page 33,
-Door handles with convenience key*
¢ page 33,
-lock cylinder at the dr iver 's door
¢page 34, or
- Power locking switch inside¢
page 34.
Selective unlocking
When t hey a re closed, the door and re ar lid
are loc ked . When unlocki ng, you can set in the
M MI whether only the driver's door or the en
tire vehicle sho uld be un locked
r::!) page 32 .
Automatic locking
The automat ic lo cking fea ture locks all the ve
hi cle doo rs and the rear lid whe n you drive
faster than 9 mph ( 15 km/h) .
The c ar is un locked aga in , when the opening
f u nction in the power lo cking system sw itch
or at one of the door leve rs is ac tuated. The
Auto lock f unction can be turned on and
off in
the M MI
¢ page 32.
Anti-theft alarm warning system
If th e a nti-theft alarm wa rning sys tem de
tec ts a bre ak-in into the vehi cle, aco ust ic and
v isua l wa rning signals are t riggered.
Opening and clo sin g 31
The anti -theft wa rning system is activated au
tomat ica lly when you lock the ve hicle .
It is de
activated when unlocking using the remote
key, w ith the mechan ica l key, and when you
switch the ign ition on .
The alarm a lso t urns
off when the a larm cycle
has expired .
Turn signals
When you unl ock the ve hicle, the turn s ignals
f lash twice . When yo u lock the veh icle t he
tu rn s ignals f lash once.
If t hey do not flash ,
one of the doo rs, the rear lid o r th e hood is
not locked.
Unintentionally locking yourself out
In the fo llow ing cases there sa feg uards to
prevent yo u locki ng you r remo te mas ter key in
the ve hicl e:
- The vehicle does not lo ck wit h the cen tral
lo ck ing swit ch
r::!) page 34 if t he drive r's
door is open.
- On veh ides with co nvenience key*, if the
mos t recen tly use d m aste r key is in the lug
gage compartment, the rear lid is a utomat i
cally un locked again after it is closed.
Do no t lock your ve hicle with the
re mote mas
ter key or convenience key*
unti l all doors
and the rear lid are closed. In this way you
avo id lock ing yo urself out acc identally .
Power side door closer*
The vehicle doo rs a re equippe d with a powe r
s ide d oor closer . W he n clos ing a doo r, y ou o n
l y have to le t it fall light ly in to the latch . The
doo r will the n automatically close by itself
¢ ,& .
&_ WARNING
-When you lock yo ur vehicle from o utside,
nobody -espec ially childre n -should re
main inside the ve hicle. Remember,
when yo u lock the vehicle from t he out
side the wi ndows cannot be o pened from
the inside. .,.
Page 43 of 294
Clear vision Lights
Switching the headlights on and off
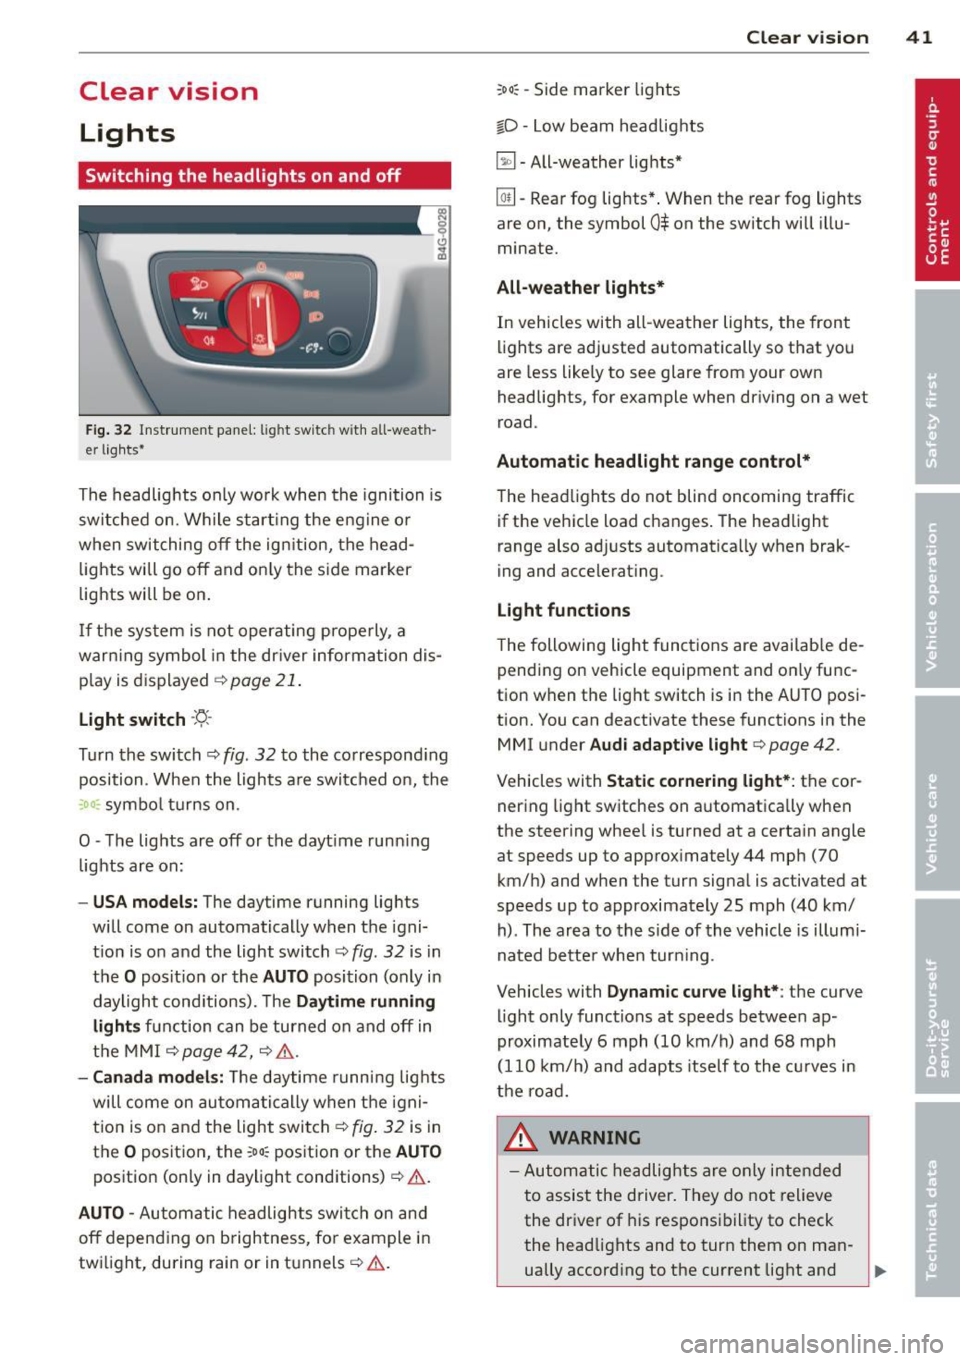
Fig . 32 Instrument pane l: lig ht sw itc h wit h all -weath
er lights•
The headlights only wo rk when the ignition is
switched on. Wh ile start ing the eng ine o r
when switching off the ign ition, the head
lights will go off and on ly the side marker
lights will be on .
If the system is not operating p rope rly, a
war ning symbol in the dr iver information dis
p lay is d isplayed
c::> page 21 .
Light switch ·'t!- -
Tu rn the switch c::> fig . 32 to the correspond ing
position . When the lights a re switched on, the
:oo: symbo l tu rns on .
0 -The lig hts are off or the dayt ime runn ing
lights are on:
- USA models: The daytime running ligh ts
will come on automatically when the igni
t ion is on and the light switch
c::> fig . 32 is in
the O posit ion or the AUTO position (only in
daylight cond itions). The Daytime running
light s function can be turned on and off in
the MMI
c::> page42, c::>A .
-Ca nada model s: The daytime running lig hts
will come on automa tically when the igni
t ion is on and the light switch
c::> fig . 32 is in
the O position, the
:oo: pos ition or the AUTO
position (only in daylight conditions)
c::> A .
AUTO -Automatic headlights swi tch on and
off depend ing o n brightness, for example i n
tw ilight, during rain or in tunnels
c::> &. .
:oo: -Side marke r lights
io -Low beam headlights
~ -All-weather lig hts*
Clear vi sion 41
[Q!l -Rear fog lights* . When th e rear fog lights
a re on, the symbol
0$ on the switch will illu
mina te.
All-weath er lights*
In vehicles with all-weather lights, the front
li ghts are adj usted automatically so that you
are less like ly to see glare from your own
headligh ts, for example when driving on a wet
road .
Automatic headlight range cont rol*
The head lights do not blind oncoming traffic
if the vehicle load changes . The headlight
range also ad justs automatica lly when brak
i ng and accelerat ing .
Light function s
T he following light funct ions are avai lab le de
pending on vehicle equipment and on ly func
tion when the light switch is i n the AUTO posi
tion. You c an deactiv ate these functions in the
MMI under Audi adaptive light
c::> page 42 .
Vehicles w ith Static cornering light* : the cor
ner ing light sw itches on automatica lly when
the stee ring whee l is tu rned at a ce rta in angle
at speeds up to approx imately 44 mph (70
km/ h) and when the turn signa l is ac tiva ted a t
speeds up to approximately 25 mph (40 km/
h) . The area to the s ide of the vehicle is illumi
nated bette r whe n turn ing .
Vehicles with Dynamic curve light* : the
curve
li ght only functions at speeds betwee n ap
proximately 6 mph (10 km/h) and 68 mph
(110 km/ h) and adapts itself to the cu rves in
the ro ad.
_& WARNING
- Autom atic headlig hts are only intended
to assist the driver. They do not relieve
the dr iver of his responsibility to check
the head lights and to turn them on man -
ually accord ing to the current light and
~
Page 48 of 294
46 Clear vis ion
vision system camera* are cleaned a utomati
cally the first time the lever is press in posi
tion ® and every 8 times it is pressed after
that . They are also cleaned every time you
hold the lever in pos ition ® for longer than 8
seconds .
A WARNING
- The ra in sensor is only des igned to assist
and support the drive r. It remains entire
ly the dr iver's respons ibility to monito r
o ut side weather conditions and to man
ually activa te the wipers as soon as rain
or drizzle reduces visibility through the
windshield.
- The windshie ld m ust not be treated with
water -repe llent materials. They can in
c rease glare under poor visibi lity condi
tions such as wetness, darkness, or when
the sun is low on the horizon. In addi
t ion, they can cause the windshield wip
ers to chatter .
- Proper ly functioning w indshie ld w iper
blades are required for a clear view and
safe dr iv ing
Q page 46, Replacing
windshield wiper blades .
([) Note
- In the case of frost, check whether the
winds hield wiper b lades are frozen to
the windshie ld. Switching on the wind
shield wipers can damage the wiper
blades!
- Prior to using a car wash, the wi ndsh ield
wipe r system must be switched off (lever
i n position 0). This helps to preve nt unin
tention al swi tching on and damage to
the windshie ld w iper system.
- Do no t use the wipe rs to cle ar a fros ted
window. Using the w ipers as a conven
ient ice scraper will destroy the wiper
b lades .
(D Tips
- The w indshield wi pers are swi tched off
when the ignition is off . Activate the
windsh ield wipers after the ignition is
'
switched back on by moving the w ind
shield wiper lever to any position.
- Worn or d irty windshield wipe r blades
result in st reaking. This can affect the
rain sensor function . Check your wind
shield wiper blades regularly.
- The washer fluid nozz les of the wind
shield washer system a re heated at low
tempe rat ures when the ignition is on .
- When stopping temporarily, e.g . at
a
traffic light, the set speed of the wind
shield wipers is automatically reduced by
one speed.
Replacing windshield wiper blades
Wiper blades in good condition help keep the
windshield clear .
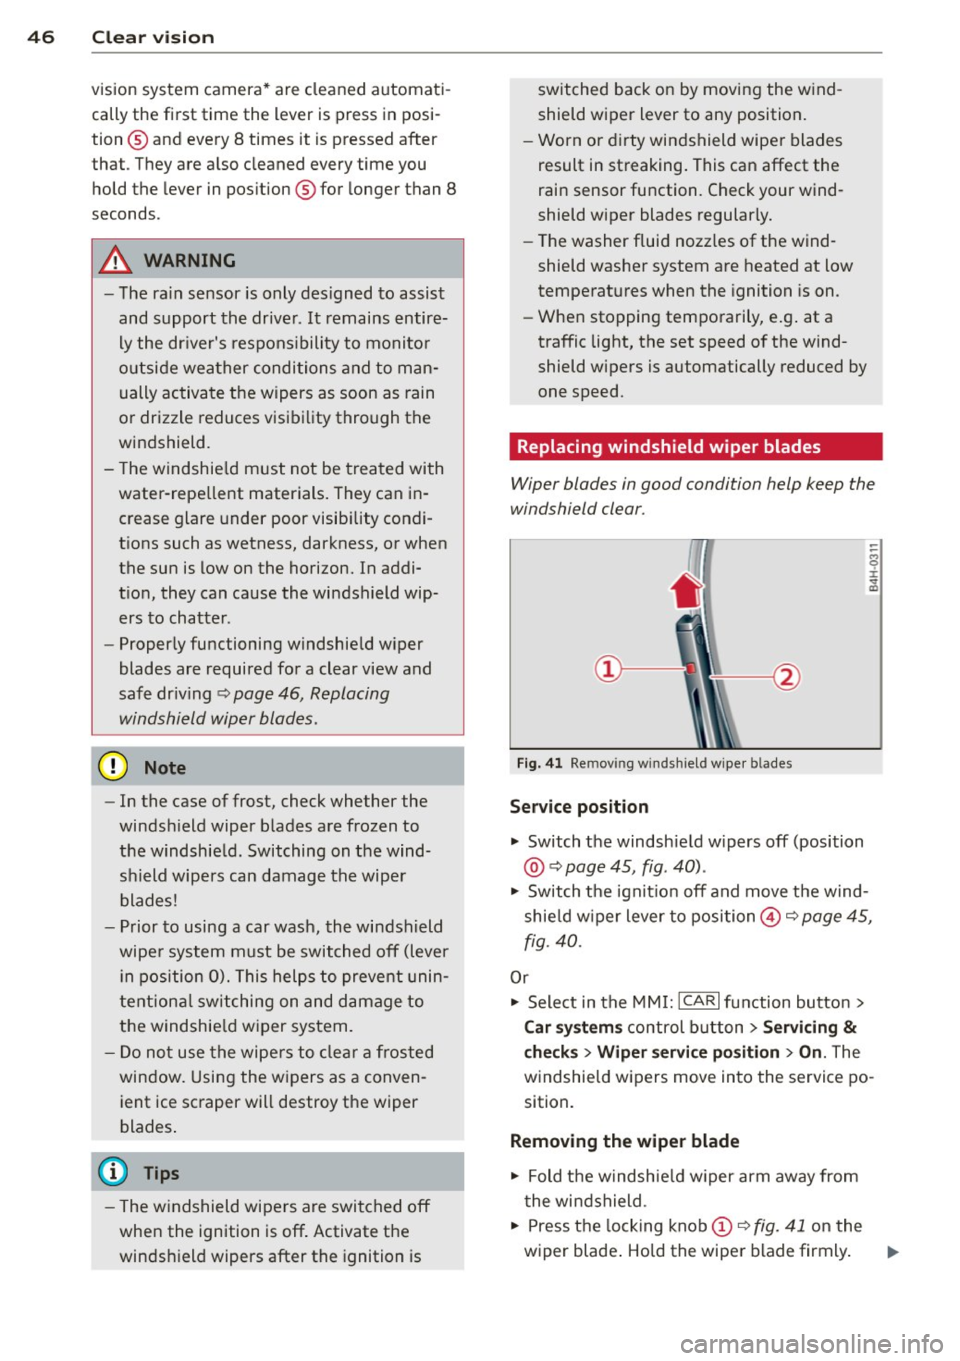
Fig. 41 Re mov ing w in d sh iel d wipe r bl ades
Service position
... Switch the windshie ld w ipers off (position
@ Q page 45, fig . 40) .
.,. Switch t he ignit ion off and move t he wind
shie ld w iper lever to position@Q
page 45,
fig. 40.
Or
.,. Sele ct in the MMI: ICAR lfunction button>
Car sy stem s control button > Servicing
&
checks > Wiper service po sition > On . The
windsh ie ld wipers move in to the service po
sition.
Removing the wiper blade
.,. Fold t he windsh ie ld w iper arm away from
t he wi ndshield .
.,. Press the locking knob
(D Q fig. 41 on the
wiper blade . Ho ld the wiper blade firmly . ..,.
Page 50 of 294
48 Clear vis ion
another gear, the new mirror position is stor
ed and assign ed to the key you a re using.
The mirror goes back in to its origina l posit io n
once yo u drive forward faster than 9 mph (15
km/h) or switch the ignition
off.
~ WARNING
- Curved ( i.e. convex) mirror s urfaces in
crease your field of view. Remember that
vehicles or other objects will appear
smaller a nd fa rther away than when seen
in a flat m irror . If you use this mirro r to
est imate distances of following vehicles
when changing lanes, you cou ld estimate
incorrectly and cause an ac cident .
-
@ Note
-If the mirro r hous ing is moved uninten
t ionally (for example, whi le park ing your
vehicle), then you must first fo ld the mi r
r or electri cally. Do not readjust the m ir
r or ho us in g manua lly . You could damage
the motor which con trols the mirror .
- If you wash t he vehi cle in an au tomatic
c ar wash, yo u m ust fold the e xterior m ir
rors in to reduce the risk of damage to
the mirrors. Never fold power fo lding ex
terior mi rrors* by hand. Only fold them
i n and out us ing t he power contro ls.
@ Tips
- The exterior mirror settings are stored
with the memory funct ion *
~ page 53.
- If there is a malfunct ion i n the elect rical
system, you can still adjust the exter ior
mirrors by pressing the edge of the mir
ror.
Dimming the mirrors
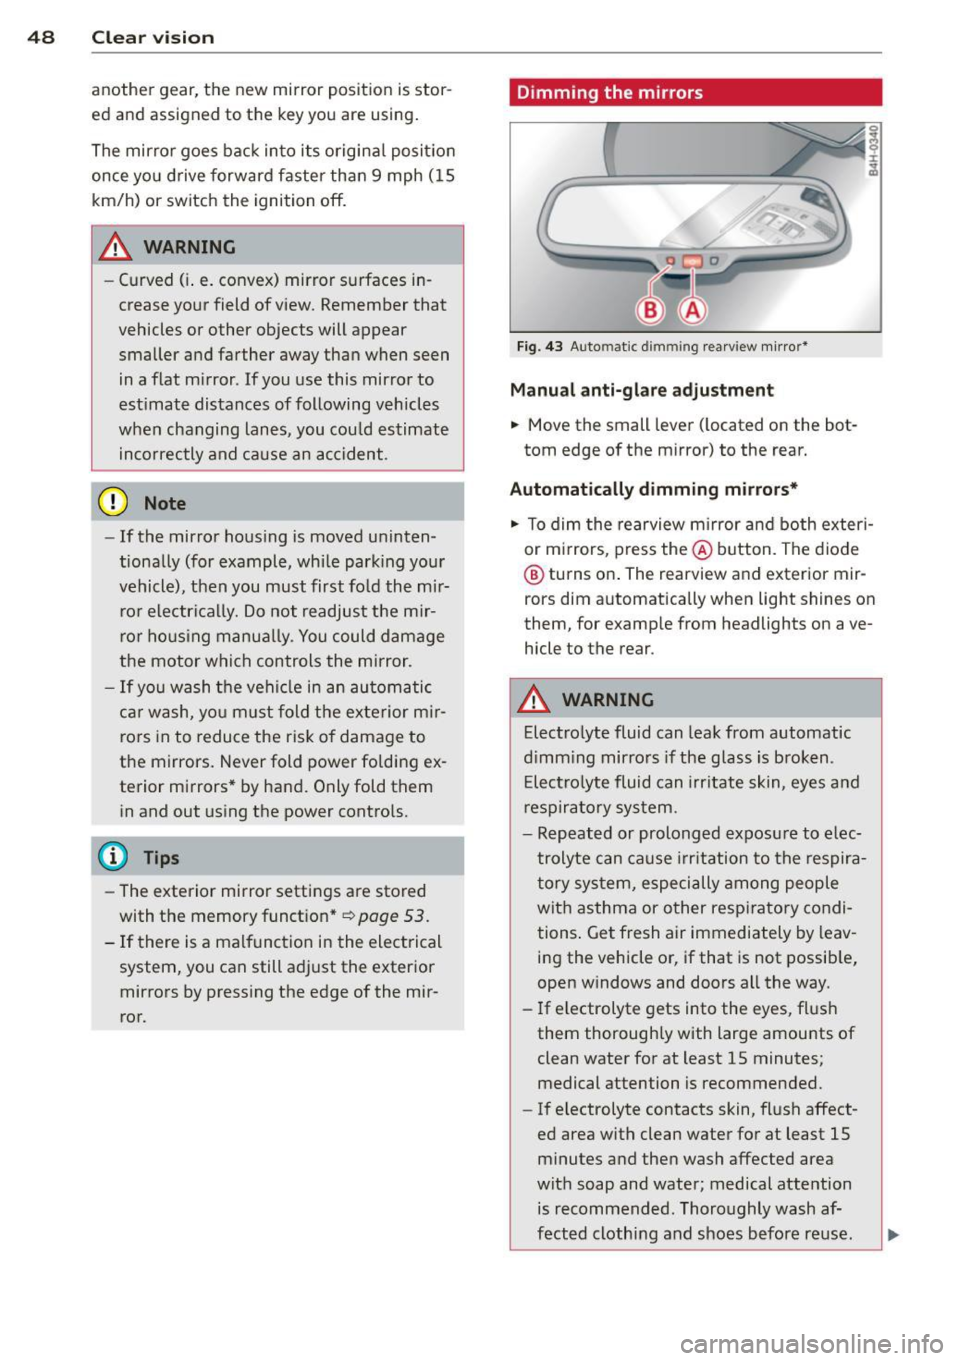
F ig . 4 3 Auto ma tic d immin g rearview mirro r*
Manu al anti-glare adjustment
.,. Move the small leve r (located on the bot
tom edge of the mirror) to the rear.
Automatically dimming mirrors*
.,. To dim the rearview m irror and both exteri
or m irrors, press the@ button . The diode
® turns on . The rearview and exterior mir
rors dim automatically when light shines on
them, for examp le from headlights on ave
hicle to the rear .
A WARNING
=
Electrolyte fluid can lea k from automatic
d imm ing mirro rs if the g lass is broken .
E lectro lyte fluid can irr itate sk in, eyes a nd
r espira to ry system .
- Repeated or prolonged exposu re to e lec
trolyte can ca u se irritation to the respira
t ory sys tem, especially among people
wit h asthma or other resp iratory condi
tions . Get fresh air immediately by leav
ing the vehicle or, if that is not possib le,
open w indows and doors all the way .
- If electrolyte gets into the eyes, fl ush
them thorough ly with large amou nts of
clean water for at least 15 minutes; medical attention is recommended.
- If electrolyte contacts skin, fl ush affect
ed area with clean water for at least 15 minutes a nd then wash affected area
with soap and water; medical atte ntion
is recommended. Thoroughly wash af
fect ed clothing and shoes before re use .
Page 52 of 294
50 Seat s a nd s tor ag e
Seats and storage
General recommen
dations
Why is your seat adjustment so
important?
The safety belts and the airbag system can
only provide maximum protection if the front
seats are correctly adjusted.
There are various ways of adjust ing the front
seats to provide safe and comfortable support
for the driver and the front passenger . Adjust
you r seat prope rly so that :
- you can easily and quick ly reach all the
switches and controls in the instrument
panel
-your body is prope rly supported thus reduc
ing physical stress and fatigue
- the safety be lts and a irbag system can offer
maximum protection
¢ page 137 .
In the following sec tions, you will see exactly
how you can best adjust you r seats .
There are special regulations and instructions
for insta lling a child seat on the front pas
senger's seat. Always fo llow the information
regarding ch ild safety provided in
q page 163, Child Safety.
A WARNING
Incorrect seating position of the driver and
all other passengers can result in serious
personal in jury.
- Always keep your feet on the floor when
the vehicle is in motion -never p ut your
f eet on top of the instrument panel, out
of the w indow or on top of the seat cush
ion . Th is app lies especially to the passen
gers .
If your seating position is incorrect,
yo u increase the r isk of injury in the case
of sudden braking or an acc ident.
If the
a irbag infla tes and the seating positio n
is incorrect, this could result in personal
injury o r even death.
- It is import ant for bo th the driver and
front passenger to keep a distance of at least 10 inches (25 cm) between them
selves and the steering wheel and/or in
strument panel. If you're s itting any
closer than th is, the a irbag system can
not protect you properly . In addition, the
front seats and head restraints must be
adjusted to your body height so that they
can give you max imum protect ion.
- Always try to keep as much distance as
possible between yourself and the steer
ing wheel o r inst rument pane l.
- Do not adjust the driver's o r front pas
senger's seat whi le the vehicle is moving.
Your sea t may move unexpected ly, caus
ing sudden loss of vehicle cont rol and
personal injury . If yo u adjust yo ur seat
while the veh icle is moving, yo u are out
of posit ion.
Driver's seat '
The correct seat position is important for safe
and relaxed driving.
We recommend tha t you adjus t the dr iver's
seat in the fo llowing manner :
.,. Adjust t he seat in fo re and aft direction so
t ha t you can eas ily push the peda ls to the
floor w hile keeping your knees sl igh tly bent
q A in Why is your seat adjustment so im
portant? on page 50.
.. Adjust the back rest so that when you sit
w ith your back against t he backrest, you can
still grasp the top of the steering wheel.
.. Adjust the head restraint so the upper edge
is as even as poss ible with the top of your
head . If that is not poss ible , try to adjust
t he head restraint so that it is as close to
t his pos it ion as possib le
q page 52.
A WARNING
Neve r place any objects in the dr iver's foot
well. An object could get into the pedal
a rea and interfere with pedal function . In
case of sudden braking or an acc ident, you
would not be able to brake or accelerate .
Page 53 of 294
Front passenger's seat
Always move the front passenger seat into the rearmost position.
To avoid contact with the airbag while it is de
ploying, do not sit any closer to the instru
ment panel than necessary and always wear
the three-point safety belt provided adjusted
correctly. We recommend that you adjust the
passenger's seat in the following manner:
.. Move the front passenger seat into the rear
most position of the fore and aft adjustment
range
~ .&. in Why is your seat adjustment
so important? on page 50.
• Bring the backrest up to an (almost) upright
position.
Do not ride with the seat reclined .
.. Adjust the head restraint so the upper edge
is as even as possible with the top of your
head. If that is not possible, try to adjust
the head restraint so that it is as close to
th is position as possible ¢
page 52.
.. Place your feet on the floor in front of the
passenger's seat .
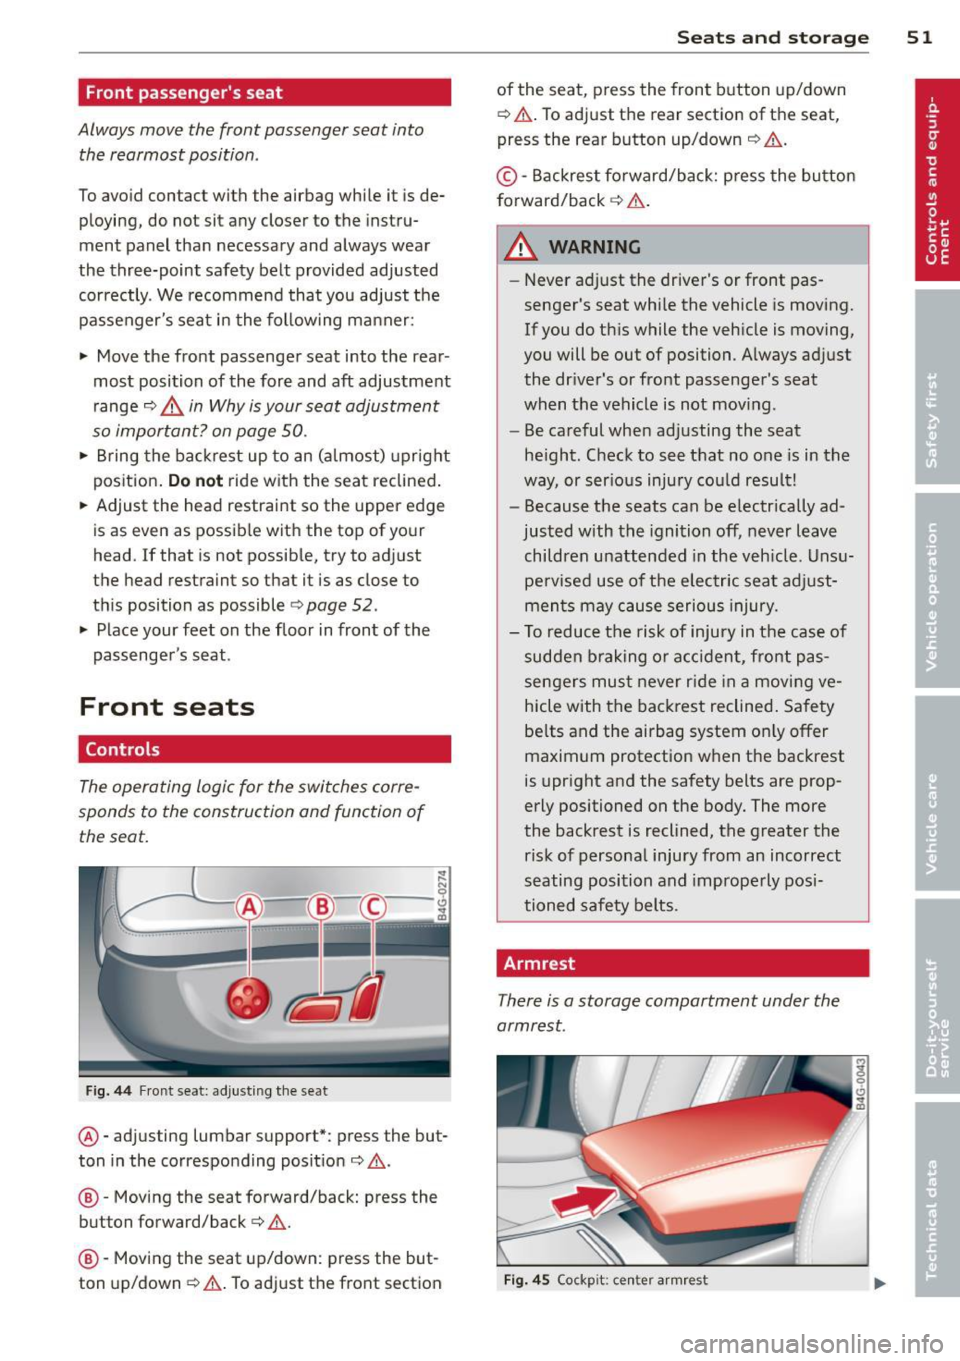
Front seats
Controls
The operating logic for the switches corre
sponds to the construction and function of
the seat.
Fig. 44 Front seat: adjusting the seat
@ -adjusting lumbar support*: press the but
ton in the corresponding position¢.&,.
@ -Moving the seat forward/back: press the
button forward/back ¢ ,&. .
@ -Mov ing the seat up/down: press the but
ton up/down ¢,&. . To adjust the front section
Seats and storage 51
of the seat, press the front button up/down
¢ ,&. .To adjust the rear section of the seat,
press the rear button up/down ¢,&. .
© -Backrest forward/back: press the button
forward/back
~ ,&. .
A WARNING
-
-Never adjust the driver's or front pas
senger's seat whi le the vehicle is moving.
If you do this while the veh icle is moving,
you will be out of position. Always adjust
the dr iver's or front passenger's seat
when the vehicle is not moving.
- Be careful when adjusting the seat
he ight. Check to see that no one is in the
way, or serious injury cou ld result!
- Because the seats can be electrically ad
justed with the ignition off, never leave
children unattended in the vehicle. Unsu
pe rvised use of the electric seat adjust
ments may cause serious injury .
- To reduce the risk of injury in the case of
sudden braking or accident, front pas
sengers must never r ide in a moving ve
hicle with the backrest reclined. Safety
be lts and the airbag system on ly offer
maximum protection when the backrest
is upright and the safety belts are prop
erly positioned on the body. The more
the backrest is reclined, the greater the risk of personal injury from an incorrect
seating position and improperly posi
tioned safety belts.
Armrest
There is a storage compartment under the
armrest.
Fig. 45 Cockp it : center armrest
Page 59 of 294
-Compartment in the rear center armrest
- Storage in the trim panels in the luggage
compartment
A WARNING
- Always remove objects from the instru
ment panel. Any items not stored could
slide around inside the vehicle while driv ing or when accelerating or when apply
ing the brakes or when driving around a
corner.
- When you are driving make sure that
anything you may have placed in the cen
ter console or other storage locations cannot fall out into the footwells. In case
of sudden braking you would not be able
to brake or accelerate.
- Always keep the lid of the compartment
for (sun)glasses* closed while driv ing to
reduce the risk of injury dur ing a sudden
braking maneuver or in the event of an
accident.
- Any articles of cloth ing that you have
hung up must not in terfere with the driv
er's view . The coat hooks are designed
only for lightweight clothing. Never hang
any clothing with hard, pointed or heavy
objects in the pockets on the coat hooks.
During sudden braking or in an accident -
especially if the airbag is deployed -
these objects could injure any passen gers inside the vehicle.
- To reduce the r isk of personal injury in an
acc ident or sudden stop, always keep the
glove compartmen t closed while dr iv ing.
- Read and fo llow all WARNINGS
~ page 159, Important safety instruc
tions on the side airbag sys tem.
- Hang clothes i n such a way that they do
not impair the dr iver's v is ion.
- The coat hooks must only be used for
lightwe ight cloth ing. Do not leave any
heavy or sharp edged obje cts in the pock
ets which may interfere with the side cur
tain airbag deployment and can cause persona l injury in a cras h.
- Do not use coat hangers for hanging
clothing on the coat hooks as this can in-
Sea ts a nd s to rage 57
terfere with proper deployment of the
side curtain a irbags in an acc ident.
- Do not hang heavy objects on the coat
hooks , as they could cause personal in
jury in a sudden stop.
(D Note
Objects located on the rear shelf that rub
against the rear window could damage the heating wires for the rear window defog
ger.
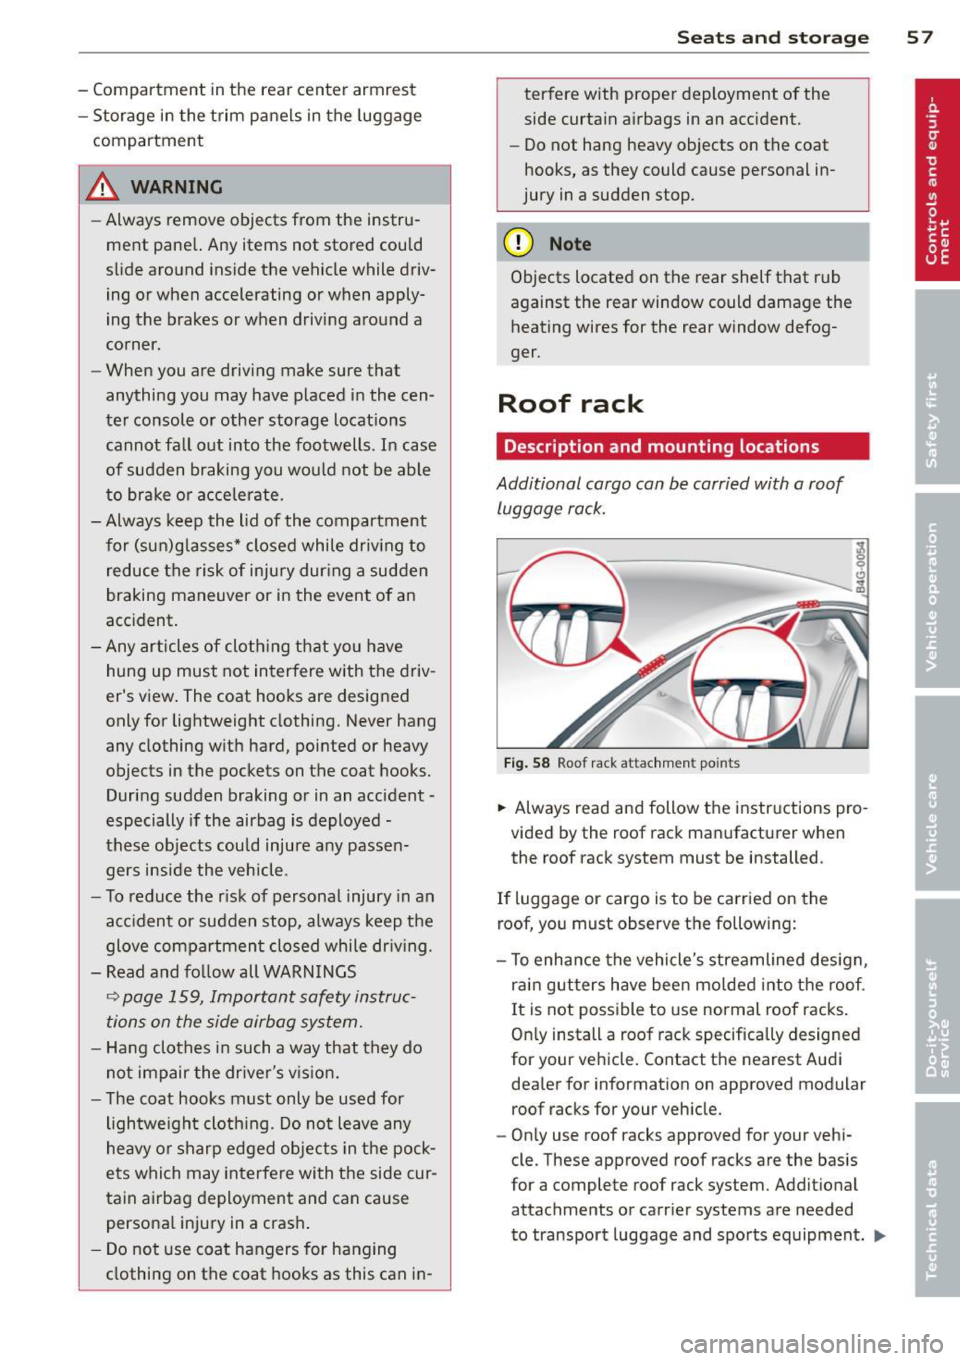
Roof rack
Description and mounting locations
Additional cargo can be carried with a roof luggage rack.
F ig . 58 Roof rack attachment points
... Always read and follow the instructions pro
vided by the roof rack manufacturer when
the roof rack system must be installed .
If luggage or cargo is to be carried on the
roof, you must observe the following:
- To enha nce the vehicle's streamlined design,
rai n gutters have been mo lded into t he roof.
I t is not possible to use normal roof racks .
On ly install a roof rack specifically designed
for your veh icle. Contact the nearest Aud i
dealer for information on approved modular
roof racks for your veh icle.
- On ly use roof racks approved for your vehi
cle. These approved roof racks are the basis
for a complete roof rack system. Addit ional
attachments or carrier systems are needed
to transport luggage and sports equipment .
IJll-
Page 66 of 294
64 Warm and cold
Warm and cold
Climate controls
Description
App lies to vehicles: with three-zone climate control or
four-zone automat ic climate contro l
The climate control system warms, cools and
adds humidity to the air in the vehicle interior .
It is the most effective when the windows and
sunroof* are closed .
If the temperature inside
the parked veh icle becomes very warm, open
ing the w indow br iefly will speed up the cool
ing process.
In all heating mode functions except
defrost,
the blower on ly switches to a highe r speed
once the engine coolant has reached a certain
temperature.
Condensat ion from the cooling system can
d rip and form a puddle of wate r under the ve
h icle. This is normal and does not mean there
is a leak .
Pollutant filt er
The pollutant filter removes pollutants such
as dust and po llen from the air.
The air pollutants filter must be changed at
the intervals spec ified in your Warranty
&
Maintenance booklet, so that the air condi
tioner can properly work .
If you drive your vehicle in an area with h igh
a ir pollution, the filter may need to be
changed more freq uently than specified in
your Aud i Warranty & Ma intenance booklet . If
i n doubt, as k your author ized Audi Se rvice Ad
visor for adv ice.
K ey coded setting s
Three-zone climate control: the blower set
ting and air distribution are stored automati
cally and ass igned to the remote control key
that you are using.
Four-zone automatic climate control: The cli
mate control settings are automatica lly stor
ed and assigned to the remote control key
that is in use .
A WARNING
Reduced visibility is dangerous and can
cause accidents.
-
- For safe driving it is very important that
all windows be free of ice, snow and con
densat ion .
- Comp lete ly fami liarize yourse lf with the
proper use and funct ion of the heat ing
and venti lation system and especially
how to defog and defrost the w indows.
- Never use the windshield wiper/washer system in freez ing weather unt il you
have wa rmed the windshie ld first, using
the heating and ventilation system. The
washer sol ution may freeze on the w ind
shie ld and red uce visib ility.
(D Note
- If you suspect that the air conditioner
has been damaged, switch the system
off to avoid further d amage and have i t
inspected by a q uali fied dealership .
- Repairs to the Audi air conditioner re
quire speci al technical know ledge and
special tools. Contact an authorized Audi
dea ler fo r ass istance.
@ For the sake of the environment
By reducing the amount of f uel you use,
you also red uce the amount of pollutants
emitted into the air.
(D Tips
- Keep the air intake s lo ts (in front o f the
windshield) free from ice, snow and de
bris in order to maintain the proper func
tion of the climate control system.
- The energy management system may
switch the seat heating* or rear window
defroster off temporar ily. These systems
are available again as soon as the energy
balance has been restored .
-Air escapes through vents under the rear window. When plac ing items of cloth ing
on the luggage compartment cover, en
sure that the openings are not covered.
Page 78 of 294
76 On the road
Emergency braking
In the event that the conventional brake sys
tem fails or locks .
.,. In an emergency, pull the switch(®) and
continue to pull it to slow your vehicle down
with the parking brake .
... As soon as you release the sw itch <®> or ac-
cele rate , the braking process stops.
If you pull the switch <®> and hold it above a
speed of about 5 mph (8 km/h), the emergen
cy braking function is in itiated . The vehicle is
b raked at all four wheels by activating the hy
dra ulic bra ke system. The b ra ke performance
i s simi lar to making an emergency stop ¢
A.
In order not to activate the emergency brak
ing by mistake, an audible wa rning tone (b uz
z e r) sounds when the switch<®> is pulled. As
soon as the switch(®) is released, or the accel
erator pedal is depressed , emergency braking
stops .
&_ WARNING
Emergency braking shou ld only be used in
an emergency, when the normal foot brake
has failed or the brake pedal is obstructed.
Using the parking brake to perform emer
gency braking will slow you r vehicle down
as if you had made a fu ll brake application.
The laws of physics cannot be s uspended
even w ith ESP and its associated compo
nents (ABS, ASR, ED L). In corners and
when road or weather conditions are bad,
a full b rake application can cause the vehi
cle to skid or the rear end to break away -
r isking an accident.
Speed warning system
Introduction
The speed warning system helps you to stay
under a specified maximum speed.
The speed warning system warns you if you
are exceeding the max imum speed that you
have set . You w ill hear a warn ing tone when
your speed exceeds the stored va lue by ap- proximate
ly 3 mph (3 km/h) . An ind icator
light . (USA
models) ;a (Canada models) in
the instr ument cluster d isp lay also turns on at
the same time. The indicator light./.
turns off when the speed decreases be low the
stored maximum speed .
Setting a threshold is recommended if you
would like to be rem inded when you reach a
certain maximum speed. S ituations where you
may wa nt to do so include driv ing in a country
with a general speed limit or if there is a
specified maximum speed for winter tires .
(D Tips
Even though your vehicle is equipped w ith
a speed warn ing system, you should still
watch the speedometer to ma ke sure you
a re not dr iv ing faster than the speed limit.
Setting the threshold
You can set, change and delete the threshold
in the MMI.
.,. Select: !CAR ! function button> Car sy stems
cont rol button > Driver a ssist > Sp eed warn
ing .
You can set any threshold between 20 mph
(30 km/h) and 150 mph (240 km/h) . Sett ings
can each be adjusted in increments of 5 mph
(10 km/h).
Page 79 of 294

Cruise control
Switching on
Applies to vehicles: with cr uise contro l
The cruise control system makes it possible to
drive at a constant speed starting at 20 mph
(30 km/h).
0
•
~
0
Fig . 79 Contro l lever with set button
Fig. 80 Display: Selected speed
• Pull the lever to position (D ¢ fig. 79 to
switch the system on.
• Drive at the speed you wish to set.
• Press button @to set that speed.
The stored speed and the indicator light
lff;(1)~1~ (US models) 111 (Canad ian models) ap
pear in the instrument cluster display
¢ fig. 80. The display may vary, depending on
the type of display in your vehicle . The indica
tor
light ll in the instrument cluster also illu
minates.
This information is also shown briefly in the
Head-up Display*.
The speed is kept constant via an engine out
put adjustment or active brake intervention .
On the road 77
A WARNING
-Always pay attention to traffic even when
the cruise control is switched on. You are
always responsible for your speed and
the distance between your veh icle and
other veh icles .
- For safety reasons, the cruise contro l
should not be used in the city, in stop
and-go traffic, on twisting roads and
when road conditions are poor (such as
ice, fog, gravel, heavy rain and hydro
planing) -risk of accident .
- Turn off the cruise control temporarily
when entering turn lanes, highway exit
lanes or in construction zones .
- Please note that inadvertently "resting"
your foot on the accelerator pedal causes the cruise control not to brake. This is
because the cruise control is overridden
by the driver's acceleration.
- If a brake system malfunction such as
overheating occurs when the cruise con
trol system is switched on, the braking
function in the system may be switched off. The other cruise control functions re
ma in active as long as the indicato r light
mmlm (US models) !Iii (Canadian mod
e ls) is on.
(D Tips
The brake lights illuminate as soon as the
brakes decelerate automatically.
Changing speed
Applies to vehicles: wi th cruise co ntrol
• Press lever in the 0 or 0 direction
¢ page 77, fig. 79 to increase or decrease
your speed .
• Release the lever to
save that speed.
Change speed in in crements of 1 mph (1 km/
h) by lightly pressing the lever. If you keep the
lever pressed down, you will a lter your speed
in 5 mph (10 km/h) increments.
You can also press the accelerator pedal down
to increase your speed, e.g . if you want to
II>