engine AUDI A7 2013 User Guide
[x] Cancel search | Manufacturer: AUDI, Model Year: 2013, Model line: A7, Model: AUDI A7 2013Pages: 310, PDF Size: 77.45 MB
Page 19 of 310
Instruments and warning/indicator lights 17
If the indicator light turns on and the mes
sage appears , the coo lant temperature is too
high or the coo lant level is too low.
.,. Pull
off the road.
.,. Stop the vehicle .
.,. Turn
off the engine.
.,. Check coo lant level
¢ page 23 7.
.,. Add coolant if necessary¢
page 238 .
.,. Continue driving only after the engine cool
ant warning/indicator light goes out .
.,. Contact your authorized Aud i dealer for as-
s istance if necessary .
If the engine coolant level is correct, then the radiator fan may be the cause of the malfunc
tion .
• Coolant temperature too high! Please let
engine run with vehicle stationary
If the indicator light turns on and the mes
sage appears in trailer mode*, let the engine
run at idle for a few m inutes to cool down.
A WARNING
- If your veh icle should break down for
mechanical or other reasons, park at a
safe distance from moving traffic, turn
off the engine and turn on the hazard
warning lights ¢
page 44, Emergency
flasher.
-
- Never open the hood if you see or hear
steam or coolant escaping from the en
gine compartment - you risk being scald
ed. Wait until you can no longe r see or
hear steam or coo lant escaping .
- The engine compartment of any vehicle
is a dangerous area. Before you perform
any work in the engine compartment,
turn of the engine and allow it to cool.
Follow the warning stickers¢
page 224,
Engine compartment.
Do not continue driving if the . symbol
illuminates. There is a ma lfunct ion in the
eng ine cooling system -you cou ld damage
your eng ine .
0 Battery
This warning/indicator light detects a mal
function in the generator or in the vehicle's
electrical system .
The .warning/ indicator light illuminates
when you switch on the ignition and must go
out after the engine has started .
• Alternator fault: Battery is not being
charged
If the indicator light turns on and the mes
sage appears, there is a malfunction in the generator or veh icle electrical system.
Drive to your authorized A udi dealer or quali
fied workshop immediate ly . Because the vehi
cle battery is discharg ing, turn
off all unnec
essary electrical equipment such as the rad io.
Seek professional assistance if the battery
charge level is too low.
t•i low battery: battery will be charged
while driving
If the indicator light turns on and the mes
sage appears, there may be limited starting
ability.
If this message turns
off after a little while,
the battery charged enough while driving.
If the message does not turn off, have your
a uthor ized Aud i dealer or qualified workshop
correct the malfunction.
~-Safety belts
This warning/indicator light reminds you to
put on your safety belt.
The . warn ing/ indicato r light illum inates
when the ignition is switched on to remind
the driver and any front passenger to put on
the safety be lt. Additiona lly, an acoustic warn
ing (gong) wi ll also sound.
For more Info rmation ¢
page 140, ~ Safety
belt warning light.
Page 20 of 310

18 Instruments and warning/indicator lights
9:::r. Engine oil pressure malfunction
The re d engin e oil pr essure warning symbol
require s immediat e ser vice or repair . Driving
with a low-oil- pre ssure indicat ion is lik ely to
inflic t seve re damage to the engine .
• Switch off engine and check oil level
If the indicator light turns on and the mes
sage appears , the oil pressure is too low.
,,. Pull
off the road.
"' Stop t he ve hicl e.
,,. Turn
off the engine.
"' Check the engine oil level¢ page 235 .
• If the engi ne oil leve l is to o low, add engine
o il ¢
page 235 . Make sure that the oil p res
s ur e warning symbol. appea rs no longe r
i n t he d is pl ay before y ou sta rt driving again .
• If the engi ne oil leve l is c orre ct and t he ind i
cat or lig ht still t urn s on, tur n t he eng ine
off
and do not conti nue d riving . Seek p ro fessio
nal assistance .
(D Tips
- The engine oil pressure symbol. is
not an indicator for a low engine oil lev
el. Do not rely on it. Instead, check the
oil level in your engine at regular inter
vals, preferably each time you refuel,
and always before going on a long trip.
- The yellow oil level warning indication
II requires oil refill or workshop serv
ice without delay . Do not wait until the
red oil pressure warning. starts to
flash before you respond to the low oil level warning
11-By then, your engine
may already have suffered serious dam
age.
~ . Engine oil level
• WARNING: Please add oil immediately
When the sy mbo l and t he dr ive r message a p
pear, the oil has to be reple nis he d rig ht no w
¢page 232.
If t he in dicator light and the message appear,
a dd engine oil imme diate ly
¢ page 235 .
II Add oil, max. x qt (l). You may continue
driving
W hen the sy mb ol an d the d river message a p
pear, add the amoun t of oil appe aring in the
display at the nex t op port unity ¢
page 232.
® -e Steering column lock
• Do not drive veh icle: Steering defective
If t he indic ato r ligh t turns on an d the mes
sage a ppears, there is an e lec tronic stee ring
co lumn lock malfunct io n. You cannot switc h
t h e i gnit io n on.
Do
not tow yo ur vehicle becau se it c annot b e
stee red. See k professiona l assistance .
!Ill Steering lock: system fault. Please con
tact dealer
If th e indicato r light turns on and the mes
sage appears, there is an e lectronic steering
co lu mn l ock malfunct io n.
Drive to y our auth orized A udi dealer immedi
ately to hav e th e malfunction corr ecte d.
A WARNING
-~
Yo ur v ehicl e m ust no t be tow ed in t he
event of a malfu nction in the elec tronic
stee ring colum n lock be cau se it ca nno t be
s teere d due to th e l ock ed steeri ng. If it is
towe d wit h the s teeri ng locke d, there is
the r isk o f an accide nt.
© -e Engine start system
• Engine start system fault . Please con
tact dealer
If the indica to r ligh t turns on and the mes
sage appears, do
not switch the ig nition off
because you may not be a ble to sw itch it on
again.
Dr ive to your au thor ized A udi dea ler immed i
ate ly to have the ma lfunction corrected.
Ill Engine start system fault . Please con
tact dealer
Page 23 of 310
![AUDI A7 2013 User Guide Instrument s and warnin g/indic ator ligh ts 21
(0 ) Worn brake pads
rl] Brak e pad s!
If the warn ing light illum inates, immediately
contact your authorized Audi dealer or quali
fie AUDI A7 2013 User Guide Instrument s and warnin g/indic ator ligh ts 21
(0 ) Worn brake pads
rl] Brak e pad s!
If the warn ing light illum inates, immediately
contact your authorized Audi dealer or quali
fie](/img/6/57603/w960_57603-22.png)
Instrument s and warnin g/indic ator ligh ts 21
(0 ) Worn brake pads
rl] Brak e pad s!
If the warn ing light illum inates, immediately
contact your authorized Audi dealer or quali
fied workshop to have all brake pads inspect
ed. On USA models the wa rning light
rl]
comes on togethe r with the warn ing light
.. . Both sets of b rake pads on an axle
must always be replaced at the same time .
~ WARNING
Driving with bad brakes can cause a coll i
sion and serious personal injury.
- If the warning light rl] and the wa rning
light ..
1> with the message Bra ke
pads !
comes on in the instrument cluster
display, immediately contact your au
thorized Aud i dea ler or qualified work
shop to have all brake pads checked or
replaced if necessary .
EPC Electronic power control
This warning/indicator light monitors the
electronic power control .
The Im warning/ indicator light (Electron ic
Power Control) illuminates when you switch
the ignition on as a function check .
(!) Tips
If this wa rning/indicator light ill uminates
while you are dr iving, then there is a mal
function in the engine electron ics . Have
the malfunction co rrected as soon as pos
sible by you r autho rized Aud i dea le r or
qua lified repair fa cility.
o Malfunction Indicator Lamp (MIL)
The Malfunc tion Ind icator Lamp (M IL) is par t
of the On -Boa rd Diagnostic (OB D II) system.
The symbol ¢• tights up when the ignition is
switched on and w ill tur n off after the engine
has started and has sett led at a constant id le
1 ) - : USA mod els on ly
-
speed. This indicates that the M IL is work ing
properly .
T he wa rni ng lig ht ill uminates w hen the re is a
malfu nction in t he engine electron ic system .
Contact your a uth orized Audi dea ler and have
the malfunction corrected .
An imprope rly closed fuel fille r cap may a lso
ca use the M IL light to illuminate~
page 2 2 7 .
Fo r more information ~ page 29.
!?) Engine speed limitation
App lies to vehicles: wit h eng ine speed limitat ion
(I! Engine sp ee d maximum XXXX RPM
The eng ine speed is automatically limited to
the speed d isplayed in the driver information
system. Th is protects the engine from over
heating.
The eng ine speed limitation deactivates once
the engine is no longer in the critical tempera
tu re range and you have re leased the accelera
tor pedal once.
If the engine speed limitation was activated
by an engine control malfunction, the indica
tor light
Im a lso tu rns on. Make sure that the
speed does not go above the speed disp layed.
Drive to your authori zed A udi dealer immedi
ate ly to have the ma lfunction corrected.
~. Engine oil level
II Add oil, max. x qt (l). You may continue
dri ving
When the symbol II and driver message ap
pear, add the amount of oil appearing in the
display at the next opportunity ~
page 235.
~tt• Engine oil sensor
Ill Oil level! Sensor defective
If the symbol illumina tes, contact yo ur au
thorized Audi dea ler and have the oil sensor
inspected. Until yo u have this done, check the .,..
Page 26 of 310
24 Instruments and warning /indicator lights
@
Tab
1
2
3
4
5
6
®
Content
Vehicle functions:
On-board computer ¢page 25
Efficiency program*¢ page 26
Digital speedometer
Cruise control*¢ page
83
Adaptive cruise control and braking
guard* ¢page
86
Audi active lane assist* <::;>page 95
Display darkened
Indicator lights and messages
Warning when a door, the hood or the rear lid is not closed
Service interva l display¢ page
28
Speed warning system ¢ page 83
Night vision assistant*¢ page 105
Audio/video
Telephone*
Navigation*
The second and third tabs are only visib le if at
least one indicator light or message is shown
or if that system is switched on.
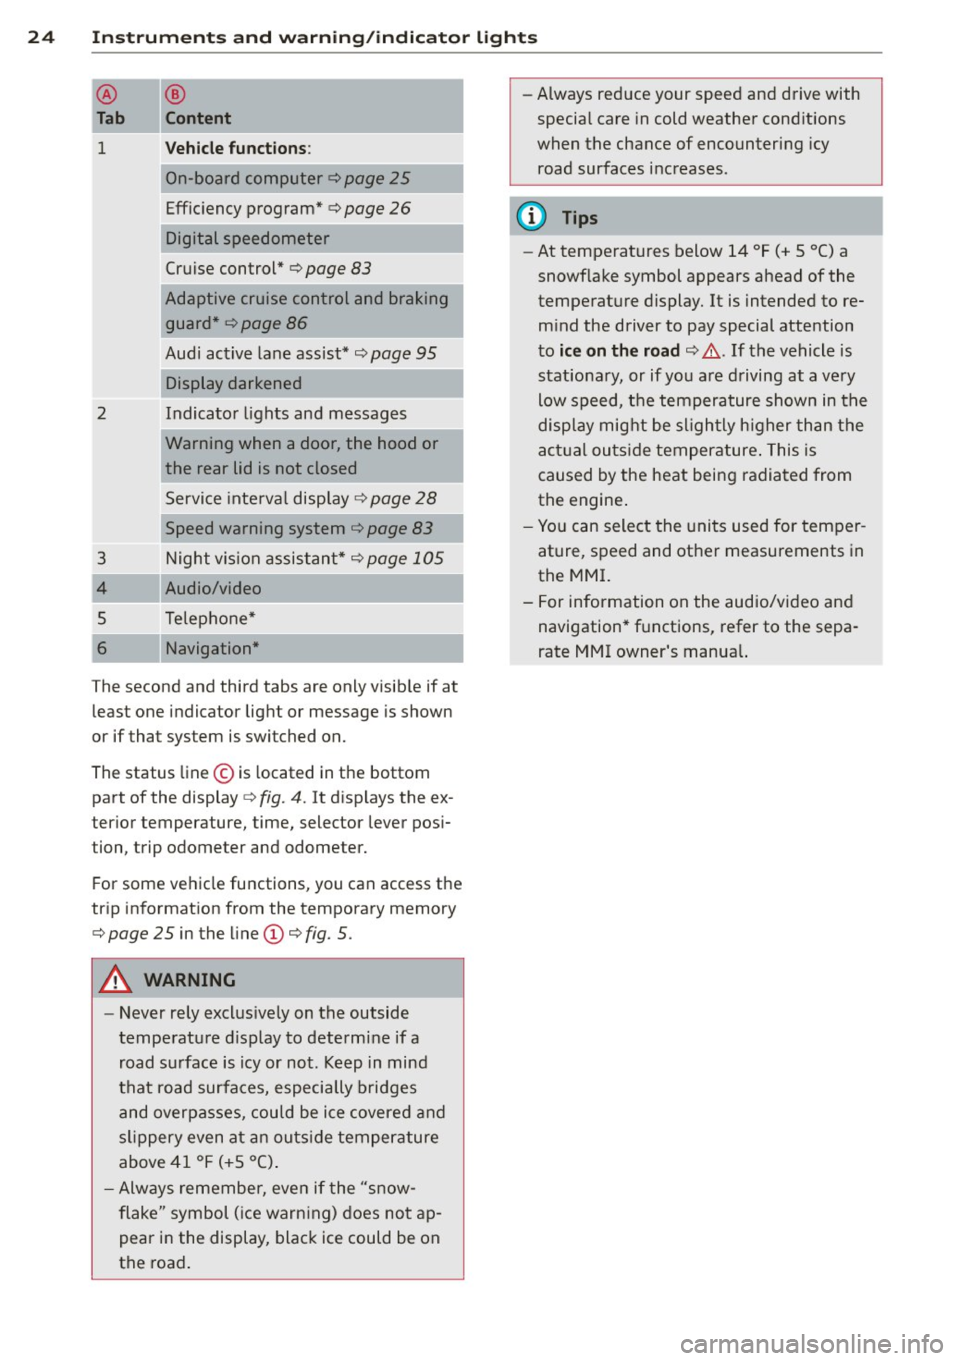
The status line© is located in the bottom
part of the display ¢fig.
4. It displays the ex
terior temperature, time, selector lever posi
ti on, trip odometer and odometer.
F or some vehicle functions, you can access the
tr ip informat ion from the temporary memory
¢ page 25 in the line (D ¢ fig. 5.
A WARNING
-
-Never rely exclus ively on the outside
temperature display to determine if a
road surface is icy or not. Keep in mind
that road surfaces, especially bridges
and overpasses, could be ice covered and
slippery even at an outside temperature
above 41 °F ( +5 °C) .
- Always remember, even if the "snow
flake" symbol (ice warning) does not ap
pear in the display, black ice could be on
the road. -
Always reduce your speed and drive with
special care in cold weather conditions
when the chance of encountering icy
road surfaces increases.
(1) Tips
- At temperatures below 14 °F (+ 5 °() a
snowf lake symbol appears ahead of the
temperature display. It is intended to re m ind the driver to pay special attention
to
ice on the road <::;> .&,. If the vehicle is
stationa ry, or if you are driving at a very
low speed, the temperature shown in the
display might be slightly hig her than the
actual outside temperature. This is
caused by the heat being radiated from
the engine .
- You can select the units used for temper
ature, speed and other measurements in
the MMI.
- For information on the audio/video and
navigation* functions, refer to the sepa
rate MMI owner's manua l.
Page 29 of 310
Instrument s and warning /indicator lights 2 7
Cylinder on demand System
Applies to vehicles: with 4.0 TFS! engine
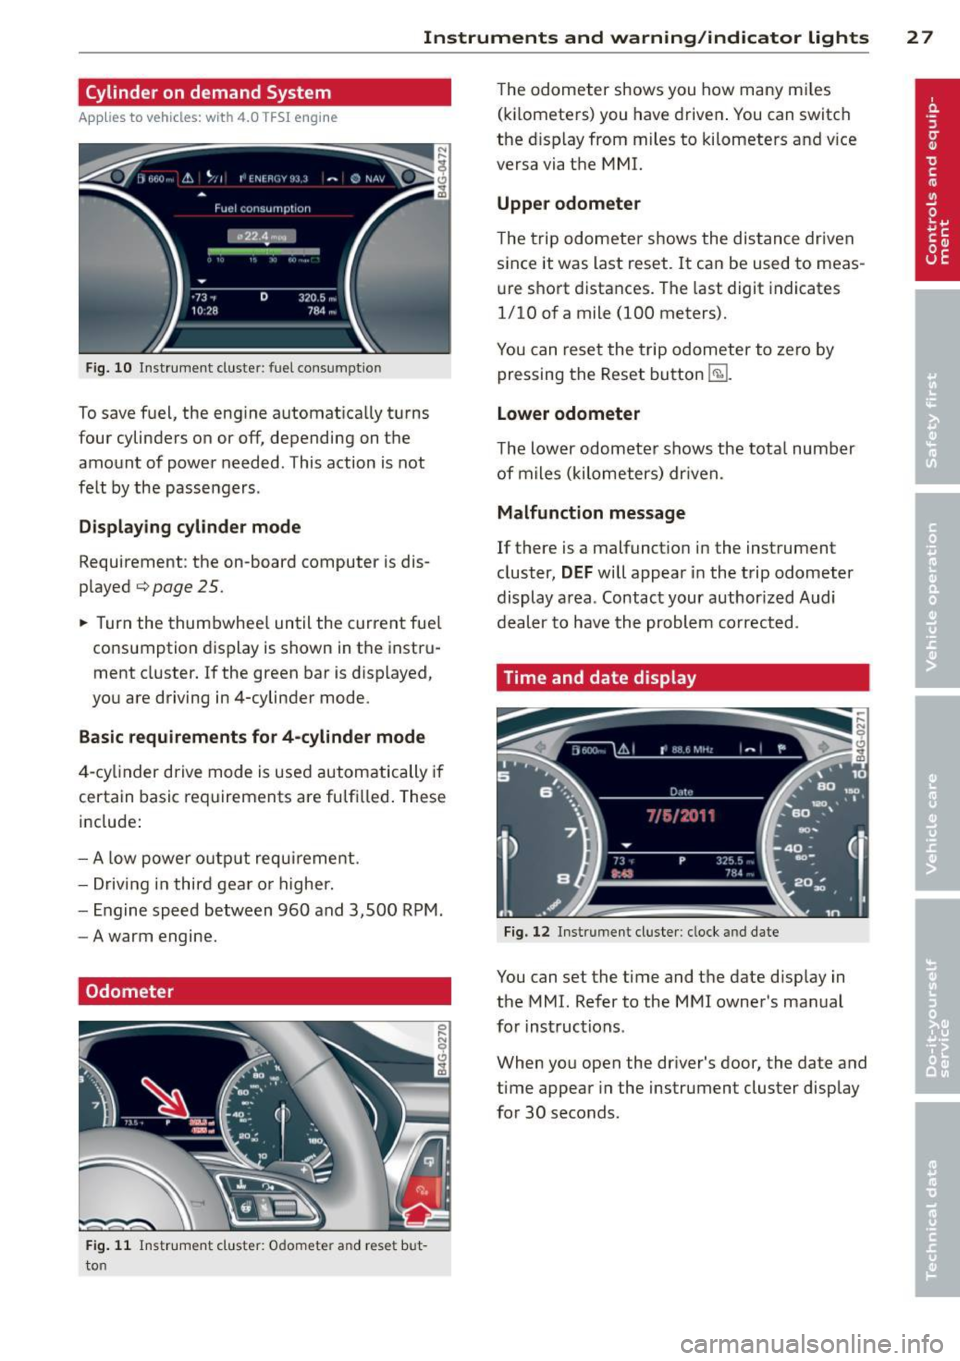
Fig . 10 Instr ume nt cluste r: fuel cons umptio n
To save f uel, the eng ine automat ica lly t urns
f our cylinders on or off, depending on the
amount of power needed . This action is not
felt by the passengers .
Displaying cylinder mode
Requirement: the on-board computer is dis
p layed
c:;, page 25.
~ Turn the thumbwhee l until the curren t fue l
co nsumption display is shown in the instru
ment cluster.
If the green bar is d isp layed,
you are driving in 4-cylinder mode .
Basic requirements for 4 -cylinder mode
4 -cy linder drive mode is used automatically if
certain basic requirements are fu lfi lled . These
include :
- A low power o utp ut requi reme nt.
- D riving i n third gea r o r higher.
- E ngine speed between 960 and 3,500 RPM .
- A warm engine.
Odometer
Fig. 11 I n s tr um en t cluster : O dome te r an d rese t but
t o n
T he odometer shows you how m any m iles
( kil omete rs) you have drive n. You can switch
the d isplay from miles to ki lometers and v ice
versa via t he M MI.
Upper odometer
The trip odomete r shows the dis tance driven
s ince it was last reset. It can be used to meas
u re short dista nces . The last digit indicates
1/10 of a mile (100 meters).
You can re set t he trip odometer to zero by
pressing the Reset bu tton
Efil .
Lower odometer
The lower odomet er shows the tota l numb er
of m iles (kilometers) dr iven.
Malfunction message
If there is a malfunc tio n i n the instrument
cluster,
DEF will appear in the trip odometer
display area . Conta ct your author ized Audi
dealer to have th e problem correct ed .
Time and date display
Fig. 12 Inst rumen t clus te r: cl ock and date
You can set the t ime and the date disp lay in
the MMI. Refer to the MMI owne r's man ual
for ins truc tio ns.
When you open the dr iver's door, the date and
time appear in the instrument cluster display
fo r 30 seconds.
Page 30 of 310
28 Instr uments and warning/indicator lights
Service interval display
The service interval display reminds you when
your next service is due .
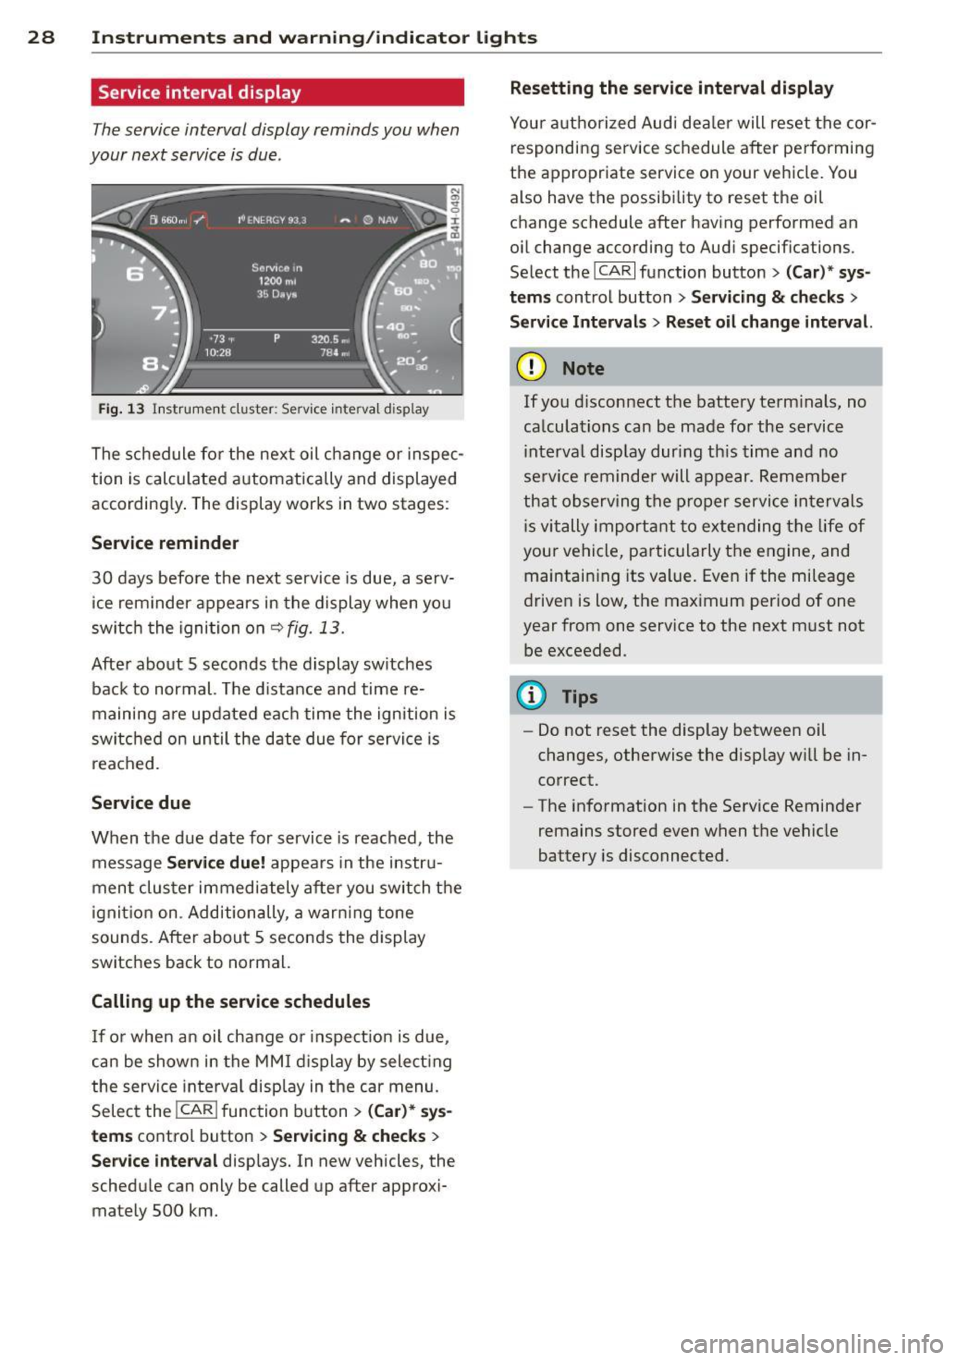
Fig. 13 Instrument cluster: Service interva l d isplay
The schedule for the next oil change o r inspec
tion is calculated automatically and displayed
according ly . The display works in two stages:
Service reminder
30 days before the next service is due, a serv
ice reminder appears in the display when you
switch the ignition o n
c::> fig. 13.
After about 5 seconds the display sw itches
back to normal. The distance and time re
maining are updated each time the ignition is
switched on until the date due for service is
reached.
Service due
When the due date for service is reached, the
message
Service due! appears in the instru
ment cluster immediately after you switch the
ignition on. Additionally, a warn ing tone
sounds. After about 5 seconds the display
switches back to normal.
Calling up the service schedules
If or when an oil change or inspect ion is due,
can be shown in the MMI display by select ing
the service interva l disp lay in the car menu .
Select the
!CAR ! function button> (Car)* sys
tems
control button > Servicing & checks >
Service interval displays. In new vehicles, the
schedule can only be called up after approxi mately S00 km.
Resetting the service interval display
Your authorized Audi dea ler will reset the cor
responding service schedule after performing
the appropriate service on your vehicle. You
also have the possibility to reset the oil
change schedule after having performed an
oil change according to Audi specifications.
Select the
ICAR I function button> (Car)* sys
tems
control button > Servicing & checks >
Service Intervals> Reset oil change interval.
(D Note
If you disconnect the battery term inals, no
calculations can be made for the service
i nterval display during th is time and no
serv ice reminder will appear. Remember
that observing the proper service in tervals
i s vitally important to extending the life of
your vehicle, particularly the engine, and maintain ing its value. Even if the mileage
driven is low, the maximum period of one
year from one service to the next must not
be exceeded.
(D Tips
-Do not reset the display between oil
changes, otherwise the display w ill be in
correct.
- The information in the Service Reminder
remains stored even when the vehicle
battery is disconnected.
Page 32 of 310

30 Instruments and warning/indicator lights
the engine starts and the idle has stabilized.
This indicates that the MIL is working proper
ly.
If the light does not go out after the engine
i s started, or illuminates whi le you are driv
ing, a ma lfunction may exist in the engine sys
tem .
If the light illuminates, the catalytic con
verter could be damaged.
Continue driving
with reduced power (avoid
ing susta ined high speeds and/or rapid accel
erat ions) and have the condition corrected.
Contact your authori zed Audi dealer .
If the light illuminates, the electronic speed
limiter may also be ma lfunctioning. For more
information
Q page 30, Electronic speed
limiter.
An improperly closed fuel filler cap may also
cause the MIL light to illuminate
Qpage227.
On-Board Diagnostics
Fig . 16 Locat io n of Data Link Co nnector (D LC)
On-Board Diagnostics monitors the compo
nents o f your emission control system. Each
monitored component in your engine system
has been assigned a code. In case of a mal
function, the component will be identified
and the fault stored as a code in the control module memory.
The MIL light may a lso illuminate if there is a
leak in the on-board fue l vapor recovery sys
tem. If the light illuminates after a refuelling,
stop the veh icle and make sure the fuel filler
cap is properly closed
Q page 22 7. In order to make an accurate diagnosis, the
stored data can on
ly be displayed using spe
c ial diagnostic equipment (generic scan tool
for OBD).
In order to connect the special diagnostic
equipment, push the plug into the Data Link
Connector (D LC). The DLC is located to the
right of the hood release~
fig. 16.
Your authorized Audi dea ler or a qualified
service station can interpret the code and per
form the necessary repair.
A WARNING
-Do not use the diagnostic connector for
personal use. Incorrect usage can cause
malfunctions, which can increase the risk
of a collision!
Electronic speed limiter
-
Your vehicle may be factory equipped w ith
t ir es that are rated for a maximum speed of
130 mph (210 km/h). This is less than the
maximum speed of your vehicle. To reduce the
risk of sudden tire fai lure and loss of control if
the vehicle is operated at excessive speeds,
your vehicle also has an e lectronic speed limit
er . The electronic speed limiter prevents your
vehicle from going faster than the tire speed
rating . For more information
Q page 257.
If the engine control unit receives faulty vehi
cle road speed signals, the Malfunction Indi
cator Lamp (MIL)
¢fj will illuminate . If this
occurs, contact the nearest authorized Audi
dealer for assistance.
S models
Your vehicle's top speed is electronica lly limit
ed to 155 mph (250 km/h).
If the engine control unit receives faulty vehi
cle roadspeed signals, the Malfunction Indica
tor Lamp (MIU¢.§ will illuminate . If this oc
curs, contact the nearest authorized Audi
dealer for assistance.
Page 34 of 310
32 Opening and clo sing
Opening and closing
Keys
Key set
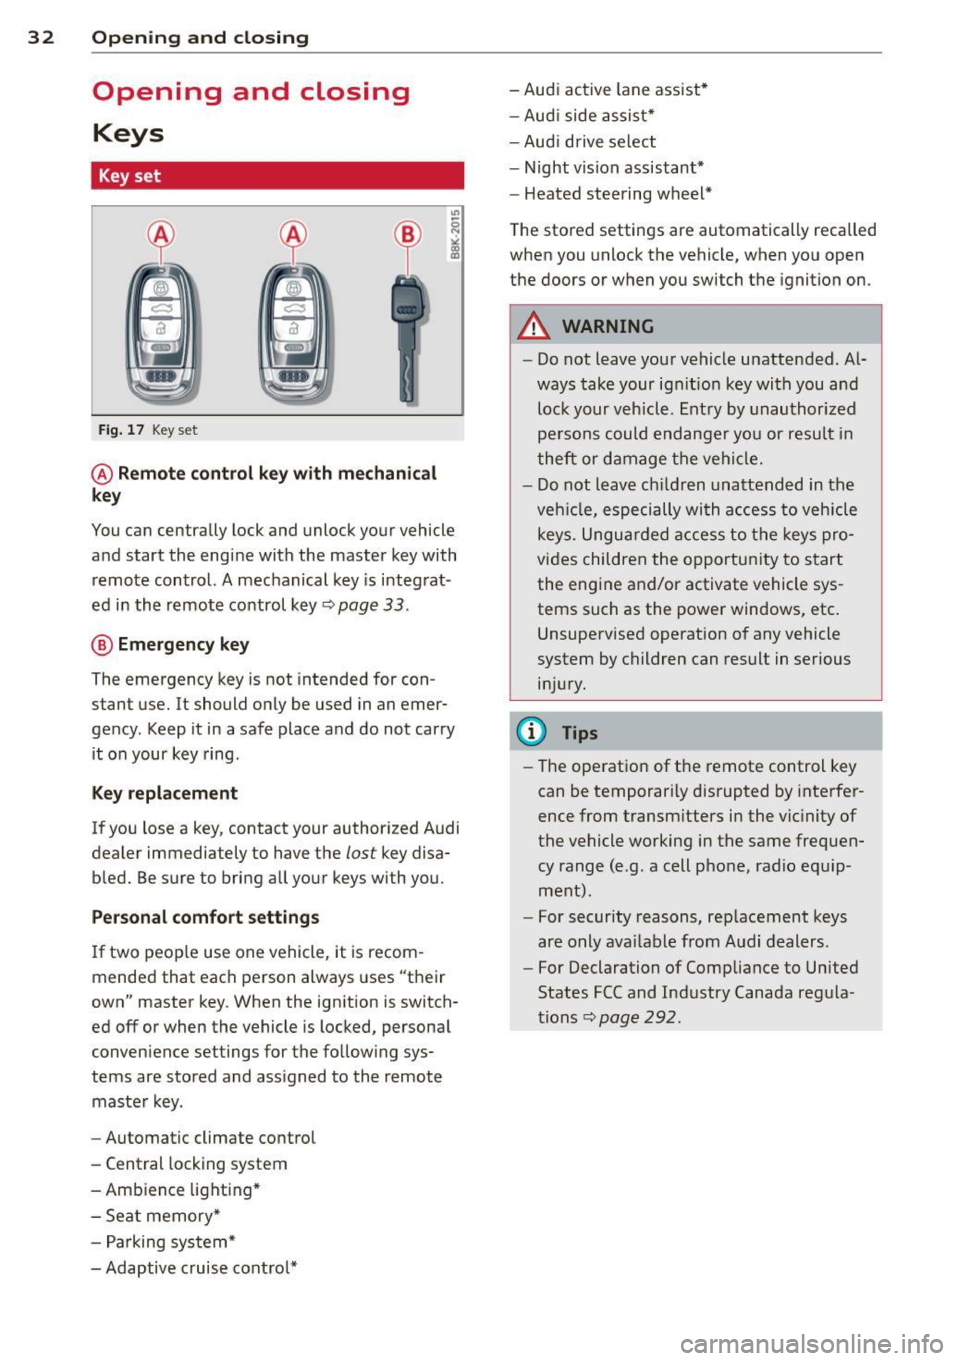
Fig . 17 Key set
@ Remot e control k ey w ith m echan ical
ke y
You can centrally lock and unlock your vehicle
and start the engine with the master key with
remote control. A mechanical key is integrat
ed in the remote control key
r:::;, page 33 .
@ Eme rgenc y ke y
The emergency key is not intended for con
stant use.
It should only be used in an emer
gency. Keep it in a safe place and do not carry it on your key ring .
Key replac em ent
If you lose a key, contact your authorized Audi
dealer immediately to have the
lost key disa
bled. Be sure to bring all your keys with you.
P er sonal c omfo rt se ttin gs
If two peop le use one vehicle, it is recom
mended that each person always uses "their
own" master key . When the ignition is switch
ed off or when the vehicle is locked, personal
convenience settings for the follow ing sys
tems are stored and assigned to the remote master key .
- Automatic climate control
- Central locking system
- Amb ience light ing*
- Seat memory*
- Parking system*
- Adaptive cruise control* - Audi active
lane assist *
- Aud i side assist*
- Aud i drive select
- Night vision assistant*
- Heated steering wheel*
The stored settings are automatically recalled
when you unlock the vehicle, when you open
the doors or when you switch the ignition on.
A WARNING
-- Do not leave your vehicle unattended . Al-
ways take your ignit ion key with you and
lock your vehicle . Entry by unauthorized
persons could endanger yo u or resu lt in
theft or damage the vehicle.
- Do not leave ch ildren unattended in the
veh icle, especially with access to vehicle
keys. Unguarded access to the keys pro
vides children the opportunity to start the engine and/or activate vehicle sys
tems such as the power windows, etc .
Unsupervised operation of any vehicle
system by children can result in serious
injury.
(1) Tips
- The operation of the remote control key
can be temporar ily disrupted by interfer
ence from transm itters in the vic inity of
the vehicle working in the same frequen
cy range (e.g. a cell phone, radio equip
ment).
- For security reasons, rep lacement keys
are only ava ilable from Audi dealers.
- For Declaration of Compliance to United
States FCC and Industry Canada regula
tions
r:::;, page 292.
Page 35 of 310
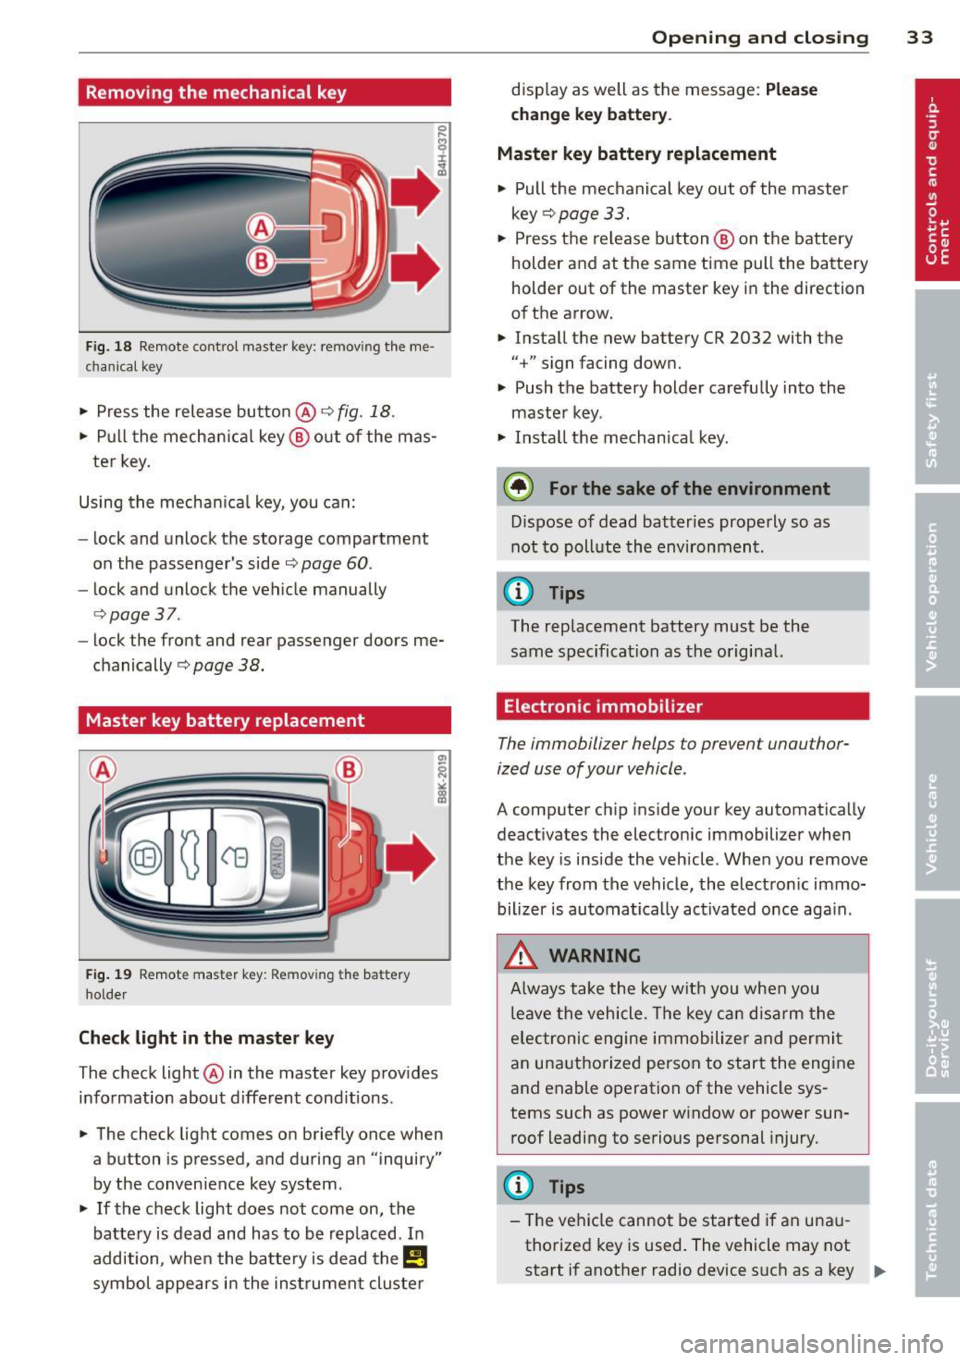
Removing the mechanical key
Fig. 18 Remote control maste r key : re mov ing the me
c han ical key
• Press the release button @ r=> fig. 18.
• Pull the mechanica l key @ out of the mas
ter key.
Using the mechan ica l key, you can:
- lock and unlock the storage compartment
on the passenger's side
c::> page 60 .
-lock and unlock the vehicle manually
c::>page 37 .
-lock the front and rear passenger doors me
chanically
c:> page 38.
Master key battery replacement
Fig . 19 Remote master key : Re mov ing the ba ttery
holde r
Check light in the master key
The check light @ in the master key provides
information about different cond itions .
• The check light comes on briefly once when
a button is pressed, and during an "inquiry"
by the conven ience key system .
• If the check light does not come on, the
battery is dead and has to be replaced. In
addition, when the battery is dead the
E!!
symbol appears in the instrument cluster
Opening and closing 33
display as well as the message: Please
change key battery .
Master key battery replacement
• Pull the mechanical key out of the master
key
c::> page 33.
• Press the release button @ on the battery
holder and at the same time pull the battery
holder out of the master key in the direction
of the arrow.
• Install the new battery CR 2032 with the
"+ " sign facing down.
• Push the battery holder carefully into the
maste r key .
• Install the mechanical key.
@ For the sake of the environment
Dispose of dead batteries properly so as
not to pollute the environment .
(D Tips
The replacement battery must be the
same specification as the original.
, Electronic immobilizer
The immobilizer helps to prevent unauthor
ized use of your vehicle .
A computer chip inside your key automatically
deactivates the electronic immobilizer when
the key is inside the vehicle. When you remove
the key from the vehicle, the electronic immo
bilizer is automatically activated once again .
A WARNING
-
Always take the key with you when you
leave the vehicle. The key can disarm the
e lectronic engine immobilizer and permit
an unauthorized person to start the engine
and enable operation of the vehicle sys
tems such as power window or power sun
roof leading to serious personal injury.
(D Tips
- Th e vehicle cannot be started if an una u
thorized key is used. The vehicle may not
start if another radio device such as a key
Ill>
Page 38 of 310
![AUDI A7 2013 User Guide 36 Openin g and clo sing
• Press b utton (f] (@ ) to lock the vehicle q A
in General description on page 3 4.
• Press button c:s (@ ) briefly to un lock the
rear lid.
• Pu AUDI A7 2013 User Guide 36 Openin g and clo sing
• Press b utton (f] (@ ) to lock the vehicle q A
in General description on page 3 4.
• Press button c:s (@ ) briefly to un lock the
rear lid.
• Pu](/img/6/57603/w960_57603-37.png)
36 Openin g and clo sing
• Press b utton ('f] (@ ) to lock the vehicle q A
in General description on page 3 4.
• Press button c:s (@ ) briefly to un lock the
rear lid.
• Push the red
!PANIC I button( @) to activate
the panic function . The horn sounds and the
turn s ignals flash. Push the red
I PANIC I but
ton aga in to deact ivate the panic function.
If the vehicle is unlocked and no door, the rear lid or the hood is opened w ith in 60 seconds,
the vehicle locks itself again automatically .
This feature prevents the ve hicle from be ing
accidenta lly left unlocked ove r a long period
of time.
It depends on the sett ings in the MMI wheth
e r the enti re veh icle is un locked or on ly cer
tain doors
q page 35.
.&_ WARNING
Read and follow a ll WARNINGS¢ &. in
General description on page 34.
{!) Tips
- In order to make sure the locking func
tion is working, you shou ld always keep
you r eye on the vehicle to make sure i t is
properly locked.
-
- Do not use the remo te control if you are
i nside the car, otherwise you may unin
tentiona lly lock the vehicle, and then you
would set off the anti-theft ala rm when
you try to start the engine or open a
door. In case this happens anyhow, push
the un lock button @.
- The vehicle can on ly be locked when the
se lector lever is in the P posit ion.
- Use the panic funct ion only i f you are in
an emergency situation.
Locking and unlocking with convenience
key
Appl ies to vehicles : wi th convenience key
The doors and the rear lid can b e unlocked
and locked without operating the master key.
Fi g. 2 1 Convenience key: Lock ing the vehicle
Unlocking vehicle
• Take ho ld of the door handle. The door is
un locked automatically.
• Pull the hand le to open the door.
Locking vehicle
• Sele ct the P se lecto r lever po sit ion. Othe r
w ise the vehicle cannot be loc ked.
• To lock the ve hicle, close the door and touch
the sensor in the door handle
once c:!;> fig . 21.
Do not reach inside the door handle.
T he vehicle can be locked and un locked at any
door . The master key must be within a range
of about 1.5 m from the appropriate door or
the rear lid. It makes no difference whether
the master key is in your jacket pocket or in
your brief case.
It is not possib le to re-open the door for a
brief period directly after closing it. This a l
l ows you to ensure that the doors are properly
l ocked.
It depends on the settings in the MMI wheth
er the ent ire vehicle is unlocked or one of the
doors
c:!;> page 35 .
.&_ WARNING ~ -
Read and follow all WARNINGS q .&. in
General description on page 34 .