ECO mode AUDI A7 2013 Owner's Manual
[x] Cancel search | Manufacturer: AUDI, Model Year: 2013, Model line: A7, Model: AUDI A7 2013Pages: 310, PDF Size: 77.45 MB
Page 104 of 310
102 Audi drive select
Audi drive select
Driving settings
Introduction
Aud i d rive select mak es it possible to expe ri
ence diffe ren t types of vehi cle se ttin gs i n o ne
ve hicl e. The dr ive r can se lect th ree
Comfort ,
Auto and Dynamic modes in the M MI to
switch between a sporty and a comforta ble
driving mo de.
You c an a lso a djust the setti ng according to
your p re ferences in the
Individual mode . F o r
examp le, you ca n combine settings such as a
sporty en gine t uning with comfortab le steer
ing.
A WARNING
Improper use of the A udi drive select can
cause collisions, ot her acc idents and se ri
ous pe rsonal injury.
Description
The vehicle setup in each mode depends on
the veh icl e's featu res. The engine, t ransm is
sion, stee ring, reve rsible sa fe ty belt tension
e rs a nd adap tive air su spension are alw ays in
volved.
Engine and transmission
Depending on the mode, the e ng ine and the
tra nsmission respond quic ker or i n a more bal
an ced manne r to acce le rator pedal move
men ts. In the sporty dyn ami c mode, the
tra nsmission sh ifts at highe r RP Ms.
Air suspension*
The adaptive air suspens ion/adaptive air sus
pension spor t*
(Air suspen sion in the MM I) is
a n e lec tronic ally con trolled air suspension and
da mpi ng sys tem. They are adjus ted depend
ing on the se lected driving mode, the drive r's
steeri ng, braking an d acceleration input and
the road s urface, ve hicle speed and load. A
sporty setting is generally used in ve hicles
with adaptive air suspension sport*. T
he veh icle clearance varies depending on the
se lected mo de an d the speed .
T he highway setti ng is a ct ivated automatic ally
whe n you dr ive above 7 5 mph (120 km/ h) fo r
more than
3 0 seconds in the Auto or Dynamic
mode. The gro und clea rance is increased a uto
matically if the speed drops below
44 mph
(70 km/h) for more than 120 seconds.
Steering
T he s teer ing adap ts in terms of s teer ing effor t
and steering ratios . Indirect stee ring that
moves easily, like the steer ing in comfo rt
mode, is best suited to long drives on a high
way. In contrast, dynamic mode provides sporty, direct steer ing .
Sport differential*
As a component of the all whee l drive system
(quattro ®)
r=:> page 201, th e Sport differen
t ia l* distributes the driving powe r to the rear
axle depending on the situation. The distr ibu
t ion of power va ries depe nding on the select
ed mode, from balanced (comfort) to agile
(dyna mic) . Th e goa l is a high leve l of agility
and ability to acce le rate on cu rves . Th e vehicle
is ve ry re sponsive to st eer ing.
Curve light*
The curve light adapts to driving on curves .
T he pivo ting act io n and the lighting are also
adapt ed to the mode .
Adaptive cruise control*
The behav ior when accelerating can be adjust
ed from comfortab le to sporty, depending on
the drive select mode. Adaptive cru ise cont ro l
also responds to th e dr iv ing behavior o f th e
vehicle a head in a mo re co nse rvative o r sporty
man ne r.
Engine sound*
The sound of the eng ine is adapted to the se
lected mode and ranges from sub tle to sporty . .,.
Page 111 of 310
Automatic Transmission
S tronic ®, tiptronic
Introduction
Applies to vehicles: with S tronic/tiptronic
The automat ic transmission is controlled elec
tronically. The transmission upshifts or down
shifts automatically depending on which drive
program is se lected .
When a
moderate driving style is used, the
transmission selects the most economica l
driving mode. It will then change up ear ly and
de lay the downshifts to give better fuel econ
omy.
The transmission switches to a sporty mode
after a kick-down or when the driver uses a
sporty driving style characterized by quick ac
celerator pedal movements, heavy accelera
tion, frequent changes in speed and traveling
at the maximum speed.
If desired, the driver can also se lect the gears
manually (t iptronic mode ) i=> page 113.
Various automatic transmissions may be in
stalled, depending on the model:
S tronic® transmission
The 5 tronic ® is a dual-clutch transmission.
Power is transferred using two clutches that
work independently from one another . They
replace the torque converter used in conven
tional automatic transmissions and allow the
vehicle to accelerate without a noticeable in
terruption in traction .
tiptronic transmission
In the tiptronic transmission, power is trans
ferred by a torque converter .
Automatic Transmission 109
Selector lever positions
Applies to vehicles: with S tronic/tiptronic
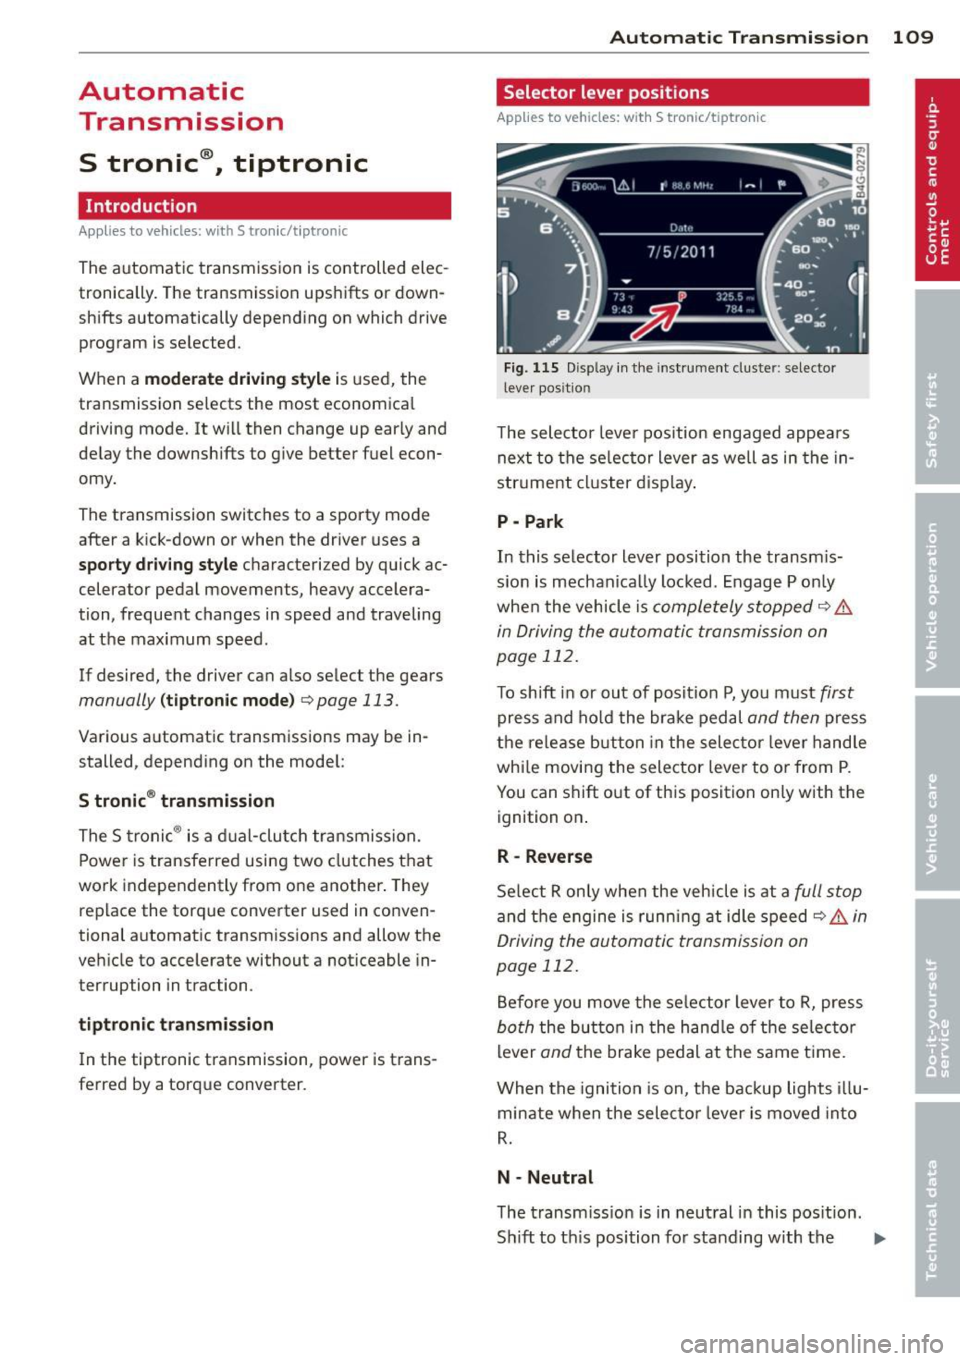
Fig. 115 Disp lay in the instrument cluste r: selector
lever pos ition
T he selector lever position engaged appears
next to the selector lever as well as in the in
strument cluster display.
P -Park
In this selector lever position the transmis
sion is mechanically locked. Engage P only
when the vehicle is
completely stopped q .&.
in Driving the automatic transmission on
page 112.
To shift in or out of position P, you must first
press and hold the brake pedal and then press
the release b utton in the selector lever handle
whi le moving the selector lever to or from P.
You can shift out of this position only with the
ignition on .
R- Reverse
Select R on ly when the vehicle is at a full stop
and the engine is running at idle speed c> .&, in
Driving the automatic transmission on
page 112.
Before you move the selector lever to R, press
both the button in the hand le of the selector
lever
and the brake pedal at the same t ime.
When the ignition is on, the backup lights illu
minate when the selector lever is moved into
R.
N -Neutral
The transmission is in neutral in this position.
Sh ift to th is position for standing with the ..,.
Page 112 of 310
110 Automatic Transmission
brakes applied ¢ & in Driving the automatic
transmission on page
112.
When the veh icle is stationary or at speeds
be low 1 mph (2 km/h), you must always apply
the footbrake before and while moving the
lever out of N.
D/S -Normal position for driving forward
In the D/S position, the transmiss io n can be
operated e ither in the normal mode Dor in
the sport mode S. To select the sport mode S,
pull the se lector lever back briefly . Pulling the
lever back again will select the normal mode
D. The instrument cluster display shows the
selected driving mode.
In the
normal mode D, the transmission auto
matica lly selects the suitab le gear ratio. It de
pends on engine load, vehicle speed and driv
ing style.
Select the
spo rt mode S for sporty driving.
The vehicle makes fu ll use of the engine's
power. Shifting may become noticeable when
accelerating.
When the vehicle is stationary or at speeds
be low 1 mph (2 km/h), you must always apply
the foot brake before and while moving the lever to D/S out of N.
A WARNING
Read and follow all WARNINGS¢ & in
Driving the automatic transmission on
page
112.
d) Note
-
Coasting downhill with the transmission in
N and the engine not running w ill result in
damage to the automatic transmission
and possibly the catalytic converter.
@ Tips
- Audi drive select: you can adjust the
sporty sh ift characteristics in the
Dy
namic driving mode.Swill appear in the
i nst rument cluste r d isplay instead of D.
-If you accidentally select N while driv ing,
take your foot off the acce lerator pedal immediately and wait
for the engine to
slow down to idle before selecting D/S.
-If there is a power failure, the selector
lever will not move out of the P position.
The emergency release can be used if
this happens
¢page 115.
Automatic Shift Lock (ASL)
Applies to vehicles : wit h S t ronic/tipt ro ni c
The Automatic Shift Lock safeguards you
against accidentally shifting into a forward or
the reverse gear and causing the vehicle to
move unintentionally.
( )
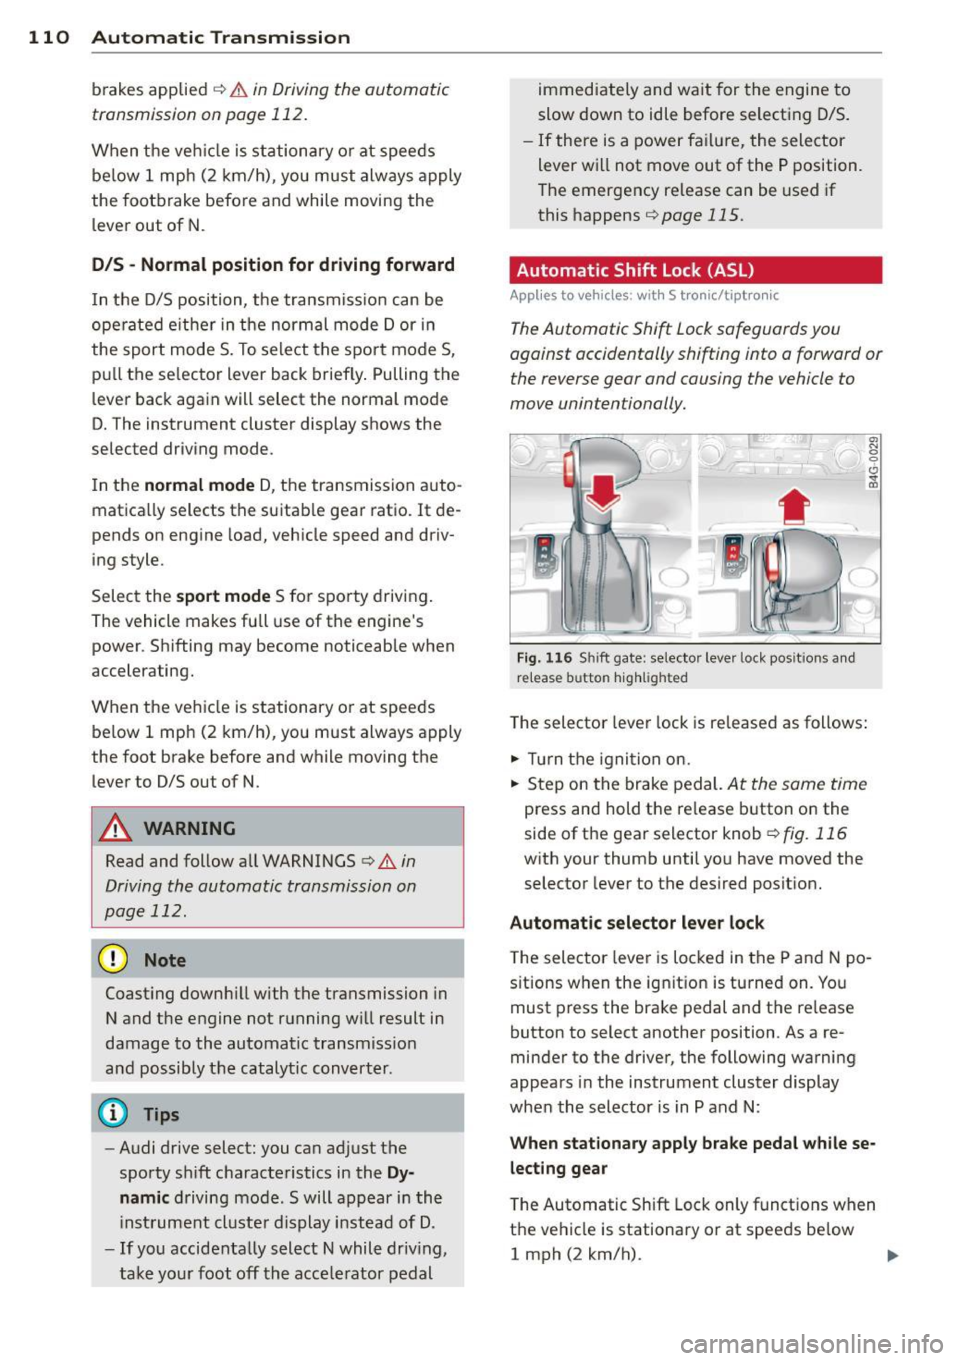
Fig. 116 Shi ft gate: selector leve r loc k pos it ions and
r e lease button highlighted
The selector lever lock is released as follows:
.,. Tu rn the ignition on.
.,. Step on the brake pedal.
At the same time
press and hold the release button on the
side of the gear selector knob
¢ fig. 116
with your thumb until you have moved the
selector lever to the desired position.
Automatic selector lever lock
The selector lever is locked in the P and N po
s itions when the ignit ion is tu rned on. You
must press the brake pedal and the re lease
button to select another position . As a re
minder to the driver, the following warning
appears in the instrument cluster display
when the selector is in P and N:
When stationary apply brake pedal while se
lecting gear
T he Automatic Shift Lock only functions when
the vehicle is stationary or at speeds be low
1 mph (2 km/h).
Page 114 of 310
112 Automatic Tran sm iss ion
_& WARNING
-The veh icle can also roll when the engine
is stopped .
- Unintended vehicle movement can cause
serious injury.
- Never leave your vehicle with the eng ine
running wh ile in gear. If you must leave
yo ur vehicle when the engine is running,
act ivate the parking brake and move the
selector lever to P.
- Power is sti ll transmitted to the whee ls
when the engine is running at idle. To
prevent the vehicle from "creeping", you
must keep your foot on the brake when
the engine is runn ing and the selector
lever is in D/S or R or "tiptron ic" mode is
selected.
- Do not press the accelerator pedal when
chang ing the selector lever pos ition
wh ile the vehicle is stat ionary and the
eng ine is running.
- Never shift into
R or P wh ile driving.
- Before driv ing down a steep slope, re-
duce your speed and shift into a lower
gear with "tiptronic".
- Do not ride the brakes or press the brake
peda l too often or too long when dr iving
down a hill. Constant braking causes the
brakes to ove rheat and s ubstant ially re
duces braking per formance, increases
braking distance or causes comp lete fail
ure of the brake system.
- To prevent the veh icle from rolling back
when stopping on inclines, a lways hold it
in place with the bra ke peda l or parking
brake.
- Never hold the ve hicle on an inc line with
a slipping clutch . The clutch opens auto
matically when it becomes too hot from
the overload. An indicator lamp
[O] illu
mi nates and a dr iver message appears
¢ page 114 when the clutch is overload
ed.
- If the eng ine must remain running, never
have any driv ing pos ition engaged when
c heck ing under the hood. Make sure the
selector lever has securely engaged and is locked in P w
it h the park ing brake set
¢ page 224, Engine compartment. Oth
erwise, any increase in engine speed may
set the veh icle in motion, even with the
parking brake applied.
(D Note
- When stopping on an incl ine, do not try
to hold t he vehicle in place by pressing
the acce lerator pedal while a driving gear
is se lected. This ca n cause the transmis
sion to ove rheat and can damage it . Acti
vate the pa rking brake or press the bra ke
peda l to preven t the vehicle from roll ing.
- Allowing th e vehicle to ro ll when the en
gine is stopped and the selecto r lever is
in N will d amage the tr ansmission be
cause it is not l ubricated unde r those cir
cumstances .
(D Tips
Fo r saf ety reaso ns, the pa rking br ake is re
l eased automatically on ly when the d riv
er's safety belt is engaged in the buckle.
Hill descent control
Appl ies to vehicles: wit h S t ronic/tiptro nic
The hill descent control system assists the
driver when driving down declines.
Hill des cent con trol is activated when these
lector lever is in D/S and yo u press the brake
peda l. The transmission automatica lly selects
a gear that is suitable for the incline . Hi ll de
scent contro l tries to maintain the speed ach
ieved at the time of braking, within phys ica l
and technical lim itations. If may st ill be nec
essary to adjust the speed with the brakes .
Hill descent cont ro l switches off once the de
cline leve ls out or you press the acce lerator
pedal.
On vehicles with the cruise contro l system*
¢ page 83, hill descent control is also activat-
ed when the speed is set. .,..
Page 116 of 310

114 Automatic Transmission
Launch Control Program
Applies to vehicles: with S tro nic
The Launch Control Program provides the
best acceleration possible when starting from
a stop .
Requirement: The engine must be at operat
ing temperature and the steering wheel must
not be turned .
.. Press the
I~ O FFI button <=> page 198 while
the engine is running. The
II indicator light
illuminates in the instrument cluster and
Stabilization control (ESC): Off Warning!
Reduced stability
appears in the driver in
formation system display.
.. Move the selector lever to position D/S to
select sport mode (5) or select
Dynamic
mode in Audi drive select<=> page 103.
.. Press the brake pedal strongly with your left
foot and hold it down for at least
1 second.
.. At the same time, press the accelerator
pedal down completely with your right foot
until the engine reaches and maintains a
high RPM.
.. Remove your foot from the brake pedal
within S seconds ¢
Li)..
.&_ WARNING
-Always adapt your driving to the traffic
flow .
- Only use the Launch Control Program
when road and traffic conditions allow it
and other drivers will not be endangered
or annoyed by yo ur driving and the vehi
cle's acce lerat ion.
- Please note that the driving wheels can
spin and the vehicle can break away
when ESC is sw itched off, espec ially
when the road is slippery.
- Once the vehicle has started moving,
press the
I~ OF F! button br iefly to turn
the ESC on.
- The transmission temperat ure may in
crease significantly after using the
launch control program. If that happens, the program
may not be available for a
few minutes . It wi ll be available again af
ter a cool-down period.
- When accelerating using the la unch con
tro l program, all vehicle parts are subject
to heavy loads. This can resu lt in in
creased wear .
Transmission malfunction
Applies to vehicles: wit h S tronic/tiptro nic
[O] Transmission: Press brake pedal and se
lect gear again
Press the brake pedal and select the desired
selector lever position again. You can then continue driving .
[O] Transmission overheating: Please drive
conservatively
The transmission temperature has increased
s ignificantly due to the sporty driving manner .
Drive in a less sporty manner until the tem
perature returns to the normal range and the
indicator light switches of.
[O] Transmission malfunction: You can con
tinue driving
T he re is a system mal function in the transmis
sion . You may continue driving. Drive to your
authorized Audi dea ler or qualified repair fa
cility soon to have the malfunction corrected.
[O] [O] Transmission malfunction: You can
continue driving with limited functionality
There is a system malfunction in the transmis
s ion. The transmission is switching to emer
gency mode. This mode on ly shifts into cer
tain gears or will no longer shift at all. The en
gine may sta ll. Drive to your authorized Audi
dealer or qualified repair facility immediately
to have the malfunction corrected.
[O] Iii Transmission malfunction: No reverse
gear. You can continue driving
S tronic® transmission: There is a system mal
f unct ion in the transmission. The transmis
sion is switching to emergency mode . This
mode only shifts into certain gears or will no
l onger shift at a ll. The engine may stall. You .,..
Page 129 of 310
Error messages
Applies to vehicles: with parking system plus/rear view
camera/per ipheral cameras
There is an e rror in the system if the LED in
the
p, qA button is blinking and you hear a con
tinuous alarm for a few seconds afte r switch
ing on the parking system or when the park
ing system is already activated. If the error is
not corrected before you switch off the igni
tion, the LED in the
Pw.6. button will blink the
next time you switch on the parking system by
shifting into reverse.
Parking system plus
If a sensor is faulty, the~ symbol will appear
in front of/behind the vehicle in the Infotain
ment display. If a rear sensor is fau lty, only
obstacles that are in areas @ and @ are
shown
c:> fig. 121 . If a front sensor is fau lty,
only obstacles that are in areas © and @are
shown .
Peripheral cameras*
There is also a system error if:
- the
'(:8:)• • symbol appears in the display and
the corresponding display area is shown in
blue. The camera is not working in this area.
- all segments around the vehicles are red or
if no segments are displayed.
Drive to your authorized Aud i dea ler o r au
thorized repair fac ility immediately to have
the ma lfunction corrected.
Trailer hitch
Appl ies to vehicles: with parking system plus/rear view
camera/per ipheral cameras and trailer hitch
For vehicles using the tra iler socket, the park
ing system rear senso rs do not turn on when
you shift into reverse gear or when yo u press
the P
01A button. This resu lts in the following re
strictions:
Parking system plus*
There is no distance wa rning for the rear. The
front sensors rema in activated. The visual dis
play switches to the trailer towing mode.
Parking systems 127
Parking system plus and rear view
camera* /Peripheral cameras*
There is no distance warning for the rear. The
front sensors remain activated. The visual dis
play sw itches to the trailer towing mode. The
rear view camera image will not show the ori
entation lines and the blue surfaces .
{D Tips
Trailer hitches that are not installed at the
factory may cause the park ing system to
malfunction or they may restr ict its func
tion.
Page 130 of 310
128 Homelink®
Homelink®
Universal remote
control
General information
Applies to vehicles: with Homelink® unive rsal remote
co ntrol
The Homelink universal remote control can
be programmed with hand-held transmitters
from existing equipment.
With Homelink, you can control devices such
as the garage door, security systems, house lights, etc. comfortably from the inside of you
vehicle.
H omelink makes it possible for you to rep lace
three different remote controls from devices in your home with one universal remote . Th is
feature works for most garage door and exte rior door moto r signals. Programming the in
d iv idual remo te control fo r you r remote con
trol takes p lace near the center of the radiator
grille. There is a control module attached at
this location .
A one-t ime programm ing of the sensor mus t
be performed before you are able to use sys
tems w ith Homelink.
A WARNING
- Never use the Homelink ® transmitter
with any garage door opener that does have not the safety stop and reverse fea
ture as required by federa l safety stand
ards. This includes any garage door open
er mode l manufact ured before April 1,
1982.
- A garage door opener which cannot de
tect an object, signaling the door to stop
and reverse does not meet cur rent feder
al safety s tandar ds. Us ing a garage doo r
o pener witho ut these fea tures in creases
risk of serious inj ury or death.
- F or safe ty reasons never release t he
parking brake or s tart the engine while
anyone is standing in front of the vehicle .
- A garage door or an est ate gate may
sometimes be set in motion when the Homelink
® remote control is being pro
grammed. If the device is repeatedly ac
tivated, this can overstrain motor and
damage its electrica l components - an
overheated motor is a fire hazard!
- To avo id possible injuries or property
damage, please always make absolutely
certa in that no persons or objects are lo
cated in the rang e of motion of any
equ ipme nt bei ng ope rated.
(0 Tips
- If you would like add itional information
on the Home Link® Unive rsal Transce iver,
Homelink compatib le p roducts, or to
purc hase other accessories s uch as the
HomeL ink® Light ing Package, please
contact Homelink at 1-800 -355 -3515 o r
on the Internet at www.homelink .com.
- For Declaration of Comp liance to Unite d
States FCC and Ind ustry Canada reg ula
tions
¢ page 292.
- For security reasons, we recommend that
you clear the programmed b uttons be
fore selling the vehicle .
Operation
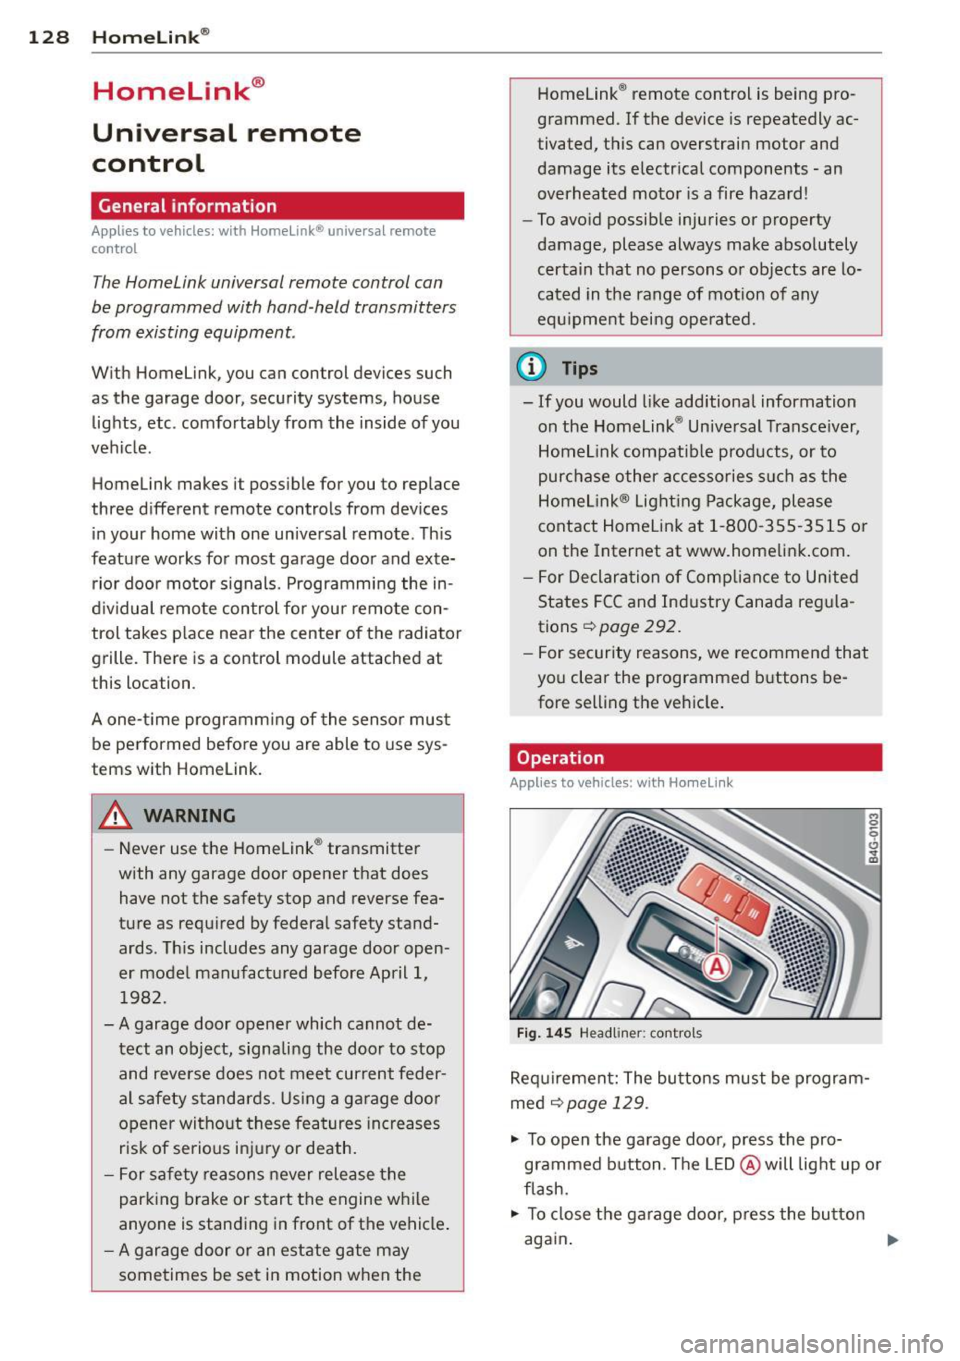
Applies to vehicles: wit h Ho meli nk
Fig . 14 5 Headliner: controls
M 0
9 (!)
~
Requi rement: The bu tto ns must be program
med
¢ page 129 .
"' To open the garage doo r, press the pro
grammed b utton. The LED @ will light up o r
flash.
"' To close the ga rage doo r, press the button
aga in .
Ill>
Page 131 of 310
@ Tips
To open the garage door, press the button,
but do not press it for longer ten seconds
or the Homelink modu le w ill switch to
programming mode .
Programming the transmitter
Applies to vehicles : with Home Link
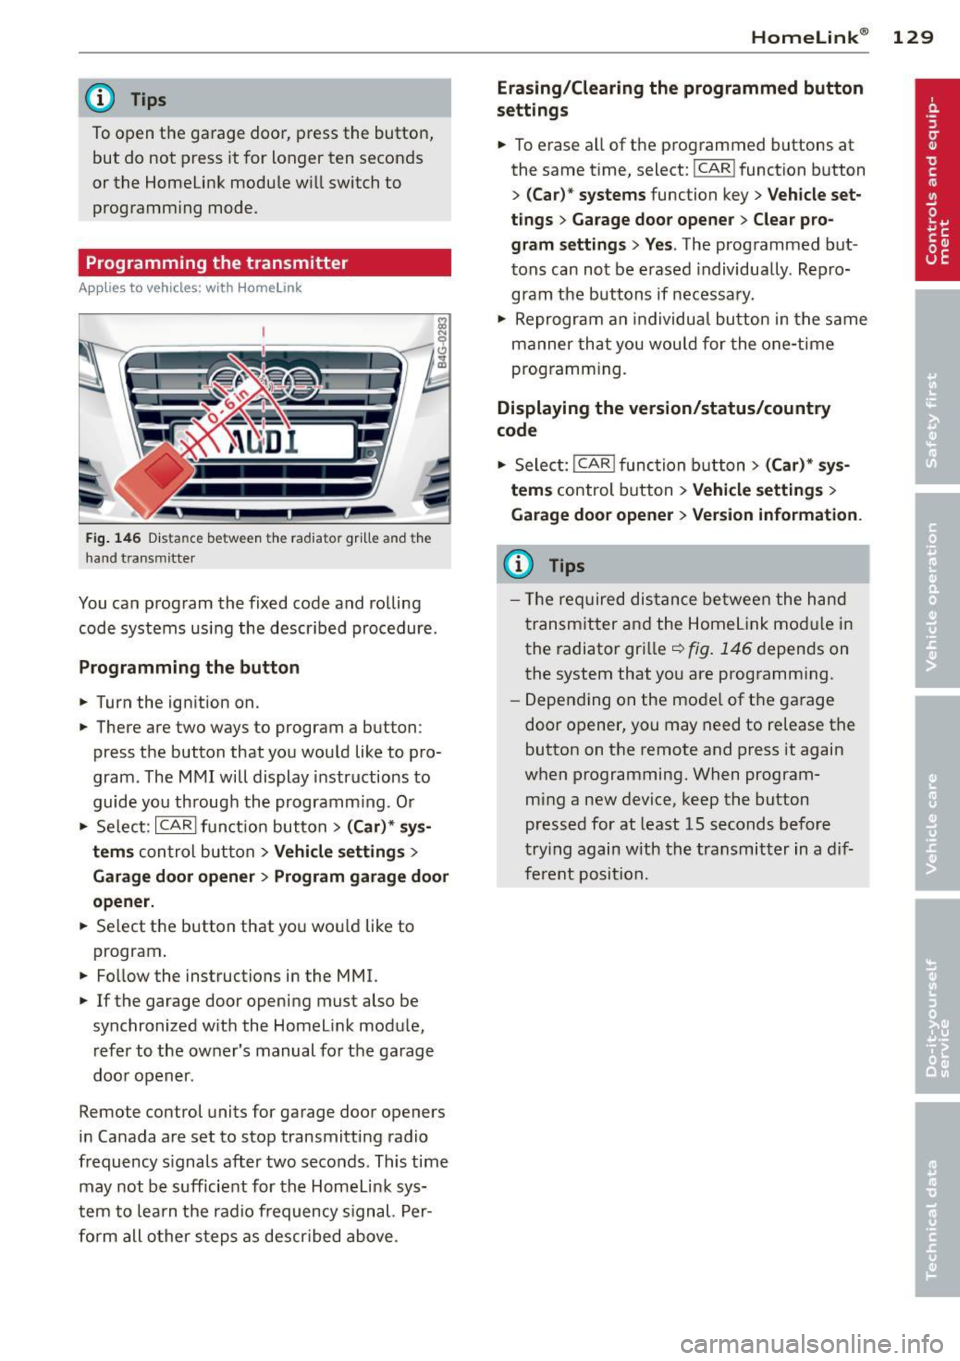
Fig. 146 Dist an ce be tween the ra diato r gr ille a nd the
hand t ransm itter
You can program the fixed code and rolling
code systems using the described procedure.
Programming the button
.. Turn the ignition on.
.. There are two ways to program a button:
press the button that you would like to pro
gram . The MMI will display instructions to
guide you through the programm ing . O r
.. Se lect: ICARlfunction button>
( Car) * sys
tems
con trol button > Vehicle settings >
Garage door opener > Program garage door
opener .
.. Se lect the button that you wou ld like to
program .
.. Fo llow the instructions in the MMI.
.. If the garage door opening must also be
synchronized with the Homelink module,
refer to the owner's manual for the garage
door opener .
Remote control units for garage door openers
in Canada are set to stop transmitting radio
frequency s ignals after two seconds . This time
may not be sufficient for the Homelink sys
tem to learn the radio frequency signal. Per
form all other steps as descr ibed above .
Homelink ® 129
Erasing/Clearing the programmed button
settings
.. To erase all of the programmed buttons at
the same time, select: !CAR ! function button
>
(Car)* systems function key> Vehicle set
tings
> Garage door opener > Clear pro
gram settings> Yes .
The programmed but
tons can not be erased individua lly . Repro
gram the buttons if necessary .
.. Reprogram an individual button in the same
manner that you wou ld for the one-time
programming.
Displaying the version/status/country
code
.. Select: I CAR I function button > (Car)* sys
tems
control button > Vehicle settings >
Garage door opener > Version information .
(D Tips
- The required distance between the hand
transmitter and the Homelink mod ule in
the radiator grille~
fig. 146 depends on
the system that you are programm ing .
- Depending on the mode l of the garage
door opener, you may need to release the
button on the remote and press it again
when programming. When program
ming a new device, keep the button
pressed for at least 15 seconds before
trying again with the transmitter in a dif
ferent position.
Page 167 of 310
-Have the airbag system inspected by
your Audi dealer before transporting
anyone on the front passenger seat.
(D Tips
If the capacitive passenger detection sys
tem determines that the front passenger seat is empty, the frontal airbag on the
passenger side will be turned off, and the
PASSENGER AIR BAG OFF light will stay
on .
Repair, care and disposal of the airbags
Parts of the airbag system are installed at
many different places on your Audi. Installing,
removing, servicing or repairing a part in an
area of the vehicle can damage a part of an
airbag system and prevent that system from
working properly in a collision.
There are some important things you have to know to make sure that the effectiveness of
the system will not be impaired and that dis
carded components do not cause injury or pol
lute the environment.
A WARNING
Improper care, servicing and repair proce
dures can increase the risk of personal in
jury and death by preventing an airbag from deploying when needed or deploying
an airbag unexpectedly:
- Never cover, obstruct, or change the
steering wheel horn pad or airbag cover
or the instrument panel or modify them
in any way .
- Never attach any objects such as cup
holders or telephone mountings to the
surfaces covering the airbag units.
- For cleaning the horn pad or instrument
panel, use only a soft, dry cloth or one
moistened with plain water. Solvents or
cleaners could damage the airbag cover
or change the stiffness or strength of the
material so that the airbag cannot de
ploy and protect properly.
Airbag system 165
- Never repair, adjust, or change any parts
of the airbag system.
- All work on the steering wheel, instru
ment panel, front seats or electrical sys
tem (including the installation of audio
equipment, cellular telephones and CB radios, etc .) must be performed by a
qualified technician who has the training
and special equipment necessary.
- For any work on the airbag system, we
strongly recommend that you see your
authorized Audi dealer or qualified work
shop.
- Never modify the front bumper or parts
of the vehicle body.
- Always make sure that the side airbag
can inflate without interference:
- Never install seat covers or replace
ment upholstery over the front seat
backs that have not been specifically
approved by Audi.
- Never use additional seat cushions that
cover the areas where the side airbags
inflate.
- Damage to the original seat covers or
to the seam in the area of the side air
bag module must always be repaired
immediately by an authorized Audi
dealer.
- The airbag system can deploy only once .
After an airbag has been deployed, it
must be replaced with new replacement
parts designed and approved especially
for your Audi model version. Replace ment of complete airbag systems or air
bag components must be performed by
qualified workshops only. Make sure that
any airbag service action is entered in
your Audi Warranty
& Maintenance book
let under
AIRBAG REPLACEMENT RE
CORD .
-For safety reasons in severe accidents,
the alternator and starter are separated
from the vehicle battery with a pyrotech
nic circuit interrupter.
- Work on the pyrotechnic circuit inter
rupter must only be performed by a
qualified technicians who have the ...
L..._ _____________ _j ...
•
•
Page 179 of 310
~ page 175, Important things to
know.
(D Tips
Always replace child restraints that were
installed in a vehicle during a crash. Dam
age to a child restraint that is not visible
could cause it to fail in another collision
situation.
Advanced front airbag system and children
Your vehicle is equipped with a front "Ad
vanced Airbag System" in compliance with United States Federal Motor Vehicle Safety
Standard (FMVSS) 208 as applicable at the
time your vehicle was manufactured.
The Advanced Airbag system in your vehicle
has been certified to meet the "low-risk" re
quirements for 3- and 6-year old children on
the passenger side and small adults on the
driver side. The low risk deployment criteria
are intended to reduce the risk of injury
through interaction with the airbag that can
occur, for example, by being too close to the
steering wheel and instrument panel when
the airbag inflates. In addition, the system
has been certified to comply with the "sup
pression" requirements of the Safety Stand
ard, to turn off the front airbag for infants up
to 12 months who are restrained on the front passenger seat in child restraints that are list
ed in the Standard.
Even though your vehicle is equipped with an
Advanced Airbag system, all children, espe
cially those 12 years and younger, should al
ways ride in the back seat properly restrained
for their age and size. The airbag on the pas
senger side makes the front seat a potentially
dangerous place for a child to ride. The front
seat is not the safest place for a child in a for
ward-facing child safety seat. It can be a very
dangerous place for an infant or a larger child
in a rearward-facing seat.
The vehicle 's Advanced Airbag System has a
capacitive passenger detection system in the
Child Safety 177
front passenger seat cushion that can detect
the presence of a baby or a child in a child re
straint system on this seat.
The capacitive passenger detection system
registers the changes that result in an electri
cal field when a child, a child restraint, and a
baby blanket are on the front passenger seat .
The change in the measured capacitance due
to the presence of a child, a child restraint,
and a baby blanket on the front passenger
seat is related to the child restraint system resting on the seat . The measured capacitance
of a child restraint system varies depending
on the type of system and specific make and
model.
The electrical capacitance of the various
types, makes, and models of child restraints
specified by the U.S.National Highway Traffic
Safety Administration (NH TSA) in the relevant
safety standard are stored in the Advanced
Airbag System control unit together with the
capacitances typical of infants and a 1-year
old child. When a child restraint is used on the
front passenger seat with a typical
1 year-old
infant, the Advanced Airbag System compares
the capacitance measured by the capacitive passenger detection system with the data
stored in the electronic control unit.
Child restraints and Advanced front
airbag system
Regardless of the child restraint that you use,
make sure that it has been certified to meet
United States Federal Motor Vehicle Safety
Standards and has been certified by its manu
facturer for use with an airbag. Always be sure
that the child restraint is properly installed at
one of the rear seating positions. If in excep
tional circumstances you must use it on the
front passenger seat, ca refully read all of the
information on child safety and Advanced Air
bags and heed all of the applicable WARN
INGS. Make certain that the chi ld and child re
straint are correctly recognized by the capaci
tive passenger detection system in the front passenger seat, that the front passenger air
bag is turned off, and that the airbag status is ..,.
•
•