ignition AUDI A7 2020 Service Manual
[x] Cancel search | Manufacturer: AUDI, Model Year: 2020, Model line: A7, Model: AUDI A7 2020Pages: 310, PDF Size: 81.29 MB
Page 103 of 310

4K8012721BC
Driving
Brake booster: deactivated. See owner's manual
The brake booster remains active for a brief peri-
od of time after switching off the ignition. Secure
the vehicle from rolling by setting the parking
brake and select the “P” gear.
Other indicator lights
rf {@® is displayed when there is a malfunction,
the brakes were under heavy load. Follow the in-
structions in the message to utilize the engine
braking effect and to relieve the brakes.
ZA WARNING
If a malfunction occurs in the ABS, ESC, and
braking distribution, interventions that stabi-
lize the vehicle will no longer be available.
This could cause the vehicle to swerve, which
increases the risk that the vehicle will slide.
Do not continue driving. See an authorized
Audi dealer or authorized Audi Service Facility
for assistance.
Electromechanical
parking brake
Operating the parking brake
The electromechanical parking brake is used to
secure the vehicle from rolling away unintention-
ally.
The ©) switch is located under the selector lever
in the center console. It turns on when the park-
ing brake is set. You can release the parking brake
manually or automatically when you start to
drive.
Setting and releasing the parking brake
> Setting: pull the @) switch.
> ris appears, the parking brake is hold-
ing the vehicle. You can remove your foot from
the brake pedal.
> Releasing: when the ignition is switched on,
press and hold the brake pedal and press the ©)
button.
If the red indicator light flashes, the braking
force has not built up enough or it has decreased.
You can also secure the vehicle by selecting the
“P” gear or pressing the brake pedal. Make sure
the indicator light is off before you start driving.
Automatically releasing the parking brake
when starting to drive
Requirement: the driver's door must be closed
and the driver’s safety belt must be fastened.
> Press the accelerator pedal to start to drive.
Z\ WARNING
—To reduce the risk of an accident, always
make sure the vehicle is situated safely
while stationary.
— If the parking brake is set, it can release au-
tomatically when the accelerator pedal is
pressed. To reduce the risk of an accident,
do not inadvertently press the accelerator
pedal and always shift into “P” when the ve-
hicle is stopped.
— If the power supply fails, you cannot set the
parking brake once it is released, or release
it if it is set. In this case, park the vehicle on
level ground and secure it by engaging the
"P” gear. Contact an authorized Audi dealer
or authorized Audi Service Facility for assis-
tance.
(i) Tips
— On steep inclines, especially when in trailer
mode, the vehicle may roll backwards unin-
tentionally when starting to drive. To re-
duces the risk of this happening, pull and
hold the ©) switch while pressing the accel-
erator pedal. If enough drive power has
built up at the wheels and the vehicle does
not roll backwards, then release the switch
to start to drive.
— If you leave the vehicle when “D” or “R” are
engaged, the parking brake will be set auto-
matically.
— Noises when the parking brake is set and re-
leased are normal and are not a cause for
concern.
— The parking brake goes through a self-test
cycle at regular intervals when the vehicle is
stopped. Any noises associated with this are
normal.
101
Page 104 of 310

Driving
Emergency braking function
Emergency braking should only be used in an
emergency, if the standard brake pedal is mal-
functioning or obstructed. When the emergency
braking function is activated, the braking effect is
similar to a heavy braking maneuver.
> Pull and hold the ©) switch while driving.
> An audio warning signal will sound and emer-
gency braking will begin.
> If you press the accelerator pedal, emergency
braking will be canceled.
ZA WARNING
Heavy braking while driving through curves or
in poor road or weather conditions can cause
the vehicle to slide or the rear of the vehicle to
swerve, which increases the risk of an acci-
dent.
Messages
Ga / @ Parking brake: malfunction! Safely
stop vehicle. See owner's manual
There is a malfunction in the parking brake. If the
message appears while stationary, check if the
parking brake is released and can be reset. If this
is the case, switch the ignition off and back on.
If the message continues to appear, if the park-
ing brake cannot be released, or if the message
appears while driving, then stop the vehicle on
level
ground and shift to “P”. Do not continue
driving. See an authorized Audi dealer or author-
ized Audi Service Facility for assistance.
Gg / @ Parking brake: malfunction! Please
release parking brake
There
is a malfunction in the parking brake. If the
message appears while stationary, check if the
parking brake is released and can be reset. If this
is the case, switch the ignition off and back on.
If the message continues to appear, if the park-
ing brake cannot be released, or if the message
appears while driving, then stop the vehicle on
level ground and shift to “P”. Do not continue
driving. See an authorized Audi dealer or author-
ized Audi Service Facility for assistance.
102
gw Parking brake: malfunction! Please contact
Service
There is a malfunction in the parking brake. Drive
to an authorized Audi dealer or authorized Audi
Service Facility immediately to have the malfunc-
tion corrected. Do not park the vehicle on inclines
and shift to “P”.
a / {Q) Parking brake: warning! Vehicle posi-
tion too steep
The braking force may not be enough to secure
the vehicle from rolling away. Park the vehicle in
a place with less of an incline.
if Parking brake: applied
The parking brake is set. Press and hold the brake
pedal
to release the parking brake.
Special driving situations
Driving uphill and downhill
When driving uphill, downhill, or at high alti-
tudes, note the following information:
— Drive slowly and carefully.
— Do not try to turn around if you cannot safely
drive on an incline or hill. Instead, drive in re-
verse.
— When driving down hills, you can activate the
hill descent control if you press the brake pedal
while driving in “D” gear. The automatic trans-
mission will select a gear suitable for driving
down the hill and will attempt to maintain the
speed at which the vehicle was traveling at the
time the brake pedal was pressed. Press the
brake pedal if necessary. The hill descent con-
trol will switch off once the hill levels out or
you press the accelerator pedal.
— Utilize the engine braking effect when driving
downhill by selecting the “S” driving program
=> page 93. This especially applies when towing
a trailer. This reduces the load on the brakes.
— Brake in intervals and do not press the brake
pedal continuously.
ZA WARNING
— Only drive on inclines that your vehicle is de-
signed to handle. Do not exceed the hill >
Page 106 of 310

Driving dynamic
Driving dynamic
Audi drive select
Introduction
Applies to: vehicles with Audi drive select
Drive select makes it possible to experience dif
ferent types of vehicle characteristics in one vehi-
cle. With different driving modes, the driver can
switch the setting, for example from sporty to
comfortable. This allows you to adjust the set-
tings to your personal preferences. This makes it
possible to combine settings such as a sporty
drivetrain setting with comfortable steering.
Selecting an Audi drive select mode
Applies to: vehicles with Audi drive select
Fig. 80 Center console: Audi drive select button
> Press the left or right arrow key > fig. 80 until
the desired mode appears in the MMI. Or:
> Applies to: MMI: Select on the home screen:
VEHICLE > Audi drive select.
You can change the driving mode when the vehi-
cle is stationary or while driving. If traffic per-
mits, briefly remove your foot from the accelera-
tor pedal after changing modes so that the mode
you have selected will be activated for the drive
system.
The following modes are available depending on
the equipment:
comfort - Provides a comfort-oriented vehicle
setup and is suited for long drives on highways.
auto - Provides an overall comfortable yet dy-
namic driving feel and is suited for everyday use.
104
dynamic - Gives the driver a sporty driving feel
and is suited to a sporty driving style. The “S”
driving program is selected.
individual - Provides the option for personalized
vehicle settings. Press ¥ to configure the mode
=> page 104, Individual settings.
G) Tips
When the ignition is being switched on, indi-
vidual systems, such as the drive system, will
be reset to a balanced setting. Select the cur-
rent mode again to attain its full configura-
tion.
Individual settings
Applies to: vehicles with Audi drive select
The equipment in your vehicle will determine
which settings you can adjust.
Drive
The drive system will react to accelerator pedal
moves more quickly or in a more balanced man-
ner. The shift points are placed in higher or lower
speed ranges.
Depending on the setting, the drive power at the
rear axle will be distributed with the sport differ-
ential* to be more sporty or moderate
=> page 108.
Steering
The power steering will adapt. Light steering is
suitable for long trips on highways or smooth
driving around curves, for example.
Suspension
The suspension adjusts to be tighter or more
comfort-oriented when it comes to compensat-
ing for uneven spots on the road.
The vehicle ground clearance is adjusted by the
air suspension* based on the setting.
Engine sound
The engine sound adapts and can be subtle to
sporty.
Page 109 of 310
4K8012721BC
Driving dynamic
the vehicle. Slow down immediately, and stop
your vehicle as soon as possible in a safe location
with enough space at the sides of the vehicle. Do
not continue driving. See an authorized Audi
dealer or authorized Audi Service Facility for as-
sistance.
2 | Steering: malfunction! Please stop vehicle
There is a malfunction in the electronic steering
lock. You cannot turn the ignition on. Do not tow
your vehicle because it cannot be steered. See an
authorized Audi dealer or authorized Audi Service
Facility for assistance.
El steering: malfunction! You can continue
driving
There is a malfunction. Steering may be more dif-
ficult or more sensitive. Adapt your driving style.
Have the steering system checked immediately
by an authorized Audi dealer or authorized Audi
Service Facility. Please note that the red indicator
light may turn on after restarting the engine. Do
not continue driving if it does.
a Steering: malfunction! Adapt driving style.
Larger turning radius
The rear axle steering may have failed. The vehi-
cle will have a larger turning radius, and the sta-
bility when driving around curves will be compa-
rable to a vehicle without rear axle steering. Drive
carefully to an authorized Audi dealer or author-
ized Audi Service Facility to have the malfunction
corrected.
|@—e| Steering lock: malfunction! Please contact
Service
There is a malfunction in the electronic steering
lock. Drive immediately to an authorized Audi
dealer or authorized Audi Service Facility to have
the malfunction repaired.
Dynamic steering: correcting steering wheel
position
The steering is reinitializing. The steering wheel
will move easily after starting the vehicle. Reiniti-
alization might be necessary if the steering wheel
was moved while the engine was switched off.
The display turns off if the initialization was suc-
cessful.
ZA WARNING
Do not tow your vehicle if there is a malfunc-
tion in the electronic steering lock because
this increases the risk of an accident.
@ Tips
—If there is a malfunction, the steering wheel
may be crooked when driving straight.
—If the a or a indicator light only stays on
for a short time, you may continue driving.
ALL wheel drive (quattro)
Applies to: vehicles with all wheel drive
The all-wheel drive system distributes the driving
power variably to the front and rear axle to im-
prove the driving characteristics. It works togeth-
er with selective wheel torque control, which can
activate when driving through curves
=> page 109.
Applies to: vehicles with quattro ultra: If the driv-
ing situation does not require all wheel drive,
then the rear section of the drivetrain will decou-
ple to save fuel. The system constantly deter-
mines and anticipates if all wheel drive is needed.
This allows the rear drivetrain to recouple shortly
before it is needed.
The all-wheel drive system is designed for high
engine power. Your vehicle is exceptionally pow-
erful and has excellent driving characteristics
both under normal driving conditions and on
snow and ice. Always read and follow safety pre-
cautions > A\.
Z\ WARNING
— Even in vehicles with all wheel drive, you
should adapt your driving style to the cur-
rent road and traffic conditions to reduce
the risk of an accident.
— The braking ability of your vehicle is limited
to the traction of the wheels. In this way, it
is not different from a two wheel drive vehi-
cle. Do not drive too fast because this in-
creases the risk of an accident. >
107
Page 110 of 310
Driving dynamic
— Note that on wet streets, the front wheels
can “hydroplane’” if driving at speeds that
are too high. Unlike front wheel drive
vehicles, the engine RPM does not increase
suddenly when the vehicle begins hydro-
planing. Adapt your speed to the road condi-
tions to reduce the risk of an accident.
Sport differential
Applies to: vehicles with sport differential
The sport differential distributes the drive power
to the rear axle based on the situation. The goal
is a high level of agility and ability to accelerate
on curves. The vehicle is very responsive to steer-
ing. The settings depend on the selected Audi
drive select* mode.
t3] All-wheel drive: malfunction! You can con-
tinue driving. Please contact Service
Drive immediately to an authorized Audi dealer
or authorized Audi Service Facility to have the
malfunction repaired.
iT-3| Sport differential: malfunction! Please con-
tact Service
Drive immediately to an authorized Audi dealer
or authorized Audi Service Facility to have the
malfunction repaired.
2] All-wheel drive: too hot. Please adapt driv-
ing style. See owner's manual
The transmission temperature has increased sig-
nificantly due to the sporty driving manner. Drive
in a less sporty manner until the temperature re-
turns to the normal range and the indicator light
switches of.
3] Sport differential: temperature too high.
Please adapt driving style
The transmission temperature has increased sig-
nificantly due to the sporty driving manner. Drive
in a less sporty manner until the temperature re-
turns to the normal range and the indicator light
switches of.
108
AN WARNING
Contact
an authorized Audi dealer or author-
ized Audi Service Facility if the sport differen-
tial is faulty or malfunctioning. The repair
must be performed by trained personnel us-
ing the correct oil in order to ensure safety.
Electronic Stabilization
Control
Electronic Stabilization Control (ESC) supports
driver safety. It reduces the risk of slipping and
improves driving stability. ESC detects critical sit-
uations, such as if the vehicle is oversteering or
understeering, or if the wheels are spinning. The
brakes are applied or the engine torque is re-
duced in order to stabilize the vehicle.
If the 3] indicator light blinks while driving, the
ESC is actively regulating.
If the BA indicator light turns on, the system has
switched the ESC off. In this case, you can switch
the ignition off and then on to switch the ESC on
again. The indicator light turns off when the sys-
tem is fully functional.
If the B indicator light turns on, ESC was limit-
ed or switched off manually > page 109.
The following systems are integrated in the ESC:
Anti-lock braking system (ABS)
ABS prevents the wheels from locking when brak-
ing. The vehicle can still be steered even during
hard braking. Apply steady pressure to the brake
pedal. Do not pump the pedal.
A pulsing in the brake pedal indicates that the
system is acting to stabilize the vehicle.
Brake assist
The brake assist system can decrease braking dis-
tance. It increases braking power when the driver
presses the brake pedal quickly in emergency sit-
uations. You must press and hold the brake pedal
until the dangerous situation is over. Depending
on the activated driver assistance systems, the >
Page 111 of 310

4K8012721BC
Driving dynamic
brake assist system may react with increased sen-
sitivity.
Anti-Slip Regulation (ASR)
ASR reduces drive power when the wheels begin
spinning and adapts the power to the road condi-
tions. This will increase the driving stability.
Electronic Differential Lock (EDL)
The EDL applies the brakes to wheels that are
slipping and transfers the drive power to the oth-
er wheels. This function is not available at higher
speeds.
In extreme cases, EDL automatically switches off
to keep the brake on the braked wheel from over-
heating. The vehicle is still functioning correctly.
EDL will switch on again automatically when con-
ditions have returned to normal.
Power steering
The ESC can also support vehicle stability
through steering.
Selective wheel torque control
Selective wheel torque control is used when driv-
ing on curves. Braking is targeted toward the
wheels on the inside of the curve as needed. This
allows more precise driving in curves.
Automatic post-collision braking system
The automatic post-collision braking system can
help to reduce the risk of sliding and of addition-
al collisions after an accident. If the airbag con-
trol module detects a collision, the vehicle is
braked by the ESC.
The vehicle does not brake automatically if one of
the following occurs:
— The driver presses the accelerator pedal, or
— The braking force generated by the pressed
brake pedal is greater than the braking force
that
would be initiated by the system
— The ESC, the brake system, or the vehicle elec-
trical system is not functioning
ZA WARNING
— The ESC and its integrated systems cannot
overcome the limits imposed by natural
physical laws. This is especially important on
slippery or wet roads. If the systems begin
acting to stabilize your vehicle, you should
immediately alter your speed to match the
road and traffic conditions. Do not let the in-
creased safety provided tempt you into tak-
ing risks. This could increase your risk of a
collision.
— Please note the risk of a collision increases
when driving fast, especially through curves
and on slippery or wet roads, and when driv-
ing too close to objects ahead. There is still
a risk of accidents because the ESC and its
integrated systems cannot always prevent
collisions.
— Accelerate carefully when driving on
smooth, slippery surfaces such as ice and
snow. The drive wheels can spin even when
these control systems are installed and this
can affect driving stability and increase the
risk of a collision.
G) Tips
— The ABS and ASR only function correctly
when all four wheels have a similar wear
condition. Different tire sizes can lead to a
reduction in engine power.
— You may hear noises when the systems de-
scribed are working.
The So button for controlling the ESC is located
in the center console, in front of the selector lev-
er.
The ESC is automatically switched on when the
ignition is switched on. It may make sense in
some situations to limit the ESC so that the
wheels can spin:
— Rocking the vehicle to free it when it is stuck
— Driving in deep snow, on unpaved ground, or
with snow chains
Limiting ESC (sport mode)
—To limit the ESC, press the So button briefly.
The B indicator light turns on.
109
>
Page 125 of 310
4K8012721BC
Driving information
— The traffic signs on the road always take pri-
ority over the display. The driver is always
responsible for adhering to the regulations
applicable in the country where the vehicle
is being operated.
— Units of measurement and language set-
tings are displayed based on how they were
set in the MMI system settings > page 219.
Applies to: vehicles with traffic light information
Switching traffic light information on and
off
The system can be switched on and off in the
MMI page 118.
Accessing traffic light information
> Select in the instrument cluster: vehicle func-
tions tab > Traffic signs.
G@) Tips
If another tab or another function is selected
in the instrument cluster, the traffic light in-
formation will appear in the status bar on the
instrument cluster.
Messages
Applies to: vehicles with traffic light information
Malfunction! See owner's manual
The system could not be configured, for example
due to a network malfunction. Switch the igni-
tion off and shut down the vehicle to restart the
system. Wait several minutes until the vehicle
has shut down completely and then switch the
ignition back on.
Function currently unavailable. See owner's
manual
There is a temporary system malfunction. Check
if one or more of the following situations applies
and correct the issue if necessary:
— Traffic light information is switched off
— Data transmission is deactivated
— The vehicle is not equipped with traffic sign rec-
ognition.
— There is no valid license
— Traffic light information is not available in that
area
Lap timer
Introduction
Applies to: vehicles with lap timer
You can measure and analyze lap times with the
lap timer in the display. You can operate the lap
timer using the multifunction steering wheel
=> page 13.
Opening the lap timer
> Select in the instrument cluster: Vehicle func-
tions tab > EI button > Lap times.
Z\ WARNING
Your focus should always be on driving your
vehicle safely. As the driver, you have com-
plete responsibility for safety in traffic. To re-
duce the risk of an accident, only use the lap
timer functions in such a way that you always
maintain complete control over your vehicle in
all traffic situations.
G) Tips
You can retrieve information from the trip
computer while the lap timer stopwatch is
running.
ya |
Applies to: vehicles with lap timer
Requirement: the lap timer must be open
=> page 123.
Timing laps
> To start timing manually, select Start lap 1 in
the menu.
> To start timing automatically as soon as you be-
gin to drive, select Start lap 1 by driving off or
Start by driving off in the menu.
> To start timing a new lap after driving a lap, se-
lect New lap in the menu. This starts timing
the next lap at the same time.
123
Page 126 of 310
Driving information
After completing a lap, the difference between
the last lap and the previous best lap time will be
indicated with a “—” or “+”.
Pausing timing and displaying a split time
> To insert a pause @ select Pause in the menu.
> To resume timing, select Resume in the menu.
> To display a split time, select Split time in the
menu. The split time appears for approxi-
mately ten seconds in the instrument cluster.
The current lap timing will continue running.
Canceling lap timing
The timing of the current lap will stop. The lap
time will be erased and will not be included in the
statistics.
> Select Cancel lap using the multifunction steer-
ing wheel.
Resetting timing
> Using the multifunction steering wheel, select
Reset lap times in the menu.
@ Tips
—A maximum of 99 lap times can be meas-
ured.
— If timing is paused, you can continue it later
even if you switch the ignition off.
— Saved lap times cannot be individually de-
leted from the total results.
— The saved lap timer values will remain after
switching the ignition off.
Lap statistics
Applies to: vehicles with lap timer
Displaying lap statistics
You can display the number of laps driven Eg,
the fastest lap “+”, the slowest lap “-”, and the
average time “®” in the instrument cluster.
>» Select in the instrument cluster: Vehicle func-
tions tab > E] button > Lap statistics.
> Turn the thumbwheel down or up to display the
individual lap times.
> To return to the lap timing that was started,
press the =] button > Lap times.
124
Resetting lap statistics
Requirement: the lap statistics menu must be
displayed.
> To reset the lap statistics, press and hold the
left thumbwheel until the message No lap
times have been recorded yet. appears.
G) Tips
The lap statistics list the lap times for the last
30 laps. The fastest and slowest lap time out
of up to 99 measured laps are also displayed.
Night vision assist
Applies to: vehicles with night vision assist
Night vision assist helps you when it is dark by
using an infrared camera to monitor the area in
front of your vehicle, within the limits of the sys-
tem. It can display objects up to a distance of ap-
proximately 1000 feet (300 m).
Pedestrian and wild animals are detected by
measuring the temperature difference between
the object and the background. Pedestrians and
wild animals will not be detected if the tempera-
ture difference is too small. The pedestrian and
wild animal marking feature is deactivated at
temperatures above approximately 77 °F (25 °C)
and when it is light outside.
The thermal image detected by the camera is dis-
played in the instrument cluster. Warm areas
generally appear lighter and cold areas appear
darker.
The camera for the night vision assist @)
= page 117 is located in the vehicle's radiator
grille. Make sure the night vision camera is not
covered by stickers, deposits, or any other ob-
structions because this can impair the night vi-
sion assist function. Follow the information
about cleaning > page 261.
ZA WARNING
— Follow the safety precautions and note the
limits of the assist systems, sensors, and
cameras > page 115. >
Page 129 of 310
4K8012721BC
Driver assistance
Driver assistance
Cruise control system
Applies to: vehicles with cruise control system
The cruise control system assists the driver in
maintaining a constant speed above approxi-
mately 15 mph (20 km/h). The system maintains
the desired speed by braking and accelerating.
ZA\ WARNING
— Always pay attention to the traffic around
your vehicle when the cruise control system
is in operation. As the driver, you are always
responsible for controlling your vehicle
speed and the distance between your vehicle
and
other vehicles.
— For safety reasons, cruise control should not
be used in the city, in stop-and-go traffic, on
winding roads, and when road conditions are
poor (such as ice, fog, gravel, heavy rain,
and conditions that could lead to hydroplan-
ing), because this increases the risk of an ac-
cident.
— Switch the cruise control off temporarily
when driving in turning lanes, highway exits,
or in construction zones.
—To reduce the risk of an accident, you should
only resume the stored speed if it is suitable
for the current traffic conditions.
() Note
Before driving downhill a long distance ona
steep hill, decrease your speed and select a
lower gear. This makes use of the engine brak-
ing effect and reduces the load placed on the
brakes.
@) Tips
The brake lights turn on when the brakes are
applied automatically.
Switching the system on
Applies to: vehicles with cruise control system
BFV-0220
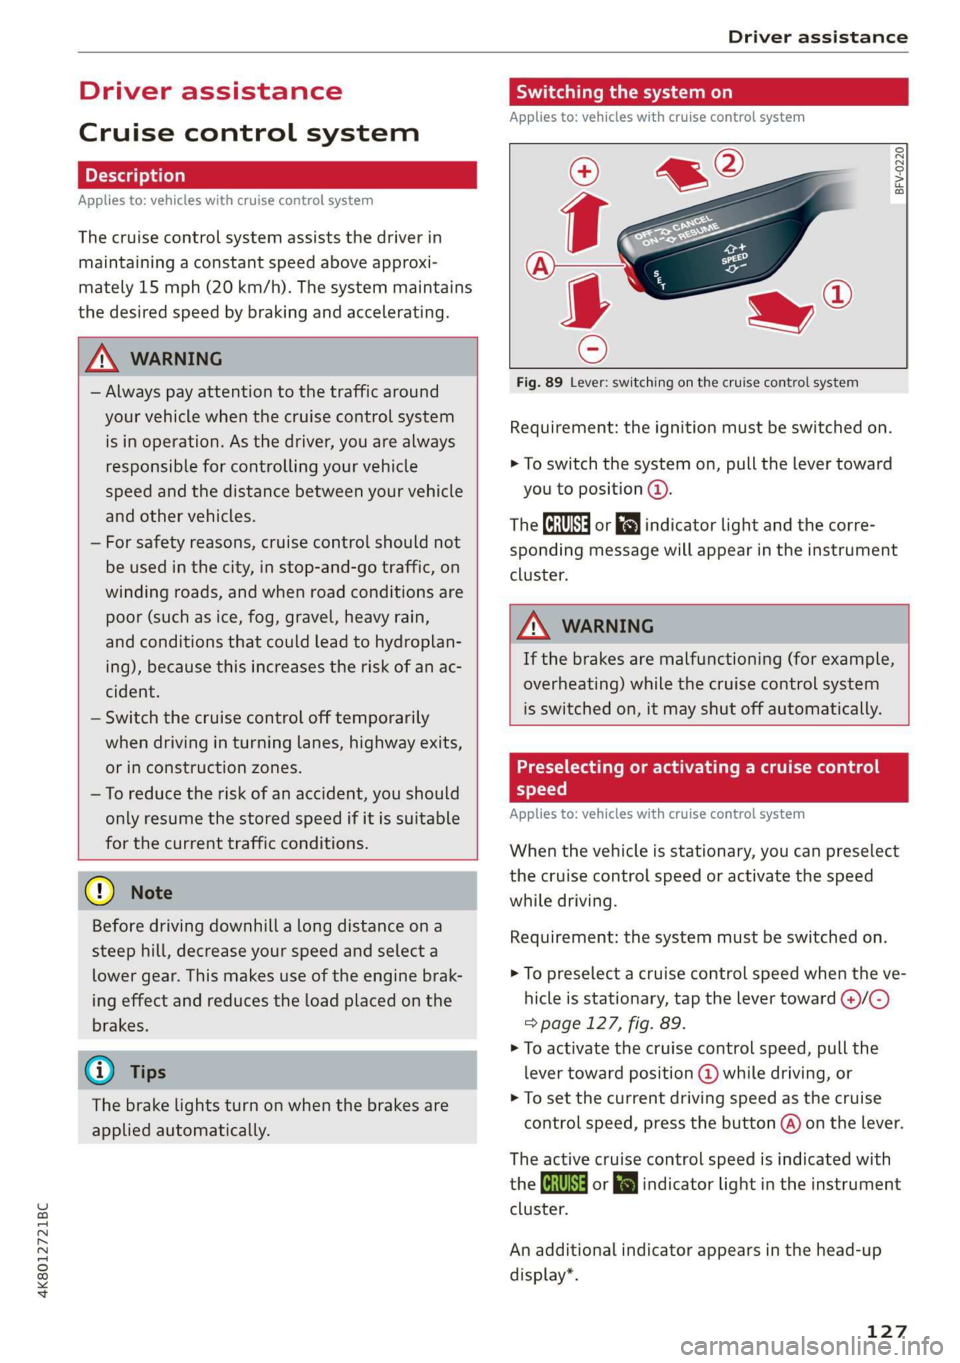
Fig. 89 Lever: switching on the cruise control system
Requirement: the ignition must be switched on.
> To switch the system on, pull the lever toward
you to position @.
The ICRUISE| or i$) indicator light and the corre-
sponding message will appear in the instrument
cluster.
ZA\ WARNING
If the brakes are malfunctioning (for example,
overheating) while the cruise control system
is switched on, it may shut off automatically.
Preselecting or activating a cruise control
speed
Applies to: vehicles with cruise control system
When the vehicle is stationary, you can preselect
the cruise control speed or activate the speed
while driving.
Requirement: the system must be switched on.
> To preselect a cruise control speed when the ve-
hicle is stationary, tap the lever toward @)/C)
=> page 127, fig. 89.
> To activate the cruise control speed, pull the
lever toward position @ while driving, or
> To set the current driving speed as the cruise
control speed, press the button @) on the lever.
The active cruise control speed is indicated with
the Gs or El indicator light in the instrument
cluster.
An additional indicator appears in the head-up
display*.
127
Page 130 of 310
Driver assistance
Changing the cruise control speed
Applies to: vehicles with cruise control system
> To increase or decrease the cruise control speed
in small increments, tap the lever up to the
first level toward @/G) & page 127, fig. 89.
> To increase or decrease the cruise control speed
in larger increments, tap the lever up to the
second level toward @)/G).
> To increase or decrease the cruise control speed
continuously, tap and hold the lever at the first
or second level toward @)/G).
Overriding or deactivating the cruise
control speed
Applies to: vehicles with cruise control system
You can override or deactivate the cruise control
system. When you deactivate the system, your
cruise control speed will be stored and you can
resume that speed.
Requirement: the system must be switched on
and activated.
Overriding
> To temporarily override the cruise control
speed, press the accelerator pedal.
> Once you release the accelerator pedal, the sys-
tem will adjust back to the stored cruise control
speed.
If you override the cruise control system for a
long period of time, the cruise control system
will be deactivated. The ICRUISE| or {g) indicator
light will be displayed and the cruise control
speed will be saved.
Deactivating
> To deactivate the cruise control speed, press
the lever toward (2) (not locked into place)
=> page 127, fig. 89.
> Press the brake pedal.
Z\ WARNING
Resting your foot on the accelerator pedal
could override the cruise control. This will pre-
vent braking interventions by the system.
128
See mea
Applies to: vehicles with cruise control system
When you switch the system off completely, the
cruise control speed will be deleted.
Requirement: the system must be switched on.
> To switch the system off, press the lever toward
@ (locked into place) > page 127, fig. 89, or:
> Switch the ignition off.
Applies to: vehicles with cruise control system
Gi / 3) Speed control system: currently un-
available. See owner's manual
If the indicator light turns on and this message
appears, the cruise control system has been deac-
tivated. There is a temporary malfunction, for ex-
ample the brakes are overheating. Switch the
cruise control system on again later.
Efficiency assist
Applies to: vehicles with efficiency assist
Efficiency assist can assist the driver with predic-
tive information in order to reduce fuel consump-
tion. Depending on vehicle equipment, the sys-
tem may access data from the navigation system,
the camera behind the windshield, and the radar
sensors.
When you remove your foot from the accelerator
pedal, efficiency assist controls downhill mode
with recuperation, depending on the situation.
Adjusting the efficiency assist
You can adjust efficiency assist functions individ-
ually. The settings depend on the vehicle equip-
ment.
— Predictive messages > page 129.
— Predictive control > page 130.
— Accelerator pedal feedback > page 94.
Situation symbols
Depending on vehicle equipment, the following
symbols may be shown. The symbols indicate the >