warning AUDI A8 2014 Repair Manual
[x] Cancel search | Manufacturer: AUDI, Model Year: 2014, Model line: A8, Model: AUDI A8 2014Pages: 314, PDF Size: 78.47 MB
Page 76 of 314
7 4 Seats and storage
- Never exceed the maximum perm issible
load carrying capacity of the roof o f your
vehicle, the permissible axle weights and
the permissible total weight of your veh i
cle
c::, page 289, Weights .
@ For the sake of the environment
As a result of the increased wind resist
ance created by a roof rack, your vehicle is
using fuel unnecessarily. So remove the
roof rack after using it.
12-volt sockets
Applies to vehicles: 12-volt soc kets
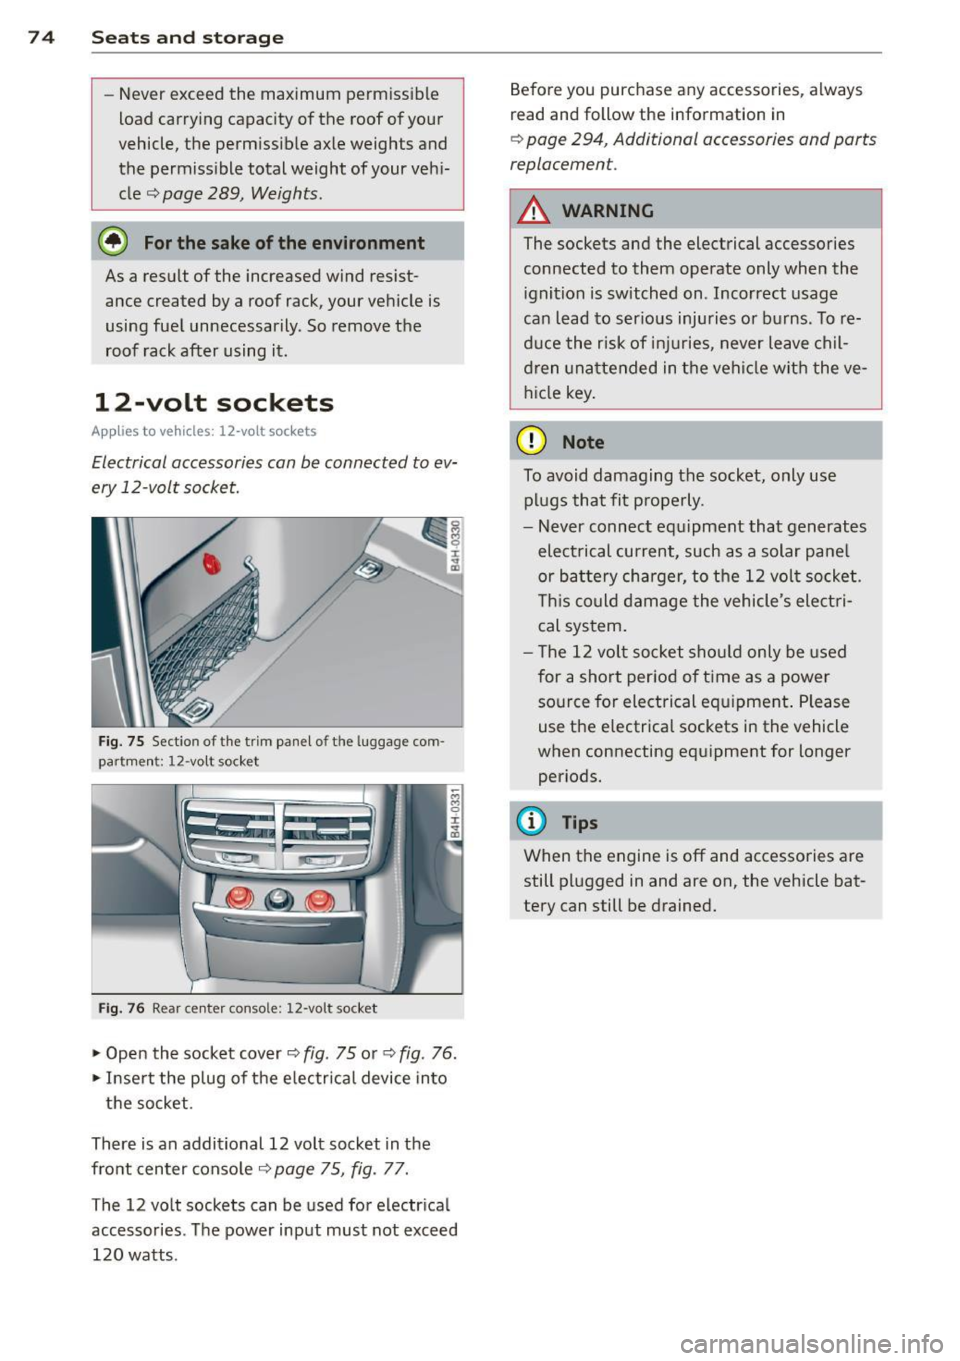
Electrical accessories can be connected to ev
ery 12-volt socket.
Fig. 75 Sect io n of the trim panel o f th e luggage com
part ment : 12 -vol t socket
Fig. 76 Rear center conso le: 12-vo lt socket
... Open the socket cover c::, fig . 75 or c::, fig . 76 .
... Inse rt the p lug of the e lectrical device into
the socket.
There is an additional 12 vo lt socket in the
fro nt center console
c::> page 75, fig. 77.
The 12 volt sockets can be used for electr ica l
accessories . Th e power input must not exceed
120 watts . Before you purchase any accessories
, always
read and follow the information in
c::, page 294, Additional accessories and parts
replacemen t.
A WARNING
The sockets and the electrical accessories
connected to them operate only when the
i gnition is switched on . Incorrect usage
ca n lead to ser ious injuries or burns. To re
duce the risk of inj uries, never leave ch il
dren unattended in t he vehicle with the ve
hicle key .
(D Note
To avoid damaging the socket, only use
plugs that fit p roperly.
- Never connect equ ipment that generates
elect rical current, such as a solar panel
or battery charger, to the 12 vol t socket .
T his could damage the vehicle 's elect ri
cal sys tem .
- The 12 volt socket shou ld only be used
for a short per iod of t i me as a power
so urce for electrical equ ipment . Please
use the electrical sockets in the vehicle
when connecting equipment for longer periods.
@ Tips
When the engine is off and accessories are
still plugged in and are on, the vehicle bat
tery can still be drained.
Page 77 of 314
Storage
(upholder
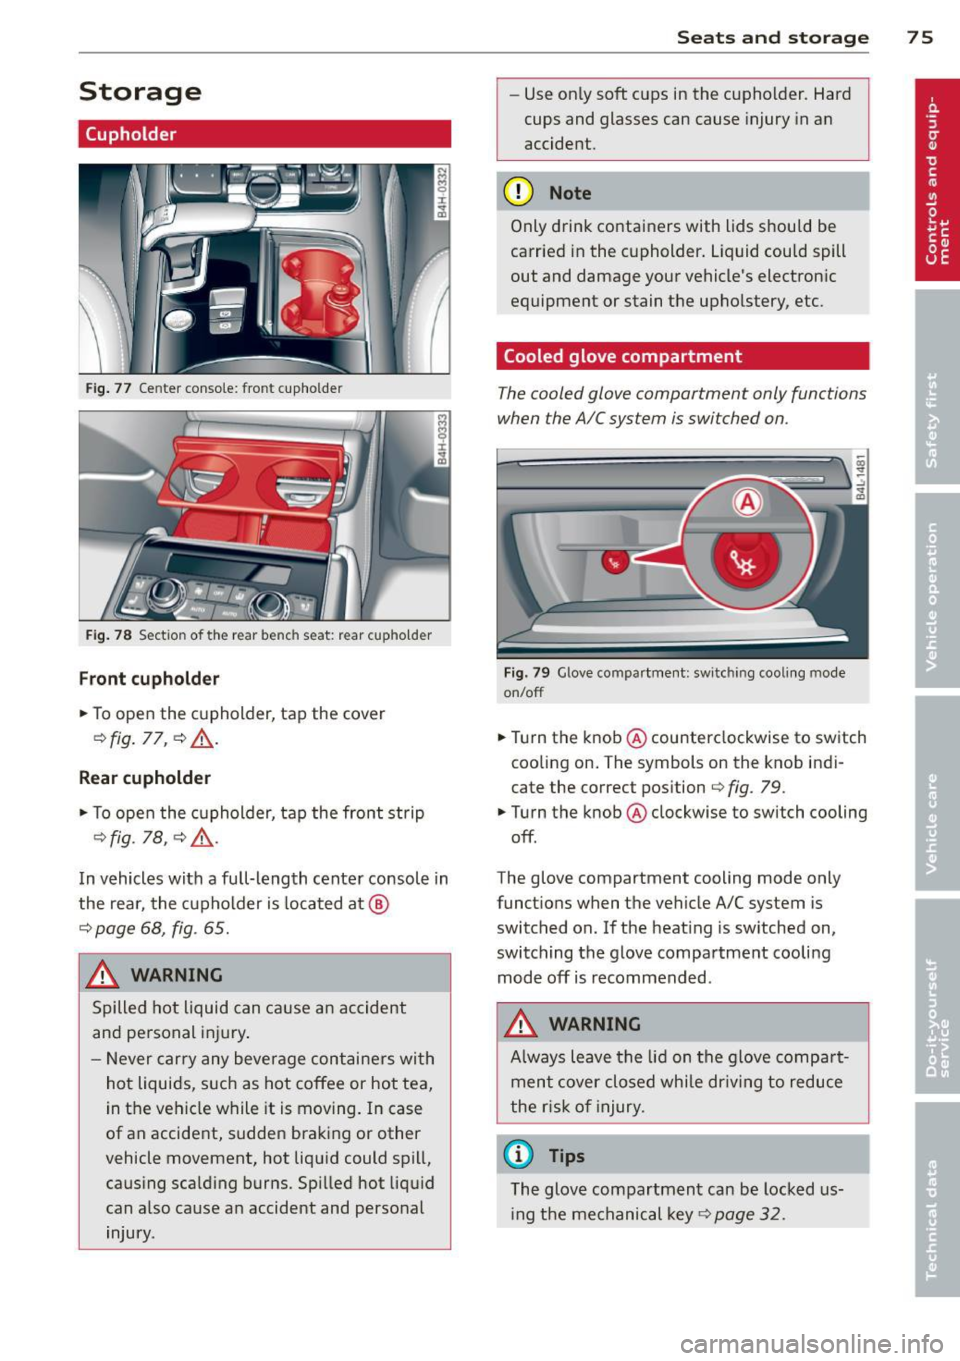
Fig. 77 Center console: front cupho lder
Fig. 78 Section of the rear bench seat: rear cupholder
Front cupholder
.,. To open the cupholder, tap the cover
Q fig . 77, Q &,.
Rear cupholder
.,. To open the cupholder, tap the front strip
Q fig. 18, QA .
In vehicles with a full-length center console in
the rear, the cupholder is located at @
Qpage 68, fig. 65.
A WARNING
Spilled hot liquid can cause an accident
and personal injury .
- Never carry any beverage containers with
hot liquids, such as hot coffee or hot tea,
in the vehicle while it is moving. In case
of an accident, sudden braking or other
vehicle movement, hot liquid could spill, causing scalding burns. Spilled hot liquid
can also cause an accident and personal
injury.
Seats and storage 75
-Use on ly soft cups in the cupholder. Hard
cups and glasses can cause injury in an
accident.
(D Note
Only drink containers with lids should be
carried in the cupholder. Liquid could spill
out and damage your vehicle's electronic
equipment or stain the upholstery, etc.
Cooled glove compartment
The cooled glove compartment only functions
when the AIC system is switched on.
Fig. 79 Glove compar tment: switching cooling mode
on/off
.,. Turn the knob@ counterclockwise to switch
cooling on. The symbols on the knob indi
cate the correct position
~ fig. 79 .
.,. Turn the knob @ clockwise to switch cooling
off .
The glove compartment cooling mode only
functions when the vehicle A/C system is
switc hed on. If the heating is switched on,
switching the glove compartment cooling mode off is recommended .
A WARNING
Always leave the lid on the glove compart
ment cover closed while dr iving to reduce
the risk of injury.
a) Tips
The glove compartment can be locked us
i ng the mechanical key
Q page 32.
Page 78 of 314

76 Seats and stor age
Addit ional storage
There are a variety of storage compartments
and fasteners in various places in the vehicle.
- Storage compartments in the doors
- Net in the front passenger footwell
- Eyeglasses compartment in the headliner (near the rearview mirror)
- Storage compartments under the center
armrests
- Compartments* on the back of the front
seat backrests
- Garment hooks over the rear doors
- Compartment in the center console with
pass-through)* (rear)
- Compartment behind the rear center arm
rest (in vehicles without the pass-through*
or cooler*)
- Bag hooks in the luggage compartment
A WARNING
-When driving, do not leave any hard ob
jects on the rear window shelf or allow
your pet to sit on the shelf. They could
become a hazard for vehicle occupants in
the event of sudden braking or a crash .
- Always remove objects from the instru
ment panel. Any items not stored could
slide around inside the vehicle while driv
ing or when accelerating or when apply
ing the brakes or when driving around a
corner.
- When you are driving make sure that
anything you may have placed in the cen
ter console or other storage locat ions
cannot fall out into the footwells. In case
of sudden braking you would not be able
to brake or accelerate.
- Any articles of clothing that you have
hung up must not interfere with the driv
er's view. The coat hooks are designed
only for lightweight clothing. Never hang
any clothing with hard, pointed or heavy
objects in the pockets on the coat hooks.
During sudden braking or in an accident -
especially if the airbag is deployed - these objects could injure any passen
gers
inside the vehicle.
- To reduce the risk of personal injury in an
accident or sudden stop, always keep the
glove compartment closed while driving.
- Read and follow all WARNINGS
c:> page 173, Important safety instruc
tions on the side airbag system.
- Hang clothes in such a way that they do
not impair the driver's vision.
- The coat hooks must only be used for
lightweight clothing. Do not leave any
heavy or sharp edged objects in the pock
ets which may interfere with the side cur
tain airbag deployment and can cause personal injury in a crash.
- Do not use coat hangers for hanging clothing on the coat hooks as this can in
terfere with proper deployment of the
side curta in airbags in an acc ident.
- Do not hang heavy objects on the coat
hooks, as they could cause personal in
jury in a sudden stop.
@ Note
Objects located on the rear shelf that rub
against the rear window could damage the
heating wires for the rear window defog
ger .
(D Tips
-A vent slot is located between the shelf
and the rear window. Do not block the
vent with any items you may place on the
rear window she lf.
- Do not place bulky items on the rear win
dow shelf as they could restrict or block
the driver's vision in the rear view mirror.
Cooler
Introduction
App lies to vehicles: wit h coo ler
Please clean the cooler before using it for the
first time
c:> table on page 218 .
You can only switch on the cooler if ...
Page 79 of 314
- the temperature in the luggage compart
ment is below 131 °f (55 °C). The cooler
switches off automatically if the tempera
ture in the luggage compartment exceeds 131 °f (55 °C) . Once the temperature falls
below 131 °f (55 °C) again, the cooler
switches on aga in automat ically .
- t he battery is adequately charged . The cool
er switches off automatically if the vehicle
battery voltage falls below a minimum lev
el. This prevents the batte ry from discha rg
i ng . The cooler switches back on again auto
matically when the battery voltage increases
again (e.g . after starting the engine).
The cooler cools to 42.8 °f
(+ 6 °C) and the
freezer cools to 21.2 °f (- 6 °C) in opt imum
cooling cond itions . Th e cooling performance
is affected by the temperature in the luggage
compartment. The temperature inside the
cooler will be higher if the luggage compart ment is hot.
A WARNING
To avoid putting the occupants at any risk, please observe the following safety rules:
- The maximum capacity is 2.5 kg (5.5
lbs.).
- Never overload the cooler. This could cause injury in the event of a collision or
sudden braking.
- The coo ler lid must always be kept closed
while you are driving. Make sure the re
taining catch is securely engaged . The
contents of the coo ler could be thrown
forward into the passenger compart
ment in the event of a collision or under
sudden braking - risk of injury!
- Inflammable liquids, gas canisters, etc.
must not be stored in the cooler -risk of
exp losion! This also includes any prod
ucts that might emit volatile or inflam
mable gases.
- Liquids will freeze at temperatures at or
below 32 °f (0 °C) and may cause glass
bottles to burst!
Seats and storage 77
(D Note
-The venti lation openings for the cooler
are located on the back pane l trim in the
luggage compartment and
must be kept
clear at all t imes.
- If the cooler is not functioning properly, switch it off to prevent further damage.
Have it checked by a qualified workshop .
Operation
Applies to vehicles: wit h coo ler
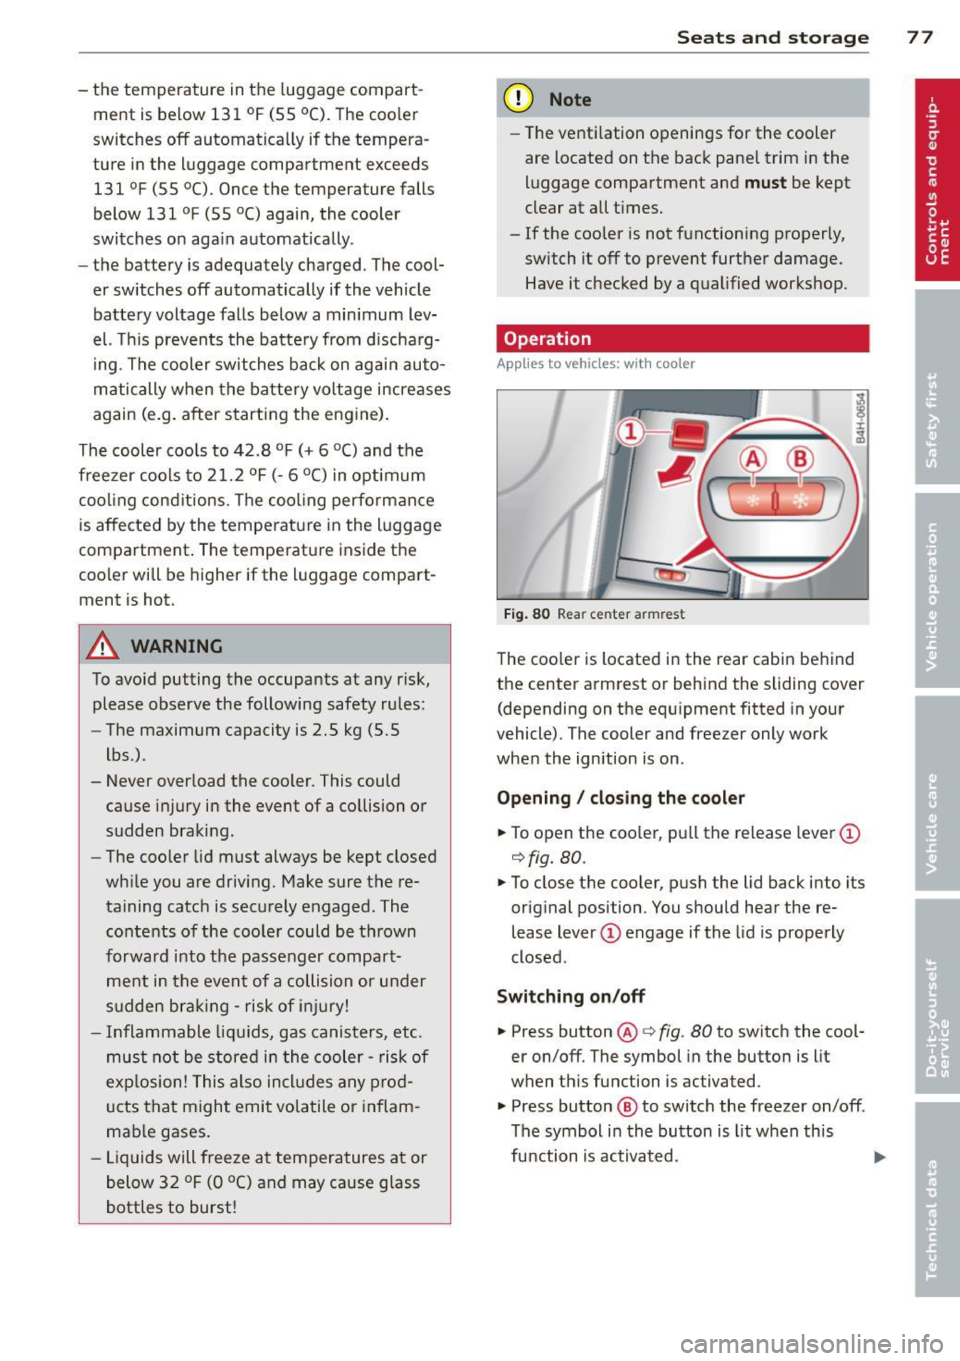
Fig. 80 Rear ce nter ar mrest
The cooler is located in the rear cabin behind
the center armrest or behind the sliding cover (depending on the equipment fitted in your
vehicle) . The cooler and freezer only work
when the ignition is on .
Opening / closing the cooler
.,. To open the cooler , pu ll the release lever@
c:!> fig. 80.
.,. To close the cooler, push the lid back into its
original position . You should hear the re
lease lever(!) engage if the lid is properly
closed.
Switching on /off
.,. Press button @ r:!> fig. 80 to switch the cool
er on/off. The symbol in the button is lit
when this function is activated .
.,. Press button
@ to switch the freezer on/off .
The symbol in the button is lit when this
function is activated .
Page 81 of 314
Warm and cold Climate controls
Description
Th e climate control sy stem warms, cools and
adds humidity to the a ir in the veh icle inter io r.
It is the most effect ive when the windows and
sunroof* a re closed. If the temperature inside
the parked vehicle becomes very warm, open ing the window briefly will speed up the cool
ing process.
I n all heating mode f unctions except
defrost,
the blower on ly switches to a higher speed
once the engine coolant has r eached a certain
temperature.
Condensation from the cooling system can
drip and form a puddle of water under the vehicle. This is normal and does not mean there
is a leak.
Pollutant filter
The po llutant filte r removes po llutants s uch
as dust and pollen from the air.
The air pollutants filte r must be changed at
t he intervals spec ified in you r Wa rra nty
&
Main tenance book let, so tha t the air condi
tioner can properly work.
I f you drive you r vehicle in an area with h igh
ai r po llution , the fi lter may need to be
changed more freq uent ly than specified in
your Aud i Warranty
& Ma intenance booklet. If
i n doubt, ask your authorized A udi Service Ad
visor for advice .
Key coded settings
The clima te con trol settings are a utomat ically
stored and assigned to the remote contro l key
that is in use .
& WARNING
Reduced visibility is dangero us and can
cause accidents . -
Warm and cold 79
-For safe driving it is very important that
all windows be free of ice, snow and con
densat ion.
- Comp letely fam iliarize yourse lf with the
proper use and funct ion of the heat ing
and ve nti lation system and especially
how to defog and defrost the w indows.
- Never use the windshield wiper/washer
system in freez ing weather unt il you
have warmed the w indshield first, using
the heating and ventilation system. The
washer sol ution may free ze o n the wind
shie ld an d red uce visib ility.
(D Note
- If you suspect that the air conditioner has been damaged, switch the system
off to avoid furt her damage and have it
i n spected by a q ua lified dea lership.
- Repairs to the Audi air condition er re
quire specia l techni cal know ledge and
speci al tools. Contact an autho rized Aud i
dealer fo r ass istance.
@ For the sake of the environment
B y reduci ng the amou nt of f uel you use,
you also re duce the amount of pollu tan ts
emitted in to the a ir .
(D Tips
- Keep the air intake s lo ts ( in fro nt of the
w indshield) free from ice, snow and de
br is in order to maintai n the proper f unc
tion of the climate control system.
- T he energy m anagement system may
switch the seat heating* or rear window
defroster off temporar i Ly . These systems
are available again as soon as the energy
balance has been restored .
- Air escapes through vents under the rear
window. When placing items of clothing
on the luggage compartment cover, en
sure that the openings are not covered.
Page 83 of 314
airflow and air distribution are controlled au
tomatically.
Adjusting the temperature
Temperatu res between 60 °F (+16 °() and
84 °F (+28 °C) can be set. O uts ide of this
range,
lo or hi will appear in the climate con
trol system disp lay. At both of these settings,
the climate control system runs continuously
at maximum coo ling or heating power. There
is no temperature regulation.
[!] Adjusting the airflow
You can ad just the airf low manually to suit
your needs . To have the airflow regulated au
tomatically, press the
I AUTO I button.
~ Adjusting the air distribution
You can manually se lect the vents where the
air will flow. To have the air distribution regu
l ated automatically, press the
IAUTOI button.
~ I lil* Adjusting Seat heating/
ventilation*
Pressing the button switches the seat heat
ing/ventilation on at the highest setting ( level
3). The LEDs indicate the temperature leve l.
To reduce the temperature, press the button
again . To switch the seat heating/ventilation
off, press the button repeatedly until the LED
turns off.
After 10 minutes, the seat heating/ventilation
automatically switches from level 3 to level 2.
I n vehicles without the four zone automat ic
climate contro l*, buttons in the rear center
console control the seat heating for both out
er rear seats*.
~ Switch the defroster on/off
The windsh ield and sid e windows are defrost
ed or cleared o f condensation as quickly as
possible. The maximum amount of air flows
mainly from the vents be low the windshield.
Recirculation mode switches off . The tempera
ture should be set to 72 °F (22 °C) or higher.
The temperature is controlled automatically .
The
IAU TOI button switches the defroster off.
Warm and cold 81
~ Switching rear window heater on/off
The rear window heater only operates when
the engine is running. It switches off auto
matically after 10 to 20 minutes, depending
on the outside temperature.
T o p revent the rear window heater from
switching off automatically, press and hold
the ~ button for more than 2 seconds . This
remains stored until the ignition is switched
off .
I SYNC I Synchronization*
When synchronization is switched on, the set
tings for the driver's side are applied to the
front passenger's side (except for seat heat
i ng/venti lation*) . The rear seat is a lso
synchronized in vehicles with the 4-zone de
luxe automatic climate control system* . Syn
chronization switches off if the sett ings are
adjusted on the front passenger's side or in
the rear* .
You can synchronize the settings in a row by
pressing and holding a knob. For example, to
apply the settings for the front passenger's s ide to the driver's side, press and ho ld the
knob on the front passenger's s ide.
Air vents
You can open or close the center and rear
vents in the cockpit and the vents in the rear
center console and door pillars us ing the
ridged thumbwheels. The levers adjust the di
rection of the airflow from the vents.
,&. WARNING
-Do not use the recirc ulation mode for ex
tended periods of time. The windows
could fog up since no fresh air can enter
the vehicle. If the windows fog up, press
the air recircu lation button again imme
diately to switch off the air recirculation
function or select defrost .
- Individuals w ith reduced sensitivity to
pa in or temperature could deve lop burns
when using the seat heating function . To
reduce the risk of injury, these indiv idu-
als shou ld not use seat heating. ..,.
Page 85 of 314
On the road
Steering
Adjusting steering wheel position
The steering wheel position can be adjusted
for height and reach .
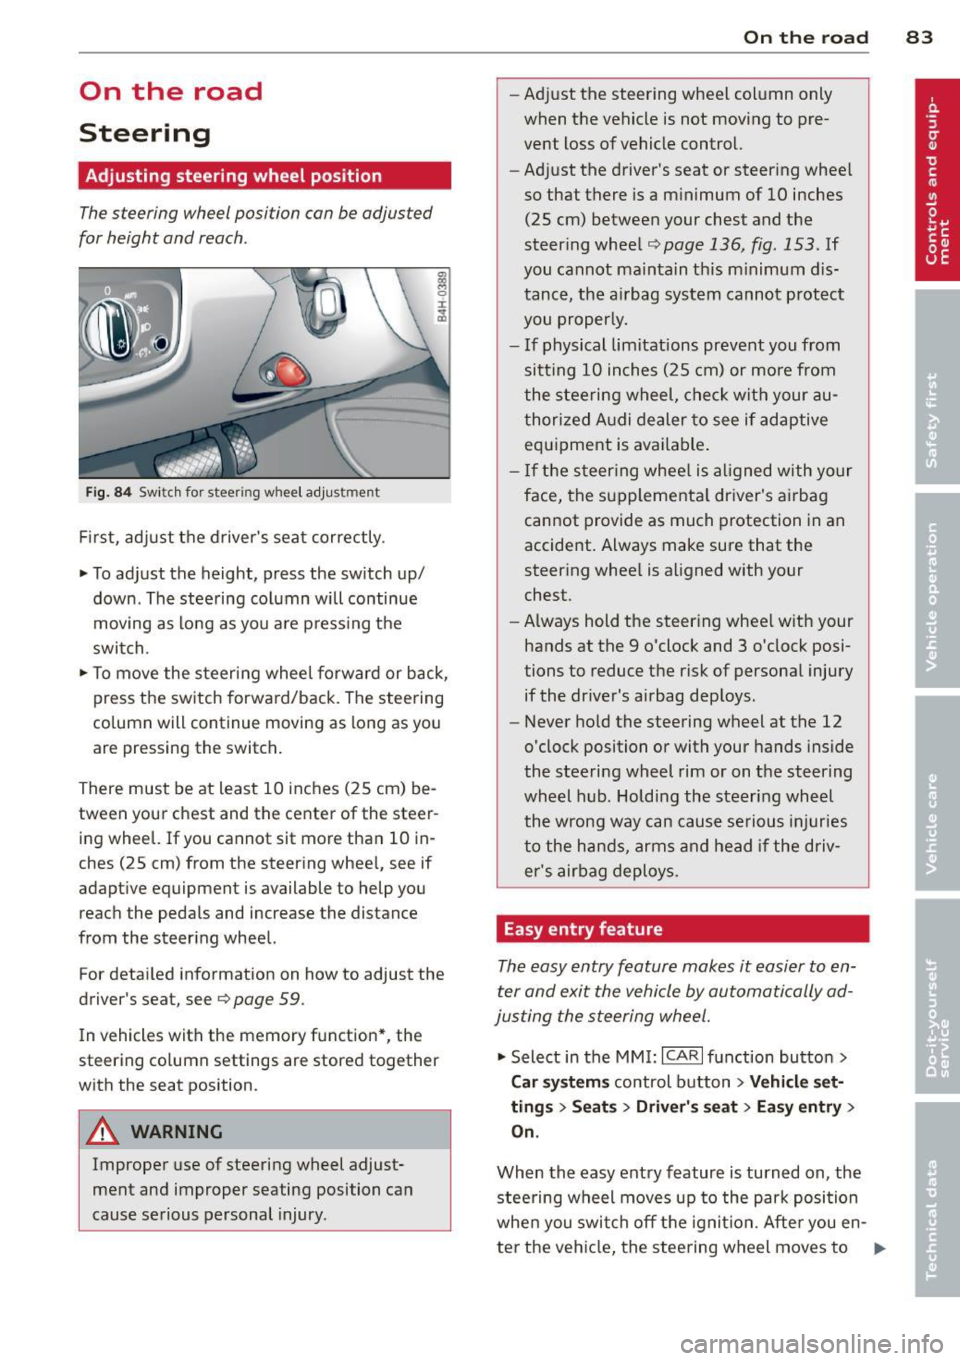
Fig. 84 Switch for steer ing w heel adjustment
First, adjust the driver's seat correctly.
• To adjust the height, press the switch up/
down . The steering column will continue
moving as long as you are pressing the
switch.
• To move the steering wheel forward or back,
press the switch forward/back . The steering
column will continue moving as long as you
are pressing the switch.
There must be at least 10 inches (25 cm) be tween your chest and the center of the steer
ing wheel. If you cannot sit more than 10 in
ches (25 cm) from the steering wheel, see if
adaptive equipment is available to help you
reach the pedals and increase the distance
from the steering wheel.
For detailed information on how to adjust the
driver's sea t, see
Q page 59 .
In vehicles with the memory function*, the
steering column settings are stored together
with the seat position .
A WARNING
Improper use of steering wheel adjust
ment and improper seating position can
cause serious personal injury.
-
On the road 83
-Adjust the steering wheel column only
when the vehicle is not moving to pre
vent loss of vehicle control.
- Adjust the driver 's seat or steering wheel
so that there is a minimum of 10 inches (25 cm) between your chest and the
steering wheel
~ page 136, fig . 153 . If
you cannot maintain th is m inimum dis
tance, the airbag system cannot protect
you properly.
- If physical limitations prevent you from
sitt ing 10 inches (25 cm) or more from
the steering wheel, check with your au
thorized Audi dealer to see if adaptive
equipment is available .
- If the steering wheel is al igned with yo ur
face, the supplementa l driver's airbag
cannot provide as much protection in an
accident. Always make sure that the
steering whee l is aligned with your
chest.
- Always hold the steering whee l with your
hands at the 9 o'clock and 3 o'clock posi
tions to reduce the risk of personal injury
if the driver's airbag deploys.
- Never hold the steering wheel at the 12
o'clock position or with your hands inside
the steering wheel rim or on the steering
wheel hub. Holding the steering wheel
the wrong way can cause serious injuries
to the hands, arms and head if the driv
er's airbag deploys.
Easy entry feature
The easy entry feature makes it easier to en
ter and exit the vehicle by automatically ad
justing the steering wheel.
• Select in the MMI: ICARI function button >
Car systems control button > Vehicle set
tings > Seats > Driver' s seat > Easy entry>
On.
When the easy entry feature is turned on , the
stee ring wheel moves up to the park position
when you swit ch off the ignition. After you en -
ter the vehicle, the steering wheel moves to ..,..
Page 86 of 314

84 On the road
the stored position as soon as you switch on
the ignition.
Starting and stopping
the engine
Starting the engine
This button switches on the ignition and
starts the engine.
Fig. 85 Cente r console: START ENGINE S TOP b utton
Sw itching the i gni tion on /off
~ To switch the ignition on/off, press the
I START
ENGINE STOPI button. Do not press
the brake pedal while do ing this . D iesel
vehicles are preheated wh ile the ignition is
switched on.
Starting the engine
~ Press the brake pedal Q &,.
~ Press the I START ENGINE STOPI button
Q fig. 85 . The engine will start.
~ It is possible that there w ill be a slight delay
when start ing the engine for diesel vehicles
i n colder temperatures . T herefore, yo u m ust
hold the brake pedal down until the engine
sta rts . The indicator lamp
& il luminates
when the eng ine is preheated.
I f the engine does not sta rt immedia tely, the
starting process is automatica lly stopped af
ter a short time. Repeat starting proced ure.
Start -Stop -System *:
Note the information on Q page 88, Start
Stop-System.
A WARNING ,-
- Never allow the engine to run in conf ined
spaces -danger of asphyx iat ion.
- Never turn off the engine until the vehi
cle has come to a complete stop.
- The brake booster and power steering
only work when the engine is running. If
the engine is off, you have to use more
force when steering or brak ing. Because
you cannot steer and brake as you usual
ly would, th is cou ld lead to crashes and
ser io us inju ries.
(D Note
- Avo id h igh engine rpm, full throttle and
heavy eng ine loads until the eng ine has
reached operating temperature -other
w ise you risk engine d amage.
- T he engine cannot be started by pushing
o r towing the vehicle.
(1) Tips
- After a co ld e ngine is started, there may
be a brief pe riod of inc reased noise be
cause oil pressure must first build up i n
t he hydraulic valve adjusters. This is nor
ma l and not a cause for conce rn.
- If you leave the veh icle with the ignition
switched on, the ignit ion w ill switch off
afte r a certain period of time. Please
note that electrical eq uipment such as
exterior lights will sw itch off as well
when that happens.
Stopping the engine
~ Bring your vehicle to a complete stop.
~ Move the selector lever to the P or N posi
tion.
~ Pr essthelS TART ENGINE STO Plbutton
Q page 84, fig. 85.
When you stop and the Start-Stop-System*
turns off the engine, the ignition remains on .
Press the I START
ENGINE STOPI button to
swi tch the ignition off d uring a stop phase.
IJII-
Page 87 of 314
Stee ring lock
The stee ring locks when you t urn the engine
off us ing the
I S TAR T ENGINE STOP! button
and open the driver 's door . The locked steer
i ng he lps pr event ve hicle theft.
E mergenc y off
If necessary , the eng ine can be sw itched off
with the selector leve r in the R, Dor S pos i
tions . The engine stops i f you press the
I S TART ENGINE STOP! button at speeds below
6 mph (10 km/h) .
.&_ WARNING
- Never turn off the eng ine before the ve
hicle has come to a complete stop. The
full function of the brake booster and the power steering is not quaranteed. You
must use mo re force to turn or brake if
necessary. Because you cannot steer and
brake as you usua lly would, this could
lead to crashes and serious injur ies.
- For safety reasons, you shou ld always
par k your vehicle with the se lector lever
in P. Otherwise, the veh icle co uld inad
vertent ly roll away .
- After the engine has been switched off,
the radiator fan can continue to r un for
up to 10 mi nutes -even with the ignition
switched off.
It can a lso switch on aga in
after some time if the coolant tempera
ture rises as the result of a heat buildup
or if the engine is hot and the engine
compartment is addit ionally heated by
the sun's rays .
0 Note
Do not stop the engine immed iate ly after
hard or extended dr iving . Keep the engine
r u nning for approximately two minutes to
prevent excessive heat build-up.
Driver message in the instrument
cluster display
Turn off ignition before leaving car
On th e ro ad 85
This message appears and a warning tone
sounds if you open the driver's door when the
ignition is sw itched on.
Pre ss brak e pedal t o sta rt engine
This message appears if yo u press the
I STAR T ENG IN E S TOP I button to start the en
gine and do not dep ress the br ake pedal. The
engine can only be s tarte d if the brake pedal
is depressed.
I!! I s key in th e vehi cle?
If the indicator light turns on and the mes
sage appears, the remote control key was re
moved from the vehicle whi le the engine was
run ning . If the ignition key is not in the veh i
cl e you will not be able to swi tch on the igni
tion or res tart the engine after i t has been
switched off. You will a lso not be able to lock
the ve hicle from the outsid e.
Shift to P, oth erwi se v ehicle can roll aw ay.
Do ors d o n ot lo ck if lever is not in P .
This dr iver message appears for safety rea
sons if the transmission has not bee n shifted
to the P position when you switc h the ign ition
off . Move the selec to r l ever to the P posi tion .
Otherwise the vehicle is not protected from
ro lling and cannot be locked.
fl Key is not r ecognized. Hold back of key
again st marked area . See ow ner' s m anu al.
If the indicato r light turns on and this mes
sage appea rs, there is a malfunct ion
~ page 86.
Turn off ign ition before lea ving ca r. Battery
is d is c harging
This message appears if the driver's door is
opened wh ile the ignition is switched on . Al
ways switch off the ign it ion if you a re leav ing
the ve hicle . See also
Q page 90 .
Shift to P and turn off ignition before lea v
ing car, otherwi se v ehicle can roll away
T his messag e app ears if the driver's door is
opened wh ile the ignition is switched on and
the selector lever is not in the P posit ion. Shift
the selecto r lever into the P pos ition and .,..
Page 89 of 314

Emergency brake function
An emergency brake ensures that the vehicle
can be slowed down even if the
normal brakes
fail
c::> page 88, Emergency broking.
Ind icator light s
-If the par king b rake is closed w ith the igni
t ion
s wit ched on the indicator lights come
on - (USA models)/ . (Canada models)
in the instrument cluster and in the switch.
- If the par king brake is closed w ith the igni
tion
s witc hed off the indicator lights come
on - (USA models)/ . (Canada models)
in the instr ument cluster and in the switch
for about 20 seconds.
A WARNING
Do not press the accelerator peda l inadver
tently if the vehicle is stat ionary but the
eng ine is running and a gear is selected.
Otherw ise the vehicle will start to move
immediately and cou ld result in a crash.
(D Note
If the symbol . in the display or the ind i
cato r light
1111 (USA models) . (Cana
da models) in the instrument cluster flash
es, the re is a malfunction in the bra ke sys
tem. Please refer to t he detai led descr ip
t ion of the indicator lights¢
page 14.
- If the indicato r light - (USA mod-
els) . (Canada mode ls) or
IIJ t ur ns
on, there may be a malfunction in the
parking brake
r=> poge 15.
@ Tips
-You can apply the pa rking brake at any
time -even w ith the ignition swi tched
off. The ignition must be on and the
brake pedal must be pressed in order to
release the parking brake.
- Occasiona l noises when the parking
brake is applied and re leased are norma l
and are not a ca use for concern.
- When the vehicle is parked, the parking
brake goes through a se lf-test cycle at
On th e ro ad 87
regular inte rva ls. Any associated noises
are normal.
· Parking
.. Press the brake pedal to stop the veh icle.
.. Pull the switch(®) to set the parking brake.
.. Select the P selector lever posit io n
c::> poge 116.
.. Tu rn the engine off c::> .&_ .
.,. When on inclines o r declines, tur n the steer
ing wheel so that your veh icle w ill ro ll into
t he c urb if it beg ins to move.
A WARNING
-==
- When you leave your vehicle -even if on-
ly briefly -always take the ignition key
with you. This applies particularly when
children remain in the vehicle. Otherwise
the children cou ld start the engine, re
lease the parking brake or operate elec
trical equipment (e.g. powe r wi ndows).
T here is the r is k of an accident.
- When the veh icle is locked, no one -par
ticularly not children should rema in in
the vehicle. Locked doors ma ke i t mo re
diff icult for emergency wo rke rs to ge t in
to the veh icle -putt ing lives at risk.
Starting from rest
The starting assist function ensures that the
parking broke is released automatically upon starting.
Stopping and applying park ing brake
.. Pull the sw itch(®) to apply the parking
brake .
Starting and automatic ally releasing the
parking brake
.. When you sta rt to dr ive as usual, the park
ing brake is automatically released and your
veh icle begi ns to move.
When stopping at a traffic signal or stopping in city traff ic, the parking brake can be ap-
plied . The vehicle does not have to be he ld
IJ>-