belt AUDI A8 2018 Owners Manual
[x] Cancel search | Manufacturer: AUDI, Model Year: 2018, Model line: A8, Model: AUDI A8 2018Pages: 356, PDF Size: 54.71 MB
Page 6 of 356
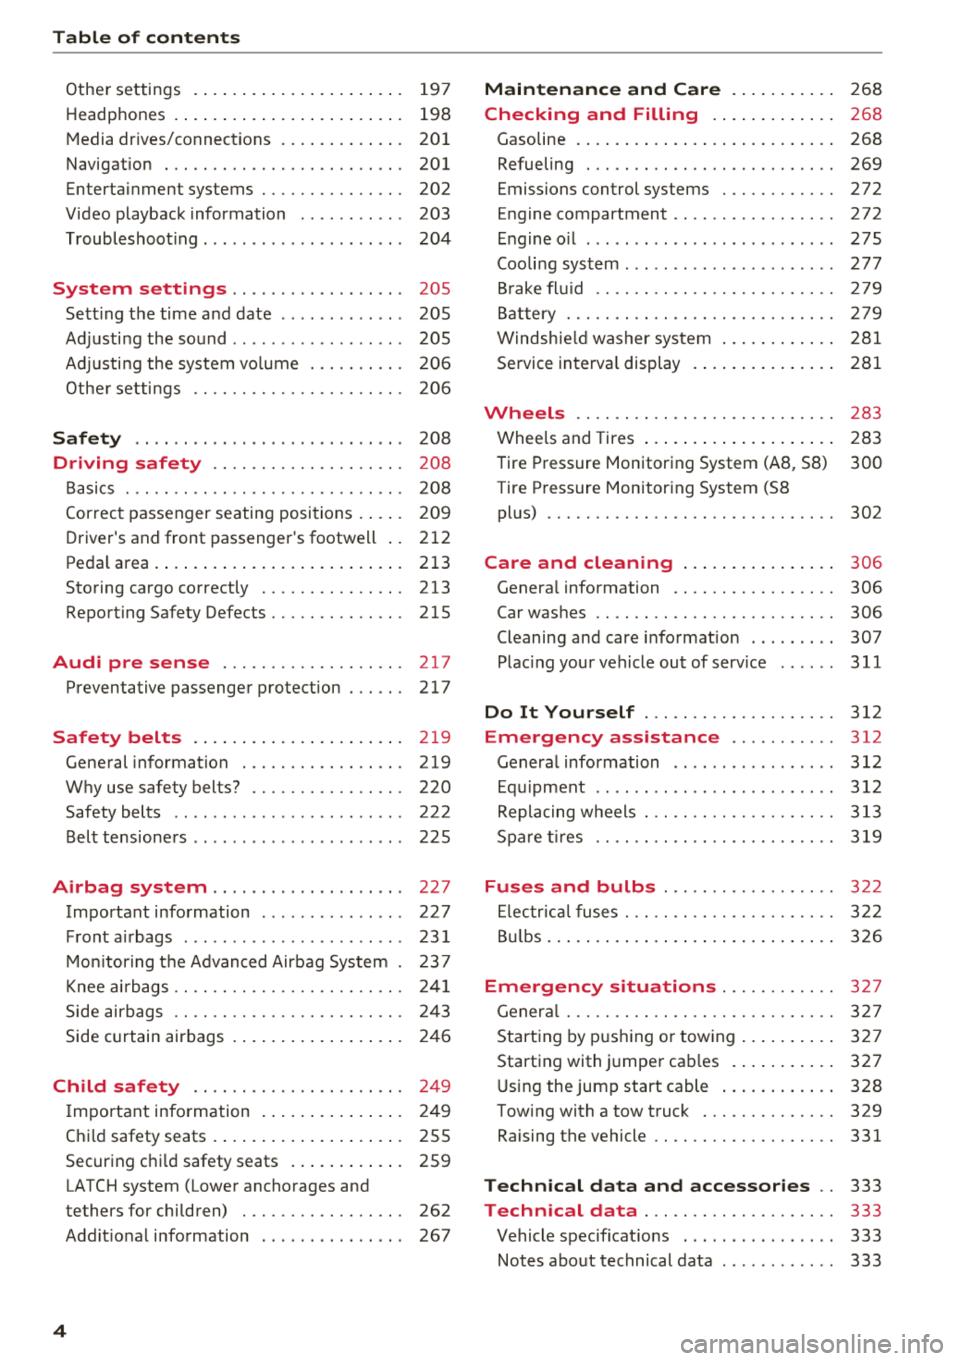
Table of contents
Other settings . . . . . . . . . . . . . . . . . . . . . . 197
H eadphon es . . . . . . . . . . . . . . . . . . . . . . . . 198
M edia drives/connect ions . . . . . . . . . . . . . 201
Navigation . . . . . . . . . . . . . . . . . . . . . . . . . 201
Enterta inment systems . . . . . . . . . . . . . . . 202
Video playback information . . . . . . . . . . . 203
T roubleshoot ing . . . . . . . . . . . . . . . . . . . . . 204
System settings . . . . . . . . . . . . . . . . . . 205
Sett ing the time and date . . . . . . . . . . . . . 205
Ad justi ng the sound . . . . . . . . . . . . . . . . . . 205
Ad justi ng the system vo lume ... .... .. .
Othe r settings .. ............. .. .. .. . 206
206
Safety .. .. .. .. ... .. ..... ... .. .. .. . 208
Driving safety . . . . . . . . . . . . . . . . . . . . 208
B asics . . . . . . . . . . . . . . . . . . . . . . . . . . . . . 20 8
Cor rect passenger seating positions . . . . . 209
D river's and front passenge r's footwell . . 212
Peda l area. ........ .. ..... ... .. .. ... 213
Storing cargo correctly . . . . . . . . . . . . . . . 213
Report ing Safety Defects....... .... .. . 215
Audi pre sense . . . . . . . . . . . . . . . . . . . 217
Preventative passenger protection . . . . . . 217
Safety belts . . . . . . . . . . . . . . . . . . . . . . 2 19
Gene ral information . . . . . . . . . . . . . . . . . 219
W hy use safety belts? . . . . . . . . . . . . . . . . 220
Safety belts . . . . . . . . . . . . . . . . . . . . . . . . 222
Belt tensioners . . . . . . . . . . . . . . . . . . . . . . 225
Airbag system . . . . . . . . . . . . . . . . . . . . 227
Important information . . . . . . . . . . . . . . . 227
F ront a irbags . . . . . . . . . . . . . . . . . . . . . . . 23 1
M on itor ing t he Advanced Airbag System . 237
Knee ai rbags . . . . . . . . . . . . . . . . . . . . . . . . 24 1
Side air bags . . . . . . . . . . . . . . . . . . . . . . . . 24 3
Side c urtain airbags . . . . . . . . . . . . . . . . . . 246
Child safety . . . . . . . . . . . . . . . . . . . . . . 24 9
I mportant info rmation . . . . . . . . . . . . . . . 24 9
Chi ld safety seats . . . . . . . . . . . . . . . . . . . . 255
Securing chi ld safety seats . . . . . . . . . . . . 259
LATCH system (Lower anchorages and
tethers for children) . . . . . . . . . . . . . . . . . 262
Add it io nal information . . . . . . . . . . . . . . . 267
4
Maintenance and Care . . . . . . . . . . . 2 68
Checking and Filling . . . . . . . . . . . . . 268
Gasoline . . . . . . . . . . . . . . . . . . . . . . . . . . . 268
Refueling . . . . . . . . . . . . . . . . . . . . . . . . . . 269
Emissions control systems . . . . . . . . . . . . 272
Engine compartment . . . . . . . . . . . . . . . . . 272
E ngine o il . . . . . . . . . . . . . . . . . . . . . . . . . . 275
Cooli ng system . . . . . . . . . . . . . . . . . . . . . . 277
B rake fl uid . . . . . . . . . . . . . . . . . . . . . . . . . 279
Bat tery . . . . . . . . . . . . . . . . . . . . . . . . . . . . 279
Windsh ie ld washer sys tem . . . . . . . . . . . . 281
Service in terva l display 281
Wheels .... .. .. .. .. ............. .. 28 3
Whee ls and Tires . . . . . . . . . . . . . . . . . . . . 283
T ire Pressure Monitoring System (AB , 58) 300
Tire P ressure Monitor ing System (58
pl us) . . . . . . . . . . . . . . . . . . . . . . . . . . . . . . 302
Care and cleaning . . . . . . . . . . . . . . . . 306
Genera l information . . . . . . . . . . . . . . . . . 306
Car washes . . . . . . . . . . . . . . . . . . . . . . . . . 306
Cleaning and care info rmation . . . . . . . . . 307
Plac ing your vehicle out of serv ice . . . . . . 311
Do It Yourself . . . . . . . . . . . . . . . . . . . . 312
Emergency assistance . . . . . . . . . . . 312
Genera l information . . . . . . . . . . . . . . . . . 312
E qu ipment . . . . . . . . . . . . . . . . . . . . . . . . . 312
Repla cing wheels . . . . . . . . . . . . . . . . . . . . 313
Spa re tir es . . . . . . . . . . . . . . . . . . . . . . . . . 319
Fuses and bulbs . . . . . . . . . . . . . . . . . . 32 2
El ec trica l fuses . . . . . . . . . . . . . . . . . . . . . . 322
B ul bs . . . . . . . . . . . . . . . . . . . . . . . . . . . . . . 3 26
Emergency situations . . . . . . . . . . . . 327
Gener al . . . . . . . . . . . . . . . . . . . . . . . . . . . . 32 7
Start ing by p ushi ng o r tow ing . . . . . . . . . . 3 27
Starting with jumper cab les . . . . . . . . . . . 327
U sing the jump start cable . . . . . . . . . . . . 328
Towing with a tow truck . . . . . . . . . . . . . . 329
Raising the vehicle . . . . . . . . . . . . . . . . . . . 331
Technical data and a ccessories . . 333
Technical data . . . . . . . . . . . . . . . . . . . . 333
Vehicle specificat ions . . . . . . . . . . . . . . . . 333
Notes abo ut technical data . . . . . . . . . . . . 333
Page 19 of 356
Display content
In t he Info tainment system, yo u can specify
which informa tion should be displayed: This
could be Navigation information* or Nig ht vision
assist *, for examp le.
The display of certa in inf ormat ion and some of
the red indicator lights cannot be h idden in the
I nfotainment system .
Display brightness
You can adjust the display br ight ness in the Info
tainment system. The display b rig htn ess decreas
es au toma tically as the amo un t of ligh t dec reas
es. The backgro und brightness is adjusted with
the instrument
i ll umination ¢ page 47.
@ Note
To preven t scratches on t he g lass cove ring the
head -up d isp lay, do not place any obje cts in
the projection opening .
(D Tips
-Su ng lasses w it h polar izat ion fi lte rs a nd un
favorab le lighting conditions can have a
negative effect on the display.
- An optim um display depends on the seat
position and the height adjustment of the
head -up display .
- A specia l windshield is needed for the head
u p disp lay function.
- Fo r informa tion on cleaning,
see¢ table on
page 308.
Indicator lights
Description
The indicato r lights in the inst rument cluste r
b lin k or t urn on. They ind icate funct ions or mal
f u nctions.
W ith some ind icator lights, messages may ap
pear and wa rning signals may sound . The ind ica
tor lights and messages in the center of the dis p lays may be replaced by other d isplays. To show
u.
~ them again, se lect the tab for ind icator lights
N ~ and messages using the multif unction steering
...... g wheel ¢ page 12. If there are several malfunc -
:c '
tions, you can disp lay them one at a time using
the thumbwheel.
Some indicato r lights in the display ca n disp lay in
severa l co lors.
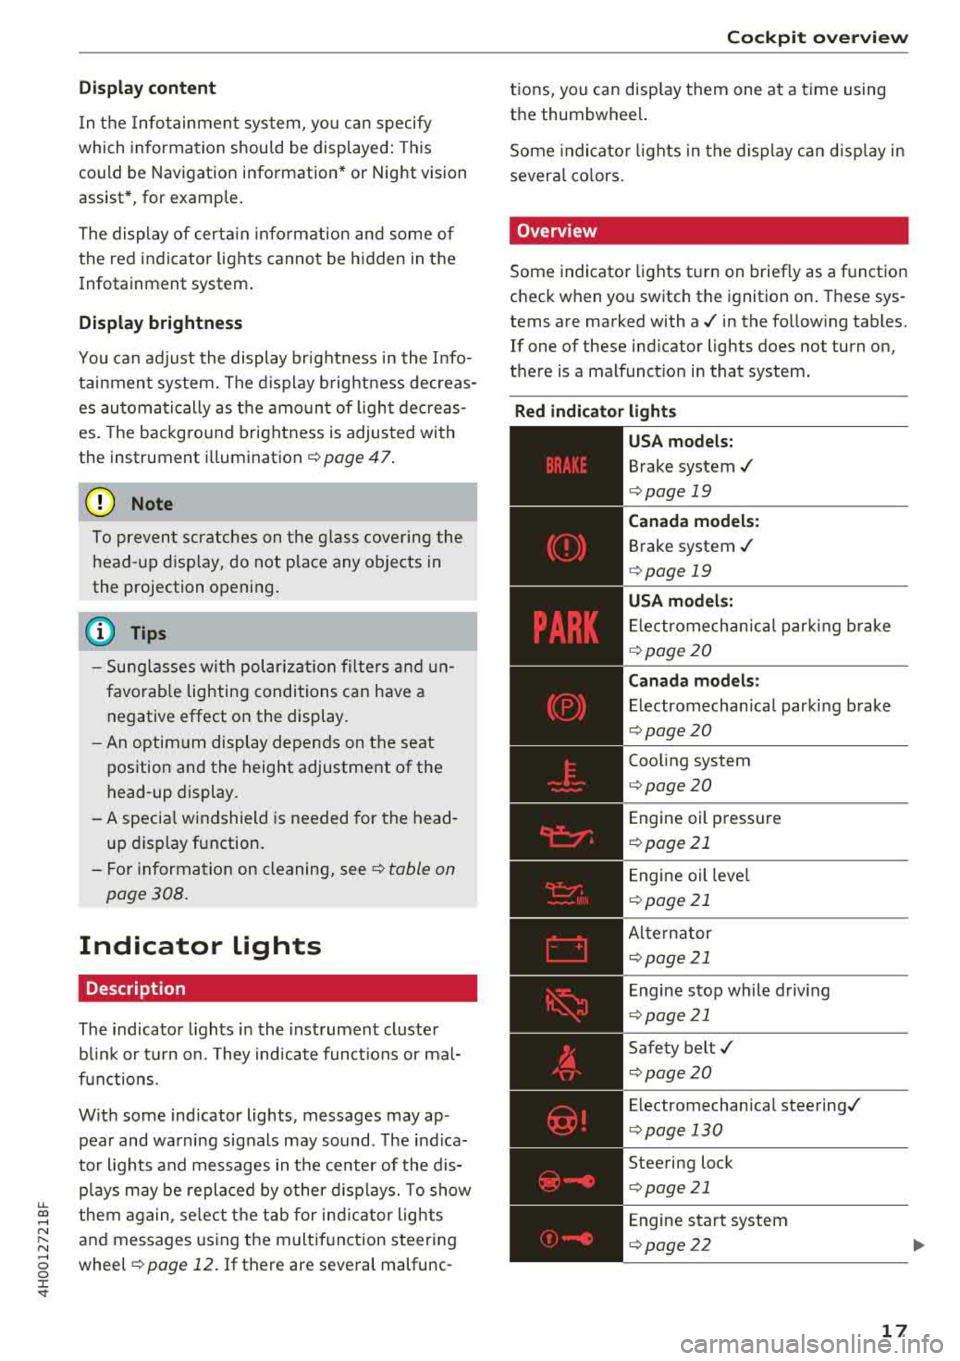
Overview
Some indicator lights turn on brief ly as a function
check when you switch the ignition on . These sys
tems are marked with a./ in the fo llow ing tab les.
If one of these ind icator lights does not turn on,
there is a malfunct io n in that system.
Red indicator light s
-------------
US A models:
Brake system./
¢ page 19
Canada model s:
Brake system ./
¢ page 19
USA models:
Electromechan ica l park ing b rake
¢ pag e 20
Canada models:
Electromechan ical parki ng brake
¢ page 20
Coo ling system
¢ page 20
Engine oil pressure
¢ page 21
Engine oil leve l
¢ page 21
Alte rnator
¢ page 21
E ngine stop while driv ing
¢ page 21
Safety belt ./
¢ page 20
Electromechanical steering./
¢ page 130
Steering lock
¢ page 21
Engine start system
¢ page 2 2
17
Page 22 of 356

Cockpit overv ie w
- If the brake system indicator light does not
t u rn off or it t urns on while driv ing, the
brake fluid level in the reservoir is too low,
and this increases the risk of an acc ident.
Stop the vehicle a nd do not cont inue dr iv
ing . See an author ized Audi dealer or au
t h orized Aud i Serv ice Faci lity fo r ass ista nce.
- If the brake system ind icator light turns on
toget he r with the ABS and ESC ind icator
l ights, the ABS/ ESC regulat ing func tion may
be m alfu nctioning. Fu nctions t hat stabilize
the vehi cle are no longer ava ilable . This
cou ld cause the ve hicle to swerve, whic h in
creases the risk that t he ve hicle wi ll slide.
Do not continue driving. See an author ized
Audi dealer or author ized Audi Service Fac ili
ty for assistance .
PARK/(®) Electromechanical parking brake
If the -(USA models) / . (Canada models)
i n dicator light tu rns on , the park ing brake was
set .
-(USA models ) /. (Canada models ) Cau·
tion : Vehicle parked too stee p
lfthe indicator light blinks and the message ap
pears, the re is not enough brak ing power to se
cure the vehicle . The brakes have overhea ted. The
ve hicle could roll away even on a small incline .
-(USA models) / . (Canada models) P ress
b rake pedal to release parking b rake
To re lease the parking brake, press the brake
pedal and press
the ~ button at the same time
or start driv ing with hill start ass ist
c> page 82 .
Ill Parking brake!
There is a malfunction in the park ing brake . Dr ive
to a n author ized Audi dealer or author ized A udi
Serv ice Faci lity immediately to have t he malfunc
tion corrected.
(D Tips
For add it io na l info rmation on the pa rk ing
brake, seer:!)
page 81.
20
_ L Cooling system
• Turn off engine and ch eck coolant l evel
The coolant level is too low .
Do not continue dr iving and switch t he engine
off. Check the coolant level
c> page 2 77 .
- If the coo lant level is too low, add coolant
r:!) page 2 78. Only continue driving once the in
dicator light turns off.
• Coolant temperature too high! Ple ase let en
gine run with vehicle stationar y
Let the engine ru n at idle fo r a few mi nutes to
cool off, until t he ind icator lig ht tur ns off .
-If the ind icator light does not turn off, do not
cont inue driving the veh icle . See an author ized
Aud i dea le r or aut horized Audi Serv ice Facility
for assis tance.
.&_ WARNING
- N ever ope n the hood if you ca n see or he ar
steam or coo la nt escaping from t he engine
compa rtment. This increases the risk of
burns. Wait until you no longer see o r hear
steam or coolant escaping.
- The engine compartment in any vehicle can
be a dange rous a rea. Stop the engine and
allow it to cool before working i n the engine
compa rtment. Always follow the informa
tion fo und in
c> page 272.
@ Note
Do not continue driv ing if the . indicator
li ght turns on as this increases the risk of en
g ine damage.
~ Safety belt
The . indicator light stays on unt il the dr iver 's
and front passenge r's safety belts are faste ned .
Above a certa in speed, the re will a lso be a war n
i ng tone.
© Tips
Fo r additional info rmat ion on safety belts,
see c>page219.
Page 25 of 356
u. co .... N
" N .... 0 0 :c '
fully to the nearest a uthorized Audi dea ler or
authorized Audi Service Fac ility and have the
ma lf u nction corrected .
(D Tips
For additional information on ESC and ABS,
re fer to
c:> page 12 7.
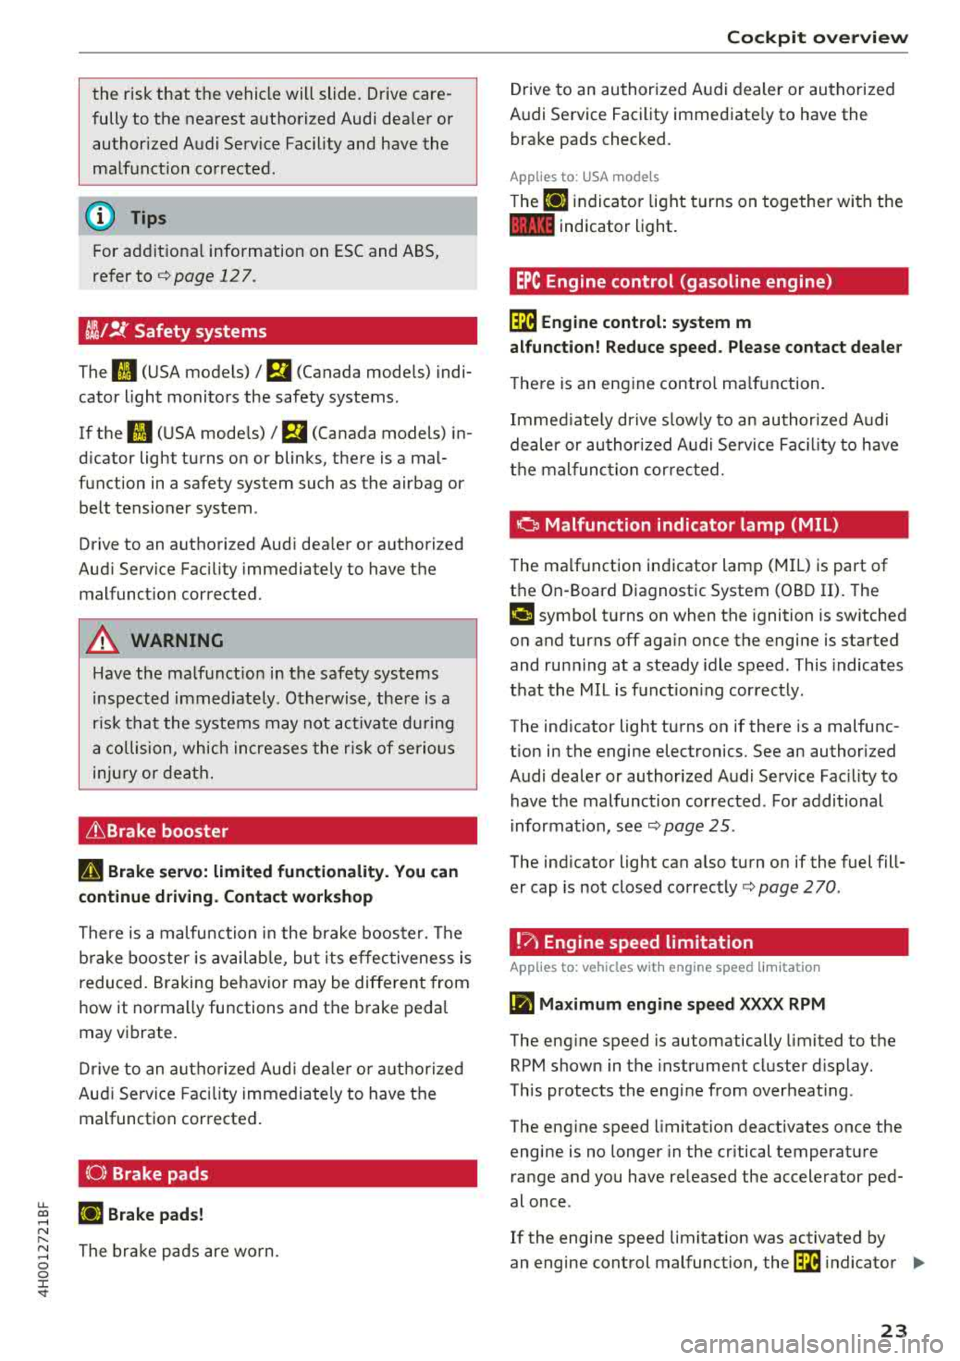
i i !i.' Safety systems
The II (USA models)/ m (Canada mode ls) indi
cator l ight monitors the safety systems .
I f the
II (U SA mode ls)/ m (Canada models) in
d icator light turns on or blinks, the re is a mal
function in a safety system such as the airbag or belt tensioner system .
Drive to an autho riz ed Aud i dea le r or a uthori zed
Aud i Service Facility immediately to have the
malfunct ion corrected.
A WARNING
Have the ma lf u nct ion in the safety systems
inspected immediately . O therwise, the re is a
r is k th at the systems may not activate during
a co llision, which increases the risk of serious
injury or deat h.
Lt Brake booster
II Brake ser vo: limited functionalit y. You can
continue driving . Contact workshop
-
There is a malfunc tion in the brake booster. The
b ra ke booster is availab le, bu t its effec tiveness is
r educed. Braking be havior may be different from
h ow it normally functions and the brake peda l
may vibrate.
Dri ve to an autho rize d Aud i de aler o r a uth o rized
Aud i Service Faci lity immediately to have t he
malfunction corrected.
{ 0 } Brake pads
EiJ Brake pads!
The brak e pads are wo rn.
Coc kpit o ver view
Drive to an authori zed A udi dealer or authori zed
Audi Service Facility immediate ly to have the
bra ke pads checked .
Applies to : USA mode ls
T he EiJ indicator light turns on togethe r wi th the
1111 indicator light.
EPC Engine control (gasoline engine)
~ Engine control: system m
alfunction! Reduce speed. Please contact dealer
T he re is an eng ine contro l ma lf u nction.
Immed iate ly dr ive s low ly to an author ized A udi
dealer or au thor ized A udi Se rvice Fa cility to have
t h e mal func tion corrected.
o Malfunction indicator lamp (MIL)
The ma lf u nction indicator lamp ( MIL) is pa rt of
t h e On -Board D iagnost ic System (080 II). The
¢..ij c;ymbo l turns on when the ignition is sw itched
o n and turns off aga in once the engine is started
and run ning at a steady idle speed . This indicates
t h at the MIL is f unction ing cor rectly .
The ind icator light tu rns on if there is a malfunc
t ion in the engine electronics . See an authorized
Audi dealer or author ized A udi Service Fac ility to
have the malfunct ion cor rected . Fo r additional
i nforma tion, see
c:> page 25 .
The ind icator light can a lso turn o n if the fuel fill
er cap is not closed correctly
c:> page 2 70 .
!?' Engine speed limitation
App lies to : vehicles wit h engine speed limitatio n
(m Maximum engine speed XXXX RPM
The eng ine speed is automatically limited to the
RPM shown in the instrument cluster d isplay.
This protects the engi ne from over heat ing .
The eng ine speed limitation deactivates once the
engine is no longe r in the critical temperatu re
range and you have re leased the accelerator ped
al once .
If the engine speed limitation was activated by
an engine cont rol malfunction,
the ~ indicato r ..,
23
Page 56 of 356
Seats and stor age
Seats and storage
General information
A WARNING
Refer to ¢ page 208, Driving safety for im
portant information, tips, suggestions and
warnings that you should read and follow for
your own safety and the safety of your pas
sengers.
Front seats
Controls
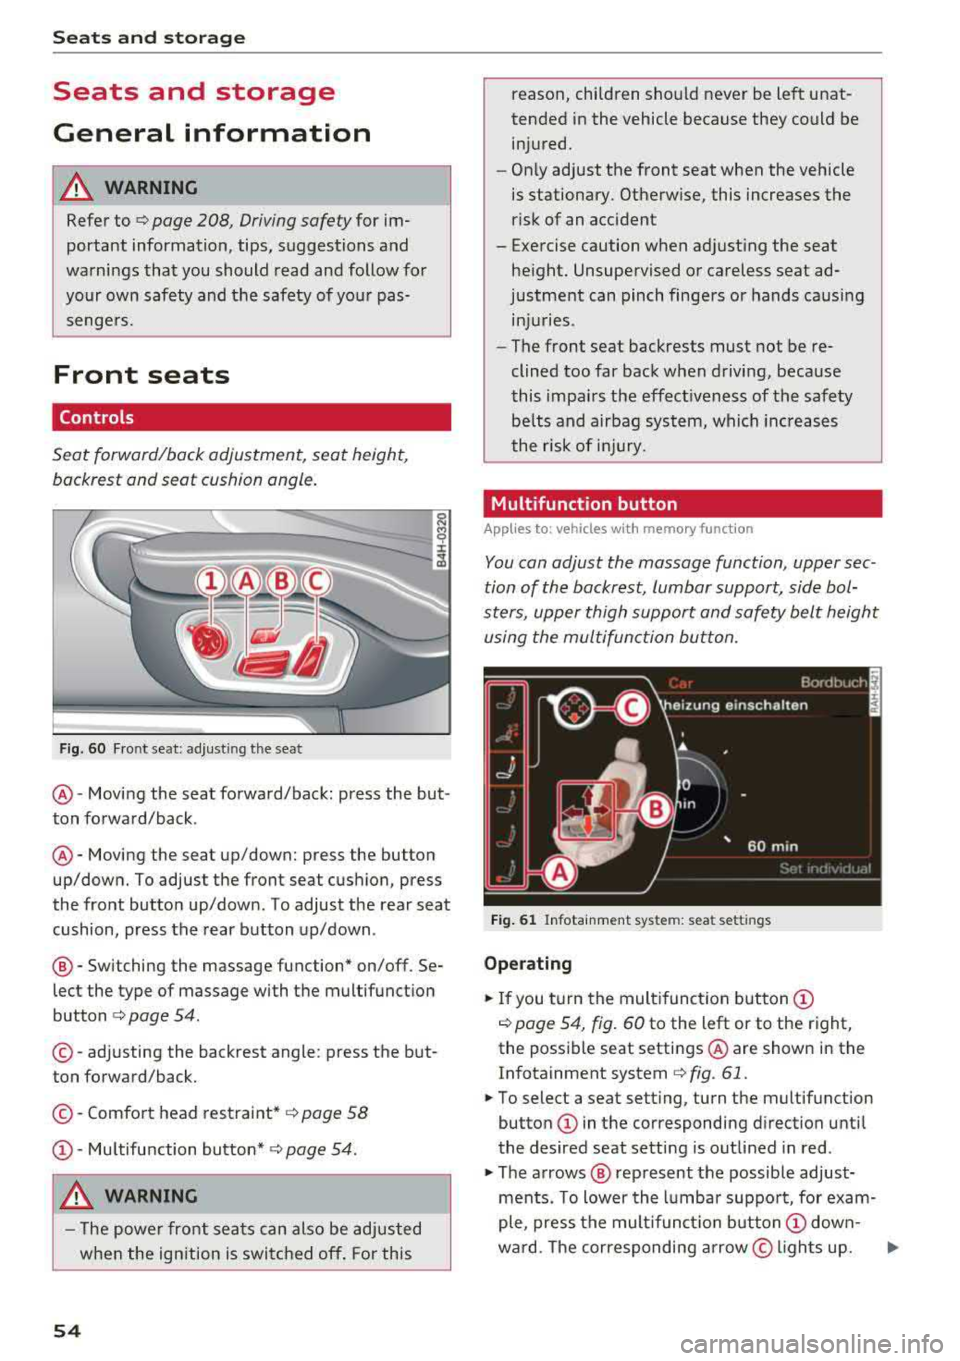
Seat forward/back adjustment, seat height, backrest and seat cushion angle.
F ig. 60 Fr ont seat: adjusting the seat
@ -Moving the seat forward/back: press the but
ton forward/back .
@-Moving the seat up/down: press the button
up/down. To adjust the front seat cush ion, press
the front button up/down . To adjust the rear seat
cushion, press the rear button up/down .
®-Switching the massage function* on/off. Se
lect the type of massage with the multifunction
button ¢ page 54.
©-adjusting the backrest angle: press the but
ton forward/back.
© -Comfort head restraint* ¢ page 58
CD-Mu ltifunction button* ¢ page 54.
A WARNING
-The power front seats can also be adjusted
when the ignition is switched off. For this
54
reason, children should never be left unat
tended in the vehicle because they could be
injured.
- Only adjust the front seat when the vehicle
is stationary. Otherwise, this increases the
risk of an accident
- Exe rcise caution when adjusting the seat
height. Unsupervised or careless seat ad
justment can pinch fingers or hands causing
injuries .
- The front seat backrests must not be re
clined too far back when driving, because
this impairs the effect iveness of the safety
be lts and airbag system, which increases
the r isk of injury.
Multifunction button
App lies to: vehicl es wi th memo ry func tion
You can adjust the massage function, upper sec
tion of the backrest, lumbar support, side bol
sters, upper thigh support and safety belt height
using the multifunction button.
Fig. 61 Infotainment system: seat settings
Operating
.. If you turn the multifunction button CD
¢ page 54, fig. 60 to the left or to the right,
the possible seat settings @are shown in the
Infotainment system
¢ fig. 61.
.. To select a seat setting, turn the multifunction
button
CD in the corresponding direction until
the desired seat setting is outlined in red .
.. The arrows @ represent the possible adjust
ments. To lower the lumbar support, for exam
ple, press the mult ifunct ion button
CD down-
wa rd. The corresponding arrow © lights up.
..,.
Page 57 of 356
lL t:0 ....
'"" ......
'"" .... 0 0 :c '
Mas sag e function * -select the Wave, Pul se ,
Str etc h, Lumbar or Should er
massage type or
off . You can adjus t the intensity of each massage
from 1 through 5. You can switch the selected
massage on/off using the
button @¢ page 54,
fig. 60.
Safety belt h eight adju stment * -adjust the safe
ty belt up or down
¢ page 224.
Upper ba ckre st * -angle the upper area of the
backrest forward or back.
Lumbar support -you can adjust the lumbar sup
port up/down and to be stronger/weaker.
Si de sec tion seat * -you can increase/decrease
the latera l support in the seat us ing the side bol
sters at the seat surface and the backrest.
Uppe r th igh support " -you can increase/de
crease the upper thigh support.
(D Tips
-The massage function" switches off auto
matically after approx imately 10 minutes.
-In vehicles with the recl ining rear seat, only
the seat belt height and thigh support can be adjusted on the front passenger seat us
i ng the multifunction button.
-The air in the s ide bo lsters" is released as
soon as the driver's door opens. This makes
i s possible to enter and exit the vehicle
more comfortably. As soon as you start driv
i ng t he ve hicle, the s ide bolsters fill.
S eats and storag e
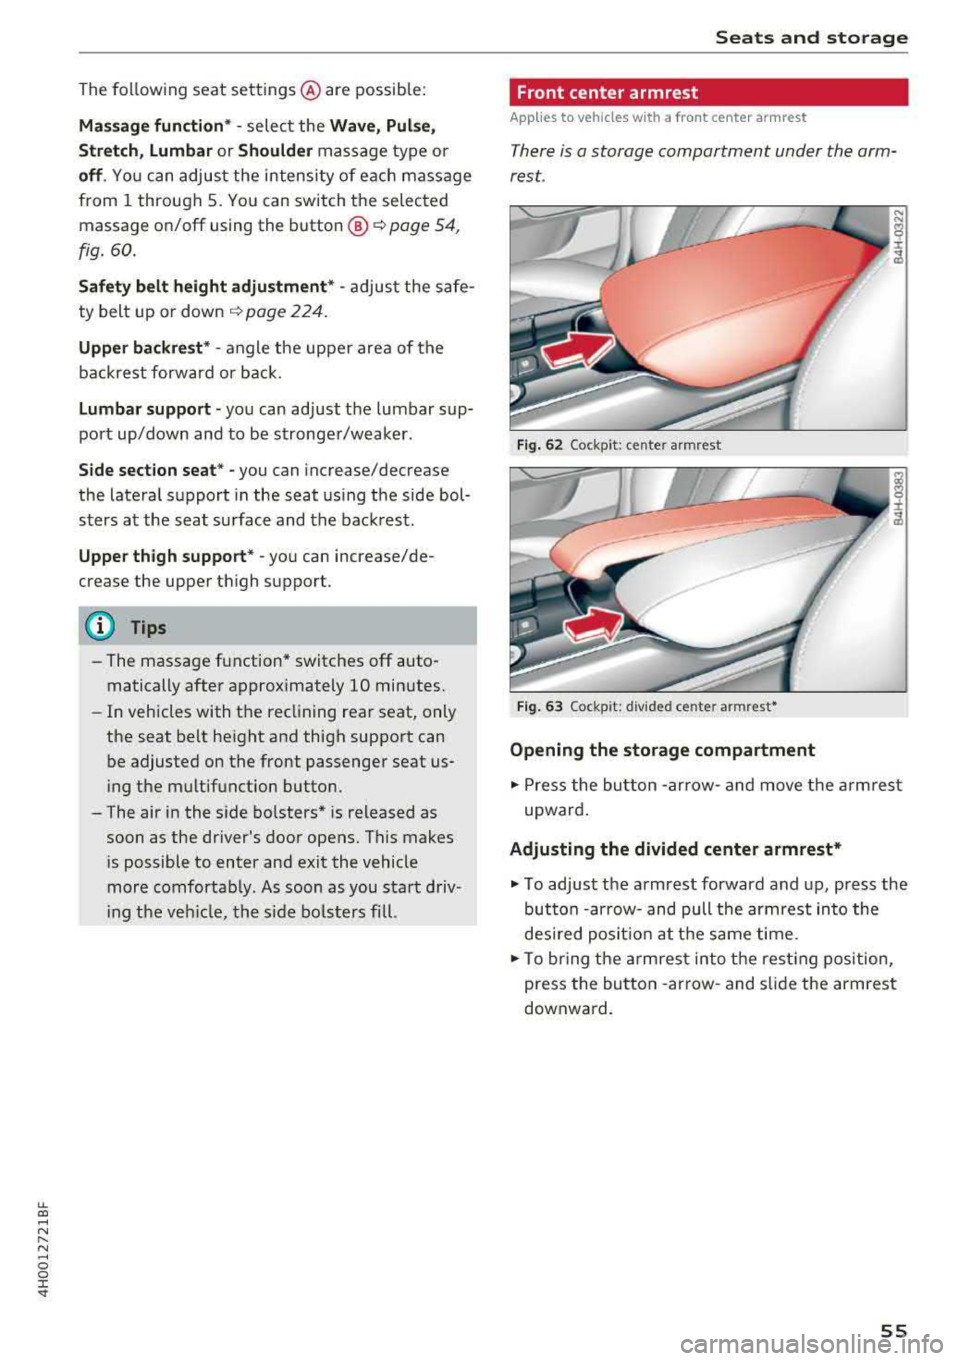
Front center armrest
Applies to veh icles w it h a front center armrest
There is a storage compartment under the arm
rest.
F ig. 62 Cockpit: center armrest
Fig. 63 Cockpit: divided center armrest •
Opening the storage compartment
.,. Press the button -arrow -and move the armrest
upward .
Adjusting the d ivided center armrest*
.,. To adjust the armrest forward and up, press the
button -ar row- and pull the armrest into the
desi red pos it ion at the same time .
.,. To br ing the arm rest into the rest ing position,
press the button -arrow- and s lide the armrest
downward.
55
Page 61 of 356
u. co .... N
" N .... 0 0 :c '
sides with both hands and slide it upward unti l
you fee l it click into place.
~ To move the head restraint down, press the
button (small
arrow)¢ fig. 68 and slide the
head restraint downward.
A WARNING
Always read and follow the applicab le wa rn
ings
¢page 211.
Memory function
Description
Applies to: vehicles with memory function
-
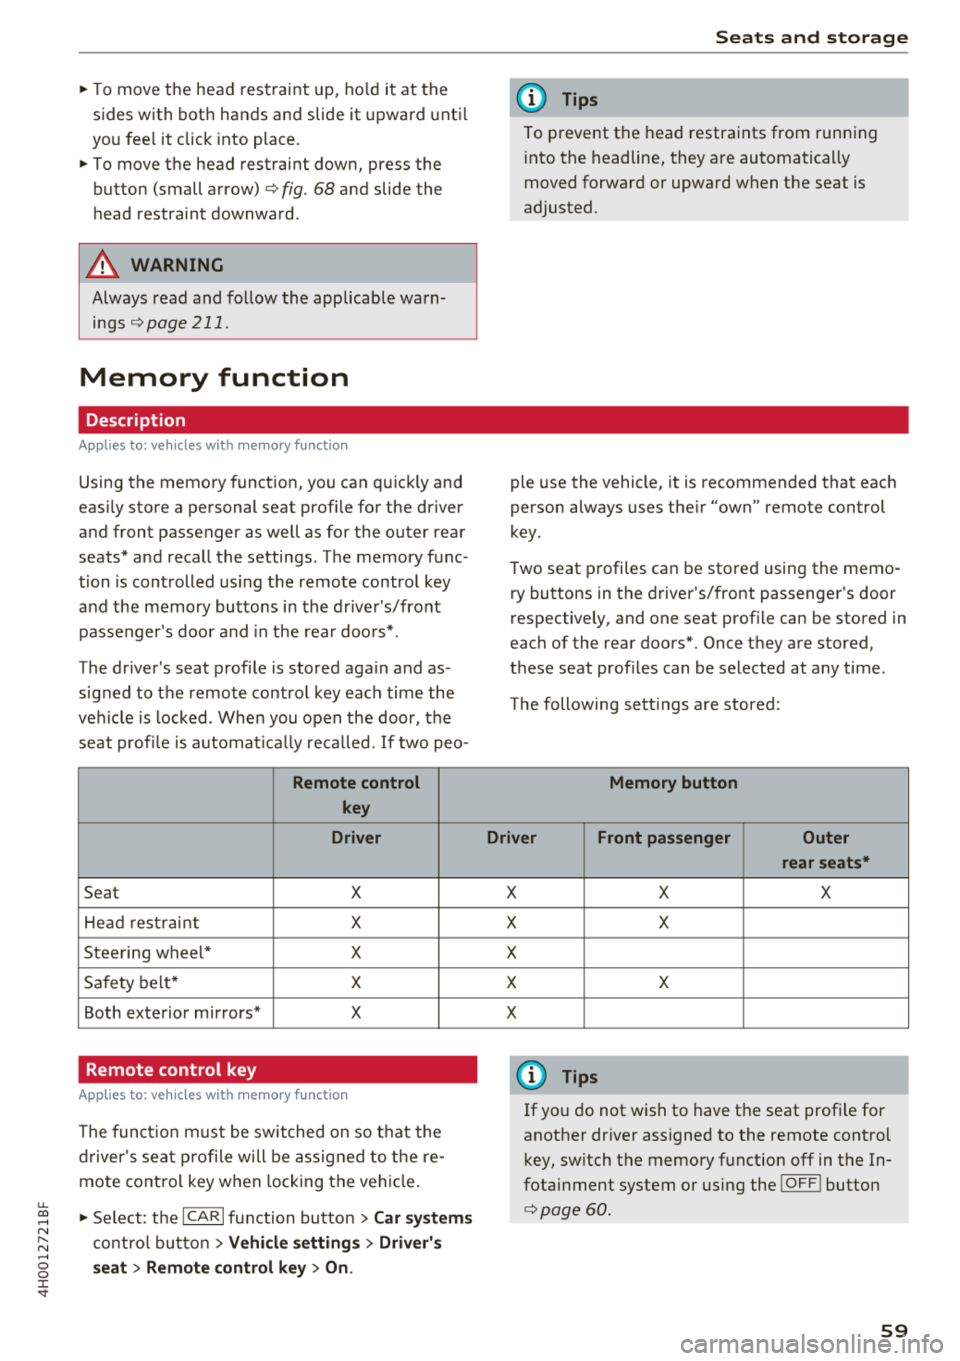
Using the memory function, you can quickly and
eas ily store a personal seat profile for the driver
and front passenger as well as for the outer rear
seats* and recall the settings. The memory func
tion is controlled us ing the remote control key
and the memory buttons in the drive r's/front
passenger's door and in the rea r doo rs*.
The driver's seat profile is stored again and as
signed to the remote control key each time the
ve hicle is locked. When you open the door, the
seat profi le is automat ica lly reca lled. If two pea-
Remote control
key
Driver
Seat X
Hea d rest raint X
Steering wheel* X
Sa fety belt* X
Both exterior mirrors* X
Remote control key
Applies to: vehicles with memory function
The functio n must be switched on so that the
d river's seat p rofile will be assig ned to t he re
mote cont rol key w hen locking the vehicle .
~ Select: the ICARI function button > Car systems
contro l bu tton > Vehicl e setting s > Driver' s
s eat > Remo te control ke y > On.
Seat s and sto rag e
(D Tips
To prevent the head restraints from running
i nto the headline, they are automatically
moved forward or upward when the seat is
adjusted.
ple use the vehicle, it is recommended that each
person always uses the ir "own" remote control
key.
T wo seat profiles can be stored using the memo
ry buttons in the driver's/front passenger's door
respectively, and one seat profile can be stored in
each of the rear doors*. Once they are stored,
these seat profiles can be selected at any time.
The following sett ings are stored:
Memory button
Driver Front passenger Outer rear seats*
X X X
X X
X X X
X
(D Tips
If yo u do not wish to have t he seat profi le for
another dr iver assigned to the remote cont rol
key, sw itch the memory function
off in the In
fotai nment system or using the
!O FF ! button
¢page 60.
59
Page 80 of 356
Driving
Shift to P, otherwise vehicle can roll away.
Doors do not lock if lever is not in
P.
This driver message appears fo r safety reasons if
the transmission has not been shifted to the P
position when you switch the ignition off. Move
the selector lever to the P position . Otherwise the
veh icle is not protected from ro lling and it cannot
be locked.
(I Key is not recognized. Hold back of key
against marked area. See owner's manual
If the i ndicator light turns on and this message
appears, there is a
malfunction ~ page 78.
Turn off ignition before leaving car
This message appears if the driver's door is
ope ned while the ignition is switched on . Always
sw itch off the ignition if you are leavi ng the vehi
cle .
Shift to P and turn off ignition before leav ing
car, otherwise vehicle can roll away
This message appears if the driver's door is
opened while the ignition is switched on and the
transmission has not been shifted to the P posi
tion . Shift the transm iss ion into the P posit ion
and turn off the ign ition if you are leaving the ve
h icle . Otherwise the vehicle could roll.
Starting the engine when there is a
malfunction
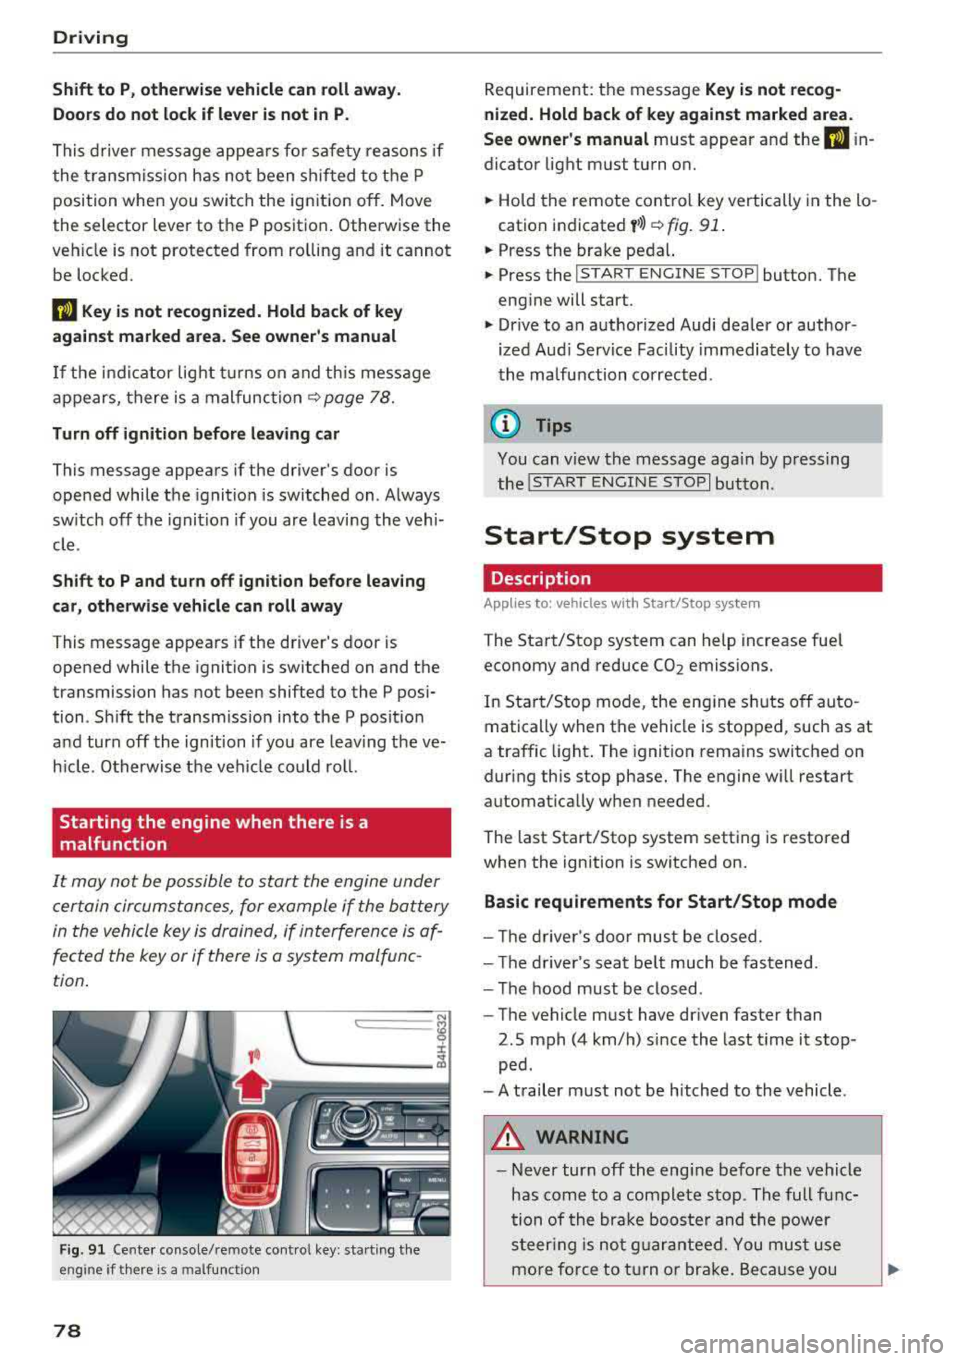
It may not be possible to start the engine under
certain circumstances, for example if the battery
in the vehicle key is drained, if interference is af
fected the key or if there is a system malfunc
tion .
c:====== ~
~ _____ ___ ci5
Fig . 91 Cente r console/remote cont ro l key : sta rt ing the
eng ine
if t here is a malfunc tion
78
Requirement: the message Key is not recog
nized. Hold back of key against marked area .
See owner's manual
must appear and the (I i n
dicator light must turn on.
.,. Hold the remote control key vertically in the lo
cation indicated
y >l) ~ fig. 91 .
.,. Press the brake peda l.
.,. Press the I START ENGINE STOPI button. The
engine will start.
.,. Drive to an authorized Audi dealer or author
ized Aud i Serv ice Facility immediately to have
the malfunction corrected .
(0 Tips
You can v iew the message aga in by pressing
the
I S TAR T ENGINE STOP I button.
Start/Stop system
Description
Applies to: vehicles with Start/Stop syste m
The Start/Stop system can help increase fuel
economy and reduce CO2 emissions.
In Start/Stop mode, the eng ine s hut s off auto
matically when the vehicle is stopped, such as at
a traffic light . The ignition remains switched on
during this stop phase. The engine w ill restart
automat ically w hen needed.
The last Start/Stop system setting is restored
when the ignition is switched on.
Basic requirements for Start/Stop mode
- Th e driver's door must be closed.
- The driver's seat belt much be fastened.
- The hood must be closed .
- The vehicle must have dr iven faster than
2.5 mph (4 km/h) since the last t ime it stop
ped .
- A trailer must not be hitched to the vehicle .
A WARNING
-Never turn off the eng ine before the vehicle
has come to a complete stop . The full func
tion of the brake booster and the power
steering is not guaranteed. You must use
more force to turn or brake. Because you
Page 83 of 356
lL t:0 ....
"' ......
"' .... 0 0 :c '
parking brake
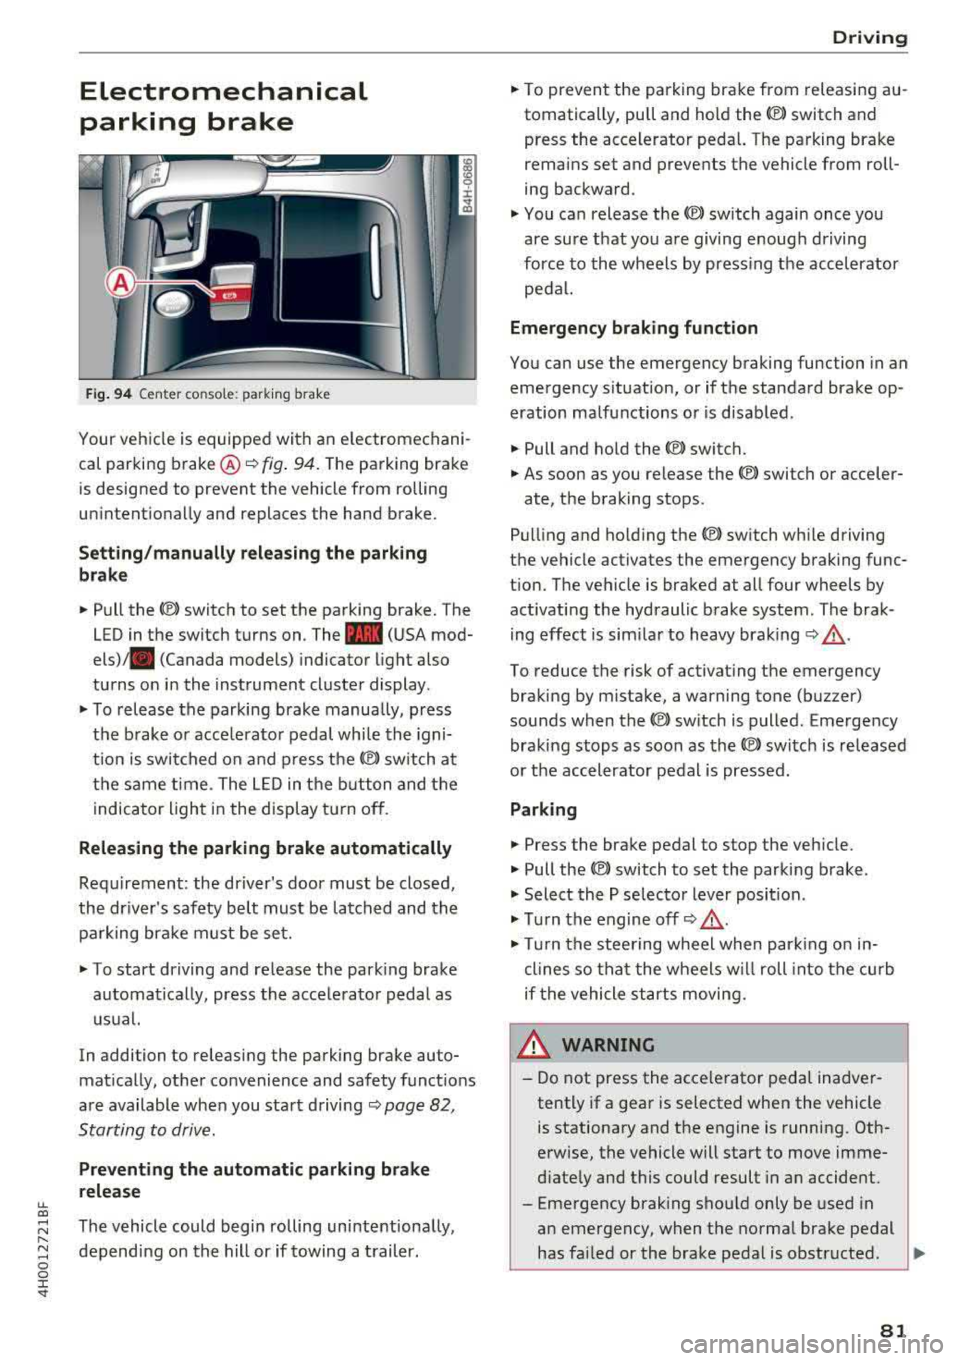
Fig. 94 Center console: parking brake
Your vehicle is equipped with an electromechani
cal parking brake ®
i=)fig. 94. The parking brake
is designed to prevent the vehicle from rolling
unintentionally and replaces the hand brake.
Setting/manually releasing the parking
brake
.. Pull the C®> switch to set the parking brake. The
LED in the switch turns on. The
-(USA mod
els) . (Canada models) indicator light also
turns on in the instrument cluster display.
.. To release the parking brake manua lly, press
the brake or acce lerator pedal while the igni
t ion is switched on and press
the(®) switch at
the same time. The LED in the button and the
indicator light in the display turn off.
Releasing the parking brake automatically
Requirement: the driver's door must be closed,
the driver's safety belt must be latched and the parking brake must be set.
.. To start driving and release the parking brake
automatically, press the accelerator pedal as
usual.
In addition to releasing the parking brake auto
matically, other convenience and safety functions
are available when you start driving
i=)page 82,
Starting to drive.
Preventing the automatic parking brake
release
The vehicle could begin rolling unintentionally,
depending on the hill or if towing a trailer.
Driving
.. To prevent the parking brake from releasing au
tomatically, pull and hold the<®> switch and press the accelerator pedal. The parking brake
remains set and prevents the vehicle from roll
ing backward .
.,. You can release the<®> switch again once you
are sure that you are giving enough driving
force to the wheels by pressing the accelerator
pedal.
Emergency braking function
You can use the emergency braking function in an
emergency situation, or if the standard brake op
eration malfunctions or is disabled.
.. Pull and hold the<®> switch.
.. As soon as you release the <®> switch or acceler-
ate, the braking stops.
Pulling and ho lding
the(®) switch while driving
the vehicle activates the emergency braking func
tion. The vehicle is braked at all four wheels by activating the hydraulic brake system. The brak
ing effect is similar to heavy braking
i=) ,& .
To reduce the risk of activating the emergency
braking by mistake, a warning tone (buzzer)
sounds when the
<®l switch is pulled. Emergency
braking stops as soon as
the© switch is released
or the accelerator pedal is pressed.
Parking
.. Press the brake pedal to stop the vehicle.
.. Pull the<®> switch to set the parking brake .
.,. Select the P selector lever position .
.,. Turn the engine off i=) ,&.
.,. Turn the steering wheel when parking on in
clines so that the wheels w ill roll into the curb
if the vehicle starts moving.
8_ WARNING
-Do not press the acce lerator pedal inadver
tently if a gear is selected when the vehicle
is stationary and the engine is running. Oth
erwise, the vehicle will start to move imme
diately and this could result in an accident.
-Eme rgency braking should only be used in
an emergency, when the normal brake pedal
has failed or the brake pedal is obstructed .
.,.
81
Page 84 of 356
Drivin g
During emergency braking, your vehicle will
brake sim ilar to heavy brak ing. ESC and the
associated components (ABS, ASR, EDL)
cannot overcome the laws of physics . In cor
ners and when road or weather cond it ions
are bad, a full b rake applicat ion ca n cause
the vehicle to skid o r the rear end to swerve,
wh ic h increases the r is k of an accident.
- If the powe r supply fa ils, you cannot set the
par king b rake if it is re leased. In th is case,
par k the vehicle on level ground and secure
it by placing the selector lever in the P posi
tion . See an authorized Audi dea ler or a u
thorized Audi Service Facility for assistance .
- Always take the vehicle key with you when
leaving your vehicle, even fo r a short period
of time . This applies particular ly w hen ch il
dren rema in in the vehicle. Otherwise ch il
dren could start the engine, release the
park ing brake or operate electrical eq uip
ment such as powe r windows, which in
c reases the risk of an acc ident.
- No one sho uld rema in in the vehicle when it
is locked - especially ch ild ren. Locked doo rs
make it mo re diff icu lt fo r eme rgency wor k
ers to get into the vehicle, which puts lives
at r is k .
0) Tips
When stopping at a traffic s ignal or stopping
in c ity traffic, you can set the parking b rake
manually. The vehicle does no t have to be
he ld w it h t he br ake peda l. The parking b rake
elim ina tes the tendency to creep when a se
lecto r lever position is engaged . As soon as
you p ress t he accelerator pedal, the parking
brake releases automat ica lly and your vehicle
starts to move
c::, page 82.
(D Tips
- Occasiona l noises when the parking brake is
set and re leased a re normal and a re not a
cause for concer n.
- The park ing bra ke goes thro ugh a se lf-test
cycle at regular intervals when the ve hicle is
stopped. Any noises associated w ith this a re
normal.
82
- If there is a powe r fail ure, the par king b rake
wi ll not set if it is released, and it wi ll not
re lease if it is
set ~.&. . See an a uth orized
Audi dealer or author ized Audi Se rvice Fa
cility for assistance.
Starting to drive
Various convenience and safety f unct ions may be
available when the vehicle begins dr iving, de
pendi ng on vehicle equipment .
Starting on hills with th e pa rking brake set
Requirement: the driver's door must be closed
and the driver's safety belt must be fastened.
.,. To sta rt driving comfortably when on a h ill, set
the parking brake and begin driving as usu a l.
The braking force of the parking brake does not
release automatically unt il the whee ls build up
enoug h driving force.
Starting on hills with hill hold assist
Hill hold assis t makes it easier to start on hills.
Requireme nt: the d rive r's doo r must be closed
and t he engine must be runn ing.
.,. To activate h ill hold assist, press and hold the
brake pedal for several seco nds . The vehicle
m ust be in an uphill d irect io n of t ravel.
After re leas ing the brake pedal, the brak ing pow
er is maintained for a brief moment
c::, &. to pre
vent the veh icle from rolli ng back w hen starting.
Du ring this t ime, you can easily begin to move
yo ur vehicle.
_8. WARNING
Applies to: vehicles with hill hold assist
-If you do not beg in d riving immed iate ly or
the engine stalls after releasing the bra ke
pedal, your veh icle may beg in to roll back
ward. Press the brake pedal or set the park
ing brake immedia tely.
- The inte lligent technology of hill ho ld assist
cannot ove rcome the limitat ions imposed by
natural p hys ica l laws. The increased comfort
offe red by hill ho ld assist should not cause
you to t ake safety r is ks.