coolant level AUDI A8 2018 Owners Manual
[x] Cancel search | Manufacturer: AUDI, Model Year: 2018, Model line: A8, Model: AUDI A8 2018Pages: 356, PDF Size: 54.71 MB
Page 11 of 356
lL t:0 ....
"" ......
"" .... 0 0 :c '
Instrument cluster
Instrument cluster overview
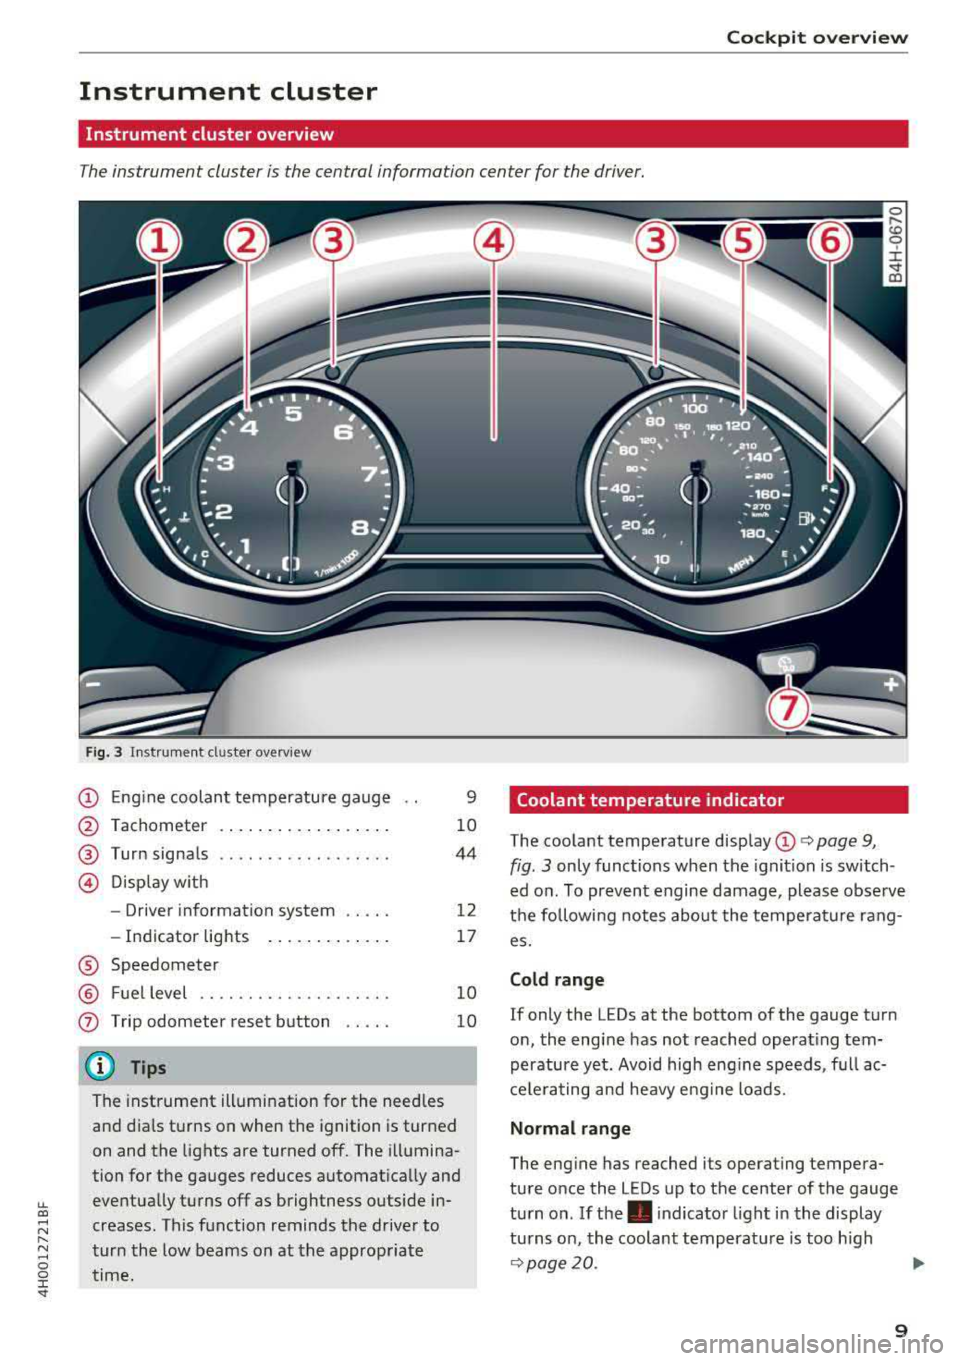
The instrument cluster is the central information center for the driver.
Fig. 3 Instrument cl uster overview
@ Eng ine coolan t temperature gauge
@ Tachometer ... .. ..... ... .. .. .
®
@
Turn signals
D isp lay w ith
- Driver information system .. .. .
- In dicator lights ..... ... .. .. .
® Speedometer
@ Fuel level ................. .. .
(j) Trip odometer reset b utton .. .. .
@ Tips
9
10
44
12
17
1 0
10
The instrument illumination for the need les
and dia ls t urns on when the ignition is turned
on and the lights are turned off. The illumina
tion for the gauges reduces automat ica lly and
eventually turns off as brightness outside in
creases. This function reminds the drive r to
tur n the low beams on at the appropriate
time.
Coolant temperature indicator
The coolant temperature disp lay @ i:> page 9,
fig. 3
only func tions when the ignition is switch
ed o n. To preven t engine damage , please observe
t h e following notes about the temperatu re rang
es.
Cold range
If only the LEDs at the bottom of the gauge turn
o n, the engine has not reached operat ing tem
perature yet. Avoid high eng ine speeds, f ull ac
c e le ra ting and heavy e ng ine loads.
Normal range
The eng ine has reached its operating tempera
ture once the LEDs up to the center of the gauge
tu rn on . If
the . indica tor light i n the display
tu rns on, th e coolant temperat ure is too h igh
c=> page 20.
9
Page 12 of 356
Cockpit overv iew
CD Note
- Auxiliary headlights and other accessories in
front of the cooling-air intake impair the
cooling effect of the coolant. This increases
the r isk of the engine overheat ing during
high outside temperatures and heavy en-
gine load.
- The front spoiler also helps to distr ibute
cooling air correctly wh ile driving. If the
spoiler is damaged, the cooling effect will
be impaired and the risk of the engine over
heating will inc rease. See an a uthorized
A ud i dealer or authorized Audi Service Fa
cility for assistance .
Tachometer
The tachometer displays the engine speed in rev
olutions per minute
(RPM).
You should shift to the next lowest gea r when
the speed is below 1,500 RP M. The beginn ing of
the red zone in the tachometer ind icates the
maximum permissible engine speed fo r all gears
once the engine has been broken in and when it is
warmed up to operating temperature . Before
reaching this zone, you should shift into the next
highest gear, select the D selector lever position,
or remove your foot from the accelerator pedal.
~ Note
The needle in the tachometer @ c:> page 9,
fig. 3 may only be in the red area of the gauge
for a short time or there is a risk of engine damage. The locat ion where the red zone be
gi ns varies depending on the engine.
@ For the sake of the environment
Upshifting early helps you to save fuel and re
duces operating noise.
Fuel level
The display @ only works when the ignition is
sw itched on. If the fuel level drops below 4 gal
(15
L), a red L ED will light up and the Ill indica
tor light will turn on
c:> page 24. The red LED
will blink when the fuel level is very low.
10
The fuel tank capacity of your ve hicle is listed in
the
Techn ical Data section c:> page 334.
CD Note
Neve r drive until the tank is comp letely emp
ty. The irregu lar supply of fuel th at results
from that can cause engine misfires . Uncom
busted fuel w ill then enter the exhaust sys
tem. This can cause overheating and damage
to the catalyt ic converter.
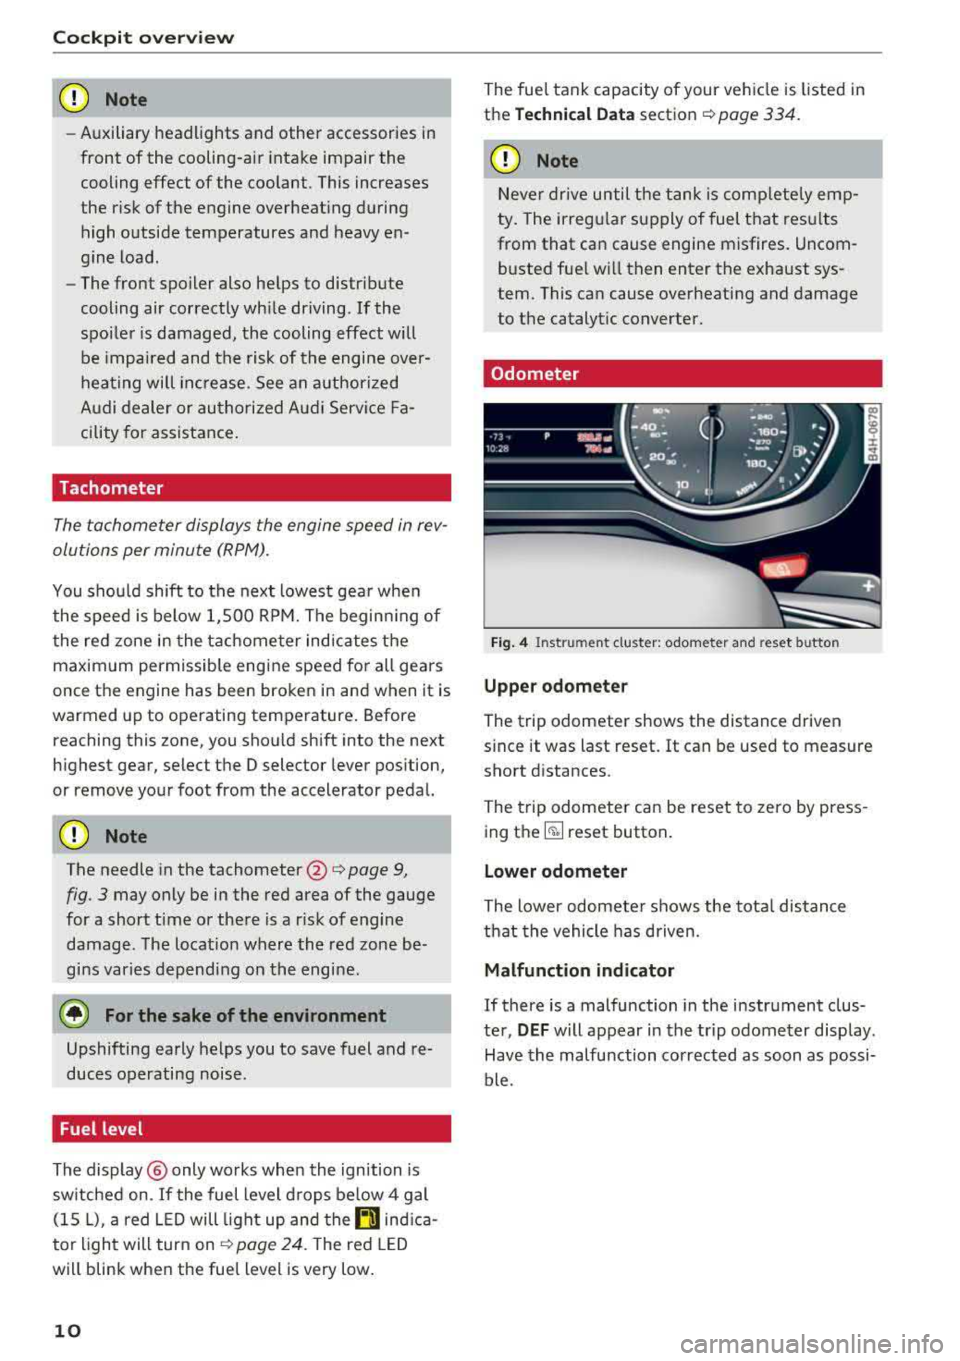
Odometer
Fig. 4 Instru ment cluster: odometer and reset button
Upper odometer
The trip odometer shows the distance driven
s ince it was last reset.
It can be used to measure
short distances.
The trip odometer can be reset to zero by press
ing
the ~ reset button.
Lower odometer
The lower odomete r shows the total distance
that the vehicle has driven.
Malfunction indicator
If there is a malfunction in the instrument clus
ter,
DEF will appear in the trip odometer display.
Have the malfunction corrected as soon as possi
ble.
Page 22 of 356

Cockpit overv ie w
- If the brake system indicator light does not
t u rn off or it t urns on while driv ing, the
brake fluid level in the reservoir is too low,
and this increases the risk of an acc ident.
Stop the vehicle a nd do not cont inue dr iv
ing . See an author ized Audi dealer or au
t h orized Aud i Serv ice Faci lity fo r ass ista nce.
- If the brake system ind icator light turns on
toget he r with the ABS and ESC ind icator
l ights, the ABS/ ESC regulat ing func tion may
be m alfu nctioning. Fu nctions t hat stabilize
the vehi cle are no longer ava ilable . This
cou ld cause the ve hicle to swerve, whic h in
creases the risk that t he ve hicle wi ll slide.
Do not continue driving. See an author ized
Audi dealer or author ized Audi Service Fac ili
ty for assistance .
PARK/(®) Electromechanical parking brake
If the -(USA models) / . (Canada models)
i n dicator light tu rns on , the park ing brake was
set .
-(USA models ) /. (Canada models ) Cau·
tion : Vehicle parked too stee p
lfthe indicator light blinks and the message ap
pears, the re is not enough brak ing power to se
cure the vehicle . The brakes have overhea ted. The
ve hicle could roll away even on a small incline .
-(USA models) / . (Canada models) P ress
b rake pedal to release parking b rake
To re lease the parking brake, press the brake
pedal and press
the ~ button at the same time
or start driv ing with hill start ass ist
c> page 82 .
Ill Parking brake!
There is a malfunction in the park ing brake . Dr ive
to a n author ized Audi dealer or author ized A udi
Serv ice Faci lity immediately to have t he malfunc
tion corrected.
(D Tips
For add it io na l info rmation on the pa rk ing
brake, seer:!)
page 81.
20
_ L Cooling system
• Turn off engine and ch eck coolant l evel
The coolant level is too low .
Do not continue dr iving and switch t he engine
off. Check the coolant level
c> page 2 77 .
- If the coo lant level is too low, add coolant
r:!) page 2 78. Only continue driving once the in
dicator light turns off.
• Coolant temperature too high! Ple ase let en
gine run with vehicle stationar y
Let the engine ru n at idle fo r a few mi nutes to
cool off, until t he ind icator lig ht tur ns off .
-If the ind icator light does not turn off, do not
cont inue driving the veh icle . See an author ized
Aud i dea le r or aut horized Audi Serv ice Facility
for assis tance.
.&_ WARNING
- N ever ope n the hood if you ca n see or he ar
steam or coo la nt escaping from t he engine
compa rtment. This increases the risk of
burns. Wait until you no longer see o r hear
steam or coolant escaping.
- The engine compartment in any vehicle can
be a dange rous a rea. Stop the engine and
allow it to cool before working i n the engine
compa rtment. Always follow the informa
tion fo und in
c> page 272.
@ Note
Do not continue driv ing if the . indicator
li ght turns on as this increases the risk of en
g ine damage.
~ Safety belt
The . indicator light stays on unt il the dr iver 's
and front passenge r's safety belts are faste ned .
Above a certa in speed, the re will a lso be a war n
i ng tone.
© Tips
Fo r additional info rmat ion on safety belts,
see c>page219.
Page 73 of 356
Adjusting the temperature
Temperatures between 60 °F ( +16 ° C) and 84 °F
(+28 °C) can be set . Outside of this range,
LO or
HI will appear in the climate contro l system dis
p lay . At both of these settings, the climate con
trol system runs continuously at maximum cool
ing or heating power. There is no temperature
regulation.
~ Adjusting the amount of air
You can adjust the airf low manually to suit your
ne eds . The blower should always run at a low set
ting to prevent the windows from fogging and to
ensure a continuous exchange of air ins ide the
vehicle. To have the airflow regulated automat i
cally, press the
IAUTO I button.
~ Adjusting the air distribution
You can manually se lect the vents where the air
will flow. To have the a ir distribution regu lated
automatically, press the
IAUTO I button.
Ill/ lil* Adjusting seat heating/ventilation*
Pressing the button switches the seat heating/
venti lation on at the highest setting (level 3). The
LEDs indicate the temperature level. To reduce
the temperature, press the button aga in. To
sw itch the seat heating/ventilation off, press the
button repeatedly until the LED turns off.
After 10 minutes, the seat heating/ventilation
automatically switches from level 3 to level 2.
l
or cleared of condensation as quickly as possible.
The maximum amount of air flows main ly from
the vents below the windshield. Recirculation
mode switches off. The temperature shou ld be
set to approximately 72 °F (22 °().
The
IAUTOI button switches the defroster off .
IQil REAR I Switching the rear window defogger
on and off
The rear window defogger only operates when
~ the engine is running. It switches off automati-....
~ cally after 10 to 20 minutes, depending on the N
~ outside temperature. 0 :c '
To prevent the rear window defogger from
switching off automatica lly, press and hold the
loo REAR I button for more than three seconds .
This is stored until the ignition is switched off.
I SYNC! Synchronization*
When synchron ization is switched on, the set
tings for the driver's side are applied to the front
pass enge r's side (except for seat heating/venti la
tion*). The rear is also synchronized in vehicles
with the 4-zone deluxe automatic climate control
system*. Synchronization switches off if the set
t ings are adjusted on the front passenger's side
or in the rear*.
You can synchronize the sett ings in a row by
pressing and holding a knob. For example, to ap
ply the sett ings for the front passenger's side to
the driver's side, press and hold the knob on the
front passenger 's side.
Vents
You can open or close the center and rear vents in
the cockpit and the vents in the rear center con
sole and door pillars using the ridged thumb
wheels. The levers adjust the direction of the air
flow from the vents.
Residual heat
You can act ivate the residual heat function when
the ignition is switched off by pressing and hold
ing the
lj) button. The residual heat from the
coolant is used to heat the vehicle interior . T he
r esidua l heat function switches off automatically
after about 30 minutes .
_&. WARNING
-You should not use the recirculation mode
for an extended period of time since no
fresh air is drawn in. With the air-condition
ing switched off, the windows can fog up,
which increases the risk of an acc ident.
- Individuals with reduced sensitivity to pain
or temperature could develop burns when
using the seat heating function. To reduce
the r isk of injury, these individua ls should
not use seat heating .
71
Page 279 of 356
u. co .... N
" N .... 0 0 :c '
-Oil should never enter the sewer system or
come into contact with the ground.
- Pay attention to legal requirements when
disposing of empty oi l containers .
Changing the engine oil
We recommend that hove your oil changed by on
authorized Audi dealer or a qualified service sta
tion .
Before you check anyt hing in the engine compart
ment,
alw ays re ad and h eed all W ARNINGS ¢ &
in Working in the engine comportment on
page 272.
The engine oil must be changed according to the
intervals specified in your Warranty
& Mainte
nance booklet . This is very important because the
lubricating properties of oil diminish gradually
during normal vehicle use.
Under some circumstances the engine oi l should
be changed more frequently. Change oil more of
ten if you drive mostly short distances, operate
the vehicle in dusty areas or under predominantly
stop-and-go traffic condit ions, or have your vehi
cle where temperatures remain below freezing
for extended periods .
Detergent additives in the oil will make fresh oil
look dark after the engine has been running for a
short t ime . Th is is normal and is not a reason to
change the oil more often than recommended .
Because of the problem of proper disposal, along
with the special tools and necessary expertise re
qu ired, we strongly recommend that you have
your oil changed by an authorized
A ud i d ea ler or
a qualified se rvice station .
If you choo se to chang e your o il y ou rse lf, please
note the following important information:
A WARNING
T o reduce the r isk of personal injury if you
must change the engine oil in your ve hicle
yourse lf:
- Wear eye protection .
-
Check ing and F illing
- To reduce the risk of burns from hot engine
oil, let the engine cool down to the touch.
- When removing the oil drain p lug with your
fingers, stay as far away as possible. Always keep your forearm parallel to the ground to
help prevent hot oil from running down your
arm.
- Drain the oil into a container designed for
this purpose, one large enough to hold at least the total amount of oil in your engine.
- Engine oil is poisonous. Keep it well out of
the reach of children .
- Continuous contact with used engine o il is
harmful to your skin. Always protect your
skin by wash ing oil off thoroughly with soap
and wate r.
@ Note
Never mix oil additives with your engine oil.
These add itives can damage your engine and
adversely affect your Audi L imited New Vehi
cle War ranty .
@ For the sake of the environment
-Before chang ing your o il, first make sure
you know where you can properly d ispose of
the used oil.
- Always dispose of used engine o il properly .
Do not dump it on garden so il, wooded
areas, i nto open streams o r down sewage
dra ins.
- Recycle used eng ine o il by tak ing it to a used
eng ine oi l collection fac ility in yo ur area, or
c ontact a se rvice station.
Cooling system
Coolant
The eng ine cooling system is filled w ith a mixture
of purified water and coolant additive at the fac
tory. This coolant must not be not changed .
The coo lant level is mon itored through
the . in
dicator
light¢ page 20. However, we do recom
mend occasionally checking the coolant level
manually .
.,.
277
Page 280 of 356
Checking and Filling
If you must add coolant, use a mixture of water
and coolant additive . Mixing the coolant additive
with distilled water is recommended.
Coolant additive
The coolant additive is made of anti-freezing and
corros ion protection agents. Only use the follow
ing coo lant additives .
Coolant additive Specification
Gl2evo
TL 774 L
Gl2++ TL 774 G
Gl3
TL 774 J
These additives may be mixed wi th each othe r.
The amount of coo lant additive that needs to be
mixed with water depends on the climate where
the vehicle will be operated. If the coolant addi
tive percentage is too low, the coo lant can free ze
and damage the engine.
Coolant addi- Freeze protec-
tive tion
Warm regions min.
40%, min. -13 °F
max . 45% (-25 °()
C old regions min.
50%, max. -40 °F
max.
55% (-40 °C)
@ Note
-Before the start of winter, have an author
ized Audi dealer or authorized Audi Service
Faci lity check if the coolant additive in your
vehicle matches the percentage appropriate
for the climate. This is especially important
when driving in colder climates .
-If the appropriate coolant additive is not
available in an emergency, do not add any
other addit ive for risk of damaging the en
g ine . If this happens, only use water and re
store the correct mixture ratio with the
specified coolant additive as soon as possi ble.
-Only refill with new coolant.
-Radiator sealant must not be mixed w ith
the coolant.
278
Adding coolant
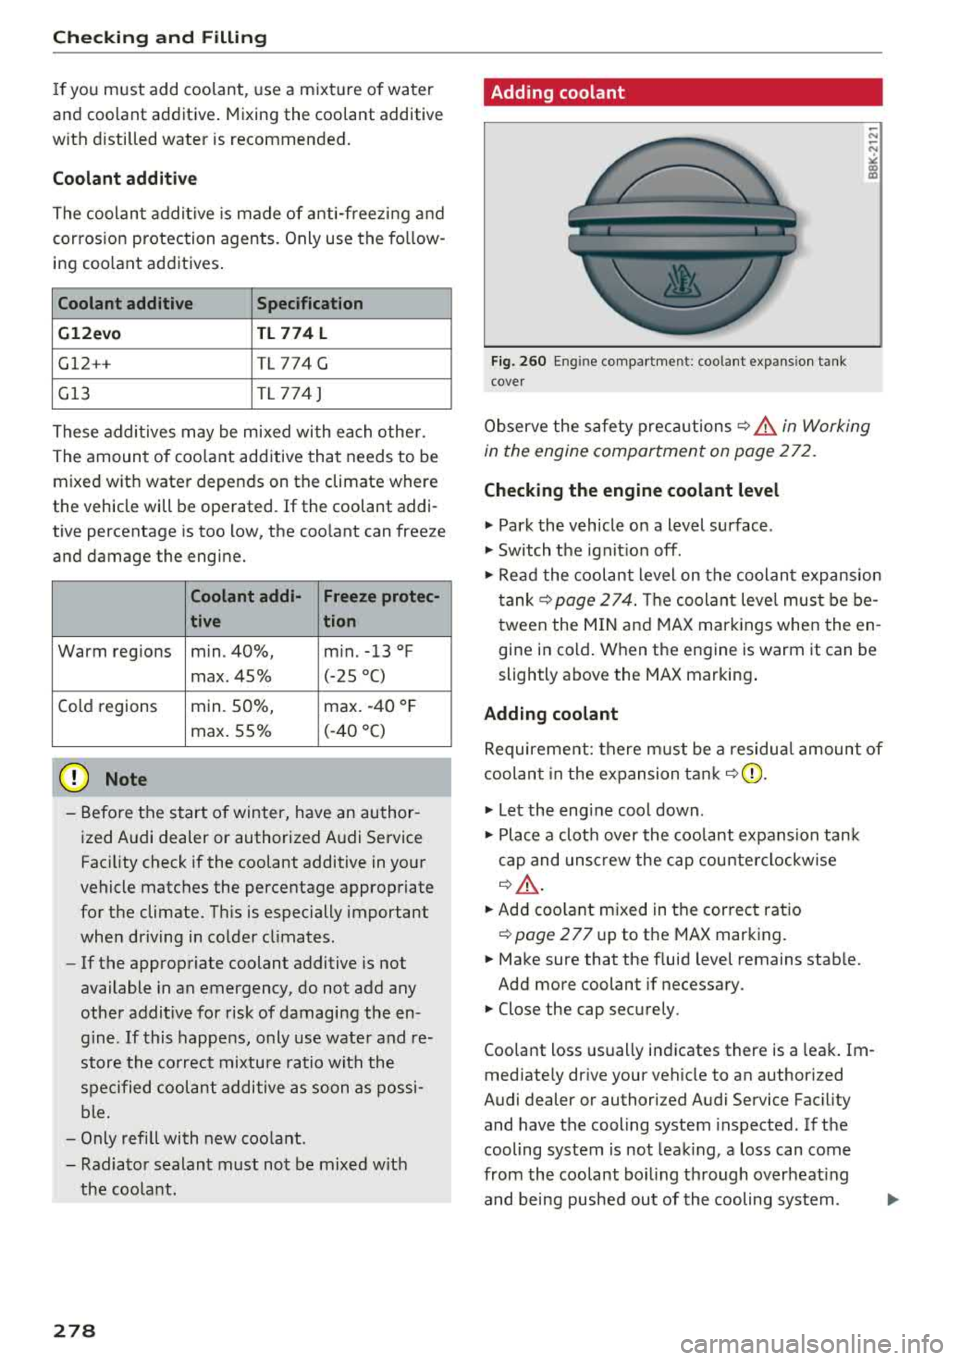
Fig. 260 Eng in e compar tment : coolant exp ansion tank
cover
Observe the safety precautions ~.&, in Working
in the engine compartment on page 2
72.
Checking the engine coolant level
~ Park the vehicle on a level surface .
~ Switch the ignit io n off.
~ Read the coolant level on the coolant expansion
tank ~ page 2 74. The coolant leve l must be be
tween the MIN and MAX markings when the en
gine in co ld. When the engine is warm it can be
slightly above the MAX marking,
Adding coolant
Requirement: there must be a residual amount of
coolant in the expansion
tank ~(©) .
~ Let the engine cool down .
~ Place a cloth over the coolant expansion tank
cap and unscrew the cap counterclockwise
~.&. -
~ Add coo lant mixed in the correct ratio
~ page 277 up to the MAX marking.
~ Make sure that the f luid level remains stable.
Add more coolant if necessary .
~ Close the cap securely .
Coo lant loss usually indicates there is a leak . Im
mediate ly drive your vehicle to an authorized
Audi dealer or authorized Audi Service Fac ility
and have the cooling system inspected. If the
cooling system is not leaking, a loss can come
from the coolant bo iling t hrough overheat ing
and being pushed out of the cooling system .
Page 281 of 356
lL
_& WARNING
-The cooling system is under pressure. Do
not open the coolant expansion tank cap
when the engine is hot. This increases the
risk of burns .
- The coolant additive and the coolant can be dangerous to your health. For this reason,
keep the coolant in the original container
and away from children. There is a risk of
poisoning.
- When working in the engine compartment,
remember that the radiator fan can switch
on even if the ignition is switched off, which
increases the risk of injury.
CD Note
Do not add coolant if the expansion tank is
empty. Air could enter the cooling system and
damage the engine. If this is the case, do not
continue driving. See an authorized Audi deal
er or authorized Audi Service Facility for assis
tance.
Brake fluid
N N
-N
" co IX)
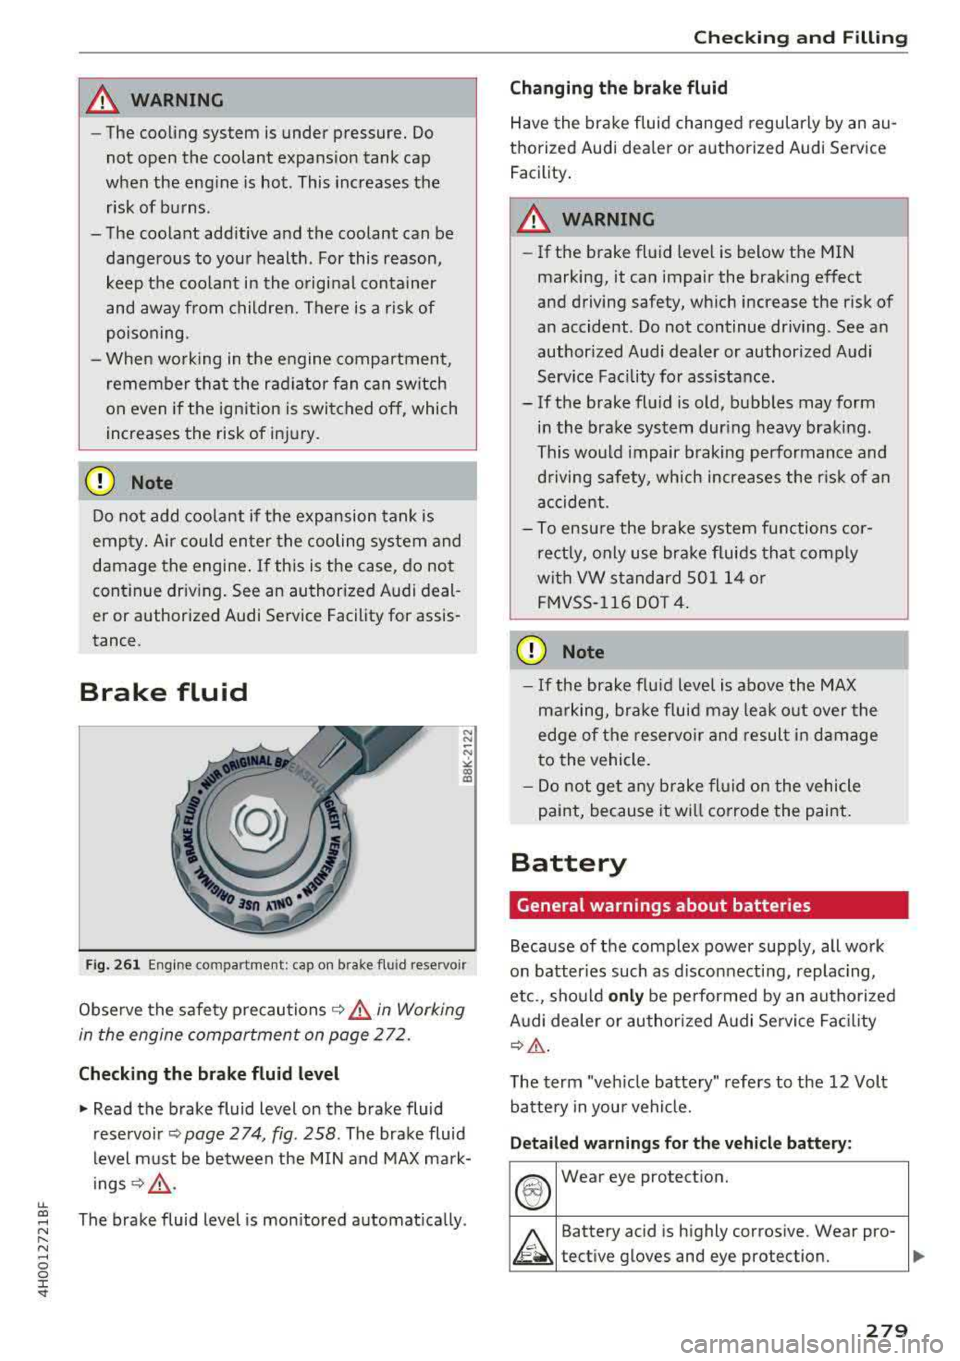
Fig. 261 Engine compartment: cap on brake flu id reservoir
Observe the safety precautions ~&. in Working
in the engine compartment on page 2
72.
Checking the brake fluid level
.. Read the brake fluid level on the brake fluid
reservoir
~ page 274, fig. 258. The brake fluid
level must be between the MIN and MAX mark
ings~&. -
~ The brake fluid level is monitored automatically .
...... N ...... 0 0 :c '
Changing the brake fluid
Have the brake fluid changed regularly by an au
thorized Audi dealer or authorized Audi Service
Facility.
_& WARNING
-
- If the brake fluid level is below the MIN
marking, it can impair the braking effect
and driving safety, which increase the risk of
an accident . Do not continue driving . See an
authorized Audi dealer or authorized Audi
Service Facility for assistance.
- If the brake fluid is old, bubbles may form
in the brake system during heavy braking.
This would impair braking performance and
driving safety, which increases the risk of an
accident.
- To ensure the brake system functions cor
rectly, only use brake fluids that comply
with VW standard 50114 or FMVSS-116 DOT 4.
CD Note
- If the brake fluid level is above the MAX
marking, brake fluid may leak out over the
edge of the reservoir and result in damage
to the vehicle.
- Do not get any brake fluid on the vehicle
paint, because it will corrode the paint.
Battery
General warnings about batteries
Because of the complex power supply, all work
on batteries such as disconnecting, replacing,
etc., should
only be performed by an authorized
Audi dealer or authorized Audi Service Facility
~ .&. .
The term "vehicle battery" refers to the 12 Volt
battery in your vehicle.
Detailed warnings for the vehicle battery:
® Wear eye protection.
b. Bat~ery acid is highly corrosive. Wear pro-
~ tect1ve gloves and eye protection. Ill>-
279
Page 339 of 356
u. co .... N
" N .... 0 0 :c '
scope of maintenance and repairs which can be
carried out by veh icle owners.
Al so , sa fet y a nd
en vironmental
concerns place very strict limits
on the nature of repairs and adjustments to en
g ine and transm ission parts wh ich a n owner can
perform .
Maintenance, adjustments and repairs usually re
qu ire special tools, test ing devices and other
equ ipment available to specially trained work
shop personnel in order to assure proper per
formance, re liability a nd safety of the veh icle and
its many systems .
Improper maintenance, adjustments and repairs
can impair the operation and reliab il ity of your
ve hicle and even void your veh icle warranty .
Therefo re, proof of se rvicing in accordance w ith
the ma intenance schedule may be a condition fo r
upho ld ing a possib le warranty claim made within
the warranty period.
Above all , ope rational safety can be adversely af
fected, creating unnecessa ry risks fo r yo u and
your passengers.
I f in do ubt about any servicing, have it done by
your author ized Audi dealer or any other prope rly
eq uipped and qua lified workshop. We strongly
u rge yo u to g ive your author ized Audi dealer the
opportunity to perform a ll scheduled mainte
nance and necessary repairs. Your dealer has the
facilities, original parts and trained specialists to keep your veh icle running properly .
Pe rforming limit ed maint enanc e yourself
The fo llowing pages describe a limited number of
procedures which can be performed on your ve hi
cle with ordinary tools, should the need arise and
trained personnel be unavailable. Before per
forming any of these procedures, always thor
oug hly read a ll of the app licable text and careful
ly follow the instructions g iven . Always rigorously
observe the
W ARNINGS prov ided .
Before you check an ything in the eng ine com
partment , alw ays read and he ed all WARNINGS
c:> &. and c:> &. in Working in the engine compart
ment on page 2
72 .
Con sum er In form ation
A WARNING
--
- Ser ious personal injury may occur as a result
of improperly performed maintenance, ad
justments or repairs .
- Always be extremely careful when work ing
on the vehicle . Always follow commonly ac
cepted safety practices and general com mon sense. Never risk pe rsonal inj ury.
- Do not attempt any of the maintenance,
checks or repairs described on the following pages if you are not fu lly famil iar with these
or other proced ures with respec t to the ve
h icle, or are uncerta in how to pro ceed.
- Do not do any work without the proper tools
and eq uipment. Have the necess ary wo rk
done by your authorized Audi dealer or an
other proper ly equipped and qualified work
shop.
- The engine compartment of any motor vehi
cle is a potentially hazardous area . Never
reach into the area around or touch the radi
ator fan.
It is temperature controlled and
can switch on suddenly - even when the en
g ine is off . The radiator fan switches on au
tomatically when the coolant reaches a cer
tain tempe rature and will cont inue to run
until the coolant temperature d rops.
- Always sw itch off the ignition before anyone
gets under the vehicle.
- Always support your veh icle with safety
stands if it is necessary to work underneath
the vehicle. The jack suppl ied with the veh i
cle is no t adequate for this pu rpose and
could collapse caus ing serious personal in
jury.
- If you must wor k unde rne ath the vehicle
with the wheels on the ground, always make
sure the vehicle is on level ground, that the
wheels a re always sec urely blocked and that
the engine cannot be started.
- Always make sure the transmission se lector
lever (automatic transmiss ion) is in
"P"
(Park position) and the pa rk brake is ap
plied.
337
Page 346 of 356
Index
Emergency operation
Fr ont passenger 's door . . . . . . . . . . . . . . . . 32
Fuel filler door . . . . . . . . . . . . . . . . . . . . . . 271
Luggage compartment lid . . . . . . . . . . . . . . 36
Panoram a glass roof . . . . . . . . . . . . . . . . . . 40
Sliding/tilting sunroof . . . . . . . . . . . . . . . . . 39
Sunshade (roof) . . . . . . . . . . . . . . . . . . . . . . 40
E mergency re lease
Parking lock . . . . . . . . . . . . . . . . . . . . . . . . . 88
Emergency starting . . . . . . . . . . . . . . . . . . . 327
Emissions control system . . . . . . . . . . . . . . 272
Energy consumers (efficiency program) . . . . 13
Energy management . . . . . . . . . . . . . . . . . . 131
E ngine
Start/Stop system . . . . . . . . . . . . . . . . . . . . 78
Starting/stopping . . . . . . . . . . . . . . . . . . . . 76
Starting with jumper cables . . . . . . . . . . . 327
E ngine compartment . . . . . . . . . . . . . . . . . . 272
Opening/closing the hood . . . . . . . . . . . . . 273
Engine oil
Adding . . . . . . . . . . . . . . . . . . . . . . . . . . . . 275
Changing . . . . . . . . . . . . . . . . . . . . . . . . . . 277
Checking oil level . . . . . . . . . . . . . . . . . . . . 275
Con sumption . . . . . . . . . . . . . . . . . . . . . . . 275
Engine sound . . . . . . . . . . . . . . . . . . . . . . . . 111
Entering a destination . . . . . . . . . . . . . 166, 170
Entering an address . . . . . . . . . . . . . . . . . . 166
From the map . . . . . . . . . . . . . . . . . . . . . . 167
La st destinations . . . . . . . . . . . . . . . . . . . . 169
Starting point (presentation mode) . . . . . 173
Entering letters (speller) . . . . . . . . . . . . . . . 138
E ntering numbers/symbols (speller) . . . . . . 138
Entry assistance . . . . . . . . . . . . . . . . . . . . 58, 76
Environment Environmentally-friendly/ economical driv -
ing ..... ... .. .. ................ ... .. 74
Fueling . . . . . . . . . . . . . . . . . . . . . . . . . . . . 270
Proper disposal of drained engine o il . . . . 277
Unleaded fu el . . . . . . . . . . . . . . . . . . . . . . . 268
EPC (engine control) . . . . . . . . . . . . . . . . . . . . 23
ESN
refer to Serial number (radio) ... .... .. .
Event Data Recorder (EDR) ........ .. .. .
E xterior lighting 179
133 43
Exterior mirrors . . . . . . . . . . . . . . . . . . . . . . . 47
344
F
Factory default settings
Multi Media Interface . . . . . . . . . . . . . . . . 207
R5E . . . . . . . . . . . . . . . . . . . . . . . . . . . . . . . 197
Fader(sound) ... .. .. .. ............. .. 206
Fastening Booster seats . . . . . . . . . . . . . . . . . . . . . . . 257
Convertible child safety seats . . . . . . . . . . 256
Infant seats . . . . . . . . . . . . . . . . . . . . . . . . 255
Fast forwarding/rewinding (audio/video
file) . . . . . . . . . . . . . . . . . . . . . . . . . . . . . . . . 191
Fast forwarding (audio/video file) . . . . . . . . 191
Favorite (navigation) . . . . . . . . . . . . . . 169, 173
File format (media) . . . . . . . . . . . . . . . . . . . 187
Floor mats.. .. .. .. .. .. ............. .. 213
Folding table . . . . . . . . . . . . . . . . . . . . . . . . . . 63
Foot pedals . . . . . . . . . . . . . . . . . . . . . . . . . . 213
Free text search
T elephone. . . . . . . . . . . . . . . . . . . . . . . . . . 152
Freeze protection Coolant additive . . . . . . . . . . . . . . . . . . . . . 277
Front airbags
Description . . . . . . . . . . . . . . . . . . . . . . . . . 231
Frontal collisions and the laws of physics . . 220
Front center armrest . . . . . . . . . . . . . . . . . . . 55
Front passenger seat adjustment . . . . . . . . . 58
Front seats
Adjusting . . . . . . . . . . . . . . . . . . . . . . . . . . 210
Child restraints in the front seat . . . . . . . . 228
also refer to Seats . . . . . . . . . . . . . . . . . . . . 54
Fuel Additives. . . . . . . . . . . . . . . . . . . . . . . . . . . 268
Blended gasoline . . . . . . . . . . . . . . . . . . . . 268
Current consumpt ion . . . . . . . . . . . . . . . . . . 12
Fuel filler neck . . . . . . . . . . . . . . . . . . . . . . 269
Fuel gauge . . . . . . . . . . . . . . . . . . . . . . . . 9, 10
Fuel tank capacity . . . . . . . . . . . . . . . . . . . 334
Gasoline . . . . . . . . . . . . . . . . . . . . . . . . . . . 268
Gasoline additives . . . . . . . . . . . . . . . . . . . 269
Octane rating . . . . . . . . . . . . . . . . . . . . . . . 268
Recommendation . . . . . . . . . . . . . . . . . . . . 268
Saving fuel ...... .. .. ............ 74, 111
Fueling Fuel filler door . . . . . . . . . . . . . . . . . . . . . . 270
Fuel gauge . . . . . . . . . . . . . . . . . . . . . . . . . . 10
Fuel tank capacity . . . . . . . . . . . . . . . . . . . 334
Page 352 of 356

Index
System volume . . . . . . . . . . . . . . . . . . . . . . . 206
T
Tachometer . . . . . . . . . . . . . . . . . . . . . . . . . 9, 10
Technical data . . . . . . . . . . . . . . . . . . . . . . . . 333
Technical modifications . . . . . . . . . . . . . . . . 339
Telephone . . . . . . . . . . . . . . . . . . . . 14 , 14 7 , 1 SO
Connecting . . . . . . . . . . . . . . . . . . . . . . . . . 148
Dialing a number . . . . . . . . . . . . . . . . . . . . 149
Memory capacity (directory) . . . . . . . . . . . 155
Settings . . . . . . . . . . . . . . . . . . . . . . . . . . . 155
Storing a number . . . . . . . . . . . . . . . . . . . . 150
Temperature indicator
Coolant . . . . . . . . . . . . . . . . . . . . . . . . . . . . . . 9
Tether anchors . . . . . . . . . . . . . . . . . . . . . . . 265
Tether strap . . . . . . . . . . . . . . . . . . . . . . . . . 265
Tie-downs ... .. .. ............. .. .. 66, 215
Time . .... .. .. .. ............. .... .. . 205
tiptronic (automatic transmission) . . . . . . . . 83
Tire mobility kit . . . . . . . . . . . . . . . . . . . . . . 312
Tires.. .... .. .. .. ............. .... .. . 283
Low-profile tires. . . . . . . . . . . . . . . . . . . . . 299
quattro (all wheel drive) . . . . . . . . . . . . . . 131
Replacing . . . . . . . . . . . . . . . . . . . . . . . . . . 313
Service life . . . . . . . . . . . . . . . . . . . . . . . . .
2 91
Tire pressure . . . . . . . . . . . . . . . . . . . . . . . 293
Tire pressure monitoring sys -
tem ..... .. .. .. ............ 300,301,302
Tire pressure table . . . . . . . . . . . . . . . . . . . 294
Treadwear indicators ................. 291
Unidirectional . . . . . . . . . . . . . . . . . . . . . . . 285
Uniform tire quality grading . . . . . . . . . . . 299
Tires and wheels
Glossary of tire and loading terminology . 285
Tires and vehicle load limits . . . . . . . . . . . 295
TMC/TMCpro
refer to Traffic information (TMC)
Tone (sound) 176
refer to Adjusting the sound
. . . . . . . . . . . 205
Tool kit ............................. 312
Torn or frayed safety be lts . . . . . . . . . . . . . . 221
Touch
refer to MMI touch 137
Towing Tow trucks
Towing loop
350
329
. . . . . . . . . . . . . . . . . . . . . 329, 330 TPMS (
Tire Pressure Monitoring System) . . 301
Traffic information (TMC) . . . . . . . . . . . . . . 176
RSE . . . . . . . . . . . . . . . . . . . . . . . . . . . . . . . 202
Switching reports on and off . . . . . . . . . . . 177
Trailer towing . . . . . . . . . . . . . . . . . . . . . . . . . 89
Information . . . . . . . . . . . . . . . . . . . . . . . . . 91
Operating instructions. . . . . . . . . . . . . . . . . 89
Parking systems . . . . . . . . . . . . . . . . . . . . . 125
T echnica l requirements . . . . . . . . . . . . . 89 , 90
Train (transporting your vehicle) . . . . . . . . . 330
Transmission malfunction . . . . . . . . . . . . . . . 87
Transport Canada . . . . . . . . . . . . . . . . . . . . . 216
Transporting your vehicle . . . . . . . . . . . . . . . 330
Tr ip odometer . . . . . . . . . . . . . . . . . . . . . . . . . 10
Turn signal . . . . . . . . . . . . . . . . . . . . . . . . . . . 44
u
Unfastening safety belts 224
Uniform tire quality grading . . . . . . . . . . . . 299
Unlocking/locking . . . . . . . . . . . . . . . . . . . . . 30
V
Valet parking function . . . . . . . . . . . . . . . . . . 40
Vanity mirror. . . . . . . . . . . . . . . . . . . . . . . 49, SO
Vehicle Care/cleaning . . . . . . . . . . . . . . . . . . . . . . . 306
D imensions . . . . . . . . . . . . . . . . . . . . . . . . . 334
Out of service . . . . . . . . . . . . . . . . . . . . . . . 311
Raising . . . . . . . . . . . . . . . . . . . . . . . . . . . . 331
Specifications . . . . . . . . . . . . . . . . . . . . . . . 333
Vehicle battery . . . . . . . . . . . . . . . . . . . . . . . 279
Charge level . . . . . . . . . . . . . . . . . . . . . . . . 131
Charging . . . . . . . . . . . . . . . . . . . . . . . . . . . 280
Winter operation . . . . . . . . . . . . . . . . . . . . 280
Vehicle control modules . . . . . . . . . . . . . . . . 133
Vehicle jack . .... .. .. .. ....... 312,315,316
Vehicle key . . . . . . . . . . . . . . . . . . . . . . . . . . . 28
Vehicle tool kit . . . . . . . . . . . . . . . . . . . . . . . 312
Vehicle transport . . . . . . . . . . . . . . . . . . . . . 330
Vent ilation . . . . . . . . . . . . . . . . . . . . . . . . . . . 69
Version information .. .. ........... 197,207
Video image settings . . . . . . . . . . . . . . . . . . 191
Video playback combinations (RSE) . . . . . . . 203
V IN . . . . . . . . . . . . . . . . . . . . . . . . . . . . . . . . 333
Voice guidance . . . . . . . . . . . . . . . . . . . . . . . 173