phone AUDI A8 2018 Owners Manual
[x] Cancel search | Manufacturer: AUDI, Model Year: 2018, Model line: A8, Model: AUDI A8 2018Pages: 356, PDF Size: 54.71 MB
Page 5 of 356
u. co .... N
" N .... 0 0 :c '
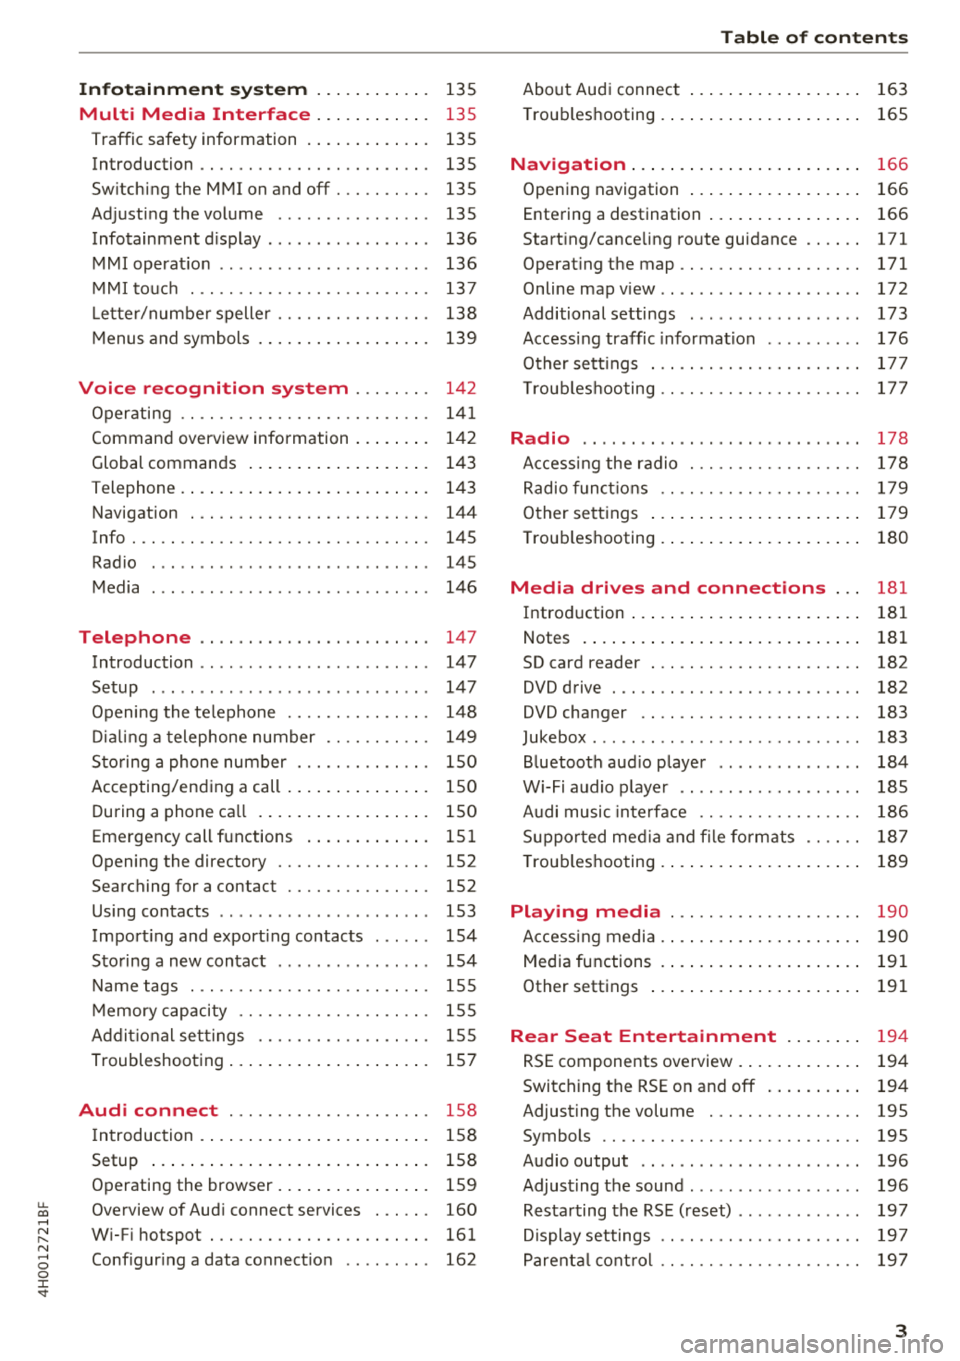
Multi Media Interface . . . . . . . . . . . . 135
Traffic safety information . . . . . . . . . . . . . 135
Introduction . . . . . . . . . . . . . . . . . . . . . . . . 135
Sw itching the MMI on and off . . . . . . . . . . 135
Adjusting the volume . . . . . . . . . . . . . . . . 135
Infotainment d isplay . . . . . . . . . . . . . . . . . 136
MMI operat io n . . . . . . . . . . . . . . . . . . . . . . 136
M MI touc h . . . . . . . . . . . . . . . . . . . . . . . . . 137
L ette r/numbe r spelle r . . . . . . . . . . . . . . . . 138
M enus and symbols . . . . . . . . . . . . . . . . . . 139
Voice recognition system . . . . . . . . 142
Operating . . . . . . . . . . . . . . . . . . . . . . . . . . 141
Command overview information . . . . . . . . 142
Global commands . . . . . . . . . . . . . . . . . . . 143
T elephone . . . . . . . . . . . . . . . . . . . . . . . . . . 143
Navigation . . . . . . . . . . . . . . . . . . . . . . . . . 144
Info . . . . . . . . . . . . . . . . . . . . . . . . . . . . . . . 145
Radio . . . . . . . . . . . . . . . . . . . . . . . . . . . . . 145
Media . . . . . . . . . . . . . . . . . . . . . . . . . . . . . 146
Telephone . . . . . . . . . . . . . . . . . . . . . . . . 147
Introduction . . . . . . . . . . . . . . . . . . . . . . . . 147
Setup . . . . . . . . . . . . . . . . . . . . . . . . . . . . . 147
Opening the te lephone . . . . . . . . . . . . . . . 14 8
Di alin g a telephone number . . . . . . . . . . . 149
Sto ring a phone number . . . . . . . . . . . . . . 150
Accepting/end ing a call . . . . . . . . . . . . . . . 150
During a phone ca ll . . . . . . . . . . . . . . . . . . 150
Emergency call functions . . . . . . . . . . . . . 15 1
Opening the directory . . . . . . . . . . . . . . . . 152
Searching for a contact . . . . . . . . . . . . . . . 152
Using contacts . . . . . . . . . . . . . . . . . . . . . . 153
Import ing and export ing contacts . . . . . . 154
Sto ring a new contact . . . . . . . . . . . . . . . . 154
Name tags . . . . . . . . . . . . . . . . . . . . . . . . . 155
M emory capacity . . . . . . . . . . . . . . . . . . . . 155
Ad dit ional se ttings . . . . . . . . . . . . . . . . . . 155
Troubleshooting . . . . . . . . . . . . . . . . . . . . . 157
Audi connect . . . . . . . . . . . . . . . . . . . . . 158
I ntroduction . . . . . . . . . . . . . . . . . . . . . . . . 158
Setup . . . . . . . . . . . . . . . . . . . . . . . . . . . . . 158
Operating the browser . . . . . . . . . . . . . . . . 159
Overview of Aud i connect services . . . . . . 160
W i-F i hotspot . . . . . . . . . . . . . . . . . . . . . . . 161
Conf igur ing a data connect io n . . . . . . . . . 162
Table of content s
About Audi connect . . . . . . . . . . . . . . . . . . 163
T roub leshooting . . . . . . . . . . . . . . . . . . . . . 165
N . .
av1gat1on ..... .. ... .. ..... ... .. . .
Opening navigation .... .. ..... ... .. . .
Entering a destination .. .. ..... ... .. . . 166
166
166
Start ing/cance ling route guidance . . . . . . 171
Operat ing the map ................. .. 171
Onlinemapview .. .. ... .. ..... ... .. .. 172
Additional settings . . . . . . . . . . . . . . . . . . 173
Access ing traffic informat ion . . . . . . . . . . 176
Other sett ings . . . . . . . . . . . . . . . . . . . . . . 177
T roub leshooting .. .. ............. .. .. 17 7
Radio .. .. .. .. .. .. ... .. ..... ... .. .. 178
A ccess ing the radio . . . . . . . . . . . . . . . . . . 178
Radio f unct io ns . . . . . . . . . . . . . . . . . . . . . 179
O ther se ttings . . . . . . . . . . . . . . . . . . . . . . 179
T roub leshooting . . . . . . . . . . . . . . . . . . . . . 180
Media drives and connections . . . 181
Introd uction . . . . . . . . . . . . . . . . . . . . . . . . 181
Notes . . . . . . . . . . . . . . . . . . . . . . . . . . . . . 181
SD card reader . . . . . . . . . . . . . . . . . . . . . . 182
DVD drive . . . . . . . . . . . . . . . . . . . . . . . . . . 182
DVD changer . . . . . . . . . . . . . . . . . . . . . . . 183
Jukebox . . . . . . . . . . . . . . . . . . . . . . . . . . . . 183
Bluetooth aud io player . . . . . . . . . . . . . . . 184
Wi-Fi audio p laye r . . . . . . . . . . . . . . . . . . . 185
A udi music inte rface . . . . . . . . . . . . . . . . . 186
S uppo rted med ia an d file fo rmats . . . . . . 18 7
T roub leshooting . . . . . . . . . . . . . . . . . . . . . 189
Playing media . . . . . . . . . . . . . . . . . . . . 190
Accessing media . . . . . . . . . . . . . . . . . . . . . 190
Media functions . . . . . . . . . . . . . . . . . . . . . 191
Other settings . . . . . . . . . . . . . . . . . . . . . . 191
Rear Seat Entertainment . . . . . . . . 194
RSE components overview . . . . . . . . . . . . . 194
Switching the RSE o n and off . . . . . . . . . . 194
Adjust ing the volume . . . . . . . . . . . . . . . . 195
Symbols . . . . . . . . . . . . . . . . . . . . . . . . . . . 195
Audio output . . . . . . . . . . . . . . . . . . . . . . . 196
Adjust ing the sound ................. . 196
Resta rting the RS E (reset) . . . . . . . . . . . . . 197
D isplay settings . . . . . . . . . . . . . . . . . . . . . 1 97
Parent al cont rol . . . . . . . . . . . . . . . . . . . . . 19 7
3
Page 10 of 356
Cockpit overv ie w
CD
@
®
©
®
®
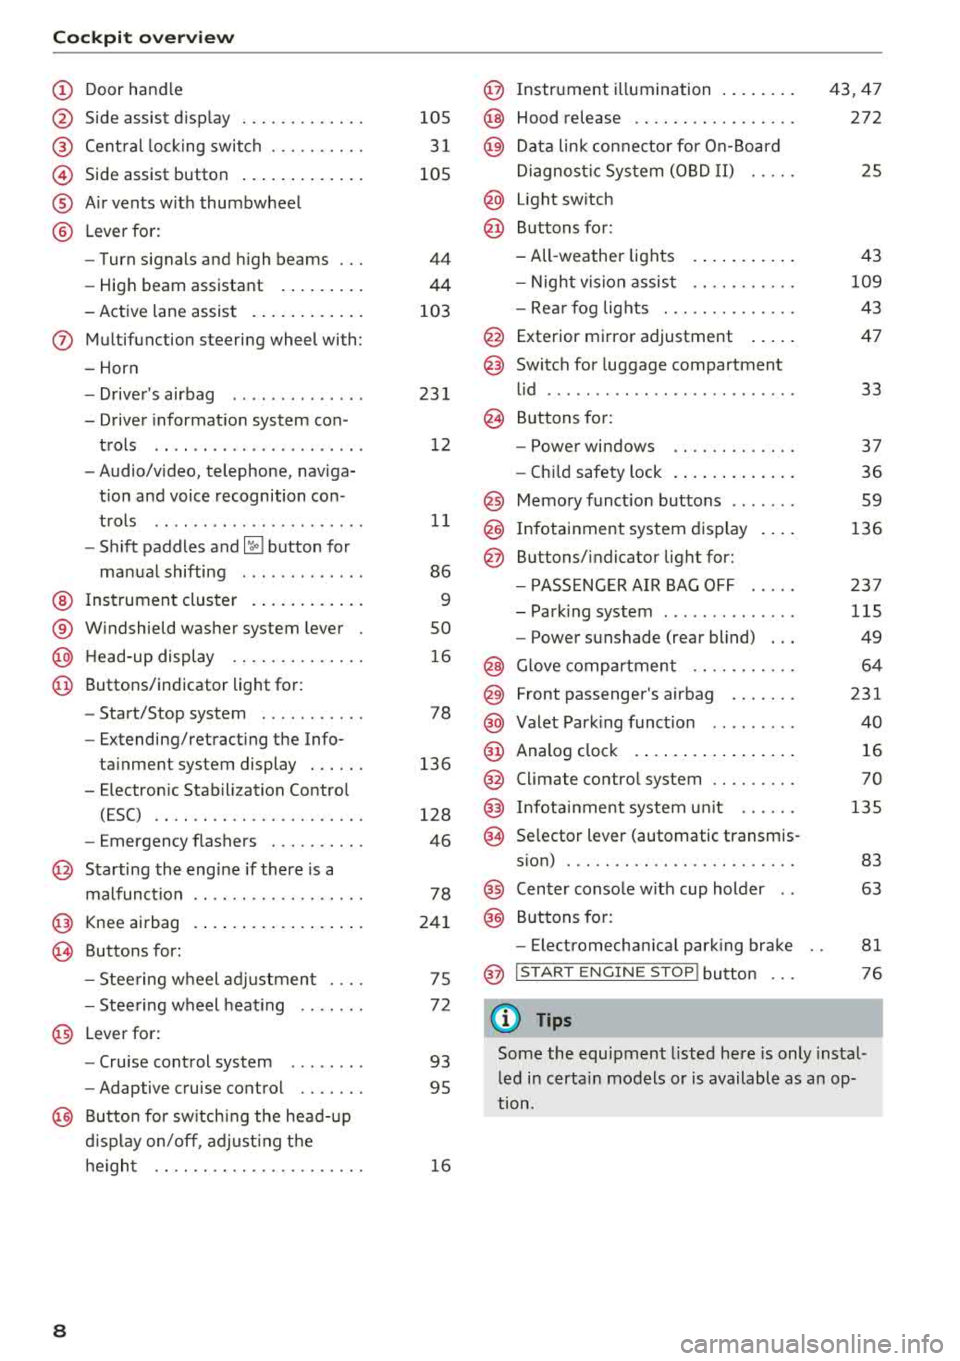
Door hand le
S ide assist d isp lay
Cent ral lock ing switch ....... .. .
Side assist button .. ..... ... .. .
A ir vents w ith thumbwheel
L ever fo r:
- Turn signals and h igh beams
- High beam assistant ... ... .. .
- Active lane assist . ..... ... .. .
(J) Multifunction steering wheel with :
- Horn
- Drive r's airbag ............. .
- Drive r informat io n system con -
trols .. .. .. ............... .
- Audio/v ideo, telephone, naviga
t ion and voice recognition con -
t rols .. .. .. ............... .
- Shift paddles
and ~ button for
manual shifting ............ .
@ Ins trumen t cluster . ..... ... .. .
® W indshield washer system lever
@ H ead-up display ........... .. .
@ Buttons/ indicator light for :
- Start/Stop system .......... .
- Extending/retract ing t he Info-
ta inment system display . .. .. .
- E lectron ic Stabili zation Contro l
(ESC) .. .. .. ............. .. .
- Emergency flashers ....... .. .
@ Starting the eng ine if there is a
malfunct ion
@ Knee airbag
~ Buttons for :
- Stee ring wheel adjustmen t ... .
- Stee ring wheel heat ing
@ Lever for:
- Cru ise control system ....... .
- Adaptive cruise control .... .. .
@ Butto n for sw itch ing the head- up
d isp lay on/off , adjust ing t he
h e igh t .. .. .. ............. .. .
8
105
3 1
105
44
44
103
23 1
1 2
11
86
9
so
1 6
78
136
128
46
78
24 1
75
7 2
93
95
1 6
@ Instr ument i llumination .. ..... .
@ Hood release .. .. .. .......... .
@ Data lin k co nne ctor fo r On-Board
Di agnos tic Sys tem (OB D II) .....
@ Light sw itch
@ Buttons for:
- All -weather lights
- Night v is ion assis t .......... .
- Rea r fog lights . .. .......... .
@ Exterior mi rror adjustment .... .
@ Switch for luggage compartment
l id ........ ... .. .. .......... .
@ B uttons for:
- Powe r windows .. .......... .
- Ch ild safety lock . .... .. ..... .
@ Memory funct io n buttons ...... .
@) Infotainment system d isplay
@ B uttons/indicator light for:
- PA SSE NG ER AIR BAG OFF .... .
- Park ing system ... .......... .
- Power sunshade (rear blind) .. .
@ Glove comp artment .......... .
@) Front passenger's airbag ...... .
@ Valet Park ing funct ion ........ .
@ Analog cloc k .... .. ... .. ..... .
@ Climate contro l system ........ .
@ Infota inment system u nit ..... .
@ Se lector lever (automatic transmis -
s ion) ... .. .. .. .. .. .......... .
@ Center conso le w ith cup holder ..
@ Buttons for:
- Electromechan ica l park ing bra ke
@ I START EN GINE STO P! button
(D Tips
43,47
272
25
43
109
43
47
33
37
36 59
136
23 7
115
49
64
231
40
16
70
135
83 63
81
76
Some the equipment l isted here is only instal
l ed i n certa in models or is available as a n op
tion.
Page 13 of 356
lL t:0 ....
"" ......
"" .... 0 0 :c '
wheel
Operating
A pp lies to: ve hicles with mult ifunction steering wheel
You can opera te various MM I functions and the
driver information sys tem, change the volume,
and turn the voice reco gnition system * on and
off with the multifunction steering wheel.
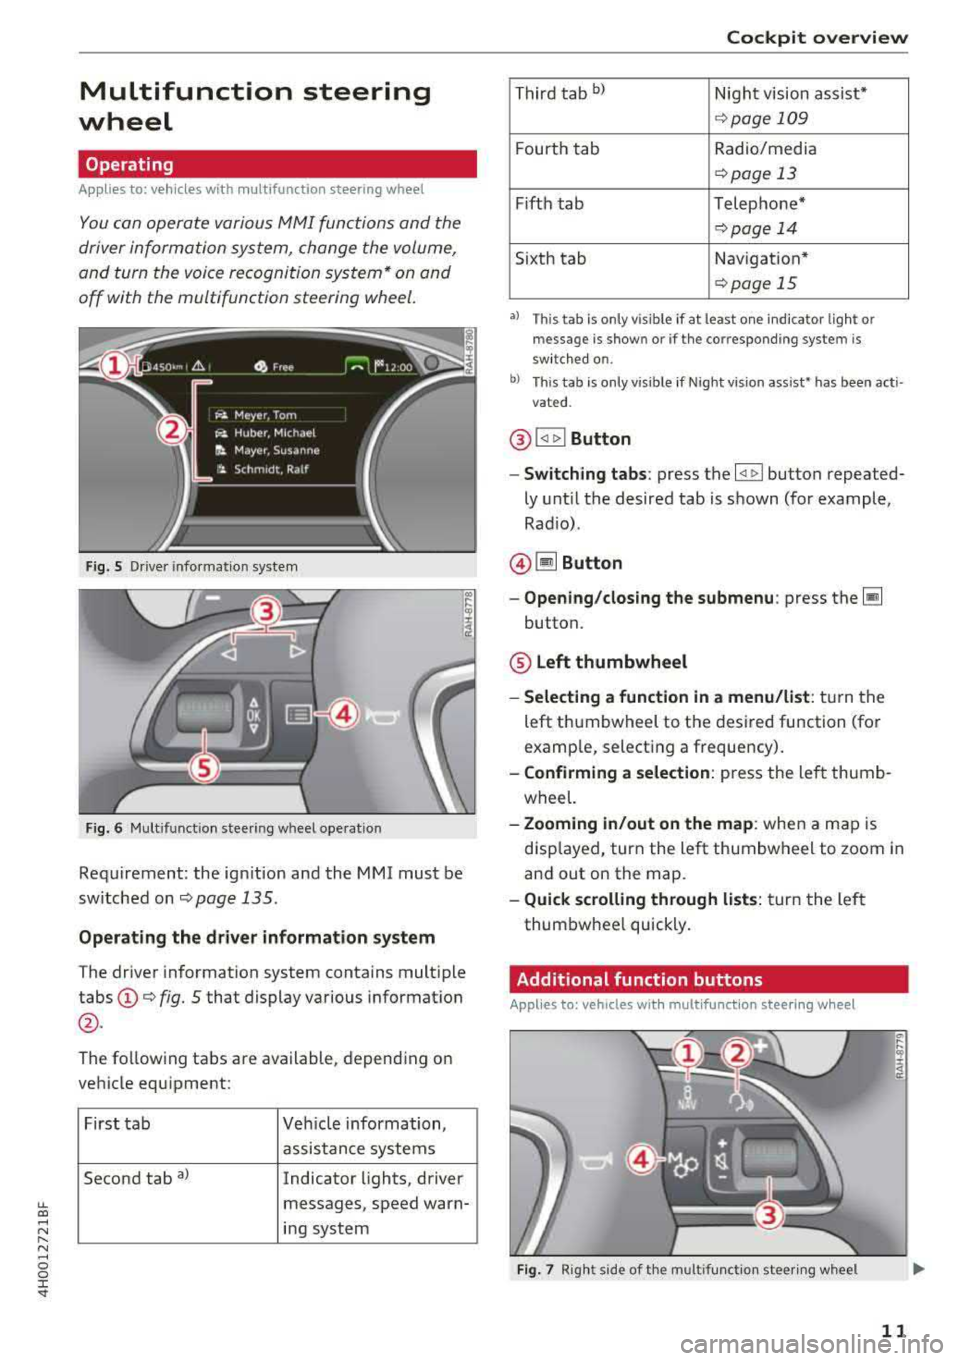
F ig. 5 Driver info rmat ion sys te m
Fig . 6 M ult ifunct ion steer ing w heel operat ion
Requ irement: the ign it ion and the MMI must be
sw itche d on
<=:>page 135.
Operating the driver information system
The drive r information system contains mult iple
tabs @<=:> fig. 5 that display various informat ion
@ .
The fo llow ing tabs are available, depending on
ve hicle equ ipment:
First ta b Vehicle information,
assis tance systems
Second tab
a) Indicator lights, driver
messages, speed warn-
i n g system
Cockpit overview
T hir d t ab bl Nigh t vision assist*
<=:> page 109
Fourt h tab Radio/media
<=:> page 13
Fifth tab Telephone*
<=:> pag e 14
Sixth tab Navigation *
<=:>page 15
•l Thi s tab is only v is ible if at least o ne in dica tor lig ht or
messa ge is show n or if t he co rr espo nding syste m is
sw it c h ed on .
b) Thi s tab is on ly v is ib le if Night vis io n ass ist• has been act i
vat ed .
@ !<1 t> ! Button
- Switching tabs : press the l<1 1> I button repeated
ly unt il t he desired tab is shown (for example,
Rad io) .
@ lil Button
-Opening /closing the submenu : press the~
button.
® Left thumbwheel
-Selecting a function in a menu/list : tur n the
left t humbwheel to the desired function (for
examp le, select ing a frequency).
- Confirming a selection : press the left thumb
wheel.
- Zooming in/out on the map : when a map is
disp layed, turn the left thumbwheel to zoom i n
and out on the map.
- Quick scrolling through lists : tur n t he le ft
thum bwhee l quickly .
Additional function buttons
Applies to: vehicles wit h mult ifunct ion stee rin g w hee l
Fig. 7 Rig ht s ide of t he mult ifun ctio n stee rin g wheel
11
Page 16 of 356

Cockpit overv iew
Media
App lies to: vehicles w ith mu ltifunction steering wheel
Fig. 12 Media men u
Requirement: a media drive must conta in audio/
video files
Q page 181 and the radio/media tab
must be displayed .
• Playing an audio /video file : select and confirm
a f ile.
• Pau sing /continui ng p layb ack: Press the right
thumbwheel. To resume playback, press the right thumbwhee l again.
• Re starting playba ck of an audio file : select the
file that is curre ntly playing, if necessary. Press
the left thumbwheel.
The fo llow ing funct ions are available when you
p ress the
Iii bu tton:
-S electing a source : select and confirm a source
such as the
Jukebo x.
-Sele cting a radio station using the sour ce l ist :
select and confirm a frequency band and then
select a station from the station list.
Telephone
A pp lies to: vehicles with multifunction steering wheel and
telep hone
Fig . 1 3 Telepho ne menu
14
Requirement: a ce ll phone must be connected to
the
MMI Q poge 147 and the telephone tab
must be d isp layed
Q fig . 13.
"'Press the ~ button on the mu ltifunction steer
ing wheel.
-Calling a conta ct in the dire ctory : select and
confirm
Dir ector y. Select and confirm a con
tact.
- Calling a conta ct in a call li st : select and con
firm
Dialed number s, Mi ssed call s or A ccept ed
c alls
Select and confirm a contact .
Directory contacts : the drive r information sys
tem on ly disp lays directory contacts t hat have a
phone number stored .
If several phone numbers
are stored with a contact, the list o f stored num
bers is displayed first when the entry is selected .
For more information about the displayed sym
bo ls, refer to
Q page 152 .
Caller information : the name, phone number or
Unknown appears in the driver information sys
tem display depend ing on if the ca ller has been
stored in the directory and if the phone number
has been transm itted.
- Accepting a call : press the left thumbwheel
when there is an incoming ca ll.
-Ig noring a call : select and confirm Decline
when there is an incoming ca ll.
-Ending a phone call : select and confirm End
call.
Functions during a phone call
-M aking an additional phone call* : select and
confirm
Ho ld >~but ton > Direct ory or an en
try in one of the call Lists.
-Acc epting an in coming call when th ere is an
a ct ive call and a call on hold :
select and con
firm
Replace . The active call is replaced with
the incoming call.
Additional funct ions :
Mute *:
if you se lect and confirm this function,
the o ther pe rson on the phone cannot hea r yo u.
You can he ar the other person.
Holding /res uming a call : you can put a current
ca ll on hold and res ume a ca ll.
.,.
Page 17 of 356

lL t:0 ....
'"" " '"" .... 0 0 :c '
calls at the same time. One of the calls will be on hold.
End call ends the active phone call. A call
that was placed on hold stays on hold and can be
taken off hold with
Resume.
Conference*:
a call on hold and up to five active
parties (depending on the network) can be added
to a conference call. To make an additional call,
put all participants in the current conference call
on hold using
Hold . If you press the~ button,
you can make an additional calls from the direc
tory or one of the call lists .
Resume takes all par
ties off hold.
@ Tips
- The telephone functions can only be con
trolled with the multifunction steering
wheel if the telephone equipment was in
stalled
at the factory.
-The telephone and call options depend on
the cell phone service provider and the cell
phone . You can obtain more information
from your cell phone service provider.
- The call options depend on the cell phone
and service provider. You can obtain more
information from your cell phone service
provider.
- The
Call waiting function must be activated
in your cell phone and in the
MMI to be
alerted when there is an incoming call dur
ing an active call.
Navigation
Applies to: vehicles with multifunction steering wheel and
nav igation system
Fig. 14 Lane d ispl ay
Cockpit overview
Fig. 15 Turn display
Requirement: a destination or a route plan must
be entered
¢ page 166, route guidance must be
started
c> page 171 and the navigation tab must
be displayed.
Depending on the vehicle equipment, the active
route guidance will be displayed in the street
view* in the driver information system:
(D Total mileage to the destination or stopover
@ Displaying an expressway, highway or main
road as preparation for an upcoming change
in direction
@ Distance to the next maneuver
@ The name of the expressway, highway or
main road onto which you will be turning
® Additional information (on-board computer)
@ Calculated arrival time
0 A bar graph appears when a direction arrow
is displayed . The fewer bars are shown, the
shorter the distance is until the turn.
@ Direction arrow for the upcoming maneuver
® Current vehicle position
The following functions are also available when route guidance is active :
-Repeating the last navigation prompt: press
the
QJ button.
- Changing the voice guidance volume: turn the
right thumbwheel up or down during voice
guidance.
- Selecting Street view/Arrow view: press the §]
button and select and confirm Street view or
Arrow view.
If you have not started route guidance, a com
pass will display in the navigation tab.
15
Page 31 of 356
lL t:0 ....
"' ......
"' .... 0 0 :c '
equipment such as power windows.
(D Tips
-The operation of the remote control key can
be temporarily disrupted by interference
from transmitters in the vicinity of the vehi
cle work ing in the same frequency range
(such as a cell phone or radio equipment).
-Using the mechanical key, you can:
- Locking/unlocking the glove compartment
,;:;,page 64.
-Manually lock/unlock the vehicle
,;:;,page 32.
-Mechanically lock the doors c:> page 32.
-Unlock the luggage compartment lid us-
ing the emergency release r;;:;, page 36.
-For an explanation on conformity with the
FCC regulations in the United States and the
Industry Canada regulations, see
r;;:;,page 339.
(D Tips
Removing the integrated mechanical key
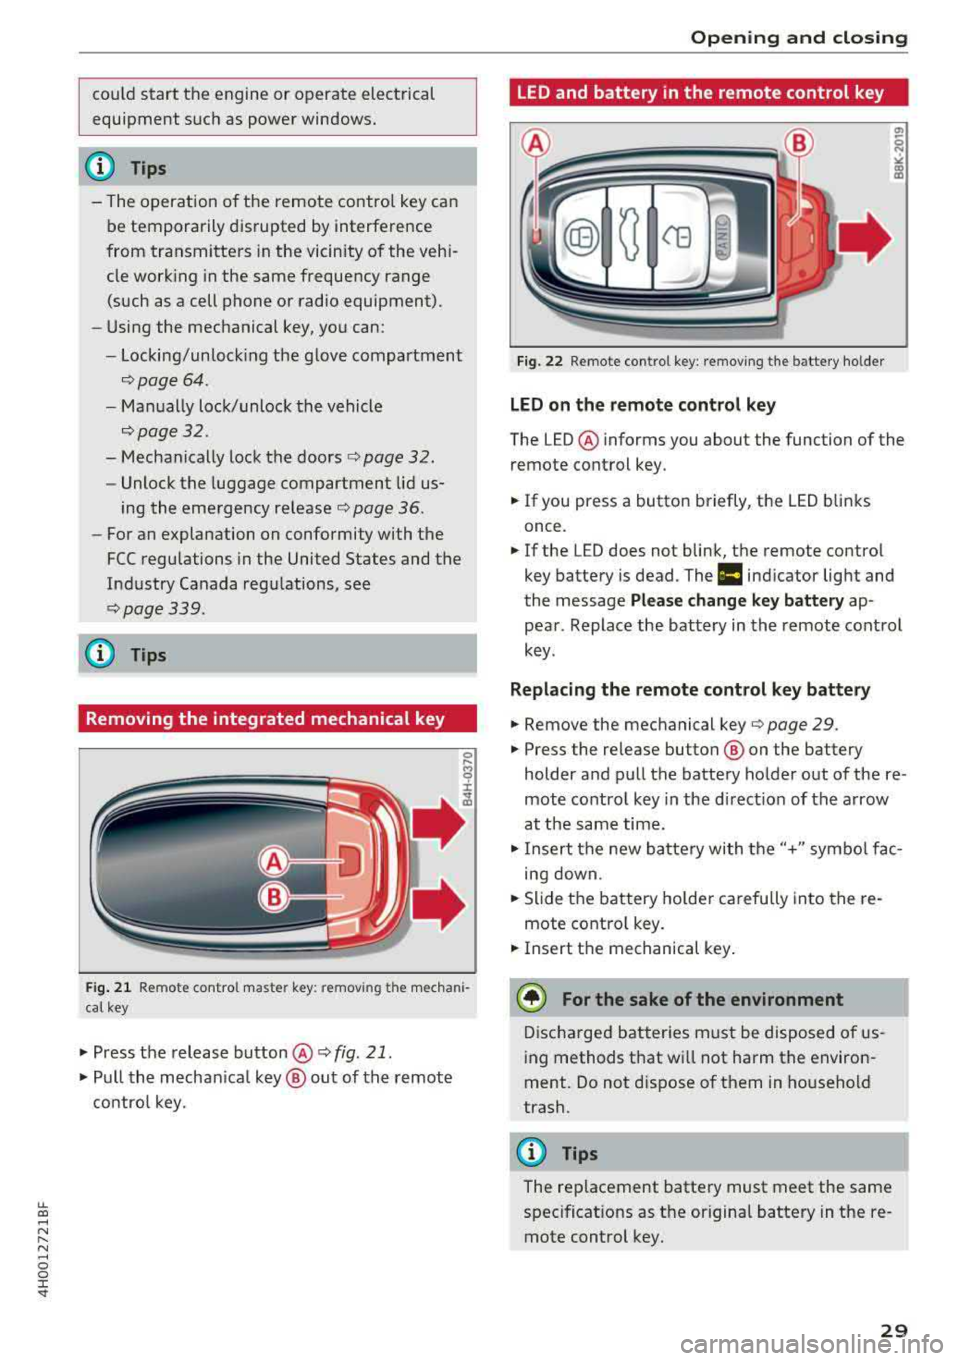
Fig. 21 Remote control master key : remov ing t he mechani
cal key
.,. Press the release button@ r;;:;, fig. 21.
.,. Pull the mechanica l key @ out of the remote
control key.
Opening and closing
LED and battery in the remote control key
Fig. 22 Remote control key: removing the battery holder
LED on the remote control key
The LED @ informs you about the function of the
remote control key.
.. If you press a button briefly, the LED blinks
once.
.. If the LED does not blink, the remote contro l
key battery is dead. The
ml indicator light and
the message
Please change key battery ap
pear . Replace the battery in the remote control
key .
Replacing the remote control key battery
.. Remove the mechanical key r;;:;, page 29 .
.. Press the release button ® on the battery
holder and pull the battery holder out of the
re
mote control key in the d irect ion of the arrow
at the same time .
.,. Insert the new battery with the"+" symbol fac
ing down .
.,. Slide the battery holder carefully into the re
mote contro l key .
.. Insert the mechanical key.
@ For the sake of the environment
Discharged batteries must be disposed of us
ing methods that wi ll not harm the environ
ment. Do not d ispose of them in household
trash.
{!) Tips
The replacement battery must meet the same
spec ificat ions as the origina l battery in the re
mote control key .
29
Page 38 of 356
Opening and closing
-there is interference to the radio signal from
the vehicle key, such as from cell phones or re
mote controls
Emergency unlocking the luggage
compartment lid
In the event that the central locking system mal
functions , the luggage compartment lid can be
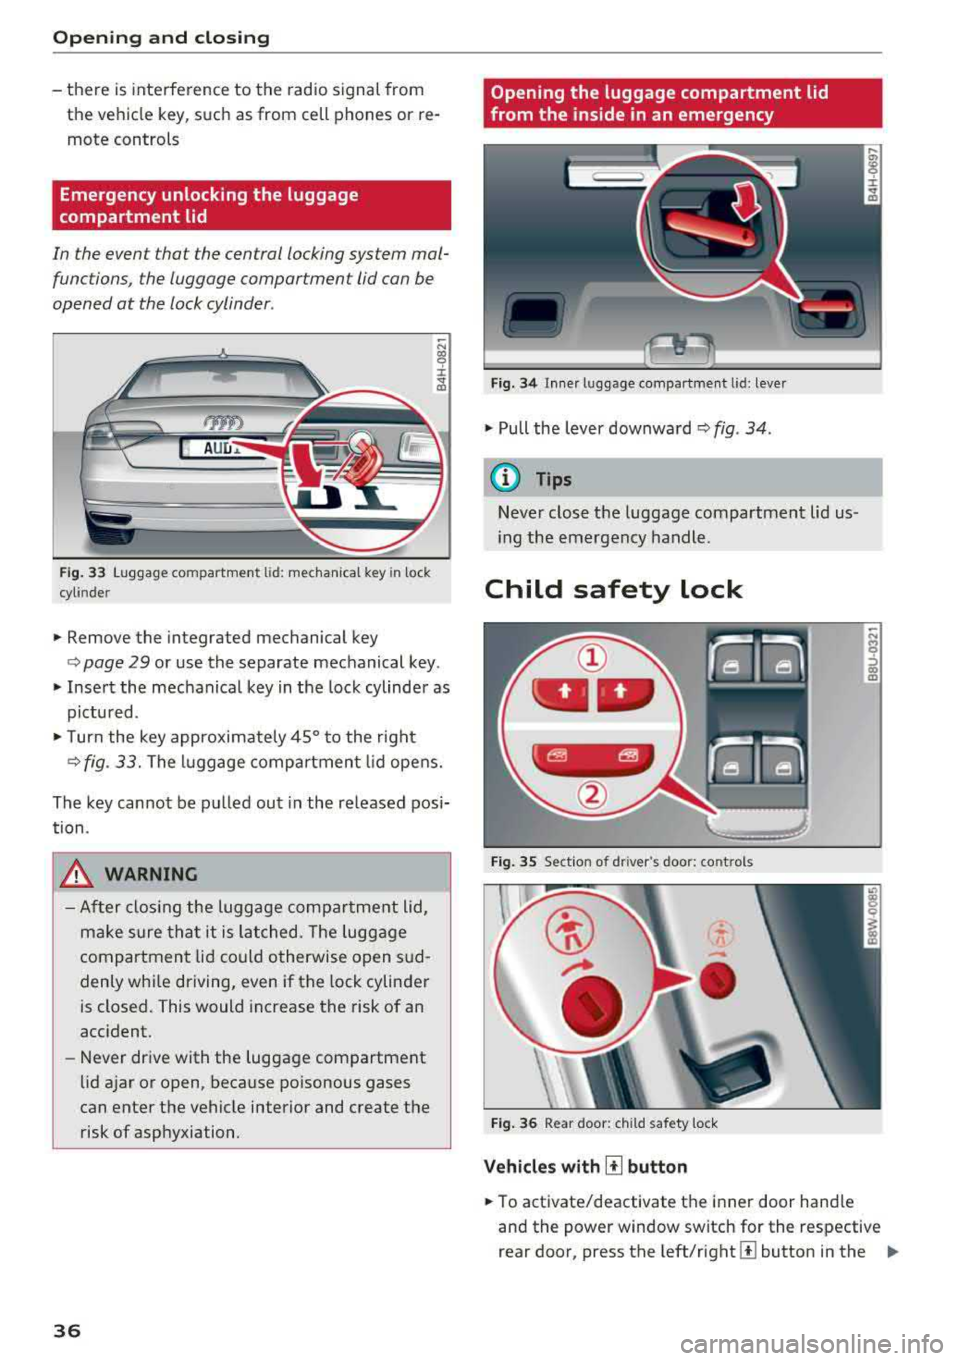
opened at the lock cylinder .
AUD.a.
Fig. 33 Luggage compartment lid: mechanica l key in lock
cyl inde r
.,. Remove the integrated mechanical key
-N CX) '9 ::c
"" "'
<=> page 29 or use the separate mechanical key.
" Insert the mechanical key in the lock cylinder as
pictu red.
"T urn the key approximate ly 45° to the right
<=> fig. 33. The luggage compartment lid opens.
The key cannot be pulled out in the released posi
tion .
_&. WARNING
-After closing the luggage compartment lid,
make sure that it is latched. The luggage
compartment lid could otherwise open s ud
denly whi le driving, even if the lock cylinder
is closed. This would increase the risk of an
acc ident.
- Never drive with the luggage compartment
lid ajar or open, because poisonous gases
can enter the vehicle interior and create the
risk of asphyxiation .
36
Opening the luggage compartment lid
from the inside in an emergency
Fig. 34 Inne r luggage compartment l id : lever
" Pull the lever downward c> fig . 34 .
@ Tips
Never close the luggage compartment lid us
i ng the emergency handle.
Child safety lock
Fig. 35 Section of dr iver 's doo r: co ntrols
Fig. 36 Rear door: child safety lock
Vehicles with [!] button
" To activate/deactivate the inner door hand le
-N
~ co
"'
and the power window switch for the respective
rear door, press the
l eft/right [±] button in the ..,,
Page 64 of 356
Seats and stor age
dried out complete ly before using the
socket again .
-Devices connected to the vehicle behave dif
ferent ly than when they are connected to a
regu lar power supply. Therefore, connected
devices can become hot dur ing operation,
wh ich can increase the risk of injury .
-There is a risk of injury when using adapters
and extension cords, because the child safe
ty on t he socket is switched off and the
socket is powered w ith current .
-To reduce the risk of fatal injury, do not in
sert any conductive objects, such as knitting
need les, into the contacts on the socket.
-T o reduce the risk of injury, switch off any
connected electr ical devices if the socket
has switched off d ue to overheating.
(D Note
- Also read the operating manuals for the
connected dev ices .
- Do not connect any lamps that contain neon
tubes . Due to technical reasons, this can
cause malf unct ions in the lamp .
- Do not connect any 230 volt dev ices to the
115 volt socket . The device can be dam
aged . Check the permitted voltage of the
device accord ing to the type label.
- With some power supply units, such as for
l aptops, switching them on disables the
in
teg rated ove rcur rent shutdown . In this
case, disconnec t the power s upply un it from
the electrical equipment and reconnect
af
ter approximately 10 seconds .
(D Tips
-Devices that are not shie lded or devices ne ar
the rear w indow antenna can ca use mal
functions in the radio, TV area or in the vehi
cle electrical system .
- T he functions on some devices may be limit
ed d ue to the low power output (wattage).
62
Full-Length center
console
Overview
Applies to: vehicles with full-length center co nsole
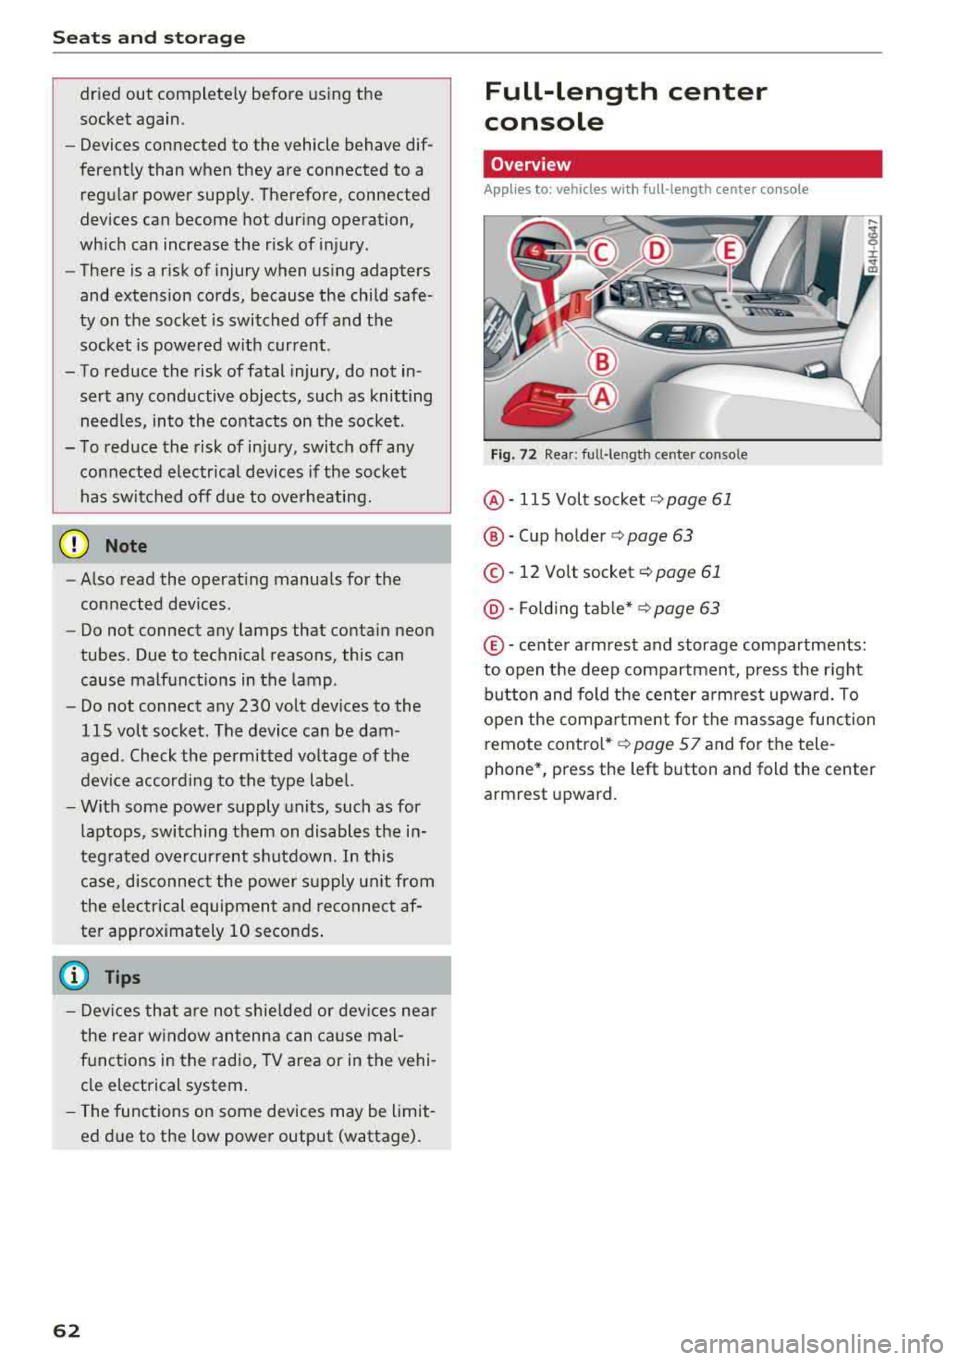
F ig. 72 Rea r: ful l-leng th center console
@ -115 Volt socket c:;, page 61
®-Cup ho lder c:;, page 63
© -12 Volt socket c:;, page 61
@ -Fo ld ing t able* c:;, page 63
© -ce nter armrest and storage compartments:
to open the deep compartment, press the right b utton and fold the center a rmrest upward. To
open the compa rtment for the massage function
remote cont rol*
c:;, page S 7 and for the tele
phone*, press the left button and fold the center
armrest upward.
Page 66 of 356
Seats and storage
(D Note
Beverage containers in the cup holders should
always have a lid. If not, beverages could spill
and cause damage to vehicle equipment, such
electronics or seat covers.
Cooled glove compartment
The cooled glove compartment only functions
when the A/C system is switched on.
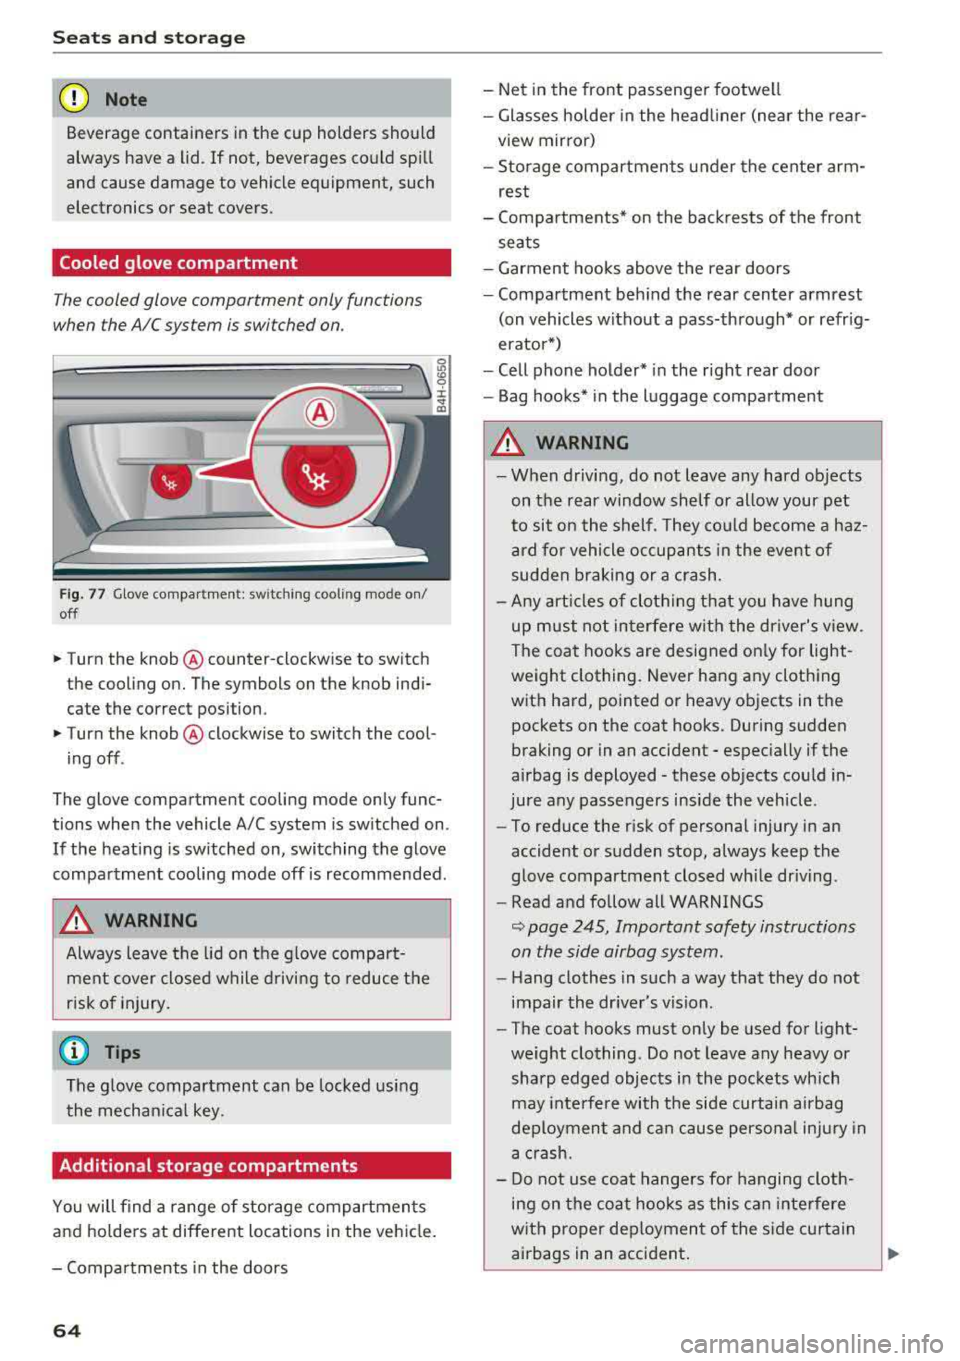
Fig. 77 Glove compar tment: switching cooling mode on/
off
.. Turn the knob @counter-clockwise to switch
the cooling on. The symbols on the knob indi
cate the correct position.
.. Turn the knob @clockwise to switch the cool-
ing off .
The glove compartment cooling mode only func
tions when the vehicle A/C system is switched on.
If the heating is switched on, switching the glove
compartment cooling mode off is recommended.
A WARNING
-
Always leave the lid on the glove compart
ment cover closed while driving to reduce the
risk of injury.
(D Tips
The glove compartment can be locked using
the mechanical key.
Additional storage compartments
You will find a range of storage compartments
and hold ers at different locations in the vehicle.
- Compartments in the doors
64
- Net in the front passenger footwell
- Glasses holder in the headliner (near the rear-
view mirror)
- Storage compartments under the center arm
rest
- Compartments* on the backrests of the front
seats
- Garment hooks above the rear doors
- Compartment behind the rear center armrest
(on vehicles without a pass-through* or refrig
erator*)
- Cell phone holder* in the right rear door
- Bag hooks* in the luggage compartment
A WARNING
-When driving, do not leave any hard objects
on the rear window shelf or allow your pet
to sit on the shelf. They could become a haz
ard for vehicle occupants in the event of
sudden braking or a crash.
- Any articles of clothing that you have hung
up must not interfere with the driver's view .
The coat hooks are designed only for light
weight clothing. Never hang any clothing
with hard, pointed or heavy objects in the
pockets on the coat hooks. During sudden
braking or in an accident
-especially if the
airbag is deployed
-these objects could in
jure any passengers inside the vehicle .
- To reduce the risk of personal injury in an
accident or sudden stop, always keep the
glove compartment closed while driving.
- Read and follow all WARNINGS
~ page 245, Important safety instructions
on the side airbag system.
- Hang clothes in such a way that they do not
impair the driver's vision.
- The coat hooks must only be used for light
weight clothing. Do not leave any heavy or
sharp edged objects in the pockets which
may interfere with the side curtain airbag
deployment and can cause personal injury in
a crash.
- Do not use coat hangers for hanging cloth
ing on the coat hooks as this can interfere
with proper deployment of the side curtain
airbags in an accident.
Page 138 of 356
Multi Media Interface
-Unmuting or resuming: press the On/Off knob
@ r=>page 135, fig . 153 briefly. Or: turn the
On/Off knob to the right.
@ Tips
Volumes that are too high or too low are au
tomatically adjusted to a set leve l when the
MMI is switched on .
Infotainment display
The Infotainment display extends automatically
when the MMI is switched on. It retracts auto
mat ically when the system is switched off.
Extending/retracting the Infotainment system
display manually:
press the ~ button @
r=:> page 7, fig. 1 .
Adjusting the Infotainment display brightness :
see r=:>page 207.
(D Tips
-If the vehicle has a cell phone p rep*, the In
fotainment system display will automatical
l y extend whenever there is an incoming
phone call.
- Use the
arrow buttons to switch stations,
for example, when listening to the radio, af
ter the disp lay has retracted in .
136
MMI operation
(---·
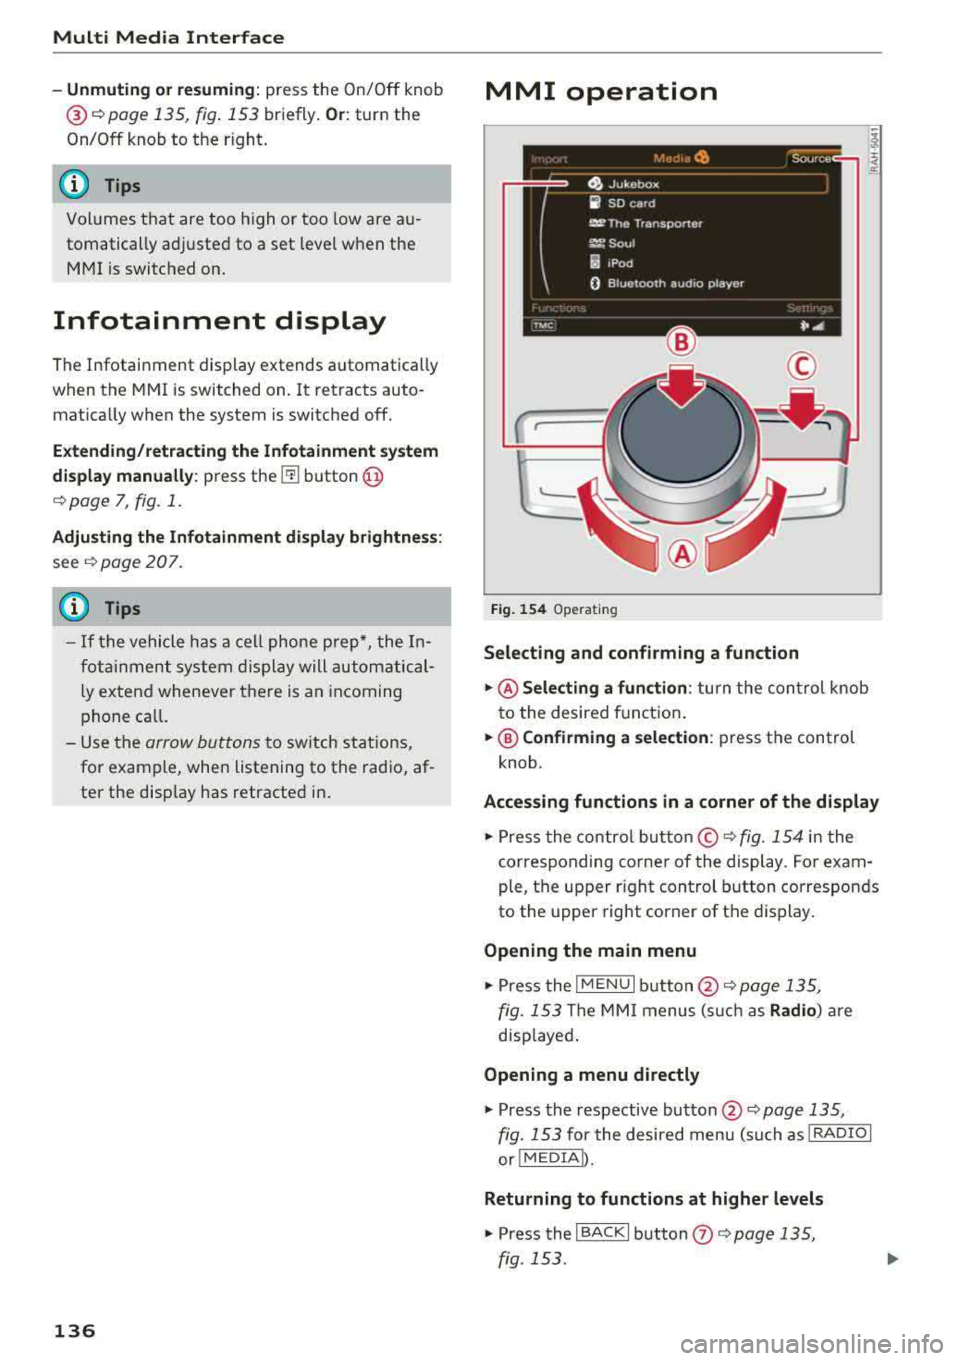
Fig. 154 Operating
Selecting and confirming a function
.,. @ Selecting a function : turn the control knob
to the desired f unction .
.,. @ Confirming a selection: press the control
knob .
Accessing functions in a corner of the display
.,. Press the control button© r=;, fig. 154 in the
corresponding corner of the display . For exam
ple, the upper r ight control button corresponds
to the upper right corner of the display.
Opening the main menu
.,. Press the I MENU I button @ r=;, page 135,
fig. 153 The MMI menus (such as Radio) are
disp layed .
Opening a menu directly
.,. Press the respective button @ r=;, page 135,
fig. 153 for the desired menu (such as I RADIO I
or!MEDIA D.
Returning to functions at higher levels
.,. Press the I BACKI button (J) r=;, page 135,
fig. 153 .