warning AUDI A8 2020 Owners Manual
[x] Cancel search | Manufacturer: AUDI, Model Year: 2020, Model line: A8, Model: AUDI A8 2020Pages: 360, PDF Size: 95.38 MB
Page 288 of 360
Checking and Filling
Always keep children away from battery
@) acid and the battery.
@/ | Always follow the instructions in the oper-
fQ | ating manual.
@ For the sake of the environment
2 ¥ Lead-acid batteries must be disposed of
using methods that will not harm the environ-
ment. Do not dispose of them in household
trash. They contain harmful substances, such
as sulfuric acid and lead, and also recyclable
raw materials. Contact an authorized Audi
dealer or authorized Audi Service Facility for
more information.
Other battery types
Explanation of warnings:
Fire, sparks, open flame, and smoking are
® forbidden.
Always keep children away from battery
3) acid and the battery.
@/ | Always follow the instructions in the oper-
fQ | ating manual.
ZA WARNING
All work on the batteries must only be per-
formed by an authorized Audi dealer or au-
thorized Audi Service Facility.
— Gases that escape from these different bat-
tery types can be poisonous or flammable.
— The contents of these battery types can be
corrosive. If any battery contents come into
contact with the skin, flush the affected
area for at least 15 minutes with clean wa-
ter. Then wash the affected area with soap.
Have the affected area examined by a medi-
cal professional.
() Note
Components must not be connected to the
battery terminals and wires on these battery
types because this increases the risk of dam-
age, for example due to overvoltage.
286
@) For the sake of the environment
OE These types of batteries must be dis-
posed of using methods that will not harm
the environment. Do not dispose of them in
household trash. They contain harmful sub-
stances and recyclable raw materials. Contact
an authorized Audi dealer or authorized Audi
Service Facility for more information.
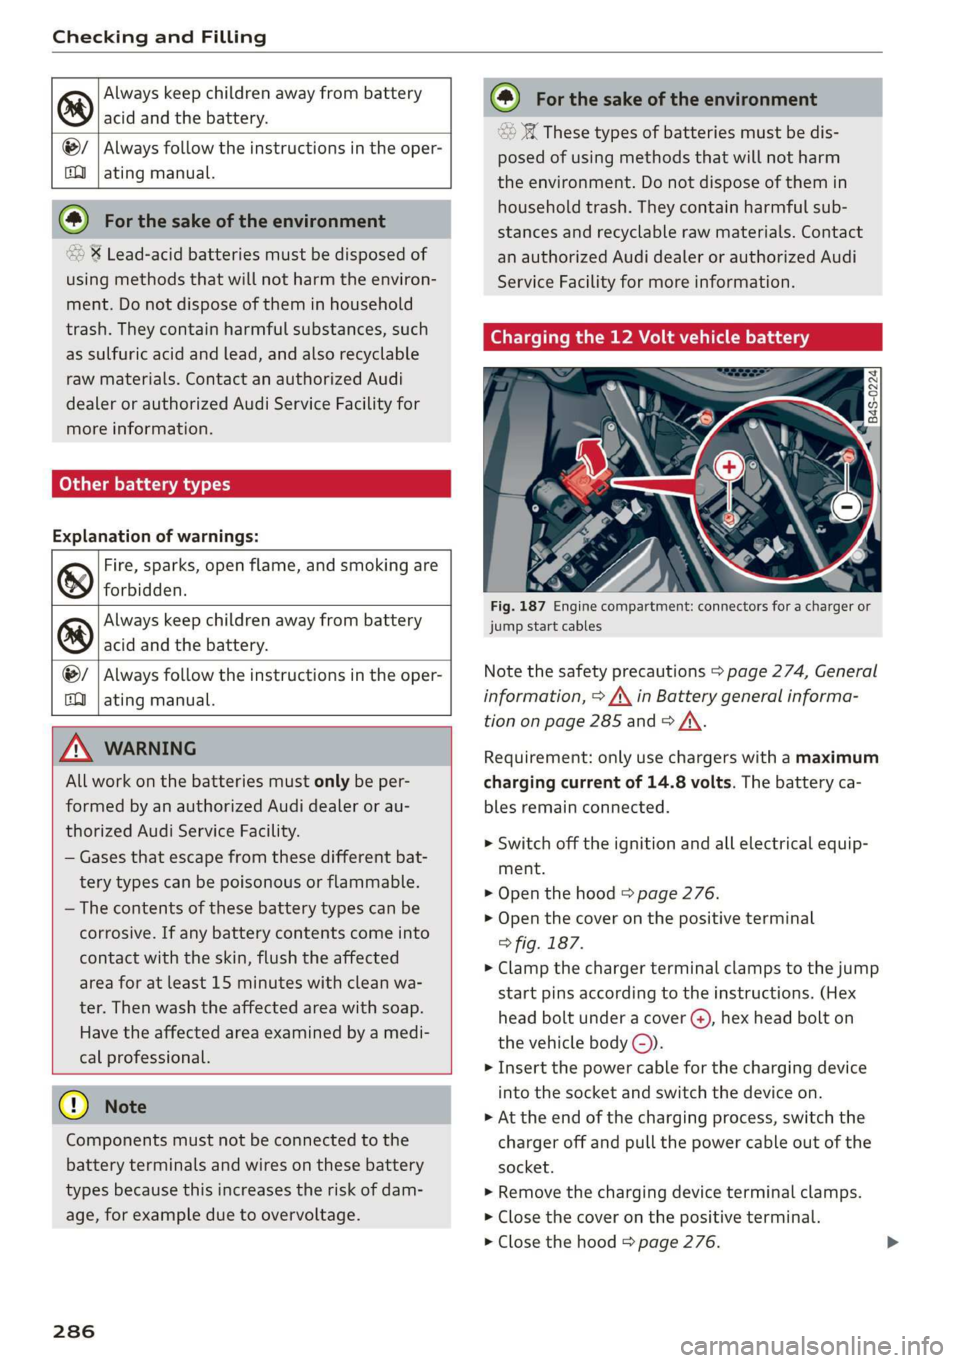
Charging the 12 Volt vehicle battery
Fig. 187 Engine compartment: connectors for a charger or
jump start cables
Note the safety precautions > page 274, General
information, > /\ in Battery general informa-
tion on page 285 and > /\.
Requirement: only use chargers with a maximum
charging current of 14.8 volts. The battery ca-
bles remain connected.
> Switch off the ignition and all electrical equip-
ment.
> Open the hood > page 276.
> Open the cover on the positive terminal
> fig. 187.
> Clamp the charger terminal clamps to the jump
start pins according to the instructions. (Hex
head bolt under a cover (), hex head bolt on
the vehicle body ©).
> Insert the power cable for the charging device
into the socket and switch the device on.
> At the end of the charging process, switch the
charger off and pull the power cable out of the
socket.
> Remove the charging device terminal clamps.
> Close the cover on the positive terminal.
> Close the hood > page 276.
Page 289 of 360
4N0012721BD
Checking and Filling
AN WARNING
— Never connect a charging cable or jump
start cable directly to the 12 Volt vehicle
battery. Only use the connections in the en-
gine compartment > page 286.
— A highly explosive mixture of gases can form
when charging batteries. Only charge the
battery in well-ventilated areas.
— A drained battery can freeze at tempera-
tures around 32 °F (0 °C). Do not charge or
use a frozen or thawed battery. If ice forms,
the battery housing can crack and battery
electrolyte can leak out, which increases the
risk of an explosion and chemical burns.
Contact an authorized Audi dealer or author-
ized Audi Service Facility for more informa-
tion.
— Do not connect or disconnect the charging
cable while charging because this increases
the risk of an explosion.
@) Tips
Read all of the manufacturer's instructions
for the charger before charging the battery.
Windshield washer
system
B4M-0135,
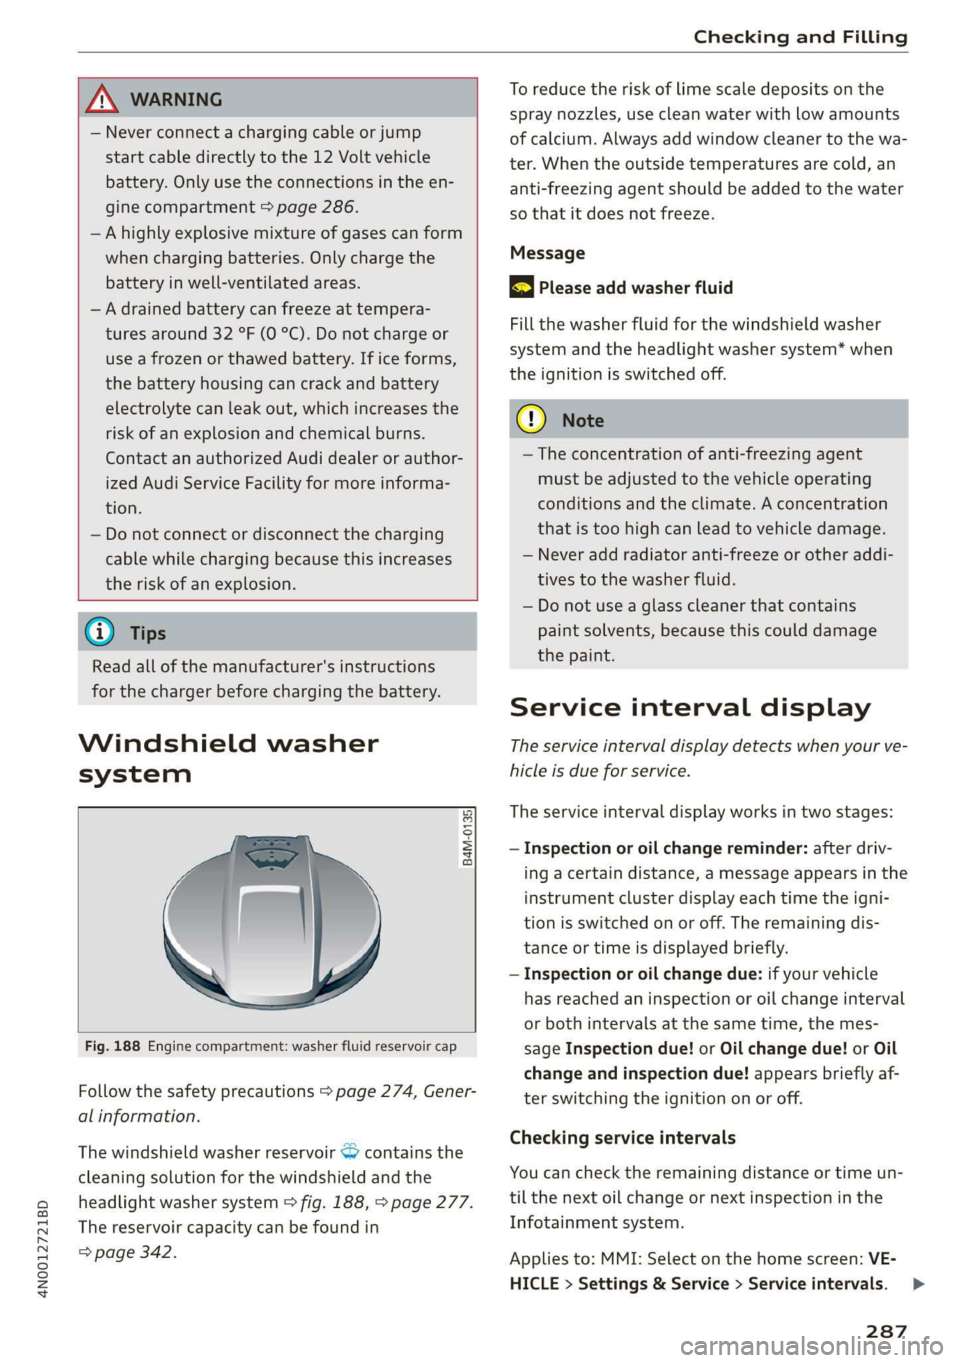
Fig. 188 Engine compartment: washer fluid reservoir cap
Follow the safety precautions > page 274, Gener-
al information.
The windshield washer reservoir > contains the
cleaning solution for the windshield and the
headlight washer system > fig. 188, > page 277.
The reservoir capacity can be found in
=> page 342.
To reduce the risk of lime scale deposits on the
spray nozzles, use clean water with low amounts
of calcium. Always add window cleaner to the wa-
ter. When the outside temperatures are cold, an
anti-freezing agent should be added to the water
so that it does not freeze.
Message
gS Please add washer fluid
Fill the washer fluid for the windshield washer
system and the headlight washer system* when
the ignition is switched off.
() Note
—The concentration of anti-freezing agent
must be adjusted to the vehicle operating
conditions and the climate. A concentration
that is too high can lead to vehicle damage.
— Never add radiator anti-freeze or other addi-
tives to the washer fluid.
— Do not use a glass cleaner that contains
paint solvents, because this could damage
the paint.
Service interval display
The service interval display detects when your ve-
hicle is due for service.
The service interval display works in two stages:
— Inspection or oil change reminder: after driv-
ing a certain distance, a message appears in the
instrument cluster display each time the igni-
tion is switched on or off. The remaining dis-
tance or time is displayed briefly.
— Inspection or oil change due: if your vehicle
has reached an inspection or oil change interval
or both intervals at the same time, the mes-
sage Inspection due! or Oil change due! or Oil
change and inspection due! appears briefly af-
ter switching the ignition on or off.
Checking service intervals
You can check the remaining distance or time un-
til the next oil change or next inspection in the
Infotainment system.
Applies to: MMI: Select on the home screen: VE-
HICLE > Settings & Service > Service intervals.
287
>
Page 291 of 360
4N0012721BD
Wheels
Wheels Wheels
and Tires
General information
> Check your tires regularly for
damage, such as punctures,
cuts, cracks, and bulges. Remove
foreign objects from the tire
tread.
>If driving over curbs or similar
obstacles, drive slowly and ap-
proach the curb at an angle.
>Have faulty tires or rims re-
placed immediately.
>Protect your tires from oil,
grease, and fuel.
>Mark tires before removing
them so that the same running
direction can be maintained if
they are reinstalled.
>Lay tires flat when storing and
store them ina cool, dry location
with as little exposure to light as
possible.
A WARNING
—Never drive faster than the
maximum permitted speed for
your tires. This could cause the
tires to heat up too much. This
increases the risk of an acci-
dent because it can cause the
tire to burst.
—Always adapt your driving to
the road and traffic condi-
tions. Drive carefully and re-
duce your speed on icy or slip-
pery roads. Even winter tires
can lose traction on black ice.
() Note
—Please note that summer and
winter tires are designed for
the conditions that are typical
in those seasons. Audi recom-
mends using winter tires dur-
ing the winter months. Low
temperatures significantly de-
crease the elasticity of summ-
er tires, which affects traction
and braking ability. If summer
tires are used in very cold tem-
peratures, cracks can form on
the tread bars, resulting in
permanent tire damage that
can cause loud driving noise
and unbalanced tires.
—Burnished, polished or
chromed rims must not be
used in winter driving condi-
tions. The surface of the rims
does not have sufficient corro-
sion protection for this and
could be permanently dam-
aged by road salt or similar
substances.
289
Page 297 of 360
4N0012721BD
Wheels
maximum permissible road
speeds. See also > A in General
information on page 289.
Tire pressure monitoring
system
means a system that detects
when one or more of a vehicle's
tires are underinflated and illumi-
nates a low tire pressure warning
telltale.
Tread
means that portion of a tire that
comes into contact with the road.
Tread separation
means pulling away of the tread
from the tire carcass.
Treadwear indicators (TWI)
means the projections within the
principal grooves designed to give
a visual indication of the degrees
of wear of the tread. See
= page 298, Treadwear indicator
for more information on measur-
ing tire wear.
Uniform Tire Quality Grading
is a tire information system devel-
oped by the United States Nation-
al Highway Traffic Safety Adminis-
tration (NHTSA) that is designed
to help buyers make relative com-
parisons among tires. The UTQG is
not a safety rating and not a guar-
antee that a tire will last for a
prescribed number of miles (kilo-
meters) or perform in a certain
way. It simply gives tire buyers
additional information to com-
bine with other considerations,
such as price, brand loyalty and
dealer recommendations. Under
UTQG, tires are graded by the tire
manufacturers in three areas:
treadwear, traction, and tempera-
ture resistance. The UTQG infor-
mation on the tires, molded into
the sidewalls.
U.S. DOT Tire Identification
Number (TIN)
This is the tire’s “serial number”.
It begins with the letters “DOT”
and indicates that the tire meets
all federal standards. The next
two numbers or letters indicate
the plant where it was manufac-
tured, and the last four numbers
represent the week and year of
manufacture. For example,
DOT... 2219...
means that the tire was produced
in the 22nd week of 2019. The
other numbers are marketing co-
des that may or may not be used >
295
Page 299 of 360
4N0012721BD
Wheels
differently even if they are the
same size > (\.
>If you would like to equip your
vehicle with a tire and rim com-
bination that is different from
what was installed at the facto-
ry, consult with an authorized
Audi dealer or authorized Audi
Service Facility before making a
purchase > A.
Because the spare tire® is differ-
ent from the regular tires instal-
led on the vehicle (such as winter
tires or wide tires), only use the
spare tire* temporarily in case of
emergency and drive carefully
while it is in use. It should be re-
placed with a regular tire as soon
as possible.
All four wheels must be equipped
with tires that are the same brand
and have the same construction
and tread pattern so that the
drive system is not damaged by
different tire speeds. For this rea-
son, in case of emergency, only
use a Spare tire* that is the same
circumference as the regular tires.
Z\ WARNING
—Do not use steel rims that are
17 inches or larger. Otherwise,
damage to the vehicle and an
accident could result.
—Only use tire/rim combina-
tions and suitable wheel bolts
that have been approved by
Audi. Otherwise, damage to
the vehicle and an accident
could result.
—For technical reasons, it is not
possible to use tires from oth-
er vehicles. In some cases, you
cannot even use tires from the
same vehicle model.
—Make sure that the tires you
select have enough clearance
to the vehicle. Replacement
tires should not be chosen
simply based on the nominal
size, because tires with a dif-
ferent construction can differ
greatly even if they are the
same size. If there is not
enough clearance, the tires or
the vehicle can be damaged
and this can reduce driving
safety and increase the risk of
an accident.
—Only use tires that are more
than six years old when abso-
lutely necessary and drive
carefully when doing so.
—Do not use run-flat tires on
your vehicle. Using them when
297
Page 301 of 360

4N0012721BD
Wheels
install the tires from the rear axle
on the front axle and vice versa.
This will allow the tires to have
approximately the same length of
service life.
For unidirectional tires, make sure
the tires are installed according to
the running direction indicated on
the tire sidewall > page 321.
Hidden damage
Damage to tires and rims can of-
ten occur in locations that are hid-
den. Unusual vibrations in the ve-
hicle or pulling to one side may
indicate that there is tire damage.
Reduce your speed immediately.
Check the tires for damage. If no
damage is visible from the out-
side, drive slowly and carefully to
the nearest authorized Audi deal-
er or authorized Audi Service Fa-
cility to have the vehicle inspect-
ed.
Z\ WARNING
Tread that has worn too low or
uneven tread depths on the
tires can reduce driving safety.
This can increase the risk of an
accident because it has a nega-
tive effect on handling, driving
through curves, and braking,
and because it increases the
risk of hydroplaning when driv-
ing through deep puddles.
Tire pressure
B4l-1383
Fig. 191 Driver's side B-pillar: tire pres-
sure label
B8K-1151
@ SEATING CAPACITY. “TOTAL uj FRONT ul REAR a) (ooun NOMBRE DE PLACES TOTAL AVANT ARRIERE soa
‘Tho combined woight of occupants and cargo shi — Ko OF pm ibs. Le poids total des occupants et du chargement n =... a,
TIRE SIZE
PNEU _| DIMENSIONS
FRONT
AVANT
REAR
ARRIERE
‘SPARE
DE SECOURS
COLD TIRE PRESSURE
PRESSION DES PNEUS A FROID
as KPA, Ml PSI
a KPA, Ml PSI
a KPA, Ml PSI
Fig. 192 Tire pressure label
The correct tire pressure for tires
installed at the factory is listed on
a label. The label is located on the
B-pillar > fig. 191, > fig. 192.
Use the tire pressure specified for
a normal vehicle load when the
vehicle is partially loaded > table
on page 301. If driving the vehi-
cle when fully loaded, you must
increase the tire pressure to the
maximum specified pressure > A. >
299
Page 302 of 360
Wheels
Checking and correcting tire
pressure
>Check the tire pressure at least
once per month and also check it
before every long drive.
> Always check the tire pressure
when the tires are cold. Do not
reduce the pressure if it increas-
es when the tires are warm.
>Refer to the sticker > fig. 192
for the correct tire pressure.
>Correct the tire pressure if nec-
essary.
>Store the new tire pressure in
the MMI & page 308.
> Check the pressure in the spare
tire*. Always maintain the maxi-
mum temperature that is speci-
fied for the tire.
and follow the important safe-
ty precautions in > page 301.
—The tire must flex more if the
tire pressure is too low or if
the vehicle speed or load are
too high. This heats the tire up
too much. This increases the
risk of an accident because it
can cause the tire to burst and
result in loss of vehicle con-
trol.
—Incorrect tire pressure increas-
es tire wear and has a negative
effect on driving and braking
behavior, which increases the
risk of an accident.
Z\ WARNING
Always adapt the tire pressure
to your driving style and the ve-
hicle load.
—Overloading can lead to loss of
vehicle control and increase
the risk of an accident. Read
() Note
Replace lost valve caps to re-
duce the risk of damage to the
tire valves.
©) For the sake of the envi-
ronment
Tire pressure that is too low in-
creases fuel consumption.
Ncw ee] c
Please note that the information
contained in the following table
was correct at the time of print-
ing, and the information is sub-
300
ject to change. If there are any
differences, you should always
follow the tire pressure sticker
> page 299, fig. 191.
Page 303 of 360

4N0012721BD
Wheels
Make sure that the tire designa- The following table lists recom-
tion on your tire matches the des- mended tire pressures in cold
ignation on the tire pressure label tires according to the load and
and the tire pressure table. the size of the tires installed.
Model/ Tire designation Tire pressure
Engine Normal load Maximum load
(up to 2/3* people)”
Front Rear Front Rear
PSI | kPA | PSI | kPA | PSI | kPA | PSI | kPA
AB L: 255/45 R19104H | 35 240 | 32 | 220 | 38 | 260 | 38 | 260
3.0L 255/45 R19104Y | 35 240 | 32 | 220 | 35 | 240 | 35 | 240
6-cylinder
265/40 R20 104H 35 240 32 220 38 260 38 260
265/40 R20 104Y 35 240 32 220 35 240 35 240
275/35 R21 103Y 35 240 32 220 35 240 35 240
A8L: 255/45R19104H| 38 | 260 | 33 | 230 | 41 | 280 | 41 | 280
4.0L 255/45 R19104Y | 35 240 | 32 | 220 | 38 | 260 | 38 | 260
8-cylinder
265/40R20104H| 38 | 260 | 33 | 230 | 41 | 280 | 41 | 280
265/40 R20104Y | 35 | 240 | 32 | 220 | 38 | 260 | 38 | 260
275/35 R21103Y | 35 | 240 | 32 | 220 | 38 | 260 | 38 | 260
A8LTFSIe: |255/45R19104H| 36 | 250 | 36 | 250 | 39 | 270 | 42 | 290
3.0L 255/45 R19104Y | 35 240 | 35 | 240 | 38 | 260 | 41 | 280
Groytinder 265/40R20104H| 36 | 250 | 36 | 250 | 39 | 270 42 | 290
265/40R20104Y | 35 | 240 | 35 | 240 | 38 | 260 41 | 280
275/35R21103Y | 35 | 240 | 35 | 240 | 38 | 260 41 | 280
S8L: 265/40R20104Y | 38 | 260 | 33 | 230 | 42 | 290) 39 | 270
4.0L 265/35R21101Y | 42 290 | 36 | 250 | 46 | 320 | 44 | 300
8-cylinder
275/35 R21 103Y 39 270 35 240 44 300 41 280
@) Vehicles with four seating positions: two people in the front, Vehicles with five seat-
ing positions: two people in the front, one person in the rear
JN WARNING Tires and vehicle load limits
Please note the important safe- | There are limits to the amount of
ty precautions regarding tire load or weight that any vehicle
pressure > page 299 and load and any tire can carry. A vehicle
limits > page 301. that is overloaded will not handle
well and is more difficult to stop.
Overloading can not only lead to >
301
Page 304 of 360
Wheels
loss of vehicle control, but can al-
so damage important parts of the
vehicle and can lead to sudden
tire failure, including a blowout
and sudden deflation that can
cause the vehicle to crash.
Your safety and that of your pas-
sengers also depends on making
sure that load limits are not ex-
ceeded. Vehicle load includes ev-
erybody and everything in and on
the vehicle. These load limits are
technically referred to as the vehi-
cle’s Gross Vehicle Weight Rating
(“GVWR”).
The “GVWR” includes the weight
of the basic vehicle, all factory in-
stalled accessories, a full tank of
fuel, oil, coolant and other fluids
plus maximum load. The maxi-
mum load includes the number of
passengers that the vehicle is in-
tended to carry (“seating capaci-
ty”) with an assumed weight of
150 lbs. (68 kg) for each passen-
ger at a designated seating posi-
tion and the total weight of any
luggage in the vehicle. If you tow
a trailer, the weight of the trailer
hitch and the tongue weight of
the loaded trailer must be includ-
ed as part of the vehicle load.
302
The Gross Axle Weight Rating
(“GAWR”) is the maximum load
that can be applied at each of the
vehicle’s two axles.
The fact that there is an upper
limit to your vehicle’s Gross Vehi-
cle Weight Rating means that the
total
weight of whatever is being
carried in the vehicle (including
the weight of a trailer hitch and
the tongue weight of the loaded
trailer) is limited. The more pas-
sengers in the vehicle or passen-
gers who are heavier than the
standard weights assumed mean
that less weight can be carried as
luggage.
The Gross Vehicle Weight Rating
and the Gross Axle Weight Rating
are listed on the safety compli-
ance sticker label located on the
driver’s side B-pillar.
Z\, WARNING
Overloading a vehicle can cause
loss of vehicle control, a crash
or other accident, serious per-
sonal injury, and even death.
—Carrying more weight than
your
vehicle was designed to
carry will prevent the vehicle [>
Page 306 of 360
Wheels
exceed the available cargo and
luggage load capacity calculat-
ed in Step 4.
6. If your vehicle will be towing a
trailer, load from your trailer
will be transferred to your vehi-
cle. Consult this manual to de-
termine how this reduces the
available cargo and luggage
load capacity of your vehicle.
> Check the tire sidewall
(=> page 290, fig. 189) to deter-
mine the designated load rating
for a specific tire.
Wheel bolts and rims
Wheel bolts
Wheel bolts must be clean and loosen/tighten
easily. You will need a special adapter to loosen
the anti-theft wheel bolts* > page 319.
Rims
Rims with a bolted rim ring* or with bolted wheel
covers* consist of multiple pieces. These compo-
nents were bolted together using special bolts
and a special procedure. You must not repair or
disassemble them > A\.
ZA WARNING
Wheel bolts that are tightened or repaired in-
correctly can become loose and result in loss
of vehicle control, which increases the risk of
an accident. For the correct tightening specifi-
cation, see > page 322, Finishing.
— Always keep the wheel bolts and the threads
in the wheel hub clean and free of grease.
— Only use wheel bolts that fit the rim.
— Always have damaged rims repaired by an
authorized Audi dealer or authorized Audi
Service Facility. Never repair or disassemble
304
rims yourself, because this increases the risk
of
an accident.
Loose wheel warning
Applies to: vehicles with loose wheel warning
Within the limits of the system, the loose wheel
warning in the instrument cluster warns you if
one or more wheels are loose.
Using the ABS sensors, the loose wheel warning
system compares the vibration characteristics of
the individual tires. If one or more wheels are
loose, it will be indicated in the instrument clus-
ter display with the fi indicator light and a mes-
sage. If only one wheel is affected, the location
of that wheel will be indicated.
Messages
fi Wheel bolts loose. Please safely stop the ve-
hicle and check all wheel bolts!
Loose wheel warning for at least one wheel > A\.
Check the wheel bolts on all wheels with the
wheel wrench (vehicle tool kit). Have the tighten-
ing specification checked as soon as possible with
a torque wrench. Drive carefully until then. For
the correct tightening specification, see
=> page 322, Finishing.
fi Wheel assessment active. Please continue
driving carefully
After this message appears and you have checked
the wheel bolts, the assessment phase begins
when the vehicle is in motion. This may take sev-
eral minutes.
& Loose wheel warning: malfunction! See
owner's manual
There is a system malfunction. Drive immediately
to an authorized Audi dealer or authorized Audi
Service Facility to have the malfunction repaired.
ZA\ WARNING
Wheel bolts that are tightened incorrectly can
become loose and result in loss of vehicle con-
trol, which increases the risk of an accident.
— If a message appears, reduce your speed im-
mediately and avoid any hard steering or >