light AUDI ALLROAD 2000 User Guide
[x] Cancel search | Manufacturer: AUDI, Model Year: 2000, Model line: ALLROAD, Model: AUDI ALLROAD 2000Pages: 306, PDF Size: 9.95 MB
Page 39 of 306
 on the
doors.")
SA
FETY FIRST
1\1 WARNING continued
• Never place or attach accesso
ries or other objects (such as cup
holders. telephone brackets. or
even large. bulky objects) on the
doors. over or near the area
marked ., Airbag" on the seat back
rests or between those areas and
yourself (an umbrella. bag. etc.}.
Such objects can become danger
ous projec tiles and cause injury if
the supplemental side airbag in
flates.
• Always prevent heavy objects
from knocking against or hitting
the sides of the seatbacks. This
could damage the side airbag sys
tems and they would not deploy in
case of an accident!
38 ��
WARNING continued
• Use the built-in coat hooks only
for lightweight clothing. Do not
leave any heavy or sharp-edged ob
jects in the pockets which may in
terfere with side airbag deploy
ment and can cause personal inju
ry in an accident.
• Never recline the front passen
ger's seat to transport objects.
Items can also move into the area
of the side airbags during braking
or sudden maneuvers. Objects
near the supplemental side airbag
can become projectiles and cause
injury particularly when the seat is
reclined. Child
restraints on the front seat
important things to know
The airbag on the passen gers ide makes the
front seat a potentially dangerous place for
a child to ride. The front seat is not the saf
est place for a child in a forward-facing child
seat. It is a very dangerous place for an in
fant or a larger child in a rearward-facing
seat. For additional important information
and WARNINGS please see chapters
"Front airbags" and "Child Safety," begin
ning on page 44.
Page 42 of 306

Some other important points
to
know
Because head airbags inflate in the blink of
an eye with a certain force, things you have
on your lap or have placed on the seat could
become dangerous projectiles and be
pushed into you if the airbag inflates.
�W ARNING
• Objects between you and the
airbag can Increase the risk of in
jury in an accident by interfering
with the way the airbag unfolds or
by being pushed Into you as the
airbag inflates.
• Only genuine Audi roll-up sun
screens may be used on the rear
doors. �W
ARNING
• Do not swivel the sun visors to
the side if you have any objects
clipped onto them (for example
pens). If the airbag should deploy,
you could be injured by these ob
jects.
• Use the built-in coat hooks only
for lightweight clothing. Do not
usa any hangers when hanging
clo thing on the coat hooks. Do not
leave any heavy or sharp-edged ob
jects in the pockets which may in
terfere with head airbag deploy
ment and can cause personal in
jury in an accident. SA
FETY FIRST
Care, Service and Disposal of
Airbags
Parts of the airbag system have been
installed at different places on your Audi.
Servicing or repairing in an area of the car
could impair airbag performance.
Some general requirements for airbags
must be observed to make sure the effec
tiveness of the system will not be impaired
and that discarded components do not
cause injury or pollute the environment.
�W ARNING
A damaged airbag system may not
work properly in an accident. In
correct service procedures could
cause an airbag to deploy unex
pectedly during service, injuring
someone. To avoid damaging the
airbag system, possibly causing
malfunction leading to injury in an
accident or during repair:
Always heed all WA RNINGS
on next page.
41
Page 54 of 306

Child
restra int anchorages for
the rear seats
If your child restraint seat or seats are
equipped with a tether strap you will want
to use one or more of the anchor points pro
vided on the filler panel.
Yo ur vehicle is equipped with three child re
straint anchorages (one for each rear seat
ing position). See illustration. They have
been covered with plastic caps.
Attaching a child restraint tether
strap to the tether anchorage
• Release or deploy the tether strap on the
child restraint according to the child re
straint manufacturer's usage instructions. •
Install the child restra int in the vehicle
rear seating position using the LATCH* low
er ancho rages according to the child re
straint manufacturer's instructions. If the
vehicle safety belts are used, activate the
conver tible locking retractor feature.
• Guide the tether strap under the rear
seat head restraints (raise the head restraint
slightly if necessary) and attach the tether
anch orage hook into the opening of the
tether anchorage. Pull on the anchorage
hook so that it is held on the anch orage by
the spring catch of the hook.
• Tighten the tether strap firmly following
the child restra int man ufacturer's instruc
tions. SA
FETY FIRST
• To release the tether strap, loosen the
tension following the child restraint
manufacturer's instructions. Depress the
spring catch on the hook and release it from
the anch orage.
Yo ur vehicle is equipped with threaded fas
tening points for the installation of a LA TCH
anchorage system.
The LATCH system provides lower anchor
age points located between the seat back
and the seat cushion of the rear seat. These
anchorages are provided for the outboard
rear seats of your vehicle.
53
Page 60 of 306

Power locks
The power locking system in your vehicle in
corporates:
• Central locking function
• Remote control feature
• Anti-theft alarm system
for detail see page 67.
You can either lock your vehicle using the
remote control in your folding master
key or by using the mechanical key.
Activat ing the power locking system locks
or unlocks all doors, the rear lid and fuel filler
flap simu ltaneously.
The anti-theft alarm system switches on or
off whenever you lock or unlock the vehicle
with the remote control or key.
When locking the vehicle the horn of the
anti-theft alarm system will sound briefly if
all doors, hood and rear lid are closed prop
erly.
The selective unlock feature makes it
possible to open just the driver's door in
cluding the fuel filler flap. Operating
locks using remote
control
Unlocking and locking
(buttons A and C)
• To unlock just the driver's door
press button A one time for approxi
mately 1 second.
To unlock all the doors and the rear
lid press button A two times.
All four turn signal lights will flash twice
when the car is unlocked. CONT
ROLS AND EQUIPMENT
After unlocking the vehicle, you have 60
seconds to open a door or the rear lid. If you
wait longer than 60 seconds, the vehicle will
automatically lock itself once again. The
alarm system will be reactiv ated.
• To lock the vehicle press button C for
approximately 1 second.
To confirm that the car is locked all four turn
signal lights will flash one time.
Remote rear lid release
(button B)
To unlock rear lid only, press button B
for at least 1 second. Then open lid within
60 seconds.
How to unlock rear lid using the key see
page 63.
PA NIC switch (button D)
Bypushingthe red button Dyou will engage
the "panic functio n." The horn sounds and
the turn signals will flash.
Press button D again to switch off the "pan
ic function ."
59
Page 62 of 306
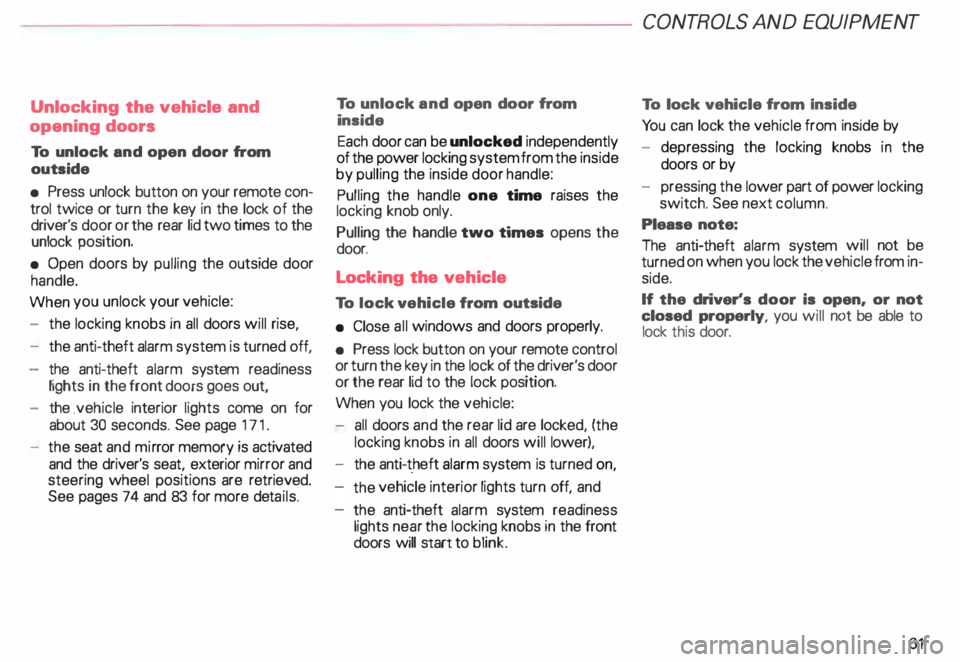
Unlocking the
vehicle and
opening doors
To unlock and open door from
outside
• Press unlock button on your remote con
trol twice or turn the key in the lock of the
driver's door or the rear lid two times to the
unlock position.
• Open doors by pulling the outside door
handle.
When you unlock your vehicle:
- the locking knobs in all doors will rise,
- the anti-theft alarm system is turned off,
- the anti-theft alarm system readiness
lights in the front doors goes out,
- the .vehicle interior lights come on for
about 30 seconds. See page 171.
- the seat and mirror memory is activated
and the driver's seat, exterior mirror and
steering wheel positions are retrieved.
See pages 74 and 83 for more details. To
unlock and open door from
inside
Each door can be unlocked independently
of the power locking system from the inside
by pulling the inside door handle:
Pulling the handle one time raises the
locking knob only.
Pulling the handle two times opens the
door.
Locking the vehicle
To lock vehicle from outside
• Close all windows and doors properly.
• Press lock button on your remote control
or turn the key in the lock of the driver's door
or the rear lid to the lock position.
When you lock the vehicle:
- all doors and the rear lid are locked, (the
locking knobs in all doors will lower),
- the anti-t .heft alarm system is turned on,
the vehicle interior lights turn off, and
the anti-theft alarm system readiness
lights near the locking knobs in the front
doors will start to blink. CONT
ROLS AND EQUIPMENT
To lock vehicle from Inside
Yo u can lock the vehicle from inside by
- depressing the locking knobs in the
doors or by
- pressing the lower part of power locking
switch. See next column.
Please note:
The anti-theft alarm system will not be
turned on when you lock the vehicle from in
side.
If the driver's door is open, or not
closed properly, you will not be able to
lock this door.
61
Page 68 of 306

---------------------CONTROLS
AND EQUIPMENT
• Certification
The remote control device complies with
Part 15 of the FCC Rules. Operation is sub
ject to the following conditions:
1 - this device may not cause harmful in
terfere nce, and
2 - this device must accept any interfer
ence received, including interference
that may cause undesir ed operation.
The manufacturer is not responsible for
ANY RADIO OR TV Interference caused by
una uthorized modifications to this equip
ment. Such modifications could void the
user's authority to operate the equipment. Anti-theft
alarm system
The anti-theft alarm system triggers an
acoustic alarm and switches on the emer
genc y flasher if it senses unauthorized inter
ference with the vehicle.
When the vehicle is locked the alarm sy
stem monitors and protects the following
parts of the vehicle:
• engine compartment
• luggage compartment
• doors
• factory installed radio
• passenger compartment
• ignition.
The alarm system is switched on or off
whenever you lock or unlock the vehicle.
Simply tum the key to the lock or unlock
position or use the remote control.
The system is activated about 30 seconds
after the vehicle is locked, and the indicator
lights on the front door window sills start
flashing. The
horn sounds briefly when the car is
locked to confirm that the alarm system is
operative and that all doors, hood and rear
lid are properly closed. If the hom does not
sound, or the indicator lights do not flash,
check all doors, rear lid and hood and close
them properly. The horn will also sound if
the door, lid and hood are closed when the
system is already switched on.
The rear lid can be opened separately even
when the system is active. When the rear
lid is closed the luggage compartment will
again be included in the alarm circuit.
When the system is switched on the alarm
will be triggered if one of the doors, the en
gine hood or the rear lid are opened, or if the
ign ition is switched on or the radio re
moved.
When the alarm is triggered the hom
sounds and all four turn signals flash simul
taneously. The engine cannot be started un
til the system is switched off with the key
or the remote control.
67
Page 69 of 306

CONT
ROLS AND
EQUIPMENT---------------------
If the alarm has sounded one time, and then
the vehicle is forced open again (for exam
ple, someone tries to forcibly open a door,
and then tries to force open the rear lid), the
signal will sound once again.
You can also trigger the alarm by pressing
the PANIC switch on your remote control
to alert other people in case of emergency
or when in another difficult situation. The
alarm can be switched off by pressing the
PA NIC switch again.
Warn ing lights
After you lock the vehicle, the warning light
on the window sills will blink quickly first for
30 seconds and will then blink slowly. This
is to let you know that the anti-theft alarm
system is activated, including the interior
move ment sensors.
If the warning lights come on continuously
for about 30 seconds instead of flashing
when the vehicle is locked, this indicates
that the interior movement sensor is defec
tive.
68 Swit
ching off the interior
movement sensors l
Yo u should switch off the interior move
ment sensors if there is the possibility that
the alarm system could be set off, for exam
ple by a pet left in the vehicle. •
Press the switch in the door pillar (see il
lustration). The indicator light in the switch
will come on. The indicator light on the win
dow sills will come on for approx imately
3 seconds. This verifies that the interior
movement sensors have been deactivat ed.
The sensors will be reactivated when you
unlo ck and lock the vehicle again.
• Lock the vehicle.
The indi cator lights in the doorpillarwill blink
quickly for approximately 3 seconds at first.
Then, after approximately 30 seconds, the
light will flash slowly.
Page 70 of 306

·--------------------CONT
ROLS AND EQUIPMENT
Power windows
The switches are located in the driver's
door. Also, the front passenger's door and
each rear door has its own power window
switch.
If the respective switch is pushed or pulled
the window will open or close.
• Switches A and B operate the front door
win dows.
• Switches C and D operate the rear win
dows.
• Safety switch S The
safety switch {S) in the armrest on the
driver's door can turn off the rear power win
dows. This feature has been provided for
the safety of small children riding in the rear
of the vehicle.
A symbol lights up in the safety switch
when the switches in the rear doors are de
activated.
Normally , the power windows can be
opened and closed only with the ignition on.
However, when the ignition is off the win
dows can still be operated by means of the
control switches as long as the driver's and
front passenger's doors are closed. yvhen
either door is opened, the power w1ndow
operation will be deactivated.
�W ARNING
• Do not leave children unat
tended In the vehicle, especially
with access to vehicle keys. Unsu
pervised use of the keys can result
in sta rting of the engine and use of
vehicle systems such as power
windows, etc. which could result
in serious injury. m
WARNING continued
• Remember also that the power
windows will continue to operate
until the ignition key has been re
moved and one of the front doors
has been opened.
• Be careful when closing the win
dows. Check to see that no one is
in the way, or serious injury could
result I
• Switch off the power to the rear
windows -if necessary -using the
safety switch S.
• Always remove the ignition key
whenever you leave your vehicle.
• If you lock your vehicle from the
outside, no one especially children
should remain in the vehicle. The
windows will not open in case of
an emergency.
• Do not stick anything on the
windows or the windshield that
may Interfere with the driver's vi
sion.
69
Page 72 of 306

---------------------CONTROLS AND EQUIPMEN T
Convenience close I open
feature
For the convenience of the driver all win
dows can be closed I opened centrally with
the ignition key while locking I unlocking the
vehicle:
Closing windows
In sert key into the lock of driver's door,
turn and hold in the locking position until all
windows are closed. The automatic close
func tion will stop imme diately if the key is
released.
�W ARNING
• Be careful when closing the win
dows.
• Check to see that no one is in
the way, or serious injury could re
sult. Opening
windows
Inse rt key into the lock of driver's door,
turn the key and hold in the unlocking posi
tion until all windows are opened.
This feature enables the driver, to let the
heat escape from the interior of the car, af
ter having parked in direct sunlight.
The convenience close I open feature is not
available when locking the vehicle using the
remote control. Note
If you disconnect and then reconnect the
battery, the convenience open and close
feature will not work.
The follow ing steps describe how to reacti
vate the convenience open I close feature
after reconnecting the battery:
• Close the window completely by lifting
the power window switch and holding.
• Release the switch and then lift it again
for a second.
• The convenience feature is now acti
vated.
71
Page 73 of 306

CONT
ROLS AND EQUIPMENT
Mir rors
Adjust the outside and inside mi rrors before
driving and after adjusting your seat to prop
er driving position. It is im porta nt for safe
driving that you have good vision to the rear.
Inside dey-night mirror
Manual anti-glare adjustment
Yo u can adjust the day -night mirror from
clear daylight visibility to non-glare visibility
at night by moving the lever at the bottom
of the mirror.
To ensure the best possible antiillare ef
fect, the lever on the lower edge of the mir
ror should be pointing forwards when the
basic setting is made.
Daylight driving -lever to front
Night driving -lever to rear.
72 Automatic
anti-glare adjustment•
When the ignition is switc hed on the interior
mirror will darken automatically depending
on the amount of light shinin g into the car
from the rear (e. g. headlights).
When you move the selector lever I gear
shift lever into Reverse R or when you
switch the interior lights on, the inside mir
ror will return to its original position (dim
ming effect off).
The mirror will return to the original position
(i. e. not anti-dazzle) when the selector lever
I gearshift lever is moved to position R. Outside
mirrors
Adjust the outside mirrors so that the side
of your own vehicle can just be seen. This
setting ensures the best possible field of
view, and in addition it serves as an instant
check on the mirror setti ng.
Self-d imming day I night outside
mirrors
The dimming of the outside mirrors is con
trolled by the inside day I night mirror.
The dimming of the outside mirrors works
only properly and without any interference,
if the rear window shade* is rolled up and I
or the light shining on the inside mirror is not
blocked by other objects.