Master key AUDI ALLROAD 2000 Owners Manual
[x] Cancel search | Manufacturer: AUDI, Model Year: 2000, Model line: ALLROAD, Model: AUDI ALLROAD 2000Pages: 306, PDF Size: 9.95 MB
Page 57 of 306
CONT
ROLS AND
EQUIPMENT---------------------
Keys
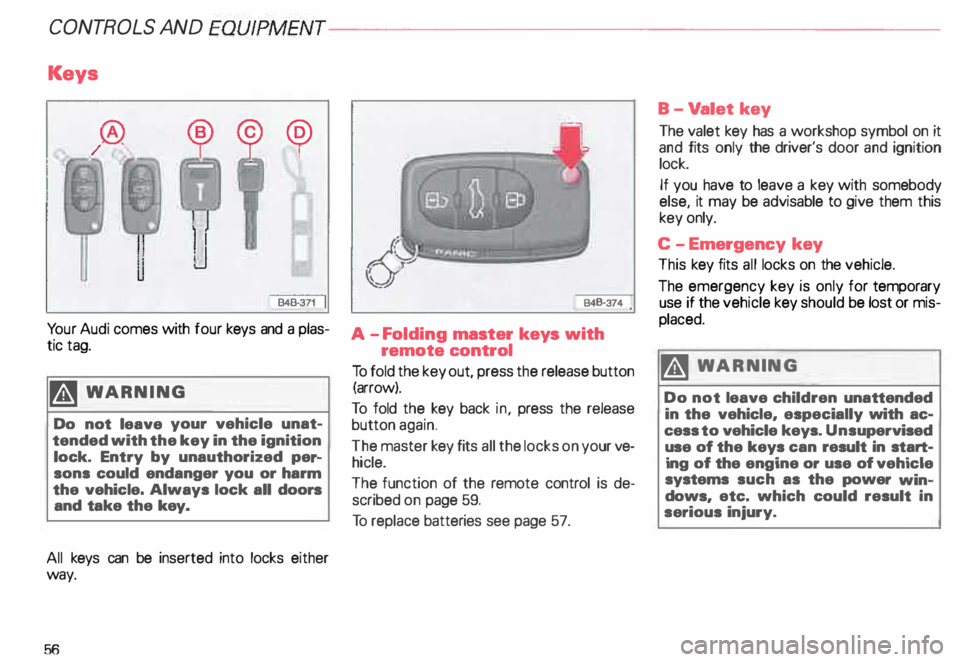
@ !
848-371
Yo ur Audi comes with tour keys and a plas
tic tag.
�W ARNING
Do not leave your vehicle unat
tended with the key in the ignition
lock. Entry by unauthorized per-
sons could endanger you or harm
the vehicle. Always lock all doors
and take the key.
All keys can be inserted into locks either
way.
56 B48-374
A -F olding master keys with
remote control
To fold the key out, press the release button
(arrow).
To told the key back in, press the release
button again.
The master key fits all the locks on your ve
hicle.
The function of the remote control is de
scribed on page 59.
To replace batteries see page 57. B-V
alet key
The valet key has a workshop symbol on it
and fits only the driver's door and ignition
lock.
If you have to leave a key with somebody
else, it may be advisable to give them this
key only.
C -E mergency key
This key fits all locks on the vehicle.
The emergency key is only for temporary
use if the vehicle key should be lost or mis
placed.
�W ARNING
Do not leave children unattended
in the vehicle, especially with ac
cess to vehicle keys. Unsupervised
use of the keys can result in start
ing of the engine or use of vehicle
systems such as the power win
dows, etc. which could result in
serious injury.
Page 58 of 306
D-
Tag
This tag gives the key num ber.
For your protection against theft:
• Record the key number and keep it in a
safe place, such as your wallet. Do not
keep it in the vehicle.
• If you �houlo IOSfl A key, rrovilie your AU
thorized Audi Dealer with the key number to
obtain a duplicate key.
Note If you open the driver's door with the key left
in the ignition lock, a chime will sound.
This is your reminder to remove the key and
lock the door. Electronic
immobilizer
Yo ur vehicle is equipped with an electronic
immobili zer.
With the help of an electronic component in
the key head, the imm obilizer prevents your
vehicle from being started by una uthorized
persons. See page 124.
Therefore, the engine can only be started
using the factory -equipped key.
If you lose a key, contact your authorized
Audi dealer immediately to have the lost key
disabled.
Note
In some cases, you may not be able to start
your vehicle if an ignition key of a different
vehicle make is also located on your set of
keys. CONT
ROLS AND EQUIPMEN T
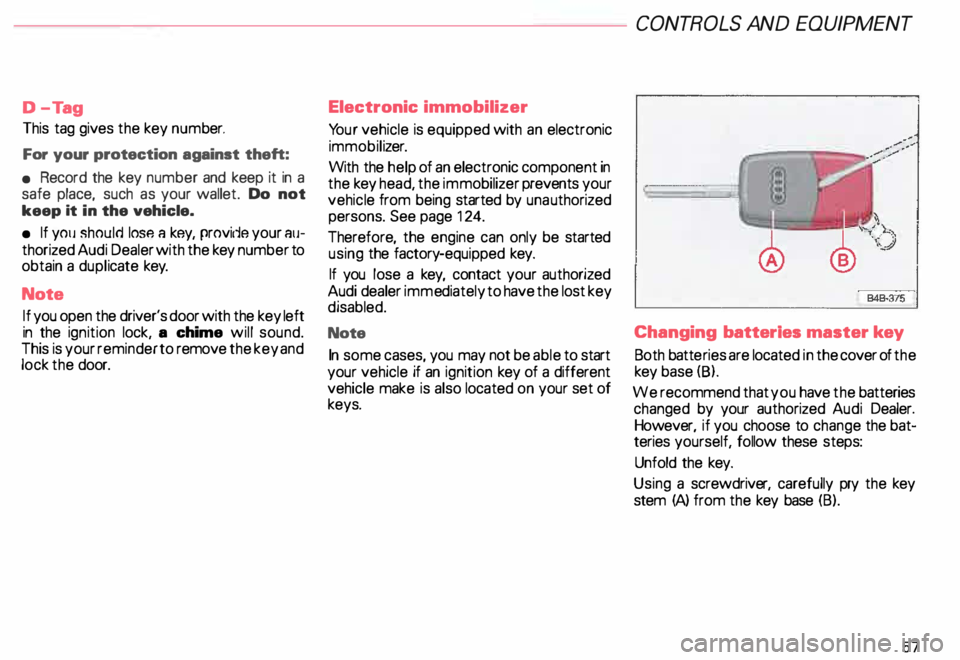
Changing batteries master key
Both batte ries are located in the cover of the
key base (8).
We recommend that you have the batteries
changed by your authorized Audi Dealer.
However, if you choose to change the bat
teries yourself, follow these steps:
Unfold the key.
Using a screwdriv er, carefully pry the key
stem (A) from the key base (B).
57
Page 60 of 306
Power locks
The power locking system in your vehicle in
corporates:
• Central locking function
• Remote control feature
• Anti-theft alarm system
for detail see page 67.
You can either lock your vehicle using the
remote control in your folding master
key or by using the mechanical key.
Activat ing the power locking system locks
or unlocks all doors, the rear lid and fuel filler
flap simu ltaneously.
The anti-theft alarm system switches on or
off whenever you lock or unlock the vehicle
with the remote control or key.
When locking the vehicle the horn of the
anti-theft alarm system will sound briefly if
all doors, hood and rear lid are closed prop
erly.
The selective unlock feature makes it
possible to open just the driver's door in
cluding the fuel filler flap. Operating
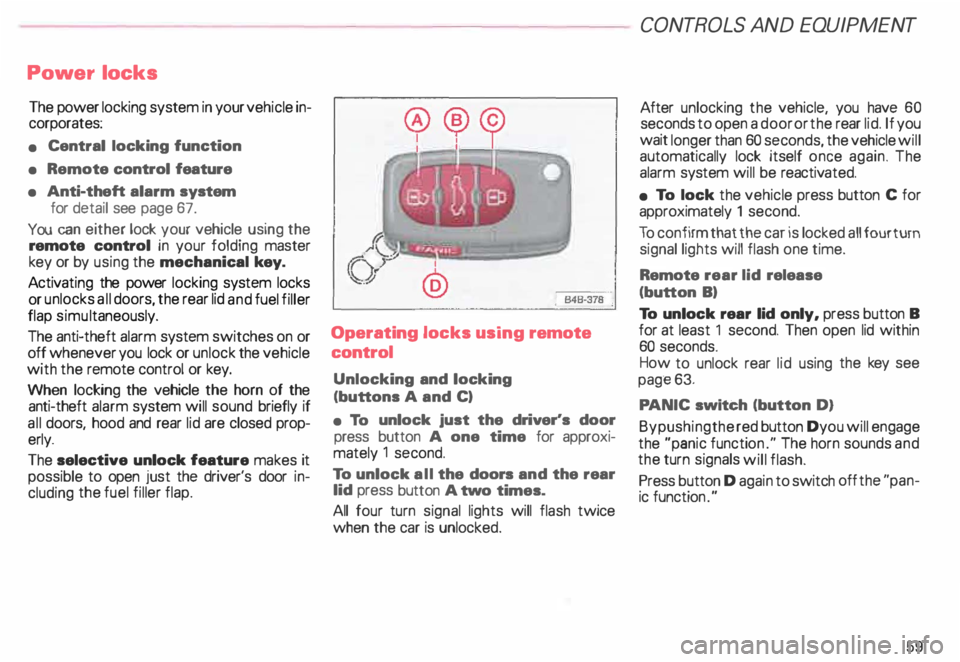
locks using remote
control
Unlocking and locking
(buttons A and C)
• To unlock just the driver's door
press button A one time for approxi
mately 1 second.
To unlock all the doors and the rear
lid press button A two times.
All four turn signal lights will flash twice
when the car is unlocked. CONT
ROLS AND EQUIPMENT
After unlocking the vehicle, you have 60
seconds to open a door or the rear lid. If you
wait longer than 60 seconds, the vehicle will
automatically lock itself once again. The
alarm system will be reactiv ated.
• To lock the vehicle press button C for
approximately 1 second.
To confirm that the car is locked all four turn
signal lights will flash one time.
Remote rear lid release
(button B)
To unlock rear lid only, press button B
for at least 1 second. Then open lid within
60 seconds.
How to unlock rear lid using the key see
page 63.
PA NIC switch (button D)
Bypushingthe red button Dyou will engage
the "panic functio n." The horn sounds and
the turn signals will flash.
Press button D again to switch off the "pan
ic function ."
59
Page 61 of 306
CONTROLS AND
EQUIPMENT--------------------
Remember- the panic function can be seen
and heard by other motorists and I or per
sons near you.
Use the panic function only if you
are In an emergency situation.
�W ARNING
Do not leave children unattended
in the vehicle especially with ac
cess to the remote control. There
mote control could be used to lock
the doors delaying access to the
children in an emergency.
Resetting the remote control
If your vehicle will not lock using the remote
control . it could be that the code for the con
trol unit and key needs to be reset. This can
occur if you frequently use the remote c �m
trol while standing outside of the effective
range.
60 Resetting
procedure
1 - To synchronize, press button A or but
ton Con the remote control one time.
2 - Then, within one minute, lock or un
lock the driver's door with the master
key.
The system is now functional.
Operating locks using the key
• To lock and unlock the vehicle from
the outside, turn the key in the lock of the
driver's door or the rear lid.
Yo u can also lock and unlock the vehicle by
turning the key in the re ar lid lock. See
page 63.
• Turn the key one time only to unlock
(A) either the driver's door or respectively
the rear lid.
• Turn the key two times to unlock all ve
hicle doors and the rear lid. Convenience
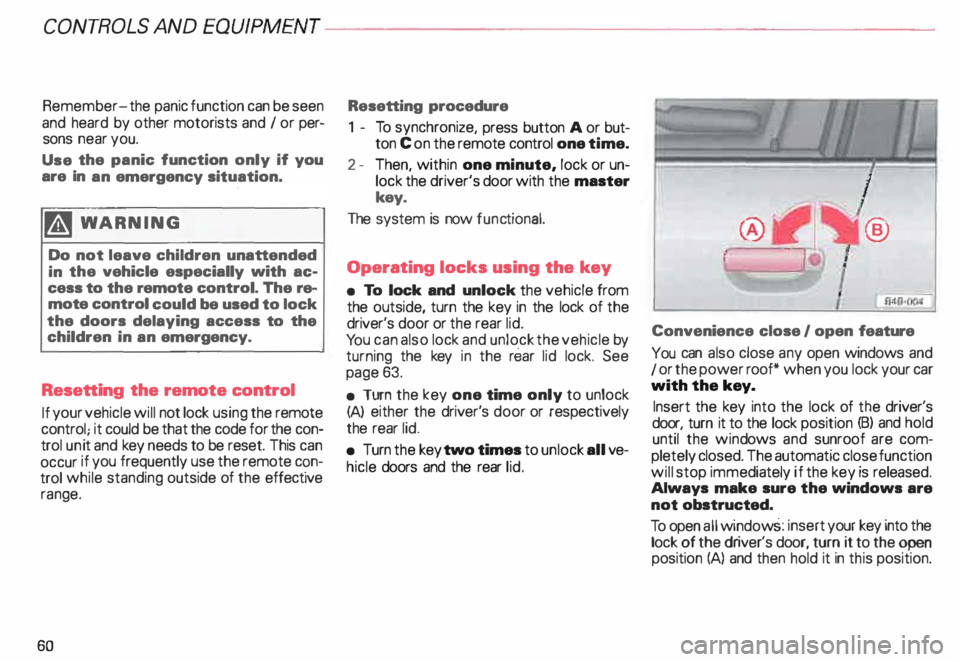
close I open feature
You can also close any open windows and
1 or the power roof* when you lock your car
with the key.
Insert the key into the lock of the driver's
door, turn it to the lock position (B) and hold
until the wind ows and sunroof are com
pletely closed. The automatic close function
will stop immediately if the key is released.
Always make sure the windows are
not obstructed.
To open all window s: insert your key into the
lock of the dr iver's door, turn it to the open
position (A) and then hold it in this position.
Page 64 of 306
B
-Child lock engaged
When the child lock is engaged (position 8),
the inside door handle is now locked and
you can only open the door from the out
side. The locking knob must be raised in or
der to open the door.
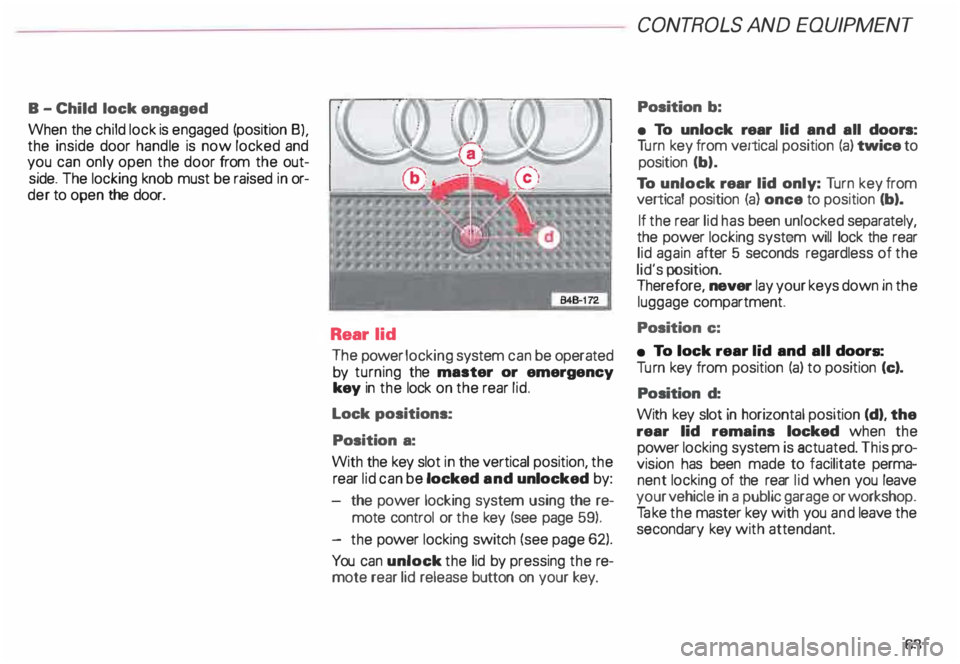
Rear lid
The power locking system can be operated
by turning the master or emergency
key in the lock on the rear lid.
Lock positions:
Position a:
With the key slot in the vertical position, the
rear lid can be locked and unlocked by:
the power locking system using the re
mote control or the key (see page 59).
- the power locking switch (see page 62).
You can unlock the lid by pressing the re
mote rear lid release button on your key. CONT
ROLS AND EQUIPMEN T
Position b:
• To unlock rear lid and all doors:
Tu rn key from vertical position (a) twice to
position (b).
To unlock rear lid only: Turn key from
vertical position (a) once to position (b).
If the rear lid has been unlocked separately,
the power locking system will lock the rear
lid again after 5 seconds regardless of the
lid's position.
Therefore, never lay your keys down in the
luggage compartment.
Position c:
• To lock rear lid and all doors:
Tu rn key from position (a) to position (c).
Position d:
With key slot in horizontal position (d), the
rear lid remains locked when the
power locking system is actuated. This pro
vision has been made to facilitate perma
nent locking of the rear lid when you leave
your vehicle in a public garage or workshop.
Ta ke the master key with you and leave the
secondary key with attendant.
63
Page 66 of 306
---------------------CONTROLS AND EQUIPMENT
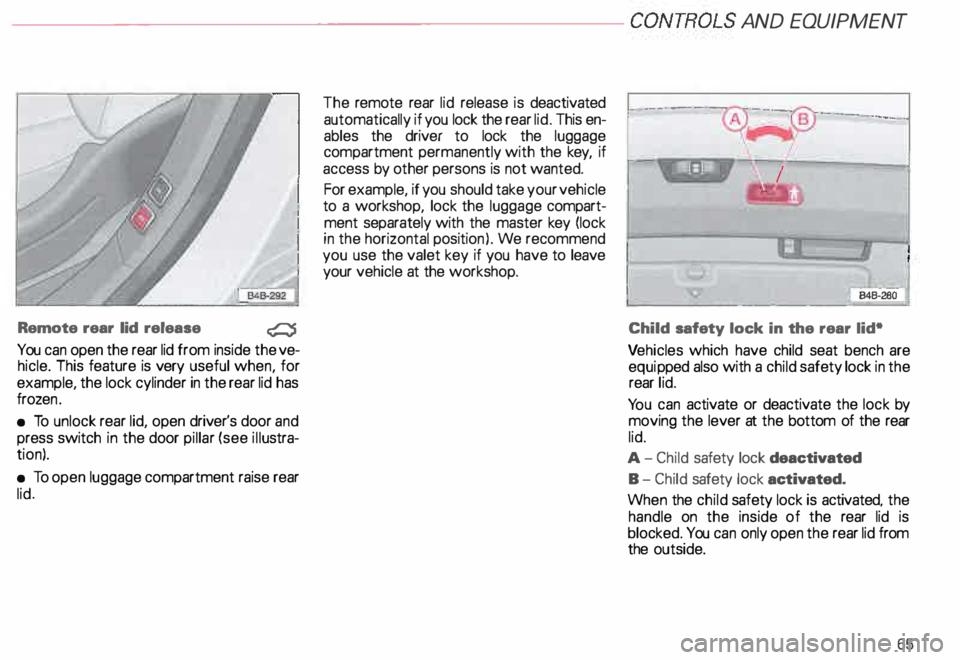
Remote rear lid release
�
You can open the rear lid from inside the ve
hicle. This feature is very useful when, for
example, the lock cylinder in the rear lid has
froze n.
• To unlock rear lid, open driver's door and
press switch in the door pillar (see illustra
tion).
• To open luggage compartment raise rear
lid. The
remote rear lid release is deactivated
automatically if you lock the rear lid. This en
ables the driver to lock the luggage
compartment permanently with the key, if
access by other persons is not wanted.
For example, if you should take your vehicle
to a workshop, lock the luggage compart
ment separately with the master key (lock
in the horizontal position). We recommend
you use the valet key if you have to leave
your vehicle at the workshop. I
I
B4B-
2Bo-i
Child safety lock in the rear lid•
Ve hicles which have child seat bench are
equi pped also with a child safety lock in the
rear lid.
Yo u can activate or deactivate the lock by
moving the lever at the bottom of the rear
lid.
A- Child safety lock deactivated
B- Child safety lock activated.
When the child safety lock is activated. the
handle on the inside of the rear lid is
blocked. You can only open the rear lid from
the outside.
65
Page 83 of 306
CONTROLS AND
EQUIPMENT---------------------
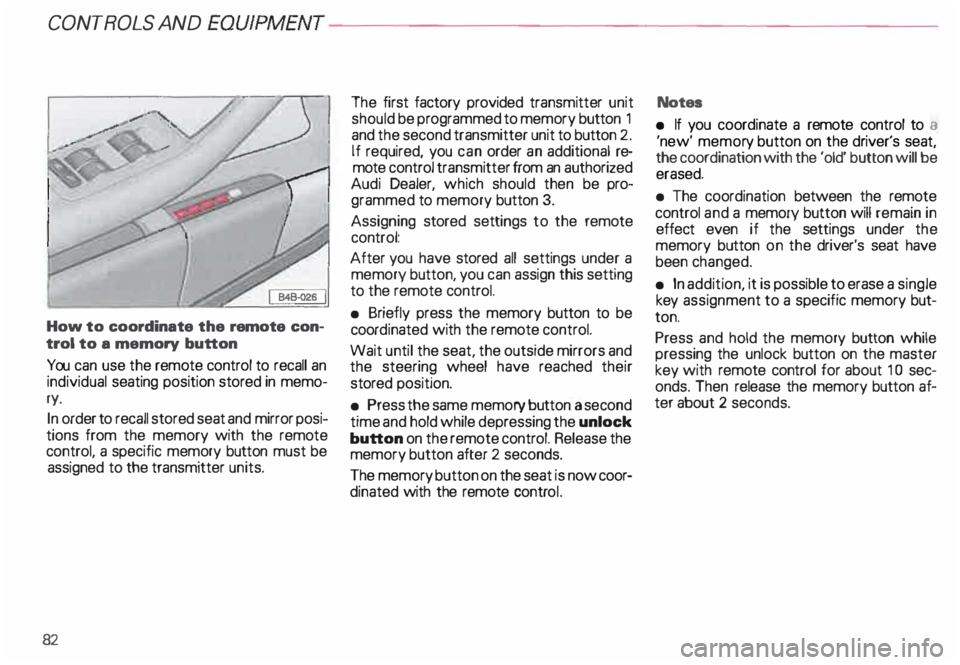
How to coordinate the remote con
trol to a memory button
You can use the remote control to recall an
individual seating position stored in memo
ry.
In order to recall stored seat and mirror posi
tions from the memory with the remote
control, a specific memory button must be
assigned to the transmitter units.
82 The
first factory provided transmitter unit
should be programmed to memory button 1
and the second transmitter unit to button 2.
If required, you can order an additional re
mote control transmitter from an authorized
Audi Dealer, which should then be pro
grammed to memory button 3.
Assigning stored settings to the remote
control:
After you have stored all settings under a
memory button, you can assign this setting
to the remote control.
• Briefly press the memory button to be
coord inated with the remote control.
Wait until the seat, the outside mirrors and
the steering wheel have reached their
stored position.
• Press the same memory button a second
time and hold while depressing the unlock
button on the remote control. Release the
memory button after 2 seconds.
The memory button on the seat is now coor
dinated with the remote control. Notes
• If you coordinate a remote control to a
'new' memor y button on the driver's seat,
the coordination with the 'old' button will be
erased.
• The coordination between the remote
control and a memory button will remain in
effect even if the settings under the
memory button on the driver's seat have
been changed.
• In addition, it is possible to erase a single
key assignment to a specific memory but
ton.
Press and hold the memory button while
pressing the unlock button on the master
key with remote control for about 1 0 sec
onds. Then release the memory button af
ter about 2 seconds.
Page 85 of 306
CONTROLS AND EQ
UIPMEN T---------------------
Retrieving using the
memory buttons
• With the passenger's door open, de
press and release the desired memory but
ton. The seat will automatically adjust to the
stored position.
• If the door has been closed, you must
then depress and hold the memory button
until the seat has reached its stored posi
tion.
Note
You can not reca ll the stored seat adjust
ment for the front passenger's seat using
the remote control in the master key.
84 Emergency
Off
In an emergency, you can interrupt
any retrieval procedure by
• pressing the '"STOP'" button (see il
lustration on page 81 and 83). or
• tapping one of the memory buttons.
Pushing the"ON/OFF"button to the OFF
position only switches off the Memory. The
stored settings will not be erased.
It's a good idea to turn the Memory off if the
vehicle is going to be used temporarily by a
driver whose driving position will not be
memorized.
The advantage is that the personal settings
that have already been memorized will re
main intact and will not change each time
the vehicle is unlocked using the remote
control. Note
The memory function is switched off when
the STOP button is pressed. The word
''OFF" lights up if the headlights are
switched on. However, the programmed
seat, outside mirrors and steering wheel
positions remain stored in the memory.
Page 179 of 306
CONTROLS AND
EQUIPMENT--------------------
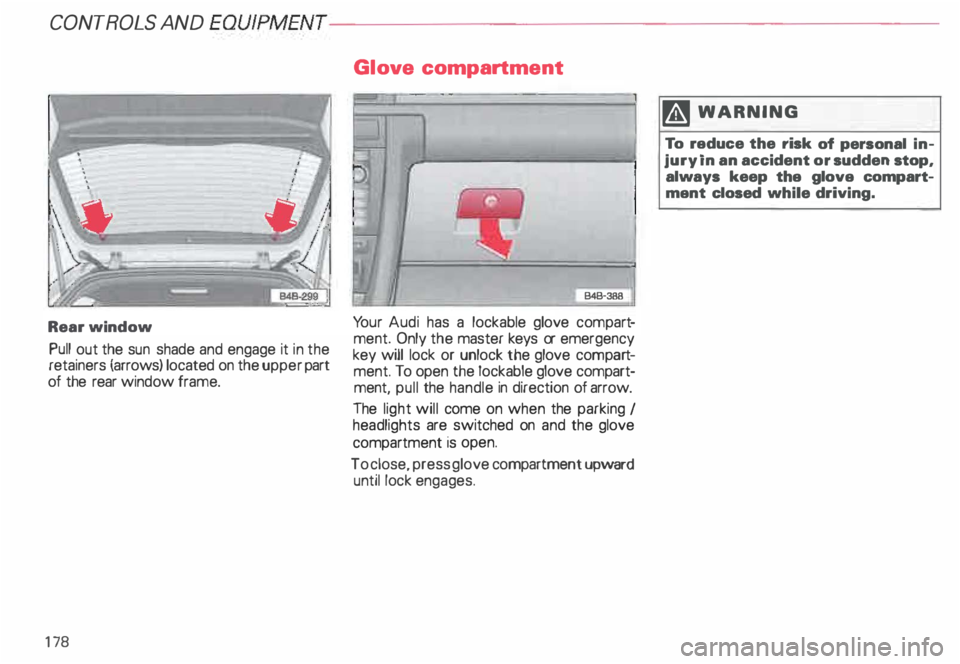
Rear window
Pull out the sun shade and engage it in the
retainers (arrows) located on the upper part
of the rear window frame.
17 8 Glo
ve compartment
B4B-388
Yo ur Audi has a lockable glove compar t
ment. Only the master keys or emergency
key will lock or unlock the glove compa rt
ment. To open the lockable glove compart
ment, pull the handle in direction of arrow.
The light will come on when the parking I
headlights are switched on and the glove
compartment is open.
To close, press glove compartment upward
until lock engages. 1ft
WARNING
To reduce the risk of personal in
jury in an accident or sudden stop,
always keep the glove compart
ment closed while driving.
Page 300 of 306
- Capacities
. . . • . . . . . . . . • . . . 287
-C oolant . . . . . . . .
238
-W indshield washer tank . . . . 250
Fog lights .. .. .. .. .
. 149
Folding master key _ . . . . . . • . . 56
Four- Wheel Drive . . . . . • • . . 207
Front airbags .
. . . • • • . . . 25
Front axle load . . . • • . • • • . 289
Front fog lights .... ... .... .. .. 149
Front seats . . . . . . . . . . . . . . . . . . . . 76
Fuel -Tank capacity . . . . . . . . . . 222
Fuel economy . . . . . . . . . • . 19
5
Fuel gauge . . . . • • . . . .
119
Fuel supply . . . . . . . . . . . . . • . . . . . 225
Fuel tank . . . . . • . . . . . . . . 222
- Capacity
. • . • • . . • . . • • • . . 287
Fuses . . . •
... .•.. .• • .. . .. 274
G
Garage door opener ...• , • . . . . 173
Gas discharge lamps . . .
277
Gasoline additives . . . . .
227
Gauges and instruments
- Coolant temperature 118 -
Engine oil temperature
-F uel ........ . ..
117
.. 119
- Odometer . . . . . • . . • . . • . . . 11 9
- Speedometer . • . . . . . . . . . . 119
-T achome ter .. _. _...... ... 117
General illustration .
. . . . 8
Gen erator ....... ..... .
Glove box light ... .
Glo ve compartment . . . .
Ground clearance ... . _ .. 12
0, 127
17 8
17 8
153
Gross axle weight rating ...... . 289
289
Gross vehicle weight rating .... .
H
Head airbags . • . • . . • • • .•. . . 39
Head restraints . . . . • . . . . . 75
Headlight adjustment . . • . • • .
148
Headlight dimmer .....• , • . . . .
156
Headlight flasher . . . . . . . . . . . • . . 157
Headlights -Cleaning . .
214
Heated seats . . . . . . . . .
150
Heated steering wheel . 150
Heating . . . . . . . . . . . . . . 162
High beam . . . . . . . . . . . • . . . . . . 12
5 ALP
HABETIC AL INDE X
High voltage label
. . . . . • • . • 291
Hood release . . .
231
Hooks . . . . . . . . . • • • • • . .
.. 89
Horn . . . . . . . . . . . • • • . _ .. . .. .. . . . 8
Hydropla ning . . . . 195, 207
I
Identification label ..
291
Identification number ....... ... 290
Ign ition .................. ... 113
Ignition key safety interlock ..... 104
Immobilize r............. 57,
124
Increasing size of luggage
compartment ..... .
Ind icator lights ...... .
Infant seats .......... .
Inside day-night mirror
Installing a radio ..... .
Installing a roof rack ..
Installing wiper blades
Instru ment cluster .... ....
88
10, 122
. 45
. 72
277
191
. . .. -... 251
. . 116
Ins trument illumination . 14 9
Instrument panel . . . . .
. . . 8
Interior lights . . . . . . . . . . . . . . . 171