warning light AUDI Q2 2021 Owner´s Manual
[x] Cancel search | Manufacturer: AUDI, Model Year: 2021, Model line: Q2, Model: AUDI Q2 2021Pages: 364, PDF Size: 87.77 MB
Page 4 of 364
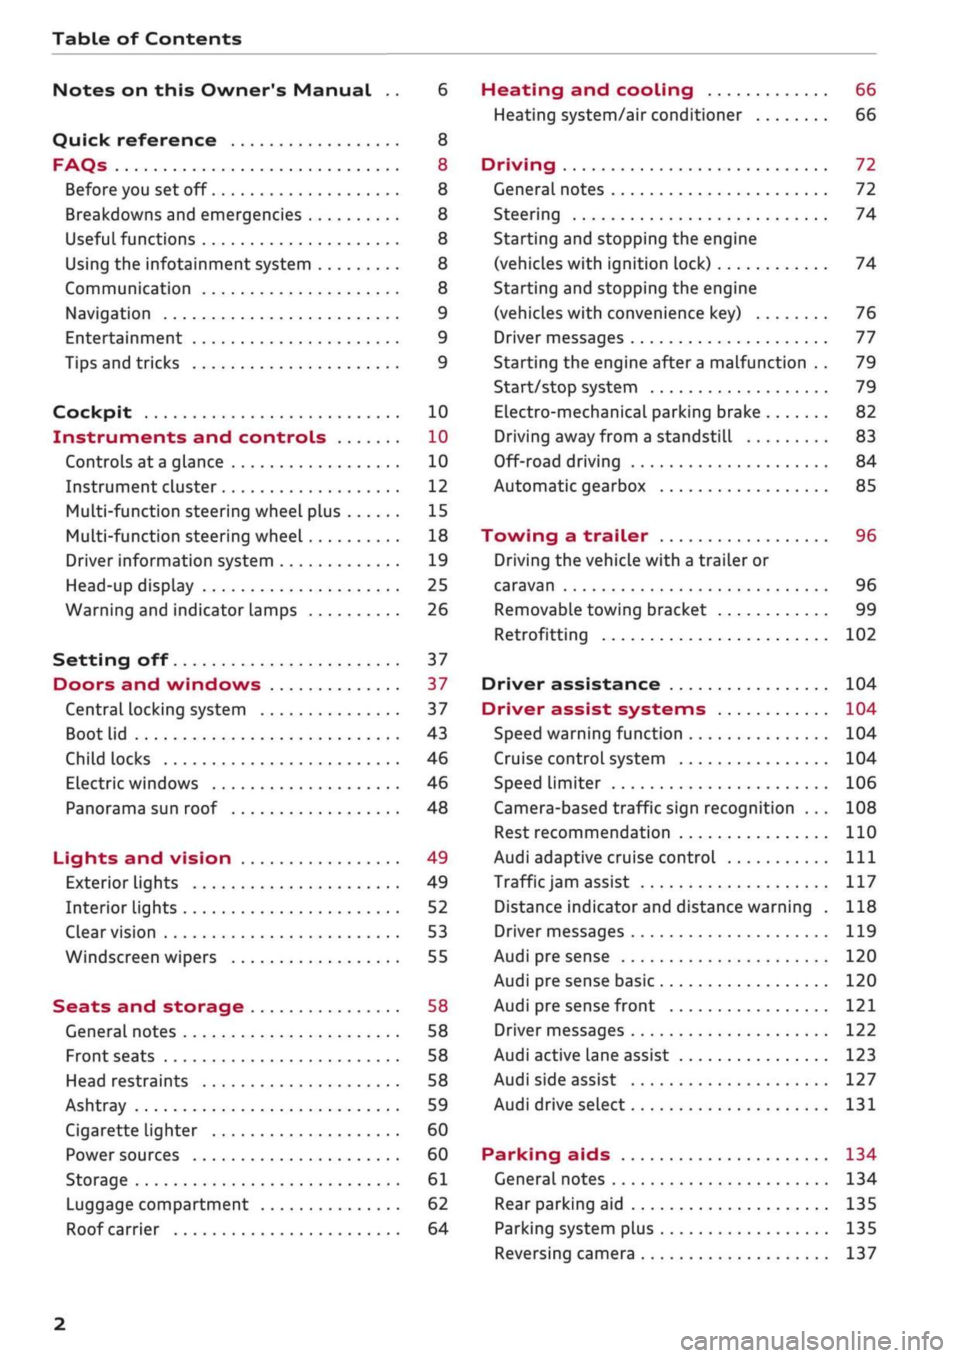
Table of Contents
Notes on this Owner's Manual .. 6
Quick reference 8
FAQs 8
Before you set off 8
Breakdowns and emergencies 8
Useful functions 8
Using the infotainment system 8
Communication 8
Navigation 9
Entertainment 9
Tips and tricks 9
Cockpit 10
Instruments and controls 10
Controls at a glance 10
Instrument cluster 12
Multi-function steering wheel plus 15
Multi-function steering wheel 18
Driver information system 19
Head-up display 25
Warning and indicator lamps 26
Setting off 37
Doors and windows 37
Central locking system 37
Boot lid 43
Child locks 46
Electric windows 46
Panorama sun roof 48
Lights and vision 49
Exterior lights 49
Interior lights 52
Clear vision 53
Windscreen wipers 55
Seats and storage 58
General notes 58
Front seats 58
Head restraints 58
Ashtray 59
Cigarette lighter 60
Power sources 60
Storage 61
Luggage compartment 62
Roof carrier 64
Heating and cooling 66
Heating system/air conditioner 66
Driving 72
General notes 72
Steering 74
Starting and stopping the engine
(vehicles with ignition lock) 74
Starting and stopping the engine
(vehicles with convenience key) 76
Driver messages 77
Starting the engine after a malfunction . . 79
Start/stop system 79
Electro-mechanical parking brake 82
Driving away from a standstill 83
Off-road driving 84
Automatic gearbox 85
Towing a trailer 96
Driving the vehicle with a trailer or
caravan 96
Removable towing bracket 99
Retrofitting 102
Driver assistance 104
Driver assist systems 104
Speed warning function 104
Cruise control system 104
Speed limiter 106
Camera-based traffic sign recognition ... 108
Rest recommendation 110
Audi adaptive cruise control
Ill
Traffic
jam assist 117
Distance indicator and distance warning . 118
Driver messages
119
Audi pre sense 120
Audi pre sense basic 120
Audi pre sense front 121
Driver messages 122
Audi active lane assist 123
Audi side assist 127
Audi drive select 131
Parking aids 134
General notes 134
Rear parking aid
135
Parking system plus 135
Reversing camera 137
2
Page 10 of 364
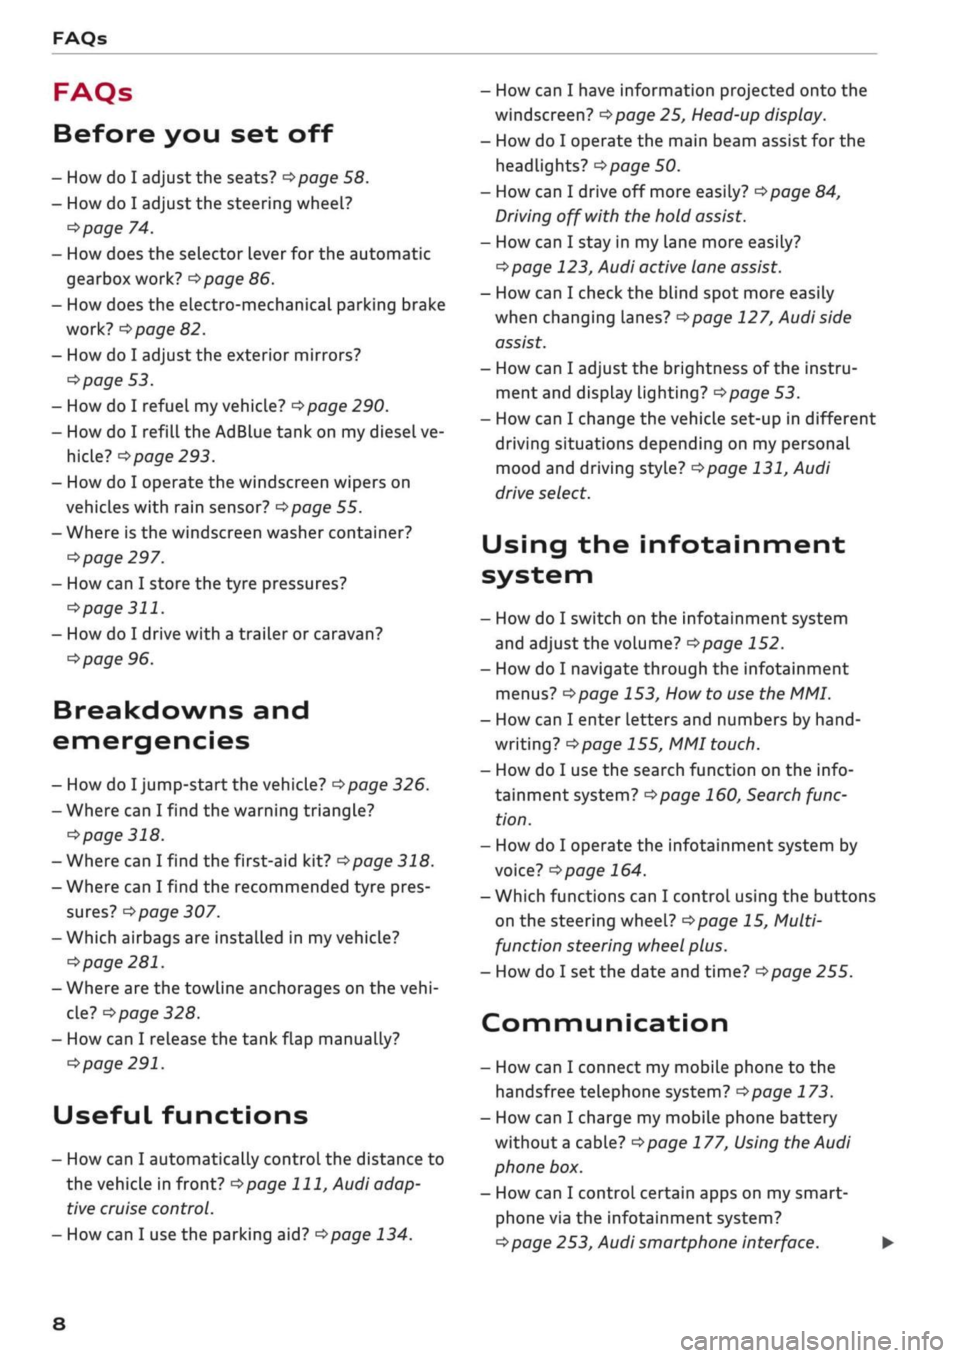
FAQs
FAQs
Before you set off
- How do I adjust the seats?
^page
58.
- How do I adjust the steering wheel?
^>page
74.
- How does the selector lever for the automatic
gearbox work?
opage
86.
- How does the electro-mechanical parking brake
work?
^>page
82.
- How do I adjust the exterior mirrors?
^>page
53.
- How do I refuel my vehicle?
^>page
290.
- How do I refill the AdBlue tank on my diesel ve
hicle?
•=>
page 293.
- How do I operate the windscreen wipers on
vehicles with rain sensor?
^>page
55.
- Where is the windscreen washer container?
•=>
page 297.
- How can I store the tyre pressures?
•=>
page
311.
- How do I drive with a trailer or caravan?
^>page
96.
Breakdowns and
emergencies
- How do I jump-start the vehicle?
^>page
326.
- Where can I find the warning triangle?
<=>page
318.
- Where can I find the first-aid kit?
•=> pagre
318.
- Where can I find the recommended tyre pres
sures?
•=>
page 307.
- Which airbags are installed in my vehicle?
•=>
page 281.
- Where are the towline anchorages on the
vehi
cle?
tapage
328.
- How can I release the tank flap manually?
•=>
page 291.
Useful functions
- How can I automatically control the distance to
the vehicle in front?
^>page
111,
Audi adap
tive cruise control.
- How can I use the parking aid?
^>page
134.
- How can I have information projected onto the
windscreen?
^>page
25, Head-up display.
- How do I operate the main beam assist for the
headlights?
^>page
50.
- How can I drive off more easily?
opage
84,
Driving off with the hold assist.
- How can I stay in my lane more easily?
cépage
123, Audi active lane assist.
- How can I check the blind spot more easily
when changing lanes?
^>page
127, Audi side
assist.
- How can I adjust the brightness of the instru
ment and display lighting?
^>page
53.
- How can I change the vehicle set-up in different
driving situations depending on my personal
mood and driving style?
^>page
131, Audi
drive select.
Using the infotainment
system
- How do I switch on the infotainment system
and adjust the volume?
^>page
152.
- How do I navigate through the infotainment
menus?
^>page
153,
How
to use the MMI.
- How can I enter letters and numbers by
hand
writing?
^>page
155, MMI touch.
- How do I use the search function on the info
tainment system?
^>page
160, Search func
tion.
- How do I operate the infotainment system by
voice?
^>page
164.
- Which functions can I control using the buttons
on the steering wheel?
^page
15, Multi
function steering wheel plus.
- How do I set the date and time?
^>page
255.
Communication
- How can I connect my mobile phone to the
handsfree telephone system?
opage
173.
- How can I charge my mobile phone battery
without a cable?
^>page
177, Using the Audi
phone box.
- How can I control certain apps on my smart-
phone via the infotainment system?
cépage
253, Audi smartphone interface. •
8
Page 13 of 364
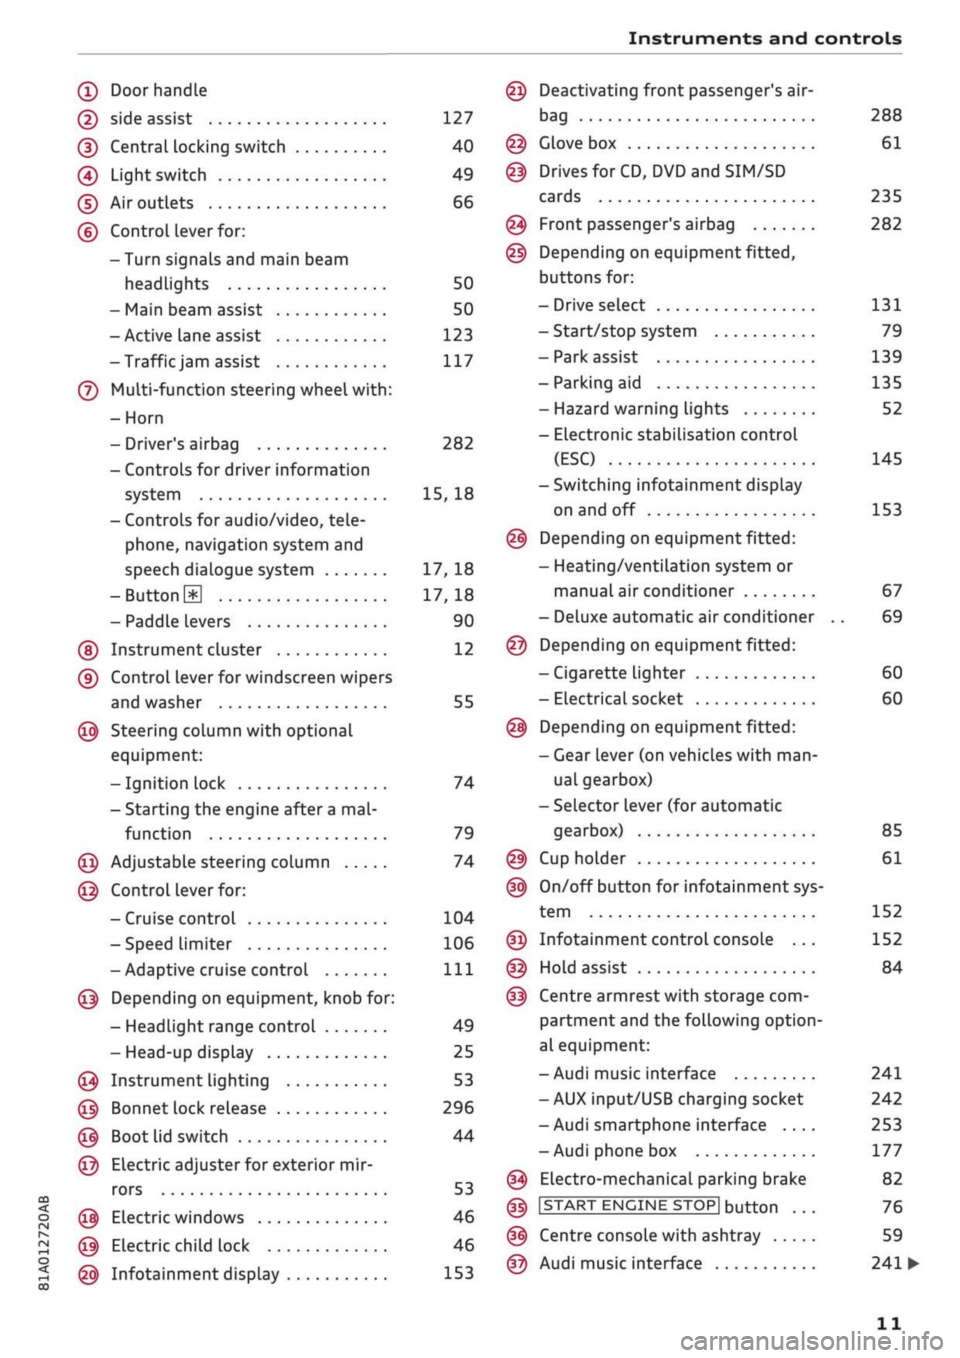
Instruments and controls
CO
<
o
IV
tN
t-H
o <
(D
Doorhandle
(D side assist 127
(D CentraL
locking switch 40
@
Light switch 49
(D Air outlets 66
(?) Control lever for:
- Turn signals and main beam
headlights 50
- Main beam assist 50
- Active lane assist 123
-Trafficjam
assist 117
(7) Multi-function steering wheel
with:
- Horn
- Driver's airbag 282
- Controls for driver information
system 15, 18
- Controls for audio/video, tele
phone,
navigation system and
speech dialogue system 17, 18
-ButtonH
17,18
- Paddle levers 90
(5) Instrument cluster 12
(?) Control lever for windscreen wipers
and washer 55
@
Steering column with optional
equipment:
- Ignition lock 74
- Starting the engine after a
mal
function 79
@
Adjustable steering column 74
@
Control lever for:
- Cruise control 104
- Speed limiter 106
-Adaptive cruise control
Ill
@
Depending on equipment, knob for:
- Headlight range control 49
- Head-up display 25
@
Instrument lighting 53
@
Bonnet lock release 296
@
Boot lid switch 44
@
Electric adjuster for exterior mir
rors 53
@
Electric windows 46
@
Electric child lock 46
@
Infotainment display 153
Deactivating front passenger's air-
bag
Glove box
Drives for CD, DVD and
SIM/SD
cards
Front passenger's airbag
Depending on equipment fitted,
buttons for:
- Drive select
- Start/stop system
- Park assist
- Parking aid
- Hazard warning lights
- Electronic stabilisation control
(ESC)
-Switching infotainment display
on and off
Depending on equipment fitted:
- Heating/ventilation system or
manual air conditioner
- Deluxe automatic air conditioner
Depending on equipment fitted:
- Cigarette lighter
- Electrical socket
Depending on equipment fitted:
- Gear lever (on vehicles with
man
ual gearbox)
- Selector lever (for automatic
gearbox)
Cup holder
On/off button for infotainment sys
tem
Infotainment control console ...
Hold assist
Centre armrest with storage com
partment and the following option
al equipment:
- Audi music interface
- AUX input/USB charging socket
- Audi smartphone interface ....
- Audi phone box
Electro-mechanical parking brake
|START
ENGINE STOP] button
Centre console with ashtray
Audi music interface
288
61
235
282
131
79
139
135
52
145
153
67
69
60
60
85
61
152
152
84
241
242
253
177
82
76
59
241
•
11
Page 15 of 364
Instruments and controls
CO
<
O
rN
r>
I-I
00
19
26
14
14
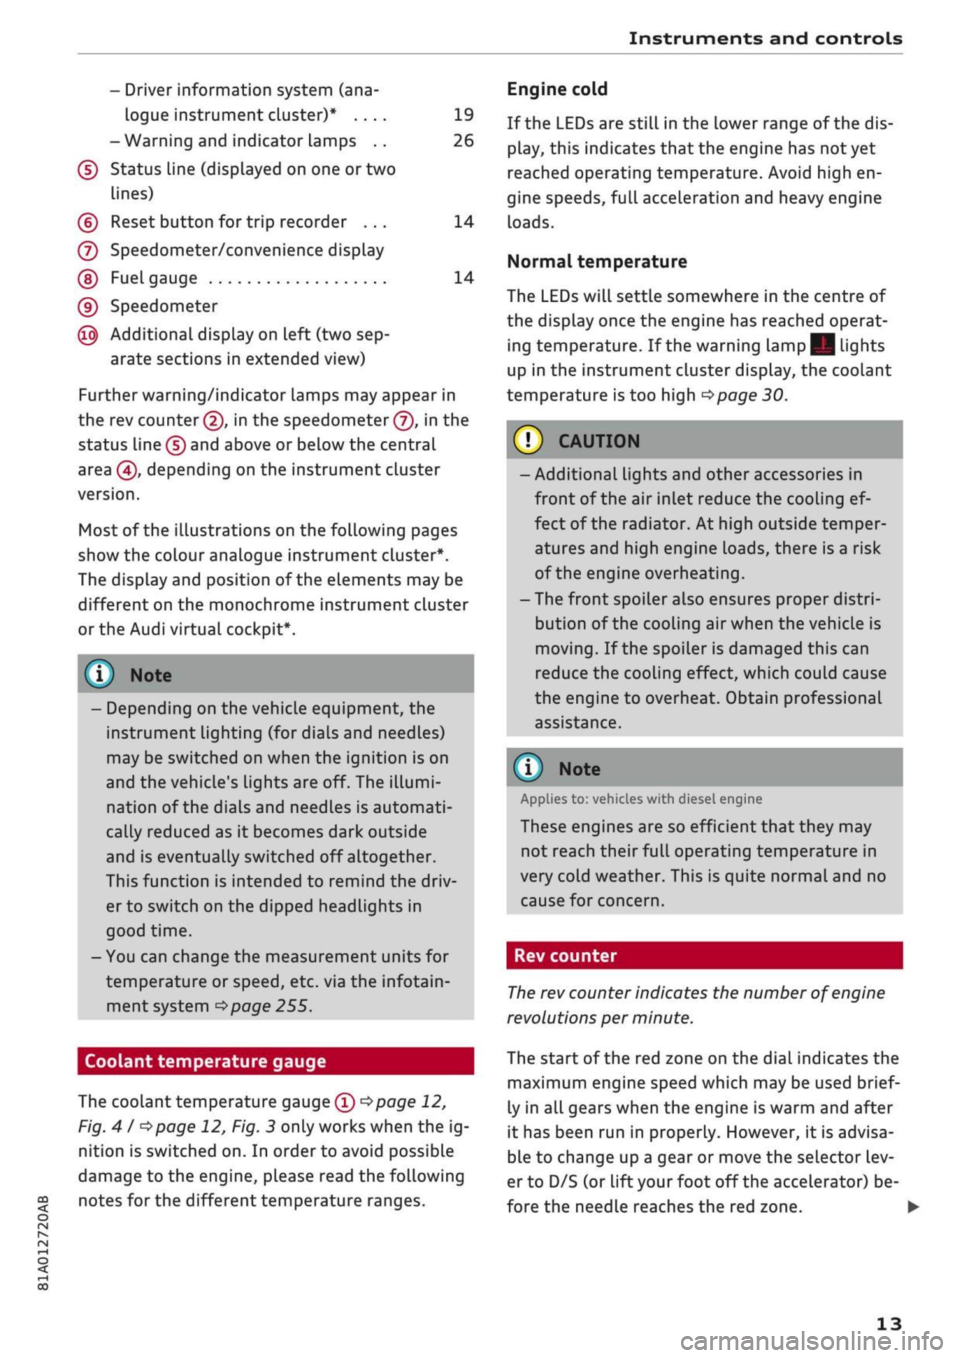
- Driver information system (ana
logue instrument cluster)* ....
-Warning and indicator Lamps ..
(f)
Status line (displayed on one
or
two
lines)
(?) Reset button for trip recorder ...
(7) Speedometer/convenience display
(§)
Fuel gauge
(9) Speedometer
@
Additional display on left (two sep
arate sections in extended view)
Further warning/indicator lamps may appear in
the rev counter
(2),
in the speedometer
(f),
in the
status line (5) and above or below the central
area
@,
depending on the instrument cluster
version.
Most of the illustrations on the following pages
show the colour analogue instrument cluster*.
The display and position of the elements may be
different on the monochrome instrument cluster
or the Audi virtual cockpit*.
1) Note
- Depending on the vehicle equipment, the
instrument lighting (for dials and needles)
may be switched on when the ignition is on
and the vehicle's lights are off. The illumi
nation of the diaLs and needles is automati
cally reduced as it becomes dark outside
and is eventually switched off altogether.
This function is intended to remind the driv
er to switch on the dipped headlights in
good time.
- You can change the measurement units for
temperature or speed, etc. via the infotain
ment system
^>page
255.
Coolant temperature gauge
The coolant temperature gauge
(T) ^>page
12,
Fig.
41 ^>page
12, Fig. 3 only works when the ig
nition is switched on. In order to avoid possible
damage to the engine, please read the following
notes for the different temperature ranges.
Engine cold
If the LEDs are still in the lower range of the dis
play, this indicates that the engine has not yet
reached operating temperature. Avoid high en
gine speeds, full acceleration and heavy engine
loads.
Normal temperature
The LEDs will settle somewhere in the centre of
the display once the engine has reached operat
ing temperature. If the warning lamp || lights
up in the instrument cluster display, the coolant
temperature is too high
<^>page
30.
© CAUTIO
- Additional lights and other accessories in
front of the air inlet reduce the cooling ef
fect of the radiator. At high outside temper
atures and high engine loads, there is a risk
of the engine overheating.
- The front spoiler also ensures proper distri
bution of the cooling air when the vehicle is
moving.
If the spoiler is damaged this can
reduce the cooling effect, which could cause
the engine to overheat. Obtain professional
assistance.
® Note
Applies to: vehicles with diesel engine
These engines are so efficient that they may
not reach their full operating temperature in
very cold weather. This is quite normal and no
cause for concern.
Rev counter
The
rev counter indicates the number of engine
revolutions per minute.
The start of the red zone on the dial indicates the
maximum engine speed which may be used brief
ly in all gears when the engine is warm and after
it has been run in properly. However, it is advisa
ble to change up a gear or move the selector lev
er to D/S (or
lift your
foot
off
the accelerator) be
fore the needle reaches the red zone. •
13
Page 16 of 364
Instruments and controls
© CAUTIOI
The rev counter needle (2)
^>page
12, Fig.
41
^>page
12, Fig. 3 must only ever briefly go in
to the red zone on the scale; otherwise there
is a risk of engine damage. The start of the
red zone on the dial is different for some en
gine versions.
(•)
For
the sake of the environment
Changing up a gear early will help you to save
fuel and minimise engine noise.
Fuel gauge
The gauge
(§) ^>page
12, Fig. 4
I ^>page
12,
Fig. 3 only works when the ignition is switched
on.
When the gauge reaches the reserve zone, a
red LED will light up and the indicator lamp
Q3
will appear
^>page
35. The LED will flash in red
if the fuel Level is very Low.
The tank capacity of your vehicle is given in the
Technical data section
^>page
343.
© CAUTION
Never run the tank completely dry. If there is
an irregular fuel supply, misfiring can occur.
Unburnt fuel can then enter the exhaust sys
tem.
This can Lead to overheating and dam
age to the catalytic converter.
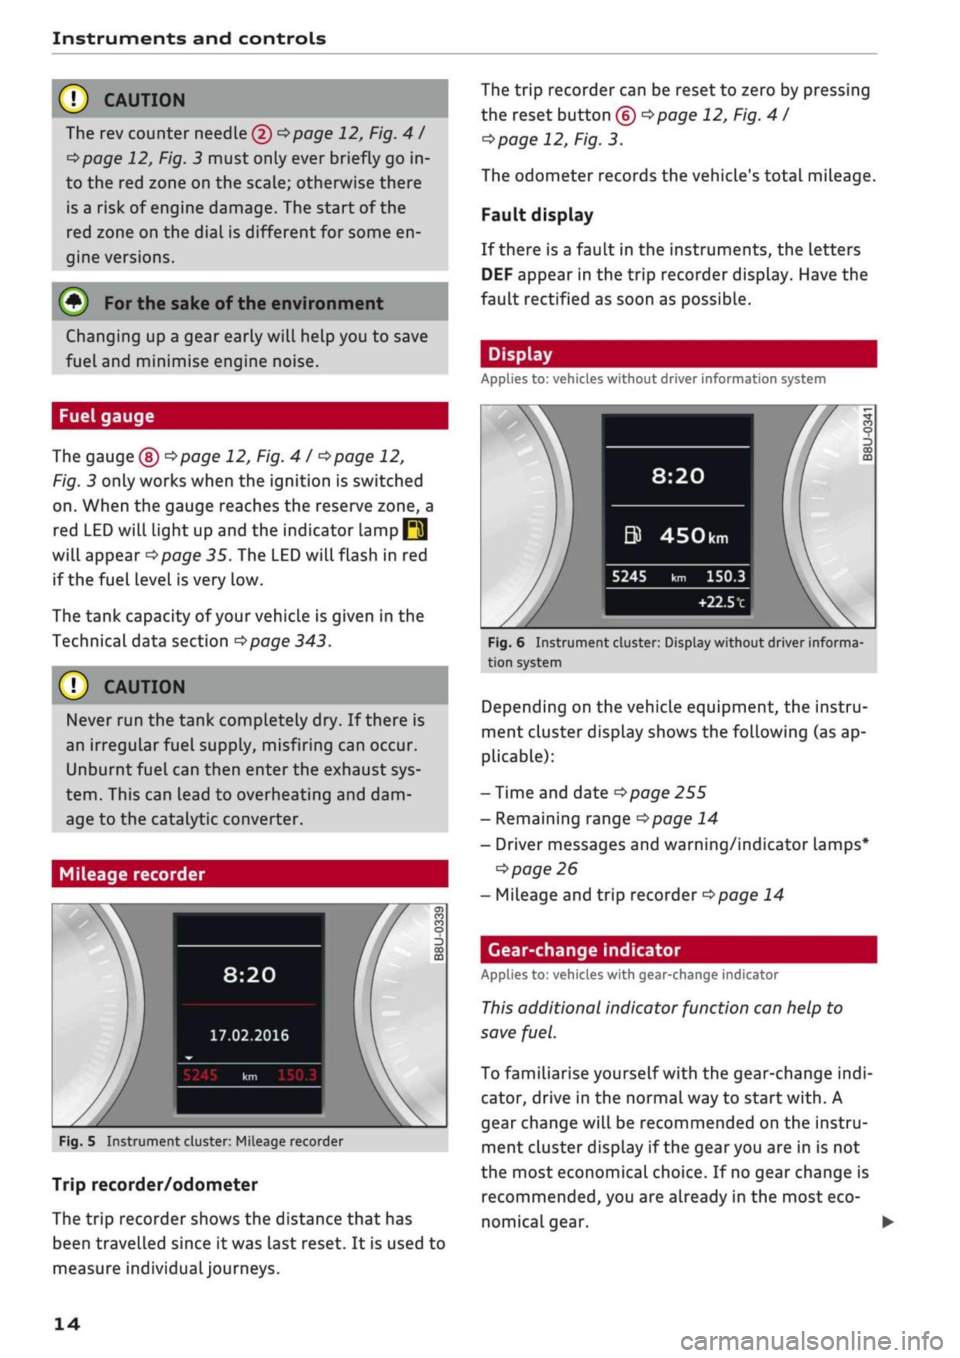
Mileage recorder
8:20
17.02.2016
Fig.
5 Instrument cluster: Mileage recorder
Trip recorder/odometer
The trip recorder shows the distance that has
been travelled since
it
was last reset. It is used to
measure individuaLjourneys.
The trip recorder can be reset to zero by pressing
the reset button (?)
<=>page
12, Fig.
41
cépage
12, Fig. 3.
The odometer records the vehicle's total mileage.
Fault display
If there is a fault in the instruments, the letters
DEF appear in the trip recorder display. Have the
fault rectified as soon as possible.
Display
Applies to: vehicles without driver information system
8:20
&
5245
450km
km 150.3
+22.5t1
Fig.
6 Instrument cluster: Display without driver informa
tion system
Depending on the vehicle equipment, the instru
ment cluster display shows the following (as ap
plicable):
- Time and date
^>page
255
- Remaining range
^>page
14
- Driver messages and warning/indicator lamps*
•=>
page 26
- Mileage and trip recorder
^page
14
Gear-change indicator
Applies to: vehicles with gear-change indicator
This
additional indicator function can help to
save
fuel.
To familiarise yourself with the gear-change
indi
cator, drive in the normal way to start
with.
A
gear change will be recommended on the instru
ment cluster display if the
gear
you are in is not
the most economical choice. If no gear change is
recommended, you are already in the most eco
nomical gear.
14
Page 17 of 364
Instruments
and
controls
CO
<
o
IV
tN
I-I
00
Vehicles with manual gearbox
-
•
Shifting
up
a gear:
The
suggested gear
ap
pears
to the
right
of
the current gear when
a
higher gear
is
recommended.
-
4
Shifting down
a
gear:
The
suggested gear
ap
pears
to the
left
of
the current gear when
a
lower gear
is
recommended.
The gearyou
are
currently
in and the
recommen
ded gear will
be
displayed. Gears
may
occasional
ly
be
skipped
(3 • 5).
Vehicles with start/stop system:
If
all
the
condi
tions
for
a
stop phase
^>page
79
have been
met,
but the
gear lever
is in
gear with
the
clutch
depressed,
the
gear change indicator will recom
mend changing
to
•N.
Put the
gear lever
in
neu
tral and take your foot
off
the clutch pedal.
The
start/stop system will automatically switch
off
the engine.
Vehicles with automatic gearbox
The display
is
only visible
in
tiptronic mode
^>page
90.
The symbol
Î
after
the
current gear means
change
up a
gear.
© CAUTION
The gear-change indicator
is
intended
to
help
save
fuel.
It is not
intended
to
recommend
the right gear
for all
driving situations.
In
cer
tain situations, only
the
driver can choose
the
correct gear
(for
instance when overtaking,
driving
up
a steep gradient
or
towing a
trail
er).
(T) Note
Applies
to:
vehicles with manual gearbox
The gear-change indicator
in the
instrument
cluster goes
out
when you press
the
clutch
pedal.
Outside temperature display
When
the
vehicle
is
stationary
or
travelling
at
very
low
speeds,
the
temperature displayed
may
be slightly higher than
the
actual outside
tem
perature
as
a result
of
the heat radiated from
the
engine.
At temperatures below +5°C a snowflake symbol
appears next
to the
temperature display
<=> A-
A WARNING
Do
not
rely
on the
outside temperature dis
play
as an ice
warning. Bear
in
mind that
there
may be
patches
of
ice
on the
roads even
at outside temperatures around
+5
°C
-
risk
of
accident!
Multi-function steering
wheel plus
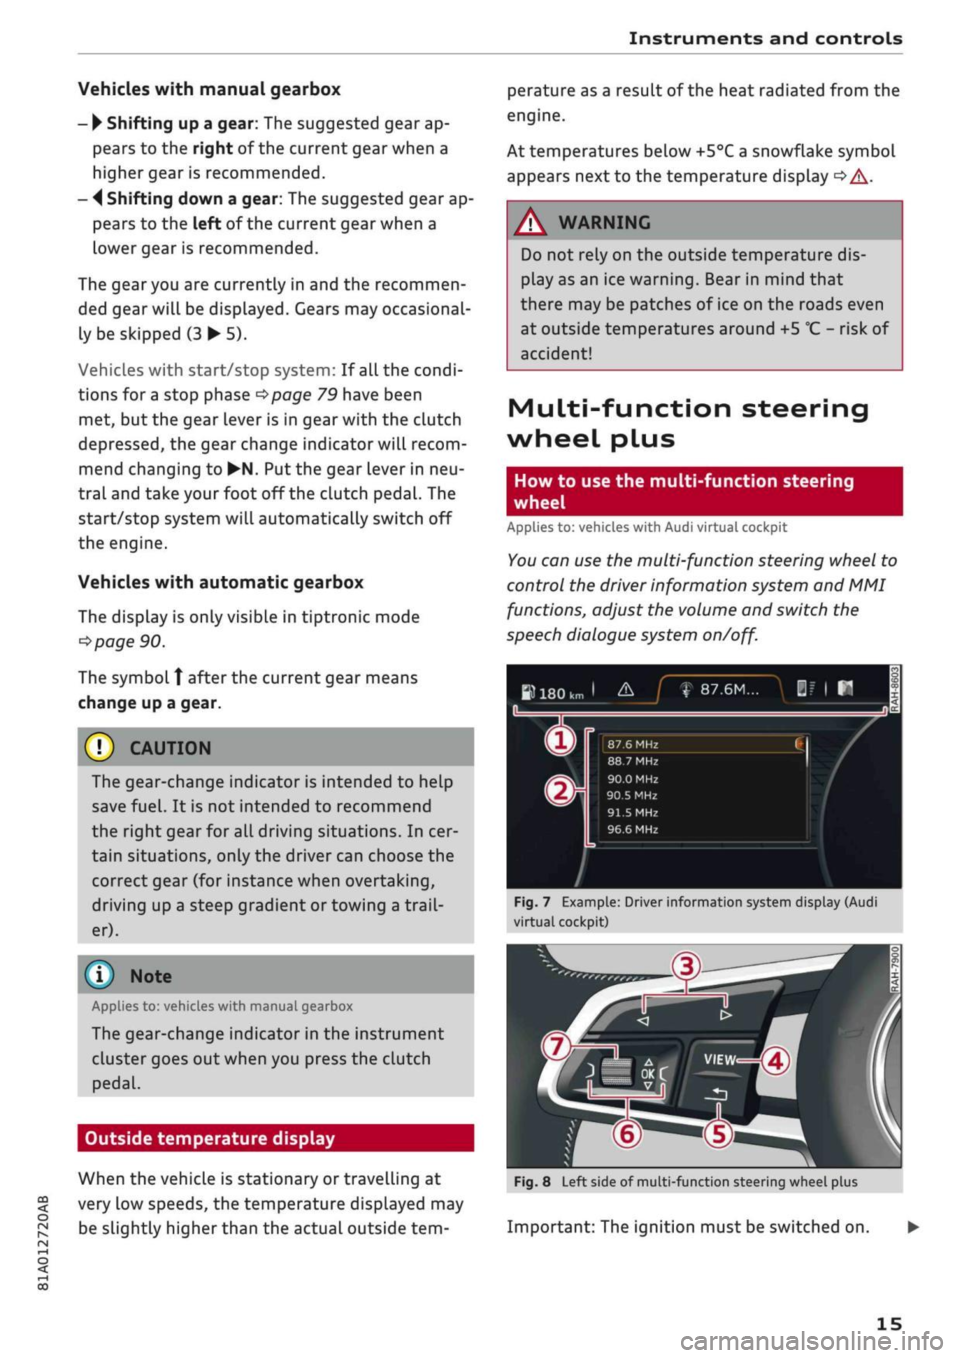
How
to use the
multi-function steering
wheel
Applies
to:
vehicles with Audi virtual cockpit
You
can
use
the
multi-function steering wheel
to
control
the
driver information system
and MMI
functions, adjust
the
volume
and
switch
the
speech dialogue system
on/off.
»180km
1
&_J
f
87.6M...
|f
|
H
n
^
_
X
m
®r
87.6 MHz CI /
88.7 MHz
90.0 MHz
90.5
MHz
91.5
MHz
96.6 MHz
Fig.
7
Example: Driver information system display (Audi
virtual cockpit)
In
1-
m
Fig.
8
Left side
of
multi-function steering wheel plus
Important:
The
ignition must
be
switched
on.
15
Page 27 of 364
Instruments and controls
CO
s
rN rN
I-I
00
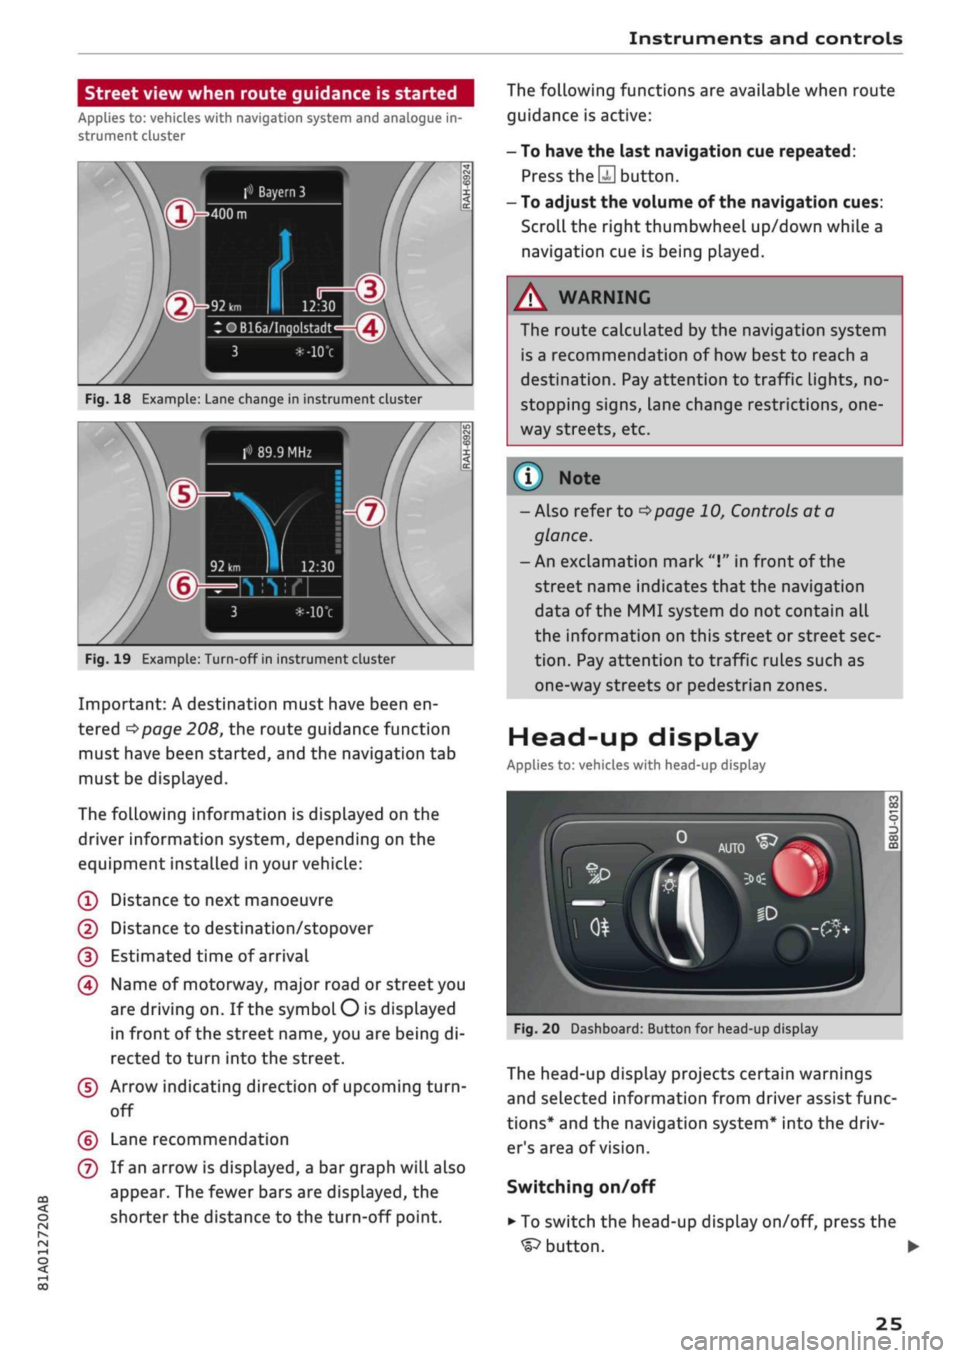
Street view when route guidance is started
Applies to: vehicles with navigation system and analogue in
strument cluster
f»
Bayern
3
:OB16a/Inqolstadt
Fig.
18 Example: Lane change in instrument cluster
> 89.9 MHz
Fig.
19 Example: Turn-off in instrument cluster
Important: A destination must have been en
tered
^>page
208, the route guidance function
must have been started, and the navigation tab
must be displayed.
The following information is displayed on the
driver information system, depending on the
equipment installed in your vehicle:
(T)
Distance to next manoeuvre
@
Distance to destination/stopover
(D Estimated time of arrival
(4) Name of motorway, major road or street you
are driving on. If the symbol
O
is displayed
in front of the street name, you are being di
rected to turn into the street.
(5) Arrow indicating direction of upcoming
turn-
off
(?) Lane recommendation
(7) If an arrow is displayed, a bar graph will also
appear. The fewer bars are displayed, the
shorter the distance to the turn-off point.
The following functions are available when route
guidance is active:
- To have the last navigation cue repeated:
Press
the S
button.
- To adjust the volume of the navigation cues:
Scroll the right thumbwheel up/down while a
navigation cue is being played.
A
WARNING
The route calculated by the navigation system
is a recommendation of how best to reach a
destination. Pay attention to traffic lights, no-
stopping signs, lane change restrictions,
one
way streets, etc.
(T)
Note
- Also refer to
^>page
10, Controls at a
glance.
- An exclamation mark
"I"
in front of the
street name indicates that the navigation
data of the MMI system do not contain all
the information on this street or street sec
tion.
Pay attention to traffic rules such as
one-way streets or pedestrian zones.
Head-up display
Applies to: vehicles with head-up display
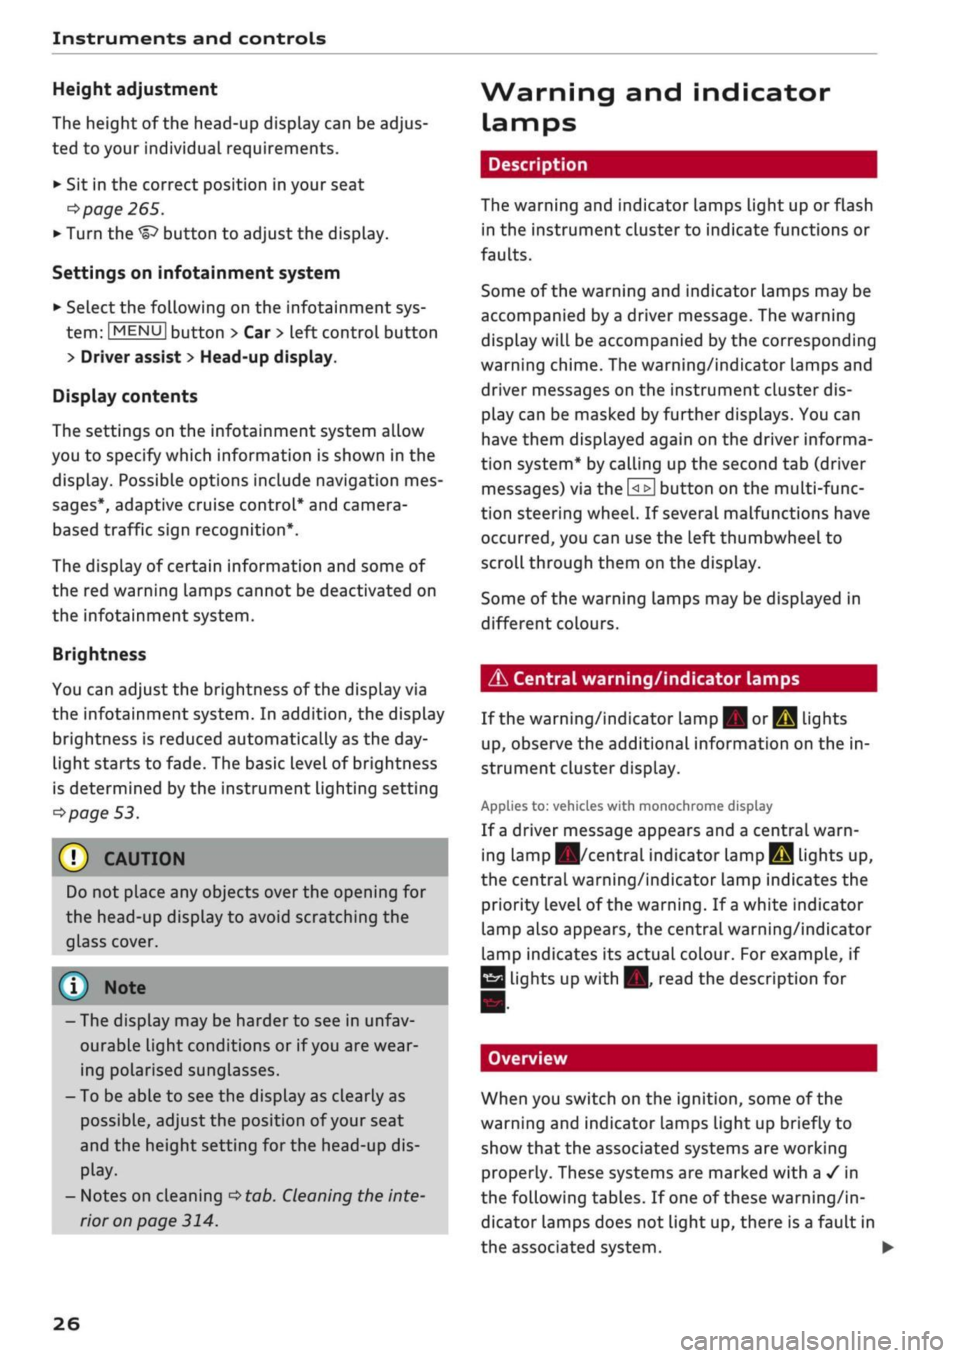
Fig.
20 Dashboard: Button for head-up display
The head-up display projects certain warnings
and selected information from driver assist func
tions*
and the navigation system* into the driv
er's area of vision.
Switching on/off
• To switch the head-up display on/off, press the
^button.
•
25
Page 28 of 364
Instruments and controls
Height adjustment
The height of the head-up display can be adjus
ted to your individual requirements.
•
Sit in the correct position in your seat
•=>
page 265.
• Turn the
Settings on infotainment system
•
Select the following on the infotainment sys
tem:
IMENU|
button > Car
>
left control button
> Driver assist
>
Head-up display.
Display contents
The settings on the infotainment system allow
you to specify which information is shown in the
display. Possible options include navigation mes
sages*, adaptive cruise control* and camera-
based traffic sign recognition*.
The display of certain information and some of
the red warning lamps cannot be deactivated on
the infotainment system.
Brightness
You can adjust the brightness of the display via
the infotainment system. In addition, the display
brightness is reduced automatically as the
day
light starts to fade. The basic level of brightness
is determined by the instrument lighting setting
•=>
page 53.
© CAUTION
Do not place any objects over the opening for
the head-up display to avoid scratching the
glass cover.
© Note
- The display may be harder to see in unfav
ourable light conditions or if
you
are wear
ing polarised sunglasses.
- To be able to see the display as clearly as
possible, adjust the position of your seat
and the height setting for the head-up dis
play.
- Notes on cleaning
^tab.
Cleaning the inte
rior on page 314.
Warning and indicator
Lamps
Description
The warning and indicator lamps light up or flash
in the instrument cluster to indicate functions or
faults.
Some of the warning and indicator lamps may be
accompanied by a driver message. The warning
display will be accompanied by the corresponding
warning chime. The warning/indicator lamps and
driver messages on the instrument
duster
dis
play can be masked by further displays. You can
have them displayed again on the driver informa
tion system* by calling up the second tab (driver
messages) via the
\<±\
button on the multi-func
tion steering wheel. If several malfunctions have
occurred,
you can use the Left thumbwheel to
scroll through them on the display.
Some of the warning lamps may be displayed in
different colours.
âs
Central warning/indicator lamps
If the warning/indicator lamp
|g or pq
lights
up,
observe the additional information on the in
strument cluster display.
Applies
to: vehicles with monochrome display
If
a
driver message appears and a central warn
ing [amp
Kfl/central
indicator
lamp^S
lights up,
the central warning/indicator lamp indicates the
priority level of the warning. If
a
white indicator
lamp also appears, the central warning/indicator
lamp indicates its actual colour. For example, if
g
lights up with
H.
read the description for
Overview
When you switch on the ignition, some of the
warning and indicator lamps Light up briefly to
show that the associated systems are working
properly. These systems are marked with a
•/
in
the following tables. If one of these warning/in
dicator lamps does not light up, there is a fault in
the associated system. •
26
Page 31 of 364
Instruments and controls
^^
CQ
<
O
rN
iv
rN
•-i
00
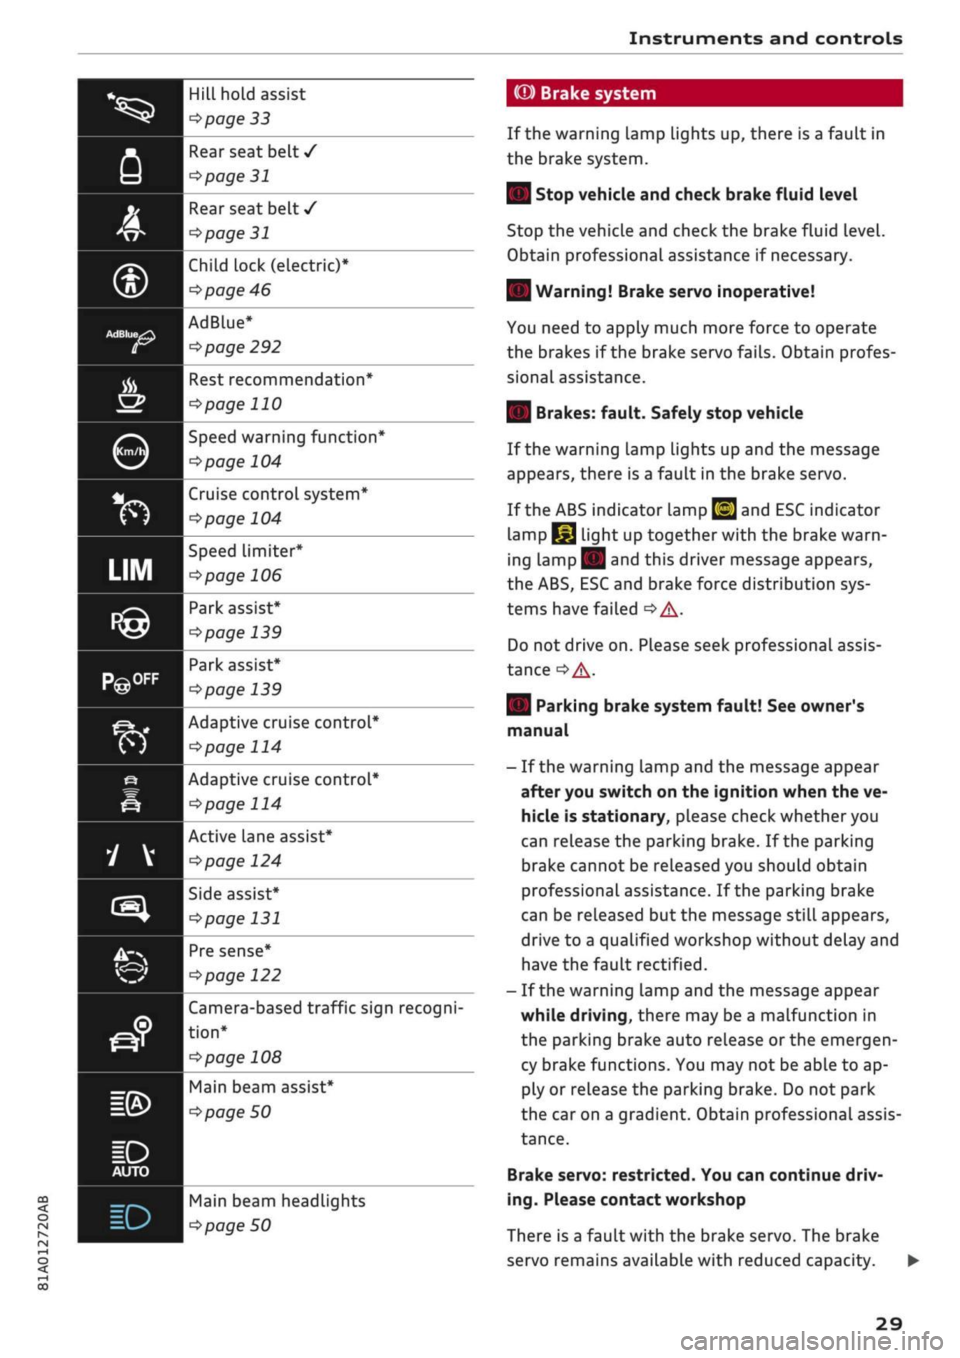
Hill hold assist
^>page
33
Rear seat belt
/
^>page
31
Rear seat belt
/
^>page
31
Child lock
(electric)*
cépage
46
AdBlue*
^page
292
Kfl I ^
page 122
Rest recommendation*
^>page
110
Speed warning function*
cépage
104
Cruise control system*
^>page
104
Speed limiter*
^>page
106
Park assist*
^>page
139
Park assist*
^>page
139
Adaptive cruise control*
^>page
114
Adaptive cruise control*
tapage
114
Active Lane assist*
tapage
124
Side assist*
tapage
131
Pre sense*
Camera-based traffic sign recogni
tion*
^>
page 108
Main beam assist*
^>
page 50
Main beam headLights
Pipage
50
(©) Brake system
If the warning Lamp Lights up, there is a fault in
the brake system.
| Stop vehicle and check brake fluid level
Stop the vehicle and check the brake fluid level.
Obtain professional assistance if necessary.
| Warning! Brake servo inoperative!
You need to apply much more force to operate
the brakes if the brake servo fails. Obtain profes
sional assistance.
| Brakes: fault. Safely stop vehicle
If the warning lamp lights up and the message
appears, there is a fault in the brake servo.
If the ABS indicator lamp
[g]
and ESC indicator
lamp
I^J
light up together with the brake warn
ing
Lamp||
and this driver message appears,
the ABS, ESC and brake force distribution sys
tems have failed
•=> A-
Do not drive on. Please seek professional assis
tance
^A-
| Parking brake system fault! See owner's
manual
- If the warning lamp and the message appear
after you switch on the ignition when the ve
hicle is stationary, please check whether you
can release the parking brake. If the parking
brake cannot be released you should obtain
professional assistance. If the parking brake
can be released but the message
stilL
appears,
drive to a qualified workshop without delay and
have the fault rectified.
- If the warning lamp and the message appear
while driving, there may be a malfunction in
the parking brake auto release or the emergen
cy brake functions. You may not be able to ap
ply or release the parking brake. Do not park
the car on a gradient. Obtain professional assis
tance.
Brake servo: restricted. You can continue driv
ing.
Please contact workshop
There is a fault with the brake servo. The brake
servo remains available with reduced capacity.
29
Page 32 of 364
Instruments
and
controls
The brakes
may
perform differently than usual
and
the
brake pedal may vibrate.
Drive
to
a qualified workshop without delay
and
have
the
fault rectified.
A WARNING
- Before opening
the
bonnet and checking
the
brake fluid level, observe
the
warning infor
mation
on
*$page
295,
Working
on
compo
nents
in the
engine compartment.
-
If
the brake warning lamp does
not go out,
or
if it
lights up when driving,
the
brake
flu
id level in
the
reservoir
is too low -
this
may
cause an increased accident risk. Stop
the
vehicle and
do not
drive on. Obtain profes
sional assistance.
-
If
the brake warning lamp lights
up
togeth
er with
the
ABS indicator lamp and
the
ESC
indicator lamp, this can mean that
the
con
trol function
of
the ESC/ABS
is not
working.
Input from
the
functions that stabilise
the
vehicle
is no
longer available. This could
cause
the
tail of
the vehicle
to
skid
side
ways.
Do not
drive on. Obtain professional
assistance.
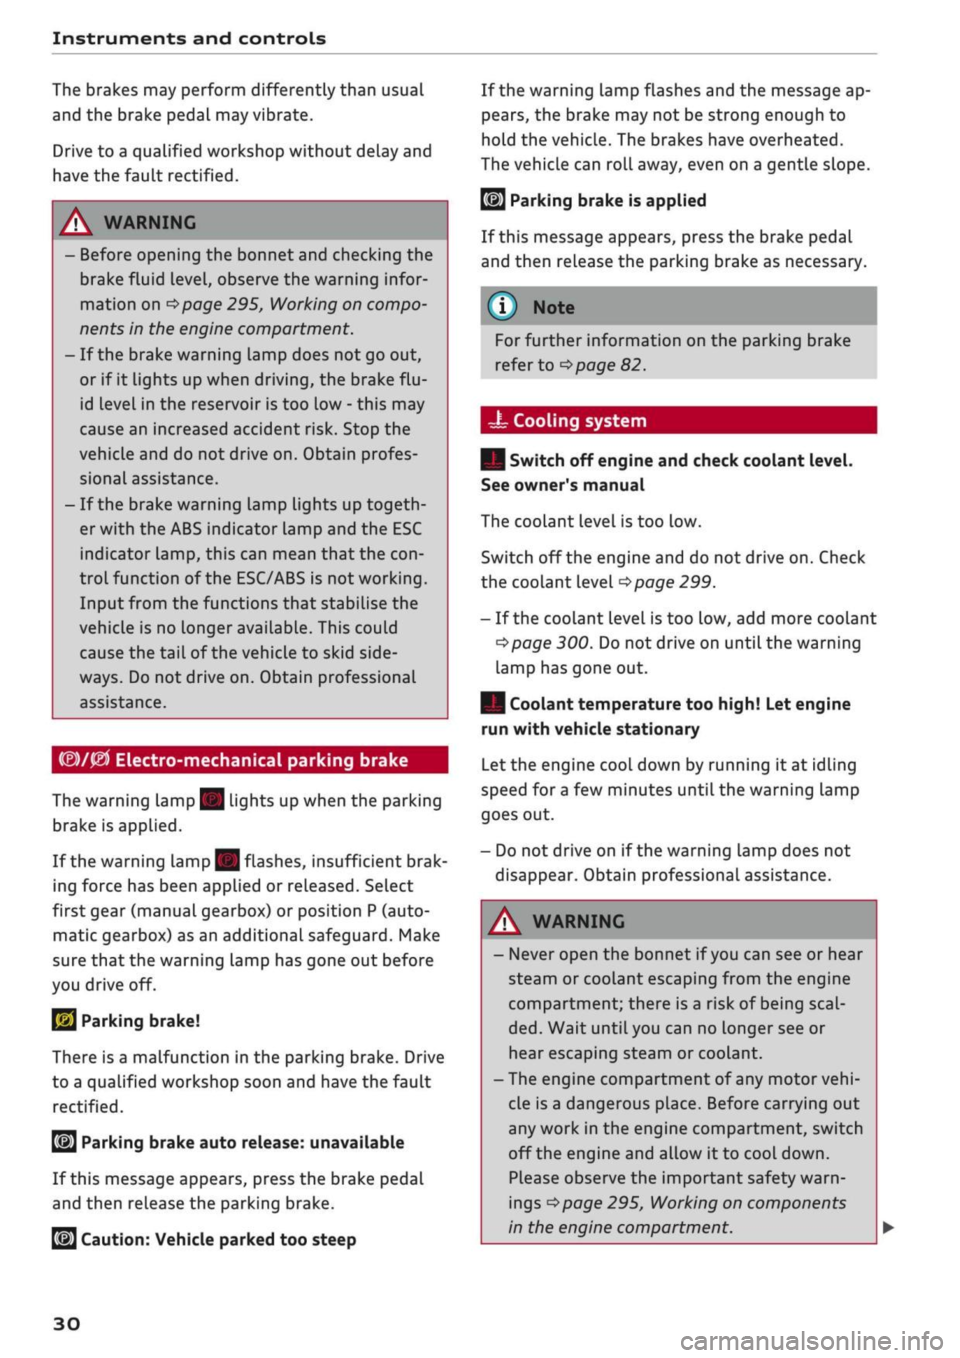
(®)/0
Electro-mechanical parking brake
The warning lamp
||
lights
up
when
the
parking
brake
is
applied.
If the warning lamp
||
flashes, insufficient brak
ing force
has
been applied
or
released. Select
first gear (manual gearbox)
or
position
P
(auto
matic gearbox)
as an
additional safeguard. Make
sure that
the
warning lamp has gone
out
before
you drive
off.
2J
Parking brake!
There
is
a malfunction
in the
parking brake. Drive
to a qualified workshop soon
and
have
the
fault
rectified.
[ft]
Parking brake auto release: unavailable
If this message appears, press
the
brake pedal
and then release
the
parking brake.
If the warning lamp flashes and
the
message
ap
pears,
the
brake
may not be
strong enough
to
hold
the
vehicle. The brakes have overheated.
The vehicle can roll away, even
on a
gentle slope.
©J Parking brake is applied
If this message appears, press
the
brake pedal
and then reLease
the
parking brake
as
necessary.
For further information
on the
parking brake
refer
to
^>page
82.
•as
Cooling system
| Switch
off
engine and check coolant level.
See owner's manual
The coolant level
is too low.
Switch
off
the engine and
do not
drive on. Check
the coolant level
^>page
299.
-
If
the coolant level
is too
low, add more coolant
^>page
300. Do not
drive
on
until
the
warning
lamp has gone
out.
| Coolant temperature too high! Let engine
run with vehicle stationary
Let
the
engine cool down
by
running
it at
idling
speed
for
a
few
minutes until
the
warning lamp
goes
out.
-
Do not
drive
on if
the warning lamp does
not
disappear. Obtain professional assistance.
JgJ
Caution:
Vehicle parked
too
steep
A WARNING
- Never open
the
bonnet
if
you
can see
or
hear
steam
or
coolant escaping from
the
engine
compartment; there
is
a risk
of
being
scal
ded.
Wait until you
can no
longer see
or
hear escaping steam
or
coolant.
-The engine compartment
of
any motor
vehi
cle
is
a dangerous place. Before carrying
out
any work
in the
engine compartment, switch
off the engine and allow
it to
cool down.
Please observe
the
important safety warn
ings
^>page
295,
Working
on
components
in
the
engine compartment.
30