belt AUDI Q3 2015 Owners Manual
[x] Cancel search | Manufacturer: AUDI, Model Year: 2015, Model line: Q3, Model: AUDI Q3 2015Pages: 258, PDF Size: 64.9 MB
Page 4 of 258
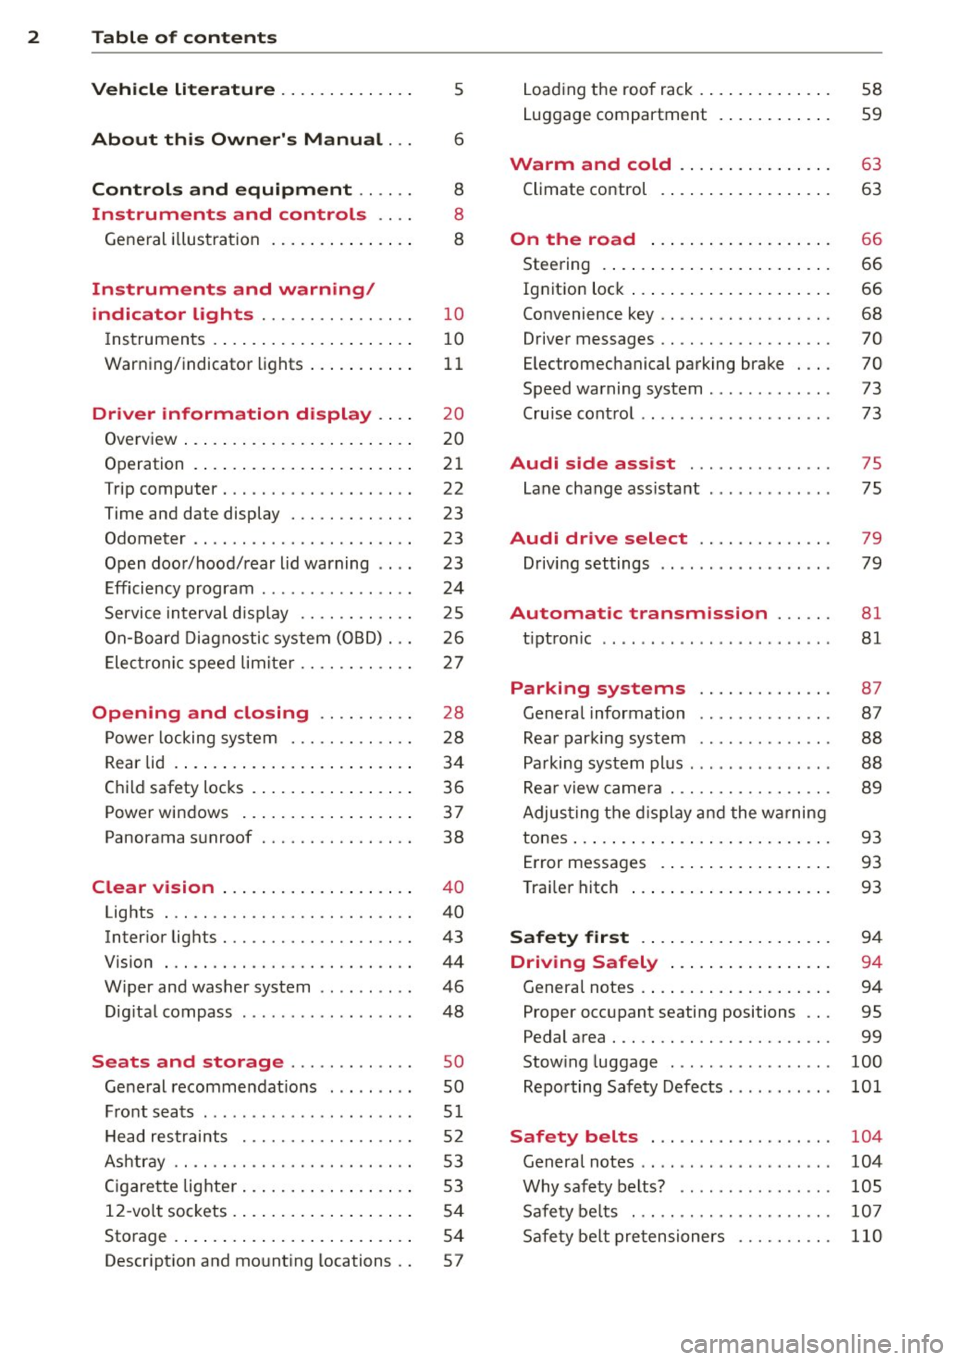
2 Table of contents Vehicle literature .. .. .. .. .. ... .
5
About this Owner's Manual . . . 6
Controls and equipment .. ... .
Ins truments and controls .. . .
General illus tration .... ... .. .. ... .
Instruments and warning /
indicator lights ........ .. .. .. . .
Ins truments . .. .. ..... ... .. .. ... .
War ning/ indi cator lights ... .. ... .. .
Driver information d isplay .. . .
Overview ... ... .. ..... ... .. .. ... .
Operation . .... .. ..... ... .. .. ... .
Trip computer . ........... .... ... .
Time and date display ..... .. .. .. . .
Odometer .. ........ ..... .. ..... .
Open doo r/hood/ rear lid warning .. . .
E fficiency p rogram ......... ... .. . .
S ervice in terval d isp lay .... .. .. ... .
On -Board D ia gnostic system ( OBD) . . . 8
8
8
1 0
1 0
11
2 0
20
2 1
22
23
23
23
24
2 5
26
Ele ctr onic spee d lim iter . . . . . . . . . . . . 2 7
Opening and closing .. .. .. .. . .
Powe r locking sy stem ..... .. .. .. . .
Rear lid ..... .. .. ..... ... .. .. ... .
C hil d safety locks . ..... ... .. .. ... .
Power win dows .. ..... ... .. .. ... .
Panorama s unroof ........ .. .. ... .
Clear vision .. .. ..... ... .. .. ... .
Lights . .. .. .. . .......... .. .. ... .
Inter ior lights ............. ... ... .
V 1s 1on . ...... ........... .... ... .
W iper and washer system . ... .. .. . .
Di gita l compass ........... ... .. . .
Seats and storage ...... ..... . .
Ge neral recomme ndat ions ..... .. . .
F ront sea ts .... .... ...... .. .. .. . .
H ead re straints .......... .. .. .. . .
Ashtr ay .. .. ............. ....... .
C igare tte lig hte r . ...... ... .. .. ... .
1 2- vo lt sockets . .. ..... ... .. .. ... .
Sto rage ..... .. .. ..... ... .. .. ... . 28
2
8
3 4
3 6
37
38
4 0
40
43
44
46
4 8
so
so
51
5 2
53
53
5 4
54
Descr ipt ion and mo unt ing locations . . 57 L
oad ing the roof rack . .. ..... .... . .
Luggage compartment . ..... ... .. .
Warm and cold .. ... ..... ... .. .
Climate control . .... .. ..... .... . .
On the road ... .. ... ..... ... .. .
Stee ring . ..... .. .. .... .... ... .. .
Ig nit ion lock ..... ... .. ..... .... . .
Convenience key .. ... .......... .. .
D river messages .. ............... .
E lectromechanical parking brake . .. .
Speed warning system . .......... . .
Cru ise cont ro l .. .. ............... .
Audi side assist .............. .
Lane change ass istant . .......... . .
Audi dr ive select ... ... ..... .. .
Driving set tings .. ..... ......... . .
Automatic transmission ... .. .
tiptron ic .. .. .. .. .. ... .. ... ..... .
Parking systems
58
59
63
63
66
66
66
68
70
70
73
73
75
75
79
79
81
81
87
Genera l information . . . . . . . . . . . . . . 87
Rea r parking syste m . . . . . . . . . . . . . . 88
P a rking system plus . . . . . . . . . . . . . . . 88
Rea r view came ra . . . . . . . . . . . . . . . . . 89
Adjus ting the display and the w arning
tones ... .. .... .. .. ... ..... ... .. . 93
E rror messages . . . . . . . . . . . . . . . . . . 93
T ra ile r hitch . . . . . . . . . . . . . . . . . . . . . 93
Safety fir st . . . . . . . . . . . . . . . . . . . . 94
Driving Safely . . . . . . . . . . . . . . . . . 94
Genera l notes . . . . . . . . . . . . . . . . . . . . 94
Proper occ upant seating positions . . . 95
Pedal area . . . . . . . . . . . . . . . . . . . . . . . 99
Stow ing luggage . . . . . . . . . . . . . . . . . 100
Reporting Sa fety Defects . . . . . . . . . . . 101
Safety belts . . . . . . . . . . . . . . . . . . . 104
General notes . . . . . . . . . . . . . . . . . . . . 104
Why safety belts? . . . . . . . . . . . . . . . . 105
Safe ty be lts . . . . . . . . . . . . . . . . . . . . . 107
Sa fe ty be lt pretensioners . . . . . . . . . . 110
Page 14 of 258
12 Instruments and warning/indicator lights
compartment, stop the engine and let it
cool down. Always exercise extreme cau
tion when work ing under the hood
c::> page 179.
Overview
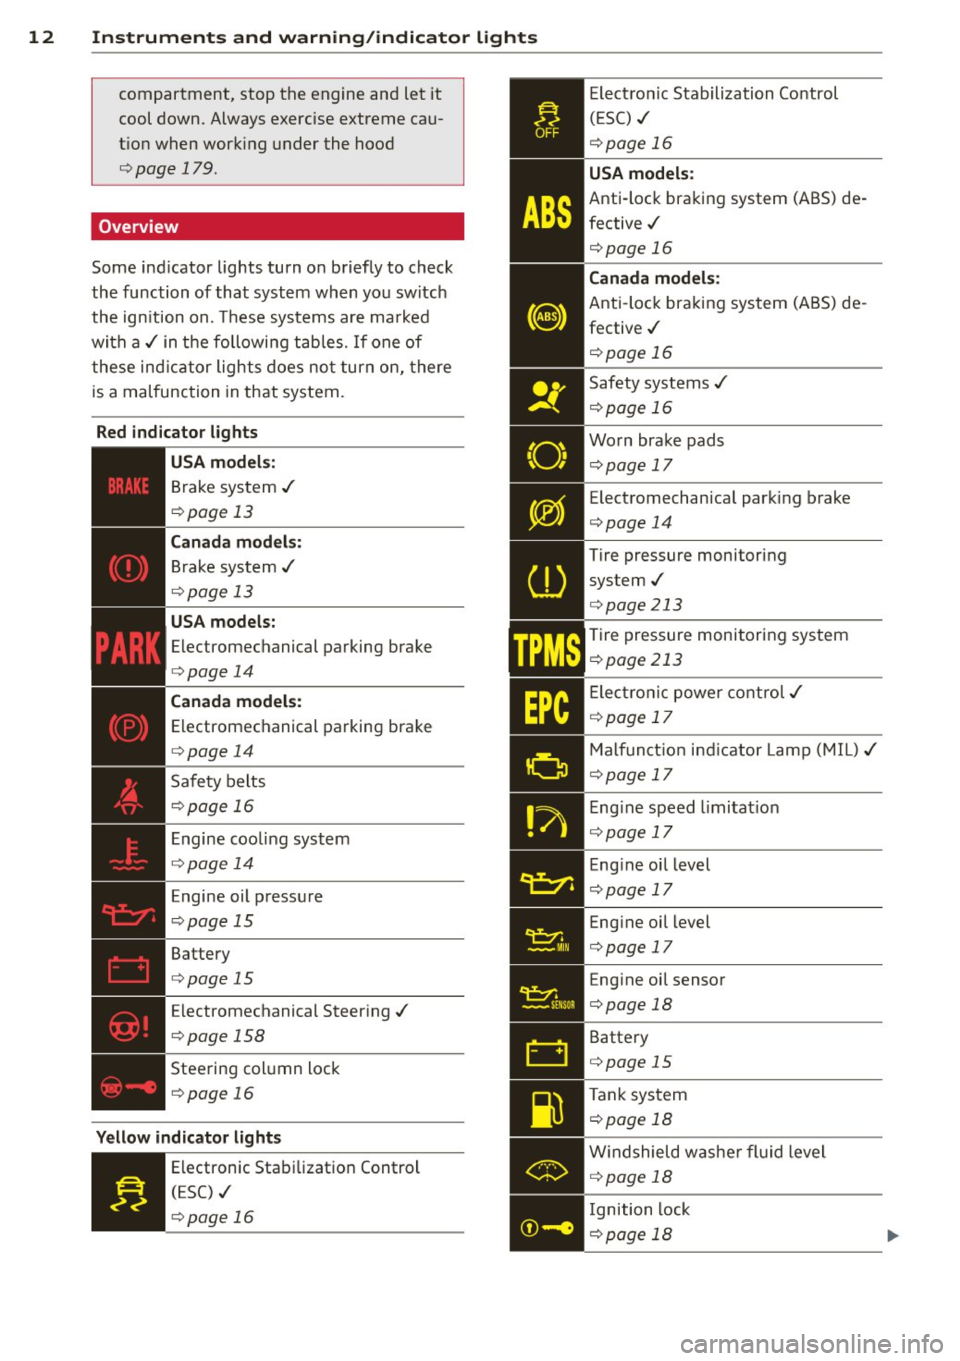
Some ind icator lights turn on briefly to check
the function of that system when you switch
the ign ition on. These systems are ma rked
with a ../ in the following tables. If one of
these indicator lights does not turn on, there
is a malfunction in that system.
Red indicator lights
USA models:
Brake system ../
c::>page 13
Canada models:
Brake system ../
c::>page 13
USA models:
Electromechanical parking brake
c::>page 14
Canada models:
Electromechanical parking brake
c::>page 14
Safety belts
c::>page 16
Engine cooling system
c::>page 14
Engine oil pressure
c::>page 15
Battery
c::>page 15
Electromechanical Steering../
¢ page 158
Steering column lock
¢page 16
Yellow indicator lights
Electronic Stabilization Control
(ESC) ../
¢page 16
TPMS
Electronic Stabilization Control
(ESC) ../
¢page 16
USA models:
Anti-lock braking system (ABS) de
fective../
¢page 16
Canada models:
Anti-lock braking system (ABS) de
fective../
c::> page 16
Safety systems ../
c::> page 16
Worn brake pads
c::> page 17
Electromechanical park ing brake
¢ page 14
Tire pressure monitoring
system../
¢page 213
Tire pressure monitoring system
¢page 213
Elect ronic power control../
c::> page 17
• M
alfunct ion ind icator Lamp (MIL)../ ¢page 17
Engine speed limitat ion
c::> page 17
- Engine oil level
- c::>pagel7
• ·
-. Engine oil level _
1 c::> page 17
• Engine oil sensor c::> page 18
Battery
c::> page 15
-
Tank system
... c::> page 18
• Windshield
washer fluid level c::> page 18
- Ignition lock
IYiiil c::> page 18
Page 18 of 258
16 Instruments and warning/indicator lights
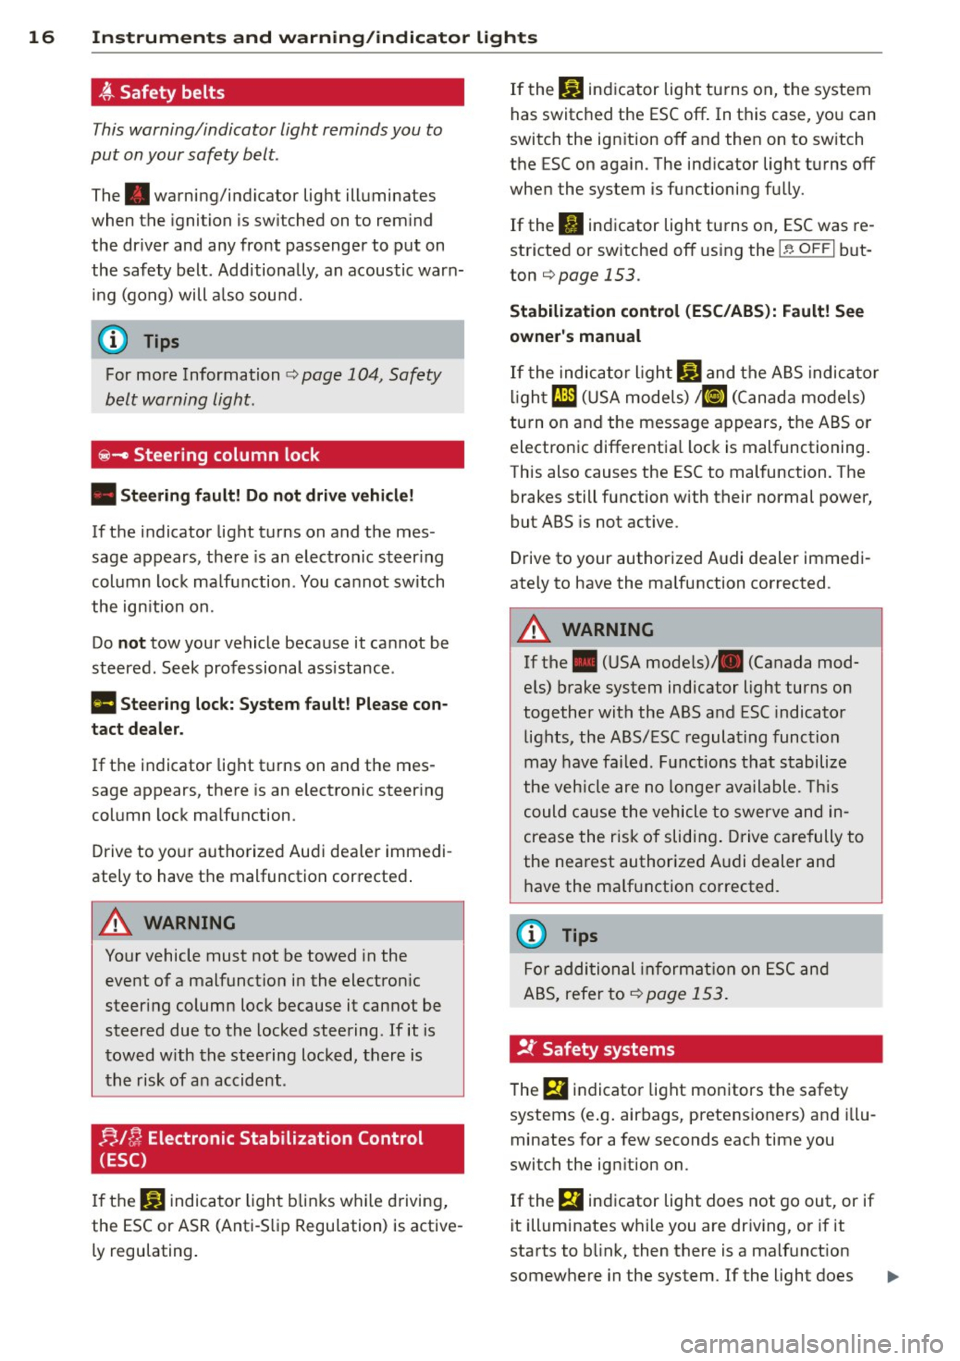
~ Safety belts
This warning/indicator light reminds you to
put on your safety belt.
The. warning/indicator light illuminates
when the ignition is sw itched on to remind
the dr iver and any front passenger to put on
the safety belt. Additionally, an acoustic warn
ing (gong) will also sound.
(D Tips
For more Information c> page 104, Safety
belt warning light.
~- Steering column lock
• Steering fault! Do not drive vehicle!
If the indicator light turns on and the mes
sage appears, there is an electronic steering
column lock malfunction. You cannot switch
the ign ition on.
Do
not tow your vehicle because it cannot be
steered . Seek professional assistance.
Ill Steering lock: System fault! Please con
tact dealer.
If the indicator light turns on and the mes
sage appears, there is an electronic steer ing
column lock malfunction.
Drive to your authorized Audi dea ler immedi
ate ly to have the malfunction corrected .
A WARNING
-
Your vehicle must not be towed in the
event of a malfunct ion in the electron ic
steering column lock because it cannot be
steered due to the locked steering. If it is
towed with the steering locked, there is
the risk of an accident .
!;.IC; Electronic Stabilization Control
(ESC)
If the J;J indicator light blink s whi le driving,
the ESC or ASR (Anti-S lip Regulation) is active
ly regulating .
If the: JjJ indicator light turns on, the system
has switched the ESC
off. In this case, you can
switch the ign ition
off and then on to switch
the ESC on aga in. The indicator light turns
off
when the system is functioning fully.
If the II indicator light turns on, ESC was re
stricted or sw itched
off using the I~ OFFI but
ton
i=> page 153.
Stabilization control (ESC/ABS): Fault! See
owner's manual
If the indicator l ight GJ and the ABS indicator
light
t1l1 (USA mode ls) ;tiJ (Canada models)
tu rn on and the message appears, the ABS o r
electronic differentia l lock is malfunctioning.
This also causes the ESC to malfunction. The
brakes still function with their normal power,
but ABS is not active.
Drive to your authorized Audi dealer immedi
ate ly to have the ma lfunction corrected.
A WARNING "--
If the . (USA mode ls)/ . (Canada mod-
e ls) brake system indicator light turns on
together with the ABS and ESC indicator
lights, the ABS/ESC regulating function
may have failed. Functions that stabilize
the vehicle are no longer ava ilable. This
could cause the vehicle to swerve and in
crease the risk of slid ing. Drive carefully to
the nearest authorized A udi dealer and
have the ma lfunction corrected.
(D Tips
For additional informat ion on ESC and
ABS, refer to
c> page 153.
!t Safety systems
The fll indicator light monitors the safety
systems (e .g. airbags, pretensioners) and illu
minates for a few seconds each time you
switch the ign ition on .
If the
fll indicator light does not go out, or if
it illuminates while you are driving, or if it
starts to b link, then there is a malfunct ion
somewhere in the system. If the light does
Page 52 of 258
50 Seat s a nd s tor ag e
Seats and storage
General recommen
dations
Why is your seat adjustment so
important?
The safety belts and the airbag system can
only provide maximum protection if the front
seats are correctly adjusted.
There are various ways of adjust ing the front
seats to provide safe and comfortable support
for the driver and the front passenger . Adjust
you r seat prope rly so that :
- you can easily and quick ly reach all the
switches and controls in the instrument
panel
-your body is prope rly supported thus reduc
ing physical stress and fatigue
- the safety be lts and a irbag system can offer
maximum protection
¢ page 112 .
In the following sec tions, you will see exactly
how you can best adjust you r seats .
There are special regulations and instructions
for insta lling a child safety seat on the front
passenger's seat. Always follow the informa
tion rega rd ing child safety provided in
q page 133, Child Safety.
A WARNING
Incorrect seating position of the driver and
all other passengers can result in serious
personal in jury.
- Always keep your feet on the floor when
the vehicle is in motion -never p ut your
f eet on top of the instrument panel, out
of the w indow or on top of the seat cush
ion . Th is app lies especially to the passen
gers .
If your seating position is incorrect,
yo u increase the r isk of injury in the case
of sudden braking or an acc ident.
If the
airbag infla tes and the seating position
is incorrect, this could result in personal
injury o r even death.
- It is import ant for bo th the driver and
front passenger to keep a distance of at least 10 inches (25 cm) between them
selves and the steering wheel and/or in
strument panel. If you're s itting any
closer than th is, the a irbag system can
not protect you properly . In addition, the
front seats and head restraints must be
adjusted to your body height so that they
can give you max imum protect ion.
- Always try to keep as much distance as
possible between yourself and the steer
ing wheel o r inst rument pane l.
- Do not adjust the driver's o r front pas
senger's seat whi le the vehicle is moving.
Your sea t may move unexpected ly, caus
ing sudden loss of vehicle control and
personal injury . If you adjust yo ur seat
while the veh icle is moving, yo u are out
of posit ion.
Driver's seat '
The correct seat position is important for safe
and relaxed driving.
We recommend tha t you adjus t the dr iver's
seat in the fo llowing manner :
.,. Adjust t he seat in fore and aft direction so
t ha t you can eas ily push the peda ls to the
floor w hile keeping your knees sl igh tly bent
q A in Why is your seat adjustment so im
portant? on page 50.
.. Adjust the seatback so that when you sit
w ith your back against t he seatback, you can
still grasp the top of the steering wheel.
.. Adjust the head restraint so the upper edge
is as even as poss ible with the top of your
head . If that is not poss ible , try to adjust
t he head restraint so that it is as close to
t his pos it ion as possib le
q page 52.
A WARNING
Neve r place any objects in the dr iver's foot
well. An object could get into the pedal
a rea and interfere with pedal function . In
case of sudden braking or an acc ident, you
would not be able to brake or accelerate .
Page 53 of 258
M N M N
0 :::i CC) rl I.O
"' rl
"' rl
Front passenger's seat
Always move the front passenger seat into the rearmost position.
To avo id contact with the airbag while it is de
ploying, do not sit any closer to the instru
ment panel than necessary and always wear
the three-point safety belt provided adjusted
correctly. We recommend that you adjust the
passenger's seat in the fo llow ing manner:
.. Move the front passenger seat in to the rear
most position of the fore and aft adjustment
range
9 .&. in Why is your seat adjustment
so important? on page 50.
• Bring the back re st up to an (a lmost) upright
pos ition .
Do not ride with the seat reclined.
.. Adjust the head restraint so the upper edge
is as even as possib le wit h the top of your
head. If that is not possib le, try to adjust
the head restraint so that it is as close to
th is position as possible ¢
page 52.
.. Place your feet on the floor in front of the
passenger's seat .
Front seats
Power seat adjustment
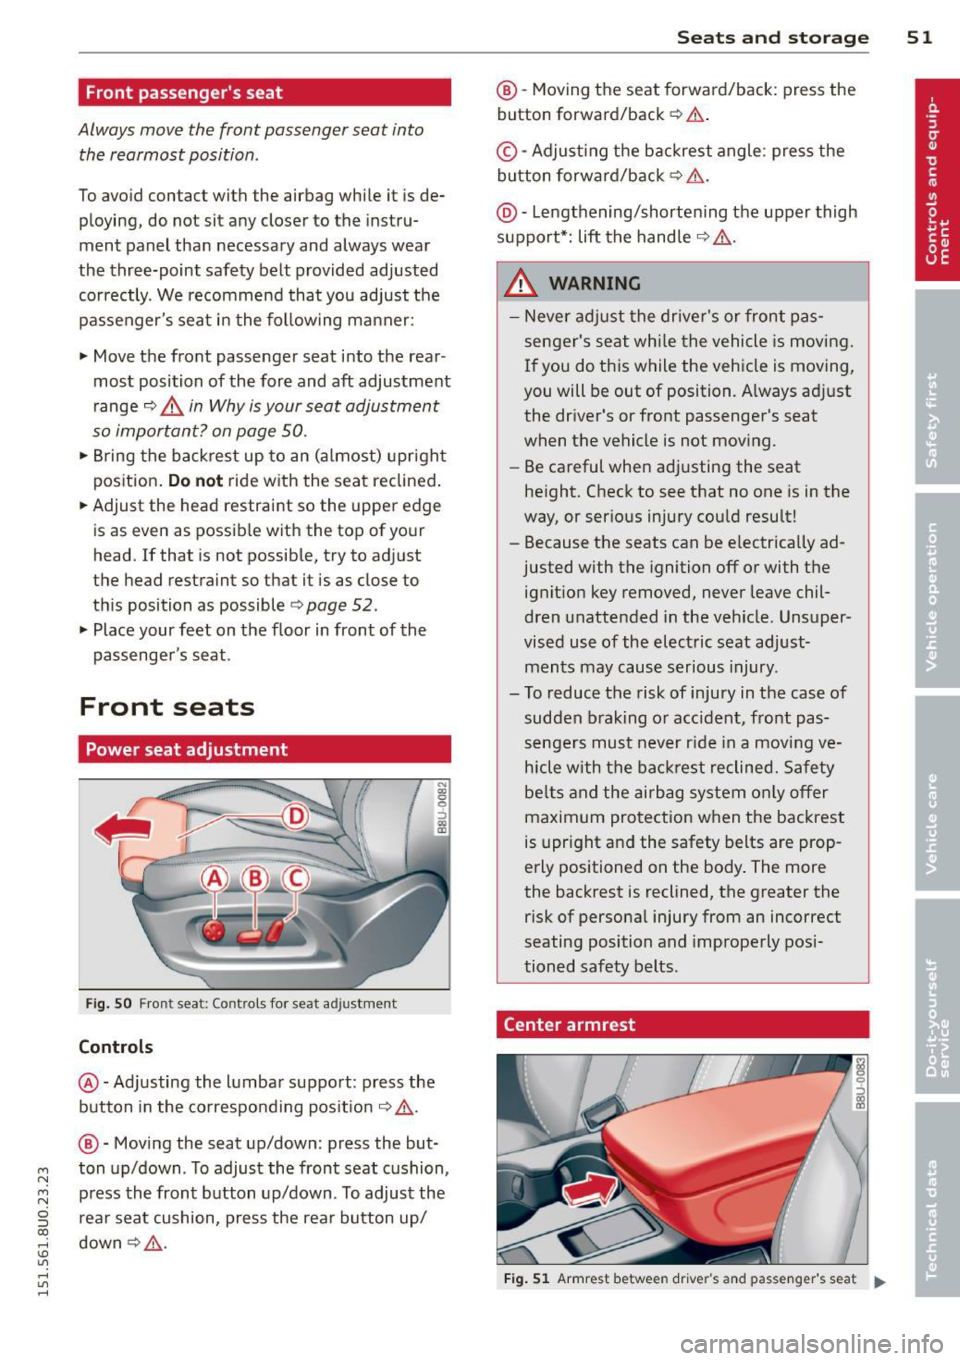
Fig . SO Front seat: Controls for seat adjustment
Controls
@-Adjusting the lumba r support: press the
b utton in the correspo nding pos it ion
9 .&,.
N co C,
C,
::i a, m
@ -Moving the seat up/down: press the but
ton up/down . To adjust the front seat cushion,
p ress the front button up/down. To adjust the
r ea r seat cushion, press the rea r button up/
down¢ .&,.
Seats and stor age 51
@ -Moving the seat forward/back: press the
button forward/back
9 .&. .
©-Adjus ting the backrest angle: press the
button forward/back¢ .&..
@ -Lengthening/shorten ing the upper thigh
suppo rt*: lift the hand le
9 .&, .
_&. WARNING
-
-Never adjust the drive r's or front pas
senger's seat whi le the vehicle is mov ing .
I f you do this while the vehicle is moving,
you will be out of position. A lways ad just
the driver's or front passenger's seat
when the vehicle is not moving.
- Be careful when adjusting the seat
height. Check to see that no one is in the
way, or ser ious injury could result!
- Because the seats can be e lectrically ad
justed with the ignition off or with the
ignit ion key removed, never leave chil
dren unattended in the veh icle. Unsuper
vised use of the electric seat adjust men ts may cause serious injury.
- To reduce the risk of injury in the case of
sudden b raking o r accident, front pas
senge rs must never r ide in a mov ing ve
hicle with the ba ckrest reclined. Sa fety
be lts and the airbag system on ly offer
maximum protection w hen the backrest
is upr ight and the safety belts are prop
erly positioned on the body . The more
the backrest is reclined, the greater the
risk of persona l injury from an incorrect
seating position and improperly posi
tioned safety belts.
Center armrest
Fig. 51 Armrest between driver 's and passenger's seat .,_.
Page 54 of 258
52 Seats and storage
Opening the storage compartment
.,. Press the button -arrow- and move the lid
upward.
Adjusting the armrest
.,. To adjust the angle, lift the armrest detent
by detent until the desi red pos ition is
reached.
.,. To bring the armrest back into its original
position, lift it above the top position and
then fo ld it back down.
Please note that the driver's arm movements
may be restricted w ith the armrest fo lded
down. For this reason, the armrest should not
be folded down when driving in city traffic.
Head restraints
Front head restraints
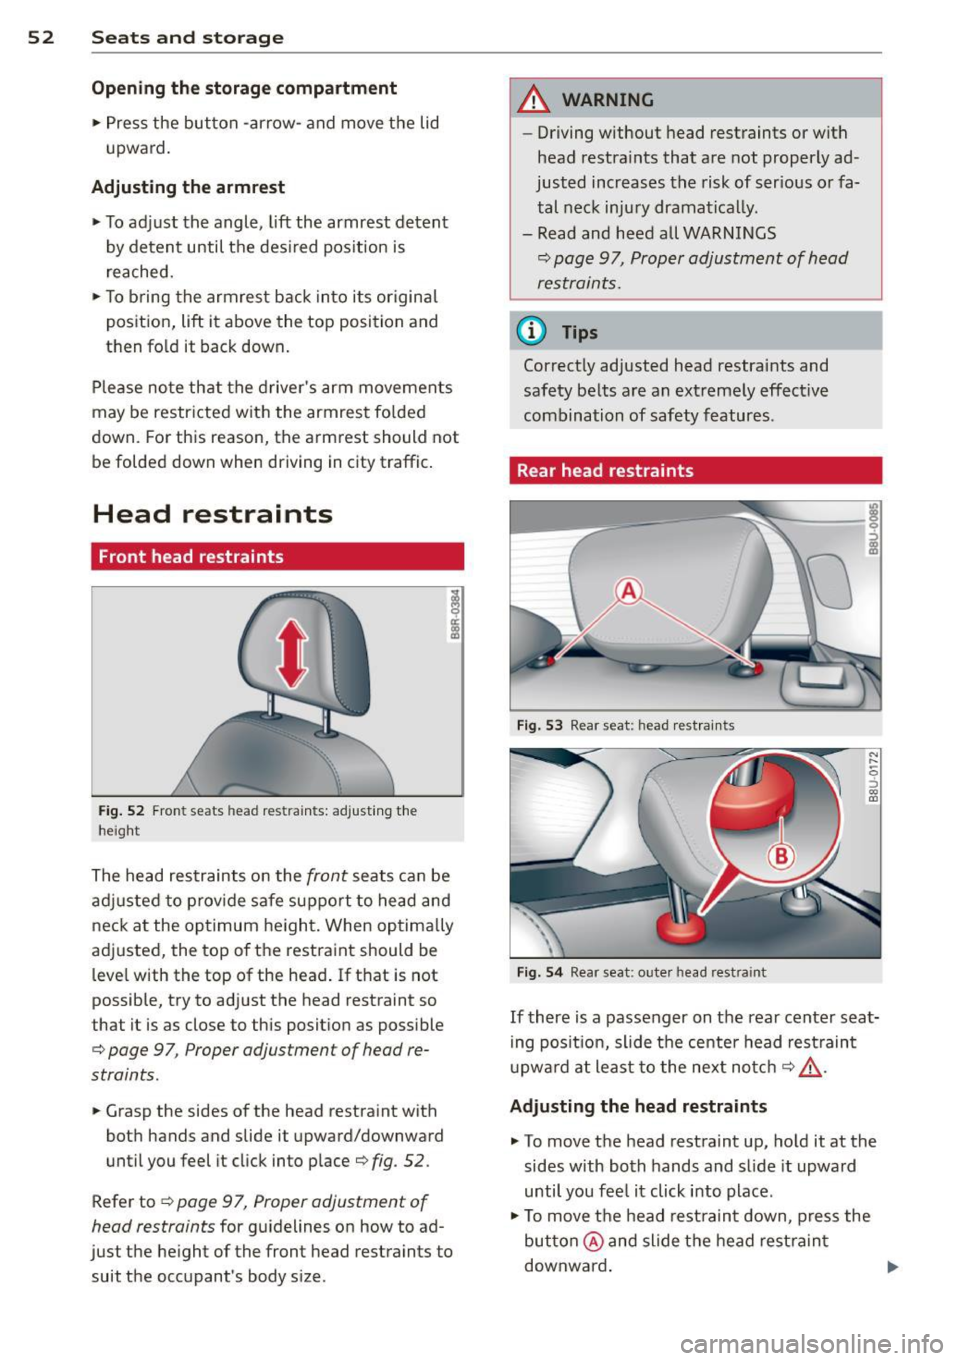
Fig . 52 Front seats head restraints: adjust ing the
height
The head restraints on the front seats can be
ad justed to provide safe support to head and
neck at the optimum height. When optimally
adjusted, the top of the restraint should be
level with the top of the head . If that is not
possib le, try to adjust the head restraint so
that it is as close to this position as possible
¢ page 97 , Proper adjustmen t of head re
straints.
.,. Grasp the sides of the head restraint with
both hands and slide it upward/downward
until you feel it click into place¢
fig. 52.
Refer to ¢ page 9 7, Proper adjustment of
head restraints
for guidelines on how to ad
just the height of the front head restraints to
suit the occupant's body s ize.
A WARNING
--
- Driving without head restraints or with
head restraints that are not properly ad
justed increases the risk of serious or fa
tal neck injury dramatica lly .
- Read and heed all WARNINGS
¢ page 9 7, Proper adjustment of head
restraints .
(D Tips
Correctly adjusted head restraints and
safety belts are an extremely effective
combination of safety features.
Rear head restraints
~--===--I
i
Fig . 53 Rear seat: head restraints
Fig. 54 Rear seat : outer head rest ra int
If there is a passenger on the rear center seat
ing position, slide the center head restraint
up ward at least to the next notch ¢
&-
Adjusting the head restraints
.,. To move the head restraint up, hold it at the
sides with both hands and slide it upward
until you feel it click into place .
.,. To move the head restraint down, press the
button @and slide the head restraint
downward . ..,_
Page 55 of 258
M N M N
0 ::i co
rl I.O
"' rl
"' rl
Removing the head restraints
• Fold the backrest forward
¢ page 60 .
• Move the head restraint upward as far as it
can go.
• Press the release@¢
fig. 54 with an auxili
ary tool and the button @. Pull the head re
straint out of the backrest at the same time
¢ & .
Install ing the head restraints
• Slide the posts on the head restraint down
into the guides until you feel the posts click
into place .
• Press the button @ and slide the head re
stra int all the way down. You should not be
able to pull the head restraint out of the
back rest.
So that the driver can have a better view to
the rear, the head restraints should be pushed
down completely when the rear seats are not
occupied.
_& WARNING
- Only remove the rear seat head restraints
when necessary in order to install a chi ld
seat . Install the head restraint again im
mediately once the child seat is removed.
Driving without head restraints or with
head restraints that are not properly ad
justed increases the risk of serious or fa
tal neck injury dramatically .
- Read and heed all WARNINGS
¢ page 9 7, Proper adjustment of head
restraints .
(D Tips
Correctly adjusted head restraints and
safety belts are an extremely effective
combinat ion of safety features.
Seats and storage 53
Ashtray
Applies to vehicles: with ashtray
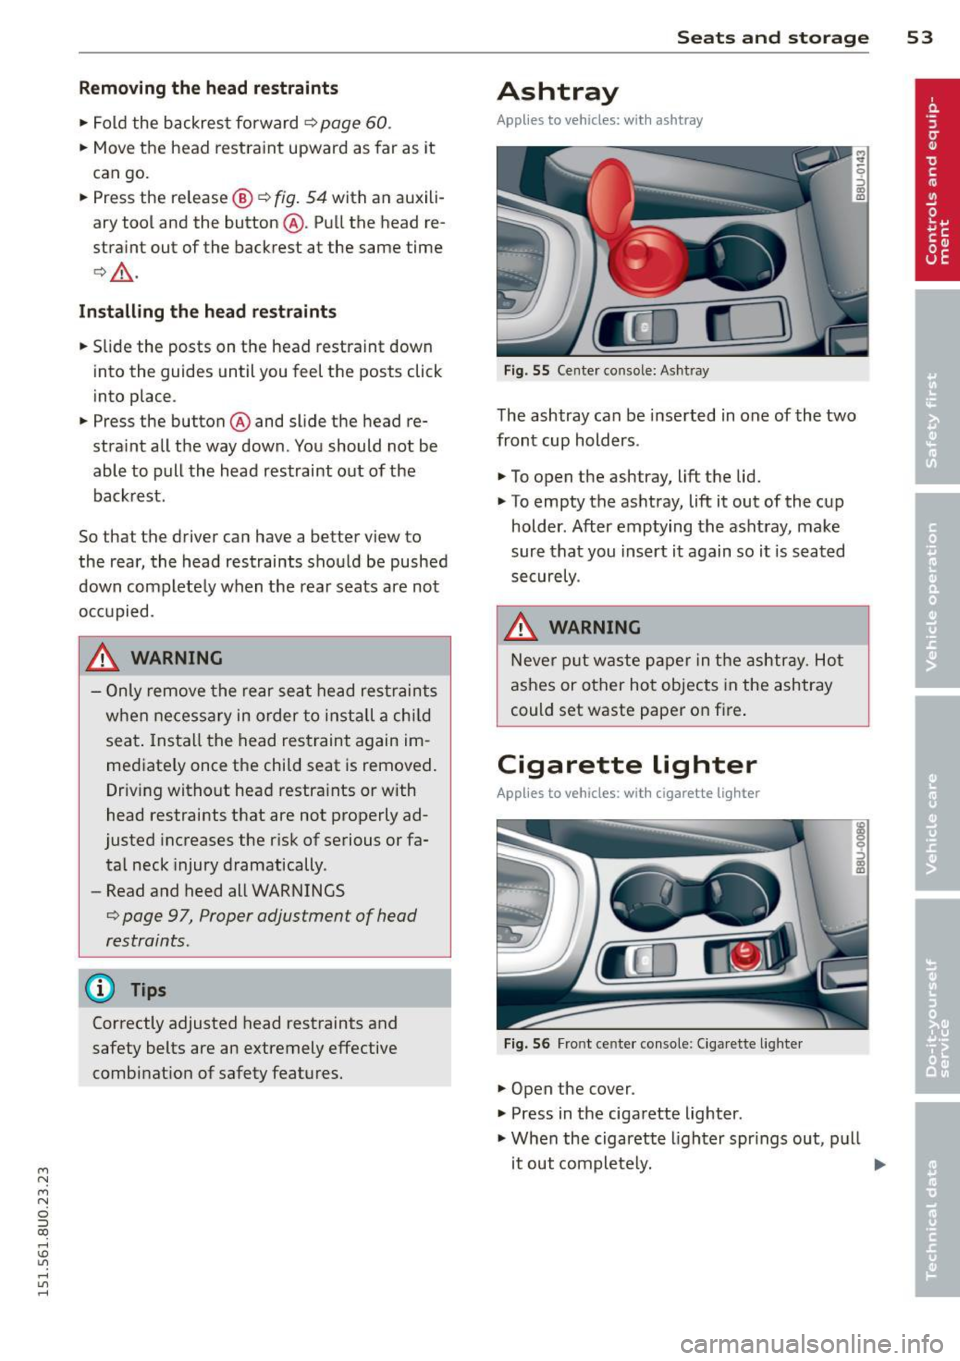
Fig. 55 Center console: Asht ray
The ashtray can be inserted in one of the two
front cup holders .
• To open the ashtray, lift the lid.
.,. To empty the ashtray, lift it out of the cup
holder . After emptying the ashtray , make
sure that you insert it again so it is seated
securely .
_& WARNING
Never put waste paper in the ashtray. Hot
ashes or other hot objects in the ashtray
could set waste paper on fire .
Cigarette lighter
Applies to vehicles: with cigarette lighter
Fig. 56 Front ce nter console: C iga rette l ighte r
.. Open the cover .
.. Press in the cigarette lighter .
.,. When the cigarette lighter spr ings out, p ull
it out completely.
II>
Page 62 of 258
60 Seats and st o rage
Enlarging the luggage compartment
The rear seat backrests can be folded forward
either separately or together .
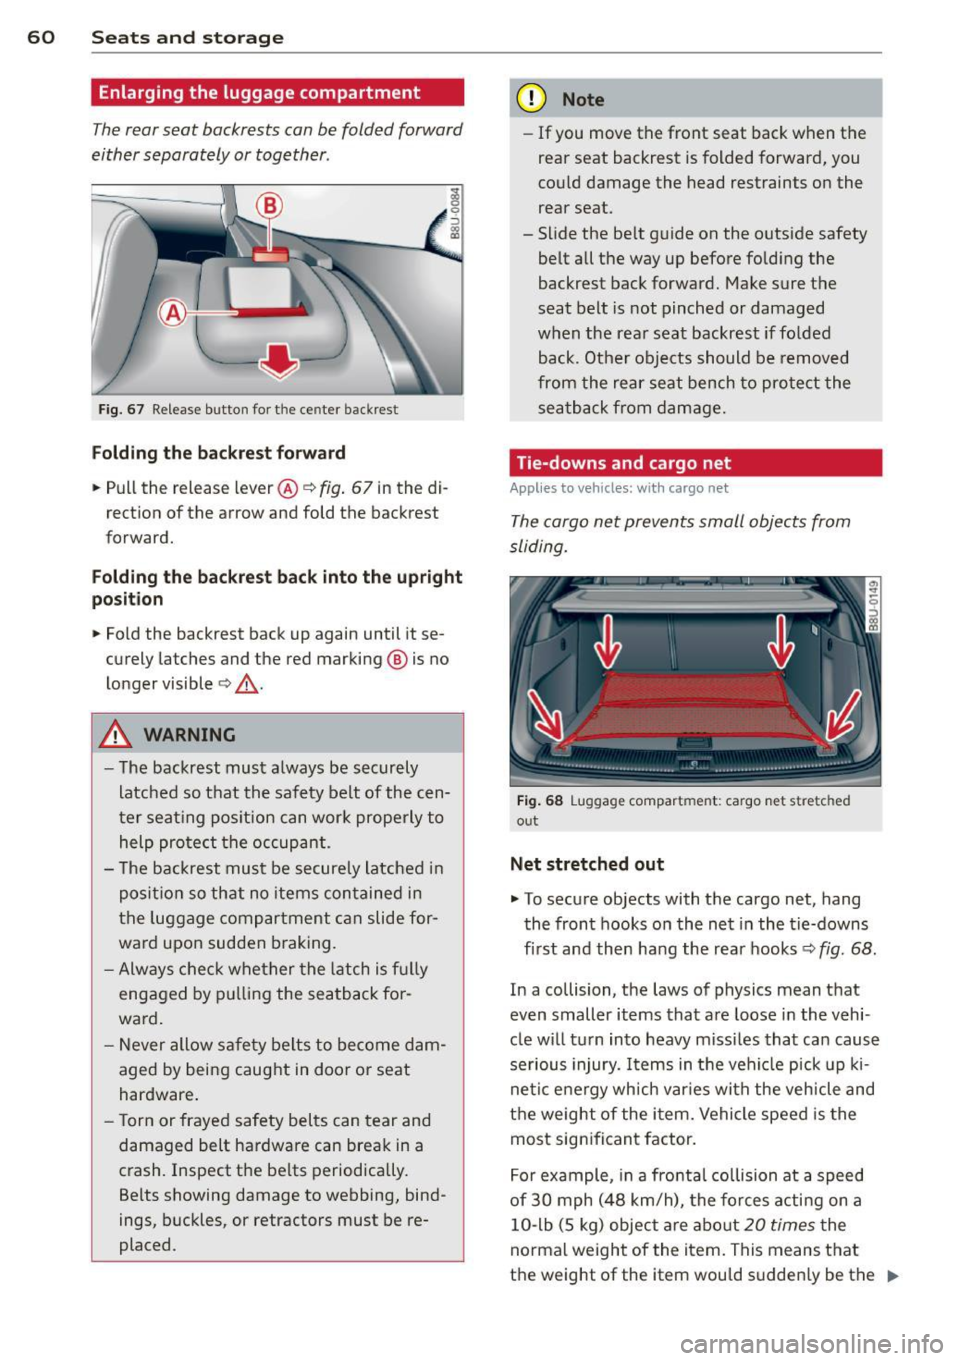
Fig. 67 Release button for t he ce nter backr est
Folding th e back rest forward
.. Pull the release lever®¢ fig. 67 in the di
rect ion of the arrow and fold the backrest
forward.
Folding th e back rest back into th e upright
position
.. Fold the backrest back up again until it se
curely latches and the red marking @ is no
longer visible ¢
_&..
&_ WARNING
-The backrest must a lways be securely
latched so that the safety belt of the cen
ter seat ing pos ition can wor k properly to
help protect the oc cupant .
- T he backrest must be secure ly latched in
posi tion so that no items contained in
the luggage compar tment can slide for
ward upon sudden braking.
- Alw ays che ck whe ther the l atch is f ully
engaged by p ulling the seatback for
ward .
- Never allow safe ty belts to be come dam
aged by being caught in doo r or seat
hardware.
- T orn or frayed safety belts can tear and
damaged belt hardware can break in a
crash. Inspect the be lts periodically.
Belts showing damage to webbing, bind
ings, buckles, or retractors must be re
placed .
(D Note
-If you move the front seat back when the
rear seat backrest is folded forward, you
cou ld damage the head restraints on the
rear seat.
- Slide the be lt guide on the outside safety
belt all the way up before folding the
backrest back forward. Make sure the
seat belt is not pinched or damaged
when the rear seat backrest if folded
back. Other objects should be removed
from the rear seat bench to protect the sea tback from damage.
Tie-downs and cargo net
Applies to vehicles: with cargo ne t
The cargo net prevents small objects from
sliding.
Fi g. 68 Lu gg ag e compar tment: cargo net s tre tc h ed
o u t
Net stretched out
.. To secure objects with the cargo net, hang
the front hooks on the net in the tie-downs
f ir st and then hang the rear hooks¢
fig. 68 .
In a co llision, the laws of physics mean that
even smaller items that are loose in the vehi
cle w ill turn into heavy miss iles that can cause
serious injury. Items in the vehi cle pick up k i
neti c energy wh ich var ie s with the veh icle and
t h e weight of the item. Vehicle speed is the
most sig nificant factor.
For example, in a fronta l collision at a speed
of 30 mph (48 km/h), the forces a cti ng on a
10-lb (5 kg) object are abo ut
20 times the
normal weight of the item. This means t hat
t h e weight of the item wou ld sudden ly be the
ll-
Page 63 of 258
M N M N
0 ::i co
rl I.O
"' rl
"' rl
equivalent of about 200 lbs (90 kg). One can
easi ly imagine the injuries that an item of that
weight flying free ly through the passenger
compartment can cause in a collision at a
speed considered relatively low.
A WARNING
Weak, damaged or improper straps used
to secure items to t ie-downs can fail dur
ing hard brak ing o r in a collision and cause
ser ious personal injury.
- Always use suitable retaining straps and
properly secure items to the tie-downs in
the luggage compartment to help pre
vent items from shifting or flying for
ward.
- When the rear seat backrest is folded down, always use su itab le retain ing
st raps and proper ly sec ure items to the
tie-downs in the luggage compartment
to help prevent items from flying for
ward into the passenger compartment.
- Never attach a child safety seat tether
strap to a tie-down.
Ski sack
Appl ies to vehicles : wit h pass -t hr oug h and ski -sack
Long objects such as skis or snowboards can
be transported in the ski sack.
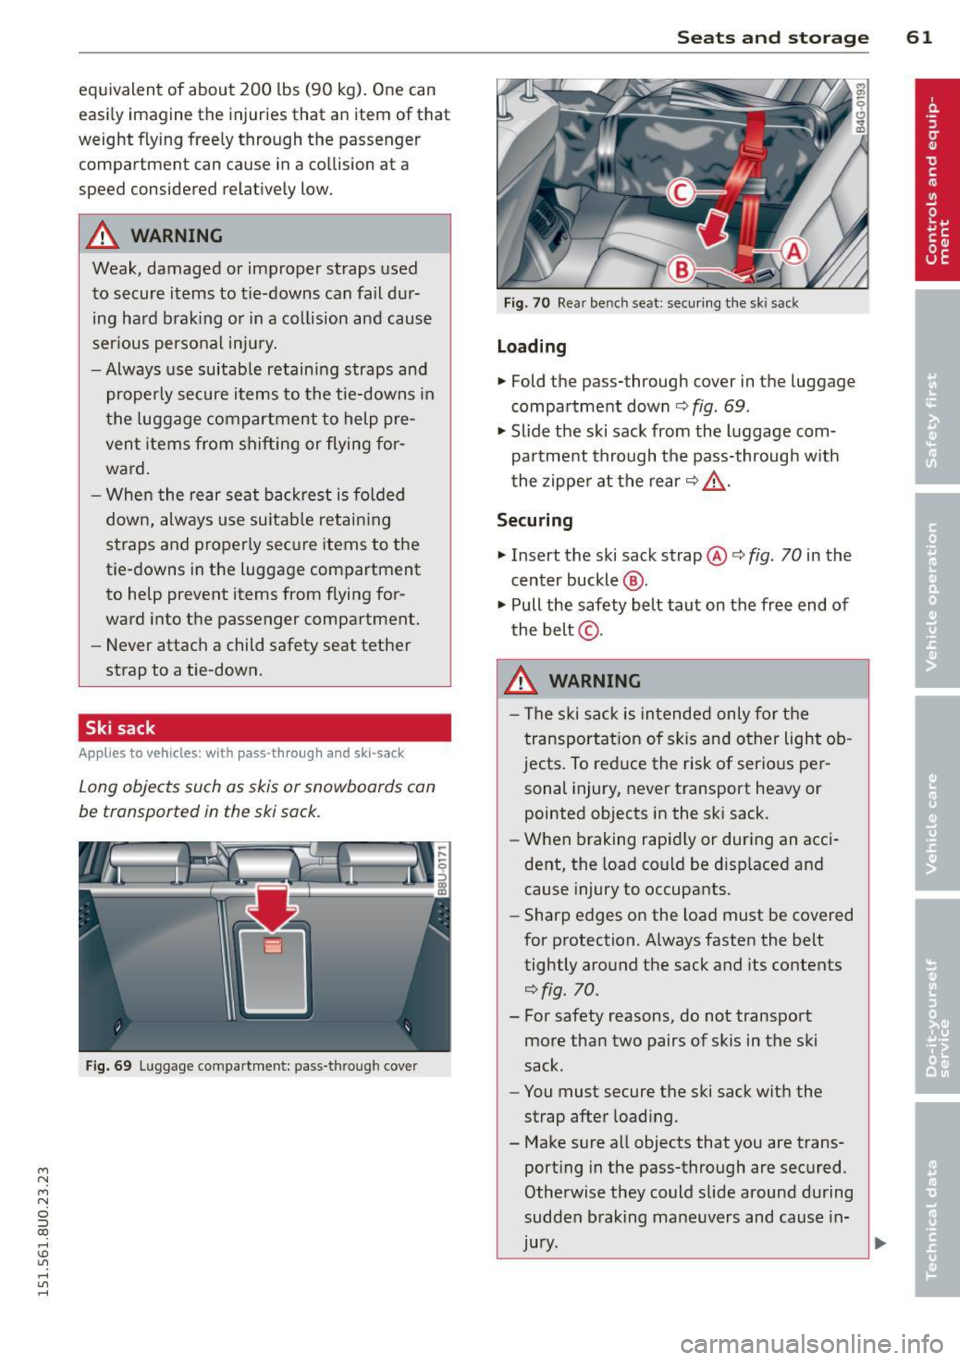
F ig. 69 Luggag .e compartment: pass-t hroug h cover
Sea ts a nd s to rage 61
Fig . 70 Rea r be nch seat : secu ring the ski sack
Lo ading
.. Fold the pass-through cover in the luggage
compartment down
¢ fig . 69 .
.. Slide the ski sack from the luggage com
partment through the pass-through with
the zipper at the rear ¢
,&.
Securing
.. Insert the ski sack strap@¢ fig. 70 in the
center buckle @.
.. Pull the safety belt taut on the free end of
the belt @.
8_ WARNING
-
-The s ki sack is intended only for the
transportat ion of sk is and other light ob
jects . To reduce the risk of serious per
sonal injury, never transport heavy or pointed objects in the sk i sack.
- When braking rapid ly or during an acci
dent, the load could be d isp laced and
cause injury to occupants.
- Sharp edges on the load must be covered
for protection. A lways fasten the belt
tightly around the sack and its contents
¢fig. 70.
- For safety reasons, do not transport
more than two pairs of skis in the ski
sack .
- You must secure the ski sack wit h the
strap after load ing.
- Make sure all objects that you are trans port ing in the pass-through are secured .
Otherwise they could slide around during
sudden braking maneuvers and cause in-
jury .
~
Page 73 of 258
M N
M N
0 ::i co ,...., \!) ..,.,
,...., ..,., ,....,
Emergency brake function
An emergency brake ensures that the vehicle
can be slowed down even if the
normal brakes
fail c::>
page 72, Emergency broking.
& WARNING
If a drive range is engaged with the vehicle
stat ionary and the engine running, you
must in no instance accelerate care lessly.
Otherw ise the vehicle will start to move
immediately -risk of an accident.
(D Tips
- If the parking brake is applied with the
i gnition switched off, the indicator lights
• in the switch and. (USA models) /
• (Canada models) in the instrument
cluster w ill go out after a certa in period
of time.
- Occasional noises when the park ing
brake is applied and re leased a re norma l
and are not a ca use for concern.
- When the vehicle is parked, the parking
brake goes through a se lf-test cycle at
regular intervals. Any assoc iated noises
are norma l.
Parking
~ Press the brake peda l to stop the vehicle.
~ Pull the switch@c::> page 70, fig . 77 to set
the parking brake.
~ Move the selector lever to P.
~ Turn the engine off c::> _&.
~ When on incl ines or declines, turn the steer
ing wheel so that the vehicle w ill roll i nto
the curb if it begi ns to move.
& WARNING
- When you leave your veh icle - even if on
ly b riefly- a lways remove the ign ition
key . This applies particularly when chil
dren remain in t he vehicle . Otherwise the
children co uld start the engine, release
the parking brake or operate electrical
equipment (e.g. power windows). There is the r isk of an accident .
On th e ro ad 71
-When the veh icle is locked, no one - par
ticularly not children should rema in in
the vehicle. Locked doors make it more
difficult for emergency wo rkers to get in
to the vehicle - putting lives at risk .
Starting from rest
The starting assist function ensures that the
parking broke is released automatically upon starting.
Stopping and applying park ing brak e
~ Pull the sw itch C®l to apply the pa rking
brake.
Starting and automatically releasing the parking brake
~ When you start to drive as usual, the park
ing brake is a utomatically released and your
veh icle begins to move.
When stopping at a traffic signal or stopping in city traff ic on vehicles with an automatic
transmission, the parking brake can be ap
plied. The vehicle does not have to be held
with the footbrake. The parking brake elimi
nates the tende ncy to creep w ith a dr ive range
engaged. As soon as you d rive off as usual,
t he pa rking bra ke is re leased automatically
and the veh icle s tarts to move.
St arting on slopes
When starting on inclines, the starting assist
prevents the vehicle from un intent io nally roll
ing back. The braking force of the parking
brake is no t re leased unt il su ff ic ient d riving
force has been built up a t the wheels.
(D Tips
Fo r safety reasons, the parking bra ke is re
l eased automatically o nly when the d riv
e r's safety belt is eng aged in the buckle.