radiator AUDI Q3 2015 Owners Manual
[x] Cancel search | Manufacturer: AUDI, Model Year: 2015, Model line: Q3, Model: AUDI Q3 2015Pages: 258, PDF Size: 64.9 MB
Page 69 of 258
M N
M N
0 ::i co ,...., \!) 1.1'1 ,...., 1.1'1 ,....,
Starting th e engin e
"'Pre ss the brake peda l and move the se lector
lever to position P or N.
"' Turn the ignition key to position @. The ig
nition key automatica lly returns to position
® · Do not press the accelerator.
If the engine fails to start immediately, switch
off the starter and try again after about
30 seconds . To start the engine again, turn
the ignition key to position @.
A WARNING
-Never allow the engine to run in confined
spaces -dange r of asphyxiation.
- Never remove the ign ition key from the
ignition look while the vehicle is moving.
Otherw ise, the stee ring lock could sud
denly engage and you would not be able
to steer the vehicle.
- Always take the key with you whenever
you leave your vehicle . Otherwise, the
engine could be started or e lectr ica l
equipment such as the power w indows
cou ld be operated . This can lead to seri
o us injury .
- Never leave c hildren or persons requi ring
assistance unattended in the vehicle. The
doo rs can be locked using the remote
transmitter, preventing peop le from es
caping from the vehicle on their own in
the event of an emergency. Depend ing
on the time of year, people inside the ve
hicle can be exposed to very h igh or ve ry
low temperatures .
(D Note
Avoid high engine rpm, full throttle and
heavy eng ine loads until the eng ine has
reached operat ing temperature -other
w ise you risk engine damage.
@) For the sake of the environment
Do not let the engine run while parked to
warm up. Beg in driving immediately. This
red uces unnecessary em iss ions.
On th e ro ad 67
(D Tips
-If it is difficult to turn the ignition key to
posit ion ©, move the steering wheel (to
take the load off the steer ing lock mech
anism) until the key turns freely.
-After starting a cold engine, there may be a brief period of increased no ise be
cause the oil pressure must f irst bu ild up
in the hydraulic valve adjusters. This is
normal and not a cause for concern.
Stopping the engine
App lies to vehicles : wit h ignition lock
Stopping the engine
"' Bring the veh icle to a full stop .
"' Tu rn the ignition key to posit ion @.
Steering lock
Req uirement: The selector lever must be in
pos ition P .
"' Remove the ignition key whi le it is in posi
tion @¢
page 66, fig. 74 ¢ &,.
"'Turn the steering wheel until you hear the
steer ing lock engage .
The steering lock acts as a theft deterrent.
A WARNING
- Never turn off the engine before the ve
hicle has come to a comp lete stop. The
fu ll funct ion of the brake booster and the
power steeri ng is not gua ranteed . You
must use more fo rce to tu rn o r brake if
necessa ry. Be ca use you canno t steer and
bra ke as you usually wo uld, this could
lead to crashes and ser ious injuries .
- F or safety re aso ns, you sho uld a lways
pa rk your vehi cle w it h the selector lever
in P. Otherwise, the vehicle could inad
vertently roll away.
- T he radiator fan can continue to run for
up to 10 minutes even after you have
turned off the engine and removed the ignit ion key. The radiator fan can a lso
turn on again if the engine coo lant heats
~
Page 71 of 258
M N M N
0 ::i co
rl I.O
"' ,....,
"' rl
@ Tips
-After starting a cold engine, there may
be a brief period of increased noise be
cause the oil pressure must first build up
i n the hydraulic valve adjusters . This is
norma l and not a cause for concern .
Switching engine off
Applies to vehicles: with conven ience key
• Bring your veh icle to a complete stop .
• Move the selecto r lever to the P or N posi
t ion.
• Press the
!S TA RT ENGINE S TO PI button
~ pag e 68, fig. 75.
Steering lock
The steering locks when you turn the engine
off us ing the
I START ENGIN E STOP I button
and ope n the dr iver 's door. The locked stee r
i n g helps preven t vehicle theft.
Emergenc y Off functi on
If necessary in an emergency, the engine can
be sw itched off while the vehicle is st ill mov
ing. Press the
I S TAR T ENG IN E ST OPI button
tw ice in quick succession or ho ld it in for lon
ger than two seconds .
_& WARNING
-Never t urn off the engine before the ve
h icle has come to a complete stop . The
full function of the brake booster and the power steering is not guaranteed. You
must use more force to turn or brake if
necessary . Because you cannot steer and
brake as you usually would, this could
lead to crashes and serious injur ies .
- For safety reasons, you should always
park your vehicle with the se lector lever
in P. Otherwise, the ve hicl e co uld inad
vertent ly roll away.
- The rad iator fan can continue to run for
up to 10 min utes even after you have
t urned off the eng ine and removed the
ignition key . The radiator fan can also
turn on again if the engine coolant heats
On th e road 69
up because of intense sunlight or heat
bui ld-up in the engine compartment.
- Always take the key with you whenever
you leave your vehicle. Otherwise, the
engine could be started or electrical
equipment such as the power windows
could be operated . This can lead to seri
ous injury.
(D Note
If the engine has been under heavy load
for an extended period, heat bu ilds up in
the eng ine compartment after the engi ne
i s sw itched off - there is a r isk of damag ing
the engine . A llow the engine to run at idle
for about two minutes before switching it
off .
Starting the engine after a malfunction
Applies to vehicles: wit h convenience key
If the remote control key battery is exhausted
or if radio interference or a system malfunc
tion o ccurs, extra steps may be necessary in
order to start the engine .
Fig. 76 Steer ing co lumn/remote contro l key : Start ing
t he en gi ne a fter a m alfu ncti on
Requ irement: The message No k ey identifi ed.
S ee owner' s manu al.
must be displayed and
the indicator lamp
m must be lit .
• Ho ld the remote control key vertically
aga inst the symbol
y >l) ~ fig . 76.
• Press the b rake pedal ~.&.
in Starting the
engin e on page 68 .
• Press the ~ I s =T -A -R =T ~ E= N~ G~IN ~ E-s=T -O ~ P~I button. The
eng ine shou ld start.
• Drive to a qualified workshop soon and h ave
the faul t rectified. .-
Page 166 of 258
164 Driving and en vironm ent
The amount of oil used is related to eng ine
load and speed.
I t is normal for the oil consumption of a new
engine to reach its lowest val ue after a certain
mileage has been driven.
You must drive your vehicle about 3 ,000 miles
(5,000 kilometers) before you can properly
assess o il cons umption .
This a lso applies to fuel consumption and en
g ine output .
0 Note
-Have your vehicle maintained properly
and in accordance with the service rec
ommendations in your War ranty
& Main
tenance booklet. Lack of proper mainte
nance as well as imp roper use of the ve
hicle will impair the function of the
emission control system and could lead
to damage.
- Do not a lter or remove any component of
the Emi ssion Contro l System unless ap
proved
by the manufacturer.
- Do not a lter or remove any device, such
as heat shields, switches, ignition wires,
va lves, which are designed to protect
your vehicle's Emiss ion Control System
and other important veh icle compo
nents .
Fewer short trips
Fuel consumption will always be relatively
high on short trips .
• Try to avo id driving sho rt distances with a
cold eng ine.
The engine and catalytic converter have to reach their optimal
ope rating tempe ratu re to
reduce fuel con sumption and noxious emis
sions effect ively.
Just after starting, a cold engine in a mid-size car on ly achieves a fuel economy of 6-8 miles
per gallon (30-40 l/100 km) . After about a
half a m ile, fuel economy climbs to 12 mpg
(20 l/100 km) . After about
2. 5 miles (4 km), the engine is at its proper operating tempera
ture and fuel economy has reached a normal
l evel. So you can see that you should avo id
short trips whenever possible.
T he
out sid e tempe rature is also critical in this
regard . Your car consumes more fue l in the
winter than in the s ummer.
Driving offroad
General information
When driving off road, the functions fo r the
electron ic stabiliza tion control ( ESC) are ex
panded . The ESC-Offroad-Mode can be activat
ed in driving situations in which a wheel lock
or a differential lock function is needed
c> page 155.
Your Audi i s howev er, n ot an offroad vehicle.
Ne ver dri ve the vehicle in te rrain wh ich i s n ot
suitable for the vehicle , o r w hich ex ceeds
y ou r driv ing skill s. Ne ver tak e an y u nneces
s ar y risk s!
Aft er d riving offroad
-After driving offroad, remove branches and
other debris from the radiator gri lle, under
body, and wheels. Look especially for objects
(stones) that have been caught in the tire
tread.
- Clean the body and the vehicle underbody
and inspect the vehicle for possible damag
es.
- Clean off the dirty windows, headlights, tail
lights and the license plate .
- Pe rform a brake test (especially after driving
through water).
A WARNING
- Be especially aware and attent ive when
driving under difficult condit ions . Dam
ages to the vehicle and injur ies may oc
cur when driv ing at an excessively high
speed or with incor rect driving maneu
vers.
- Always adjust you r speed and hand ling
to the roads, terrain, t raff ic and weather
~
Page 182 of 258
180 Checking and filling
coolant can be seen or heard before
carefully opening the hood.
- Keep children away from the engine com
partment.
- Never spill fluids on hot engine compo
nents. They can cause a fire.
- Never touch the radiator fan. The auxili ary electric fan is temperature controlled
and can switch on suddenly.
- Never open the coolant reservoir cap
when the engine is still warm. The cool
ant system is pressurized and hot cool
ant could spray out .
- Protect your face, hands and arm from
steam or hot engine coolant by placing a
thick rag over the cap when you open the
coolant reservoir .
- Do not remove the engine cover under
any circumstances. This increases the
risk of burns.
- If work on the fuel system or the electri
cal system is necessary:
- Always disconnect the battery .
- Never smoke or work near heaters or
open flames. Fluids in the engine com
partment could start a fire.
- Keep an approved fire extinguisher im
mediately available.
- To avoid electrical shock and personal in
jury while the engine is running or being
started, never touch:
- Ignition cables
- Other components of the high voltage
electronic ignition system.
- If you must perform a check or repair
with the engine running:
- First, fully apply the parking brake,
move selector lever of automatic trans
mission to "P" (Park) .
-Always use extreme caution to prevent
clothing, jewelry, or long hair from get- ting caught in the
radiator fan, V-belts
or other moving parts, or from contact
ing hot parts. Tie back hair before
starting, and do not wear clothing that
will hang or droop into the engine .
- Minimize exposure to emission and
chemical hazards
c> A .
A WARNING
-California Proposition 65 Warning:
- Engine exhaust, some of its constituents,
and certain vehicle components contain
or emit chemicals known to the State of
California to cause cancer and birth de
fects and reproductive harm. In addition,
certain fluids contained in vehicles and
certain products of component wear con
tain or emit chemicals known to the
State of California to cause cancer and
birth defects or other reproductive harm.
- Battery posts, terminals and related ac
cessories contain lead and lead com
pounds, chemicals known to the State of
California to cause cancer and reproduc
tive harms. Wash hands after handling.
(D Note
When adding fluids, always make sure that
they are poured into the proper container
or filler opening, otherwise serious dam
age to vehicle systems will occur.
@ For the sake of the environment
To detect leaks in time, inspect the vehicle
floor pan from underneath regularly. If
you see spots from oil or other vehicle flu
ids, have your vehicle inspected by an au
thorized Audi dealer.
Page 188 of 258
186 Checking and filling
Engine cooling system
Coolant
The engine coolant performs two functions: it
keeps the engine from overheating and it pro
tects the engine from freezing in the winter .
The cooling system is sealed and generally re
qu ires little attention .
The cooling system has been filled at the fac
tory with a permanent coo lant which does not
need to be changed. The coolant consists of a
mixture of spec ially conditioned water and the
manufacturer's glycol-basedcoolant addi-
tive G13 antifreeze with ant icorros ion addi
tives (50% for USA models; 60% for Ca nada
models) . This mixture both assures the neces
sary frost protection and protects metal com
ponents in the engine's cooling system from
corrosion and scaling.
It a lso raises the boil
ing point of the coo lant.
Do not reduce the concentration o f the coo l
ant in the summer by adding plain water .
The
proportion of coolant additive must be at
least 50% but not more than 60%
to main
tain antifree ze protection and cooling efficien
cy. If the coolant frost protect ion is too low,
the coolant could freeze and damage the veh i
cle heating and engine cooling system .
For year-round driving, antifree ze is added at
the factory for temperatures down to:
- -31°F(-35°C)USA
- - 40 °F ( -40 °C) Canada.
I f you must add coo lant, use a mixture of wa
ter and coolant addit ive. Mixing the coolant
additive with distilled water is recommended.
_& WARNING
Before yo u check anything in the engine
compartment, always read and heed all
WARNINGS
~ &. in Working in the engine
compartment on page 179.
(D Note
- Before winter sets in, have the coolant
checked to see if the coolant additive in
-
your vehicle is sufficient to meet the cli mate conditions . This is especia lly impor
tant if you live in a reg ion where the win
ter is extreme ly cold. If necessary, in
crease the proportion of coolant add itive
to 60% .
- When adding coolant additive to your
cooling system, remember:
- We recommend using only coolant ad
ditive G12++ or G13 for your vehicle.
This coolant additive is available at au
thorized Audi dealers. Other types of
antifreeze can significantly reduce cor rosion protection. The resulting corro
sion can cause a loss of coolant and se
rious engine damage .
- Do not add any type of rad iator leak seal
ant to your vehicle's engine coolant.
Adding radiator repair flu id may adverse
ly affect the function and performance of
your cooling system and could result in
damage not covered by your New Vehicle
Limited Warranty.
Checking the engine coolant level
The engine coolant level can be checked with
a quick glance.
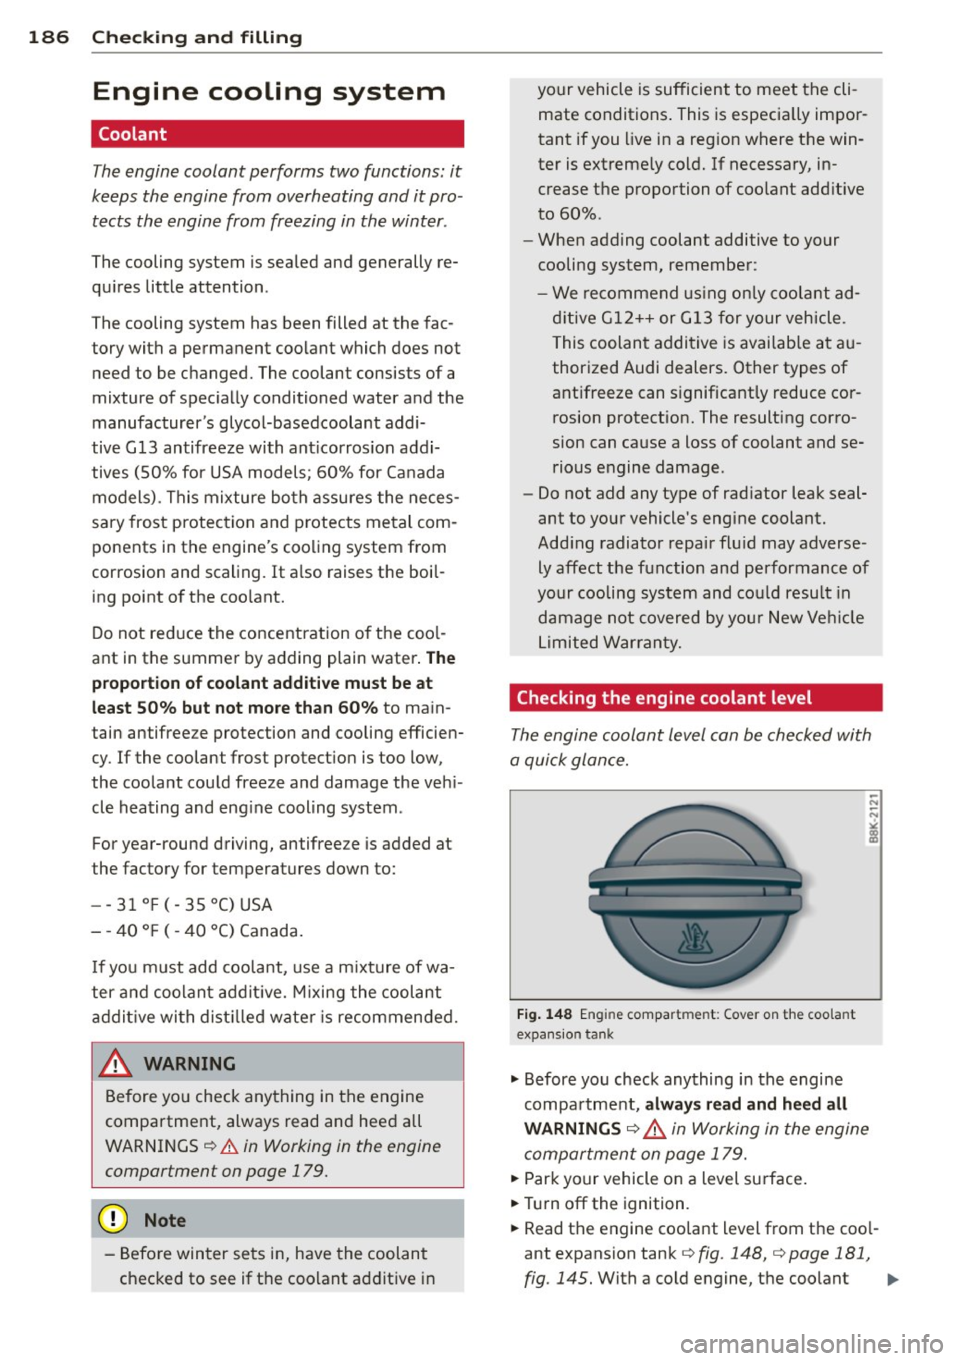
Fig. 148 E n gin e compart men t: Cover on the coo la n t
expans io n tank
.,. Before you check anything in the engine
compa rtment,
always read and heed all
WARNINGS ~ ,& in Working in the engine
compartment on page 179.
.,. Park your vehicle on a level surface .
.,. Tur n off the ignition.
.,. Read the engine coolant level from the coo l
ant expansion tank
c:> fig . 148, c:> page 181,
fig. 145.
With a cold engine, the coolant Iii>-
Page 189 of 258
M N
M N
0 ::i co ,...., \!) ..,.,
,...., ..,., ,....,
level should be between the "MIN" and
"MAX" markings. When the engine is warm,
the level may be slightly above the "MAX"
marking .
The location of the coolant expansion tank
can be seen in the engine compartment illus
tration
<=> page 181.
To obtain an accurate reading , the engine
must be switched
off.
The expansion tank in your vehicle is equipped
with an electric coolant level sensor.
When the coolant level is too low, the warning
light in the Auto-Check System <=>
page 14 will
blink until you add coolant and the level has
been restored to normal. Even though there is
an electric coolant level sensor, we still rec
ommend you check the coolant level from
time to time.
Coolant loss
Coolant loss may indicate a leak in the cooling
system. In the event of coolant loss, the cool
ing system should be inspected immediately
by your authorized Audi dealer.
It is not
enough merely to add coolant.
In a
sealed system, losses can occur only if
the boiling point of the coolant is exceeded as
a result of overheating.
A WARNING
The cooling system is under pressure and
can get very hot. Reduce the risk of scald
ing from hot coolant by following these
steps.
- Turn
off the engine and allow it to cool
down.
- Protect your face, hands and arms from escaping fluid and steam by covering the
cap with a large, thick rag .
- Turn the cap slowly and very carefully in
a counter-clockwise direction while ap
plying light, downward pressure on the
top of the cap .
- To avoid being burned, do not spill anti
freeze or coolant on the exhaust system
Checking and filling 187
or hot engine parts. Under certain condi
tions, the ethylene glycol in engine cool
ant can catch fire.
([) Note
Do not add any type of radiator leak seal
ant to your vehicle's engine coolant. Add- ing radiator repair fluid may adversely af
fect the function and performance of your
cooling system and could result in damage
not covered by your New Vehicle limited
Warranty .
Adding coolant
Be very careful when adding engine coolant.
Before you check anything in the engine com
partment ,
always read and heed all WARN
INGS <=>
A in Working in the engine compart
ment on page 179 .
Requirement: There must be a residual
amount of coolant in the expansion tank
<=> (D.
.,. Turn off the engine.
.,. Let the engine cool down.
.,. Place a thick rag over the coolant expansion
tank
<=> page 186, fig . 148 and carefully turn
the cap counter-clockwise
<=> .&_ .
.,. Add coolant mixed in the correct ratio
<=> page 186, Coolant up to the MAX mark
ing.
.,. Make sure that the fluid level remains sta-
ble. Add more coolant if necessary.
.,. Twist the cap on again
tightly.
Replacement engine coolant must conform to
exact specifications
<=> page 186, Coolant.
We recommend using only coolant additive
G12 ++, G13 or in an emergency G12 +. Do
not
use a different additive. In an emergency use
plain water until you can get the correct addi
tive and can restore the correct ratio. This
should be done as soon as possible.
If you have lost a considerable amount of
coolant , then you should add cold antifreeze
and cold water only when the engine is cold.
Always use
new engine coolant when refilling . .,.
•
•
Page 190 of 258
188 Checking and filling
Do not fill coolant above the "MAX" mark. Ex
cess coolant will be forced out through the pressure re lief valve in the cap when the en
g ine becomes hot.
A WARNING
- The coo ling system is under pressure and
can get very hot. Reduce the risk of
scalding from hot coolant by following
these steps.
- Turn
off the eng ine and a llow it to cool
down.
- Protect your face, hands and arms from
escaping fluid and steam by covering
the cap with a large, thick rag.
- Turn the cap slowly and very ca refully
i n a co unte r-clockwise d irection while
apply ing light, downward press ure on
the top of the cap.
- To avoid being burned, do not spi ll an
tifreeze or coolant on the exhaust sys
tem or hot engine parts. Under certa in
conditions, the ethylene glyco l in en
g ine coolant can ca tch f ire.
- Antifreeze is poisonous. Always store an
t ifreeze in its original container and we ll
o ut of the reac h of children.
- If you drain the coolant, it must be
caught and safely stored in a p roper con
ta iner clear ly ma rked "poison".
(D Note
- Do not add coolant if the expansion tan k
i s empty. A ir could enter the cooling sys
tem and damage the eng ine. If this is
the case, do not continue driving. Seek
professional assistance.
- Coolant po llutes the e nv ironment and
could cause an engine fire. Excess coo l
ant will be forced ou t through the pres
su re re lief v alve in the ca p when the en
gine becomes hot .
- If, in an emergen cy, only water can be
added, the corre ct ratio be twee n wa te r
and antifr eeze¢
page 186 must be re
stored as soon as possib le .
{® For the sake of the environment
D rained coo lant should not be reused . A l
ways d ispose of used coolant whi le observ
i ng a ll environmental regulations.
Radiator fan
The radiator fan switches on automatically by
itself
T he rad iator fan is driven by the engine v ia the
V-belt. The viscous clutch regulates the spee d
of the fan acco rding to the temperature of the
coolant.
An a uxiliary electric radiator fan* sw itches on
and
off depending on coolant temperature
and othe r vehicle ope rat ing condit ions .
A ft er yo u sw itc h t he eng ine
off, the aux iliary
f an can continue running for up to 10 m inutes
- even wit h the ignition
off. It can even switc h
on again later by itself¢.&. , if
- t he tempe rature of the engine coo lant rises
due to the heat build -up from the engine in
the engine compa rtment, or
- the engine compa rtment heats up because
the vehicle is parked in i ntense sunlig ht.
A WARNING ~
- To reduce the risk of perso na l inj ury nev -
er touch the radiator fan.
- The a uxiliary electric fan is tempe rat ure
contro lled and can sw itch on sud denly
even when the engine is not running.
- The a uxiliary radiator fan sw itches on a u
tomatically when the engine coo lant
reac hes a certa in temperature and will
continue to ru n until the coolant temper
ature drops.
Page 233 of 258
M N M N
0 ::i co
rl I.O
"' rl
"' rl
Front towing loop
Do not install the front towing loop until it is
needed.
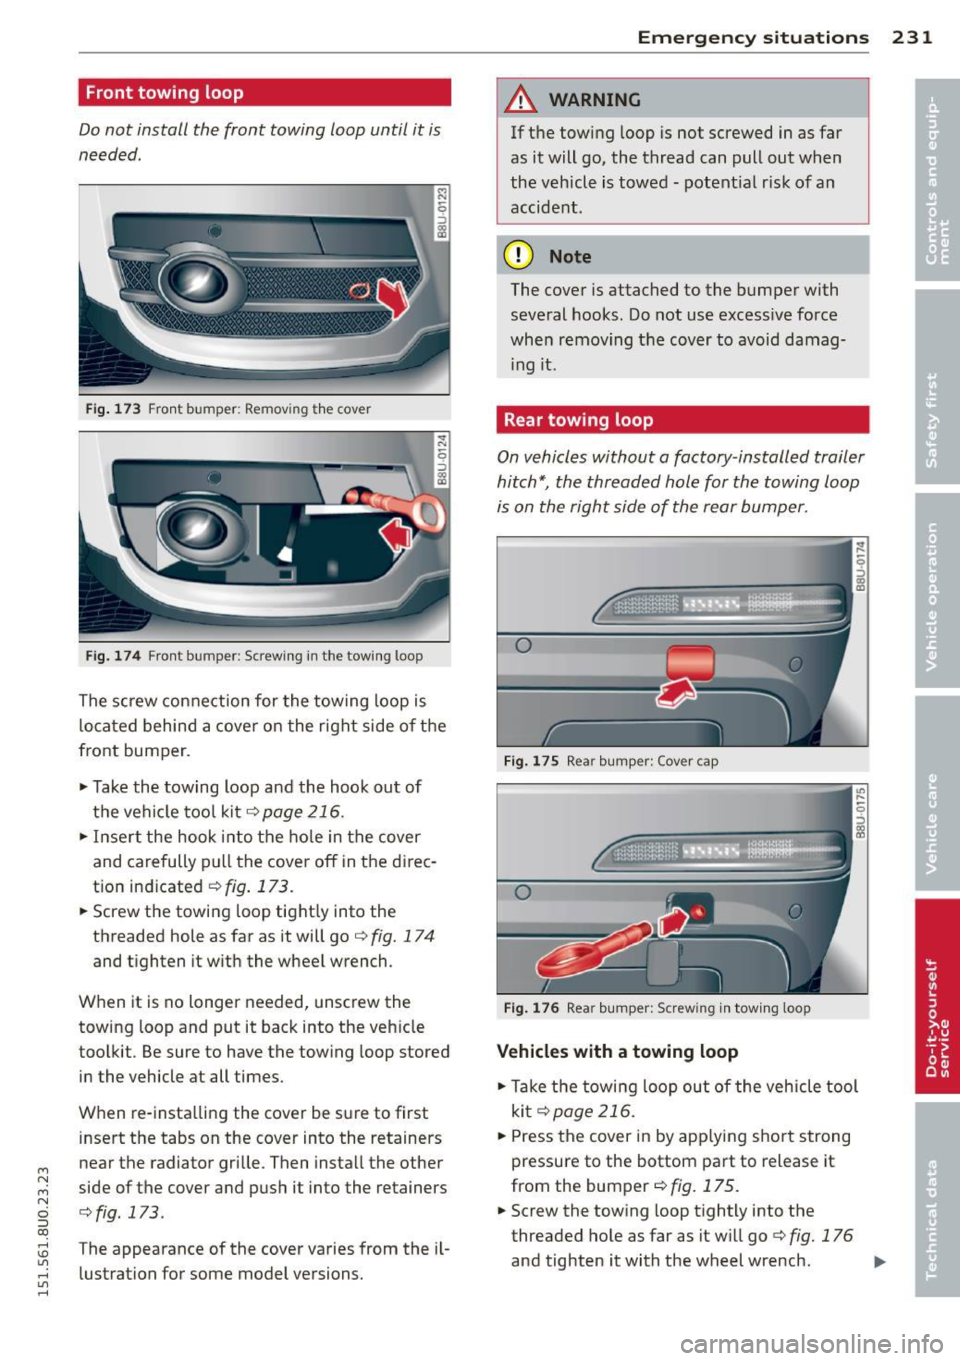
Fig. 1 73 Fro nt bumper : Remov ing th e cover
Fi g.17 4 Fron t bumper: S crew ing in the tow ing loo p
The screw connection for the towing loop is
l ocated behind a cove r on the right side of the
front bumper.
"' Take the towing loop and the hook out of
the vehi cle too l kit
c:::> page 216 .
"'Inse rt the hook into the ho le in the cover
and carefully pu ll the cove r off in the direc
tion ind icated
<=:> fig . 173.
"' Screw the towi ng loop tight ly into the
threaded hole as far as it will go
c:::> fig. 174
and t ighten it w ith the wheel wrench .
When it is no longer needed, unscrew the
towing loop and put it back into the veh icle
too lkit . Be sure to have the tow ing loop stored
in the vehicle at all times.
When re-insta lling the cover be s ure to first
insert the tabs on the cover into the retainers
near the radiator gri lle . Then insta ll the other
side of the cover and push it into the retainers
¢ fig . 173 .
The appearance of the cover varies from the il
l ustration for some model versions.
Emergenc y situ ation s 231
A WARNING
If t he tow ing loop is not screwed in as far
as it will go, the thread can pull out when
the vehicle is towed -potent ia l risk of an
accide nt.
(D Note
The cover is attached to the bumper with
several hooks . Do not use excess ive force
when remov ing t he cover to avoid damag
i ng it.
Rear towing loop
On vehicles without a factory -installed trailer
hitch*, the threaded hole for the towing loop
is on the right side of the rear bumper.
0
Fi g. 17S Rear bumper: Cov er cap
0
F ig . 1 76 Rea r bumper: Sc rew ing in tow ing loop
V ehicles with a towing loop
"' Take the towi ng loop out of the vehicle tool
ki t
c:::> page 216.
"' Press the cover in by app lying short strong
pressure to the bottom part to release it
from the bumper
c:::> fig. 175.
"' Screw the towing loop t ightly into the
threaded ho le as far as it w ill go
¢ fig. 176
and tighten it with the wheel wrench. Ill>
Page 248 of 258
246 Index
Checking the engine coolant leve l .... . 186
Radiator fan . . . . . . . . . . . . . . . . . . . . . . 188
E ng ine coolant temperature
Temperature gauge ..... .. .. .. .. .. .. 10
Eng ine hood
Closing .... .......... ...... ... .. . 179
H ow to release the hood . . . . . . . . . . . . 179
E ngine oi l ..... ........... .... .... . 181
Adding .. .. ............. .. .. .. ... 184
Addi tives . . . . . . . . . . . . . . . . . . . . . . . . . 184
Changing .. ................ ... .. . 185
Check oil level ............ ... .. .. . 184
Consumpt ion . ........... .. .. .... . 184
I ndicator light . . . . . . . . . . . . . . . . . 17, 18
O il consumption .......... .... .... . 183
Oil dipstick ............... ... .... . 184
Oil grades . ................. ..... . 181
Pressure malfunction ....... .... ... .. 15
Sensor defective . . . . . . . . . . . . . . . . . . . . 18
Specification and viscosity .. .. .. .. .. . 181
Engine speed limitation ......... .... . . 17
Environment Break-in period ... ..... ... .. .. .. .. . 161
Cata lytic converter ............ ..... 161
Disposing of your vehicle battery .. .. . 193
Driving at high speeds ......... .. .. . 163
Driving to minimize pollution and noise 162
Fuel ... .... ................ ..... . 177
Fue l economy .............. .. .... . 162
Leaks under your vehicle ... .. .. .... . 179
Le tting the vehicle stand and warm up . 163
Proper disposal of dra ined brake fluid . 189
Proper disposal of dra ined engine cool-
ant . .. .... ... .......... .. .. .. .. . 187
Proper disposal of dra ined engine
oil . . . . . . . . . . . . . . . . . . . . . . . . . 184, 185
Recycling used engine oil ......... .. . 184
Roof rack . . . . . . . . . . . . . . . . . . . . . . . . . 58
Unleaded fuel ..................... 175
What should I do with an old battery? 193
EPC
refer to Electronic power control . . . . . . 17
Event Data Recorder (EDR) . ........ .. . 152
Exhaust tail pipes Cleaning . ............... ........ . 171
Expansion tank ............ .. .. .. .. . 186
Exterior lighting ............ ... .. ... . 40 Exterior
mirrors
Adjusting ..... .. .. .............. .. 44
Dimm ing . ... .. .. .. .............. .. 45
Heating ... .... .. ............. .... . 44
F
Fan
Radiator
Fastening Booster seats .... ................ .
Convertib le child safety seats ..... .. .
Infant seats ..... ............. ... .
Flat tire 188
141
140
139
Changing . .... .. ............. .... 218
Floor .. .. .. .. .. .. .. ...... .... ..... . 62
Floor mats . . . . . . . . . . . . . . . . . . . . . . . . . . 99
Fog lights/rear fog lights ...... ... .. .. . 40
Folding chocks .. .. ... .......... .... 217
Folding the rear seat forward ... .. .. .. . 60
Foot pedals ..... .. .......... ...... .. 99
For the sake of the environment Gasoline fumes and the environment .. 177
Le tting the engine warm up . . . . . .
66, 68
Refueling . . . . . . . . . . . . . . . . . . . . . . . . 177
Sav ing fuel by early upshifting ........ 11
Front airbags Description . . . . . . . . . . . . . . . . . . . . . . . 116
How they work . .. ............. .... 121
Frontal collis ions and the laws of physics 105
Front passenger's door emergency lock ing 33
Front seats . . . . . . . . . . . . . . . . . . . . . . . . . 50
Adjusting . .... .. ............. .... . 96
Child restraints in the front seat .. .. .. 114
Fuel Additives . ..... .. ................ . 175
B lended gasoline ................. . 175
Consumption .. ... ................ . 22
Filler neck . .... .. ............. .... 176
Fuel gauge . . . . . . . . . . . . . . . . . . . . . . . . 11
Gasoline .. ... ... ................ . 175
Gasoline additives ................ . 176
Low fuel level symbol . . . . . . . . . . . . . . . 18
Octane rating .. .. ............. .... 175
Recommendation ... ........... .. .. 175
Refueling . . . . . . . . . . . . . . . . . . . . . . . . 177
Reserve ........................... 11
Tank capacity .. .. ... .......... .... 235
Page 252 of 258
250 Index
Pregnant women Specia l consid erations when wearing a
safety be lt .... ... .... ... .. .. .... . 109
Prope r safety belt pos it ion . .. .. .. .. .. . 108
Proper seat ing pos ition
Front passenger . . . . . . . . . . . . . . . . . . . . 96
Occupants .. ................ ... ... . 95
Rear passengers . . . . . . . . . . . . . . . . . . . . 97
Protecting . . . . . . . . . . . . . . . . . . . . . . . . . 172
P rotective liner .. .. ..... ... .. .. .... .. 62
Q
Qua rtz clock . . . . . . . . . . . . . . . . . . . . . . . . 23
q uattro
refer to All -wheel dr ive ..... ... .. ... 158
Question What happens to unbe lted occupants? 105
Why safety belts? ........ .. .. .... . 104
R
Radiator fan 188
Ra in/ lig ht sensor
H eadlights . ... .......... .. .. .. .. .. 40
I n termittent (windshield wipe rs) .. .. .. 4 6
Sensor defective .. ..... ... .. .. .... .. 1 9
R eading lights .............. ... .. .. .. 43
Rear lid Automatic operation ...... .. .. .... .. 35
Emergency release .. ... ... .. .. .. .. . . 36
Opening and clos ing ....... ... .. .... 34
Rear light Defective ................. .. .... .. 18
Rear v iew c amer a
refer to Parking systems . . . . . . . . . . . . . 89
Rear v iew mir ro r .. ...... .... ... .. .. .. 45
Rear window heating . . . . . . . . . . . . . . . . . 65
Re circul ation mode (au tomatic climate
con trol) . . . . . . . . . . . . . . . . . . . . . . . . . . . . 64
Refueling . . . . . . . . . . . . . . . . . . . . . . . . . . 177
Release lever for hood . . . . . . . . . . . . . . . 179
R emote cont rol
Rese tting remo te control .. .. .. .. .. . . 30
Remote control key . . . . . . . . . . . . . . . . . . . 29
un locking/locking ............ .. .... 30 R
emote maste r key
Battery replacement . . . . . . . . . . . . . . . . 30
Check light . ... .. ... .. ..... ... .. .. . 30
Remote rea r lid re lease .......... .. .. . 34
Repair ma nuals .. .. .. .. ...... ... .. .. 237
Repairs Airbag system ... .. ... ..... ... .. .. 126
Rep la cement key .. ............. .... . 29
Replacing Windsh ield w iper b lades ........... .. 48
R e pl acing b ulbs ... ... .. ..... .... . .. 226
Replac ing tires and wheels ........ .. .. 20 7
Rep lacing wiper b lades .......... .. .. . 47
Repor ting Sa fe ty Defects . . . . . . . . 101, 102
Reset button . . . . . . . . . . . . . . . . . . . . . . . . 23
Resetting remote cont ro l ...... ... .. .. . 30
Retracto r ... .... .. ............. .... 10 7
Reversible floor . . . . . . . . . . . . . . . . . . . . . . 62
Rims Cleaning . ..... .. .. ... .. ..... ... .. 171
Roof rack
Roof~ ad ..... .. ... .......... .. .. . 58
Roof weight ..... ... .. ..... ... .. .. . 58
s
Safe drivi ng habits ................ .. . 94
Safety be lt pos ition ............... .. 108
Safety be lt height adjustme nt . ...... 110
Safety be lts wo rn by pregnant women . 109
Safety be lt pretensioner .......... .... 110
Serv ice and disposal . . . . . . . . . . . . . . . 111
S af ety be lts . ...... ............. .... 1 07
C leaning . ..... .. .. ... ..... ... .. .. 172
Danger to passengers who do not wear a
safety be lt . ... .. .. .... .... ... .. .. 105
Fastening . . . . . . . . . . . . . . . . . . . . . . . . 107
Height ad justment ............. .. .. 110
Improperly worn ...... .. ... ..... .. 110
Not wor n ..... .. .......... ...... . lOS
Safety be lt pos ition ......... ...... . 108
Safety i nstr uctions ... .......... .. .. 10 7
Secu ring child sa fe ty seats .... .. .. .. 143
S pec ia l considerations for pregnan t
women ... .... .. .. ... ..... ... .. .. 109
Un fastening ..... ... .. ..... ... .. .. 109
Warning/ind icator light ......... .... 104