jack stand AUDI Q3 2016 Owners Manual
[x] Cancel search | Manufacturer: AUDI, Model Year: 2016, Model line: Q3, Model: AUDI Q3 2016Pages: 252, PDF Size: 62.81 MB
Page 32 of 252
Opening and clo sin g
If the vehicle is unlocked and no doo r or the rear
lid is opened within 30 seconds, the vehicle locks
itself again automatically . This feature prevents
the vehicle from being accidentally left unlocked
over a long period of time. This does not apply
when you push the©~ button for at least one
second.
It depends on the settings in the radio or MM!*
whether the entire veh icle is unlocked or only cer
tain doors
¢ page 31.
A WARNING
Read and heed all WARNINGS c::> _.&. in General
description on page 2
7.
{!) Tips
- In order to make sure the locking function is
working, you should always keep your eye
on the vehicle to make sure it is properly l ocked.
- Do not use the remote co ntrol if you are in
side the car, otherwise you may un inten
tiona lly lock the veh icle, and then yo u wo uld
set off the anti-theft alarm when you try to
start the engine or open a doo r. In case this
happe ns anyhow, push the unlo ck button
cfi.
- Use t he panic funct ion only if you are in a n
emergency s ituation.
- Additional remote contro l key f unct ions
c::>page37.
Locking and unlocking with convenience
key
A ppl ies to veh icles: with conve nience key
The doors and the rear lid can be unlocked and
locked without operating the master key.
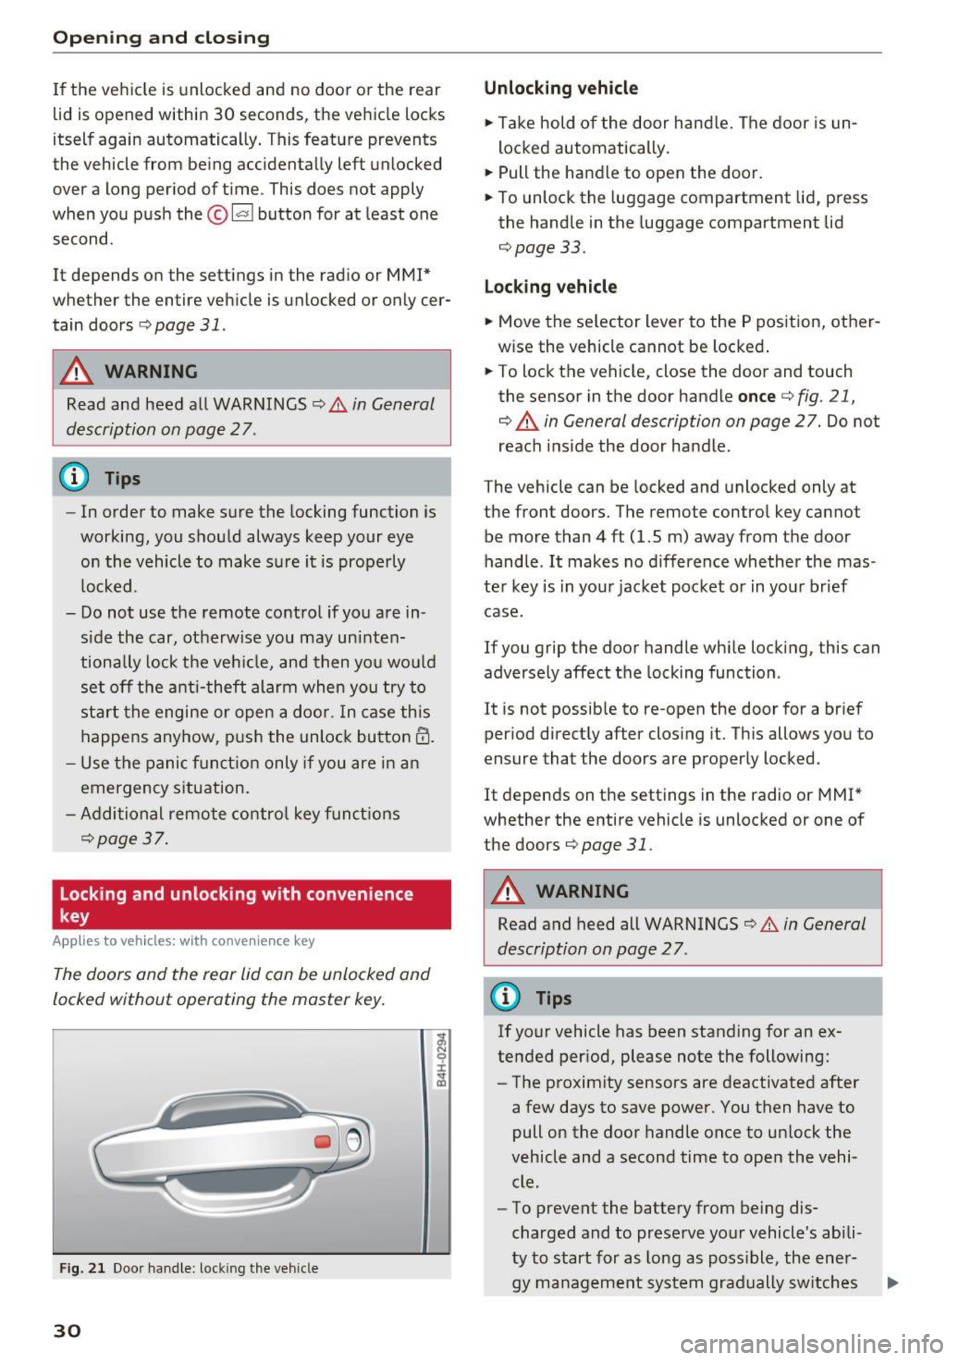
F ig . 2 1 Door handle: lock ing the vehicle
30
Unlocking vehicle
.. Ta ke hold of the door hand le. The door is un
lo cked automatically.
.. Pull the handle to open the door.
.. To unlock the luggage compartment lid, press
the handle in the luggage compartment lid
¢page 33.
Locking vehicle
.. Move the se lector lever to the P position, other
w ise the vehicle cannot be locked .
.. To lock the vehicle, close the door and touch
the senso r in the door handle
once ¢ fig. 21,
¢ .&. in General description on page
27. Do not
reach i nside the door handle .
The vehicle can be locked and unlocked only at
the front doors. The remote control key cannot
be more than
4 ft (1.5 m) away from the door
handle .
It makes no d ifference whether the mas
ter key is in you r jacket poc ket o r in you r brief
case.
If you grip the door handle whi le locking, this can
adversely affect the locking function .
It is not possib le to re-open the door for a br ief
period direct ly after closing it. Th is allows you to
ensure that the doors are properly locked.
It depends on the settings in the radio or MMI *
whether the entire vehicle is unlocked or one of
the doors
¢page 31.
A WARNING
Read and heed all WARNINGS¢.&. in General
description on page 2
7 .
(D Tips
If your vehicle has been standing for an ex
tended per iod, please note the following:
- The proximity sensors are deactivated after
a few days to save power. You then have to
pull on the door handle once to unlock the
vehicle and a second time to open the vehi cle.
- To prevent the battery from being dis
charged and to preserve your vehicle's abili
ty to start for as long as poss ible, the ener-
gy management system gradually sw itches .,..
Page 214 of 252
Emergency assistance
-Support the vehicle securely with appropri
ate stands if work is to be performed under
neath the vehicle; otherwise, there is a po
tential risk for injury .
(D Tips
The vehicle jack* in your vehicle is mainte
nance-free.
Folding chocks
Applies to veh icles: with folding chocks
The folding chocks ore part of the on board tool
kit.
---
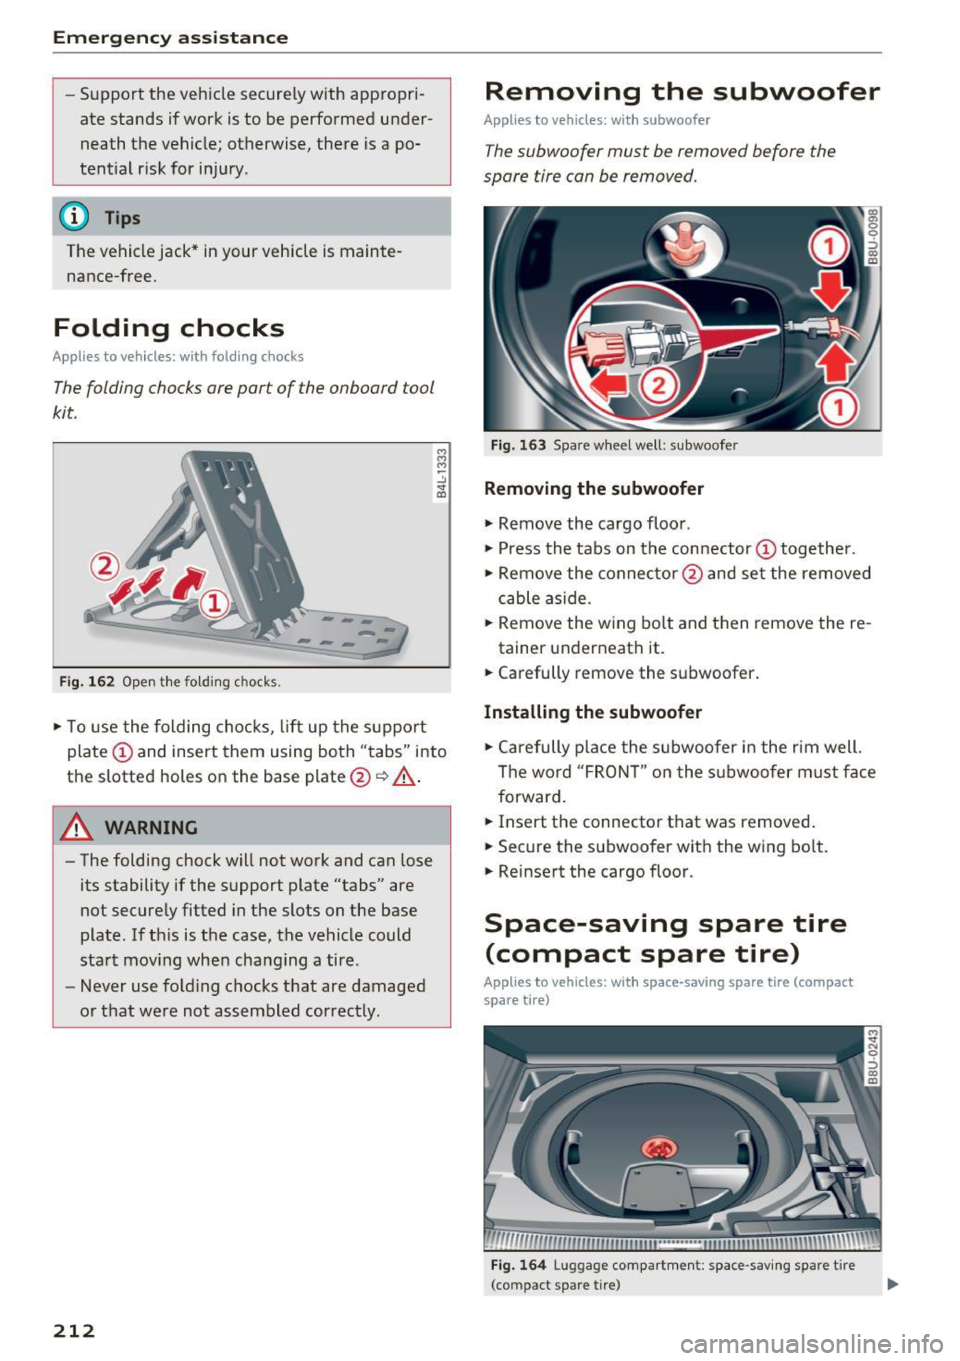
Fig. 162 Open the folding c hocks.
• To use the folding chocks, lift up the support
plate (!) and insert them using both "tabs" into
the slotted holes on the base plate@¢.&_ .
8_ WARNING
-The folding chock will not work and can lose
its stability if the support plate "tabs" are
not securely fitted in the slots on the base
plate. If th is is the case, the vehicle could
start moving when changing a tire.
- Never use fold ing chocks that are damaged
or that were not assembled correctly.
212
Removing the subwoofer
Appl ies to vehicles: with subwoofer
The subwoofer must be removed before the
spare tire can be removed.
Fig. 163 Spare wheel well: subwoofe r
Removing the subwoofer
• Remove the cargo floor .
• Press the tabs on the connector(!) together.
• Remove the connector @and set the removed
cable aside .
• Remove the wing bolt and then remove the re-
tainer underneath it.
• Carefully remove the subwoofer.
Installing the subwoofer
• Carefully place the subwoofer in the rim well.
The word "FRON T" on the subwoofer must face
forward.
• Insert the connector that was removed.
• Secure the subwoofer with the wing bolt.
• Reinsert the cargo floor .
Space-saving spare tire
(compact spare tire)
Applies to vehicles: with space-saving spare tire (compact
spare tire)
Fig. 164 Luggage compartment: space -sav ing spare t ire
(compact spare tire)
Page 219 of 252
.... N
c:i ::J CX)
.... I.Cl U"I
N I.Cl ......
-Make sure jack posit ion is correct , adjust
as necessary and then cont inue to raise
the jack.
- If work has to be done under the vehicle,
ensure that it is safely supported on su ita
ble stands -risk of injury!
- Never start the engine when the vehicle is
on the jack -risk of accident!
CD Note
Do not lift the vehicle by the sill. Position the
vehicle jack on ly at the designated lifting
points on the sill. Otherwise, your vehicle will
be damaged.
Taking the wheel off/installing the spare
tire
F ollow these instructions step-by-step for chang
ing the wheel .
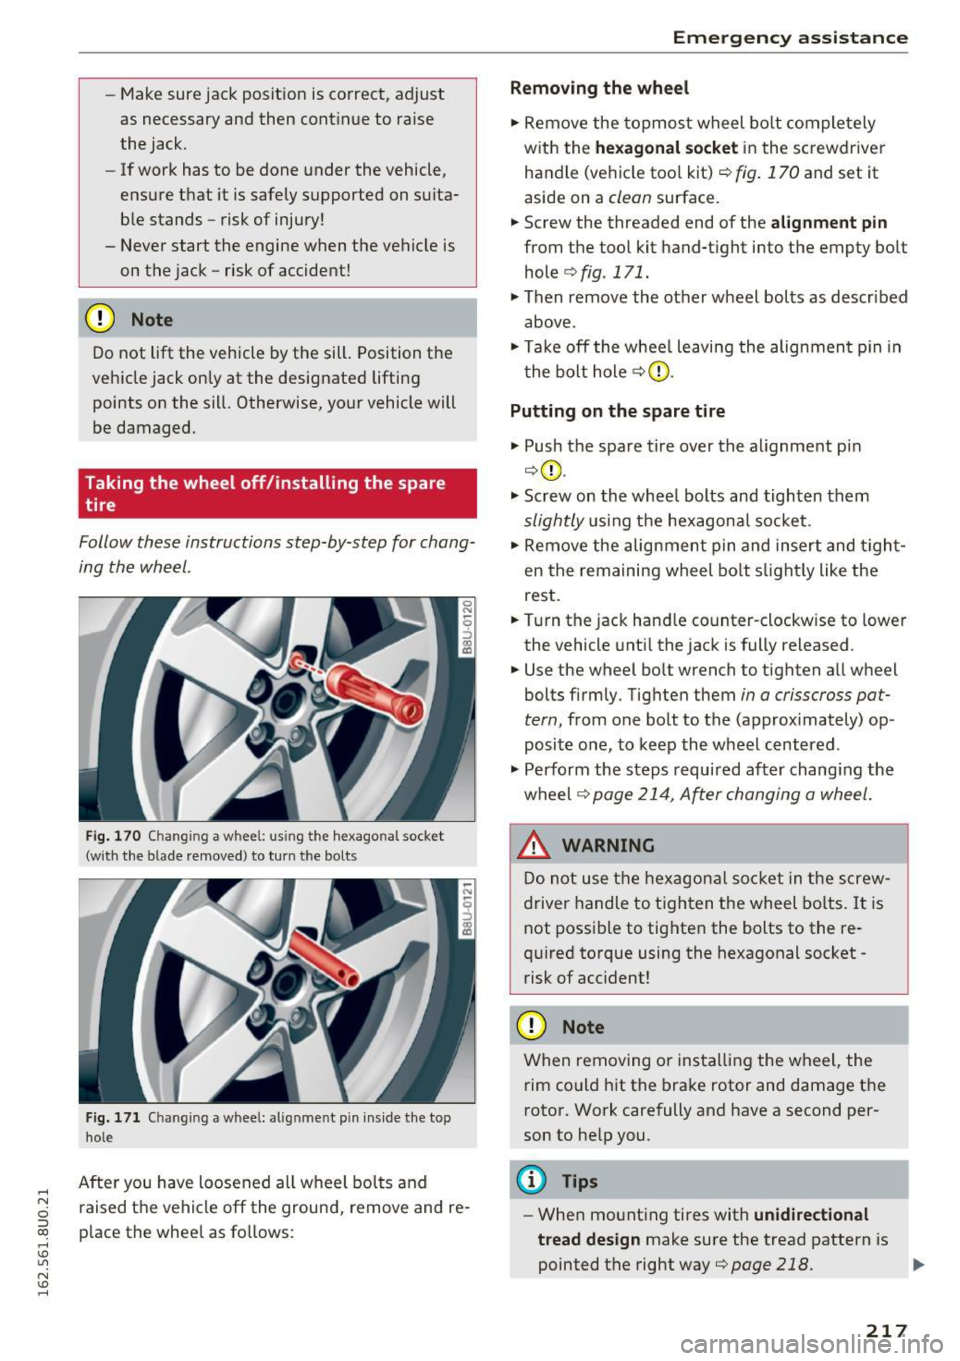
Fig. 170 C hangin g a w heel: using th e hexagonal s oc ket
(w it h the blade removed ) to turn t he bolt s
Fig. 171 Chan gin g a w hee l: a lig nm ent pin in side the to p
h ol e
After you have loosened all wheel bolts and
raised the vehicle off the ground, remove and re
p lace the whee l as follows:
Em ergen cy a ssis tanc e
Removing the whe el
"' Remove the topmost wheel bolt completely
with the
he xagona l s oc ket in the screwdriver
handle (vehicle too l kit)
c::> fig. 170 and set it
aside on a
clean surface.
.. Screw the threaded end of the
alignment pin
from the tool kit hand-tight into the empty bolt
hole
c::> fig . 171.
"' Then remove the other wheel bolts as described
above .
"' Take off the whee l leaving the alignment p in in
the bolt hole
c::> G) .
Putting on the spare tire
"' Push the spare tire over the alignment pi n
c::>(D .
"' Screw on the whee l bolts and tighten them
slightly u sing the hexagona l socket .
"' Remove the alignment pin and insert and t ight
en the remaining wheel bo lt s lightly like the
rest .
.. Turn the jack hand le count er-clockw ise to lower
the vehicle unti l the jack is fully released .
.. Use the wheel bo lt wrench to tighten all wheel
bolts firmly . Tighten them
in a crisscross pa t
tern,
from one bolt to the (approx imately) op
posite one, to keep the wheel centered .
"' Perform the steps required after chang ing the
wheel
c::> page 214, A~er changing a wheel.
_& WARNING
Do not use the hexagon al soc ket in the screw
driver handle to tighten the wheel bo lts. It is
not possible to tighten the bolts to the re
qu ired torque using the hexagonal socket -
risk of acc ident!
CD Note
When removing or installing the wheel, the
rim could h it the brake rotor and damage t he
rotor. Work carefully and have a second per
son to he lp you.
@ Tips
- When mounting tires with un idirectional
tread de sign
make sure the tread pattern is
pointed the right way
c::> page 218 . 1JJ,,
217
Page 229 of 252
.... N
c:i ::J CX)
.... I.Cl U"I
N I.Cl ......
Front hook up
• Align the vehicle w ith the centerline of the car
earner ramp .
• Attach the winch hook to the front towline eye
previously installed.
Rear hook up
• Al ign the vehicle w ith the centerline of the car
carr ier ramp .
• Attach the winch hook to the rear towline eye
previously installed.
@ Tips
Check carefully to make sure the hook-up is
secure befo re moving the car up the flatbed
truck ramp.
Raising the vehicle
Lifting with workshop hoist and with floor
jack
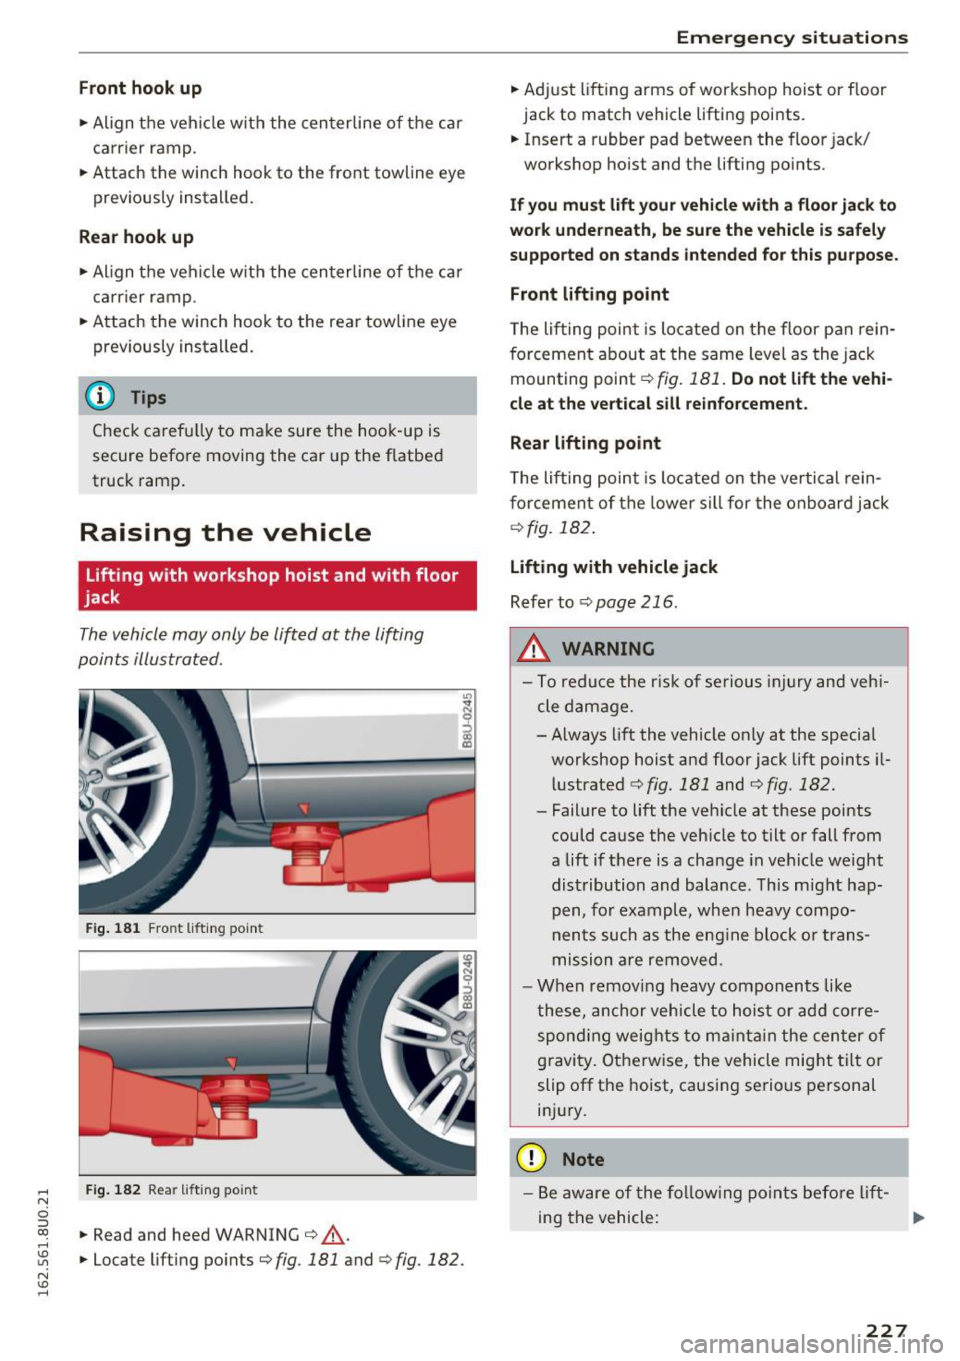
The vehicle may only be lifted at the lifting
points illustrated.
Fig. 181 Front lifting point
F ig . 182 Rear lifting point
• Read and heed WARNING¢,&..
I
• Locate lifting points ¢fig.181 and ¢ fig. 182.
Emergency situations
• Adjust lifting arms of workshop hoist or floor
jack to match vehicle lifting points .
• Insert a rubber pad between the floor jack/
workshop hoist and the lifting points .
If you must lift your vehicle with a floor jack to
work underneath, be sure the vehicle is safely
supported on stands intended for this purpose .
Front lifting point
T he lifting point is located on the floor pan rein
forcement about at the same level as the jack
mounting point ¢
fig. 181. Do not lift the vehi
cle at the vertical sill reinforcement .
Rear lifting point
The lifting point is located on the vertical rein
forcement of the lower sill for the on board jack
¢fig . 182.
Lifting with vehicle jack
Refer to¢ page 216.
&_ WARNING
- To reduce the risk of se rious injury and vehi
cle damage.
- Always lift the vehicle on ly at the special
workshop hoist and floor jack lift points il
lustrated ¢
fig. 181 and ¢ fig. 182.
- Failure to lift the vehicle at these points
could cause the vehicle to tilt or fall from
a lift if there is a change in vehicle weight
distribution and balance . This might hap
pen, for example, when heavy compo
nents such as the engine block or trans
mission are removed.
- When remov ing heavy components like
these, anchor vehicle to hoist or add corre
sponding weights to maintain the center of
gravity. Otherw ise, the vehicle might tilt or
slip off the hoist, causing serious personal
injury .
([) Note
-Be aware of the following points before lift-
ing the vehicle: ..,_
227
Page 235 of 252
today's automobiles, have steadily reduced the
scope of maintenance and repairs which can be
carried out by vehicle owners.
Also, safety and
environmental
concerns place very strict limits
on the nature of repairs and adjustments to en
gine and transmission parts which an owner can perform .
Maintenance, adjustments and repairs usually re
quire special tools, testing devices and other
equipment available to specially trained work
shop personnel in order to assure proper per
formance, reliability and safety of the vehicle and
its many systems.
Improper maintenance, adjustments and repairs
can impair the operation and reliability of your
vehicle and even void your vehicle warranty .
Therefore, proof of servicing in accordance with
the maintenance schedule may be a condition for upholding a possible warranty claim made within
the warranty period.
Above all , operational safety can be adversely af
fected, creating unnecessary risks for you and
your passengers.
If in doubt about any servicing, have it done by
your authorized Audi dealer or any other properly equipped and qualified workshop. We strongly urge you to give your authorized Audi dealer the
opportunity to perform all scheduled mainte nance and necessary repairs. Your dealer has the
facilities, original parts and trained specialists to keep your vehicle running properly .
Performing limited maintenance yourself
The following pages describe a limited number of
procedures which can be performed on your vehi
cle with ordinary tools, should the need arise and
trained personnel be unavailable. Before per
forming any of these procedures, always thor
oughly read all of the applicable text and careful ly follow the instructions given . Always rigorously
observe the
WARNINGS provided .
Before you check anything in the engine com
partment, always read and heed all WARNINGS
c::> .&. and c::> .&. in Working in the engine compart
ment on page 177. Consumer information
A WARNING
-
Serious personal injury may occur as a result
of improperly performed maintenance, ad
justments or repairs .
- Always be extremely careful when working
on the vehicle. Always follow commonly ac
cepted safety practices and general com
mon sense. Never risk personal injury.
- Do not attempt any of the maintenance,
checks or repairs described on the following pages if you are not fully familiar with these
or other procedures with respect to the ve hicle, or are uncertain how to proceed.
- Do not do any work without the proper tools
and equipment. Have the necessary work
done by your authorized Audi dealer or an
other properly equipped and qualified work
shop.
- The engine compartment of any motor vehi cle is a potentially hazardous area. Never
reach into the area around or touch the radi
ator fan.
It is temperature controlled and
can switch on suddenly - even when the en
gine is off and the ignition key has been re
moved. The radiator fan switches on auto
matically when the coolant reaches a certain
temperature and will continue to run until
the coolant temperature drops.
- Always remove the ignition key before any
one gets under the vehicle.
- Always support your vehicle with safety
stands if it is necessary to work underneath
the vehicle. The jack* supplied with the vehi
cle is not adequate for this purpose and
could collapse causing serious personal in
jury.
- If you must work underneath the vehicle
with the wheels on the ground, always make
sure the vehicle is on level ground, that the
wheels are always securely blocked and that the engine cannot be started.
- Always make sure the transmission selector
lever (automatic transmission) is in P (Park
position) and the park brake is applied.
233