display AUDI Q3 2017 Owner´s Manual
[x] Cancel search | Manufacturer: AUDI, Model Year: 2017, Model line: Q3, Model: AUDI Q3 2017Pages: 236, PDF Size: 58.93 MB
Page 23 of 236
a:,
a:,
...... N r--. N .-< 0 0 ::, a:,
You can identify which on-board computer is cur
r e ntly being shown in the display based on th e
small
O or fl .
The o n-board computer 0 ¢ fig . 9 is a short-term
memo ry .
It collects driving information from the
time the ignition is switch ed on until it is sw itch
ed off. If you continue driving within two hours
after switching the ignition off, the new values
are included when calculating the current trip in
formation .
Unlike the short-term memory , the long-term
memory (on-board computer
fl ) is not erased
automatically. You can select the time period for
evaluating trip information yourself .
You can call up the following information consec
utively in on -board computer
O or fl :
- Date
- Range
- Travel time
- Average consumption
- Average speed
- Distance
- Current fuel consumption
@ Tips
Information on the efficiency program
¢page 21.
Efficiency program
Overview
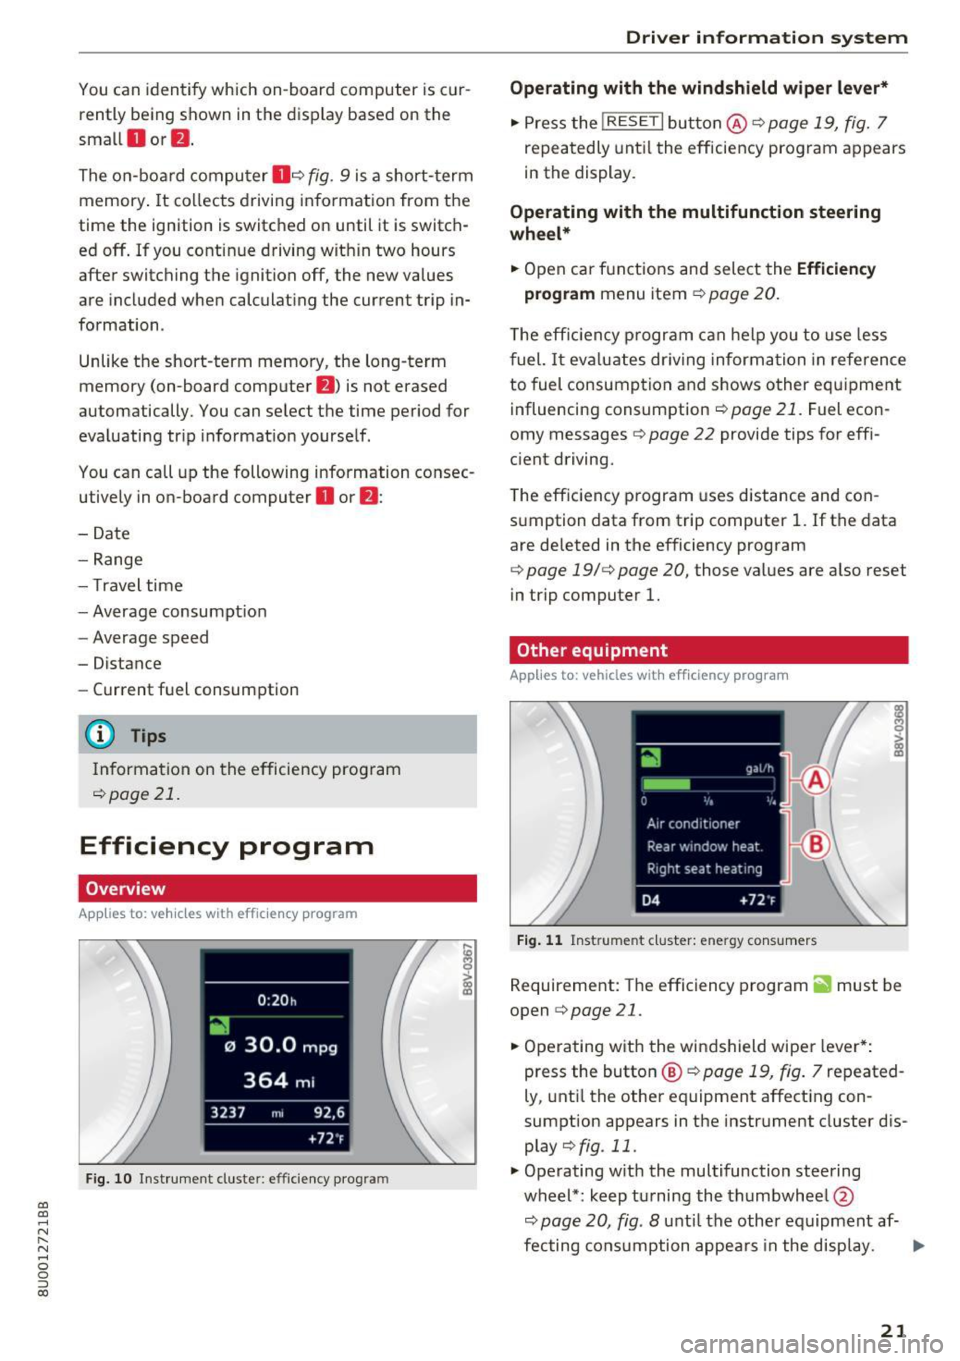
Applies to: vehicles with efficiency program
Fig. 10 Instrument cluster: e ffi ciency program
Driver in forma tion system
Operating with the windshield wiper lever*
.,. Press the !RESE T I button @¢page 19, fig. 7
repeatedly until the efficiency program appears
in the display .
Operating with the multifunction steering
wheel*
.,. Open car f unctions and select the Efficiency
program
menu item ¢ page 20.
The eff iciency program can help you to use less
fuel.
It eva luates dr iving information in reference
to fuel consumption and shows other equipment
influencing consumption
¢ page 21. Fuel econ
omy messages ¢
page 22 provide tips for effi
c ient driving.
The efficiency program uses distance and con
sumption data from trip computer
1. If the data
are deleted in the efficiency program
¢
page 19/ ¢ page 20, those values are also reset
in trip computer
1.
Other equipment
Applies to : vehicles with efficiency program
Fig. 11 Instrume nt cluster: e nerg y consumers
Requirement: The efficiency program ii must be
open
¢ page 21 .
.,. Operating with the windshield wiper lever*:
press the button@¢
page 19, fig. 7 repeated
ly, until the other equipment affecting con
sumption appears in the instrument cluster dis
play
¢ fig . 11 .
.,. Operating w ith the multifunction steering
wheel* : keep turning the thumbwheel@
¢
page 20, fig . 8 unti l the other equipment af-
fecting consumption appears in the display. .,.
21
Page 24 of 236
Driver information system
Other equipment that is currently affecting fuel
consumption is listed in the efficiency program .
The display shows up to three other items of
equ ipment @. The equipment using the most
power is listed first. If more than three items us
ing power are switched on, the equipment that is
currently us ing the most power is displayed.
A gauge @also shows the current total con
sumption of all other consumers.
Fuel economy messages
Applies to: vehicles with efficiency program
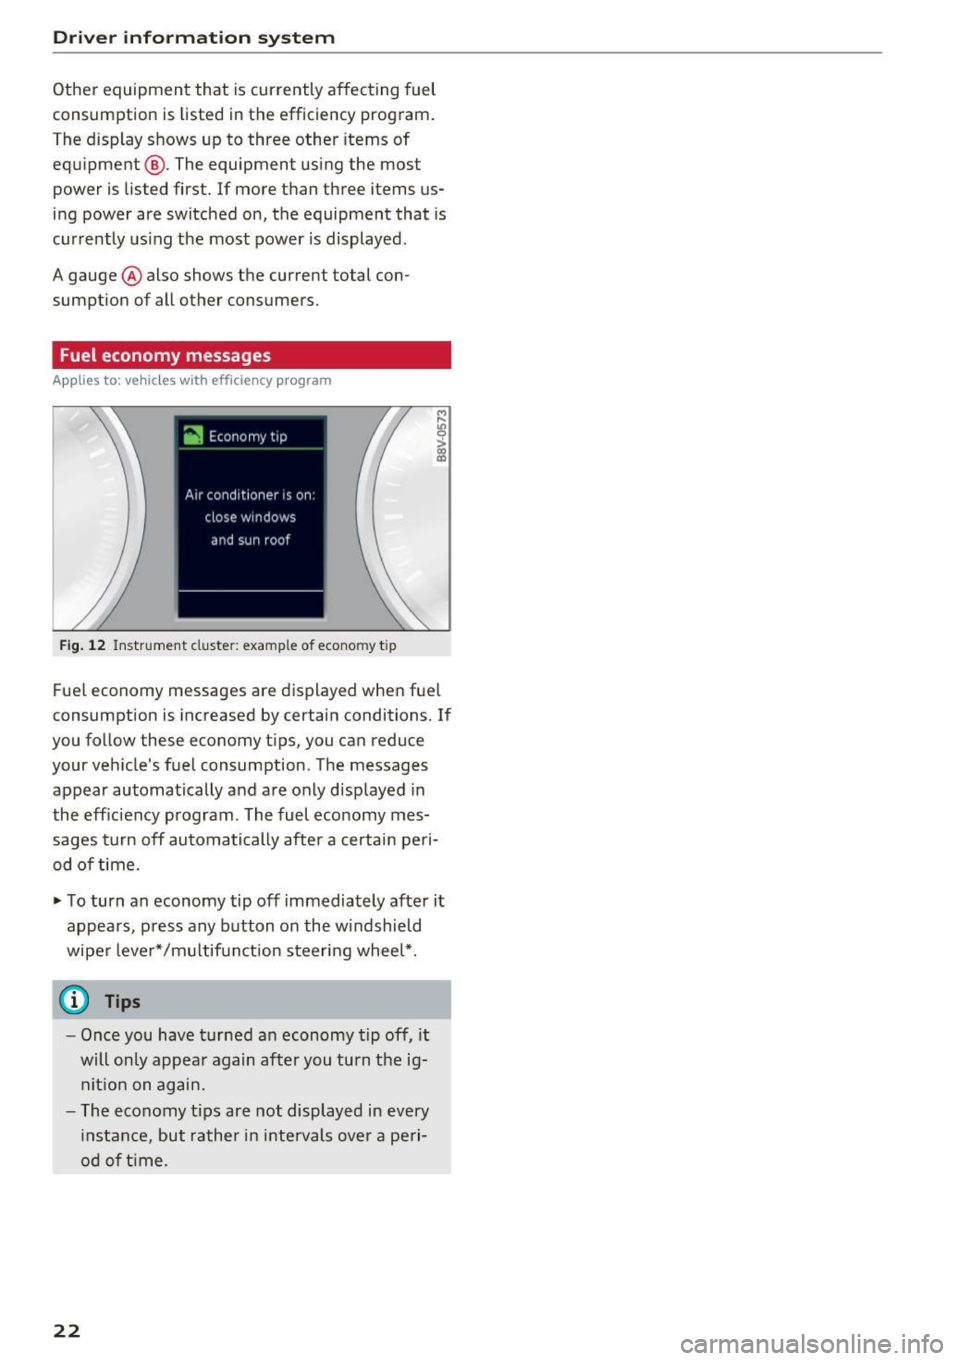
Fig . 12 Instrument cluster: example of economy t ip
Fue l economy messages are d isplayed when fue l
consumption is increased by certain conditions. If
you follow these economy tips, you can reduce
your vehicle's fuel consumption. The messages
appear automatically and are only displayed in
the efficiency program . The fuel economy mes
sages turn off automatically after a certai n pe ri
od of time.
• To turn an economy tip off immediately after it
appears, press any button on the windshield
wipe r lever*/multifunction steering wheel*.
(D Tips
-Once you have turned an economy tip off, it
will only appea r again after you turn the ig
nition on again.
- The economy tips are not displayed in every
instanc e, but rather in intervals over a peri
od of time .
22
Page 26 of 236
Opening and clo sin g
Key set
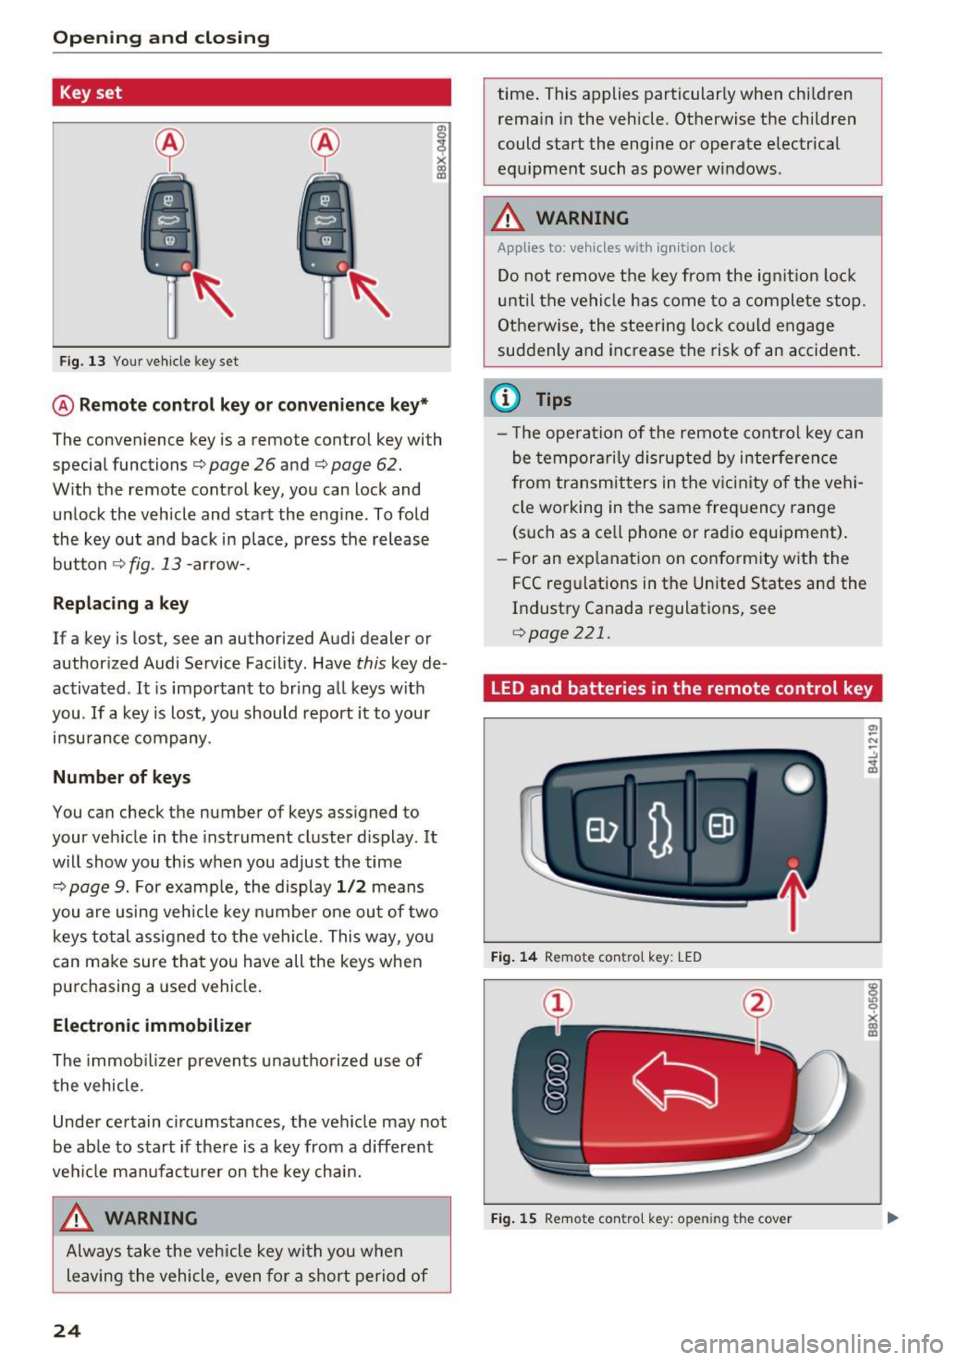
Fig. 13 Your veh icle key set
I X CX) cc
@ Remote control key o r con venience k ey*
The convenience key is a remote control key with
special functions
c> page 26 and c> page 62.
W ith the remote control key, you can lock and
unlock the vehicle and start the engine . To fold
the key out and back in place, press the release button
c> fig. 13 -arrow-.
Repla cing a ke y
If a key is lost, see an authorized Audi dealer or
authorized Audi Service Facility . Have
this key de
activated .
It is important to bring a ll keys with
you .
If a key is lost, you should report it to your
insu rance company.
Numb er of k ey s
You can check the number of keys ass igned to
your veh icle in the instrument cluster d isplay . It
will show you this when you adjust the time
c> page 9. For examp le, the display 1/2 means
you are using vehicle key numbe r one out of two
keys total assigned to the vehicle. This way, you
can make sure that you have all the keys when
purchasing a used vehicle.
Electronic immobilizer
The immob il izer prevents una uthorized use of
the vehicle .
Under certain c ircumstances, the veh icle may not
be ab le to start if there is a key from a different
veh icle man ufact urer on the key cha in.
A WARNING
Always take the vehicle key with you when
leaving the vehicle, even for a short period of
24
time . This applies particularly when children
rema in in the vehicle. Otherwise the children
could start the engine or operate electrical
equipment such as power windows .
A WARNING
Applies to: vehicles with ignition lock
Do not remove the key from the ign it ion lock
until the vehicle has come to a complete stop.
Otherw ise, the steering lo ck could engage
suddenly and increase the risk of an accident.
@ Tips
- T he opera tion of the remote cont rol key can
be temporarily disrupted by interference
from transmitters in the v ic inity of the vehi
cle working in the same frequency range
(such as a ce ll phone or radio equipment).
- For an exp lanation on conformity with the
FCC regulations in the Un ited States and the
Industry Canada regulat ions, see
c> page 221.
LED and batteries in the remote control key
Fig . 14 Remot e con tro l key: LED
Fig . 15 Remote con tro l key : o pen in g th e cov er
Page 27 of 236
a:,
a:,
...... N r--. N .-< 0 0 ::, a:,
LED in the remote control key
The LED ¢ fig . 14 in fo rms you of the remote con
tro l key function .
.. If you p ress a b utton b riefly, the L ED blinks
on ce .
.. If the L ED does no t blink , the remote con trol
key batt ery is dead . The message
1:1 Please
change key battery
may also appear in the in
strument cluster display . Replace the battery in
the remote contro l key.
Replacing the remote control key battery
.. Pry the cover @off of the key CD using a coin
¢ fig. 15.
.. Remove the cover in the direction of the arrow .
.. Inse rt the n ew battery with the" +" facing up.
.. Press the cover back onto the key until it clicks
into place .
@ For the sake of the environment
Discharged batteries must be disposed of us
ing methods that will not harm the env iron
ment. Do not dispose of them in household
tras h.
@ Tips
The replacement battery must meet the same
specifications as the orig inal battery i n the re
m ote co ntro l key .
Remote control key synchronization
If the ve hicle ca nnot be u nlock ed/locked by the
r emo te control, yo u can synchron ize the remo te
con trol key.
.. Press the remote co ntrol key button [@].
.. Inse rt the key in the driver's door lock wit hin 30
se con ds.
.. Press th e ~ button or~ button .
Open ing and closing
Unlocking/locking by remote control
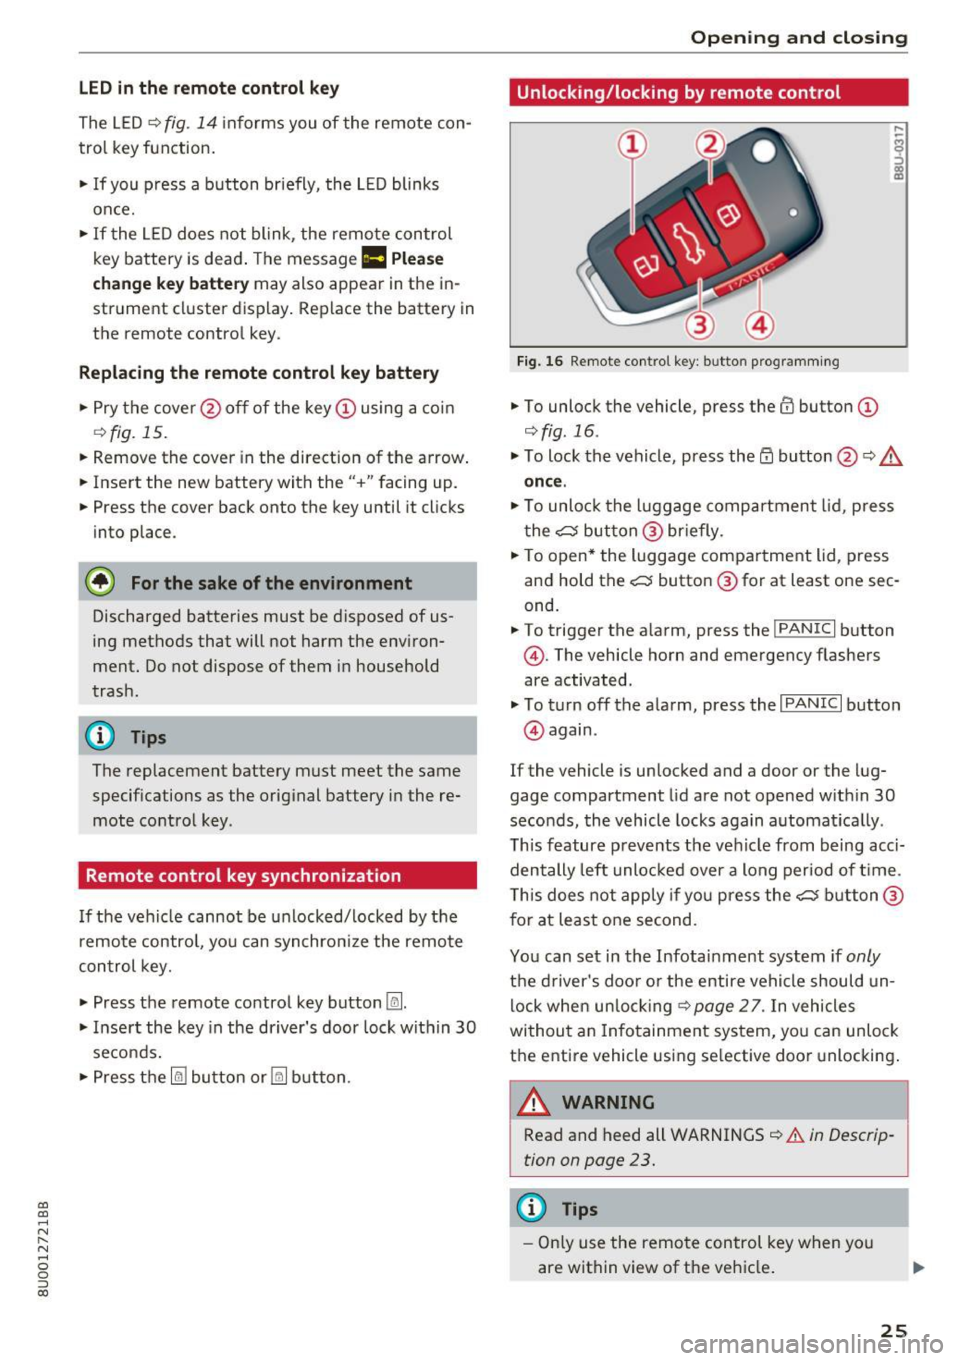
Fi g. 16 Remote control key: b utto n p rogra mming
.. To unlock the vehicle, press the ffi butto n CD
¢fig.16 .
.,. To lock the vehicle, press the~ button @¢ &
once .
.,. To unlo ck the l uggage compart ment lid, press
t he
c:5 but ton @ briefly.
.,. To open* the l uggage compar tment lid, p ress
an d hold the
c:5 button @for at least one sec
ond.
.. To trigger the a la rm, press the
! PANIC I button
@ . The vehicle ho rn and emergency flashers
are activated.
.,. To t urn off t he ala rm, press the
I PANIC I button
@ again .
If the vehicle is un locked and a door or the l ug
gage compartment lid are not opened w it hi n 30
secon ds, the vehicle locks again a utoma tica lly .
T h is feature p revents the ve hicl e from being acc i
dentally left unl ocked over a long period of t ime.
T h is does not app ly if yo u press the
c:5 bu tton @
f or at le ast o ne second .
Yo u can set in th e Infotainment system if
only
t h e dr iver's doo r o r the entire vehicle should un
lock w hen unlo cking <=?
page 2 7. In vehicles
withou t an Infotainment sys tem, yo u can unloc k
the entire vehicle using se lective door unlocking .
A WARNING ,..__
Read and heed all WARNI NGS¢ &. in Descrip
tion on page 23 .
(D Tips
- Only use the remo te control key w hen yo u
are within view o f th e veh icle.
25
Page 44 of 236
Lights and Vision
@ Tips
-You can also use the service position, for ex
ample, if you want to protect the windsh ield
from icing by using a cover.
- You cannot activate the service position
when the hood is open.
Replacing rear wiper blades
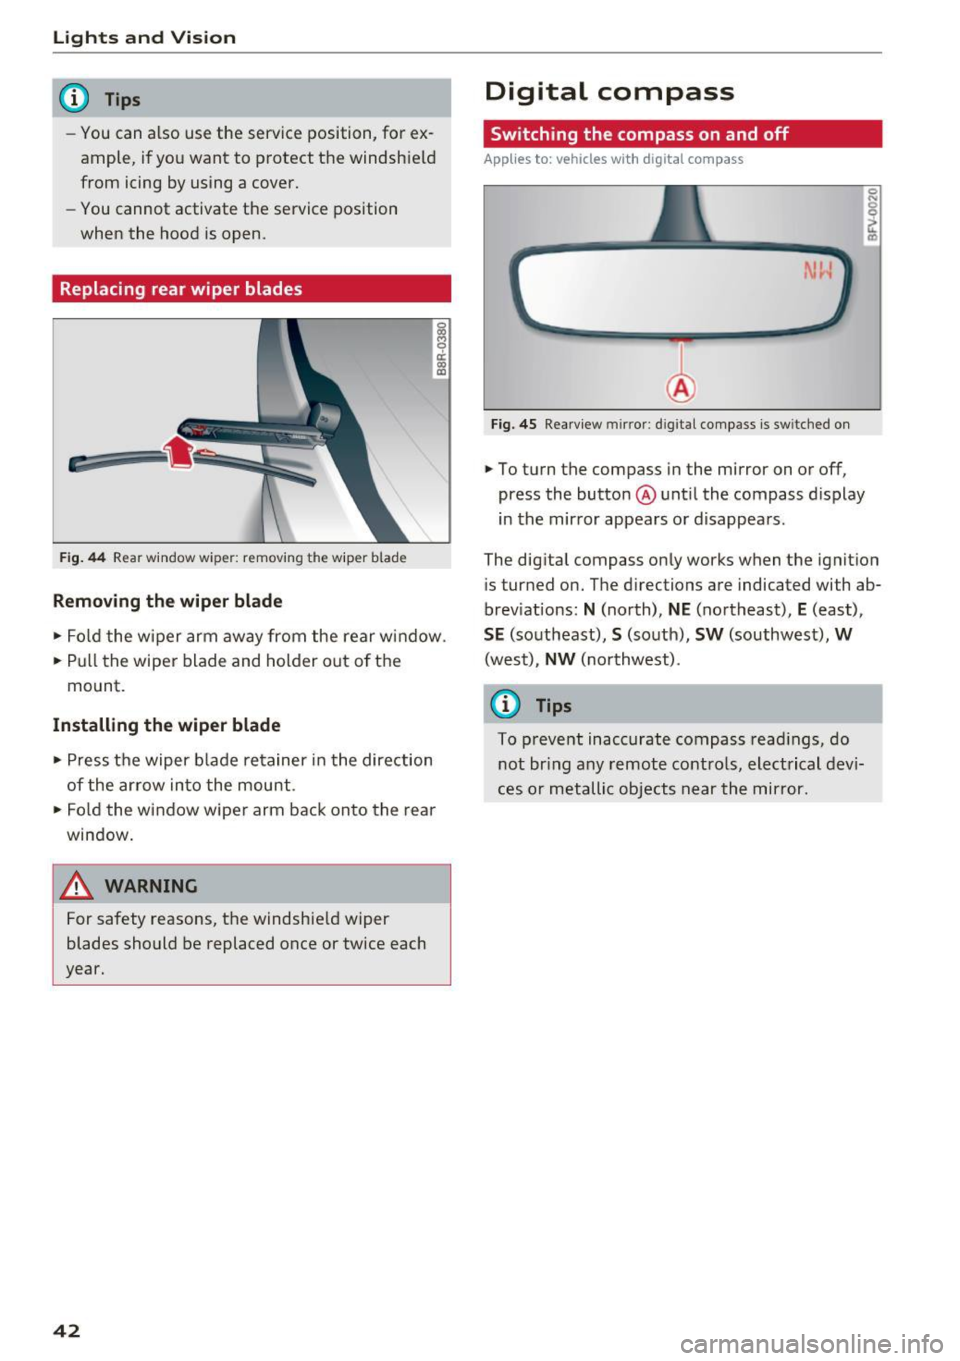
Fig . 44 Rear window wiper: removing the wiper blade
Removing th e wiper blade
16 M 0 ci: (X) a,
• Fo ld the w iper arm away from the rear window.
• Pull the wiper blade and holder out of the
mount.
Installing th e wiper blade
• Press the wiper b lade retainer in the direction
of the ar row into the mount.
• Fo ld the window wiper arm back onto the rear
window.
A WARNING
For safety reasons, the windshie ld wiper
blades should be replaced once or tw ice each
year.
42
Digital compass
Switching the compass on and off
App lies to: vehicles with digital compass
Fig. 45 Rearv iew m ir ror : d ig ita l compass is sw itched on
• To turn the compass in the mirror on or off,
press the butto n@ unt il the compass display
in the mir ror appears or d isappears.
0 N
I .,
The digital compass on ly works when the ignit ion
i s turned on. The directions are indicated with ab
brev iat ions:
N (north), NE (northeast), E (east),
S E (southeast), S (south), SW (southwest), W
(wes t), NW (no rthwest).
(D Tips
To preve nt inaccurate compass read ings, do
n ot br ing any remote cont ro ls, elect rical dev i
ces or metallic objects near the mirror.
Page 45 of 236
a:,
a:,
...... N r--. N
'"' 0 0 ::, a:,
Adjusting the magnetic zone
Applies to: vehicles with digital compass
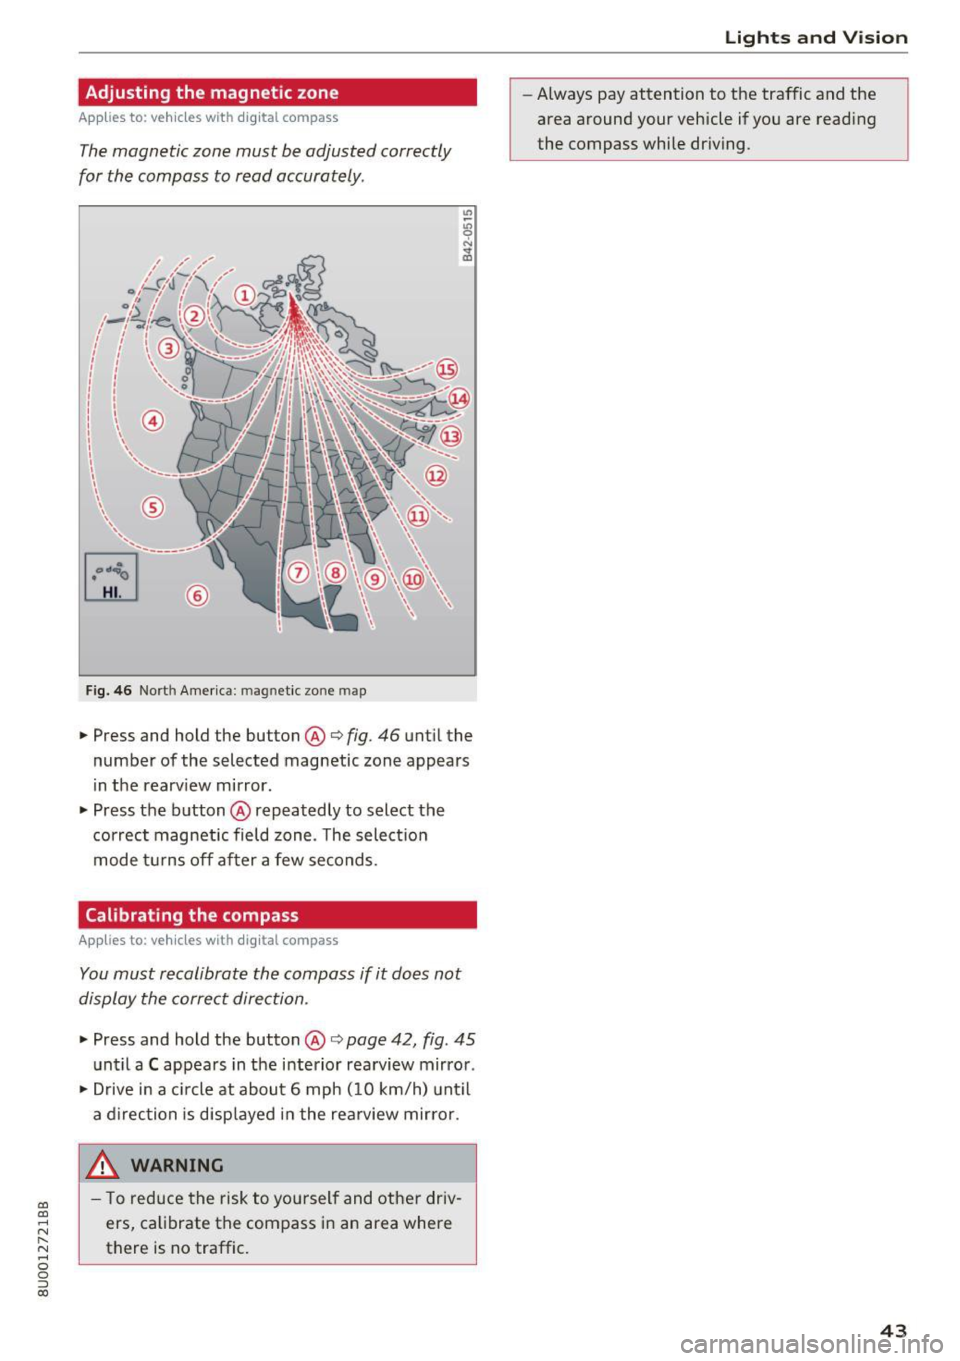
The magnetic zone must be adjusted correctly
for the compass to read accurately .
®
Fig. 46 Nort h Americ a: magn etic zone map
• Press and hold the button @i=> fig. 46 unt il the
number of the selected magnetic zone appears
in the rearv iew mirror.
• Press the button @repeatedly to select the
correct magnetic field zone . T he select io n
mode t urns off after a few seconds.
Calibrating the compass
Applies to: vehicles with digital compass
You must recalibrate the compass if it does not
display the correct direction .
• Press and hold the button @i=> page 42, fig . 45
unt il a C appears in the interior rearview mirror .
• Drive in a c ircle at about 6 mph ( 10 km/h) unt il
a d irection is disp layed in the rea rview mirror.
_& WARNING ,___
- T o reduce the risk to you rself and other driv
ers, calibrate the compass i n an area where
there is no traffic.
Lights and V ision
-Always pay attention to the traffic and the
area around your vehicle if you are read ing
the compass while dr iv ing .
43
Page 59 of 236
IAUTOI Switching automatic mode on and off
Automatic mode ma inta ins a constant tempera
ture ins ide the vehicle. Air temperature, airflow
and air distribution are controlled automatically.
- I -Adjusting the temperature
The vehicle inte rior temperature can be adjusted
for the driver and the front passenger us ing the
l eft/rig ht knob. Temperatures can be set be
tween a range o f 60 °F ( +16 °() and 84 °F
(+28 °C) . Outside of this range,
LO or HI will ap
pear in the climate control system display. At
both of these settings, the climate contro l sys
tem runs continuously at maximum cooling or
heating power. There is no temperature regula
tion .
~ Adjust ing the blower
You can adjust the vo lume of air generated by the
blower to your preference. Use the left
l!:I button
to decrease the air speed, and use the right
lj]
button to increase the air speed . The blower
should always run at a low sett ing to prevent the
windows from fogging and to ensure a continu
ous exchange of air ins ide the veh icle. To have
the airflow regulated automatically, press the
IAUTO! button.
~/l;o!/ h0! Adjusting air distribution
You can manually select the vents where the air
will flow. The buttons can be pressed individually
or in combination with each other. To have the air
d is tribution regulated automatical ly, press the
IAUTO ! button.
~ Adjusting the seat heating*
Pressing the button switches the seat heating on
at the h ighest setting (level 3). The LEDs indicate
the temperature level. To reduce the tempera
ture, press the butto n again . To switch the seat
heating off, press the button repeatedly until the
LED turns off.
Afte r approximately 10 minutes, the seat heating
a utomatically switches from level 3 to level 2.
00
~ I@ MAXI Switching the defroster on and off
"' ,....
~ The windshield and s ide windows are defrosted 0
g or cleared of condensation as quickly as possible.
00
Warm and cold
The maximum amount of air flows mainly from
the vents below the windshield . Recirculation
mode switches off. The temperature should be
set at +72°F (22°() or higher.
T he
!AUTOI button switches the defroster off.
llilil REAR! Switching the rear window defogger
on and off
T he rear window defogge r on ly operates when
the engine is running and will be automatically
switched off after approximate ly 10 minutes .
Synchronization
If you press the
IAUTO I button longer, you can
transfe r the d river temperature setting to the
front passenger. Synchronization is switched off
as soon as the temperature for the front pas
senger's s ide is changed.
Air vents
You can open o r close the center and rear vents in
the cockpit and the vents in the rear center con
sole using the ridged thumbwheels . The levers
adjust the direction of the airflow from the vents.
Switching the temperature measurement
units
T he temperature display can be switched be
tween°( and °F. Press and hold the
l ,e,,: ,.I button
r=;, fig. 67 and turn the knob on the driver's side to
- for three seconds.
A WARNING
-
-You shou ld not use the recirculation mode
for an extended period of time since no
fresh air is drawn in. With the air-condition
ing switched off, the windows can fog up,
which increases the risk of an acc ident.
- Indiv iduals w ith reduced sensit iv ity to pain
or temperature could develop burns when
using the seat heating* function. To reduce
the risk of injur y, these individua ls should
not use seat heating*.
0 Note
To avoid damaging the seat heating* ele
ments, do not kneel on the seats or place
heavy pressure on one area of the seat.
57
Page 65 of 236
a:,
a:,
...... N r--. N .-< 0 0 ::, a:,
Engaging the steering lock1
)
The steering locks when you tu rn the engine off
using the
! S TART ENGINE ST OP I butto n and
open the driver's door. The locked stee ring he lps
p revent vehicle theft .
Emergency off function *
If it is absolutely necessary, the engine can also
be turned off while driv ing at speeds starting at
4 mph (7 km/h). To switch the engine off, p ress
the
! STA RT ENGINE ST OP I button twice in a row
bri efly or press and hold for long er than two sec
onds.
A WARNING
- Never turn off the engine before the veh icle
has come to a complete stop. The f ull func
ti on of the brake booster and the power
steering is not gua ranteed. You must use
more fo rce to turn or b rake if necessary. Be
c a use you canno t steer and brake as you
usually wou ld, this could lead to c rashes
and serious injuries .
- For safety reasons, you should always par k
yo ur vehicle wi th the selector lever in P .
Otherwise, the vehicle could inadvertently
roll away .
- The radiator fan can continue to run for up
to 10 min utes even afte r you have turned
off the engine and removed the ignition key.
The radiator fan can also tu rn on again if the
engine coolant heats up because of intense
sunlight or heat bui ld -up in the engine com
partment.
- Always take the key with you whenever you
leave your vehicle. Otherw ise, the engine
cou ld be sta rted or electrical equ ipme nt
such as the power w indows cou ld be opera t
ed . T his can lead to se rious inj ury.
(D Note
If the eng ine has been under heavy load for
an extended per iod of t ime, heat builds up in
the engine compa rtme nt after the eng ine is
sw itched off and there is a risk of dam aging
ll Th is fun ctio n is not a vail able in al l countries .
Drivi ng
the engine. For th is reason, let the engine run
at idle for approximate ly two minutes before
shutting it off .
Starting the engine when there is a
malfunction
Applies to: vehicles with convenience key
Other circumstan ce s can cause the engine no t to
s tar t, such as the battery in the remote control
key has drained , there is interference with the
key or there is a system malfunction.
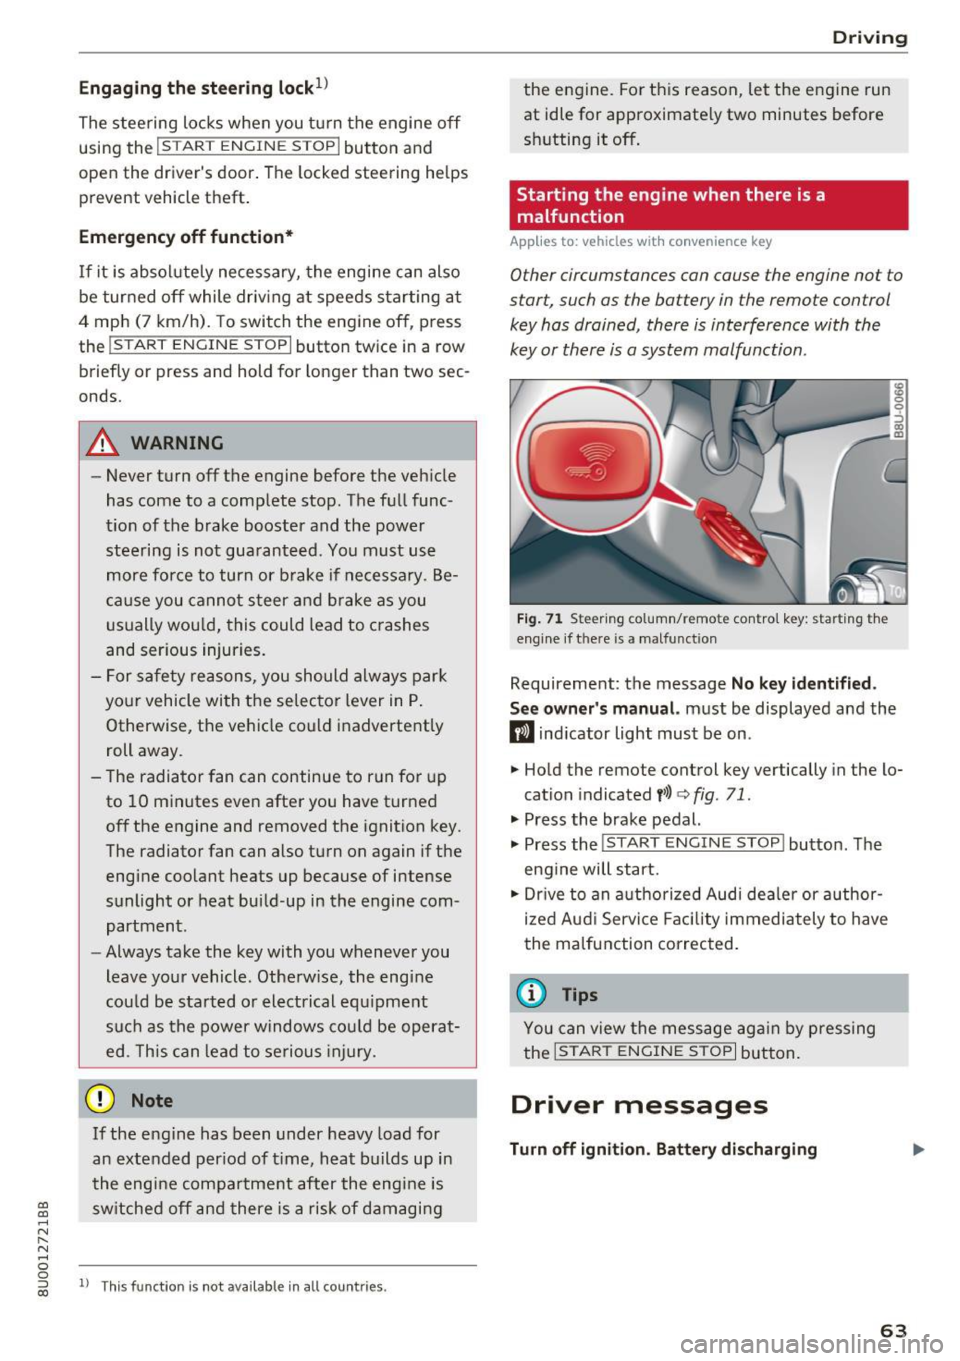
F ig . 7 1 Steer ing co lumn/remo te con trol k ey: star ting the
eng ine if t here is a ma lfun ction
Requirement: the message No key id entified .
S ee owner's manual.
must be displayed and the
m ind icator light must be on .
.,. Hold the remote control key vertically in the lo
cation indicated
y> l) q fig. 71 .
.,. Press the brake pedal.
... Press the
!START E NGINE STOP ! button. The
eng ine will start.
.,. Dr ive to an a uthorized Audi dea ler or a uthor
ized Aud i Servi ce Fa cili ty immediately to have
the malfunct ion correc ted.
(D Tips
You can view the message ag ai n by pressing
the
I START ENGI NE STOP I bu tton.
Driver messages
Turn off ignition . Battery discharging
63
Page 70 of 236
Driving
Selector lever positions
Fig. 73 Instrument cluste r: selector leve r positions
Fig. 74 Selecto r lever
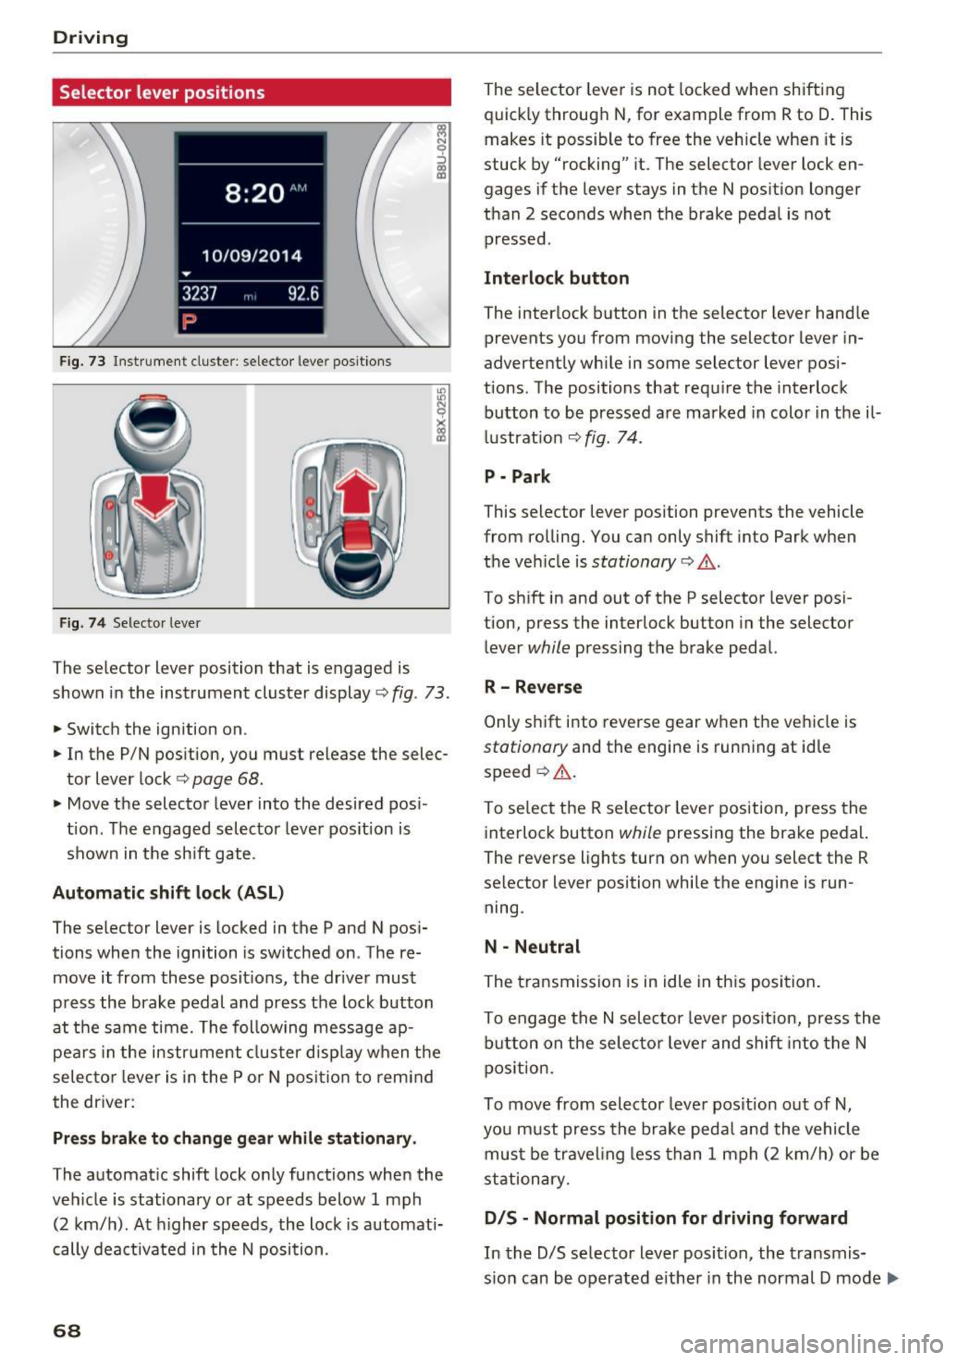
The selector lever position that is engaged is
shown in the instrument cluster display
<=> fig . 73 .
.,. Switch the ignition on .
.. In the P/N position, you must release the selec
tor lever lock
c:> page 68.
• Move the selector leve r into the desired pos i
tion . The engaged selector lever pos ition is
shown in the sh ift gate .
Automatic shift lock (ASL )
The selector lever is locked in the P and N pos i
tions when the ignition is sw itched on . The re
move it from these posit ions, the driver must
press the brake pedal and press the lock button
at the same time. The following message ap pears in the instr ument cluster disp lay when t he
selec to r l ever is in the P or N posi tion to remi nd
the driver:
Pr ess brake to change gear while stationar y.
The automatic shift lock only functions when the
veh icle is stationary or at speeds below 1 mph
(2 km/h). At h igher speeds , the lock is automati
cally dea ctivated i n the N position.
68
The selector leve r is not locked whe n shifting
quick ly through N , for example from R to D. This
makes it possible to free the veh icle when it is
stuck by "rocking" it. The selector lever lock en
gages if the lever stays in the N pos ition longer
than 2 seconds when the brake peda l is not
pressed .
Interlock button
The interlock b utton in the selector lever hand le
prevents you from moving the selector lever in
advertently wh ile in some selector lever posi
tions. The positions that requ ire the interlock
button to be pressed a re marked in colo r in t he il
l ustrat ion <=>
fig. 74.
P - Park
This selector lever position prevents the vehicle
from rolling. You can only shift into Park when
the ve hicle is
stationary c:> A .
To sh ift in and out of the P selector lever posi
tion, press the interlock button in the selector
lever
while pressing the brake pedal.
R -Rever se
Only s hift i nto reve rse gear when the veh icle is
stationary and the engine is running at id le
speed ¢
A.
To se lect the R selector leve r position, press the
interlock button
while pressing the brake pedal.
The reverse lights turn on when you select the R
selector lever position while the engine is run
ning .
N -Neutral
The transmission is in idle in th is posi tion .
To engage the
N sele ctor leve r pos it ion, press the
b utton on the selecto r leve r and shift into the N
pos ition.
To move from selector leve r pos it ion out of
N,
you m ust press the brake peda l and the vehicle
mus t be trave ling less than 1 mph (2 k m/h) or be
stationary.
D IS -Normal position for driving forward
In the D/S se lector lever position, the transmis
s io n can be operated eithe r in the normal D mode ..,_
Page 71 of 236
00
or in the 5 sport mode. The instrument cluster
display shows the selected driving mode.
In the
normal mode D, the transmission auto
matically selects the suitable gear ratio.
It de
pends on engine load, vehicle speed and driving
style.
Select the
sport mode 5 for sporty driving. The
vehicle makes full use of the engine's power.
Shifting may become noticeable when accelerat
ing.
To move from selector lever position N to D, you
must press the brake pedal and the vehicle must
be traveling less than 1 mph (2 km/h) or be sta
tionary ¢&. .
A WARNING
Read and follow all WARNINGS¢&. in Driv
ing tips on page
70.
@ Note
Coasting downhill with the transmission in N
and the engine not running will result in dam
age to the automatic transmission and possi
bly the catalytic converter.
(D Tips
- If you accidentally select N while driving,
take your foot off the accelerator pedal and
wait for the engine to slow down to idle be
fore selecting Dor 5.
- If there is a power failure, the selector lever
will not move out of the P position. The
emergency release can be used if this hap
pens ¢
page 72.
Driving tips
Starting the engine
.. The selector lever must be in the P or the N po
sition.
Starting from a stop
.. Press and hold the brake pedal.
~ .. Press and hold the interlock button in these-
"' ~ lector lever handle, select the desired selector .... 0 0
:::,
00
Driving
lever position such as D ¢ page 68 and release
the lock button.
.. Wait a moment until the transmission shifts.
You will notice a slight movement when the
gear engages.
.. Release the brake pedal and press the accelera
tor pedal ¢_& .
Stopping temporarily
.. Press the brake pedal to stop the vehicle, for
example at a traffic light. Do not press the ac
celerator pedal when doing this.
.. To prevent the vehicle from rolling when you
start driving, set the parking brake when stop
ping on steep inclines¢,& .
.. The parking brake will release automatically
and the vehicle will start moving once you press
the accelerator pedal.
Stopping/parking
If the selector lever is not in the P position when
you open the driver's door, the vehicle could roll.
In vehicles with a convenience key*, the message
Shift to P and turn off ignition, or vehicle can
roll away
appears.
.. Press and hold the brake pedal¢ _&.
.. Set the parking brake .
.. Select the P selector lever position.
Stopping on an incline
.. Always press the brake pedal to hold the vehi
cle in place and prevent it from "rolling back"
¢
&_ . Do not try to prevent the vehicle from
" rolling back" when a gear is engaged by in
creasing the engine speed
¢(D .
Starting on a hill
.. Set the parking brake .
.. Select the D position .
.. Press the accelerator pedal carefully. If your
safety belt is fastened, the parking brake is au
tomatically released and your vehicle begins to
move.
69