interior lights AUDI Q3 2018 Owners Manual
[x] Cancel search | Manufacturer: AUDI, Model Year: 2018, Model line: Q3, Model: AUDI Q3 2018Pages: 230, PDF Size: 57.03 MB
Page 37 of 230
a
co
...... N r-N .... 0 0 ::, co
"' Press the &I. button to switch the emergency
flashers on or off.
You can indicate a lane change or a turn when the
emergency flashers are switched on by using the
turn signal lever . The eme rgency flashers stop
temporarily .
The emergency flashers also work when the igni
tion is turned off.
(D Tips
You shou ld sw itch the emergency flashers on
if:
- you are the last car in a t raff ic jam so that
all othe r vehicles approach ing from beh ind
ca n see you, or if
- you r vehicle has bro ken down or you are
having an emergency, or if
- you r vehicle is being towed or if you a re tow
i ng anot her vehicle
Interior Lighting
Front interior lighting
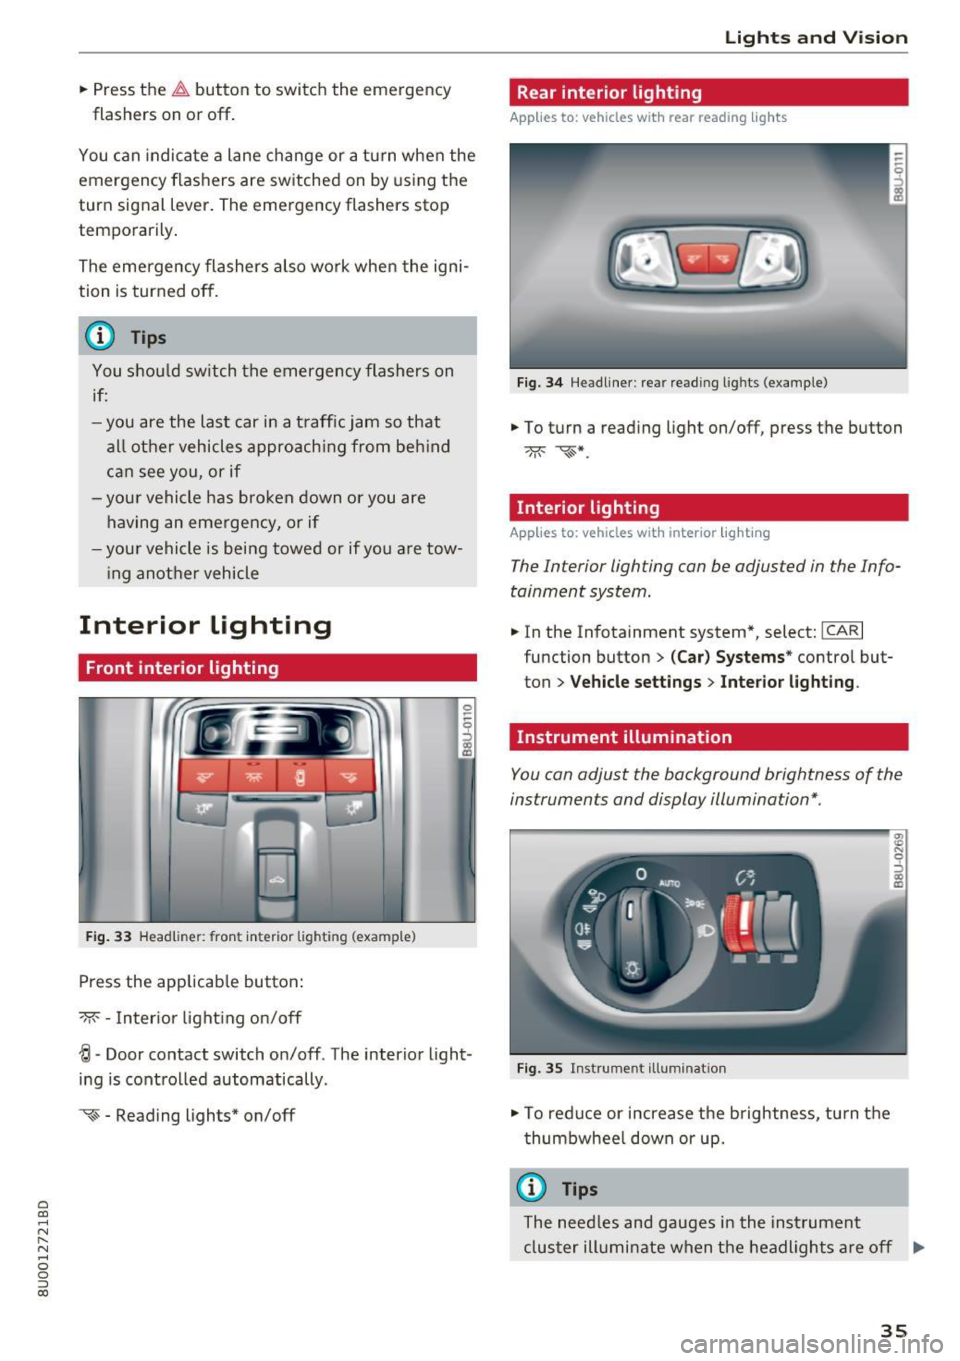
Fig . 33 Headliner: front inter ior lighting (example)
Press the app licab le button :
-M- -Inter ior light ing on/off
0
~
"' a,
~ - Door contact switch on/off . The interior light
ing is controlled automatically.
~ - Reading lights* on/off
Lights and V ision
Rear interior lighting
Applies to: vehicles with rear reading lights
Fig. 3 4 Headliner: rear reading l ights (example)
"' To turn a read ing light on/off, press the button
Interior lighting
Applies to: vehicles with interior lighting
The Interior lighting can be adjusted in the Info
tainment system.
"' In the Infotainment system*, select: ICARI
function button > (Car) Sy stems * control but
ton
> Vehicle setting s > Interior lighting .
Instrument illumination
You can adjust the background brightness of the
instruments and display illumination*.
F ig. 35 Instrument illuminat ion
"' To red uce or increase the b rightness, tu rn the
thumbwhee l down or up.
(D Tips
The need les and gauges i n the inst rument
cluster illumi nate when the headlights a re off
Iii>
35
Page 39 of 230
Manual dimming rearvi ew mirr or*
• Pull the lever on the bottom of the mirror back .
Automatic dimming re arview mirror*
• Press the button @to switch the dimming
function on the mirror on or off . If the indicator
light @ turns on , the inter ior and exter ior mir
rors* are dimmed when light shines on them
( for example , headlights shining from a vehicle
behind you) .
A WARNING
If the glass on an automatic dimming mirror
breaks, electrolyte can leak out. This liquid
can irritate the sk in , eyes and respiratory sys
tem. If there is contact with the flu id, flush
immed iately w ith plenty of water . Consult a
physician if necessary.
- Repeated or long -term e xposure to electro
lyte fluid can lead to irritat ion of the a ir
ways, especially in people with asthma or
other resp irato ry co nd it io ns. Take deep
breat hs immed iate ly after leaving the veh i
cl e or, if this is not possib le, open all of t he
doo rs and windows as wide as possible.
- If e lec trolyte flu id ente rs the eyes, flush
them tho roughly with a la rge amou nt of
clean water for at least 15 min utes and then
seek medical attention.
- If e lectrolyte f lu id comes into contact with
the skin, flush t he affected area w ith clean
water for at least 15 minutes and then clean
with soap and water and seek med ical at
tent ion. Clean affected clot hing and shoes
thoroughly before wear ing again .
- I f the fluid was swallowed and the person is
conscious, flush the mouth with water for at
least 15 minutes. Do not induce vom iting
unless this is recommended by med ica l pro
fessionals. Seek med ica l attent ion immed i
ately.
([) Note
If the glass on an automatic dimming mirror
a '.:: breaks, e lectrolyte can leak out . Th is liquid
~ damages plast ic surfaces and pa int. Clean
'"' 0 0 ::, (X)
Lights and V ision
this liquid as quick ly as possible, for example
with a wet sponge .
(D Tips
-If the light reach ing the rearview mirror is
obstructed, the automatic dimming mirror
wi ll not function correctly,
- T he automatic dimming mirrors do not dim
when the interior lighting is turned on or
the reverse gear is se lected.
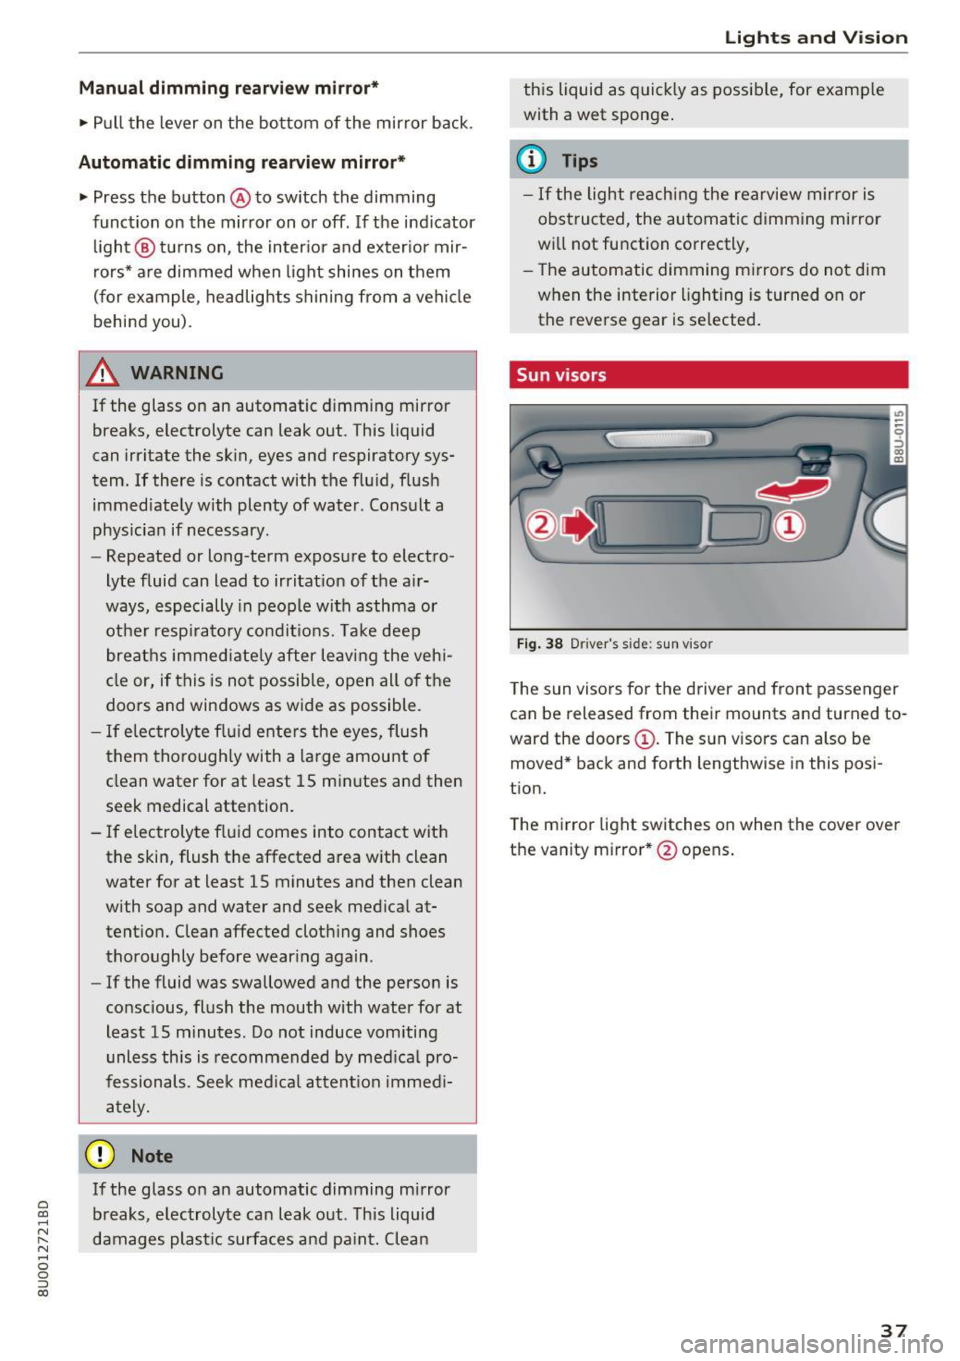
Sun visors
F ig. 38 D river 's s id e: s un vis o r
The sun visors for t he driver and front passenger
can be released from their mounts and turned to
ward the doors@. The sun v isors can also be
moved* b ack and forth lengthwise in this posi
t ion.
T he mirror light switches on when the
cover over
the vanity m irror *@ opens .
37
Page 202 of 230
Fuses and bulbs
(D Tips
-The following table does not list fuse loca
tions that are not used.
- Some of the equipment listed in the follow
ing tables applies only to certain model ver
sions or certain optional equipment.
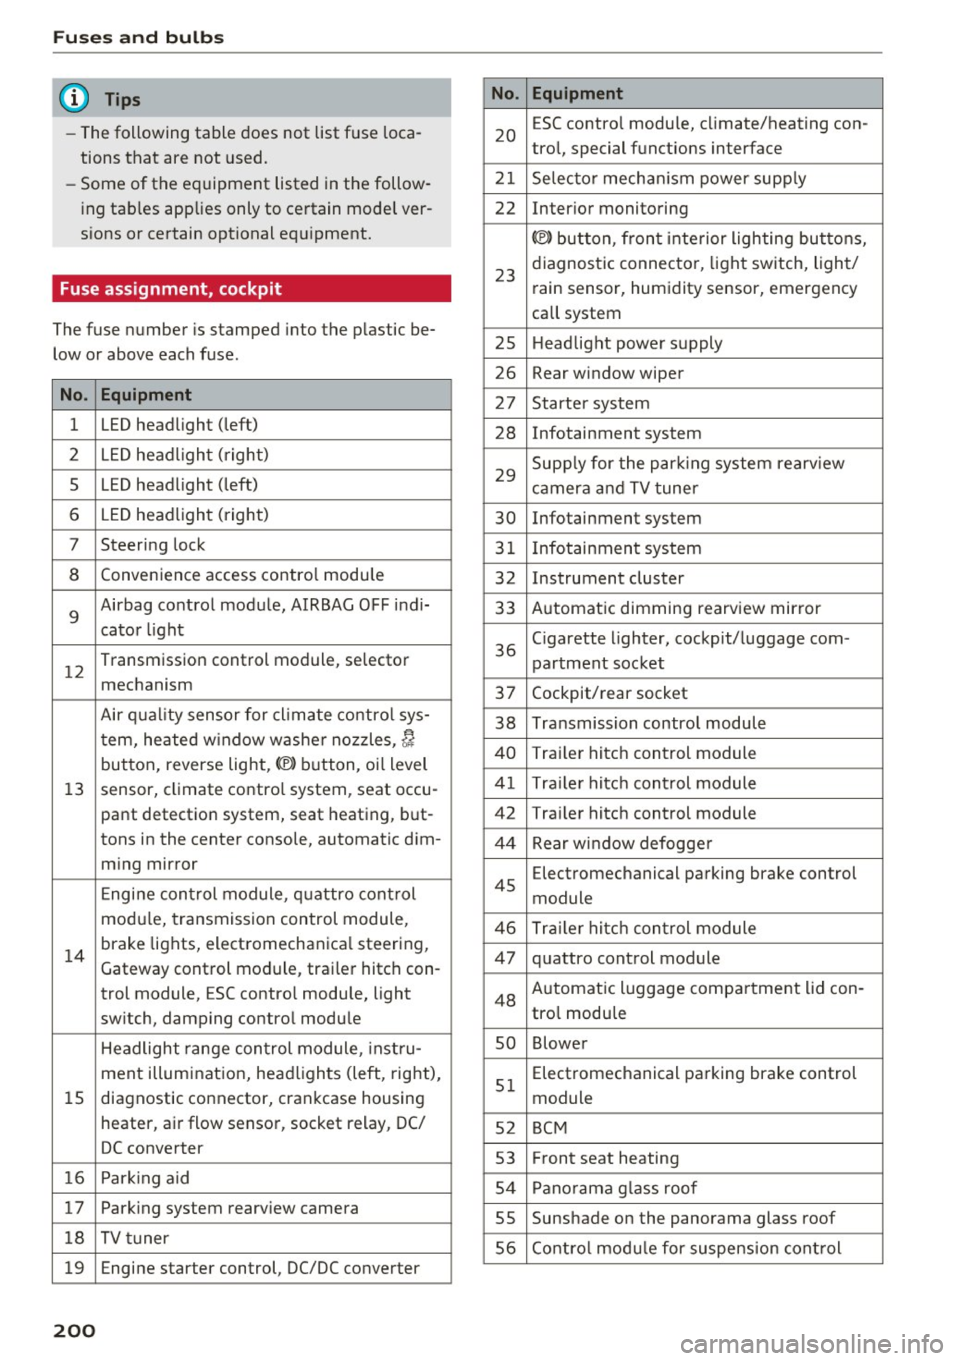
Fuse assignment, cockpit
The fuse number is stamped into the plastic be
low or above each fuse.
No. Equipment
1 LED headlight (left)
2 LED headlight (
right)
5 LED headlight (left)
6 LED headlight (right)
7 Steering lock
8 Convenience access contro
l module
9 Airbag control module, AIRBAG OFF
indi-
cator light
12
Transmission control module, selector
mechanism
Air quality sensor for cl imate control sys-
tern, heated w indow washer nozzles,~
button, reverse light,(®) button, oil level
13 sensor, climate contro
l system, seat occu-
pant detection system, seat heating, but-
tons in the center console, automatic dim-
ming mirror
Engine control module , quattro control
modu le, transmission control module,
14 brake lights, electromechanica
l steering,
Gateway control module, trai ler hitch con-
trol module, ESC control module, light
switch, damping control module
Headlight range control module, instru-
ment illumination, headlights (left, right),
15 diagnostic connector, crankcase housing
heater, a
ir flow sensor, socket relay, DC/
DC converter
16 Parking aid
17 Parking system rearview camera
18 TV tuner
19 Engine starter control, DC/DC converter
200
No
. Equipment
20 E
SC contro l module, climate/heating con-
trol, special functions interface
21 Selector mechanism power supply
22 Interior monitoring
(®) button, front interior lighting buttons,
23 diagnostic connector, light
switch, light/
rain sensor, humidity sensor, emergency
call system
25 Headlight power supply
26 Rear window wiper
27 Starter system
28 Infotainment system
29 Supply for
the park ing system rearview
camera and TV tuner
30 Infotainment system
31 Infotainment system
32 Instrument cluster
33 Automatic dimming rearview mirror
36 Cigarette lighter, cockpit/luggage com
-
partment socket
37 Cockpit/rear socket 38 Transmission contro l module
40 Trailer hitch control module 41 Trailer hitch control module
42 Trai ler hitch control module
44 Rear window defogge r
4S Electromechanical parking brake control
module
46 Trailer hitch control module
47 quattro control module
48 Automatic luggage compartment lid con-
tro
l modu le
so Blowe r
51 Electromechanical parking brake control
module
52 BCM
53 Front seat heating
54 Panorama gla ss roof
55 Sunshade on the panorama glass roof
56 Contro l modu le for suspension control
Page 206 of 230
Emergency situations
@ Tips
The discharged battery must be properly con
nected to the vehicle's electrical system .
When jump starting or charging the battery,
never connect the negative ground cable to
the battery negative post because the battery
manager system must be able to detect the
battery's state of charge . Always connect the
negat ive ground cable to the negative ground
pos t of the battery manager control unit.
Use of jumper cables
Make sure to connect the jumper cable clamps in
exactly the order described below!
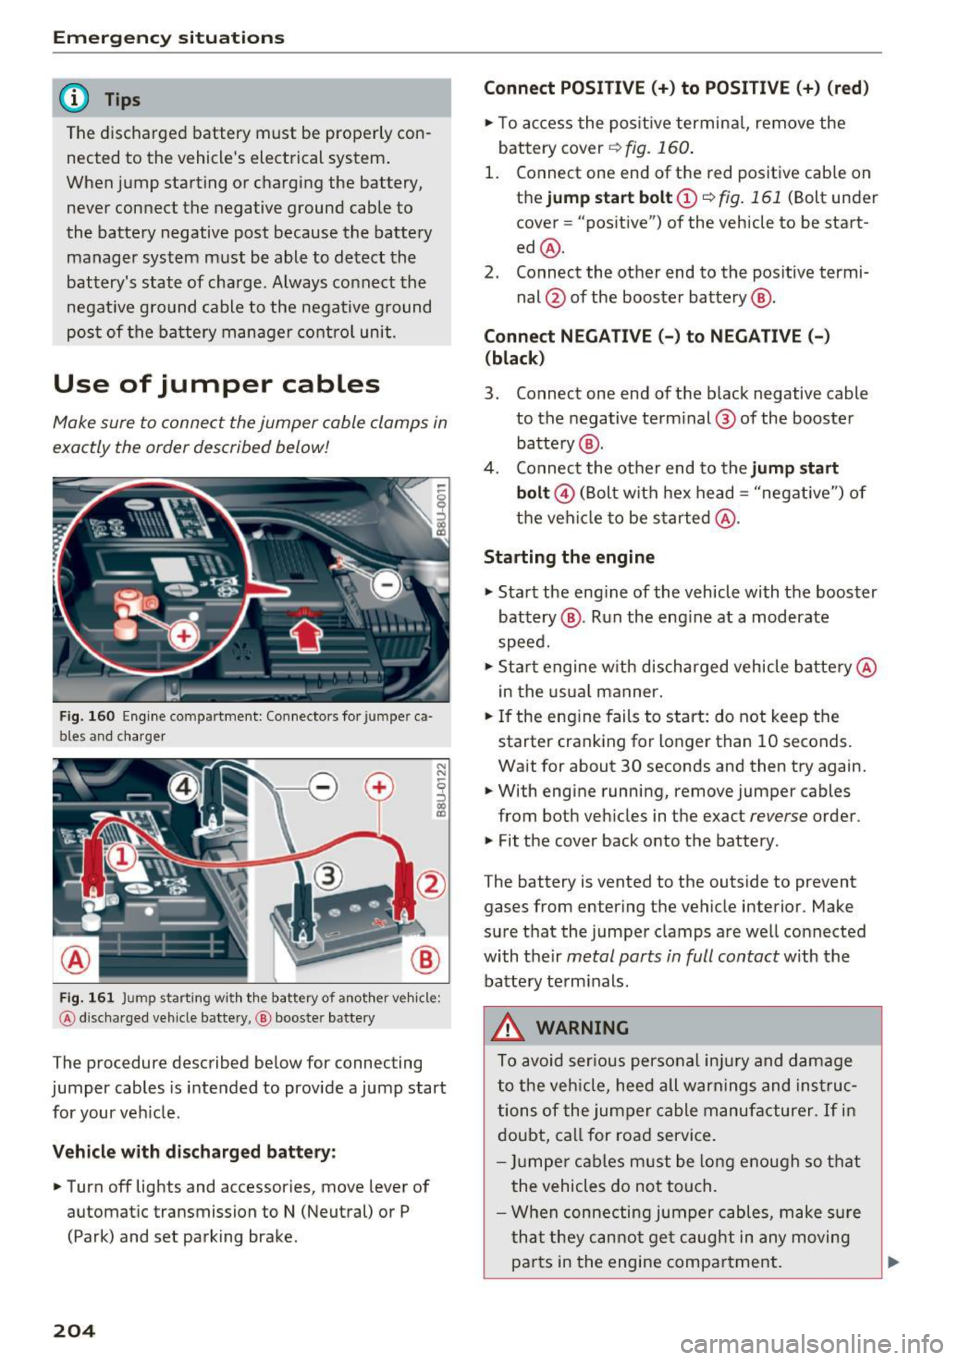
Fig. 160 Engine compartmen t: Connectors fo r ju m pe r ca
bles and charger
Fig. 161 J u mp starting w ith the battery of another vehicle :
@ discha rged vehicle bat te ry, @ booste r battery
The procedure described below for connecting
jumper cables is intended to provide a jump start
for your veh icle.
Vehicle with discharged battery:
.. Turn off lights and accessories, move lever of
automatic transmission to
N (Neutral) or P
(Park) and set park ing brake .
204
Connect POSITIVE(+) to POSITIVE (+) (red)
.. To access the positive terminal, remove the
battery cover
r:!) fig. 160.
1. Connect one end of the red positive cable on
the
jump start bolt (D ~ fig. 161 (Bolt under
cover= "positive") of the vehicle to be start
ed @.
2. Connect the other end to the positive termi-
nal@ of the booster battery @.
Connect NEGATIVE(-) to NEGATIVE(-)
(black)
3. Connect one end of the black negative cable
to the negative terminal ® of the booster
battery @.
4. Connect the other end to the
jump start
bolt @
(Bolt with hex head = "negative") of
the vehicle to be started @.
Starting the engine
"'Start the eng ine of the vehicle with the booster
battery @. Run the eng ine at a moderate
speed .
.,. Start engine w ith discharged vehicle battery@
in the usual manner.
.. If the engine fails to start: do not keep the
starter cranking for longer than 10 seconds.
Wait for about 30 seconds and then try again .
.. With engine running, remove jumper cables
from both vehicles in the exact
reverse order.
"' Fit the cover back onto the battery .
The battery is vented to the outside to prevent gases from entering the vehicle interior . Make
sure that the jumper clamps are well connected
with their
metal parts in full contact with the
batte ry terminals.
A WARNING
To avoid serious personal inju ry and damage
to the veh icle, heed all warnings and instruc
tions of the jumper cable manufacturer.
If in
doubt, call for road service.
- Jumper cables must be long enough so that
the vehicles do not touch .
- When connecting jumper cables, make sur e
that they cannot get caug ht in any moving
pa rts in the engine compartment. ..,.
Page 222 of 230
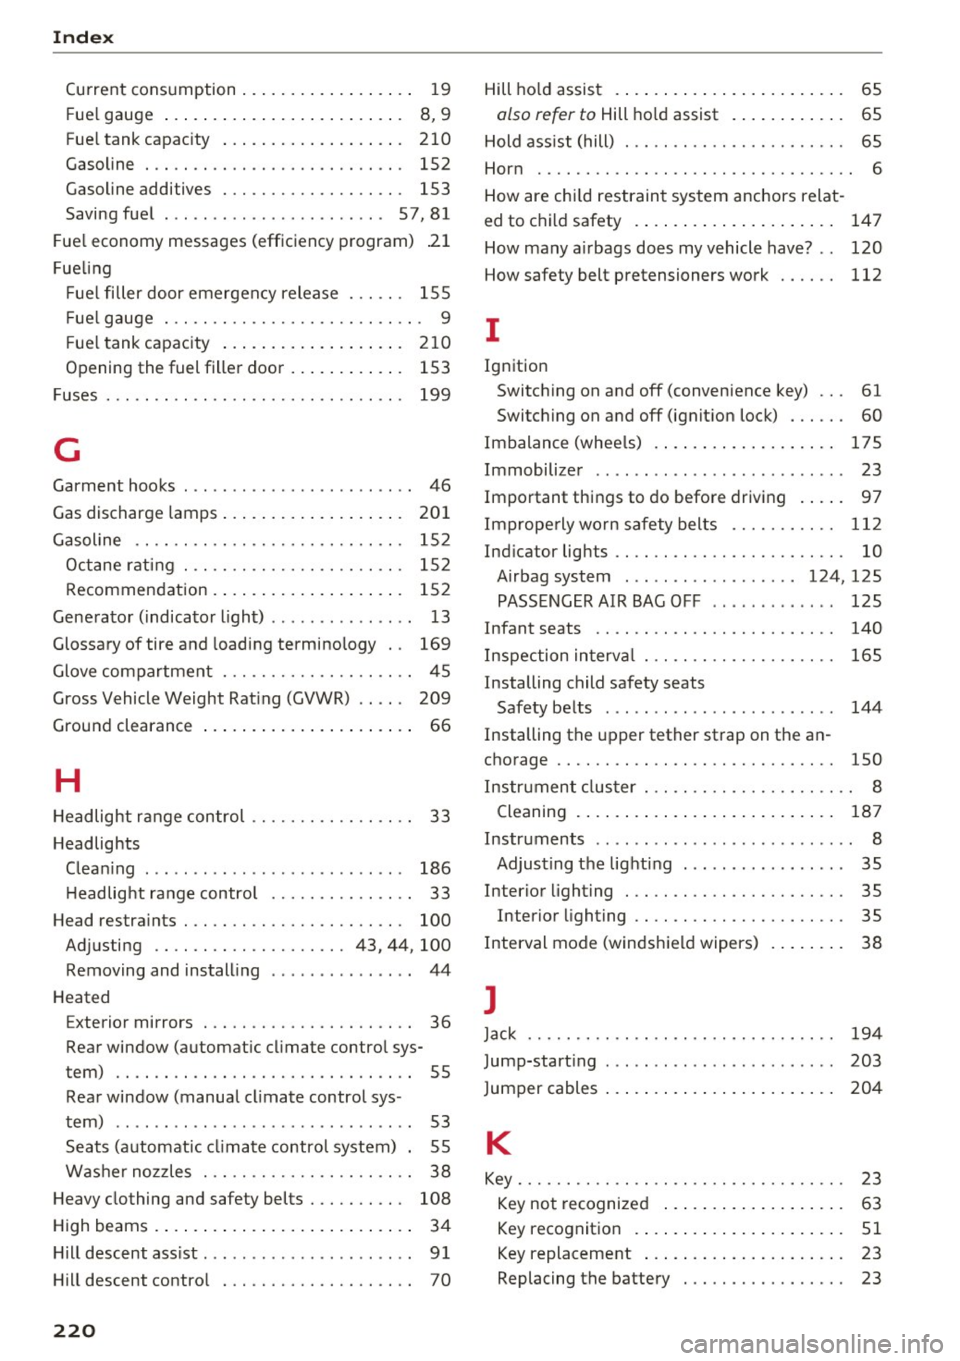
Index
Current consumption . . . . . . . . . . . . . . . . . . 19
Fuel gauge . . . . . . . . . . . . . . . . . . . . . . . . . 8, 9
Fuel tank capacity ................... 210
Gasoline . . . . . . . . . . . . . . . . . . . . . . . . . . . 152
Gasoline additives . . . . . . . . . . . . . . . . . . . 153
Saving fuel . . . . . . . . . . . . . . . . . . . . . . . 57, 81
Fuel economy messages (efficiency program) .21
Fueling Fuel filler door emergency release . . . . . . 155
F uel gauge . . . . . . . . . . . . . . . . . . . . . . . . . . . 9
F uel tank capacity . . . . . . . . . . . . . . . . . . . 210
Opening the fuel filler door . . . . . . . . . . . . 153
Fuses . . . . . . . . . . . . . . . . . . . . . . . . . . . . . . . 199
G
Garment hooks . . . . . . . . . . . . . . . . . . . . . . . . 46
Gas discharge lamps . . . . . . . . . . . . . . . . . . . 201
Gasoline . . . . . . . . . . . . . . . . . . . . . . . . . . . . 152
Octane rating . . . . . . . . . . . . . . . . . . . . . . . 152
Recommendation . . . . . . . . . . . . . . . . . . . . 152
Generator (indicator light) . . . . . . . . . . . . . . . 13
Glossary of tire and loading terminology . . 169
Glove compartment . . . . . . . . . . . . . . . . . . . . 45
Gross Vehicle Weight Rating (GVWR) . . . . . 209
Ground clearance . . . . . . . . . . . . . . . . . . . . . . 66
H
Headlight range control . . . . . . . . . . . . . . . . . 33
Headlights Cleaning . . . . . . . . . . . . . . . . . . . . . . . . . . . 186
H eadlight range control . . . . . . . . . . . . . . . 33
Head restraints . . . . . . . . . . . . . . . . . . . . . . . 100
Adjusting .. .. ................ 43, 44, 100
Removing and installing . . . . . . . . . . . . . . . 44
Heated Exterior mirrors . . . . . . . . . . . . . . . . . . . . . . 36
Rear window (automatic climate control sys-
tem) . . . . . . . . . . . . . . . . . . . . . . . . . . . . . . . 55
Rear window (manual climate control sys -
tem) . . . . . . . . . . . . . . . . . . . . . . . . . . . . . . . 53
Seats (automatic climate control system) . 55
Washer nozzles . . . . . . . . . . . . . . . . . . . . . . 38
Heavy clothing and safety belts . . . . . . . . . . 108
High beams . . . . . . . . . . . . . . . . . . . . . . . . . . . 34
Hill descent assist ... . .. .. ...... .. .. .. .. 91
Hill descent control . . . . . . . . . . . . . . . . . . . . 70
220
Hill hold assist . . . . . . . . . . . . . . . . . . . . . . . . 65
also refer to Hill hold assist . . . . . . . . . . . . 65
Hold ass ist (hill) . . . . . . . . . . . . . . . . . . . . . . . 65
Horn . . . . . . . . . . . . . . . . . . . . . . . . . . . . . . . . . 6
How are child restraint system anchors relat-
ed to child safety . . . . . . . . . . . . . . . . . . . . . 147
How many a irbags does my vehicle have? . . 120
How safety belt pretensioners work 112
I
Ignition
Switching on and off (convenience key) . . . 61
Switching on and off (ignition lock) . . . . . . 60
Imbalance (wheels) . . . . . . . . . . . . . . . . . . . 175
Immobilizer . . . . . . . . . . . . . . . . . . . . . . . . . . 23
Important things to do before driving . . . . . 97
Improperly worn safety belts . . . . . . . . . . . 112
Indicator lights . . . . . . . . . . . . . . . . . . . . . . . . 10
Airbag system . . . . . . . . . . . . . . . . . . 124, 125
PASSENGER AIR BAG OFF . . . . . . . . . . . . . 125
Infant seats . . . . . . . . . . . . . . . . . . . . . . . . . 140
Inspection interval . . . . . . . . . . . . . . . . . . . . 165
Installing child safety seats Safety belts . . . . . . . . . . . . . . . . . . . . . . . . 144
Installing the upper tether strap on the an
chorage . . . . . . . . . . . . . . . . . . . . . . . . . . . . . 150
Instrument cluster . . . . . . . . . . . . . . . . . . . . . . 8
Cleaning . . . . . . . . . . . . . . . . . . . . . . . . . . . 187
Instruments . . . . . . . . . . . . . . . . . . . . . . . . . . . 8
Adjusting the lighting . . . . . . . . . . . . . . . . . 35
Interior lighting . . . . . . . . . . . . . . . . . . . . . . . 35
Interior lighting . . . . . . . . . . . . . . . . . . . . . . 35
Interval mode (windshield wipers) . . . . . . . . 38
J
Jack . . . . . . . . . . . . . . . . . . . . . . . . . . . . . . . . 194
Jump-starting . . . . . . . . . . . . . . . . . . . . . . . . 203
Jumper cables . . . . . . . . . . . . . . . . . . . . . . . . 204
K
Key........ .. .. .. .. .. ... .......... ... 23
Key not recognized . . . . . . . . . . . . . . . . . . . 63
Key recognition . . . . . . . . . . . . . . . . . . . . . . 51
Key replacement . . . . . . . . . . . . . . . . . . . . . 23
Replacing the battery . . . . . . . . . . . . . . . . . 23
Page 223 of 230

0 co ......
"' ,....
"' ...... 0 0 :::,
00
Kick-down (automatic transmission) . . . . . . . 71
L
LATCH 147
Description . . . . . . . . . . . . . . . . . . . . . . . . . 148
Installing a child restraint . . . . . . . . . . . . . 149
Loc ation
Mounting and relea sing the anchorage
hook
. . .. .. .. ............... .. .... .
148
149
L eather care/clean ing . . . . . . . . . . . . . . . . . 188
Leaving home . . . . . . . . . . . . . . . . . . . . . . . . . 34
Light/rain sensor Headlights . . . . . . . . . . . . . . . . . . . . . . . . . . 33
Interval mode (windsh ield wipers) . . . . . . . 38
Lighting Exterior . . . . . . . . . . . . . . . . . . . . . . . . . . . . . 33
Interior . . . . . . . . . . . . . . . . . . . . . . . . . . . . . 35
L ights
I nterior/reading lights . . . . . . . . . . . . . . . . 35
Interior lighting . . . . . . . . . . . . . . . . . . . . . . 35
Loading the luggage compartment . . . . . . . 102
Locking/un locking
refer to Unlocking/locking . . . . . . . . . . . . . 24
L ow-profile tires . . . . . . . . . . . . . . . . . . . . . . 182
Low beam headlights . . . . . . . . . . . . . . . . . . . 33
Lower univ ersal anchorages (Canada) . . . . . 147
L uggage compartment. . . . . . . . . . . . . . . . . . 46
L uggage compartment lid . . . . . . . . . . . . . . 27
Storing cargo correctly . . . . . . . . . . . . . . . 102
also refer to Loading the luggage compart-
ment. ... .. .. ................. .... . 102
L uggage compartment net . . . . . . . . . . . . . . 47
Luggage rack . . . . . . . . . . . . . . . . . . . . . . . . . . 49
L umbar support . . . . . . . . . . . . . . . . . . . . . . . 42
M
M . t arn enance . .. ............. .. .. .... . 212
M . t . l arn enance mterva s . . . . . . . . . . . . . . . . . 165
Malfunction indicator lamp (MIL) . . . . . . 14, 17
Manual climate control system
refer to Climate control system
(manual) . . . . . . . . . . . . . . . . . . . . . . . . . 51, 52
Mirror compass . . . . . . . . . . . . . . . . . . . . . . . . 40
Mirrors . . . . . . . . . . . . . . . . . . . . . . . . . . . . . . 36
Monitoring the Advanced Airbag System . . 124
Index
Multifunction steering wheel. . . . . . . . . . . . . 19
N
Natural leather care/cleaning . . . . . . . . . . . 188
Net . . . . . . . . . . . . . . . . . . . . . . . . . . . . . . . . . 46
NH TSA
Contacting 104
Number of seats . . . . . . . . . . . . . . . . . . . . . . 106
0
Occupant seating positions . . . . . . . . . . . . . . 98
Octane rating (gasoline) . . . . . . . . . . . . . . . . 152
Odometer . . . . . . . . . . . . . . . . . . . . . . . . . . . . . 9
Oil
refer to Engine oil . . . . . . . . . . . . . . . 158, 160
Oil change interval . . . . . . . . . . . . . . . . . . . . 165
On-board computer . . . . . . . . . . . . . . . . . . . . 19
On-Board Diagnostic System (OBD) Data Link Connector (DLC) . . . . . . . . . . . . . . 17
Malfunction indicator lamp (MIL) . . . . . . . . 17
Opening.... .... .. .. ............... .. . 22
Fuel filler door . . . . . . . . . . . . . . . . . . . . . . 153
Hood . . . . . . . . . . . . . . . . . . . . . . . . . . . . . . 157
Luggage compartment lid . . . . . . . . . . . . . . 28
Panorama glass roof . . . . . . . . . . . . . . . . . . 31
Windows . .. .. .. .. ............. .... . 30
Opening/closing
refer to Unlocking/locking . . . . . . . . . . . . . 24
Other equipment (efficiency program) . . . . . 20
Outside temperature display . . . . . . . . . . . . . . 9
Overview (Cockpit) . . . . . . . . . . . . . . . . . . . . . . 6
p
Paint damage . . . . . . . . . . . . . . . . . . . . . . . . 187
Paint number . . . . . . . . . . . . . . . . . . . . . . . . 209
Panorama glass roof. . . . . . . . . . . . . . . . . . . . 31
Emergency closing . . . . . . . . . . . . . . . . . . . . 32
also refer to Convenience opening/closing 31
Parking brake
refer to Elect rome chanica l parking brake . 63
Parking lights . . . . . . . . . . . . . . . . . . . . . . . . . 33
Parking system Parking system plus . . . . . . . . . . . . . . . . . . . 83
also refer to Parking systems . . . . . . . . 83, 84
221