reset AUDI Q3 2019 Owners Manual
[x] Cancel search | Manufacturer: AUDI, Model Year: 2019, Model line: Q3, Model: AUDI Q3 2019Pages: 280, PDF Size: 72.73 MB
Page 16 of 280
Instrument cluster
@) Note
The tachometer needle should only be in the
red zone briefly: Otherwise, this increases the
risk of engine damage. The location where the
red zone begins varies depending on the en-
gine.
Odometer
The trip odometer and odometer are displayed in
the status line ©) > page 11.
The trip odometer shows the distance driven
since it was last reset. It can be used to measure
short distances. The odometer shows the total
distance that the vehicle has been driven.
Resetting the trip odometer
> Select in the instrument cluster: Vehicle func-
tions tab > [=] button > Reset mi.
@) Tips
Distances are displayed in mi (miles) or km
(kilometers).
Outside temperature
display
The outside temperature is displayed in the sta-
tus line @) > page 11.
If your vehicle is stationary or if you are driving at
very low speeds, the temperature displayed in
the instrument cluster may be slightly higher
than the actual temperature outside due to heat
radiating from the engine.
At temperatures below 41 °F (+5 °C), a snowflake
symbol appears in front of the temperature dis-
play > A.
ZA\ WARNING
Do not assume the roads are free of ice based
on the outside temperature display. Be aware
that there may be ice on roads even when the
outside temperature is around 41 °F (+5 °C)
and that ice can increase the risk of accidents.
14
Vehicle functions
The trip computer is displayed in the first tab of
the driver information system. Additional vehicle
functions can be accessed depending on the vehi-
cle equipment.
> Press the =] button on the multifunction steer-
ing wheel.
— On-board computer > page 14
— Reduced display > page 13
— Reset trip odometer > page 14
On-board computer
Resetting values to zero
Requirement: the Consumption, Short-term
memory, or Long-term memory display must be
selected.
> To reset the values in one of the memories to
zero, press and hold the left thumbwheel on
the multifunction steering wheel for one sec-
ond, or
> Select in the instrument cluster: Vehicle func-
tions tab > [=] button > Reset mi.
Depending on the vehicle equipment, you can call
up the following displays in the on-board com-
puter one at a time by turning the left thumb-
wheel on the multifunction steering wheel:
— Time and date > page 195
— Average consumption > page 15
— Short-term memory overview
— Long-term memory overview
— Energy consumers > page 15
— Driver assistance
Short-term memory and long-term memory
The short-term memory collects driving informa-
tion from the time the ignition is switched on un-
tilit is switched off. If you continue driving within
two hours after switching the ignition off, the
new values will be included when calculating the
current trip information.
Page 43 of 280
83A012721BA
Opening and closing
objects are in the area immediately sur-
rounding the equipment. People can be in-
jured or property can be damaged if struck
when closing.
— Do not allow yourself to be distracted from
traffic by the viewing and operating the dis-
plays.
@) Tips
— If you sell your vehicle, reset all settings to
the factory default settings > page 196.
— For an explanation on conformity with the
FCC regulations in the United States and the
Industry Canada regulations, see
=> page 261.
@ Tips
Before you program your system to the ga-
rage door opener, first check the compatibili-
ty:
— Ask an authorized Audi dealer or authorized
Audi Service Facility or check at www.
homelink.com. You can also find more infor-
mation about HomeLink there.
— You can display information about Home-
Link (compatibility level/status/country
code/HomeLink generation) in the MMI:
— Select on the home screen: VEHICLE > Set-
tings & Service > Garage door opener > (0.
Applies to: vehicles with garage door opener
Requirements: the remote control transmitter
must be programmed © page 41, the vehicle
must be within range of the system, and the igni-
tion must be switched on.
There are multiple options to open or close the
system (such as the garage door).
> To display the -& button (garage door opener
button) for the garage door opener, press the
[=] button in the status bar > page 20.
> If you have only programmed one remote con-
trol transmitter, press the - button in the sta-
tus bar on the display > page 19. Or
> If you have programmed multiple remote con-
trol transmitters, press the - button in the
status bar on the display > page 19 and then
press the button for the respective system. Or
> If you have configured the programmable
steering wheel button*, press the >K button
= page 26 and then press the respective button
for the system. Or
>» Applies to: vehicles with GPS pairing: If you
have programmed GPS pairing, press the re-
spective button in the center display (notifica-
tion center > page 20). As you approach the
system, the button is displayed on the MMI. Or
> When reverse gear is selected, the parking sys-
tem* / rearview camera* / peripheral camera*
will appear in the display. To display the but-
tons of the first three garage door openers,
press the E=] button in the status bar and then
press the button for the respective system.
If transmission was successful, the message:
Send to: XXX will appear.
Applies to: vehicles with garage door opener
You can program both fixed code and rolling code
systems in the MMI using the procedure that is
described.
Requirement: The ignition must be switched on.
Programming the system
Requirement: the hand transmitter must be
present and the vehicle must be within range of
the system (such as the garage door) that you
would like to program. If you program more than
three remote control transmitters, assign the
first three spots to the systems that you would
also like to use when driving in reverse.
> To display the - button for the garage door
opener, press the E=] button in the status bar
=> page 20.
> If you are programming the garage door opener
for the first time, press the r button on the
display. Follow the instructions in the MMI. Or
> If you want to program more systems, select
on the home screen: VEHICLE > Settings &
Service > Garage door opener. Select the de-
sired button: @). Follow the instructions in the
MMI.
41
>
Page 85 of 280
83A012721BA
Driving
— D (Drive): Drive forward
Selecting a gear
Requirement: The ignition must be switched on.
— Bring the vehicle to a full stop and press the
brake pedal.
— Press the release button @ on the selector lev-
er.
—To select a gear, move the selector lever into
the corresponding position.
— The label next to the selector lever for the se-
lected gear will light up.
“N” (Neutral) gear
In the “N” gear, power is not transmitted to the
driving wheels. Use the “N” gear in a car wash
(with conveyor belts), for example.
If you unintentionally select “N” while driving
(faster than 1 mph (2 km/h)), you can also shift
back to “D” without pressing the brake pedal.
For safety reasons, the vehicle cannot be locked
when the transmission is in the "N” gear.
“p” (Park) gear
The vehicle is secured from rolling away by the
parking lock when in the “P” gear.
If you cannot shift out of “P”, for example be-
cause the vehicle has no power, you may need to
use the emergency release for the parking lock
=>page 85.
Selecting a driving program
Various driving programs can be selected when in
the “D” gear. The programs influence when the
transmission shifts and how the accelerator ped-
al responds.
The selected driving program is displayed in the
instrument cluster.
— D (Drive): Normal driving mode
—S (Sport): Sporty driving mode
If you select the Dynamic mode in Audi drive se-
lect*, the “S” driving program will be activated.
When the ignition is switched off, the driving pro-
gram may be reset to “D”.
To switch between the current driving program
and “S”, push the selector lever toward the rear.
Z\ WARNING
— Before starting to drive, check if the desired
gear is displayed next to the selector lever.
— Always secure your vehicle from rolling
away. Press the brake pedal or shift to “P”.
When leaving the vehicle, also set the park-
ing brake.
— Power is still transmitted to the wheels
when the engine is running at idle. To pre-
vent the vehicle from “creeping”, you must
keep your foot on the brake in all selector
lever positions (except "P" and "N") when
the engine is running.
—To reduce the risk of an accident, do not
press the accelerator pedal when changing
gears if the vehicle is stationary and the en-
gine is running.
— Never select the “R" or "P” gears while driv-
ing. Doing so could cause an accident.
— The vehicle can roll even if the ignition is
switched off.
@ Tips
If you shift between “D” and “R” within one
second, you do not need to press the brake
pedal. This makes it possible to “rock” if it is
stuck, for example.
83
Page 98 of 280
Driving dynamic
Driving dynamic
Audi drive select
Introduction
Applies to: vehicles with Audi drive select
Drive select makes it possible to experience dif
ferent types of vehicle settings in one vehicle.
With different driving modes, the driver can
switch the setting, for example from sporty to
comfortable. In the individual* mode, the set-
tings can be adjusted to your personal preferen-
ces. This makes it possible to combine settings
such as a sporty drivetrain setting with light
steering.
Selecting the driving mode
Applies to: vehicles with Audi drive select
The sie button is located above the selector lever
in the center console.
> Press the 4a button repeatedly until the de-
sired mode appears in the instrument cluster or
center display, or:
> Select on the home screen: VEHICLE > Audi
drive select.
You can change the driving mode when the vehi-
cle is stationary or while driving. If traffic per-
mits, briefly remove your foot from the accelera-
tor pedal after changing modes so that the mode
you have selected will be activated for the drive
system.
offroad - Provides assistance when driving off-
road. The vehicle will exit this mode after the ig-
nition is switched off.
comfort - Provides a comfort-oriented vehicle
setup and is suited for long drives on highways.
auto - Provides an overall comfortable yet dy-
namic driving feel and is suited for everyday use.
dynamic - Gives the driver a sporty driving feel
and is suited to a sporty driving style. The “S”
driving program is selected on vehicles with an
automatic transmission
individual > page 96.
96
G) Tips
Certain vehicle settings will be reset when the
ignition is switched off.
Adjusting the “individual” mode
Applies to: vehicles with Audi drive select
You can adjust details about the vehicle settings.
> Select on the home screen: VEHICLE > Audi
drive select.
> Press individual %.
The equipment in your vehicle will determine
which settings you can adjust.
Drive
The drive system will react to accelerator pedal
moves more quickly or in a more balanced man-
ner. The shift points are located in higher or low-
er engine speed ranges on vehicles with automat-
ic transmissions.
Depending on the equipment, certain driver as-
sistance systems can also become more sporty or
efficient.
Steering
The power steering will adapt. Indirect steering
that moves easily is especially suited to long
drives on highways.
Suspension
The suspension adjusts to be tighter or more
comfort-oriented when it comes to compensat-
ing for uneven spots on the road.
Engine sound
The engine sound adapts and can be subtle to
sporty.
Suspension
Adaptive dampers
Applies to: vehicles with adaptive dampers
The adaptive dampers are an electronically-con-
trolled damping system. The firmness of the sus-
pension will adapt to the driving conditions and >
Page 120 of 280
Driver assistance
ZA WARNING
Follow the safety precautions and note the
limits of the assist systems, sensors, and
cameras > page 104.
Adjusting the adaptive cruise assist
Applies to: vehicles with adaptive cruise assist
You can adjust the adaptive cruise assist to your
own preferences. The settings depend on the ve-
hicle equipment.
> Applies to: MMI: Select on the home screen:
VEHICLE > Driver assistance > Adaptive cruise
assist.
Possible settings:
Applies to: vehicles without Audi drive select
Driving program - Depending on the selected
driving program and distance, the vehicle han-
dling will be adjusted from Sport to Moderate.
Applies to: vehicles with Audi drive select
Vehicle handling will be adjusted based on the
set distance and the selected Audi drive select
mode > page 96.
Store last distance - The last distance that was
set will be stored after the ignition is switched
off. If the distance is not stored, distance [fz
(time distance of approximately 1.8 seconds) is
automatically preset every time the ignition is
switched on.
Messages
Applies to: vehicles with adaptive cruise assist
If or fal is displayed when there is a malfunc-
tion, the adaptive cruise assist functions may be
unavailable or limited.
A message that indicates the cause and possible
solution may appear with some displays. The
weather conditions may be too poor or a sensor
may be covered. Clean the area in front of the
sensors > page 105, fig. 87 and try to turn on
the systems again later.
118
If the malfunction remains, drive to an author-
ized Audi dealer or authorized Audi Service Facili-
ty immediately to have the malfunction correct-
ed.
Please take over!
This message appears if the vehicle rolls back
when starting on a slight incline, even though the
systems are active. Press the brake pedal to pre-
vent the vehicle from rolling or starting to move.
G) Tips
Always keep your hands on the steering
wheel. The driver is always responsible for ad-
hering to the regulations applicable in the
country where the vehicle is being operated.
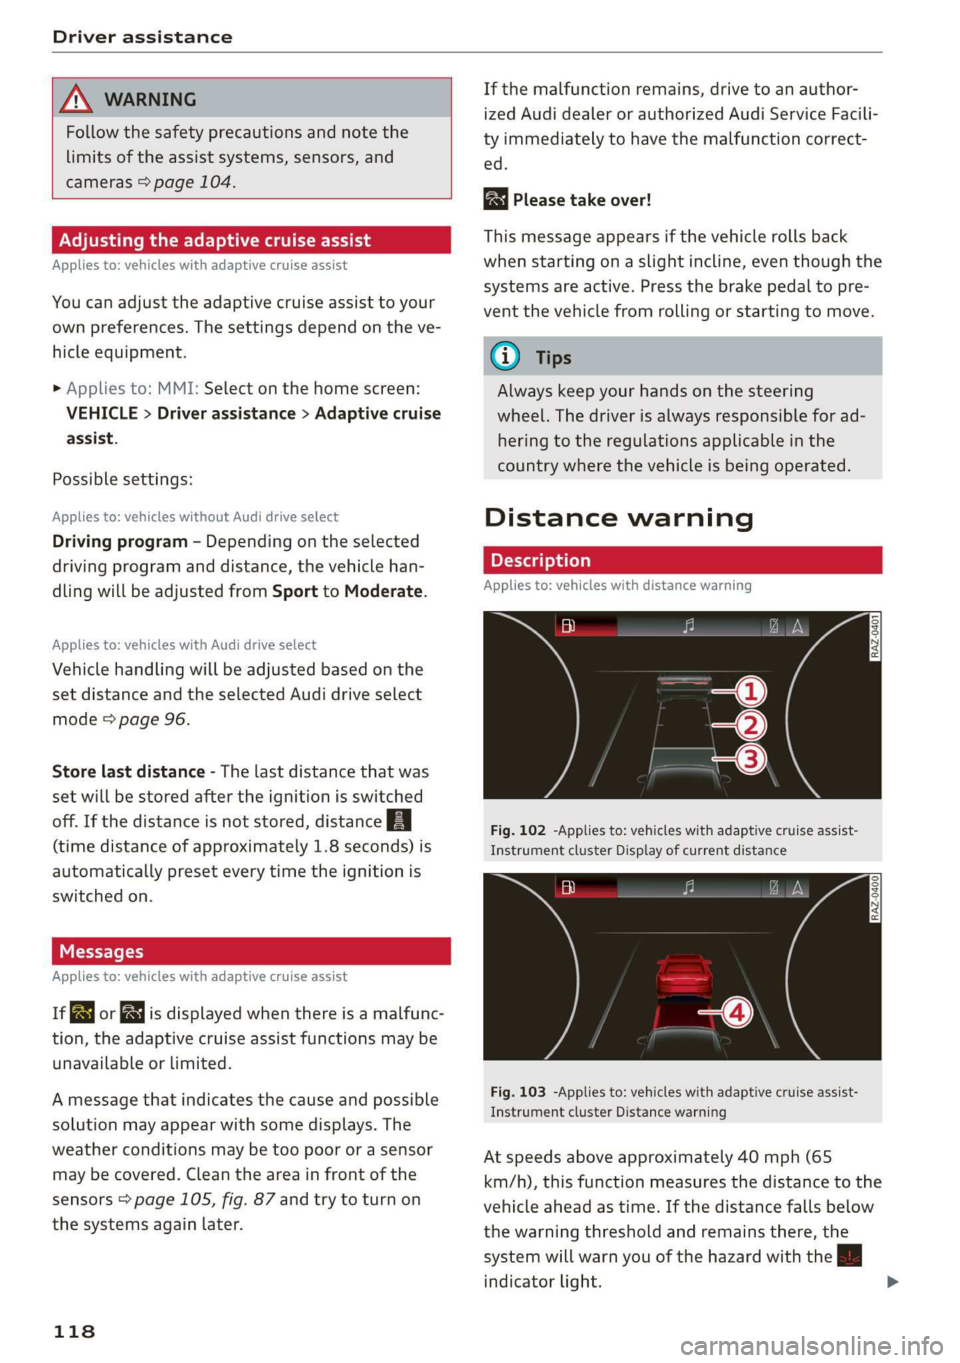
Distance warning
Applies to: vehicles with distance warning
S| 3 1?) IN| Iz jac
Fig. 102 -Applies to: vehicles with adaptive cruise assist-
Instrument cluster Display of current distance
RAZ-0400
Fig. 103 -Applies to: vehicles with adaptive cruise assist-
Instrument cluster Distance warning
At speeds above approximately 40 mph (65
km/h), this function measures the distance to the
vehicle ahead as time. If the distance falls below
the warning threshold and remains there, the
system will warn you of the hazard with the BB
indicator light.
Page 153 of 280
83A012721BA
Telephone
Enable VoLTE
When this function is switched on, Voice over
LTE* will be supported.
Network settings
— Login to mobile phone network: select to log
into your cell phone service provider network
automatically or manually.
— Network selection: Requirement: the data
module must be switched on and Login to mo-
bile phone network must be set to Manual. Se-
lect a network manually from the list of availa-
ble networks at the present location.
Car phone serial number (IMEI):
Applies to: vehicles with car phone
The serial number (IMEI) of your car phone is dis-
played.
G) Tips
— Several mobile devices can be paired with
the MMI, but only two* mobile devices can
be actively connected.
—To delete all paired Bluetooth devices, the
Bluetooth function can be reset to the fac-
tory default settings > page 196.
Directory settings
Applies to: vehicles with telephone
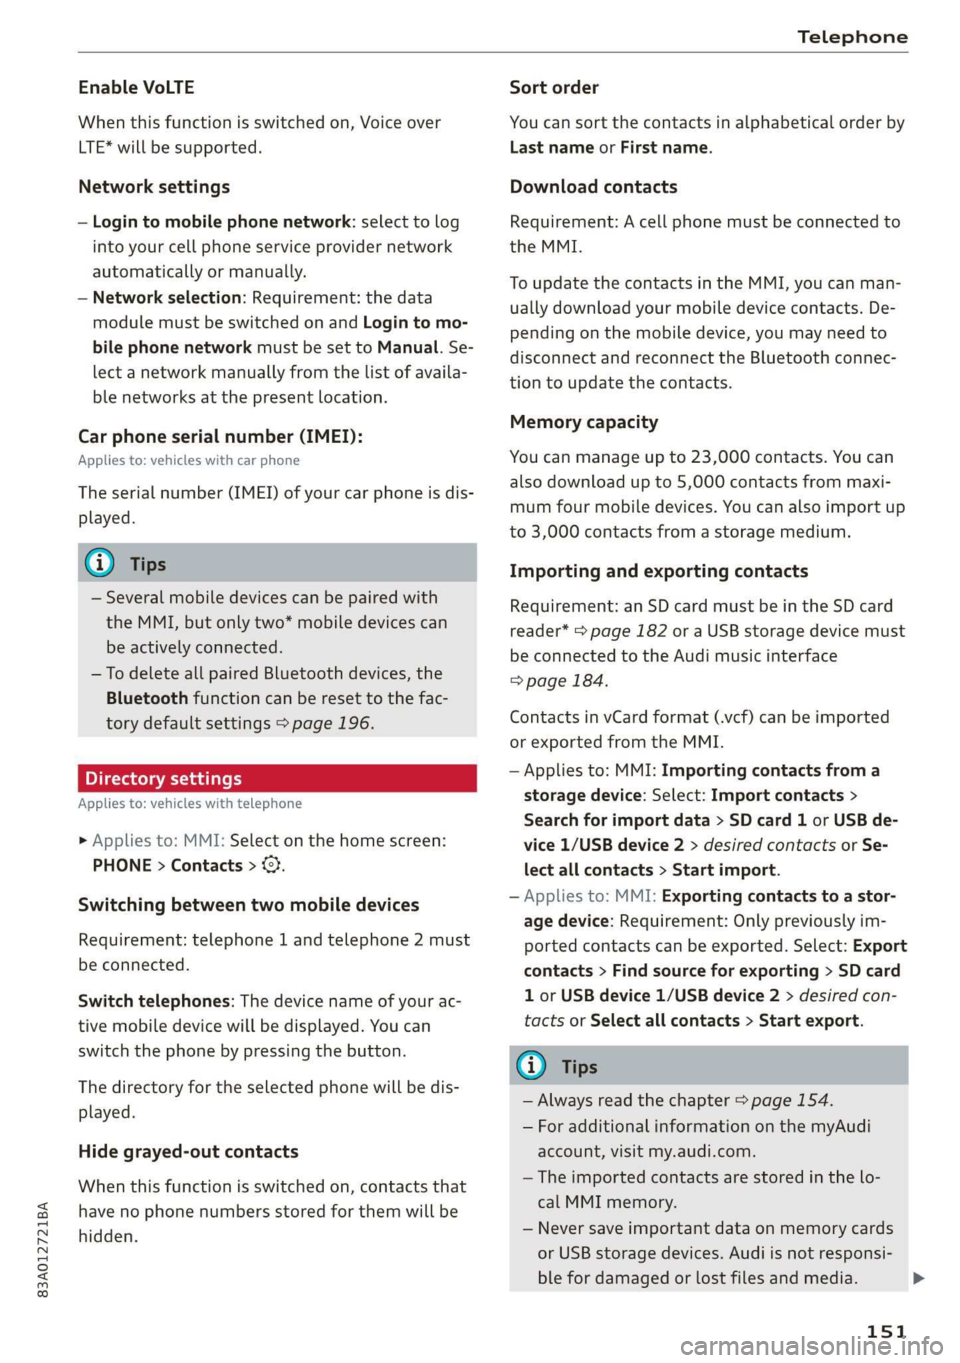
> Applies to: MMI: Select on the home screen:
PHONE > Contacts > ©).
Switching between two mobile devices
Requirement: telephone 1 and telephone 2 must
be connected.
Switch telephones: The device name of your ac-
tive mobile device will be displayed. You can
switch the phone by pressing the button.
The directory for the selected phone will be dis-
played.
Hide grayed-out contacts
When this function is switched on, contacts that
have no phone numbers stored for them will be
hidden.
Sort order
You can sort the contacts in alphabetical order by
Last name or First name.
Download contacts
Requirement: A cell phone must be connected to
the MMI.
To update the contacts in the MMI, you can man-
ually download your mobile device contacts. De-
pending on the mobile device, you may need to
disconnect and reconnect the Bluetooth connec-
tion to update the contacts.
Memory capacity
You can manage up to 23,000 contacts. You can
also download up to 5,000 contacts from maxi-
mum four mobile devices. You can also import up
to 3,000 contacts from a storage medium.
Importing and exporting contacts
Requirement: an SD card must be in the SD card
reader* > page 182 or a USB storage device must
be connected to the Audi music interface
> page 184.
Contacts in vCard format (.vcf) can be imported
or exported from the MMI.
— Applies to: MMI: Importing contacts from a
storage device: Select: Import contacts >
Search for import data > SD card 1 or USB de-
vice 1/USB device 2 > desired contacts or Se-
lect all contacts > Start import.
— Applies to: MMI: Exporting contacts to a stor-
age device: Requirement: Only previously im-
ported contacts can be exported. Select: Export
contacts > Find source for exporting > SD card
1 or USB device 1/USB device 2 > desired con-
tacts or Select all contacts > Start export.
G) Tips
— Always read the chapter > page 154.
— For additional information on the myAudi
account, visit my.audi.com.
— The imported contacts are stored in the lo-
cal MMI memory.
— Never save important data on memory cards
or USB storage devices. Audi is not responsi-
ble for damaged or lost files and media.
151
>
Page 159 of 280
83A012721BA
Audi connect
— Allow MMI online services: when this function
is switched on, a data connection is automati-
cally established in order to use Audi connect
Infotainment services.
— Allow Wi-Fi devices: when this function is
switched on, you can allow or deny Internet
connections.
Access point
The connection is configured automatically based
on the SIM card being used. The following values
can be changed. You can obtain more information
from your cell phone service provider.
— Access Point Name (APN): The access point de-
pends on the cell phone service provider and is
assigned automatically.
— User name: your cell phone service provider as-
signs the user name for your online profile.
— Password: your cell phone service provider as-
signs the password for your online profile.
— Apply settings: saves the changed settings.
— Reset configuration: resets the connection set-
tings.
Data usage counter
Your current data usage is displayed.
— Reset counter: you can reset your usage statis-
tics to zero.
— Warning limit: you can set a warning limit for
your data usage (GB/MB).
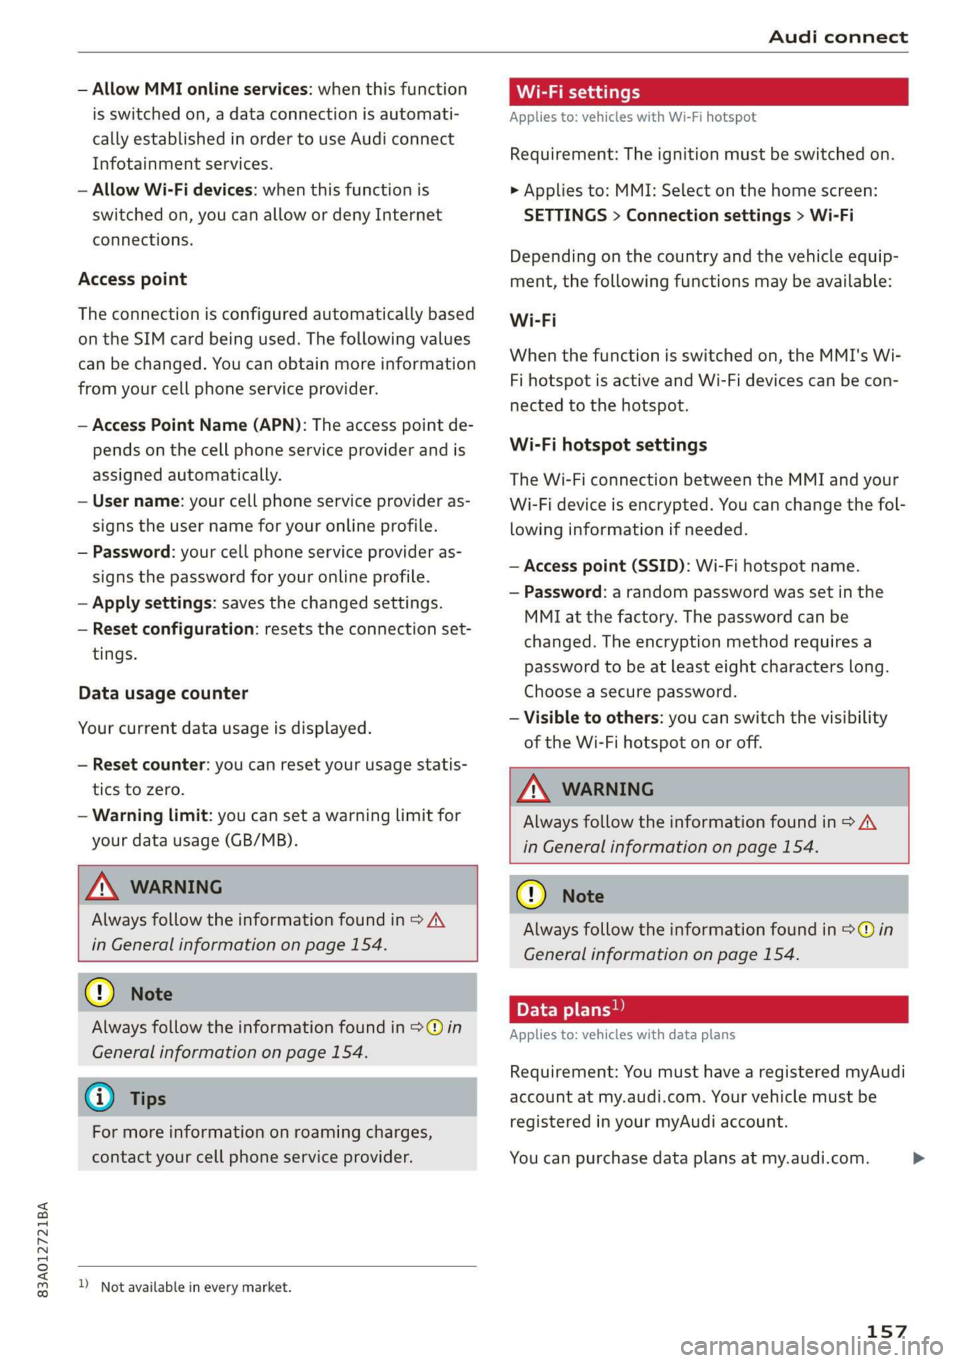
Wi-Fi settings
Applies to: vehicles with Wi-Fi hotspot
Requirement: The ignition must be switched on.
> Applies to: MMI: Select on the home screen:
SETTINGS > Connection settings > Wi-Fi
Depending on the country and the vehicle equip-
ment, the following functions may be available:
Wi-Fi
When the function is switched on, the MMI's Wi-
Fi hotspot is active and Wi-Fi devices can be con-
nected to the hotspot.
Wi-Fi hotspot settings
The Wi-Fi connection between the MMI and your
Wi-Fi device is encrypted. You can change the fol-
lowing information if needed.
— Access point (SSID): Wi-Fi hotspot name.
— Password: a random password was set in the
MMI at the factory. The password can be
changed. The encryption method requires a
password to be at least eight characters long.
Choose a secure password.
— Visible to others: you can switch the visibility
of the Wi-Fi hotspot on or off.
Z\ WARNING
Always follow the information found in > A,
in General information on page 154.
ZA WARNING
Always follow the information found in > A\
in General information on page 154.
@) Note
Always follow the information found in >@ in
General information on page 154.
G) Tips
For more information on roaming charges,
contact your cell phone service provider.
))_ Not available in every market.
@) Note
Always follow the information found in >@ in
General information on page 154.
Applies to: vehicles with data plans
Requirement: You must have a registered myAudi
account at my.audi.com. Your vehicle must be
registered in your myAudi account.
You can purchase data plans at my.audi.com.
157
Page 179 of 280
83A012721BA
Radio
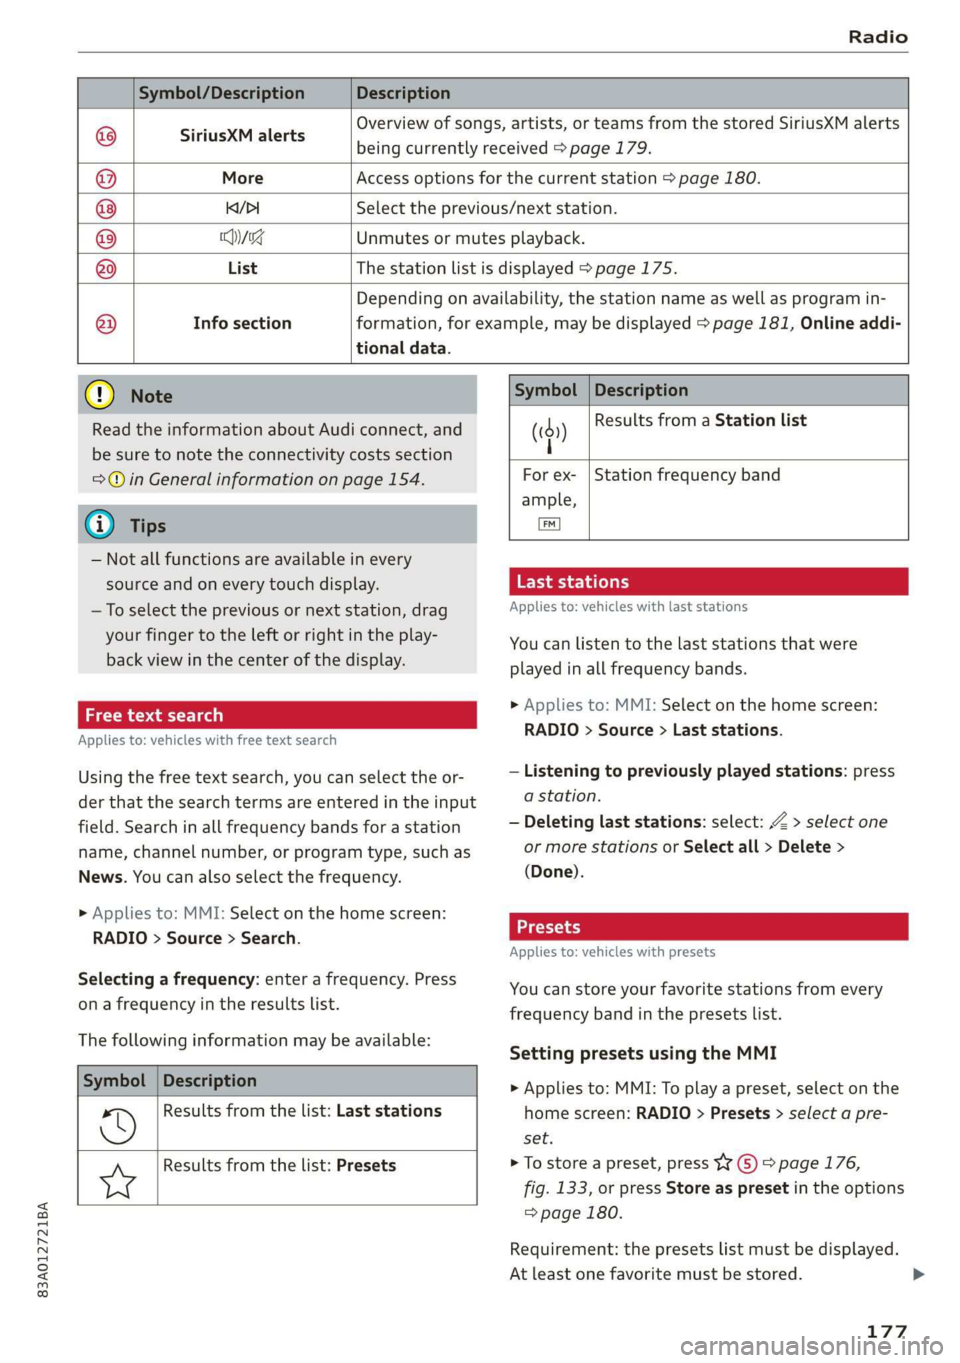
Symbol/Description Description
SiriusXM alerts
Overview of songs, artists, or teams from the stored SiriusXM alerts
being currently received > page 179.
More Access options for the current station > page 180.
KY/PI Select the previous/next station.
Hyg Unmutes or mutes playback.
List The station list is displayed > page 175.
®
|O|O/@|O|
©
Info section
tional data.
Depending on availability, the station name as well as program in-
formation, for example, may be displayed > page 181, Online addi-
@) Note
Read the information about Audi connect, and
be sure to note the connectivity costs section
=@ in General information on page 154.
@ Tips
— Not all functions are available in every
source and on every touch display.
—To select the previous or next station, drag
your finger to the left or right in the play-
back view in the center of the display.
Free text search
Applies to: vehicles with free text search
Using the free text search, you can select the or-
der that the search terms are entered in the input
field. Search in all frequency bands for a station
name, channel number, or program type, such as
News. You can also select the frequency.
> Applies to: MMI: Select on the home screen:
RADIO > Source > Search.
Selecting a frequency: enter a frequency. Press
on a frequency in the results list.
The following information may be available:
Symbol
©
Description
Results from the list: Last stations
Results from the list: Presets
Ww
Symbol | Description
4 Results from a Station list
(0)
|
For ex- | Station frequency band
ample,
i]
Taichi telat
Applies to: vehicles with last stations
You can listen to the last stations that were
played in all frequency bands.
> Applies to: MMI: Select on the home screen:
RADIO > Source > Last stations.
— Listening to previously played stations: press
a station.
— Deleting last stations: select: Z > select one
or more stations or Select all > Delete >
(Done).
Applies to: vehicles with presets
You can store your favorite stations from every
frequency band in the presets list.
Setting presets using the MMI
> Applies to: MMI: To play a preset, select on the
home screen: RADIO > Presets > select a pre-
set.
> To store a preset, press WY © > page 176,
fig. 133, or press Store as preset in the options
=> page 180.
Requirement: the presets list must be displayed.
At least one favorite must be stored. >
177
Page 180 of 280
Radio
> To delete a preset, select: Z > select one or
more stations or Select all > Delete > (Done).
Requirement: the presets list must be displayed.
At least two favorites must be stored.
> To move a preset, press Z. Touch the symbol
and move the entry to the desired position.
Press Done.
Smart favorites
Applies to: vehicles with smart favorites
SiriusXM channels are stored in the presets as
smart favorites with the »% symbol. After switch-
ing the ignition and the MMI on, the smart favor-
ites store radio programs at a specific time. Press
ona smart favorite. You have the following op-
tions:
— Pause/Start: press |I/D.
— Selecting the previous or next track: press !I<
or >i.
— Going to the beginning of a recording or live
program: press and hold !I< or >i.
— Setting the playback point: you can adjust the
playback position using the knob.
— Going to a live program: press Lvé).
Applies to: vehicles with Audi connect Infotainment and on-
line radio
You can listen to various radio stations or pod-
casts on the Internet using online radio.
Requirement: The MMI must be connected to the
Internet > page 154, Audi connect.
> Applies to: MMI: Select on the home screen:
RADIO > Source > Online.
The following functions are available in the on-
line radio menu:
— Search: you only can search for online radio sta-
tions in this search. You can search for station
names and categories.
— Last played station: the station that was
played last will start playing.
— Top stations: select a station from the list of
popular online radio stations.
178
— Filtering the list: Select: © > (select a catego-
ry) > select a station name. The following cate-
gories are available:
— Countries
— Genres
— Languages
Other categories may be available depending on
the country and vehicle equipment.
Podcasts
— Applies to: MMI: Select on the home screen:
RADIO > Source > Online > Podcasts.
The following functions are available:
— Listening to a podcast: select: ag podcast >a
podcast episode.
— Search: press 2.
The following functions are available in the pod-
cast playback view:
— Displaying the podcast episodes: press List.
— Starting or stopping the podcast: press P orl.
— Previous or next podcast: press K/D\, or use one
finger to drag the center of the display to the
left or right.
— Changing the playback point: you can adjust
the playback position using the knob.
— Displaying the online radio menu: press 58.
— Switching to radio: press Source. The sources
in the Radio menu are displayed.
Podcast favorites
You can store podcasts in the Podcast favorites.
Storing a podcast favorite: requirement: the
podcast playback view must be displayed. Press
yy, or press Save podcast in the options
=> page 180, Options.
Requirement: at least one entry must be stored
in the Podcast favorites.
— Listening to a podcast favorite: press on the
desired podcast.
— Browsing podcast favorites: use your finger to
swipe to the Left or right.
— Displaying all podcast favorites: press All.
— Deleting a favorite: Select: All > Z > select one
or more podcasts or Select all > Delete >
(Done).
Page 183 of 280
83A012721BA
Radio
— First category, then channel name: the chan-
nels are sorted by their category and then by
their channel names.
SiriusXM category filter
The stations shown in the station list can be fil-
tered by your personal preferences and by pro-
gram type. The program categories that you can
select depend on what is offered by your provid-
er. When the Unsubscribed channels function is
switched off, unsubscribed channels will be hid-
den.
SiriusXM subscription status
This option is available when your subscription is
about to expire or has already expired. The expi-
ration date for your license is displayed.
Call SiriusXM: the telephone number and radio
ID of your satellite radio provider are displayed.
To call your satellite radio provider using the
MMI, press Call SiriusXM.
Online additional data
Applies to: vehicles with Audi connect Infotainment
Requirement: The MMI must be connected to the
Internet > page 155.
Troubleshooting
The information that follows lists some trouble-
shooting options. They depend on the equip-
ment.
When the function is switched on, additional in-
formation (such as station logos, cover, artist,
track) will be loaded depending on the availabili-
ty from the different providers.
Preferred online radio data rate
Applies to: vehicles with Audi connect Infotainment and on-
line radio
You can set the data rate for online radio
=> page 178.
For optimal sound playback, press High. To re-
duce data usage, press Low.
() Note
Read the information about Audi connect, and
be sure to note the connectivity costs section
=>@) in General information on page 154.
Gi) Tips
Delays may occur when switching automati-
cally between normal frequency bands and
online radio*.
Problem Solution
A station is no longer displayed in the sta-
tion list.
Store the station as a preset in advance. Access the pre-
sets using the presets list > page 177.
Online radio: no playback from online ra-
dio.
Check if a suitable data plan was purchased > page 157.
181