turn signal AUDI Q5 2013 Owners Manual
[x] Cancel search | Manufacturer: AUDI, Model Year: 2013, Model line: Q5, Model: AUDI Q5 2013Pages: 316, PDF Size: 78.89 MB
Page 16 of 316
14 Instruments and warning/indicator lights
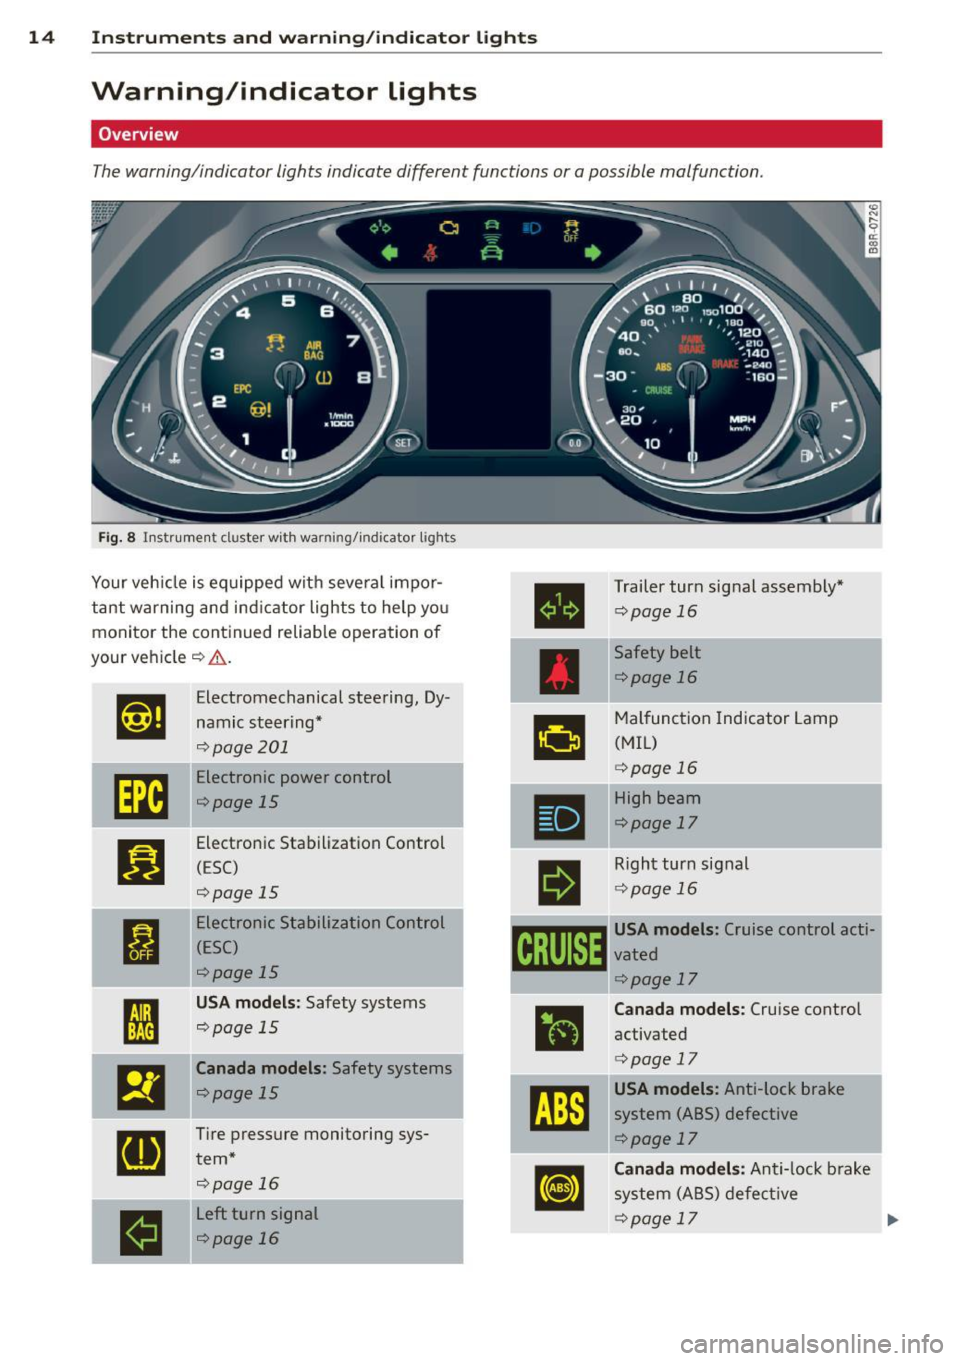
Warning/indicator lights
Overview
The warning/indicator lights indicate differen t func tions or a pos sible malfunction .
Fig. 8 In st rume nt cl us ter with wa rning /in dicato r ligh ts
Your veh icle is equipped with seve ral impor
tant warning and indicator lights to help you monito r the continued reliable operat ion of
your veh icle
¢ .&. .
Et·ff
Electromechanical steering, Dy -
namic steering*
¢ page 201
[m
Electronic power control
¢page 15
Bl
Electronic Stabilization Control
( E SC)
qpage 15
•
Electronic Stabilization Control
(ESC)
¢page 15
fl
USA models: Safety systems
qpage 15 •
El
Canada models: Safety systems
qpage 15
[I]
Tire pressure monitoring sys-
tern*
qpage 16
...
----
II
Left turn signal
r:!) page 16
•
•
11
I
'
I
I I ~ I
•
Trailer turn signal assembly*
~page 16
Safety belt
¢page 16
Malfunction Indicator Lamp
(MIL)
¢ page 16
High beam
¢page 17
Right turn signal
¢page 16
USA models: Cruise control acti-
vated
¢ page 17
Canada models: Cruise control
activated
¢ page 17
USA models: Anti-lock brake
system (ABS) defective
¢ page 17
Canada models: Anti-lock brake
system (ABS) defective
¢page 17
j
Page 18 of 316
16 Instrum ent s and w arn ing /indic ato r light s
blink, then there is a ma lfunction somewhere
in the system.
If the light does not illuminate
when you switch the ignition on, this also
means there is a malfunction.
A WARNING
If you have a malfunction in the safety sys
tems, contact your author ized Audi dealer
immediately. Otherw ise the safety sys
tems may not work properly in an acci
dent.
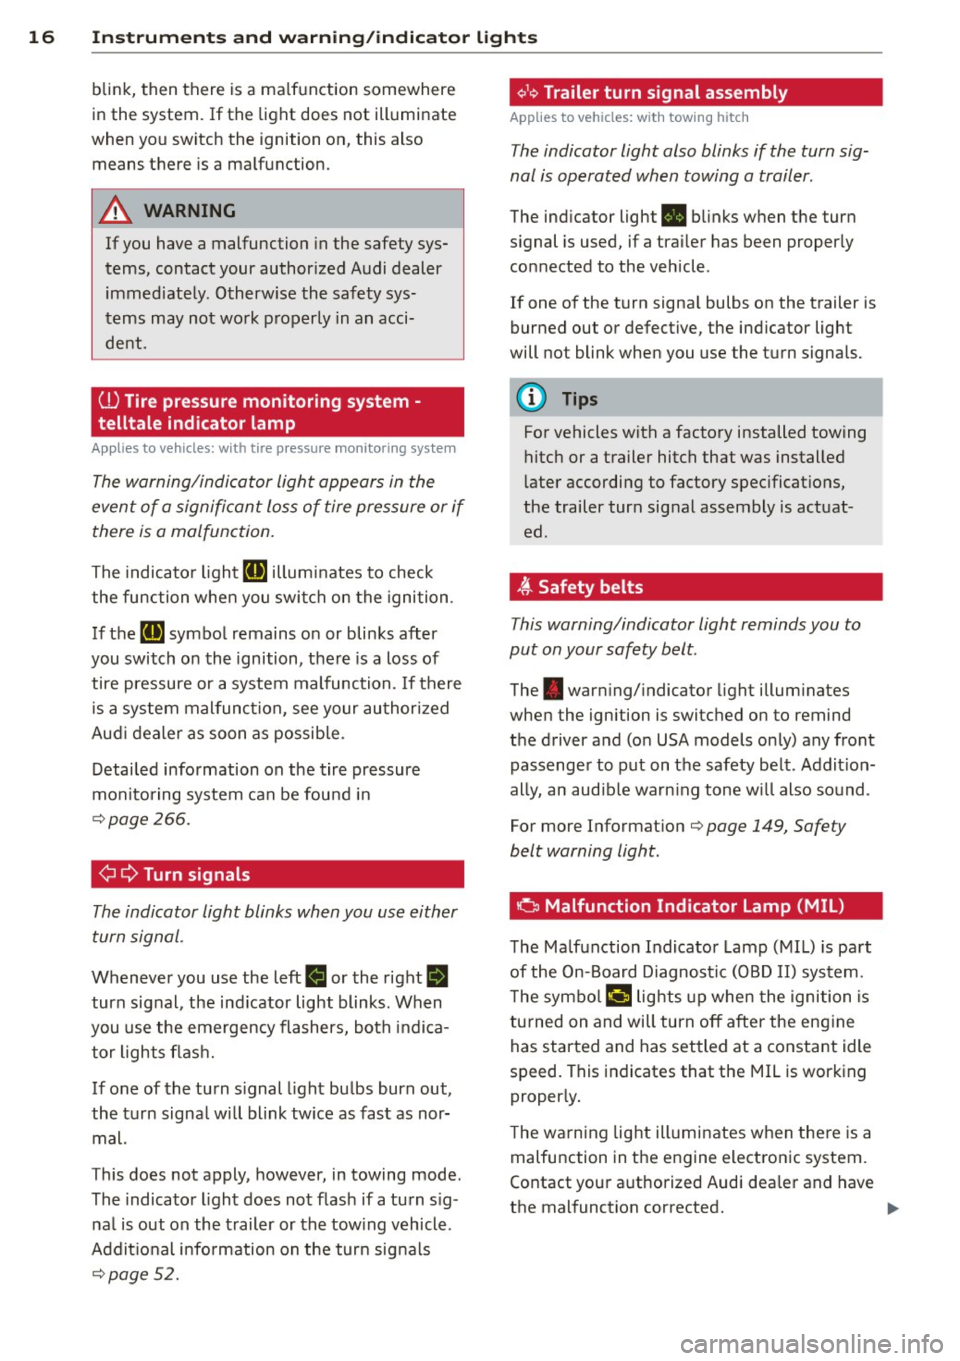
U) Tire pressure monitoring system -
telltale indicator lamp
Appl ies to vehicles: with tire pressure monitoring system
The warning/indicator light appears in the
event of a significant loss of tire pressure or if there is a malfunction.
The indicator light IE illuminates to check
the function when you switch on the ignition.
If the
IE symbol remains on or blinks after
you switch on the ignition, the re is a loss of
tire pressure or a system malfunction.
If there
is a system malfunction, see your authorized
Aud i dealer as soon as possible.
Detai led information on the tire pressure
mon itoring system can be fou nd in
¢page 266.
¢ Q Turn signals
The indicator light blinks when you use either
turn signal.
Whenever you use the left B or the right II
turn signal, the ind icator light blinks. When
you use the emergency flashers, both indica tor lights flas h.
If one of the turn s ignal light bulbs burn out,
the turn signa l wi ll blink tw ice as fast as nor
mal.
This does not apply, however, in towing mode.
The indicator light does no t flash if a turn s ig
nal is out on the trailer or the tow ing vehicle.
Addit ional info rmation on the turn sig nals
¢page 52.
~,1 ¢ Trailer turn signal assembly
Applies to vehicles: with towing hitch
The indicator light also blinks if the turn sig
nal is operated when towing a trailer.
The ind icator light. bli nks when the turn
s ignal is used, if a trailer has been properly
con nected to the vehicle .
If one of the turn signa l bulbs on the trailer is
burned out or defective, the ind icator light
will not blink when you use the turn signals.
(D Tips
For vehicles with a factory installed towing
hitch or a trailer hitch that was installed
l ater according to factory spec ificat ions,
the trailer turn signal assembly is actuat
ed.
,(t Safety belts
This warning/indicator light reminds you to
put on your safety belt.
The . warn ing/ indicator light illum inates
when the ignition is switched on to remind
the driver and (o n USA models only) any front
passenger to put on the safety be lt . Addit ion
ally, an audib le warn ing tone w ill also sound .
For more Informat ion
¢ page 149, Safety
belt warning light.
o Malfunction Indicator Lamp (MIL )
The Ma lfunction Indicator Lamp (MIL) is part
of the On-Board Diagnos tic (OBD II) sys tem.
T he symbo l
(4 lights up when the ignition is
tu rned on and will turn off after the eng ine
has started and has settled at a constant idle
speed. This indicates that the MIL is working
properly.
The warning light ill uminates when the re is a
malfunction in the engine electronic system.
Contact your a uthorized Audi dea ler and have
the malfunction corrected. .,..
Page 22 of 316
20 Driver information display
Driver information
display
Introduction
General notes
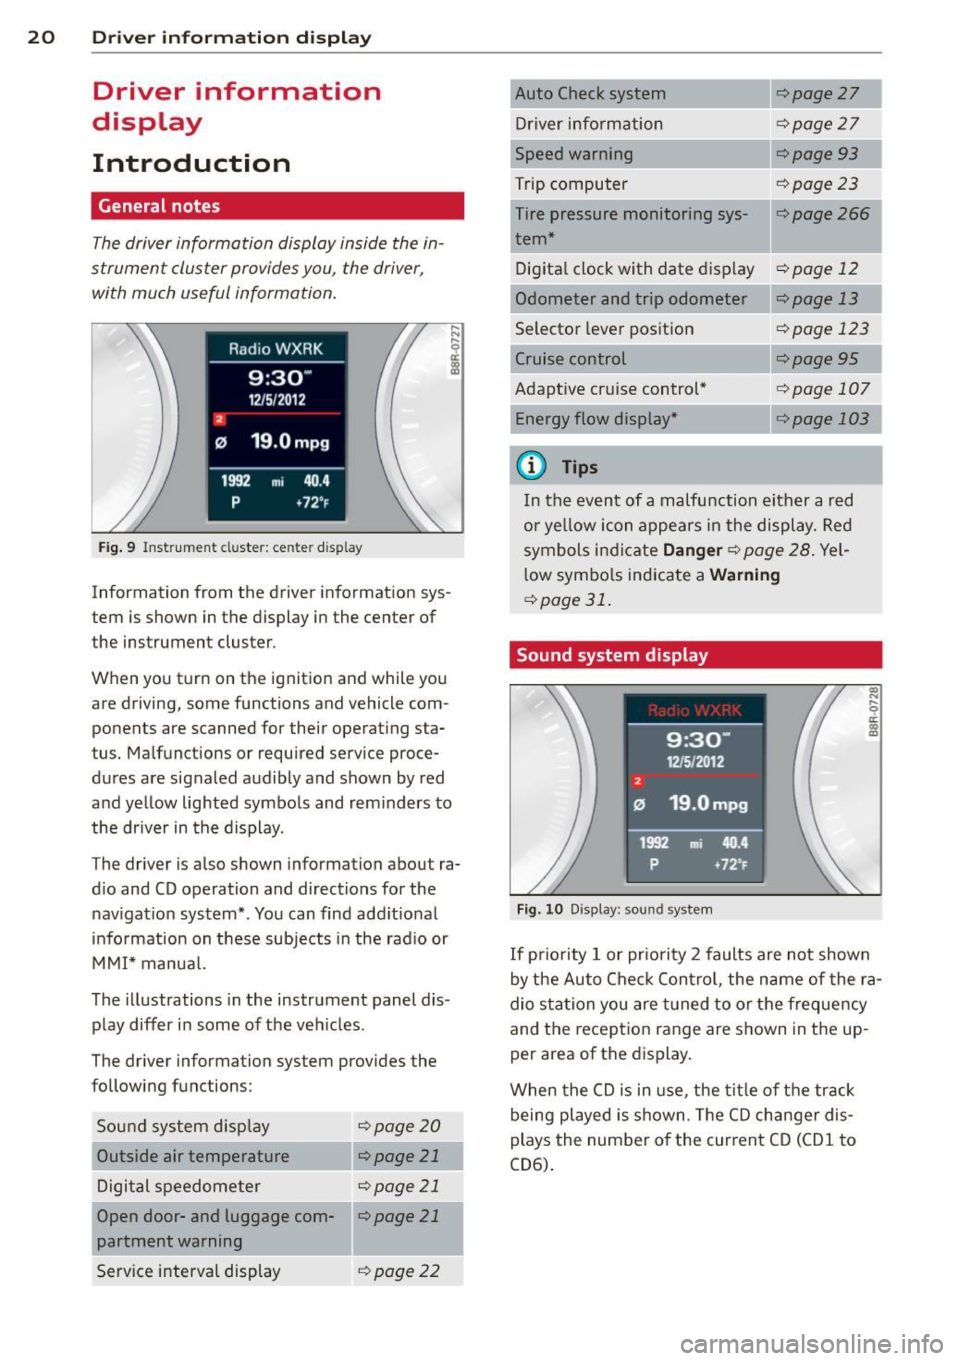
The driver information display inside the in
strument cluster provides you, the driver,
with much useful information.
Fig. 9 Instrument cluster: center display
Information from the driver information sys
tem is shown in the display in the center of
the instrument cluster.
When you turn on the ignition and while you
are driving, some functions and vehicle com
ponents are scanned for their operat ing sta
tus. Malfunctions or required service proce
dures are signaled audibly and shown by red
and yellow lighted symbols and reminders to
the driver in the display.
The driver is also shown information about ra
dio and CD operation and directions for the
navigation system*. You can find additional
information on these subjects in the radio or
MMI* manual.
The illustr ations in the instrument panel dis
play differ in some of the vehicles .
The driver information system provides the
following functions:
Sound system display
¢page20
Outside air temperature r:::;, page 21
Digital speedometer r:::;, page 21
Open door- and luggage com-llr:::;, page 21
partment warning
Service interval display
¢page 22 r:::;,page
27
Driver information r:::;,page 27
Speed warning r:::;,page93
Trip computer r:::;, page 23
Tire pressure monitoring sys-r:::;, page 266 1
tern*
Digital clock with date dis play
r:::;, page 12
Odometer and trip odometer ¢page 13
Selector lever position r:::;, page 123
¢page95
Adaptive cruise control* Energy flow display* ¢page 107
---,.--
r:=;,page 103
¢j) Tips
In the event of a malfunction either a red
or yellow icon appears in the display. Red
symbols indicate
Danger r:::;, page 28. Yel
low symbols indicate a
Warning
¢page 31.
Sound system display
Fig. 10 Display: sound system
(0
"' .... 9 a:
~
If priority 1 or priority 2 faults are not shown
by the Auto Check Control, the name of the ra
dio station you are tuned to or the frequency
and the reception range are shown in the up
per area of the displ ay.
When the CD is in use , the title of the track
being played is shown. The CD changer dis
plays the number of the current CD (CD
1 to
CD6).
Page 29 of 316
Electronic speed
limiter
Your vehicle may be factory equipped with
tires that are rated for a maximum speed of
130 mph (210 km/h) . This is less than the
maximum speed of your vehicle . To reduce the
risk of sudden tire failure and loss of control if
the vehicle is ope rated at excessive speeds,
your veh icle also has an elect ronic speed limit
er. The electronic speed limiter prevents your
ve hicle from going faster than the tire speed
rating. For more information
c::> page 259 .
If the engine control unit rece ives fau lty vehi
cle road speed signals, the Malfunction Ind i
cator Lamp (MIU¢• will illuminate . If this
occurs, contact the nearest authorized Audi
dea ler for assistance.
A WARNING
Always observe the posted speed limits
and adjust your speed to suit prevailing
road, traff ic and weather conditions. Never
drive your vehicle faster than the maxi
mum speed ra ting of the tires insta lled.
Auto Check Control
Introduction
The Auto-Check control monitors the function
of certain veh icle features and components. It
simply makes sure these features and compo
nents are work ing properly . The Auto-Check
control wo rks as long as the ignition is on, as
well as whenever the vehicle is driven .
If a component is malfunctioning or if the need for an urgent repair has been detected,
this wi ll appear in the instrument cluster dis
p lay. You will a lso hear a n aud ible warn ing
tone. The d isplays are color coded in either
red or yellow depending on their level of prior
ity.
A red symbo l means
Dang er, a ye llow symbo l
indi cates
W arning . In certain s ituations, in
formation message for the dr iver appear in
additio n to the red and yellow symbols .
Driver inform ation di spl ay 2 7
Note about autom atic transmi ssion
T he Au to-Che ck Con trol wi ll automa tically
perform a test each t ime you sw itch on the ig
nition. With the selecto r lever in P or N, the
following message appears in the display:
When stationar y appl y brake pedal while se
lect ing gear
When you se lect a d iffe ren t gear (for exam
ple: R, D, etc.), t he mes sage will disappea r
and the Auto-Check f unct ion is displayed .
If there is a malfunct ion, then the malfu nc·
tion message will appear about 15 seconds af
te r you start the vehicle. At the same time you
will hear a wa rning tone.
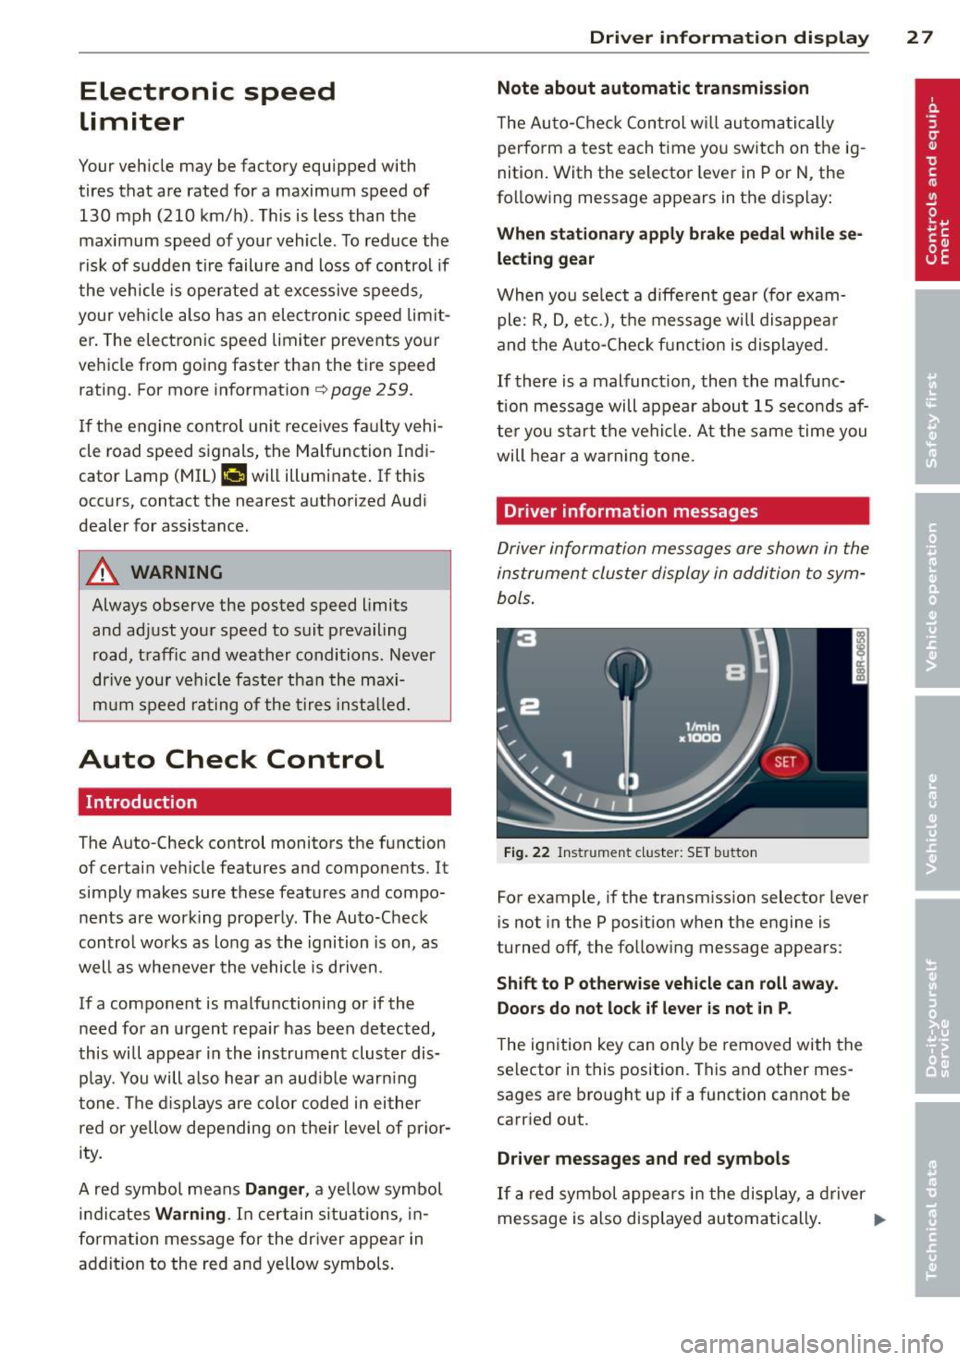
Driver information messages
Driver information messages are shown in the
instrument cluster display in addition to sym
bols .
Fig . 2 2 Instrument cluster: SET b utto n
For example, if the transmission selector lever
is not in the P position when the engine is
turned off, the follow ing message appears :
Shift to P otherwise vehicle can roll away.
Door s do not lock if le ver is not in P .
The ign ition key can only be removed with the
selector in this position. This and other mes
sages are bro ught up if a function cannot be
carr ied out .
Driver messages and red s ymbols
If a red symbol appears in the display, a driver
message is also displayed au toma tically . ..,..
Page 41 of 316
The alarm also turns off when the alarm cycle
has expired.
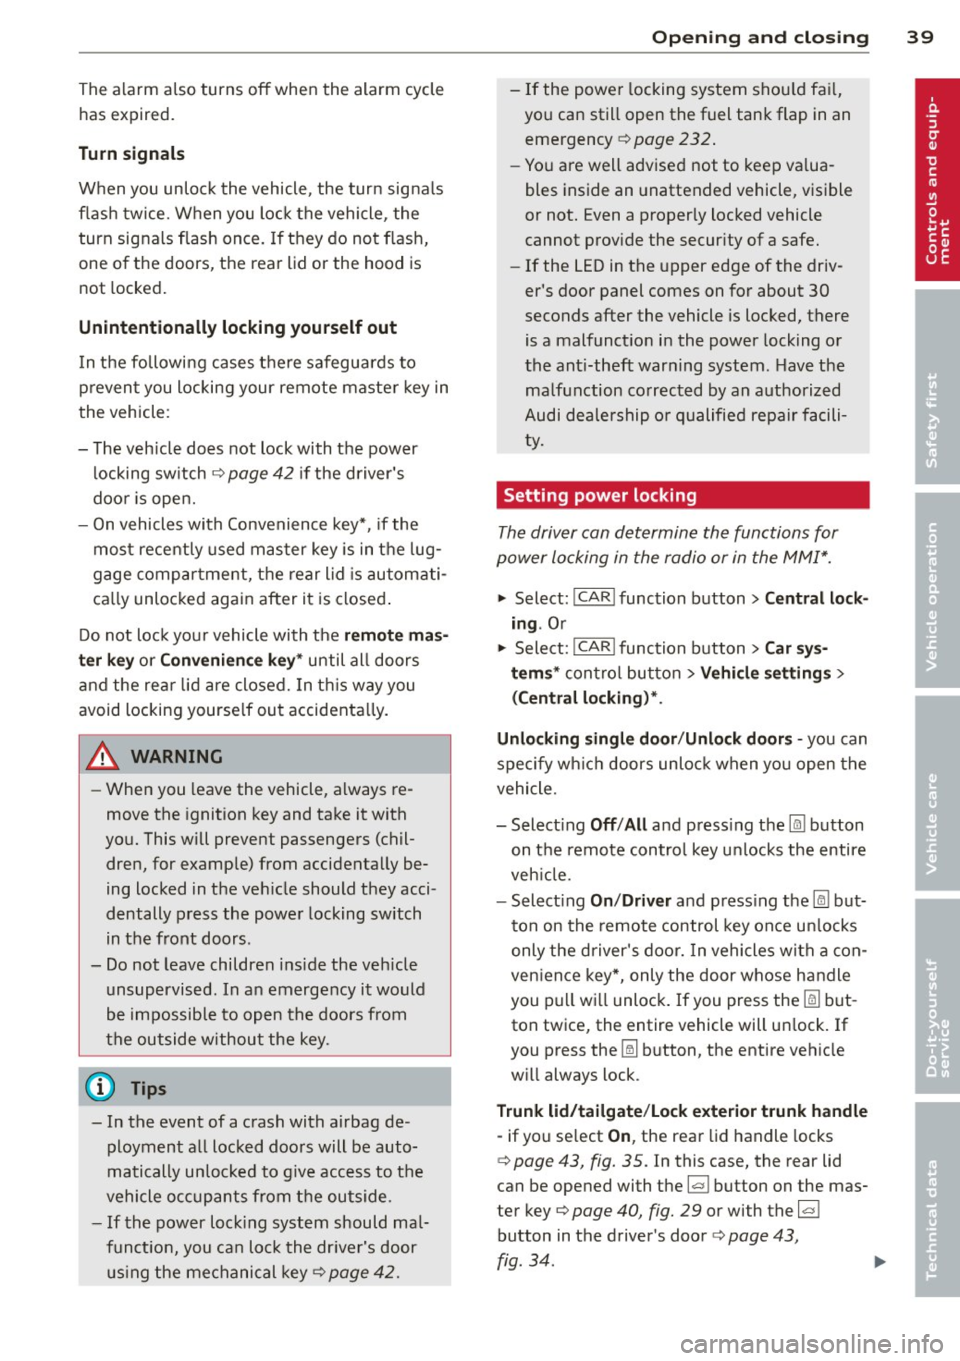
Turn signals
When you unlock the vehicle, the turn signals
flash twice. When you lock the vehicle , the
turn signals flash once. If they do not flash,
one of the doors, the rear lid or the hood is
not locked.
Unintentionally locking yourself out
In the following cases there safeguards to
prevent you locking your remote master key in
the vehicle:
- The vehicle does not lock with the power
locking switch
¢ page 42 if the driver's
door is open.
- On vehicles with Convenience key* , if the
most recently used master key is in the lug
gage compartment, the rear lid is automati
cally unlocked again after it is closed.
Do not lock your vehicle with the
remote mas
ter key
or Convenience key* until all doors
and the rear lid are closed. In this way you
avoid locking yourself out accidentally.
A WARNING
- When you leave the vehicle, always re
move the ignition key and take it with
you. This will prevent passengers (chil
dren, for example) from accidentally be
ing locked in the vehicle should they acci
dentally press the power locking switch
in the front doors .
- Do not leave children inside the vehicle
unsupervised . In an emergency it would
be impossible to open the doors from
the outside without the key.
@ Tips
- In the event of a crash with airbag de
ployment all locked doors will be auto
matically unlocked to give access to the
vehicle occupants from the outside .
-If the power locking system should mal
function, you can lock the driver's door
using the mechanical key
¢ page 42.
-
Opening and closing 39
- If the power locking system should fail,
you can still open the fuel tank flap in an
emergency
¢ page 232.
- You are well advised not to keep valua
bles inside an unattended vehicle, visible
or not. Even a properly locked vehicle
cannot provide the security of a safe.
- If the LED in the upper edge of the driv
er's door panel comes on for about 30
seconds after the vehicle is locked, there
is a malfunction in the power locking or
the anti-theft warning system . Have the
malfunction corrected by an authorized
Audi dealership or qualified repair facili
ty.
Setting power locking
The driver can determine the functions for
power locking in the radio or in the
MM!*.
.,. Select: I CAR ! function button > Central lock
ing .
Or
.,. Select:
,.., I c=- A,...., Rc-, 1 function button > Car sys-
tems* control button > Vehicle settings >
(Central locking)* .
Unlocking single door/Unlock doors -
you can
specify which doors unlock when you open the
vehicle.
- Selecting
Off/All and pressing the [®] button
on the remote control key unlocks the entire
vehicle.
- Selecting
On/Driver and pressing the~ but
ton on the remote control key once unlocks
only the driver's door. In vehicles with a con
venience key*, only the door whose handle
you pull will unlock. If you press the
Iii but
ton twice, the entire vehicle will unlock. If
you press the~ button, the entire vehicle
will always lock .
Trunk lid/tailgate/Lock exterior trunk handle
-if you select On , the rear lid handle locks
¢ page 43, fig. 35 . In this case, the rear lid
can be opened with the
1£1 button on the mas
ter key
¢ page 40, fig. 29 or with the 1£1
button in the driver's door ¢ page 43,
fig. 34.
Page 54 of 316
52 Clear vision
(40 km/h) when a certain steering wheel an
gle is reached or when a turn signal is activat
ed. The area to the side of the vehicle is illu
minated better when turning .
Emergency flashers
The emergency flashers makes other moto
rists aware that you or your vehicle are in an
emergency situation.
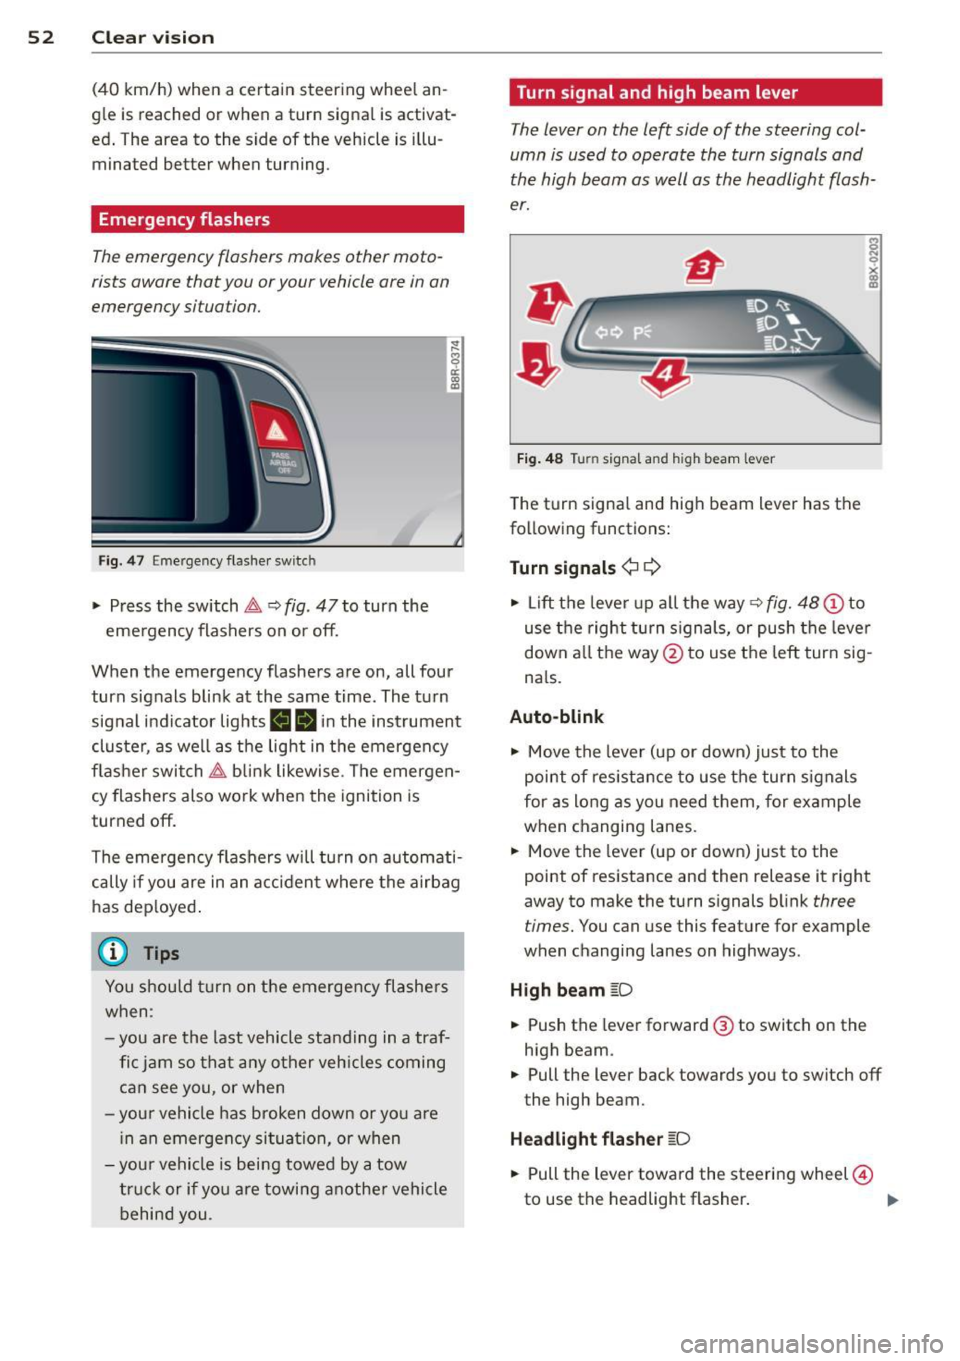
Fig . 4 7 Emer gency flasher switc h
"" Press the switch &-, ¢ fig. 47 to turn the
emergency flashers on or off.
~
9 a: (X) a:,
When the emergency flashers are on, all four
turn signals blink at the same time. The turn signal indicator lights
BB in the instrument
cluster, as well as the light in the emergency
flasher switch &-, blink likewise . The emergen
cy flashers also work when the ignition is
turned off.
The emergency flashers will turn on automati
cally if you are in an accident where the airbag
has deployed.
@ Tips
You should turn on the emergency flashers
when :
-you are the last vehicle standing in a traf
fic jam so that any other vehicles coming
can see you, or when
-your vehicle has broken down or you are
in an emergency situation, or when
-your vehicle is being towed by a tow
truck or if you are towing another vehicle
behind you. Turn signal and high beam lever
The
lever on the left side of the steering col
umn is used to operate the turn signals and
the high beam as well as the headlight flash
er.
Fig. 48 Turn signal and high beam lever
The turn signal and high beam lever has the
following functions:
Turn signals¢ ¢
s
"" '? X co a,
"" Lift the lever up all the way c:> fig. 48 (!) to
use the right turn signals, or push the lever
down all the way@ to use the left turn sig
n a ls.
Auto-blink .,. Move the lever (up or down) just to the
point of resistance to use the turn signals
for as long as you need them, for example
when changing lanes .
.,. Move the lever (up or down) just to the
point of resistance and then release it right
away to make the turn signals blink
three
times.
You can use this feature for example
when changing lanes on highways .
High beam
[D
"" Push the lever forward ® to switch on the
high beam .
.,. Pull the lever back towards you to switch off
the high beam.
Headlight flasher
[D
.. Pull the lever toward the steering wheel@
to use the headlight flasher.
IJJ>
Page 55 of 316
Notes o n these featur es
-The turn signals only work with the ignition
turned on. The indicator lights
II or Ill in
the instrument cluster
¢page 14 also b link.
- After you have turned a corner, the turn sig-
nal switches off automatica lly.
- The
high beam works only when the head
lights are on. The indicator light
II in th e
instrument cluster illuminates when the
high beams are on.
- The
headlight flasher wo rks only as long as
you hold the lever -even if there are no
lights turned on. The indicator light
II in
the instrument cluster illuminates when you
use the headlight flasher.
A WARNING
Do not use the high beam or headlight
flasher if you know that thes e cou ld blind
oncoming traffic.
Interior lights
Front interior lights
-
The front interior lights also contain reading
lights for the driver and passenger .
r ,,,,, , 11111
~8 ,~
G) Gl
,o . . o
I
Fig. 49 Headliner: Fro nt inte rior/rea ding lights
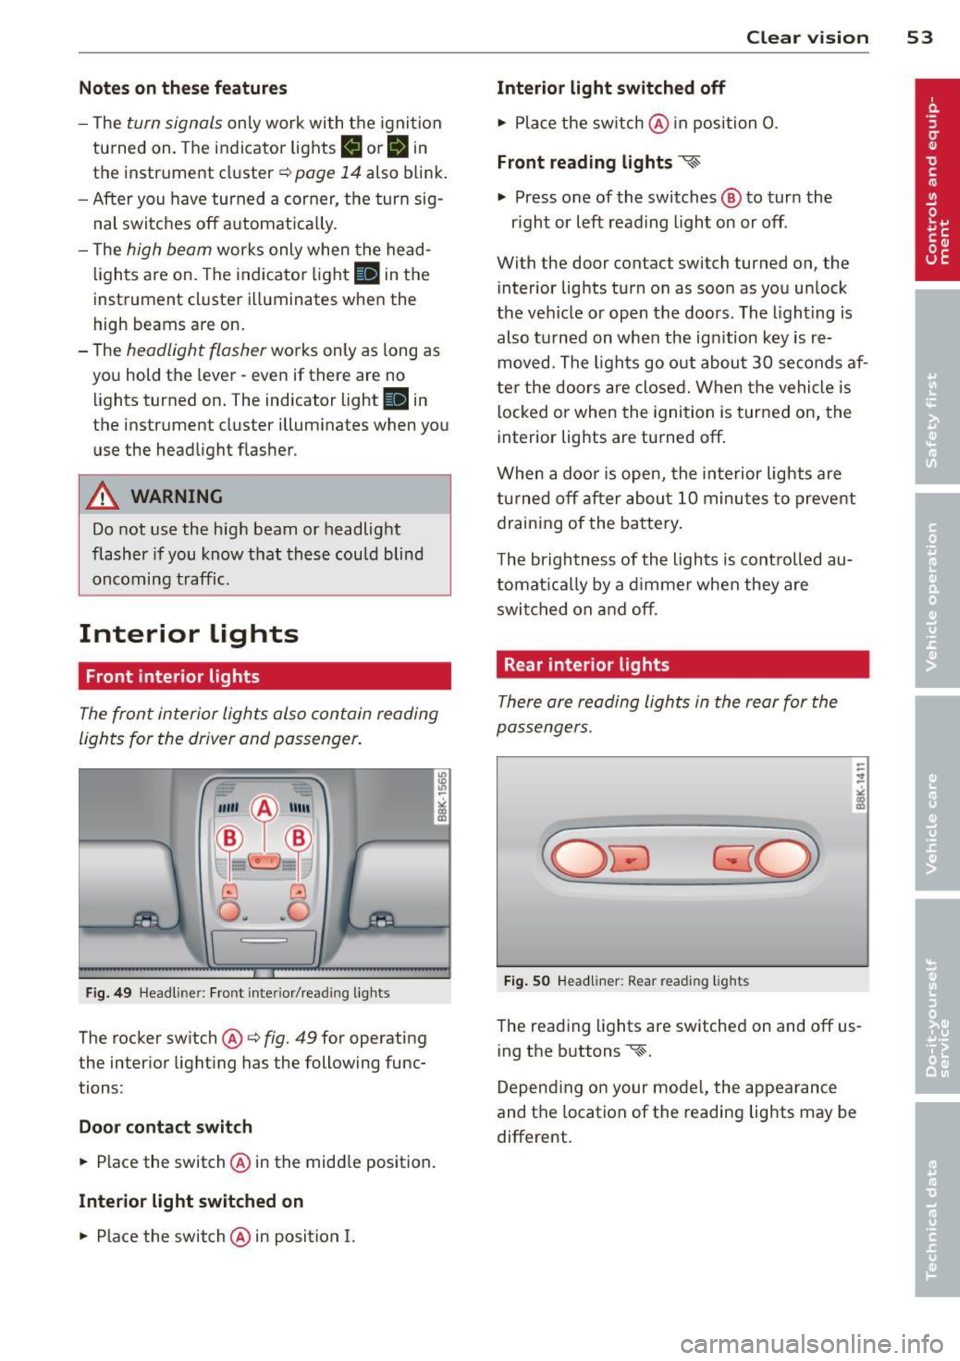
The rocker switch @¢ fig. 49 for operating
the interior lighting has the following func
tions :
Door cont act swi tch
.,. Place the switch @ in the middle position.
Inte rior light switched on
.,. Place the switch@ in posit ion I.
Clear vision 5 3
Interior light switch ed off
.,. Place the sw itch @ in position 0.
Front re ad in g lights ~
.,. Press one of the switches@ to turn the
r ight or left reading light on or off .
With the door contact switch turned on, the
interior lights turn on as soon as you unlock
the vehicle or open the doors. The lighting is
also turned on when the ignition key is re
moved. The lights go out about 30 seconds af
ter the doors are closed. When the vehicle is locked or when the ignition is turned on, the
interior lights are turned off.
When a doo r is open, the interior lights are
tu rned off after about 10 minutes to prevent
draining of the battery .
The brightness of the lights is controlled au
tomat ica lly by a d immer when they are
swi tched on and off.
Rear interior lights
There are reading lights in the rear for the
passengers .
Fig . 50 Headliner: Rear read ing lig hts
The read ing l ights are switched on and off us
ing the buttons ~-
Depending on your model, the appearance
and the location of the reading lights may be
different .
Page 90 of 316
88 On the road
Driver messages
Ignition is on
This message appears and a warn ing tone
sounds if yo u open the dr iver's door when the
ignition is switched on.
No key identified
This message appears when the
I STAR T ENGIN E ST OP !* button is pressed if
there is no master key inside the vehicle or if
the system does not recognize it. For exam
p le, the master key cannot be recognized if it
is co vered by an object (e.g. aluminum brief
case) which screens the radio signal. Electron
ic devices s uch as ce ll phones can also inter
fere with the radio signal.
Press brake pedal to start engine
This message appears if you do not press the
brake peda l to start the engine .
Shift to N or P to start engine
This message appears when attempting to
start the engine if the selector lever for the
automatic transmission is not in the P or N
position . The engine can only be started with
the selector in these posit ions .
!I Is the key in the vehicle ?
This message appears in a veh icle w ith Con
ve nience key* if the master key is removed
from the veh icle with the engine running . If
the master key is no longer in the vehicle, you
cannot switch on the ignition after stopping
the eng ine and you also cannot start the en
g ine again . Moreover, you cannot lock the ve
h icle from the outside with the key .
Shift to P otherwise vehicle can roll away.
Doors do not lock if lever is not in P.
This message appears for safety reasons
a long with a warning signal. It appears if the
selector lever for the automatic transm ission
is not in the P position when switch ing off the
ignition . Move the selector lever to the P pos i
tion, otherwise the veh icle is not sec ured
against rolling away . You also cannot lock the vehicle
using the locking button* on the door
handle or using the remote key.
Turn off ignition before leaving car
Th is message appears if the driver's door is
opened wh ile the ignition is switched on. Al
ways switch off the ignition if you are leaving
the vehicle. See also
r::} page 84 or¢ page 86.
Shift to P and turn off ignition, otherwise ve
hicle can roll away
This message appears if the driver's door is
opened w hile the ignition is switched on and
t h e selecto r lever is not in the P position. Shift
the selecto r lever into the P position and
switch off the ignition when you exi t the vehi
cl e. Otherwise the vehicle could roll. See also
¢ page 84 or¢ page 86.
Convenience key defective! Use ignition lock
This message appears if the engine must be
started or stopped using the ign ition key and
not the
I START ENGINE STOP I* button.
Electro mechanical
parking brake
Operation
The electromechonicol parking broke replaces
the hand broke.
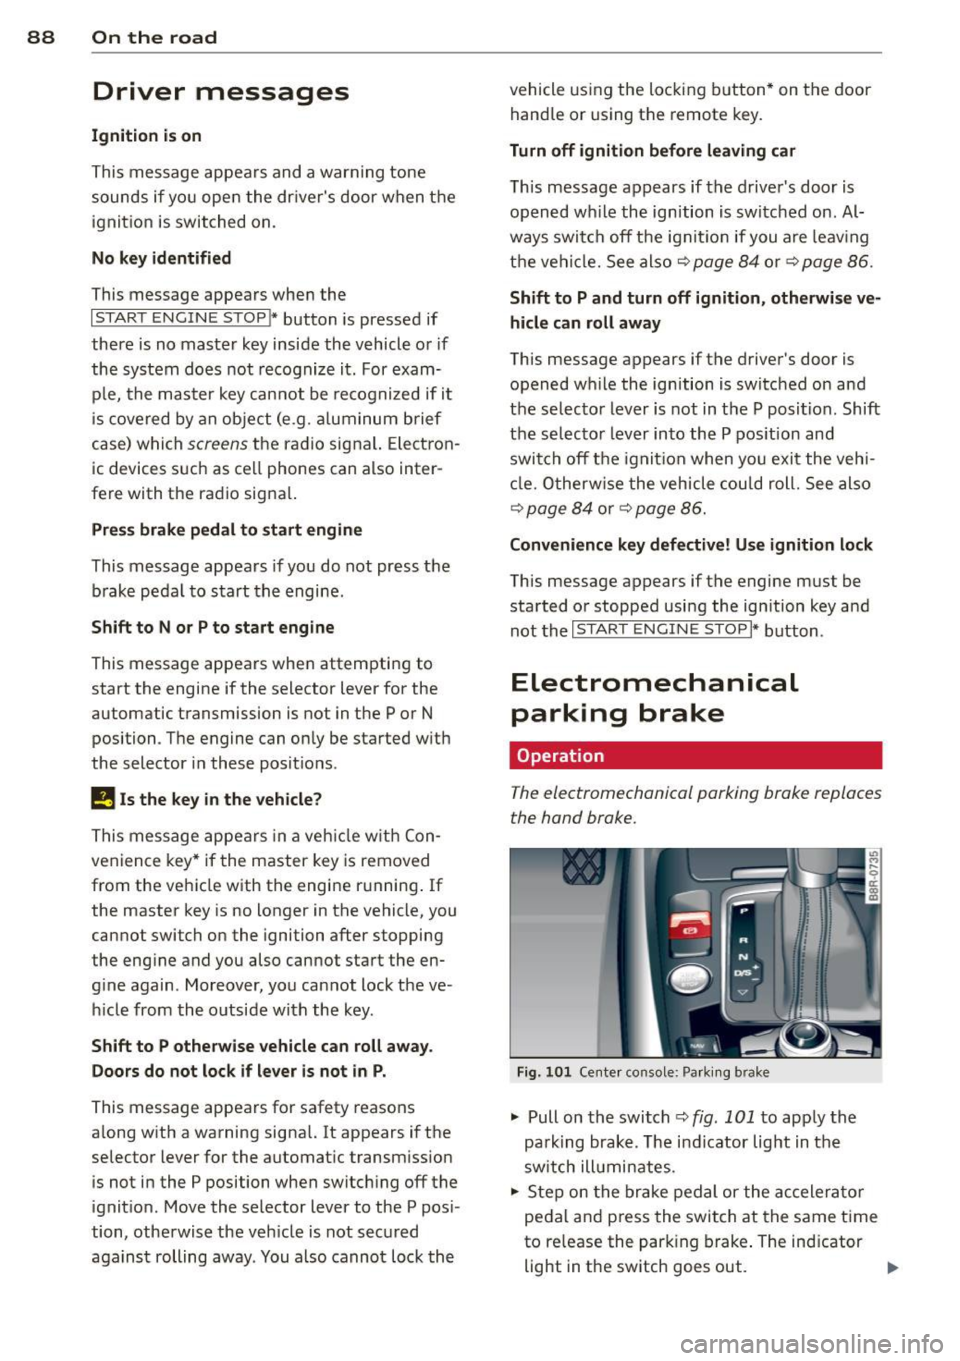
Fig. 101 Cente r console: Park ing b rake
"' Pull on the switch ¢ fig. 101 to apply the
pa rking brake . The indicator light in the
sw itch ill uminates.
"' Step on the brake pedal or the accelerator
pedal and press the swit ch at the same time
to release the park ing brake. The indicator
light in the switch goes out.
Ill>
Page 118 of 316
116 Audi side assist
Audi side assist
Lane change assistant
Description
App lies to vehicles: with Audi side assist
D
Fig. 125 Sensor detectio n ran ge
Fig. 126 Display on the exterio r mirro r
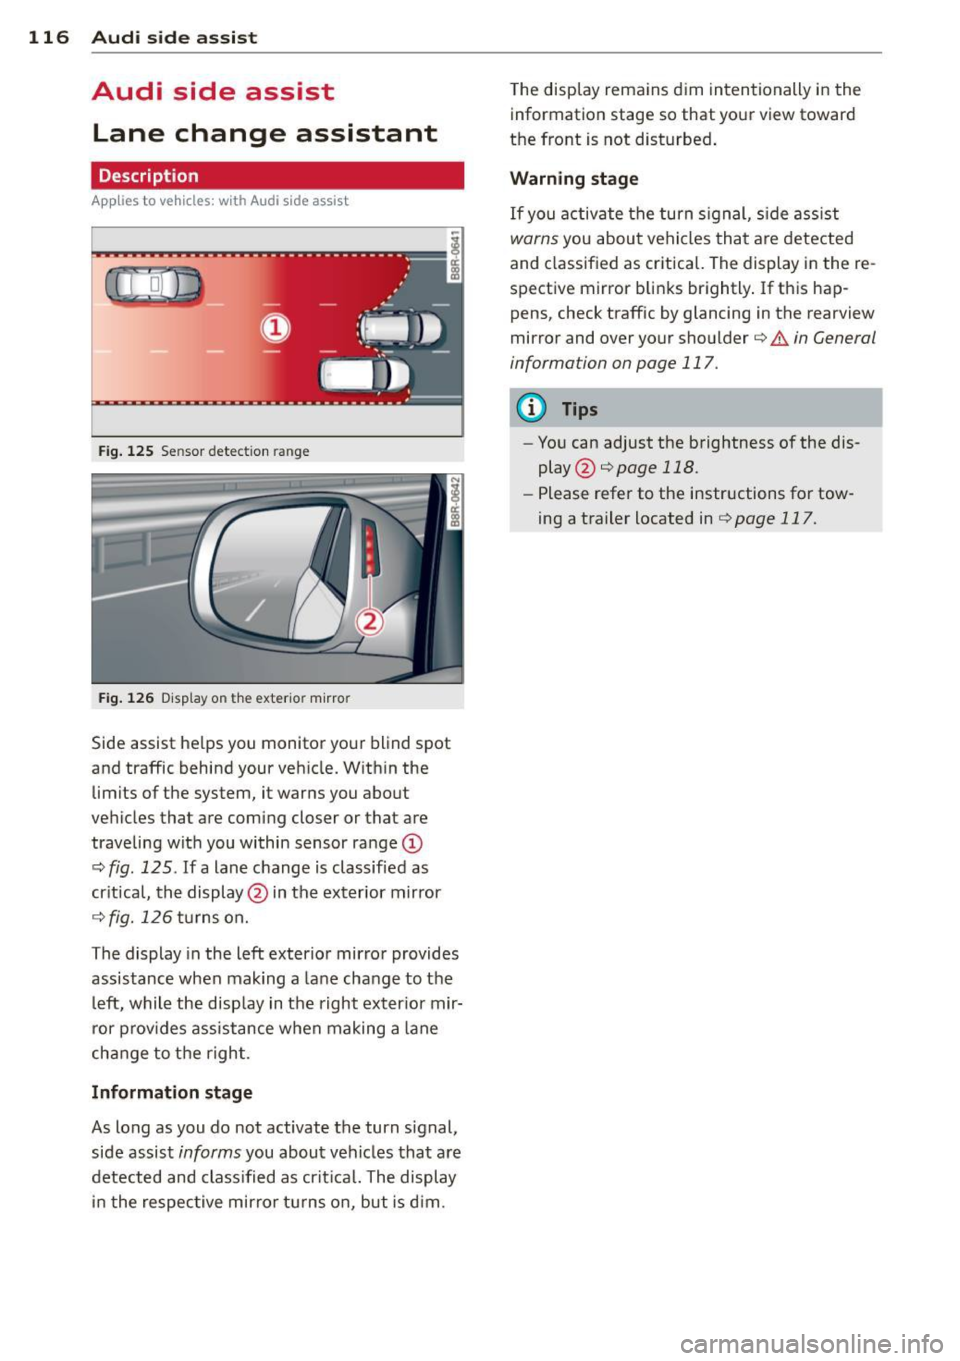
Side assist he lps you monitor your blind spot
and traffic behind your veh icle. W ith in the
limits of the system, it warns you about
vehicles that are coming closer or that are
traveling with you within sensor range
(D
c:> fig . 125 . If a lane change is classified as
critical, the display @in the exterior mirror
¢ fig. 126 turns on.
The display in the left exterior mirror provides
assistance when mak ing a lane change to the
le ft, while the display in the right exter ior mir·
ror provides assistance when making a lane
change to the right.
Information stage
As long as you do not activate the turn signal,
side assist
informs you about vehicles that are
detected and class ified as critical. The display
in the respective mirror turns on, but is d im. T
he display remains dim intentionally in the
information stage so that your view toward
the front is not disturbed .
Warning stage
If you activate the turn s ignal, s ide ass ist
warns you about vehicles that are detected
and class ified as critical. The display in the re
spective mirror blinks brightly . If this hap
pens, check traffic by glancing in the rearview
mirror and over your shoulder c:>
.&. in General
information on page 117.
(D Tips
- You can adjust the brightness of the dis
play @c:>
page 118.
-Please refer to the instructions for tow·
ing a trailer located in
¢ page 117.
Page 120 of 316
118 Audi sid e as sist
- Improper reliance on the side ass ist sys
tem can cause co llisions and serious
persona l injury:
- Never rely only o n side assist when
ch anging lanes.
- Always check rear view m irrors to make
sure that it is safe to change lanes.
- Side ass ist cannot detect a ll vehicles un
der all cond it ions -danger of ac cident!
- Please note that side assist indicates
there are approachi ng veh icles, o r
vehicles in your blind spot, on ly afte r
yo ur vehicle has rea ched a driving speed
of at least 19 mph (30 km/h).
- In certain s ituations, the system may not
f unc tion o r its fun ct io n may be lim ite d.
For example:
- if veh icles are approaching or being left
behind very quick ly . The display may
not turn on in time.
- in poor weather co ndit ions such as
heavy ra in, snow or heavy m ist .
- on very wide lanes, in tight curves or if
there is a rise in the road surface.
Vehicles in the adjacent lane may not be detected because they are outside
of the sensor range.
(D Note
The sensors ca n be displaced by impacts or
damage to the bumpe r, wheel housing and
unde rbody . This can affect the system.
Have your author ized Audi dealer or au
thori zed A udi Se rvice Facility check the ir
function.
@ Tips
- If the window g lass in the driver 's door
o r fro nt passenger's door has been tin t
ed, the disp lay in the exterior mirror may
be misinterp reted.
- Fo r De clarat ion of Compliance to Uni ted
Sta tes FCC and Industry Canada regu la
tions¢
page 298.
Activating and deactivating
Applies to vehicles: with A udi side assist
Fig. 129 D river 's doo r: Side ass ist butto n
-"' ~ a: co a,
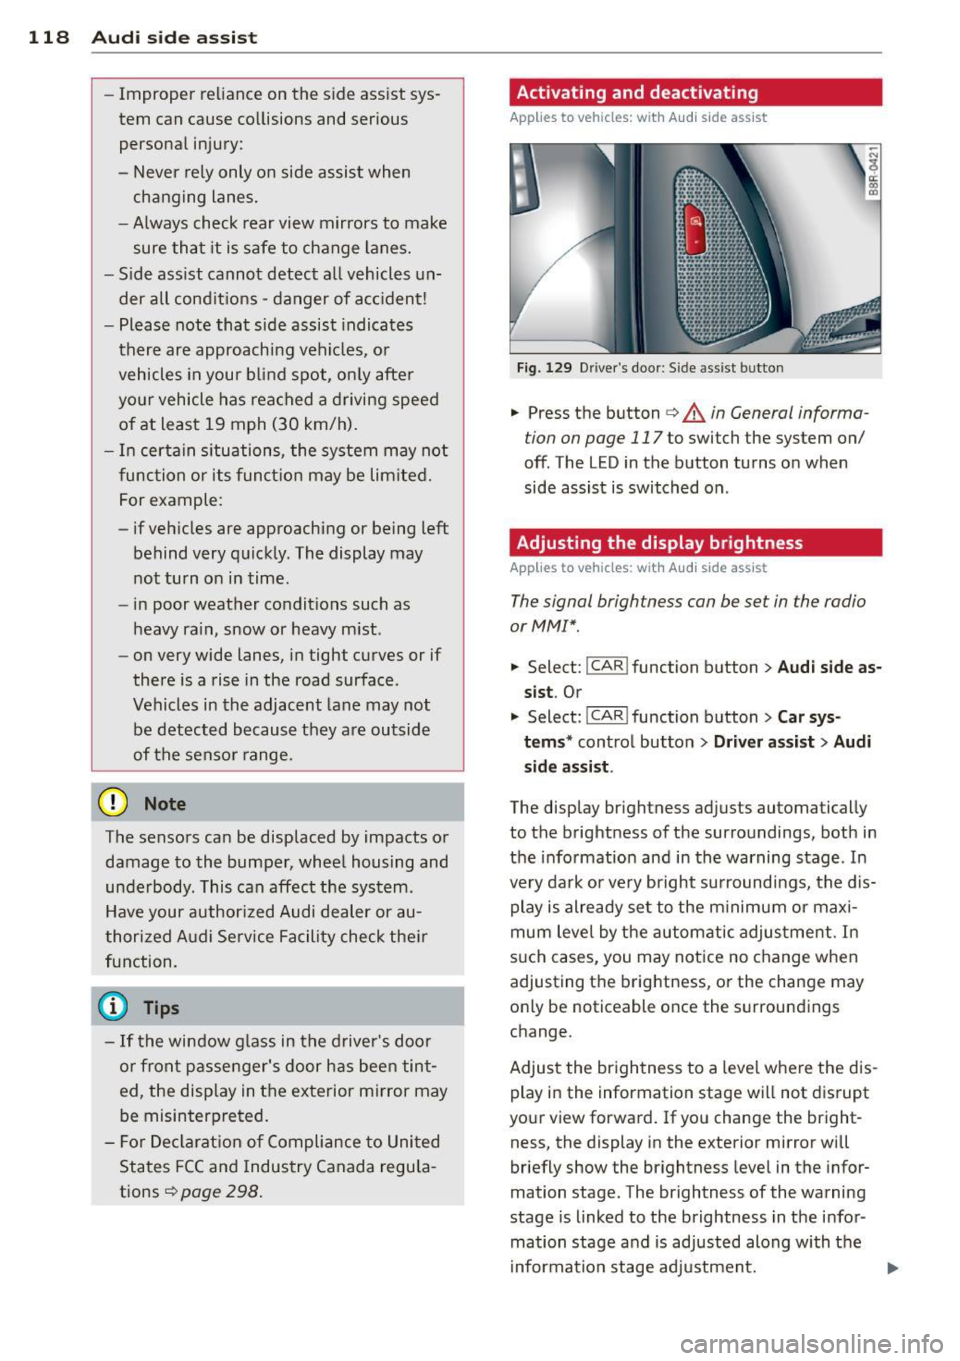
.. Press the button c> & in General informa
tion on page 117
to switch the system on/
off. The LED in the button turns on when
side assist is switched on .
Adjusting the display brightness
Applies to vehicles: wit h Audi s ide assist
The signal brightness con be set in the radio
or MM!* .
.. Select: !CAR ! function b utton> Aud i side a s
s ist .
Or
.. Select:~ , C~ A~ R~ I function button > Car sy s
t e m s*
control button > Dri ver a ssis t > Au di
s id e a ss is t .
The display br ightness adjusts automatical ly
to the brightness of the surroundings, both in
the info rmation and in the warning stage . In
very dark or very bright su rroundi ngs, the dis
play is already se t to the m inimum or maxi
mum leve l by the automatic adjus tme nt. In
s u ch cases, you may notice no change when
adjusting the brightness, or the change may only be noticeable once the surroundings
change.
Adjust the br ightness to a leve l whe re the dis
play in the information stage wi ll not d isrupt
your view forward. If you change the bright
ness, the display in the exterior mirror will
briefly show the br ightness level in the infor
mation stage. The brightness of the warning
stage is linked to the brightness in the infor
mation stage and is adjusted along with the
i nformation stage adjustment.