interior lights AUDI Q5 2014 Owners Manual
[x] Cancel search | Manufacturer: AUDI, Model Year: 2014, Model line: Q5, Model: AUDI Q5 2014Pages: 316, PDF Size: 78.41 MB
Page 55 of 316
Notes o n these featur es
-The turn signals only work with the ignition
turned on. The indicator lights
II or Ill in
the instrument cluster
¢page 14 also b link.
- After you have turned a corner, the turn sig-
nal switches off automatica lly.
- The
high beam works only when the head
lights are on. The indicator light
II in th e
instrument cluster illuminates when the
high beams are on.
- The
headlight flasher wo rks only as long as
you hold the lever -even if there are no
lights turned on. The indicator light
II in
the instrument cluster illuminates when you
use the headlight flasher.
A WARNING
Do not use the high beam or headlight
flasher if you know that thes e cou ld blind
oncoming traffic.
Interior lights
Front interior lights
-
The front interior lights also contain reading
lights for the driver and passenger .
r ,,,,, , 11111
~8 ,~
G) Gl
,o . . o
I
Fig. 49 Headliner: Fro nt inte rior/rea ding lights
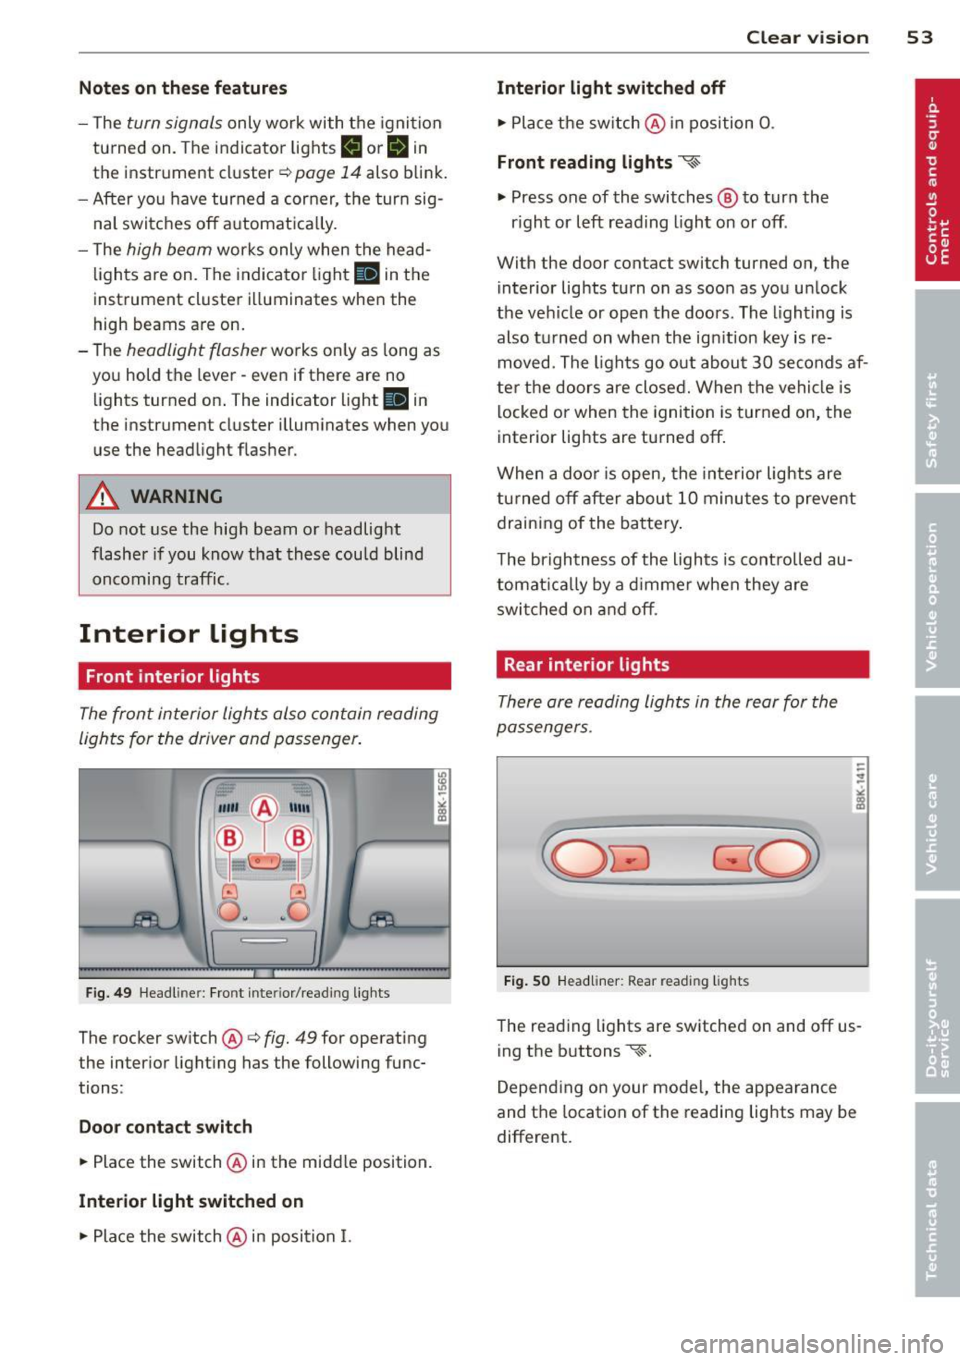
The rocker switch @¢ fig. 49 for operating
the interior lighting has the following func
tions :
Door cont act swi tch
.,. Place the switch @ in the midd le position.
Interior light switched on
.,. Pla ce the switch @ in position I.
Clear vision 5 3
Interior light swit ch ed off
.,. Place the switch @ in position 0 .
Front read ing lights ~
.,. Press one of the switches@ to turn the
r ight or left reading light on or off .
With the door contact switch turned on, the
interior lights turn on as soon as you unlock
the vehicle or open the doors. The lighting is
also turned on when the ignition key is re
moved. The lights go out about 30 seconds af
ter the doors are closed. When the vehicle is locked or when the ignition is turned on, the
interior lights are turned off.
When a doo r is open, the interior lights are
tu rned off after about 10 minutes to prevent
draining of the battery .
The brightness of the lights is controlled au
tomat ica lly by a d immer when they are
swi tched on and off.
Rear interior lights
There are reading lights in the rear for the
passengers .
Fig . 50 Headliner: Rear read ing lig hts
The read ing l ights are switched on and off us
ing the buttons ~-
Depending on your model, the appearance
and the location of the reading lights may be
different .
Page 60 of 316
58 Clear vis ion
@ Tips
If there shou ld be a malfunction in the
electrical system, you can still adjust the
exterior mirrors by pressing the edge of
the mirror .
Dimming the mirrors
N
..
-
" ~==============~ l8
Fig. 58 A ut oma tic d imm ing re arview mirror*
Manual anti -glar e adju stm ent
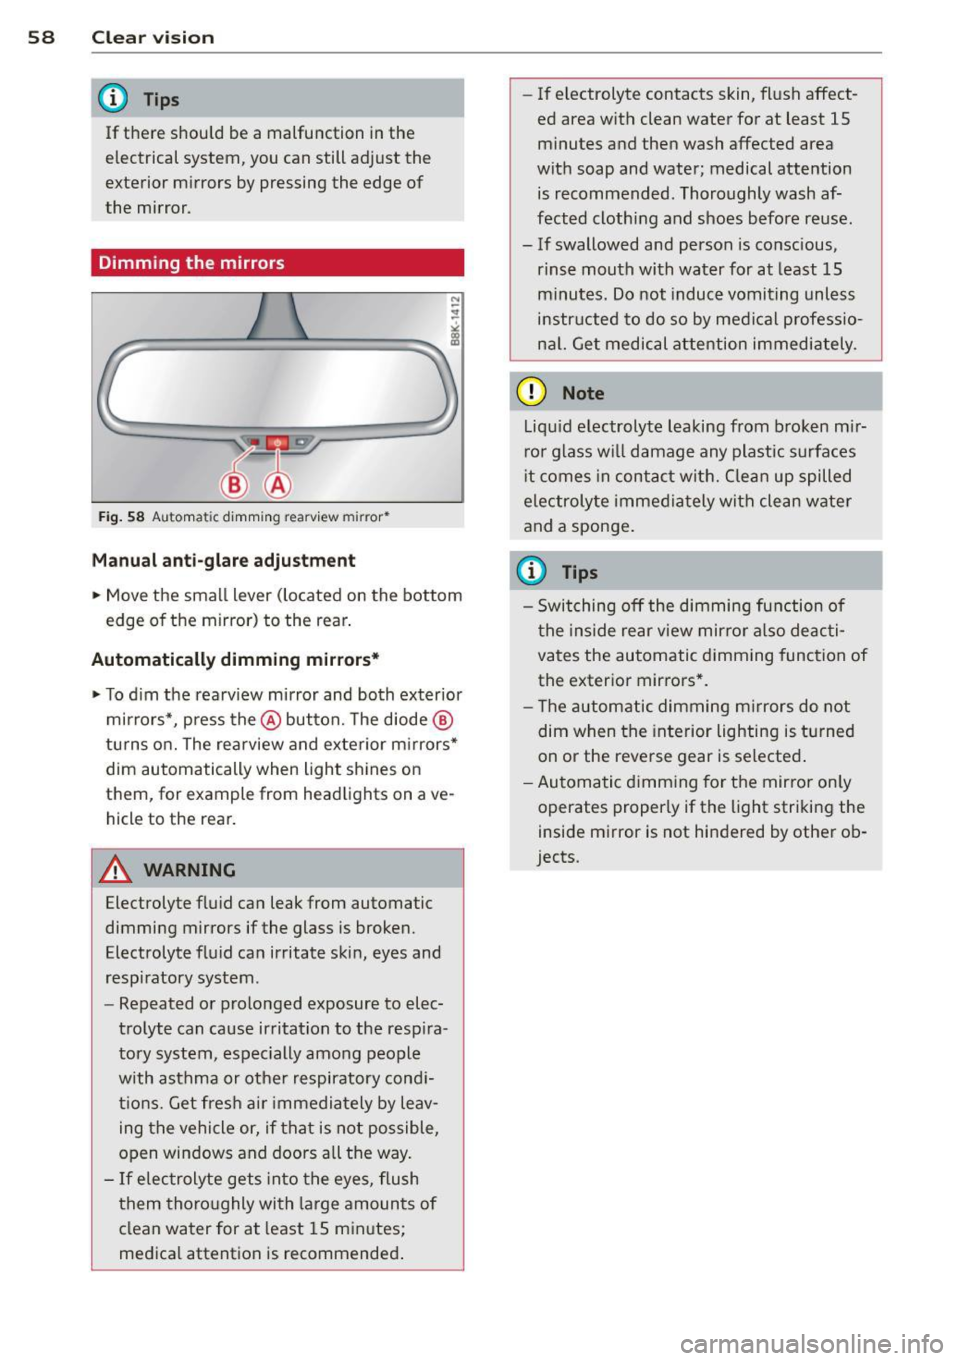
.. Move the small lever (located on the bottom
edge of the mirror) to the rear .
Automatically dimming mirrors*
.. To d im the rearv iew mirror and both exterior
mirrors*, press the @button. The diode ®
turns o n. The rearview and exterior m irrors*
dim automatically when light shines on
them, for example from headlights on ave
hicle to the rear.
A WARNING
Electrolyte flu id can leak from automatic
dimming mirrors if the glass is broken.
Electrolyte fluid can irritate skin, eyes and
respiratory system .
- Repeated or prolonged exposure to elec
trolyte can cause irritation to the resp ira
tory system, espec ially among people
with asthma or other respiratory cond i
t ions. Get fres h air immedia tely by leav
ing t he vehicle or, if that is not possible,
open windows and doors all the way.
- If electrolyte gets in to the eyes, flush
them thoro ughly with large amounts of
clean water for at least 15 minutes;
medica l attention is recommended .
-If electrolyte contacts skin, flush affect
ed area with clean water for at least 15 minutes and then wash affected area
with soap and water; medical attention is recommended . Thoroughly wash af
fected clothing and shoes before reuse.
- If swallowed and person is conscious,
rinse mouth with water for at least 15
minutes. Do not induc e vomiting unless
instructed to do so by medi cal professio
na l. Get medical attention immediately .
(D Note
Liquid electrolyte leaking from b roken m ir
ror glass w ill damage any plastic surfaces
i t comes in contac t with. Clean up spilled
electrolyte imme diately with clean water
and a sponge .
(D Tips
-Switching off the dimming function of
the inside rear view mirror also deacti
vates the automatic dimming func tion of
the exterior mirrors * .
- The automatic dimming m irrors do not
dim when the interior lighting is turned
on or the reverse gear is selected .
- Au toma tic d imm ing for the mirror on ly
operates properly if the light striking the
inside mirror is not hindered by othe r ob
jects .
Page 94 of 316
92 On the road
Shift from D/S to P quickly to prevent the en
gin e from starting unintentionally when shift
ing through R.
You can dete rm ine fo r yoursel f if the eng ine
will stop or not by reducing o r increasing the
amo unt of force you use to press th e brake
pedal. For example, if you only lightly press
on the brake pedal in stop-and and -go traffic
o r when turning , the engine will not switch off
when the vehicle is stationary . As soon as you
press the brake down harder , the eng ine will
switch off.
(D Tips
- Press the brake pedal during a stop
phase to keep the vehicle from rolling .
- The ign ition will turn off if you press the
I S TART ENGINE STOP I* button dur ing a
stop phase .
- The image in the display is slightly differ
ent in some mode ls .
General information
App lies to vehicles: with Start -Stop -System
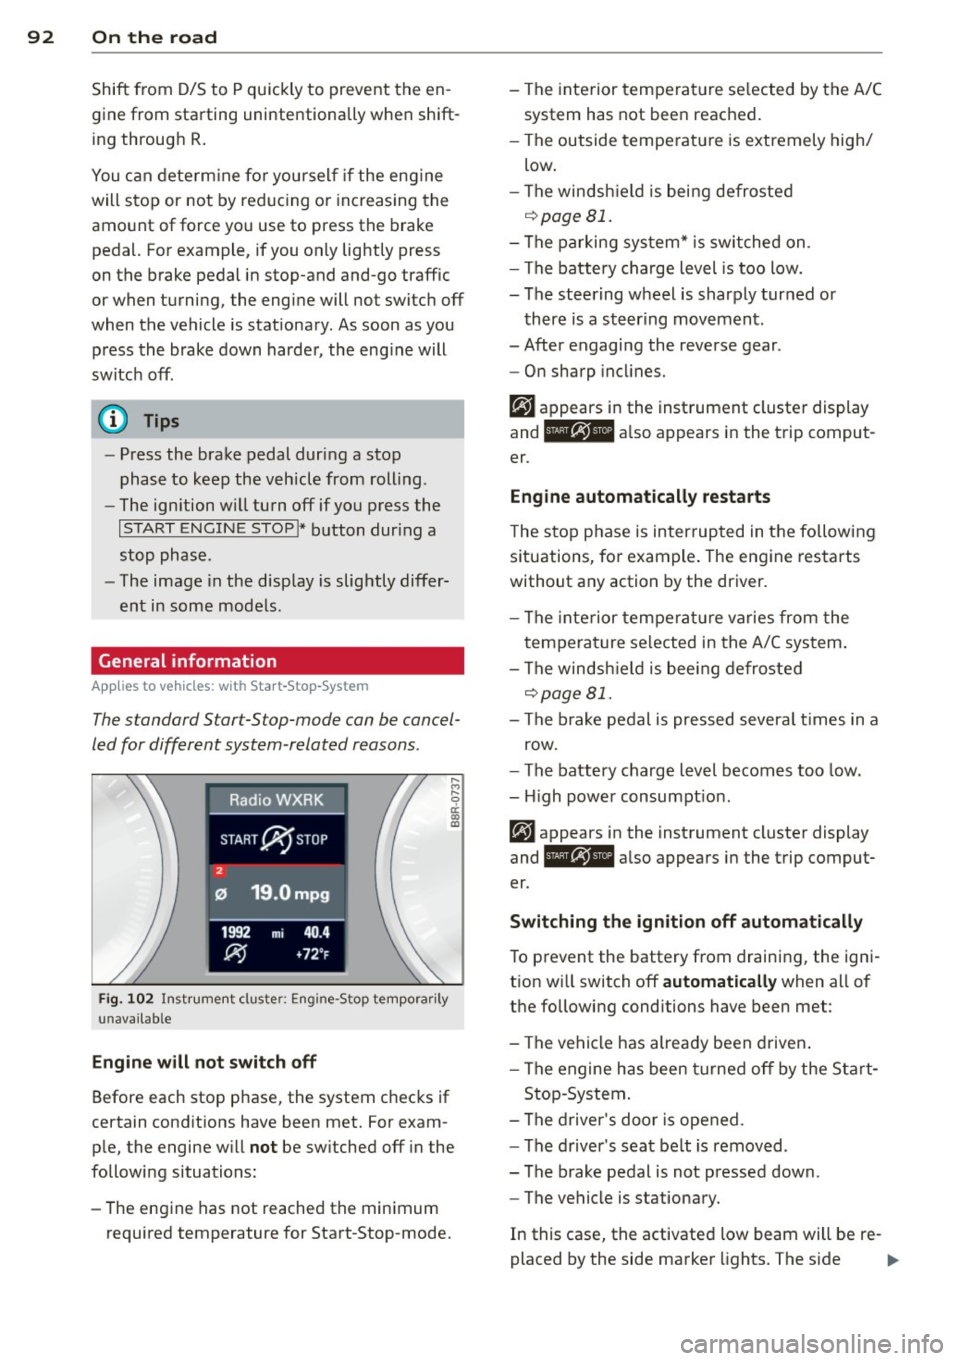
The standard S tar t-S top-mode can be cancel
led for different system -related reasons .
Fig. 1 02 Ins trument clust er: E ngin e-S top tempo rari ly
una va ilabl e
Engine w ill not switch off
Before each stop phase, the system checks if
ce rt a in cond itions have been met. For exam
ple, the engine w ill
not be sw itched off in the
following situations:
- The engine has not reached the min imum
required temperatu re for Start -Stop-mode. - The interior temperat
ure se lected by the A/C
system has not bee n reached.
- The outside tempe rature is extremely high/
low .
- The winds hield is being defroste d
o::::>pageBl.
-The parking sys tem* is switched on .
- The battery charge level is too low.
- The steering wheel is sharply turned or
there is a steer ing movement .
- After engaging the reverse gear .
- On sharp incl ine s.
er .
Eng ine automat ically r estarts
T he stop phase is interrupted in the follow ing
situations, fo r example . The engine restarts
without any action by the driver.
- The interior temperat ure varies from the
temperature se lected in the A/C system .
- The winds hield is bee ing defrosted
o::::> page 81.
- The b rake pedal is pressed severa l times in a
row.
- The battery charge level becomes too low .
- High power consumpt ion.
er .
Switching the ign ition off automatically
To p revent the battery from draining, the ign i
t ion w ill switch off
automatic ally when all of
the following conditions have been met :
- The vehicle has already been d riven .
- The engine has been turned off by the Sta rt-
Stop -System .
- The d river 's doo r is opened .
- The d river 's seat belt is removed .
- The brake pedal is not pressed down .
- The vehicle is stationary.
In this case, the activated low beam will be re-
placed by the side marker lights. The s ide ..,.
Page 281 of 316
Fuses and bulbs
Electrical fuses
Replacing fuses
Fuses tha t have blown will have me tal s trips
that have burned through .
Fig . 225 Left cockp it : fu se pan el c over
The fuses are located at the front left and
r igh t of the cockpit and behi nd the trim on
the right side of the luggage compartment .
.. Turn
off the ignit ion a nd the affected electri
ca l consume rs .
.. Check the following table to see which fuse
belongs to the consumer .
.. Remove the appropriate cover .
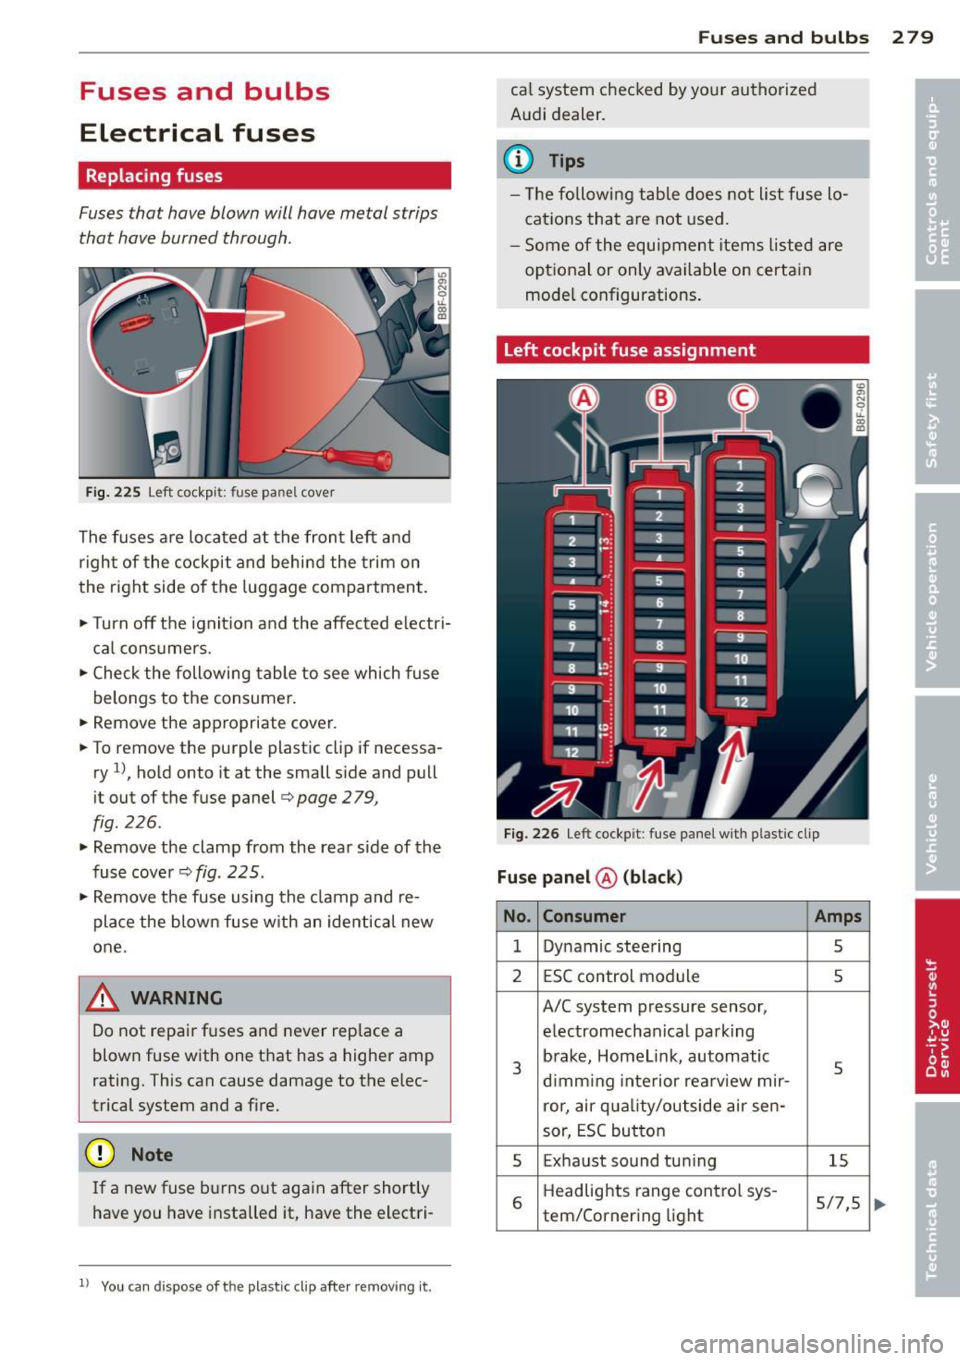
.. To remove the purple plastic clip if necessa
ry
1 ), hold onto it at the small s ide and pull
it out of the fuse panel<=>
page 2 79,
fig . 226 .
.. Remove the clamp from the rear side of the
fuse cover
c> fig . 225 .
.. Remove the fuse using the clamp and re
place the blow n fuse w ith an identical new
one .
A WARNING
-
Do not repair f uses and never replace a
blown fuse w ith one t hat has a higher amp
rating. This can cause damage to the e lec
trical system and a fire.
(D Note
If a new fuse b urns o ut again after shortly
have you have installed it, have the electri-
11 You can dispo se of the pla stic cl ip aft er r emo vin g it.
Fu se s and bulb s 2 79
cal system checked by your authorized
Audi dealer .
a) Tips
- The followi ng ta ble d oes not list fuse lo
cations that are not used.
- Some of the equipment items liste d are
opt ional or only available on certain
mode l configurations .
Left cockpit fuse assignment
Fig . 226 Le ft coc kp it : fuse p anel w ith pla st ic cl ip
Fu se panel @ (black )
No . Consumer Amps
1 Dynamic steering 5
2 E SC control module 5
A/C system pressure sensor,
e lectromechanical pa rk ing
3
b rake, Homelink, automatic
5 d imm ing interior rea rview mir -
ror, air qua lity/outside air se n-
sor, ESC but ton
5 Exhaust sound tun ing 15
6
Headlights range cont ro l sys -
5/7,5 tem/Corner i ng light
Page 306 of 316
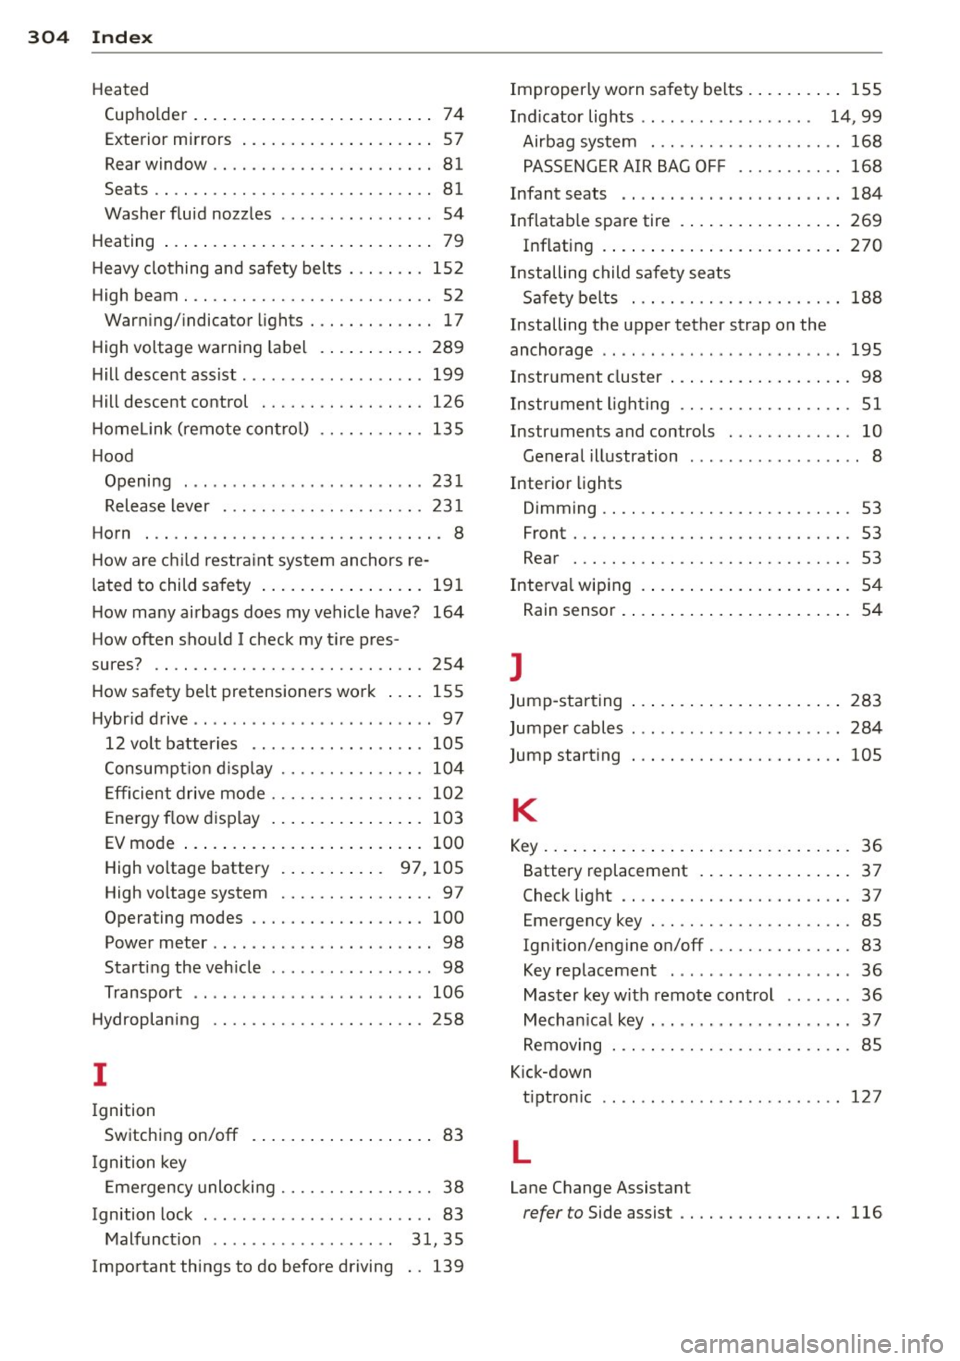
304 Index
Heated (upho lder . .... . ...... ... .. .. .... .. 74
Exterior m irrors ... .... ... .. .. .... .. 57
Rear window ............. .... ...... 81
Seats .. ...... ........... ........ .. 81
Washer fluid nozz les . . . . . . . . . . . . . . . . 54
H eating ...... .. .. ..... ... .. .. .... .. 79
H eavy clothing and safety belts . .. ..... 1 52
High beam . .. ............. .. .. .. ... . 52
War ning/ indicato r lights ... .. .. .. .. . . 17
High voltage warning labe l .. .. .... .. . 289
H ill descent assist . . . . . . . . . . . . . . . . . . . 199
Hill descent control ........ .. .. .... . 126
H omelink (remote con tro l)
H ood 135
Opening . .. .. .. .. .......... ... .. . 23 1
Release lever . ........... .. .. .... . 23 1
Ho rn . .. ...... ........... .... .... .. . 8
H ow are c hild restra int sys tem anchors re -
l ated to child sa fe ty ..... ... .. .. .... . 19 1
H ow many airbags does my vehicle have? 164
How often sho uld I check my t ire pres-
sures? .. .. ................. .. .... . 254
H ow sa fety belt pretensioners wo rk ... . 1 55
H ybr id d rive .. .. .. ...... .... ... .. .. .. 97
12 vo lt batteries .... ... .. .. .. .. .. . 105
Consumpt io n disp lay ...... .. .. .... . 10 4
E fficien t drive mode ....... .. .. .... . 10 2
E ne rgy flow d isplay .. ... .. .. .. .... . 103
EV mode ... ... .. ..... ... .. .. .... . 100
H igh vo ltage battery . . . . . . . . . . . 97, 105
High vo ltage system .......... .. .. .. 97
Operating modes ......... .... .... . 100
Power meter . . . . . . . . . . . . . . . . . . . . . . . 98
Start ing the veh icle ...... ... .. .. .... 98
Transport . . . . . . . . . . . . . . . . . . . . . . . . 106
H ydroplaning ............... .. .... . 258
I
Ignition
Switching on/off . ..... ... .. .. .... .. 83
I gnition key
E mergency unloc king . . . . . . . . . . . . . . . . 3 8
Ignition lock . . . . . . . . . . . . . . . . . . . . . . . . 83
M alfunct io n . . . . . . . . . . . . . . . . . . . 31, 3 5
Important things to do before driving .. 139 Improperly worn sa
fety belts . ... .. .. .. 155
Ind icator lig hts . . . . . . . . . . . . . . . . . . 14 , 99
Airbag system ................ .... 168
P ASS ENG ER A IR BAG OF F ....... .. .. 168
Infant seats .. .. .. .... .... ..... .. .. 184
Inflatab le spare tire . .. .. ..... ... .. .. 269
I n flating . ..... .. .. ... ..... ... .. .. 270
Installing child safety sea ts
S af ety be lts . . . . . . . . . . . . . . . . . . . . . . 188
Installing the upper tether strap on the
ancho rage .. .. .. .. ... .. .. ... ..... .. 195
Instrument cluster .... .. ..... ... .. .. . 98
Instrument ligh ting ............. .... . 51
Instruments and controls ........ .. .. . 10
General illustration . . . . . . . . . . . . . . . . . . 8
Interior lights
Dimming .. ..................... .. . 53
Front . .. .. .... ............... ..... 53
Rea r ..... .. .. .. .. ........... .... . 53
Interval wiping .... ... .. ..... .... . .. . 54
Rain sensor . . . . . . . . . . . . . . . . . . . . . . . . 54
J
Jump-star ting 283
Jumper cables ... .. ... .. .. ... ..... .. 284
Jump start ing .................. .... 105
K
Key ... ... .. .... .. .. ... .. ..... ... .. . 36
Battery replacement . . . . . . . . . . . . . . . . 3 7
Check light . . . . . . . . . . . . . . . . . . . . . . . . 3 7
Emergency key . . . . . . . . . . . . . . . . . . . . . 85
Ig nit io n/engine o n/off .............. . 83
Key replacement . . . . . . . . . . . . . . . . . . . 36
Master key with remote control . . . . . . . 36
Mechan ica l key . .. .... .... ..... .. .. . 37
Removing . .. .. .. ... .......... .... . 85
K ick-down
t iptro nic .. .. .. .. ... .. .. ... ..... .. 127
L
Lane Change Assistant
refer to Side assist . . . . . . . . . . . . . . . . . 116