air condition AUDI Q5 2014 Owners Manual
[x] Cancel search | Manufacturer: AUDI, Model Year: 2014, Model line: Q5, Model: AUDI Q5 2014Pages: 316, PDF Size: 78.41 MB
Page 5 of 316
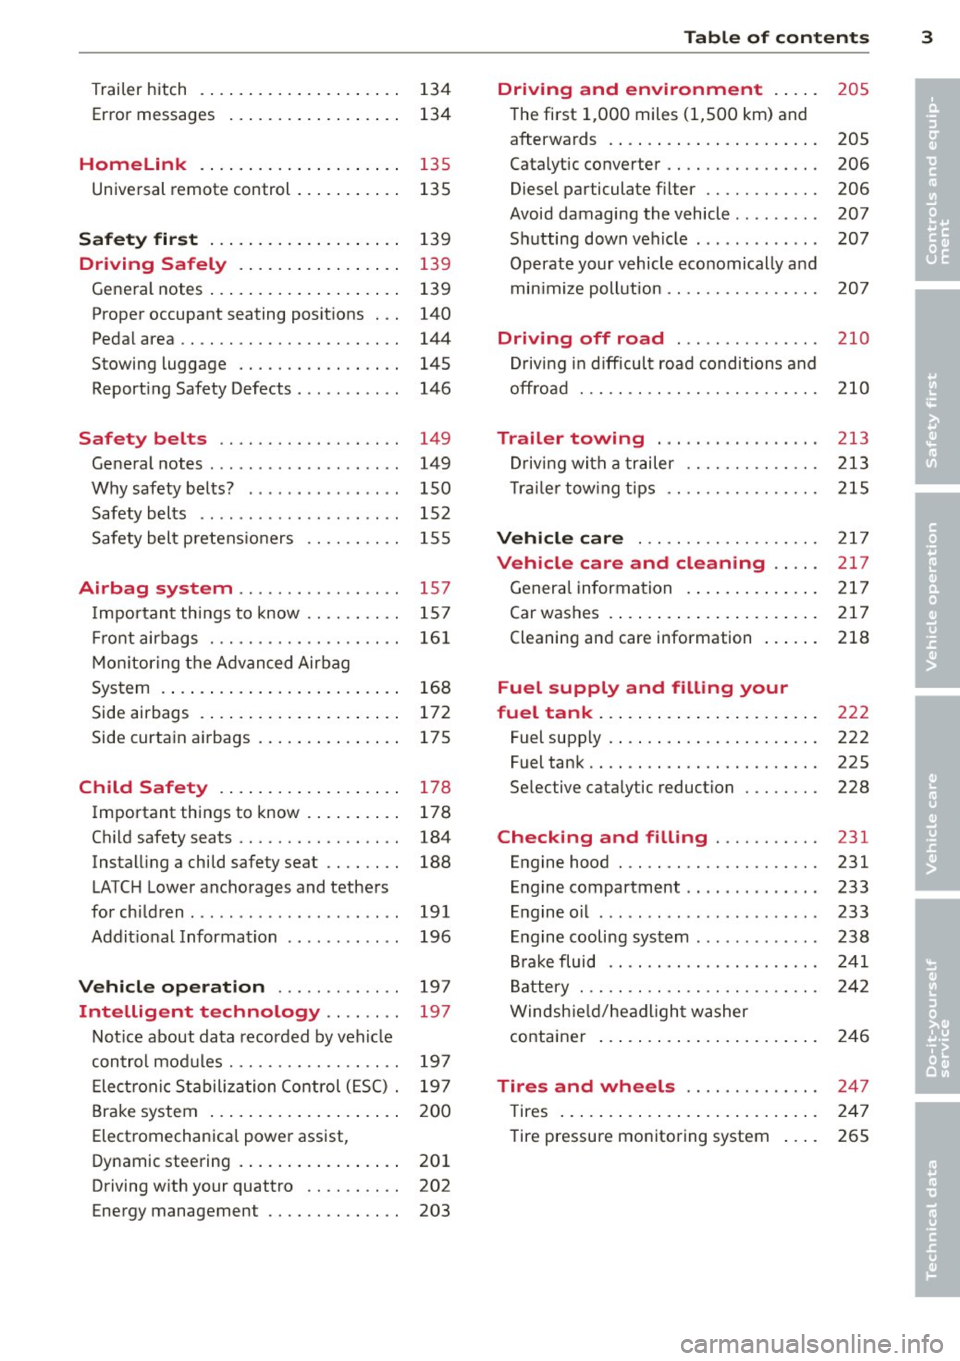
Trailer hitch ................... . .
Error messages
Homelink ................ ... . .
Universal remote control .......... .
Safety first ................... .
134
134
135
135
139
Dri ving Safely . . . . . . . . . . . . . . . . . 139
General notes . . . . . . . . . . . . . . . . . . . . 139
Proper occupant seating positions . . . 140
Pedal area . . . . . . . . . . . . . . . . . . . . . . . 144
Stowing luggage . . . . . . . . . . . . . . . . . 145
Reporting Safety Defects . . . . . . . . . . . 146
Safety belts . . . . . . . . . . . . . . . . . . . 149
General notes . . . . . . . . . . . . . . . . . . . . 149
Why safety belts? . . . . . . . . . . . . . . . . 150
Safety belts . . . . . . . . . . . . . . . . . . . . . 152
Safety belt pretensioners . . . . . . . . . . 155
Airbag sy stem .......... ... ... . 157
Important things to know . . . . . . . . . . 157
Front airbags . . . . . . . . . . . . . . . . . . . . 161
Monitoring the Advanced Airbag
System . . . . . . . . . . . . . . . . . . . . . . . . . 168
Side airbags . . . . . . . . . . . . . . . . . . . . . 172
Side curtain airbags . . . . . . . . . . . . . . . 175
Child Safety ................. . .
Important things to know ........ . .
Child safety seats ......... .... .. . .
Installing a child safety seat .. .. .. . .
LATCH Lower anchorages and tethers
for children .... .. .. ...... .. .. .. . .
Additional Information
Vehicle operation ....... .. .. . .
Intelligent technology .. .. . .. .
178
178
184
188
191
196
197
197
Notice about data recorded by vehicle
control modules . . . . . . . . . . . . . . . . . . 197
Electronic Stabilization Control (ESC) . 197
Brake system . . . . . . . . . . . . . . . . . . . . 200
Electromechanical power assist,
Dynamic steering . . . . . . . . . . . . . . . . . 201
Driving with your quattro . . . . . . . . . . 202
Energy management . . . . . . . . . . . . . . 203
Table of contents 3
Driving and environment . . . . .
205
The first 1,000 miles (1,500 km) and
afterwards . . . . . . . . . . . . . . . . . . . . . . 205
Catalytic converter . . . . . . . . . . . . . . . . 206
Diesel particulate filter . . . . . . . . . . . . 206
Avoid damaging the vehicle . . . . . . . . . 207
Shutting down vehicle . . . . . . . . . . . . . 207
Operate your vehicle economically and
min imize pollution . . . . . . . . . . . . . . . . 207
Driving off road . . . . . . . . . . . . . . . 210
Driving in difficult road conditions and
offroad . . . . . . . . . . . . . . . . . . . . . . . . . 210
Trailer towing . . . . . . . . . . . . . . . . . 213
Driving with a trailer . . . . . . . . . . . . . . 213
Trailer towing tips . . . . . . . . . . . . . . . . 215
Vehicle care . . . . . . . . . . . . . . . . . . . 217
Vehicle care and cleaning . . . . . 217
General information . . . . . . . . . . . . . . 217
Car washes . . . . . . . . . . . . . . . . . . . . . . 217
Cleaning and care information . . . . . . 218
Fuel supply and filling your
fuel tank . . . . . . . . . . . . . . . . . . . . . . .
222
Fuel supply . . . . . . . . . . . . . . . . . . . . . . 222
Fuel tank. . . . . . . . . . . . . . . . . . . . . . . . 225
Selective catalytic reduction . . . . . . . . 228
Checking and filling . . . . . . . . . . . 231
Engine hood . . . . . . . . . . . . . . . . . . . . . 231
Engine compartment . . . . . . . . . . . . . . 233
Engine oil . . . . . . . . . . . . . . . . . . . . . . . 233
Engine cooling system . . . . . . . . . . . . . 238
Brake fluid . . . . . . . . . . . . . . . . . . . . . . 241
Battery . . . . . . . . . . . . . . . . . . . . . . . . . 242
Windshield/headlight washer
container . . . . . . . . . . . . . . . . . . . . . . . 246
Tires and wheels . . . . . . . . . . . . . . 247
T ires . . . . . . . . . . . . . . . . . . . . . . . . . . . 247
Tire pressure monitoring system . . . . 265
•
•
Page 28 of 316
26 Driver information d isplay
program. The fuel economy messages turn off
automatically after a certain per iod of t ime .
.,. To turn a fue l economy message off immedi
ately after it appears, press the
!RESE T I but
ton ¢
page 24, fig. 17 @, or
.,. Press the funct ion selection switch
¢ page 24 , fig. 17@.
(D Tips
-Once you have turned a fuel economy
message off, it will only appear again af
ter you turn the ignition on again.
- The fuel economy messages are not dis
played in every instance, but rather in in
tervals over a period of time.
On-Board Diagnostic
system (OBD)
Malfunction Indicator Lamp (MIL)
T he Malfunction Indicator Lamp (MIL) ¢4 in
the instrument cluster¢
page 14, fig. 8 is
part o f the On-Board Diagnostic (OBD II) sys
tem.
T he warning/indicator light illuminates when
the ignition is switched on and goes out after
the engine starts and the idle has stabilized .
T his indicates that the MIL is working proper
ly .
If the light does not go out after the engine
is started, or illuminates while you are driv
ing, a malfunction may exist in the engine sys
tem. If the light illuminates, the catalytic con
verter could be damaged.
Continue driving
with reduced power (avoid
ing sustained high speeds and/or rapid accel
erat ions) and have the condition corrected .
Contact your authorized Audi dealer.
If the light illuminates, the electronic speed limiter may also be malfunctioning. For more
information ¢
page 2 7, Electronic speed
limiter .
An improperly closed fuel filler cap may also
cause the MIL light to illuminate (only
vehicles with gasoline engine)
¢ page 226 .
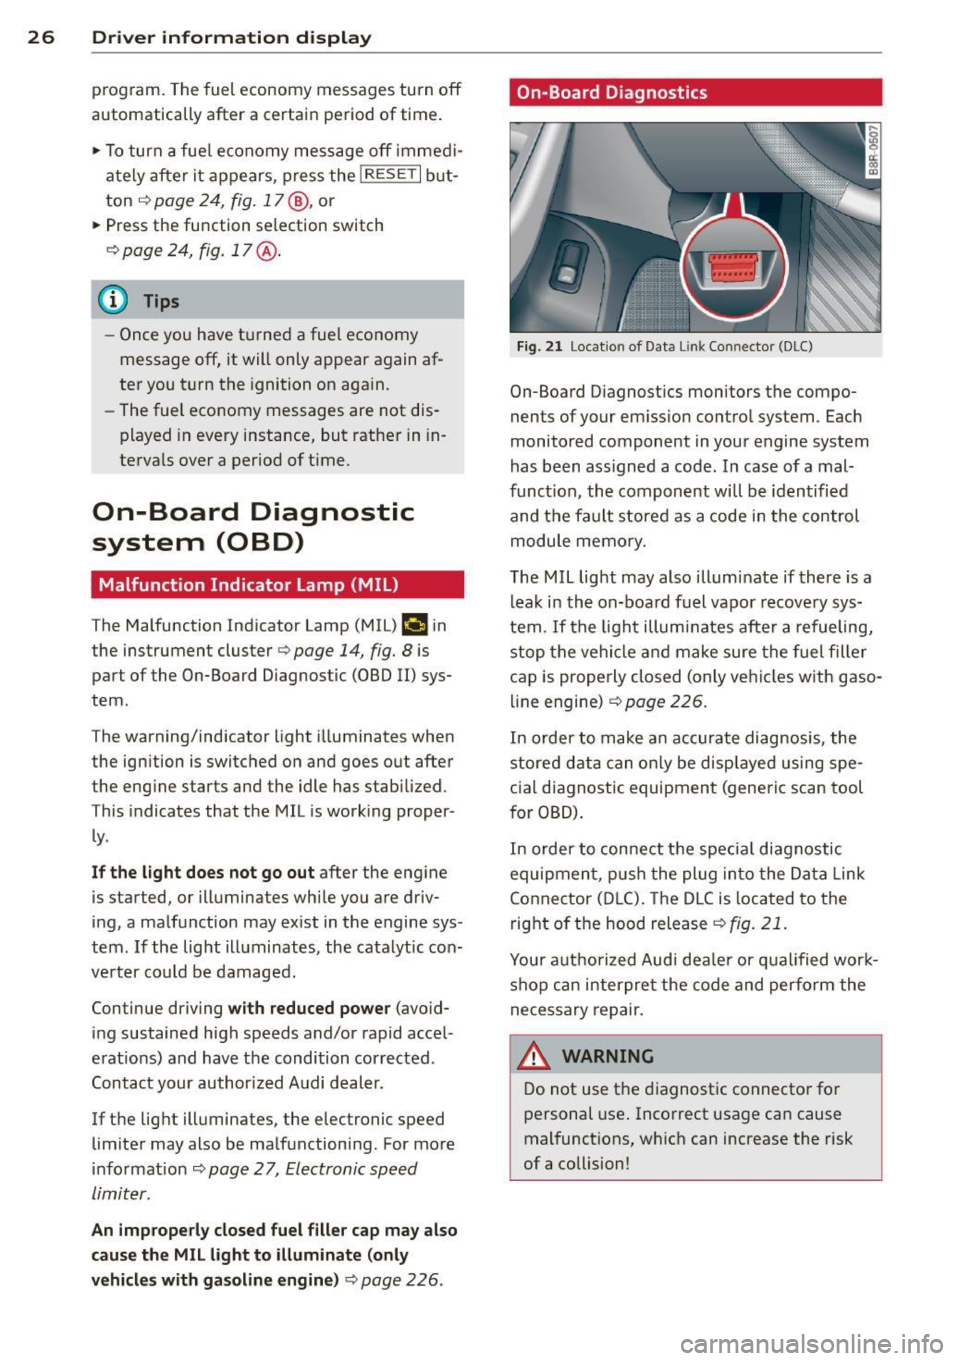
On-Board Diagnostics
Fig. 21 Location of Data Li nk Conn ecto r (DLC)
On-Board D iagnostics monitors the compo
nents of your emission control system . Each
monitored component in your engine system
has been ass igned a code . In case of a mal
function, the component will be identified
and the fault stored as a code in the control
module memory.
The MIL light may also illuminate if there is a
leak in the on-board fuel vapor recovery sys
tem .
If the light illuminates after a refueling,
stop the vehicle and make sure the fuel filler
cap is properly closed (only vehicles with gaso
line engine) ¢
page 226.
In order to make an accurate diagnosis, the
stored data can only be displayed using spe
cial diagnostic equipment (generic scan tool
for OBD).
In order to connect the special diagnostic
equipment, push the plug into the Data Link
Connector (DLC). The DLC is located to the
right of the hood release
¢fig. 21.
Your authorized Audi deale r or qualified work
shop can interpret the code and perform the
necessary repair.
.&_ WARNING ~ -
Do not use the diagnostic connector for
personal use. Incorrect usage can cause
malfunctions, which can increase the risk
of a collision!
Page 29 of 316
Electronic speed
limiter
Your vehicle may be factory equipped with
tires that are rated for a maximum speed of
130 mph (210 km/h) . This is less than the
maximum speed of your vehicle . To reduce the
risk of sudden tire failure and loss of control if
the vehicle is ope rated at excessive speeds,
your vehicle also has an elect ronic speed limit
er. The electronic speed limiter prevents your
ve hicl e from going faster than the tire speed
rating. For more information
c::> page 258.
If the engine control unit receives faulty vehi
cle road speed signals, the Malfunction Ind i
cator Lamp (MIU¢• will illuminate .
If this
occurs, contact the nearest authorized Audi
dea ler for assistance.
SQS
Your vehicle's top speed is e lectronically limit
ed to 155 mph (250 km/h).
If the engine control unit receives faulty vehi
cle road speed signals, the Malfunction Indi
cator Lamp
(MIL) ¢..fi will illuminate . If this
occurs, contact the nearest authorized Audi
dealer for assistance .
_& WARNING
-
Always observe the posted speed limits
and adjust your speed to suit prevailing
road, traffic and weather conditions. Never
drive your vehicle faster than the maxi
mum speed rating of the tires installed.
Auto Check Control
Introduction
The Auto-Check control monitors the function
of certain vehicle features and components. It
simply makes sure these features and compo
nents are working properly. The Auto-Check
control works as long as the ignition is on, as
well as whenever the vehicle is driven .
If a component is ma lfunctioning or if the
need for an urgent repair has been detected,
Driver information display 2 7
this will appear in the instrument cluster dis
play. You will also hear an audible warning
tone . The displays are color coded in either
red or yellow depending on their level of prior
ity.
A red symbol means Danger , a yellow symbo l
indicates
Warning. In certain situat ions, in
formation message for the driver appear in
addition to the red and yellow symbols.
Note about automatic transmission
The Auto -Check Control wi ll automatically
perform a test each time you switch on the ig
nition. With the selector lever in P or N, the
following message appears in the d isplay:
When stationary apply brake pedal while se
lecting gear
When you select a diffe ren t gear (for exam
ple: R, D, etc.), the message w ill disappear
and the Auto-Check function is displayed.
If there is a malfunct ion, then the malfunc
tion message will appear about 15 seconds af
te r you start the vehicle . At the same time you
will hear a warning tone.
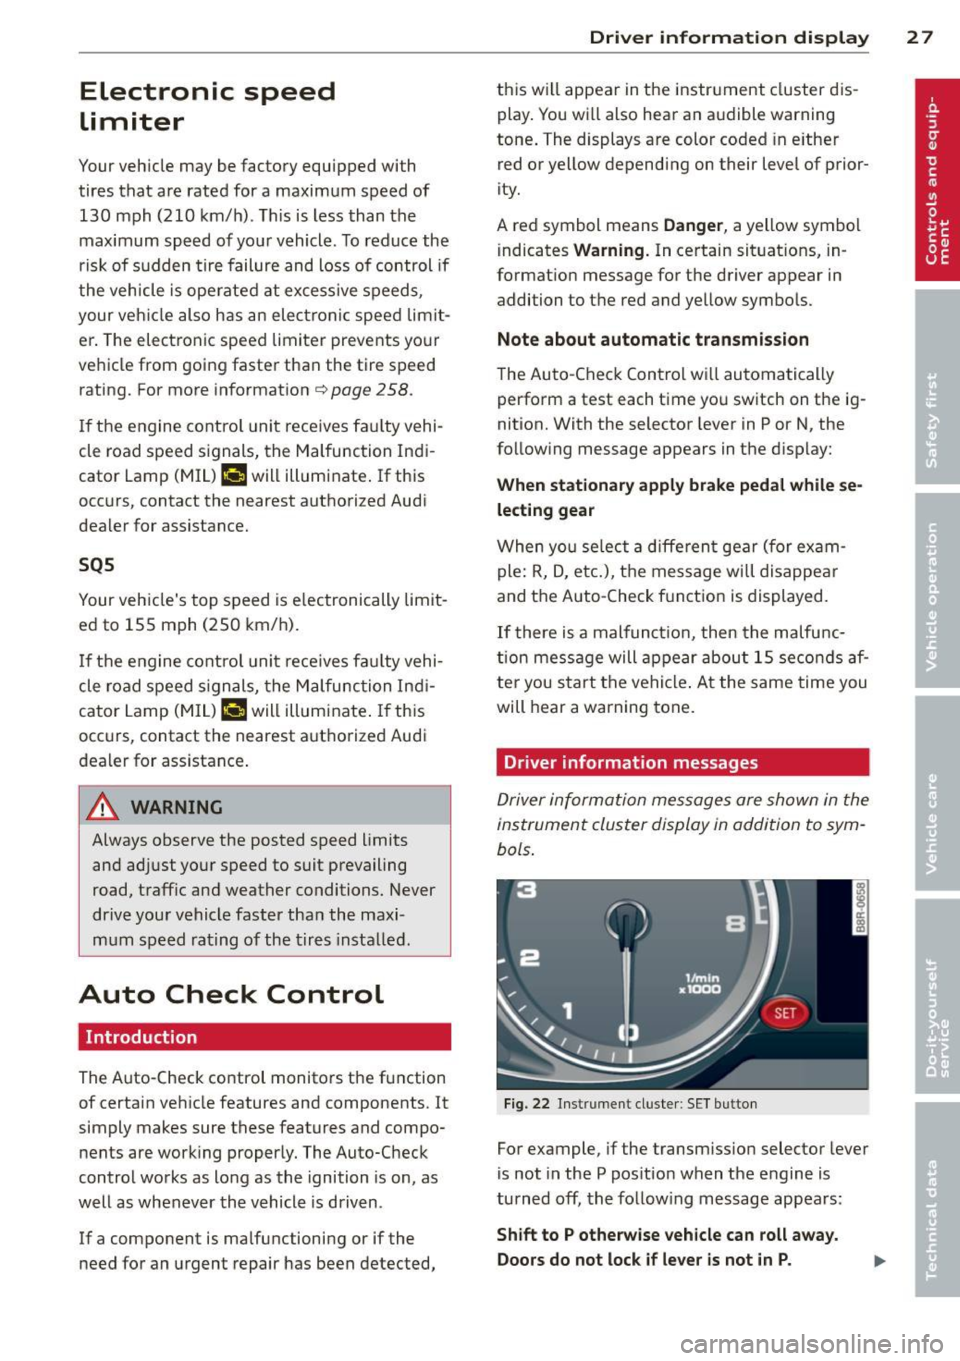
Driver information messages
Driver information messages are shown in the
instrument cluster display in addition to sym
bols.
Fig. 22 Instrument cluster: SET button
For example, if the transmiss ion selector lever
is not in the P position when the engine is
turned
off, the following message appears :
Shift to P otherwise vehicle can roll away.
Doors do not lock if lever is not in P.
Page 53 of 316
Canada models : The function cannot be
turned off.
It is activated a utomatica lly each
time the ignition is switched on.
Travel mod e (Canada models)*
The headlight beam is asymmetrical. This pro
vides stronge r illum ination on the s ide of the
road on which you are driving . If you are driv
ing in a co untry that drives on the opposite
side of the road from your own country, this
will cause glare for oncoming drivers. To pre
vent glare:
- Trave l mode must be selected in vehicles
with Xenon headlights*.
- In vehicles with halogen headlights, certain
areas of the head light lenses must be cov
ered with waterproof adhesive covers that
prevent light from passing through. For
more information, please see your author
ized Audi dealer or author ized repair facility .
@ Tips
When travel mode* is activated, a d isp lay
in the drive r information system ind icates
this each time you switch the ignit io n on .
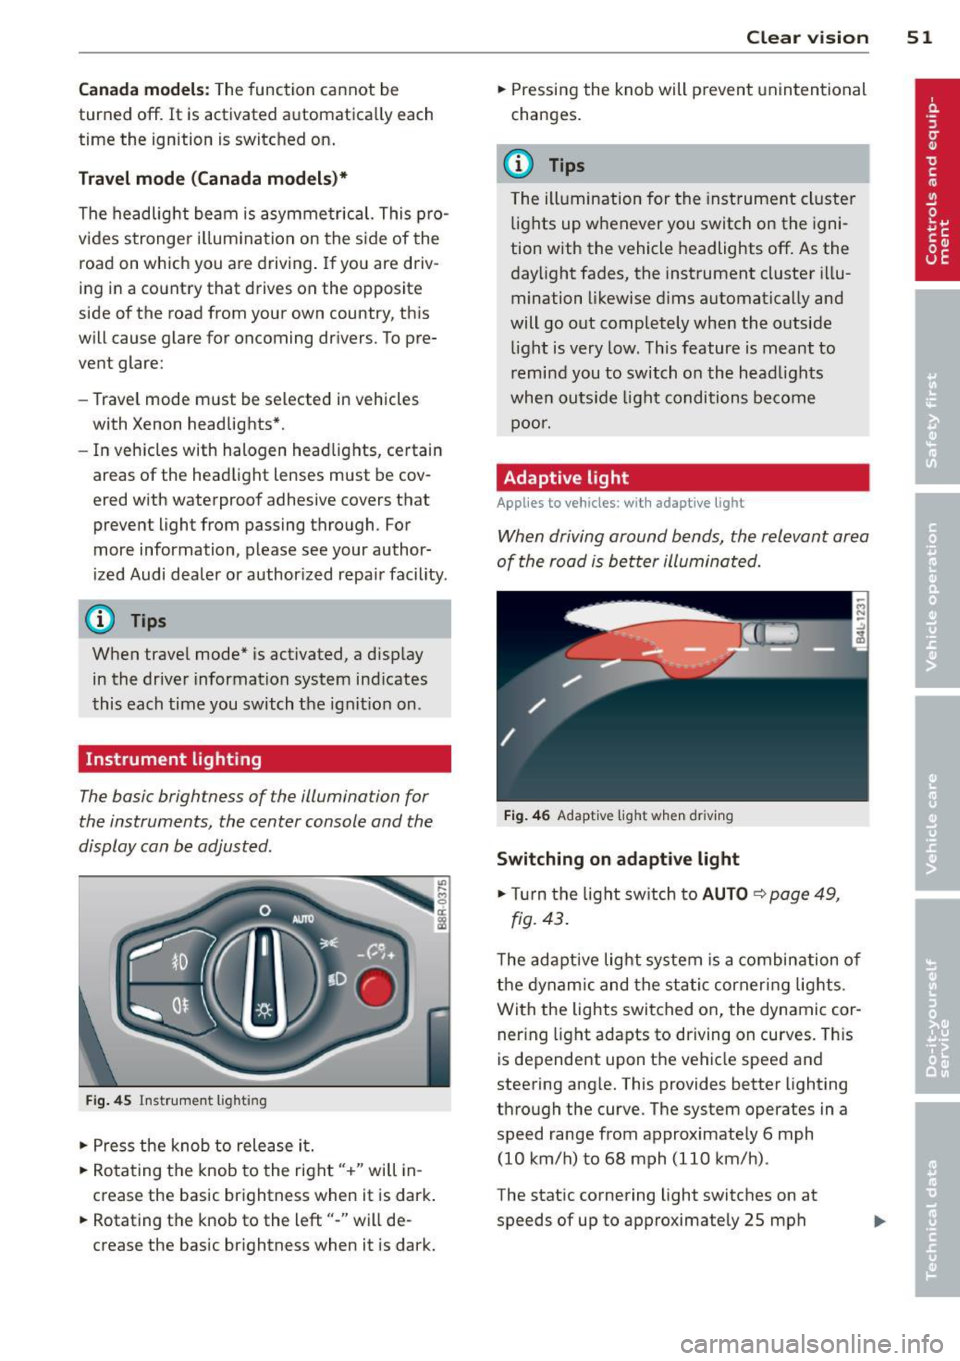
Instrument lighting
The basic brightness of the illumination for
the instruments, the center console and the
display can be adjusted .
Fig. 45 Inst rume nt lighting
.. Press the knob to release it.
.. Ro ta ting t he knob to the right" +" will in
crease the basic brightness when it is dark .
.. Rotating the knob to the left"-" will de
crease the basic br ightness when it is dark. Clear vi
sion 51
.. Pressing the knob will p revent unintentional
changes.
(D Tips
T he ill umination for the inst rument cluster
lights up w henever you switch on the igni
tion with the vehicle headlights off. As the
day light fades, the instrument cluster i llu
mination likewise dims automatically and
will go out completely when the outside light is very low. This feature is meant to
r emind you to switch on the head lights
whe n outs ide light conditions become
p oor .
Adaptive light
Applies to vehicles: wi th adaptive light
Wh en driving around bends, the relevant area
of the road is be tter illuminated.
Fi g. 4 6 Adapt ive light w hen driv ing
Switching on adapt ive light
.. Tu rn the light sw itch to AUTO ~ page 49,
fig. 43 .
The adaptive lig ht system is a combin ation o f
the dynam ic and the static corneri ng lights.
Wi th the lights switched on, the dynamic cor
ner ing light adapts to driving on curves. This
is dependent upon t he vehicle speed and
steering ang le. This provides better lighting
through the curve. The system operates in a
speed range from approximate ly 6 mph
(10 km/h) to 68 mph (110 km/h) .
The static cornering light switches on at
speeds of up to approximately 25 mph
Page 57 of 316
while driving. You can switch this function off by moving the lever to position ® within 10
seconds of the afterwipe operation. The after
wipe function is reactivated the next time the ignit ion is switched on.
The rear wiper automatically switches on
when the reverse gear is engaged and the
front w indshield wipers are on and in opera
tion .
C lea ning the headlights *. The headlight wash
er system * operates on ly when the headlights
are on. If you move the lever to pos ition ®,
the headlights are washed in interva ls .
® -Wipe the rear window. The rear wiper
moves about every 4 seconds .
0-Clean the rear window. The number of
wiping operations depends on how long the l ever is held in positio n 7.
A WARNING
-The ra in sensor is only intended to assist
the driver. The driver is still responsible
for man ually sw itching the w ipers on ac
cording to the v is ibility conditions.
- The windshie ld may not be treated w ith
water-repe lling windshie ld coat ing
agents. Unfavorable conditions, such as
wetness, darkness, low sun, can res ult in
increased glare. W iper b lade chatter is
also possible .
- Proper ly functioning w indshie ld w iper
blade s are required fo r a clear view and
sa fe dr iv ing .
(D Note
-In the case of frost, check whether the
windsh ield wiper b lades a re fro zen to
t h e windshie ld. Swit ching on the wind
s h ield wipers can d amage t he wipe r
blades!
- Prior to using a car w ash, the windshield
wipe r system m ust be swit ched off (lever
i n position 0) . This helps to prevent unin
tentiona l switching on and damage to
the windshie ld w iper system.
Clear v is ion 5 5
(D Tips
- The windshie ld w ipers are switched off
when the ign it ion is tu rned off . Act ivate
the windsh ield wipers after the ignition
is switc hed back on by moving t he wind
shield wipe r lever to any position .
- Worn or d irty windshield wiper blades
result in streaking. This ca n affect the
rai n sensor function. Check your wind
shield w iper blades regularly.
- The washer fluid nozz les of the wind
shield washe r system a re heated at low
tempe rat ures whe n the ignition is on .
- When stopping temporarily, e .g. at a
t raffic light, the set spe ed of the wind
shield wiper s is automatically reduced by
one speed.
Cleaning windshield wiper blades
C lean the w indsh ie ld w iper blades when t hey
begin to leave st reaks.
.,. Place t he w indshie ld w iper arms in the serv
ice pos ition. Re fer to ~
page 56.
.,. Lift the wiper a rm away from the rea r win
dow .
.. Use a soft cloth and glass cleane r to clean
the windshield wiper b lades.
A WARNING
Dirty windsh ield wiper b lades can impair
your view . This can lead to accidents .
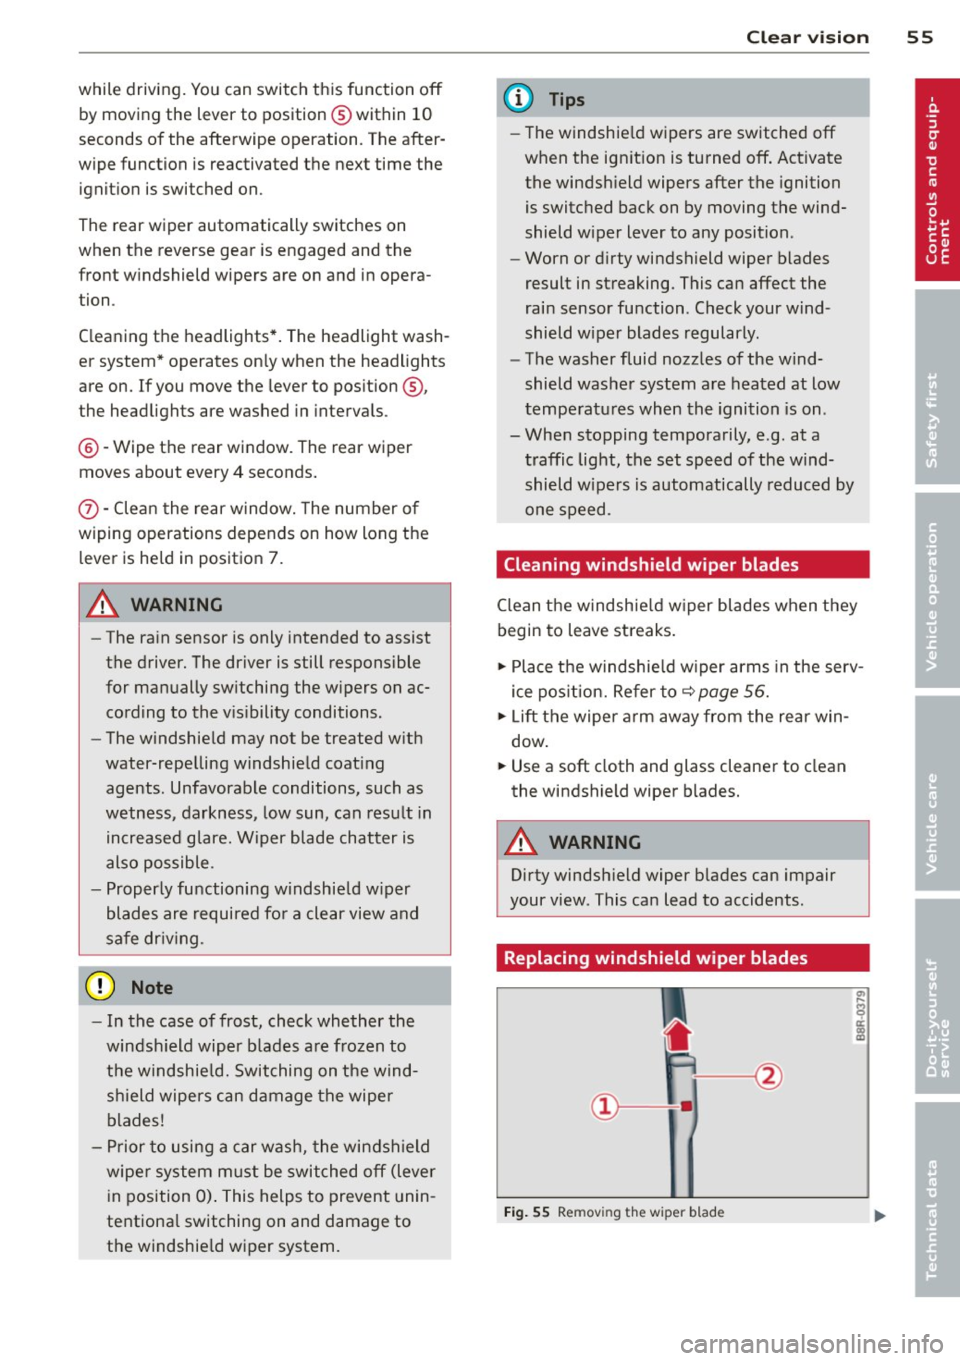
Replacing windshield wiper blades
Fig. 55 Remov ing the w iper blad e
Page 81 of 316
Warm and cold Climate control
Description
The climate control system warms, cools and
adds humidity to the a ir in the veh icle inter io r.
It is the most effect ive when the windows and
panoramic sliding sunroo f* are closed . If
there is a build-up of heat inside the vehicle,
venti lation can help to speed up the cooling
process.
I n all heating mode f unctions except
defrost,
the blower on ly switches to a higher speed
once the engine coolant has reached a certain
temperature.
Condensation from the cooling system can
drip and form a puddle of water under the vehicle. This is normal and does not mean there
is a leak.
Pollutant filter
The po llutant filte r removes po llutants s uch
as dust and pollen from the air.
The air pollutants filte r must be changed at
the in tervals specified in you r Wa rranty
&
Main tenance book let, so tha t the air condi
tioner can properly work.
I f you drive you r vehicle in an area with h igh
a ir po llution, the fi lter may need to be
ch anged more freq uent ly than specified in
your Aud i Warranty
& Ma intenance booklet. If
i n doubt, ask your authorized A udi Service Ad
visor for advice .
K ey coded settings
The climate con trol settings are automat ically
stored and assigned to the remote cont ro l key
that is in use .
& WARNING
Reduced visibility is dangero us and can
cause accidents . -
Warm and cold 79
-For safe driving it is very important that
all windows be free of ice, snow and con
densat ion.
- Comp letely fam iliarize yourse lf with the
proper use and funct ion of the heat ing
and ve nti lation system and especially
how to defog and defrost the w indows.
- Never use the windshield wiper/washer
system in freez ing weather unt il you
have warmed the w indshield first, using
the heating and ventilation system. The
washer sol ution may free ze o n the wind
shie ld and red uce visib ility.
(D Note
- If you suspect that the air conditioner has been damaged, switch the system
off to avoid furt her damage and have it
i n spected by a q ua lified dea lership.
- Repairs to the Audi air conditioner re
quire specia l techni cal know ledge and
speci al tools. Contact an autho rized Aud i
dealer fo r ass istance.
@ For the sake of the environment
B y reduci ng the amou nt of f uel you use,
you also red uce the amount of pollutan ts
emitted in to the air.
(D Tips
- Keep the air intake s lots ( in fro nt of the
w indshield) free from ice, snow and de
br is in order to maintai n the proper f unc
tion of the climate control system.
- T he energy management system may
switch the seat heating* or rear window
defroster off temporar i Ly . These systems
are available again as soon as the energy
balance has been restored.
- The air flowing out of the vents and
throughout the vehicle's entire interior is
discharged at the rear of the ve hicle.
Make sure that the outlet slots are not
covered by clothing, etc.
Page 102 of 316
100 Hybrid
Hybrid battery: Low battery charge.
B attery will be charged while driving.
This message appears if the high voltage bat
tery charge level has fa llen below a certain
range. If this message turns off after a little
while, the high voltage battery charged
enough while dr iv in g.
If the message does not turn off, have an au
thorized repair fac ility correct the malfunction
as soon as possible.
EV mode is currently unavailable .
This message appears if the conditions
¢
page 100 for enhanced e lectric driving are
not met. Try again at a later time.
Hybrid functions and operating modes
App lies to vehicles: with hybrid dr ive
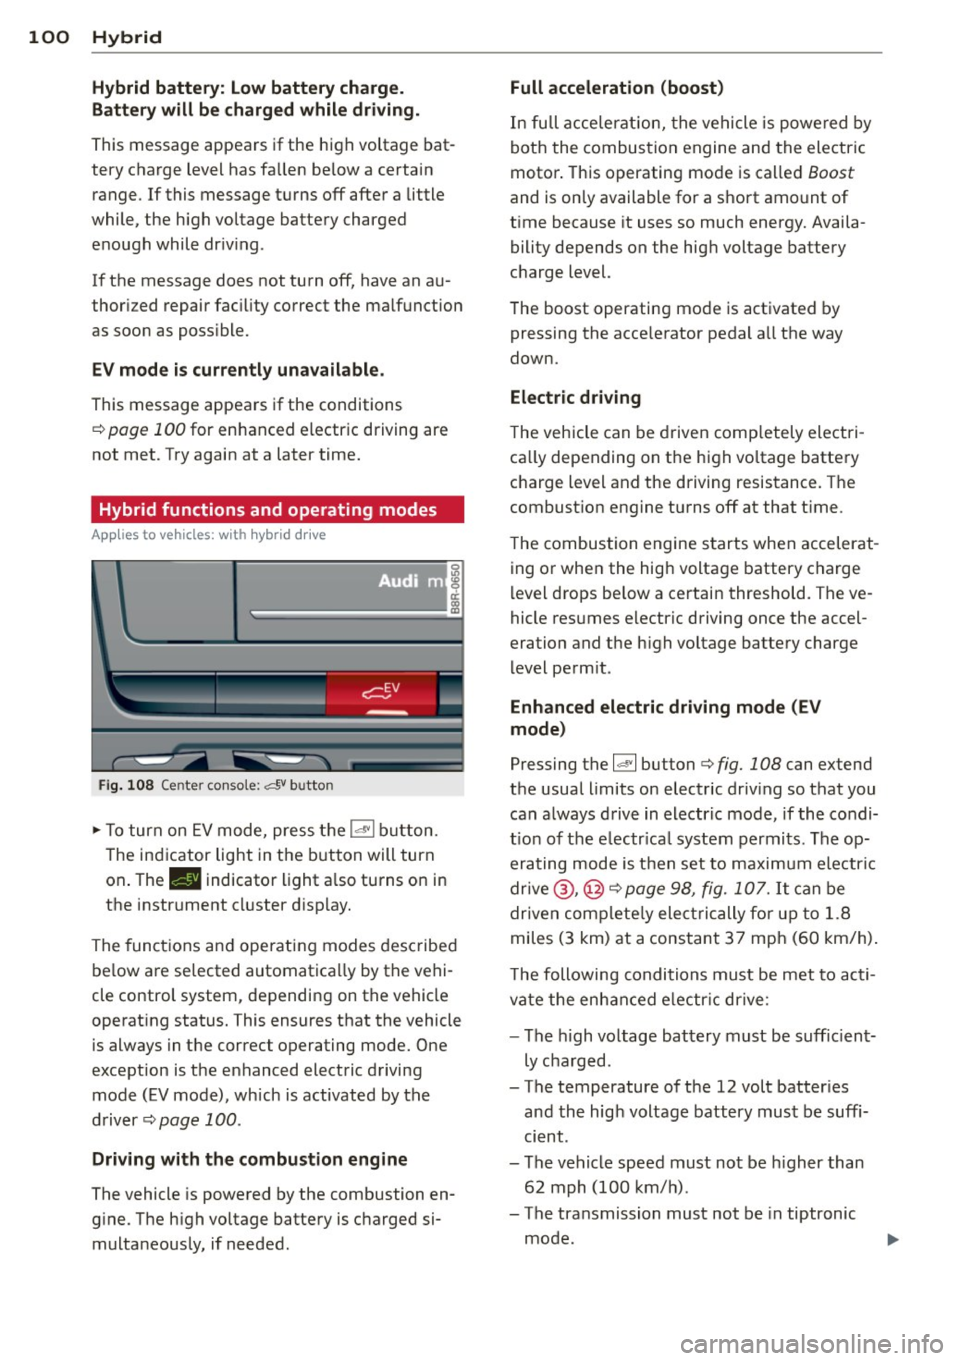
Fig. 108 Center console: c:f,V button
.,. To turn on EV mode, press the 14'1 button.
The indicator light in the button will turn
on . The. indicator light a lso turns on in
the instrument cluster display.
The functions and operating modes described
be low are se lected automatica lly by the vehi
cle control system, depending on the vehicle
operat ing status. This ensures that the vehicle
is always in the correct operating mode. One
exception is the enhanced electric driving
mode (EV mode), which is activated by the
driver
¢pag e 100.
Driving with the combustion engine
The vehicle is powered by the combustion en
gine. The h igh voltage battery is charged si
multaneously, if needed.
Full acceleration (boost)
In full acceleration, the vehicle is powered by
both the combustion engine and the electric
motor . This operating mode is called
Boost
and is on ly available for a short amount of
time because it uses so much energy. Availa
bility depends on the high voltage battery
charge level.
The boost operating mode is activated by
pressing the accelerator pedal all the way
down.
Electric driving
The vehicle can be driven completely electri
ca lly depending on the high vo ltage battery
charge level and the driving resistance. The
combust ion eng ine turns off at that t ime.
The combustion engine starts when accelerat
ing or when the high voltage battery charge
level drops be low a certain threshold. The ve
hicle resumes e lectric driving once the accel
eration and the high voltage battery charge
level permit.
Enhanced electric driving mode (EV
mode)
Pressing the l~ I button ¢ fig. 108 can extend
the usual limits on electric driving so that you
can always drive in electric mode, if the condi
t ion of the e lectr ica l system permits . The op
erating mode is then set to maximum electric
drive @,@ ¢
page 98, fig. 107. It can be
driven complete ly elec trically for up to 1.8
miles (3 km) at a constant 37 mph (60 km/h) .
T he following conditions must be met to act i
vate the enhanced e lectr ic drive:
- The high voltage battery must be suffic ient
ly charged.
- The temperature of the 12 volt batter ies
and the hig h voltage battery must be suffi
cient.
- The vehicle speed must not be higher than
62 mph (100 km/h).
- The transmission must not be in tiptronic
mode.
Page 142 of 316
140 Driving Safely
• Sit properly in your seat and make sure that
your passengers do the same¢
page 61,
General recommendations.
• Fasten your safety belt and wear it properly.
Also instruct your passengers to fasten their
safety belts properly¢
page 149 .
What impairs driving safety?
Safe driving is directly related to the condi
tion of the vehicle, the driver as well as the
driver's ability to concentrate on the road
without being distracted.
The driver is responsible for the safety of the
vehicle and all of its occupants . If your ability
to drive is impaired, safety risks for everybody
in the vehicle increase and you also become a
hazard to everyone else on the road
9 .&,.
Therefore:
• Do not let yourself be distracted by passen
gers or by using a cellular telephone.
• NEVER drive when your driving ability is im
paired (by medications, alcohol, drugs, etc.).
• Observe all traffic laws, rules of the road
and speed limits and plain common sense.
• ALWAYS adjust your speed to road, traffic
and weather conditions .
• Take frequent breaks on long trips. Do not
drive for more than two hours at a stretch.
> Do NOT drive when you are tired, under
pressure or when you are stressed .
A WARNING
Impaired driving safety increases the risk
of serious personal injury and death when
ever a vehicle is being used.
Proper occupant
seating positions
Proper seating position for the driver
The proper driver seating position is impor
tant for safe, relaxed driving.
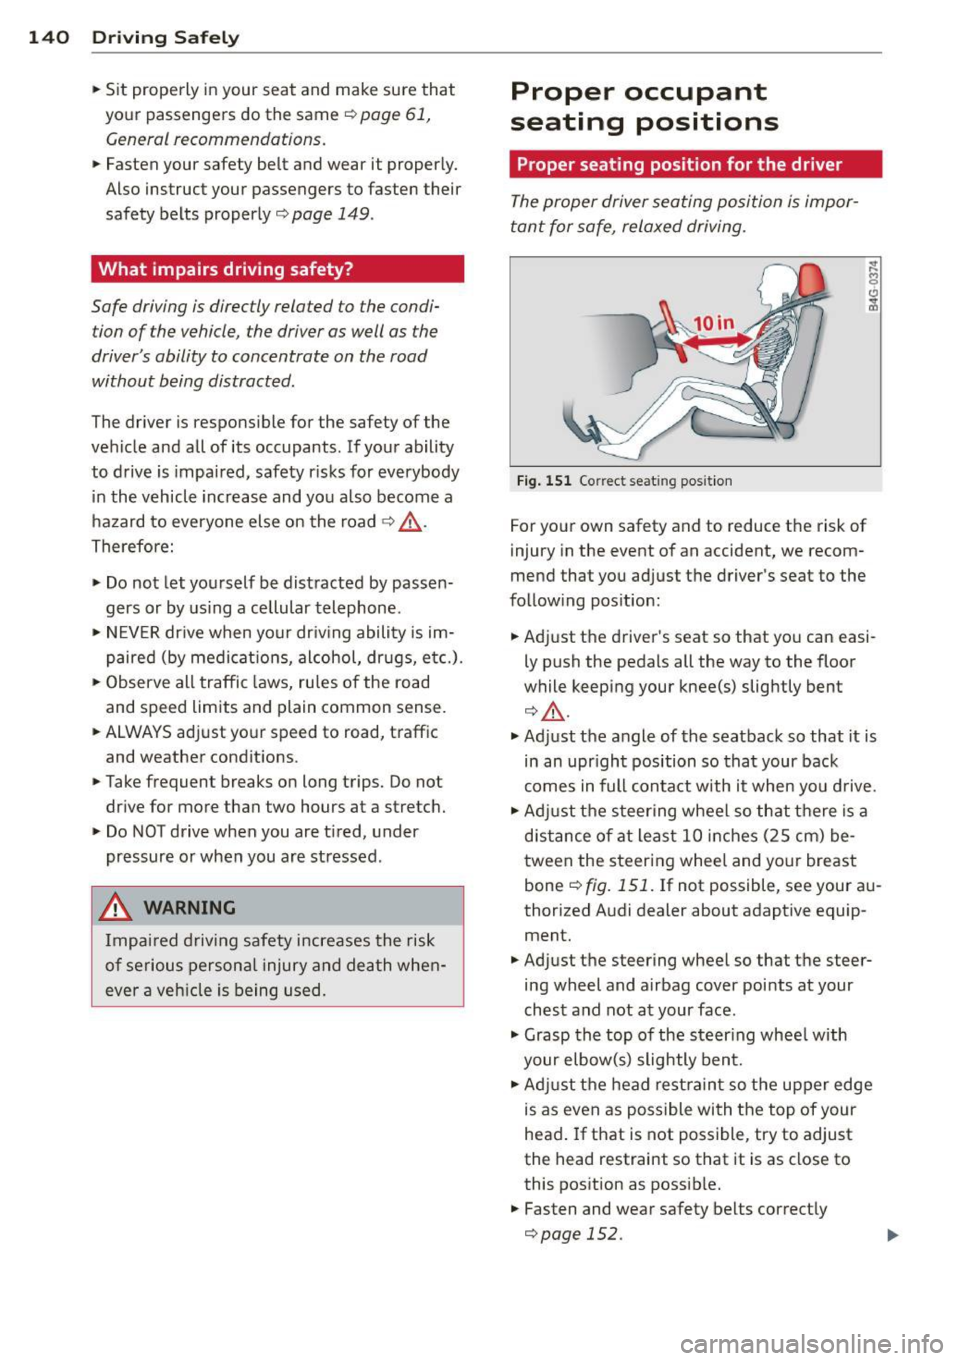
Fig. 151 Correct seat ing position
For your own safety and to reduce the risk of
injury in the event of an accident, we recom
mend that you adjust the driver's seat to the
following position:
• Adjust the driver's seat so that you can easi
ly push the pedals all the way to the floor
while keeping your knee(s) slightly bent
¢,&. .
• Adjust the angle of the seatback so that it is
in an upright position so that your back
comes in full contact with it when you drive.
• Adjust the steering wheel so that there is a
distance of at least 10 inches (25 cm) be
tween the steering wheel and your breast
bone ¢
fig. 151. If not possible, see your au
thorized Audi dealer about adaptive equip ment.
• Adjust the steering wheel so that the steer
ing wheel and airbag cover points at your
chest and not at your face .
• Grasp the top of the steering wheel with
your elbow(s) slightly bent.
• Adjust the head restraint so the upper edge
is as even as possible with the top of your
head. If that is not possible, try to adjust
the head restraint so that it is as close to
this position as possible.
• Fasten and wear safety belts correctly
¢page 152.
Page 148 of 316

146 Driving Safel y
to reduce the risk of inj ury when the vehi
cle is not be ing used.
- After closing the rear lid, always make
sure that it is properly closed and locked.
- Never leave your vehicle unattended es
pecially with the rear lid left open . A
child could crawl into the vehicle through
the luggage compartment and close the
rear lid becoming trapped and unable to
get out . Be ing trapped in a vehicle can
lead to serious persona l injury.
- Never let children p lay in or around the
vehicle .
- Never let passengers r ide in the luggage
compartment . Veh icle occupan ts must
always be proper ly restrained in one of
the vehicle's seating positions.
(D Tips
- Air circulation helps to reduce window
fogging . Sta le air escapes to the o utside
th rough vents in the trim pane l. Be su re
to keep these slots free and open.
- The tire pressure must correspond to the
load . The t ire pr essure is shown on the
tire p ressu re label. The tire pressure la
bel is loc ate d on the driver's s ide B-pi lla r.
The tire pressure label lists the recom
men ded cold t ire inflat ion pressu res for
the veh icle at its maximum capacity
weight and the tires that were on your
vehicle at the time it was manufact ured.
For recommended t ire pressures for nor
mal load conditions, please see chapter
Q page 251.
Tie-downs
The luggage compartment is equipped with
four tie-downs to secure luggage and other
items .
Use the tie-downs to secure your cargo prop
erly ¢ page 145, Loading the luggage com
partment .
In a coll is ion, the laws of phys ics mean that
even smaller items that are loose in the vehi
cle will become heavy missiles that can cause se
rious injury. Items in t he vehi cle possess en
ergy which vary with vehicle speed and the
weight of t he item . Vehicle speed is the most
s ignificant factor.
F or example, in a frontal collision at a speed
of 30 mph (48 km/h), the forces acting on a 10 -lb (5 kg) object a re abo ut 20 times the
normal weight of the item. This means that
the weight of the item would sudden ly be
about 200 lbs . (90 kg) . You can imag ine the
injur ies that a 200 lbs . (90 kg) item fly ing
fr ee ly t hro ugh the passenger compa rtment
cou ld cause in a col lision like this.
_& WARNING
We ak, damaged or imprope r straps used
to secure items to tie-downs can fail dur
i ng hard braking or in a collision and cause
se rious pe rsonal injury.
-Always use s uita ble mo unt ing straps an d
p roperly secu re items to the tie-downs in
the l uggage compa rtment to he lp pre
vent items from shift ing or fly ing fo r
ward as dangerous missiles.
- When the rea r seat backrest is folded
down, a lways use suitable mounting
straps and properly secure items to the
tie-downs in the luggage compartment
to hel p prevent items from fly ing for
ward as dangerous missiles into the pas
senger compartment.
- Never attach a chi ld safety seat t ether
s trap to a t ie-down .
Reporting Safety
Defects
Applicable to U.S.A.
If yo u b eli eve that your vehi cle
has a def ect whi ch could cau se
a crash or could cau se injury or
death, you should immediately
inform the National Highway
Traffic Safet y Administration ""
Page 163 of 316
-Never place additional items on the seat
that can increase the total weight regis
tered by the weight-sensing mat and can
cause injury in a crash.
Front airbags
Description of front airbags
The airbag system can provide supplemental
protection to properly restrained front seat o ccupan ts.
F ig . 165 Location of driver airbag: in steer ing whee l
Fig. 166 Location of front passenger's airbag: in the in
st rument panel
Your veh icle is equipped w ith an "Advanced
Ai rbag System" in compliance with United
States Federal Motor Vehicle Safety Standard (F MVSS) 208 as app licab le at the time your
ve hicle w as manufac tured. The system senses
the position of the front seats and controls
front airbag inflation with a va lve, depending
on the distance between the respect ive seat
and the steering wheel or instrument panel.
The safety belts for the seats have "preten
sioners" that he lp to take slack out of the belt
system . The pretensioners are also activated
by the electron ic contro l unit for the airbag
sys tem.
A irba g sy stem 161
The front sa fety belts also have load limiters
to help reduce the forces applied to the body
in a crash .
T he airbag for the drive r is in the stee ring
whee l hub
q fig. 1 65 and the airbag for the
front passenger is in the instrument panel
~fig. 166 . The general locat ion of the a irbags
is marked "AIRBAG".
There is a lot you need to know about the ai r
bags in your vehicle . We urge you to read t he
detailed information about airbags, safety
belts and child safety i n this and the other
chapters that make up the owner's literature. Please be sure to heed the WARNINGS -they
are extremely important for your safety and
the safety of yo ur passengers, especially in
fants and small children.
_&. WARNING
N ever rely on airbags alone for protec tion.
- E ven w hen they deploy, airbags provide
only s uppleme nta l pro tect ion .
- Airbag work most effective ly when used
wit h properly wor n safety belts.
- Therefore, always wea r you r safe ty belts
and make sure that eve rybody i n your ve
hicle is p rope rly res trained.
_&. WARNING
A pe rson on the fron t passe nger seat, es
pe cial ly infants and sma ll children, will re
ceive serious injuries and can even be kil l ed by being too close to the airbag when
it inflates .
- Altho ugh the Advanced Airbag System in
your veh icle is designed to tur n off the
front passenge r airbag if an infant or a
small child is on the front passenger
seat, nobody can absolutely guarantee
that deployment under these specia l
conditions is imposs ible in all conceiva
b le sit uat ions that may happen during
t he useful life of your vehicle.
- The Advanced Airbag System can dep loy
in acco rdance with t he "low risk" option
un der the U.S. Fede ral Standa rd if a child
that is he avie r than the typical one-year
-
..