brake fluid AUDI Q5 2015 Owners Manual
[x] Cancel search | Manufacturer: AUDI, Model Year: 2015, Model line: Q5, Model: AUDI Q5 2015Pages: 302, PDF Size: 75.01 MB
Page 5 of 302
M N
co
a:
co
,...., \!) 1.1'1
N 1.1'1 ,....,
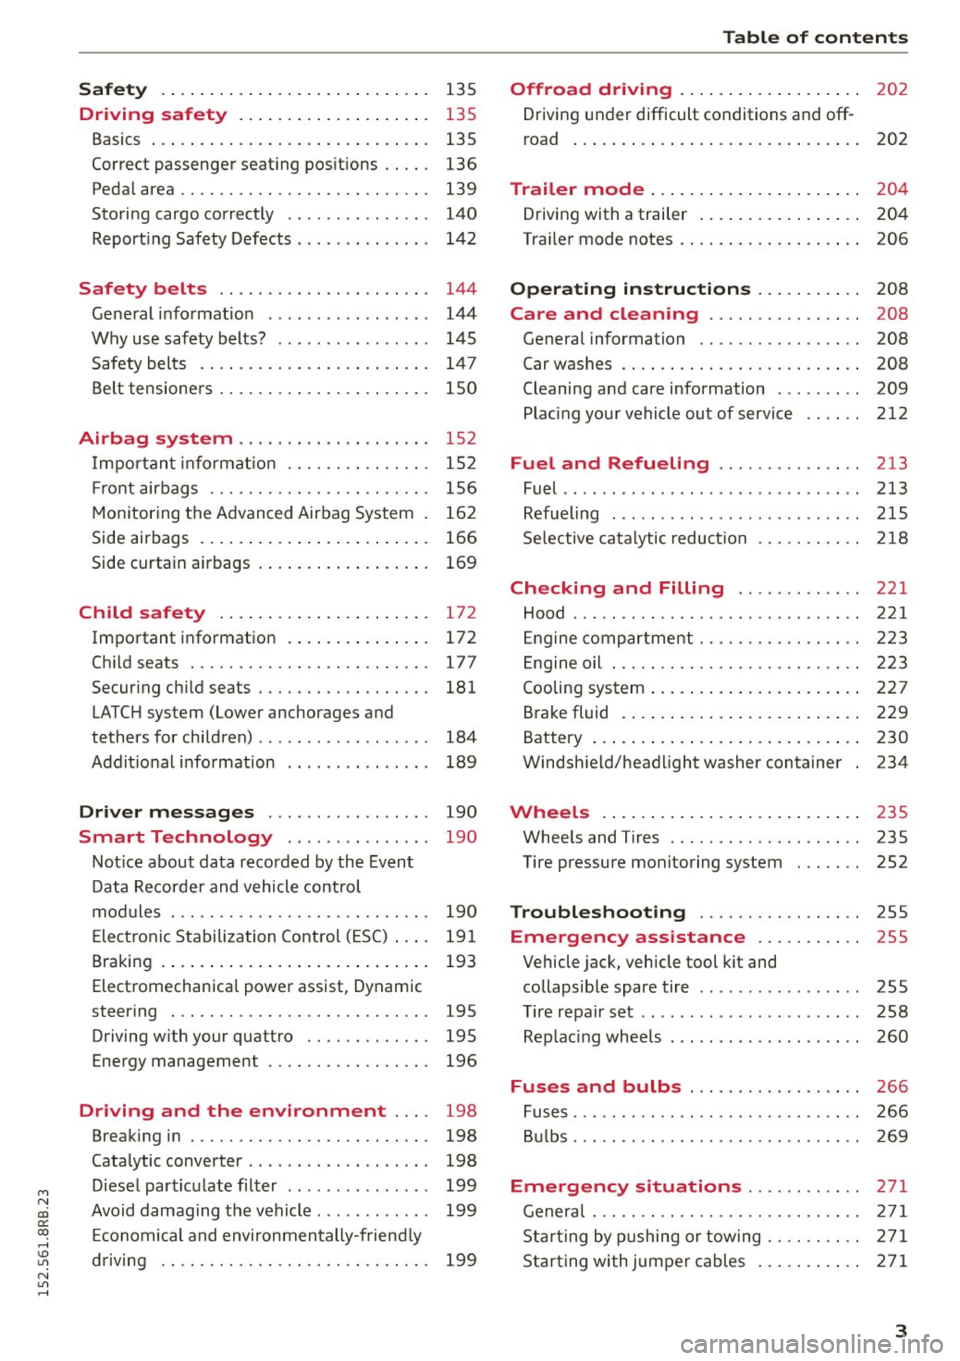
Safety . . . . . . . . . . . . . . . . . . . . . . . . . . . . 135
Driving safety . . . . . . . . . . . . . . . . . . . . 135
Basics . . . . . . . . . . . . . . . . . . . . . . . . . . . . . 135
Correct passenger seat ing positions . . . . . 136
Pedal area . . . . . . . . . . . . . . . . . . . . . . . . . . 139
Storing cargo correct ly . . . . . . . . . . . . . . . 140
Reporting Safety Defects . . . . . . . . . . . . . . 142
Safety belts . . . . . . . . . . . . . . . . . . . . . . 144
General information . . . . . . . . . . . . . . . . . 144
Why use safety belts? . . . . . . . . . . . . . . . . 145
Safety belts . . . . . . . . . . . . . . . . . . . . . . . . 147
Belt tensioners . . . . . . . . . . . . . . . . . . . . . . 150
Airbag system . . . . . . . . . . . . . . . . . . . . 152
Important information . . . . . . . . . . . . . . . 152
Front airbags . . . . . . . . . . . . . . . . . . . . . . . 156
Monito ring the Advanced Airbag System . 162
Side airbags . . . . . . . . . . . . . . . . . . . . . . . . 166
Side curtain airbags . . . . . . . . . . . . . . . . . . 169
Child safety . . . . . . . . . . . . . . . . . . . . . . 172
Important information . . . . . . . . . . . . . . . 172
Child seats .............. .... .. .. ... 177
Secur ing ch ild seats . . . . . . . . . . . . . . . . . . 181
LATCH system (Lower anchorages and
tethers for children) . . . . . . . . . . . . . . . . . . 184
Addit ional info rmation . . . . . . . . . . . . . . . 189
Driver messages . . . . . . . . . . . . . . . . . 190
Smart Technology . . . . . . . . . . . . . . . 190
Notice about data recorded by the Event
Data Recorder and vehicle control
modules . . . . . . . . . . . . . . . . . . . . . . . . . . . 190
E lect ronic Stabilization Control (ESC) . . . . 191
B raking . . . . . . . . . . . . . . . . . . . . . . . . . . . . 193
Electromechanica l power assist, Dynamic
steering . . . . . . . . . . . . . . . . . . . . . . . . . . . 195
Driving with your quattro . . . . . . . . . . . . . 195
Energy management . . . . . . . . . . . . . . . . . 196
Driving and the environment . . . . 198
Breaking in . . . . . . . . . . . . . . . . . . . . . . . . . 198
Cata lytic converter . . . . . . . . . . . . . . . . . . . 198
Diesel particu late filter . . . . . . . . . . . . . . . 199
Avoid damaging the vehicle . . . . . . . . . . . . 199
Econom ical and environmentally-friend ly
driving . . . . . . . . . . . . . . . . . . . . . . . . . . . . 199
Table of contents
Offroad driving . . . . . . . . . . . . . . . . . . .
202
Driving under difficult conditions and off-
road . . . . . . . . . . . . . . . . . . . . . . . . . . . . . . 202
Trailer mode . . . . . . . . . . . . . . . . . . . . . . 204
Driving with a trailer . . . . . . . . . . . . . . . . . 204
Tra iler mode notes . . . . . . . . . . . . . . . . . . . 206
Operating instructions . . . . . . . . . . . 208
Care and cleaning . . . . . . . . . . . . . . . . 208
General information . . . . . . . . . . . . . . . . . 208
Car washes . . . . . . . . . . . . . . . . . . . . . . . . . 208
Cleaning and care information . . . . . . . . . 209
Placing your vehicle out of service . . . . . . 212
Fuel and Refueling .......... ... .. 213
Fuel .. ..... ... .. .. ........ ...... ... 213
Refueling ... .. .. .. ... .. ... ..... .. .. 215
Selective catalytic reduction 218
Checking and Filling . . . . . . . . . . . . . 221
Hood . . . . . . . . . . . . . . . . . . . . . . . . . . . . . . 221
Eng ine compartm ent . . . . . . . . . . . . . . . . . 223
En gine oil . . . . . . . . . . . . . . . . . . . . . . . . . . 223
Cooling system . . . . . . . . . . . . . . . . . . . . . . 227
Brake fluid . . . . . . . . . . . . . . . . . . . . . . . . . 229
Battery . . . . . . . . . . . . . . . . . . . . . . . . . . . . 230
Windshield/headlight washer container 234
Wheels .. .... .. .. ... ........ .. .. .. 235
Wheels and Tires . . . . . . . . . . . . . . . . . . . . 235
Tire pressure monitoring system . . . . . . . 252
Troubleshooting . . . . . . . . . . . . . . . . . 255
Emergency assistance . . . . . . . . . . . 255
Vehicle jack, vehicle tool kit and
collapsib le spare tire . . . . . . . . . . . . . . . . . 255
Tire repair set . . . . . . . . . . . . . . . . . . . . . . . 258
Replacing wheels . . . . . . . . . . . . . . . . . . . . 260
Fuses and bulbs . . . . . . . . . . . . . . . . . . 266
Fuses. ...... .. .. .. ... .. ... ..... .. .. 266
Bulbs. . . . . . . . . . . . . . . . . . . . . . . . . . . . . . 269
Emergency situations . . . . . . . . . . . . 271
General . . . . . . . . . . . . . . . . . . . . . . . . . . . . 271
Starting by pushing or towing . . . . . . . . . . 271
Starting with jumper cables . . . . . . . . . . . 27 1
3
Page 20 of 302
Instruments and indicator lights
Malfunction in th e electronic diffe rential
lock (EDL )
The EDL works together with the ABS . The ABS
warning light wi ll come on if there is a malfunc
t ion in the EDL system
q page 191 . See your au
t hor ized Audi dealer as soon as possible.
A WARNING
- If the Lil3 (USA models) ;[IJ (Canada mod
els) warning light does not go out , or if it
comes on while d riving, the ABS system is
not working properly. The vehicle can the n
be stopped only with the standard brakes
(without ABS) . You wi ll not have the protec
tion ABS p rovides . Contact your authorized
Audi dealer as soon as possible .
- If the
1111 (USA models)/ . (Canada mod
els) brake system indicator light t urns on to
gether wit h the ABS and ESC indicator
lights , the ABS/ESC regulating function may
have failed. Funct ions that stab ilize the ve
hicle are no longer availab le. This could
cause the vehicle to swerve and increase the
risk of sliding . Driv e ca refully to the nea rest
autho rized Aud i dealer o r othe r qualified
wor kshop and have the malfunction correc t
ed.
:fil .lC® ) Electromechanical parking brake
The warning/indicator light monitors the elec
trome chanical parking brake.
W ith the parking brake applied and the ign it ion
turned on, the. (USA models)/ . (Cana-
da models) warning/indicator light illuminates.
Afte r the ig nitio n has been turned off , the warn
ing/indicator light continues to illum inate fo r
about 30 seconds . If the parking brake is applied
w ith the ignition t urned off, the warning/indica
tor light illuminates for abo ut 30 seconds.
The warning/indicator ligh t will go o ut when t he
parking brake is re leased .
-
If the war ning/ indicato r light flashes cont inuous
ly
after applying the p ark ing brake , brak ing fo rce
is no t sufficient to prevent the vehicle from roll
ing unintentiona lly . Please note the following:
18
- I f the slope of the ground is too steep to pa rk
the vehicle, the add itiona l driv e message ap
pears
Caution: Vehicle parked too steep.
- In the event of a pa rking brake malfunction ,
the yellow
Ill symbol appears in the instru
ment cluster display and the driver message
Pa rk ing brake malfunction! is displayed. Have
the malfu nction repaired as soon as possible by
an authorized A udi dealer or any other qualified
workshop .
BRAKE/C(D) Brake system
The warning/indicator light flashes if brake fluid
level is low, if there is an ABS system malfunc
tion or a parking brake malfunction .
The 1111 (USA models)/ . (Canada models)
l ight illum inates when the ignition is turned on .
It goes out after the engine has been started.
This ind icates that the brake warn ing light is
fun ct io ni ng properly.
If th e brake warning light does not light up
when the engine is cranking, there may be a
malfunction in the electrical system. In this
case, conta ct an authorized Audi dealer .
If the brake system warning/indicator light flash
es, there is a brake system malfunction . By press
i ng the
IS ET I button , you can b ring up a dr iver
message wh ich explains the malfunction in mo re
d etail
q page 28.
If the ABS fails, the ABS wa rn ing/ indicator lig ht
9 (USA models)! IIJ (Canada mode ls) flashes
togethe r wi th the b rake system wa rning/ind ica
tor lig ht
q ,&. .
(USA mode ls): If the war ning light 1111 a nd the
warning
light Ei'I illuminate together, immedi
ate ly conta ct yo ur autho rized Aud i dea le r or
q ualifie d workshop to have all brake pads in
spected
q page 32 .
When the light comes on , a n aud ible warn ing sig-
nal is also given. .,.
Page 21 of 302
M N
co
a:
co
,...., \!) ..,.,
N ..,., ,....,
A WARNING ,~
- If the 1111 (USA models)/ . (Canada mod
els) brake system indicator light turns on to
gether with the ABS and ESC indicator
lights, the ABS/ESC regulating function may
have failed. Functions that stabilize the ve
hicle are no longer available. This could
cause the vehicle to swerve and increase the
risk of sliding. Drive carefully to the nearest
authorized Audi dealer or other qualified
workshop and have the malfunction correct
ed.
- If the brake warning/indicator light does
not go out after a few seconds and the park
ing brake is released, or lights up while you
are driving, the fluid level in the brake fluid reservoir is too low. If you believe that it is
safe to do so, proceed immediately at low
speed to the nearest authorized Audi dealer
or qualified repair facility and have the
brake system inspected.
- Always keep in mind that after several brake
applications, you will need greater pressure
on the brake pedal to stop your vehicle. Do
not rely on strained brakes to respond with
maximum stopping power in critical situa
tions. You must allow for increased braking
distances. The extra distance used up by
fading brakes could lead to an accident.
Instruments and indicator lights
19
Page 29 of 302
M N
co ~ co
rl I.O
"' N
"' rl
Lamp (MIL) ¢..ffi will il luminate. If this occurs,
contact the nea rest authorized Audi dea ler for as
sistance.
.&_ WARNING
Always observe the posted speed limits and adjust your speed to suit prevailing road, traf
fic and weather cond it ions . Never drive your
vehicle faster than the maximum speed rating
of the tires installed .
Auto Check Control
Introduction
The Auto-Check control monitors the function of
certain vehicle features and components .
It sim
ply makes sure these features and components
are working properly . The Auto-Check control
works as long as the ignition is on, as well as
whenever the veh icle is driven .
-
If a component is malfunctioning or if the need
for an urgent repair has been detected, this will appear in the instrument cluster display . You w ill
also hear an audible warning tone . The displays
are color coded in either red or ye llow depending
on their level of prior ity.
A red symbol means
Danger , a yellow symbol in
dicates
Warning . In certain situations, informa
tion message for the dr iver appear in addition to
the red and yellow symbols.
Note about automatic transmission
The Auto-Check Control will automat ically per
form a test each time you switch o n the ignition .
With the selector lever in P or N, the following
message appears in the display :
When stationary apply brake pedal while select
ing gear
When you select a different gear (for example: R,
D, etc.), the message will disappear and the Au
to -Check function is d isplayed.
If there is a malfunction, then the malfunction
message will appear about 15 seconds after you
start the vehicle. At the same time you will hear a
warning tone.
Dri ver information system
Dr iver information messages
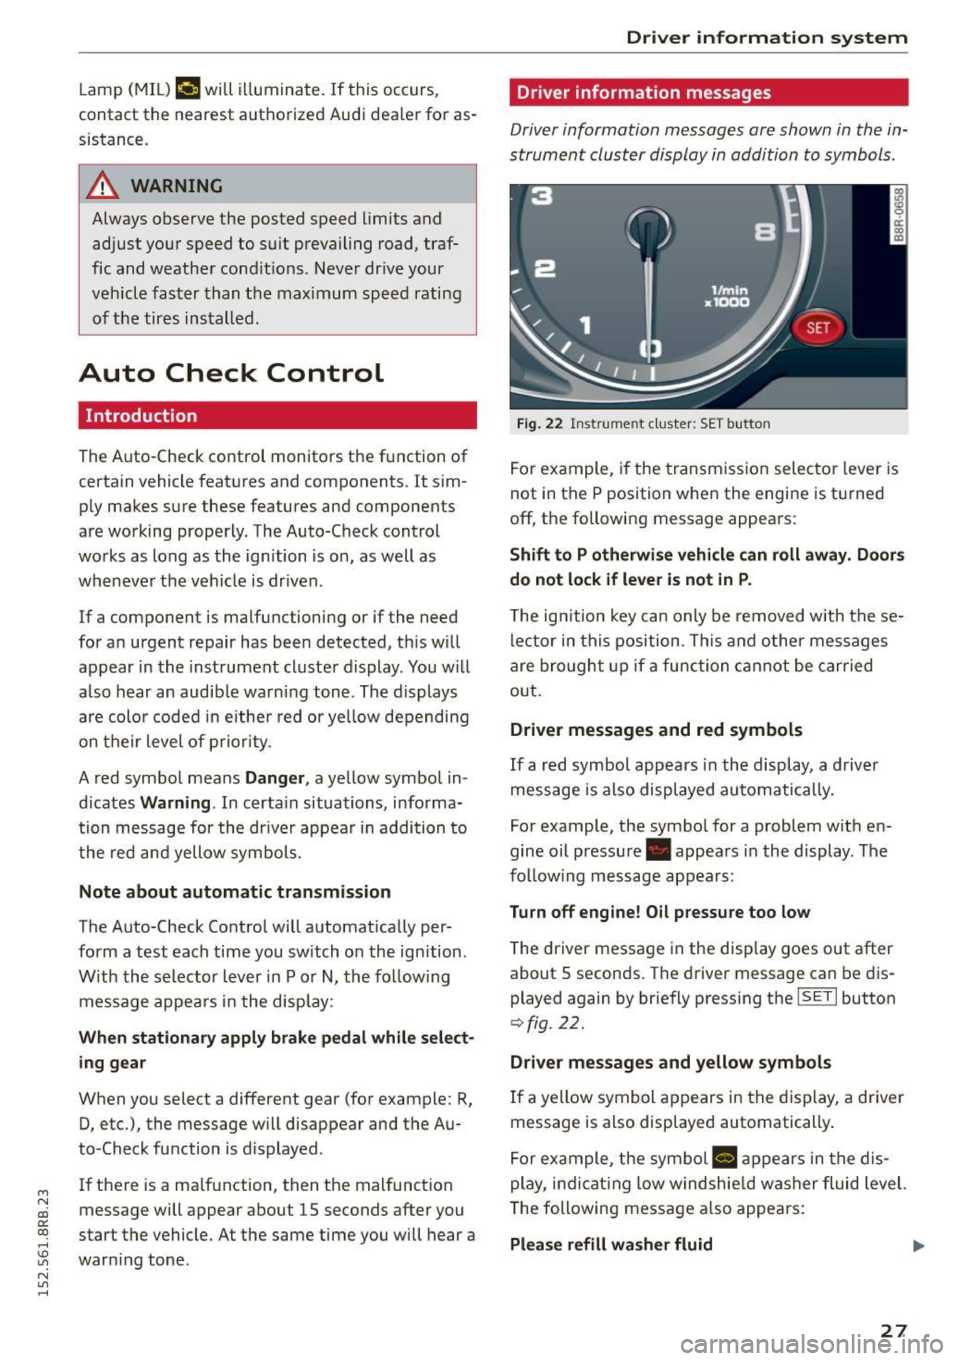
Driver information messages are shown in the in
strument cluster display in addition to symbols .
Fig. 22 Inst rume nt clust er: SET button
For example, if the transmission selector lever is
not in the P position when the engine is turned
off, the following message appears :
Shift to P otherwise vehicle can roll away. Doors
do not lock if lever is not in P .
The ign ition key can only be removed w ith these
lector in this position . This and other messages
are bro ught up if a function cannot be carried
out .
Driver messages and red symbols
If a red symbol appears in the display, a driver
message is also displayed automatically.
For example, the symbol for a problem w ith en
gine oil pressure . appears in the display . The
fo llow ing message appears:
Turn off engine! O il pressure too low
T he driver message in the display goes out after
about S seconds . The dr iver message can be dis
played again by briefly press ing the
ISETI button
9 fig . 22.
Driver messages and yellow symbols
If a yellow symbol appears in the display, a driver
message is also displayed automatically .
For example, the symbol
Ill appears in the dis
play, indicat ing low windshie ld washer fluid level.
The following message also appears :
Please refill washer fluid ..,_
27
Page 31 of 302
M N
co
a:
co
,...., \!) ..,.,
N ..,., ,....,
Stop vehicle and check b rake fluid l evel
"' Stop the vehicle.
"' Check the brake fluid level
o page 229.
"'Seek professiona l assistance if necessary .
Warning! Fault in brake system. Contact
worksho p
"'Drive carefu lly to the nearest authorized Audi
dealer or other qualified workshop and have
the malfunction corrected
o A .
Pa rking brak e system fault! See owner 's
m anual
"' If this symbol appears when the vehicle is sta
tionary or after the ignitio n is turned on, check
to see if the parking brake can be re leased.
Drive to an authorized Audi dealer or other
qualified workshop as soon as possible and
have the malfunct ion corrected. If the park ing
brake cannot be opened, then take it to an ex
pert at an authorized Audi dea ler.
"' If the symbol appears while you are driving, it is
poss ible that the trac tion control or the eme r
gency brake has malfunctioned. It is possible
that the parking brake cannot be applied.
It is
also possible that the parking brake cannot be
released after it has been applied. Drive to an
authorized Aud i dealer or other qualified work
shop to have the malfunction corrected.
If the ABS system malfunctions, the ABS warn ing/indicator light illuminates together with the
brake system malfunction warning/ind icator
light
o _&. .
A WARNING
-Always observe the wa rnings in
o page 221, before opening the hood and
c heck ing the b rake fluid.
- Driv ing with low b rake fluid is a safety haz
ard. Stop the car and get p rofess ional assis
tance.
- If the
111111 (USA models)/ . (Canada mod
els) brake system indi cator lig ht t urns on to
ge ther with the ABS an d ESC i ndica to r
lights, the ABS/ ESC regu lating function may
have failed. Functions that stab ilize the ve
hicle a re no longer avai lab le . This could
Dri ver information s ystem
cause the vehicle to swerve and increase the
risk of s liding. Drive carefully to the nearest
authorized Audi dealer or other qualif ied
workshop and have the malfunct ion correct
ed.
- L Engine cooling system malfunction
A malfunction in the engine cooling system must
be repaired as soon as possible.
If the . symbo l flashes in the disp lay, either the
engine coo lant
temperature is too high or the en
gine coolant
level is too low . A driver message
appears as we ll to explain the malfunct ion in
more detail. The d river warn ing goes out after
about 5 seconds, but it can be brought up at any
t ime by press ing the
ISET I button again.
Turn off engin e an d check coolant leve l
"'Pull off the road .
"' Stop the vehicle .
"' Turn
off the engine.
"' Check coolant level
o page 22 7 .
"' Add coolant if necessary ~ page 228.
"'Continue driv ing on ly afte r the engine coo lant
warning/indi cato r light goes out.
"' Con ta ct yo ur au thorize d Aud i dealer for assis
tance if necessary .
If the engine coolant level is correct, then the ra
diato r fan may be the cause of the malfunct io n.
A WARNING
- If your vehicle should brea k down for me
chan ica l or other reasons, pa rk at a safe d is
tance from moving traffic, turn
off the en
gine and turn on the hazard warning lights
o page 54, Emergency flashers.
- Never open the hood if you see or hear
steam or coo lant escaping from the eng ine
compartment -you risk being scalded. Wait
until you can no longer see or hear steam or
coo lant escaping.
- The engine compartment of any vehicle is a
dangerous area. Before you perform any
work in the eng ine compartment, turn of
the engine and a llow it to cool. Fo llow the
~
warn ing stickers o page 221. ~
29
Page 33 of 302
M N
co
a:
co
,...., \!) 1.1'1
N 1.1'1 ,....,
~ Do not turn the engine off.
~ Drive immediately to an authorized Audi dealer
to have the malfunction corrected .
If there is a malfunction in the e lectronic ignition
l ock, the ignition cannot be turned off . Drive im
mediately to an authorized service facility to have
the cause of the ma lfunction corrected.
On vehicles with Convenience key*, the engine
should not be switched off using the Start/Stop
button because the engine cannot be started
again after the ignition has been switched off.
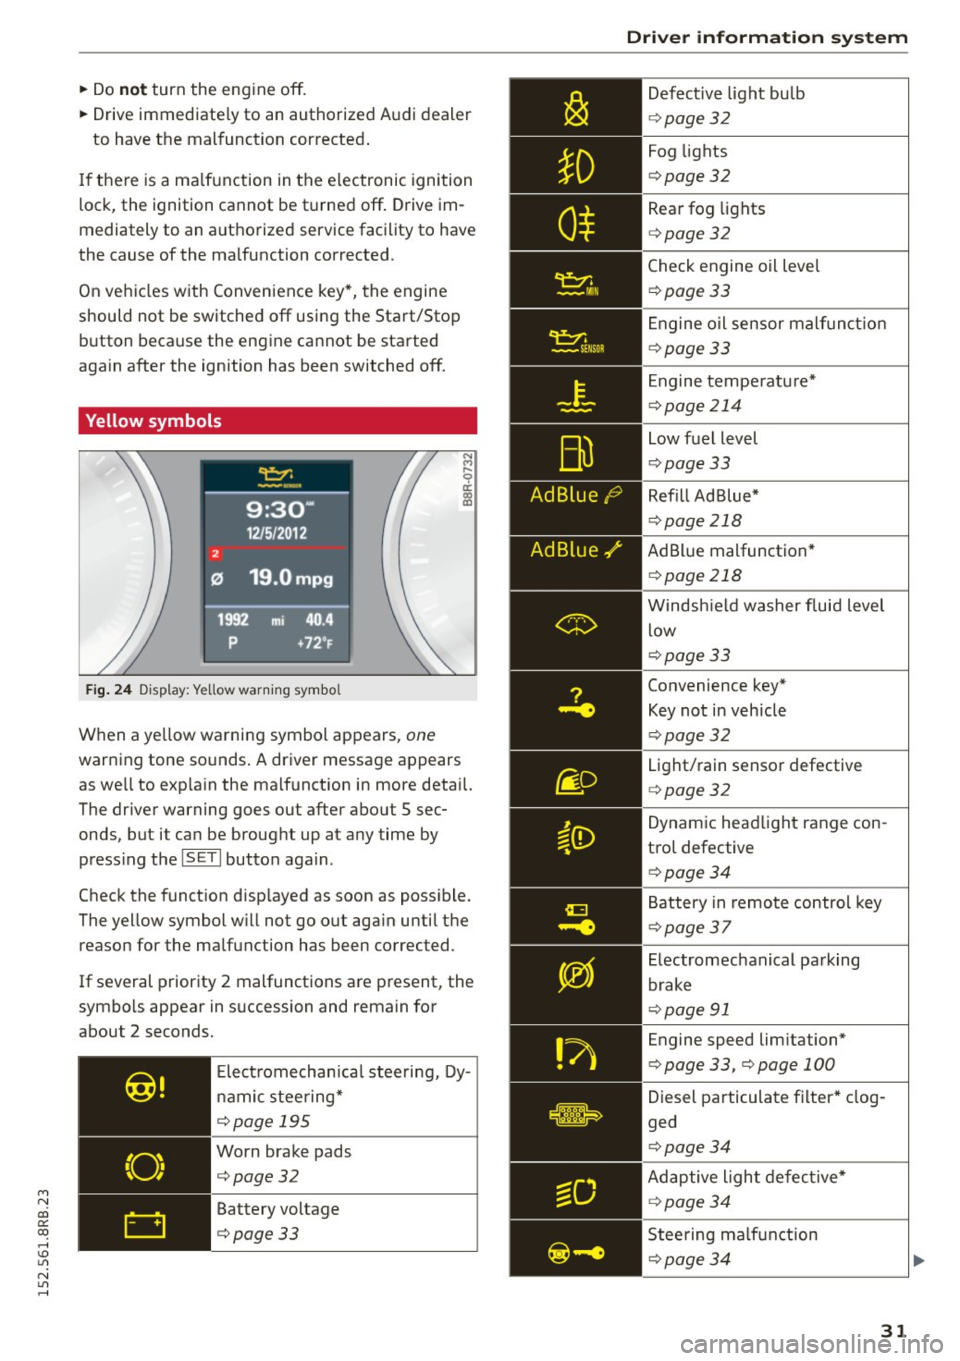
Yellow symbols
Fig. 24 Display: Ye llow warn ing symbo l
N M
9 a: a, a,
When a ye llow warning symbol appears, one
warning tone so unds . A driver message appears
as we ll to exp la in the malf unction in more detail.
The driver warning goes out after about S sec
onds, but it can be brought up at any time by press ing t he
ISETI button again.
Check the function d isp layed as soon as possible.
The yellow symbol w ill not go out aga in until the
reason for the malfunction has been corrected.
If several priority 2 malfunctions are present, the
symbols appear in succession and remain for
about 2 seconds.
Elect rom echan ica l steering, Dy
namic steering*
¢page 195
Worn brake pads
¢page32
Battery voltage
¢page33
Driver information system
Defective light bulb
¢ page 32
Fog lights
¢page 32
Rear fog lights
¢page 32
Check engine oil leve l
¢page 33
Engine oil sensor malf unc tion
¢page 33
Engine temperature*
¢page 214
Low fuel level
¢page 33
Refill Ad Blue*
¢page 218
AdBlue malfunction *
¢page 218
Windshield washer fluid level
low
¢page 33
Convenience key*
Key not in veh icle
¢ page 32
Light/rain sensor defective
¢page 32
Dynamic headlight range con
trol defective
¢ page 34
Battery in remote control key
¢page 37
Electromechanical parking
brake
¢page 91
Engine speed lim itation*
¢ page 33, ¢page 100
Diesel particulate filter* clog
ged
¢ page 34
Adaptive light defective*
¢page 34
Steering malfunction
¢page 34
31
Page 196 of 302
Smart Technolog y
Operating c ondit ion s and drivin g hab it s
The brakes on today 's automobi les are st ill sub
ject to wear, depending largely on operating con ditions and driving habits¢.&. . On vehicles that
are either driven mostly in stop-and-go city traf
f ic or are driven hard, the brake pads should be
checked by your authori zed Audi dealer more of
ten than specified in the
Wa rra nty & Mainte
n an ce boo kle t .
Fa ilure to have your brake pads
inspected can result in reduced brake perform
ance.
On steep slopes, you should use the brak ing ef
fect of the eng ine . Th is way, you prevent unnec
essary wear on the brake system. If you must use
your brakes, do not ho ld the brakes down contin
uously. Pump the brakes at inte rva ls.
Operat ing no ise
Noises may occur when braking depending on the
speed, brak ing force and outside conditions such
as temperature and humid ity .
Effect of w ate r an d r oad sal t
In certain situations, for example after driving
through water, in heavy rain, after overn ight con
densat ion or after washing your car, the braking
effect can be reduced by mo isture or ice on the
brake rotors and brake pads . The brakes must be
d ried first with a few carefu l brake applications.
At h igher speeds and with the w indshield wipers
turned on, the brake pads press against the brake rotors for a short amount of t ime . This occurs at
regular intervals without the d river noticing and
p rov ides for better brake response t ime unde r
wet conditions .
The effectiveness of the brakes can be reduced
when the vehicle is dr iven on a salt-covered road
a nd the brakes are not used . L ikew ise, you clean
off accumulated sa lt coating from brake discs
and pads with a few cautious applications of the brake ¢.&. .
Corros ion
There may be a tendency for dirt to bui ld up on
the brake pads and corros ion to fo rm on the discs
if the car is not driven regularly or on ly for short
trips with litt le use of the brakes.
194
If the brakes are not used frequently, or if corro
sion has formed on the discs, it is advisable to clean off the pads and d iscs by braking firmly a
few times from a moderate ly high speed¢.&. .
Fault s in the brak e system
If you shou ld notice a sudden increase in bra ke
pedal travel, then one of the two brake circuits
may have failed
¢ .&. .
Lo w b rake fluid l evel
Malfunctions can occur in the brake system if the
brake flu id leve l is too low. The brake fl uid level is
monitored electronica lly.
Brake boos ter
The brake booster increases the pressure that you
generate w ith the brake pedal. It on ly operates
whi le the engine is runn ing o r with the ig nit ion
switched on (hybrid drive*)
¢ ,& .
Brake lining we ar status
Brake lining wear may be checked by visual in
spection of the condition of the brake pads
through the open ings in the wheel. If necessary ,
the wheel may be removed for this inspec tion
¢ page 260, Replacing wheels .
& WARNING -
- New brake pads don't have the best stop
ping power and m ust be "broken-in" during
the initial 250 miles (400 km) . You can com
pensate for this by pressing the brake pedal
more f irm ly. This also applies later when
new pads are installed.
- You should perform braking maneuvers for
the purpose of cleaning the brake system
only if road conditions permit. Other road
users must not be put at r isk -you may
cause an accident!
- Before descend ing a steep grade, reduce
speed and sh ift transmission into a lower
gea r or lower dr iving range. Do not ride the
bra kes or ho ld the peda l down too long or
too often . This could cause the bra kes to get
hot and diminish braking efficiency.
- Do not "ride the brakes" by rest ing your foot
on the pedal when you do not intend to
~
Page 204 of 302
Offroad driving
Off road driving
Driving under difficult
conditions and off-road
General information
The opera tion of the E lectronic Stabilization Con
trol (ESC) is expanded for operation away from paved roads. In situat ions where s lip or a differ
ential locking function is required, the offroad mode can be activated
<=> page 191. Your Aud i al
so has permanent a ll-wheel drive in addition .
However, your Audi is not a pure offroad veh icle.
It was not bu ilt for driving under extreme condi
tions, e.g. for trips that are in the nature of an ex
pedit io n.
Dri ve o nly on roads and offro ad sections which
match the des ign of you r vehicle and your abil i
ties as a dr iver. Neve r take r isks!
B efo re driving offroad
- Check the eng ine oil level, tire p ressure, cool
ant leve l, and the fluid level i n the windshield
washer reservo ir.
- Stow luggage items and other objects in the
lu ggage compartment, and sec ure them
against slid ing aro und.
After dri ving off road
- After trips offroad, remove any twigs and othe r
f oreign objects from the grill, the unde rbody
and the wheels . Pay special attention to foreign
objects (stones) which have become lodged in
the tire tread.
- Clean the body and the vehicle unders ide, and
inspect the vehicle for poss ible damage.
- Clean dirty windows, headlamp lenses, rear
lights, and license p lates.
- Perform a brake check (particularly after t ravel
li ng through water).
A WARNING
- Drive especia lly attentive ly and plan ahead
in diffic ult road cond itions and w hen
off
road. Excessive speed or incorrect mane u
vers can cause in ju ries and damage to the
vehicle.
202
- Always adapt your speed and driving sty le to
road, off road, traffic, and weather cond i
tions. Dr ive espec ially slowly offroad w hen
your view is restricted.
- Please be aware that in offroad mode, par
ticularly on a smooth and slippery road, the
wheels may have an increased tendency to
spin and the vehicle may break away -dan
ge r of skidding!
- Stability is limited in the offroad mode .
® For the sake of the environment
Avoid damage to the environment and respect
nature.
(D Tips
Only drive where it is permitte d and stay on
marked roads and paths .
Explanation of some technical terms
The following data refer to ideal cond itions. De
pend ing on veh icle load a nd gro und cond itions
and the env ironment, the numbe rs may vary.
It is
the d river 's responsibility to decide whethe r ave
h icle can overcome a specific s ituation
<=> .&, .
Gradient angle
The number of meters in alt itude ga ined over a
distance of 109 .4 yards or 100 meters (grade)
are given as a pe rcentage o r degrees . Info rma
tion about the gradient the ve hicle can climb un
der i ts own power (depends in part on the road
s ur fa ce and eng ine power). M axim um permi tted
grade: 31°
Ground clearance
The distanc e between the road s urface and the
l owest poi nt of the veh icle underbody . G round
cl ear ance 7.9 in ( 20 0 mm)
A WARNING
Exceed ing the s tated max imum figur es c an
res ult in seve re injuries or vehicle damage .
- All the info rm ation w as g athered on level,
-
fi rm and non -slip pery road s urfaces, and un-
de r dry weather conditions .
llll>
Page 207 of 302
M N
co
a:
co
,...., \!) Ll"I
N Ll"I ,....,
Operating instructions
6"
~
a
2
. 1/2"
'
-{ I} 1-1/2"
-
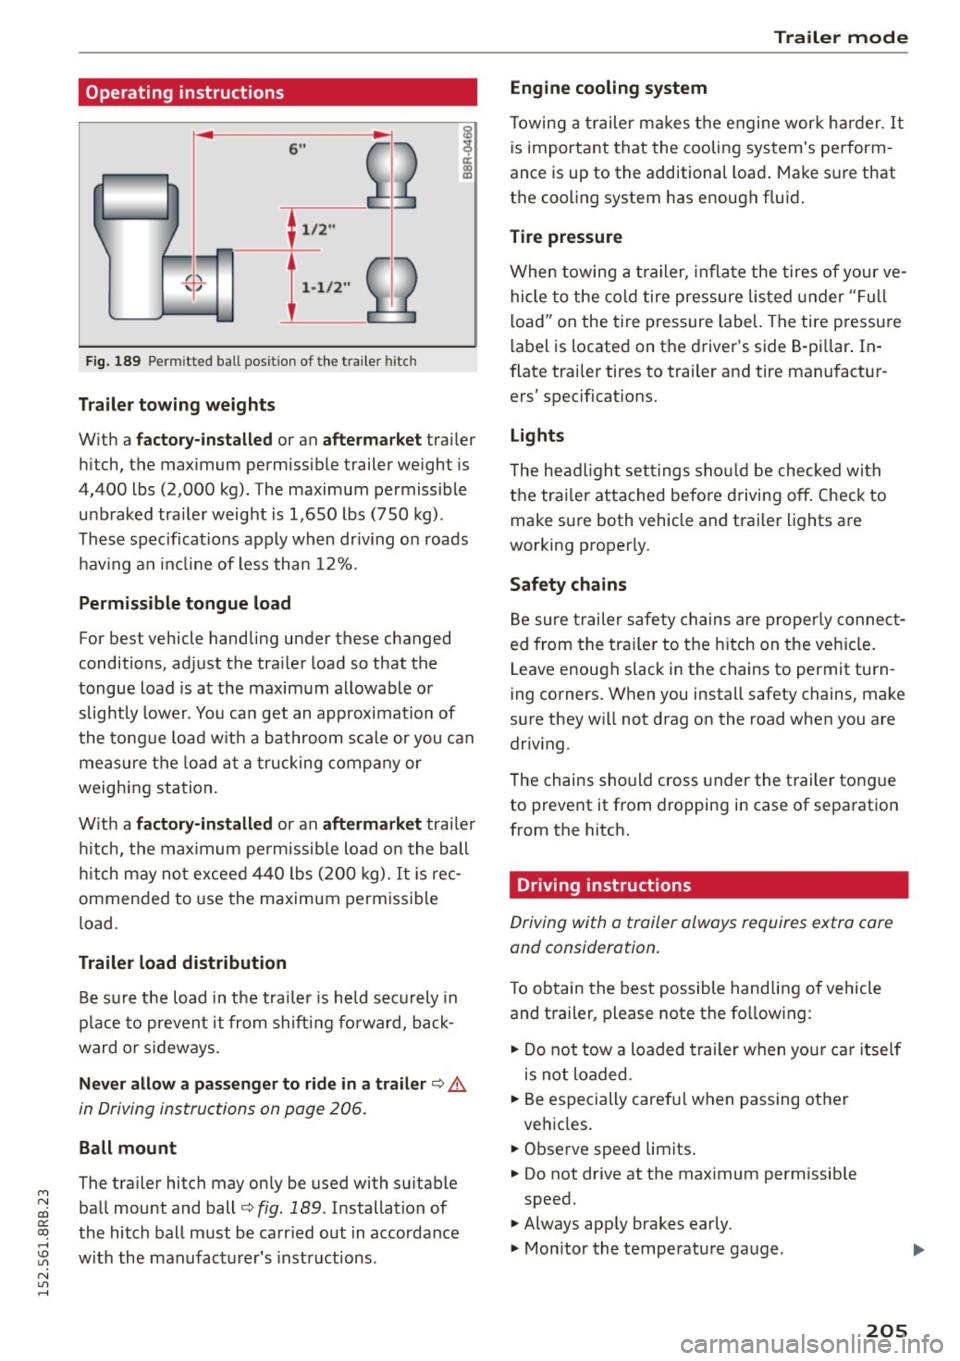
Fig. 189 Pe rmi tted ba ll pos it ion of the trailer hitc h
Trailer towing weights
With a factory-installed or an aftermarket trailer
hitch, the maximum permissible trailer weight is
4,400 lbs (2,000 kg) . T he maximum permissible
unbraked trailer weight is 1,650 lbs (750 kg) .
These specifications apply when dr iv ing on roads
having an inclin e of less than 12%.
Permissible tongue load
For best vehicle handling under these changed
conditions, adjust the traile r load so that the
tongue load is at the maximum allowable or
slightly lower. You can get an approximat ion of
the tongue load w ith a bathroom scale or you can
measure the load at a trucking company or
weighing station.
With a
factory-installed or an aftermarket trailer
hitch, the maximum permissible load on the ball
hitch may not exceed 440 lbs (200 kg). It is rec
ommended to use the maximum permissible
l oad.
Trailer load distribution
Be sure the load in the tra iler is held securely in
place to prevent it from shifting forward, back
ward or sideways .
Never allow a passenger to ride in a trailer c::> .&.
in Driving instructions on page 206.
Ball mount
The trailer hitch may only be used with suitable
ball mount and ball
c::> fig. 189 . Installation of
the hitch ball must be carr ied out in accordance
with the manufacturer's instructions .
Trailer mode
Engine cooling system
Towing a trailer makes the engine work harder . It
is important that the cooling system's perform
ance is up to the additional load . Make s ure that
the cooling system has enough fluid .
Tire pressure
When towing a trailer, inflate the tires of your ve
hicle to the cold tire pressure listed under "Full
load" on the tire pressure label. The tire pressure
label is located on the driver's side B·pillar. In·
flate trailer tires to trailer and tire manufactur
ers' specifications.
Lights
T he headlight settings sho uld be checked with
the trai ler attached before driving off. Check to
make sure both vehicle and trailer lights are
working properly.
Safety chains
Be sure trailer safety chains are properly connect
ed from the trailer to the hitch on the vehicle.
Leave enough slack in the chains to permit turn
ing corners. When you install safety chains, make
sure they w ill not drag on the road when you are
driving.
The chains should cross under the trailer tongue
to prevent it from dropping in case of separation
from the hitch.
Driving instructions
Driving with o trailer always requires extra core
and consideration .
To obtain the best possible handling of vehicle
and trailer, please note the fo llowing :
.. Do not tow a loaded trailer when your car itse lf
is not loaded.
.. Be especially careful when passing other
vehicles .
.. Observe speed lim its .
.. Do not drive at the maximum permissible
speed.
.. Always apply brakes early .
.. Mon itor the temperature gauge .
205
Page 223 of 302
M N
Checking and Filling Hood
Releasing the engine hood
The engine hood is released from inside the vehi
cle .
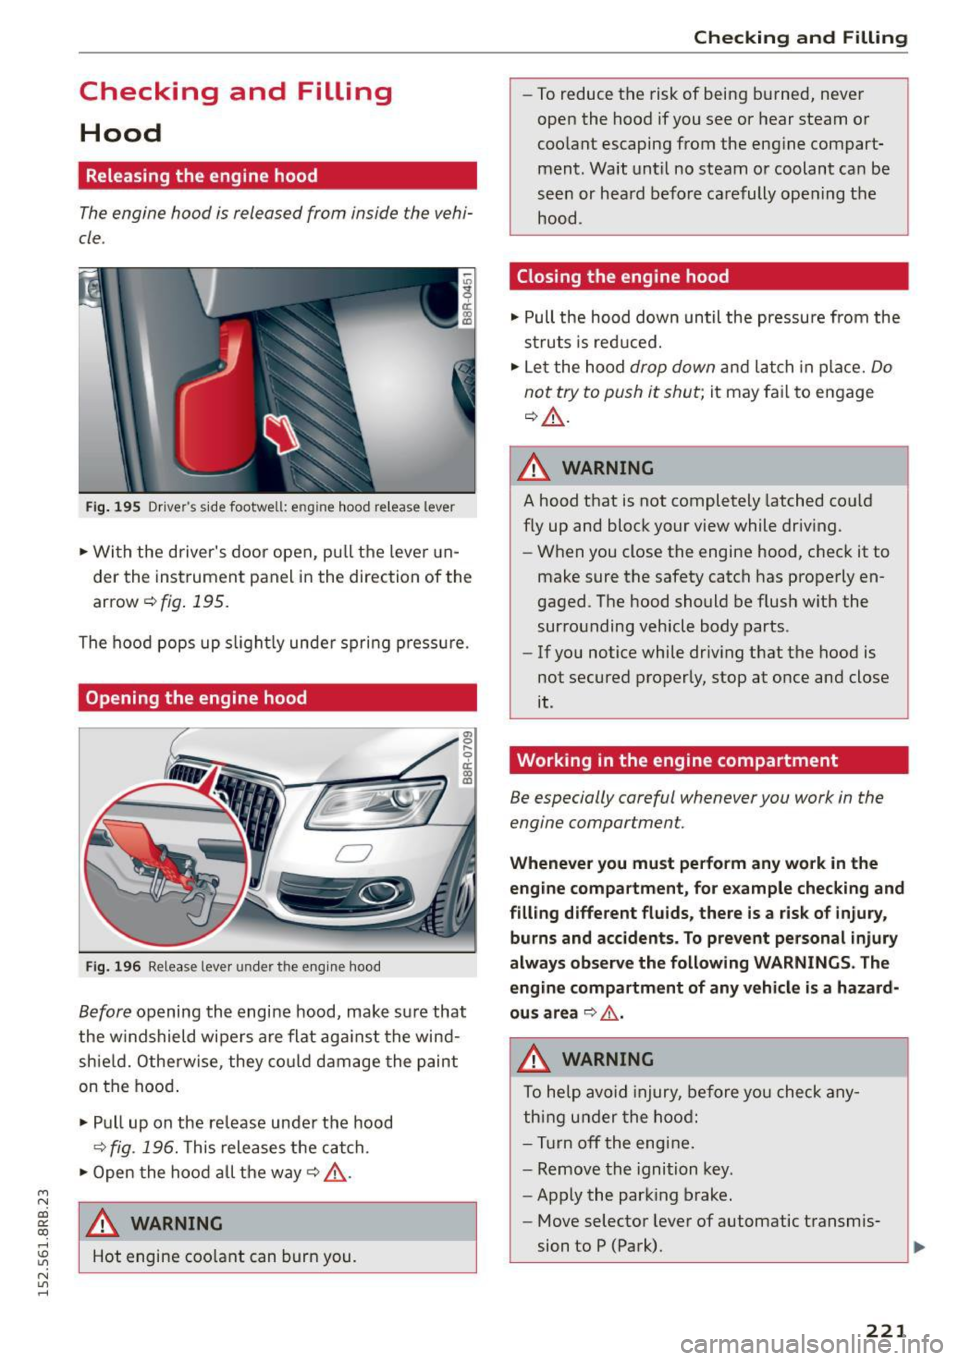
Fig . 195 Drive r's side footwe ll: e ng ine hood re lease lever
"' Wi th the driver's door open, pu ll the leve r un
der the instrument panel in the direction of the
arrow
c::> fig . 195.
The hood pops up s light ly under spri ng press ure.
Opening the engine hood
Fig. 196 Relea se leve r un der the eng ine hood
Before opening the engine hood, make su re that
the w indshield wipers are flat aga inst the wind
shield. Otherwise, they could damage the paint
on the hood .
"' Pull up on the release under the hood
c:> fig . 196. This releases the catch.
"' Open the hood all the way
c::> A.
~ _&. WARNING
rl
:5: Hot engine coo lant can burn you.
N l/1 rl
Ch eck in g and Fillin g
-To reduce the risk of being burned, never
open the hood if you see or hear steam or
coolant escaping from the eng ine compart
ment. Wait until no steam or coolant can be
seen or heard before carefully opening the hood.
Closing the engine hood
"' Pull the hood down until the pressu re from the
struts is reduced.
"' Le t the hood
drop down and latch in p lace. Do
not try to push it shut;
it may fa il to engage
c::> A .
A WARNING
-
A hood that is not completely latched cou ld
fly up and block your view while driv ing.
-
- When you close the engine hood, check it to
make sure the safety catch has properly en
gaged . The hood should be flush with the
surrounding vehicle body parts .
- If you notice while driv ing that the hood is
not secured properly, stop at once and close
it .
Working in the engine compartment
Be especially careful whenever you work in the
engine compartment.
Wheneve r you must pe rfo rm an y wo rk in the
eng ine comp artment , for e xample chec king and
fi lling differen t fluids , ther e is a ri sk of i nju ry,
bu rn s and acci den ts. To p re ve nt pe rsonal injur y
al way s ob serve the follo wing WARN INGS . The
e ngi ne compartm ent of an y ve hicle is a haza rd
ou s area
~ ,&..
A WARNING
To help avoid injury, before you check any
thing under the hood:
- Turn off the eng ine.
- Remove the ignition key.
- Apply the parking brake.
-
- Move selector lever of automatic transmis-
sion to P (Park).
221