airbag off AUDI Q5 2016 Owners Manual
[x] Cancel search | Manufacturer: AUDI, Model Year: 2016, Model line: Q5, Model: AUDI Q5 2016Pages: 300, PDF Size: 75.02 MB
Page 5 of 300
.... N
co
er::
co
....
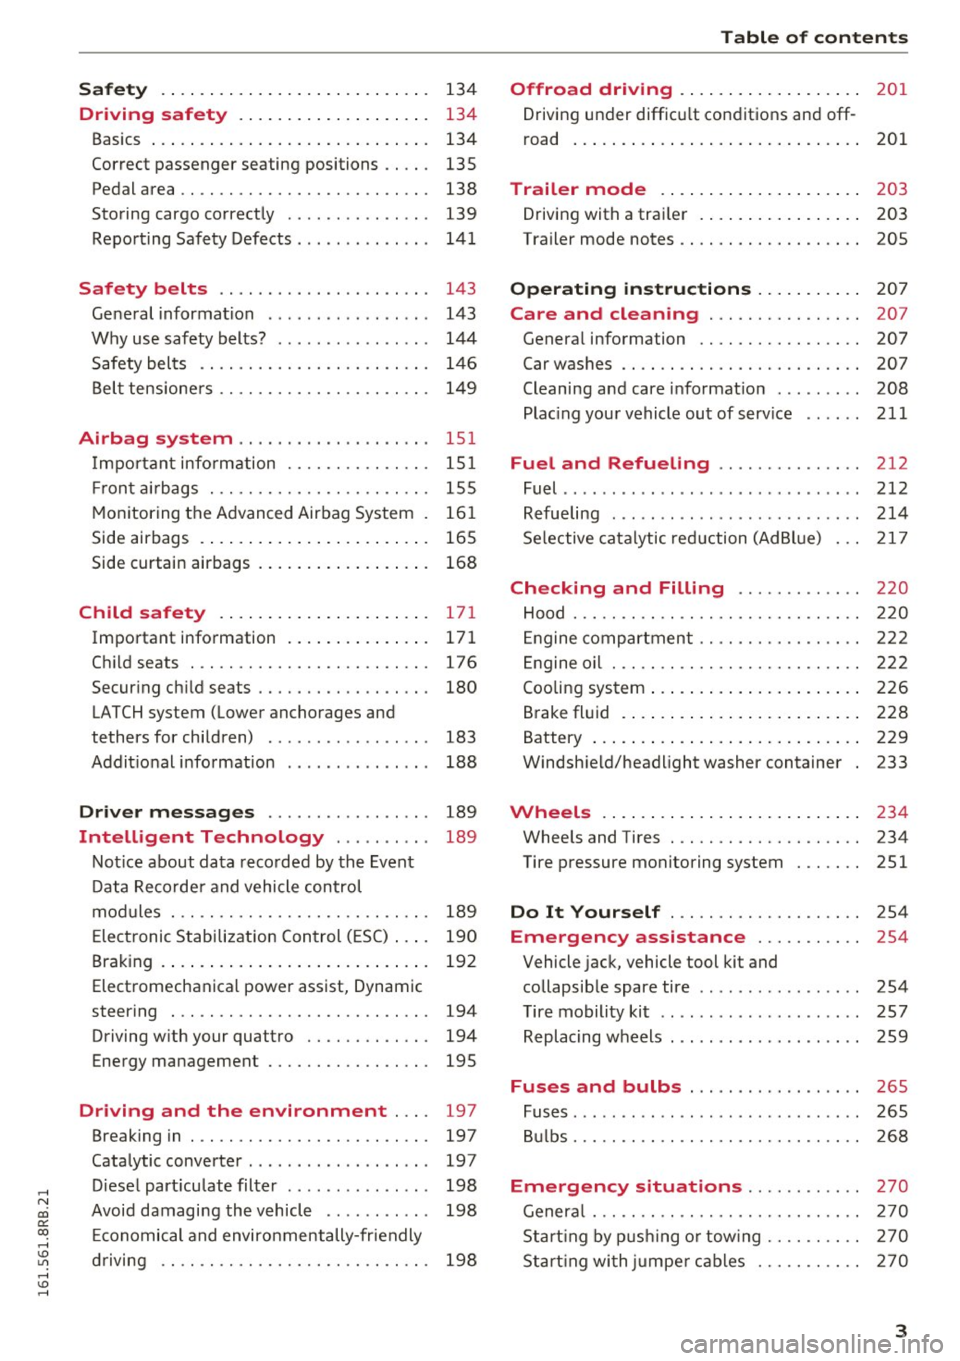
Driving safety . . . . . . . . . . . . . . . . . . . . 134
Basics . . . . . . . . . . . . . . . . . . . . . . . . . . . . . 134
Correct passenger seating positions . . . . . 135
Pedal area . . . . . . . . . . . . . . . . . . . . . . . . . . 138
Storing cargo correct ly . . . . . . . . . . . . . . . 139
Repo rt ing Safety Defects . . . . . . . . . . . . . . 14 1
Safety belts . . . . . . . . . . . . . . . . . . . . . . 143
Ge ne ral information . . . . . . . . . . . . . . . . . 143
Why use safety belts? . . . . . . . . . . . . . . . . 144
S afety belts . . . . . . . . . . . . . . . . . . . . . . . . 14 6
Bel t tensione rs . . . . . . . . . . . . . . . . . . . . . . 14 9
Airbag system .......... .... ... .. . 15 1
I mportant info rm ation . . . . . . . . . . . . . . . 151
Fr on t air bags . . . . . . . . . . . . . . . . . . . . . . . 155
M oni toring the A dvanced Airbag Sys tem . 16 1
Side airbags . . . . . . . . . . . . . . . . . . . . . . . . 165
Side curtain airbags . . . . . . . . . . . . . . . . . . 168
Child safety . . . . . . . . . . . . . . . . . . . . . . 171
Important information . . . . . . . . . . . . . . . 17 1
Ch ild seats . .. ............... .. .... . 17 6
Secur ing child seats . . . . . . . . . . . . . . . . . . 180
LATCH system (Lower anchorages and
tethers for children) . . . . . . . . . . . . . . . . . 183
Addit ional information 188
Driver messages . . . . . . . . . . . . . . . . . 189
Intelligent Technology . . . . . . . . . . 189
Not ice about data reco rded by the Event
D ata Recorde r and vehicle control
mod ules . . . . . . . . . . . . . . . . . . . . . . . . . . . 189
E lectronic Stabilization Con trol ( ESC) . . . . 190
Braking . . . . . . . . . . . . . . . . . . . . . . . . . . . . 192
Elect romechanica l power assist, Dynam ic
steering . . . . . . . . . . . . . . . . . . . . . . . . . . . 194
Driving w ith your quattro . . . . . . . . . . . . . 194
Energy management . . . . . . . . . . . . . . . . . 195
Driving and the environment . . . . 197
Breaking in . . . . . . . . . . . . . . . . . . . . . . . . . 197
Cata lytic converte r . . . . . . . . . . . . . . . . . . . 197
D iese l part icu late filter . . . . . . . . . . . . . . . 198
Avoid damagi ng the vehicle . . . . . . . . . . . 198
E conomical and environmentally-fr iendly
driving . . . . . . . . . . . . . . . . . . . . . . . . . . . . 198
Table of contents
Offroad driving . . . . . . . . . . . . . . . . . . .
201
Driving under diffic ult con ditions and off -
road . . . . . . . . . . . . . . . . . . . . . . . . . . . . . . 201
Trailer mode . . . . . . . . . . . . . . . . . . . . . 203
Driving with a trai ler . . . . . . . . . . . . . . . . . 203
Trailer mode notes . . . . . . . . . . . . . . . . . . . 205
Operating instructions . . . . . . . . . . . 207
Care and cleaning . . . . . . . . . . . . . . . . 207
Genera l information . . . . . . . . . . . . . . . . . 207
Car washes . . . . . . . . . . . . . . . . . . . . . . . . . 207
Cleaning and care informat ion . . . . . . . . . 208
Plac ing your vehicle out of serv ice . . . . . . 211
Fuel and Refueling ............... 212
Fuel ......... ...................... 212
Refue ling . . . . . . . . . . . . . . . . . . . . . . . . . . 214
Se lective cata lytic red uction (AdBlue) 217
Checking and Filling . . . . . . . . . . . . . 220
Hood . . . . . . . . . . . . . . . . . . . . . . . . . . . . . . 220
En gine compartment . . . . . . . . . . . . . . . . . 22 2
En gine oi l . . . . . . . . . . . . . . . . . . . . . . . . . . 2 22
Cooling sys tem . . . . . . . . . . . . . . . . . . . . . . 2 26
Brake fl uid . . . . . . . . . . . . . . . . . . . . . . . . . 228
Battery . . . . . . . . . . . . . . . . . . . . . . . . . . . . 229
Windsh ield/headlight washer container 233
Wheels .. .. .. .. .. ... .. ..... ... .. .. 234
Wheels and Tires . . . . . . . . . . . . . . . . . . . . 234
Tire p ressure mon itoring system
251
Do It Yourself . . . . . . . . . . . . . . . . . . . . 254
Emergency assistance . . . . . . . . . . . 254
Vehicle jack, vehicle tool kit and
collapsib le spare tire . . . . . . . . . . . . . . . . . 254
T ire mobility kit . . . . . . . . . . . . . . . . . . . . . 257
Replacing w heels . . . . . . . . . . . . . . . . . . . . 259
Fuses and bulbs . . . . . . . . . . . . . . . . . . 265
Fuses . . . . . . . . . . . . . . . . . . . . . . . . . . . . . . 265
B ulbs. . . . . . . . . . . . . . . . . . . . . . . . . . . . . . 268
Emergency situations . . . . . . . . . . . . 270
Genera l . . . . . . . . . . . . . . . . . . . . . . . . . . . . 270
Start ing by p ushi ng o r tow ing . . . . . . . . . . 270
Sta rt ing wi th ju mpe r cab les . . . . . . . . . . . 270
3
Page 11 of 300
.... N
co
er::
co
....
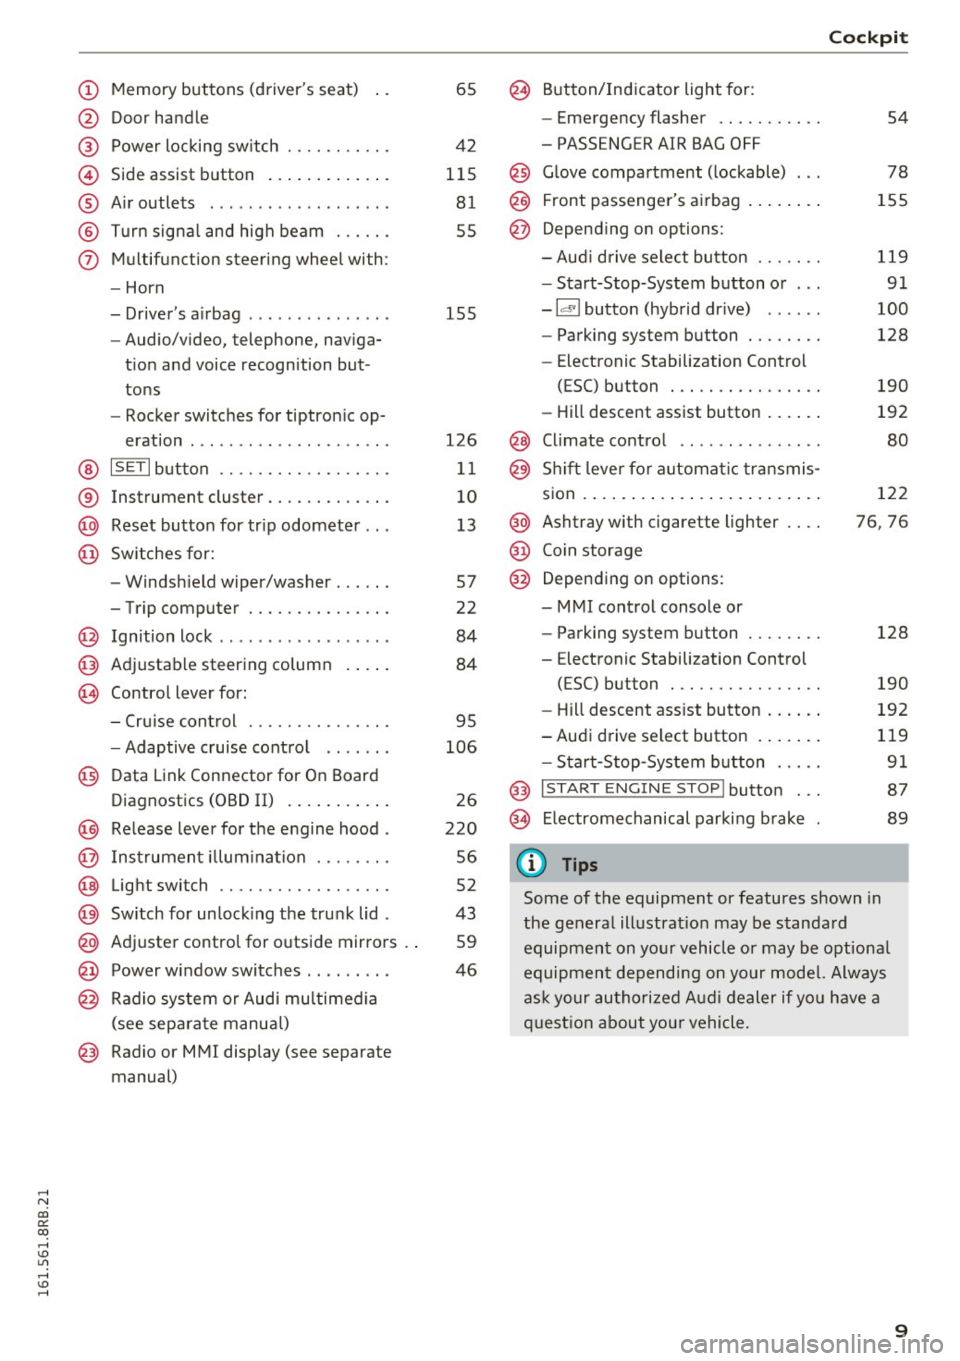
@ Door handle
@ Power locking sw itch .......... .
© Side assist button ............ .
® Air outlets ..... ........ .... . .
@ Turn signal and high beam ... .. .
(j) Multifunction steering wheel with:
- Horn
- Driver's airbag ..... ..... ... . .
- Audio/video, telephone, naviga-
tion and voice recognition but
tons
- Rocker switches for tiptronic op-
eration ............... ..... .
@ ISETI button ............... .. .
® Instrument cluster .......... .. .
@ Reset button for trip odometer .. .
@ Switches for:
- Windshield wiper/washer . .... .
- Trip computer ............ .. .
@ Ignition lock ................. .
@ Adjustable steering column
@ Control lever for:
65
42
115 81
55
155
126
11
10
13
57
22
84
84
- Cruise control . . . . . . . . . . . . . . . 95
- Adaptive cruise control . . . . . . .
106
@ Data Link Connector for On Board
Diagnostics (OBD II) . . . . . . . . . . .
26
@) Release lever for the engine hood . 220
@ Instrument illumination . . . . . . . . 56
@ Light switch . . . . . . . . . . . . . . . . . . 52
@) Switch for unlocking the trunk lid . 43
@ Adjuster control for outside mirrors . . 59
@ Power window switches . . . . . . . . . 46
@ Radio system or Audi multimedia
(see separate manual)
@ Radio or MMI display (see separate
manual)
@ Button/Indicator light for:
- Emergency flasher .......... .
- PASSENGER AIR BAG OFF
@ Glove compartment (lockable) .. .
@ Front passenger's airbag ....... .
@ Depending on options:
- Aud i drive select button ...... .
- Start-Stop-System button or .. .
- Id'! button (hybrid drive) ..... .
- Parking system button ....... .
- Elect ronic Stabilization Control
(ESC) button . .............. .
- Hill descent assist button ..... .
@ Climate control .. ............ .
@ Shift lever for automat ic transmis-
sion ..... ..... .. ............ .
@ Ashtray with cigarette lighter ... .
@ Coin storage
@ Depending on options:
- MMI control console or
- Parking system button ....... .
- E lectronic Stabilization Control
(ESC) button . .. ............ .
Cockpit
54
78
155
119
91
100
128
190
192
80
122
76, 76
128
190
- Hill descent assist button . . . . . . 192
-Audi drive select button . . . . . . . 119
- Start-Stop -System button . . . . . 91
@ I START ENGINE STOP! button . . . 87
@> Electromechanical parking brake 89
(D Tips
Some of the equipment or features shown in
the general illustration may be standard
equipment on your vehicle or may be optional
equipment depending on your model. Always
ask your authorized Audi dealer if you have a
question about you r vehicle.
9
Page 40 of 300
Opening and clo sin g
Emergency unlocking of the ignition key
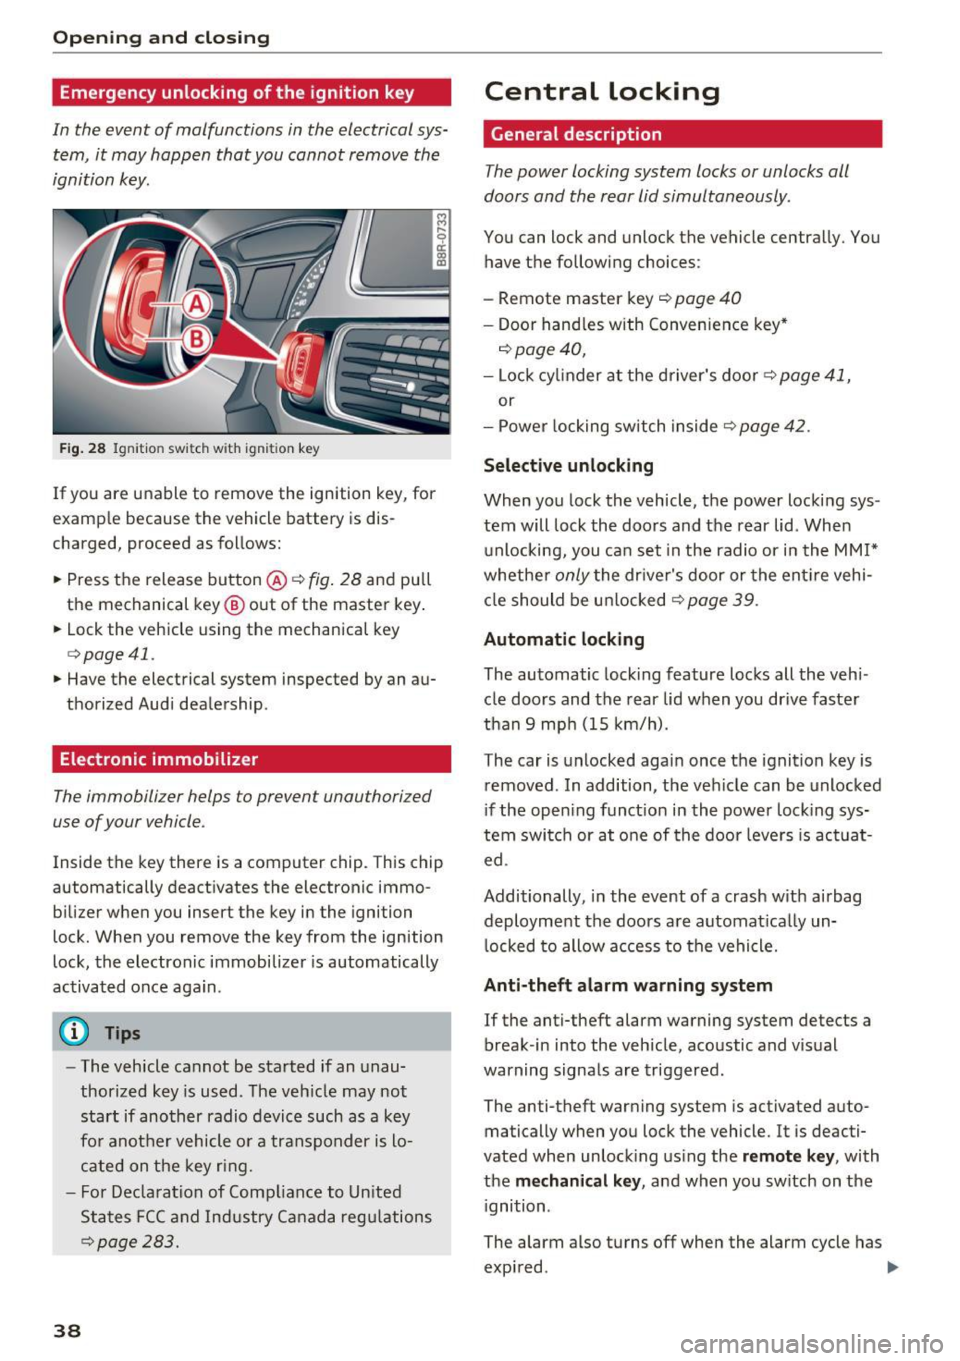
In the event of malfunctions in the electrical sys
tem, it may happ en that you cannot remove the
ignition key.
Fig . 28 Ignit ion switch with ignition key
If you are unable to remove the ignition key, for
example because the vehicle battery is dis
charged, proceed as follows:
.. Press the release button @
c::> fig. 28 and pull
the mechanical key ® out of the master key .
.. Lock the vehicle using the mechanica l key
c::> page 41.
.. Have the electrical system inspected by an au
thorized Audi dealership.
Electronic immobilizer
The immobilizer helps to prevent unauthorized
use of your vehicle.
Inside the key there is a computer chip. This chip
automatically deact ivates the electronic immo
bilizer when you insert the key in the ignition
lock. When you remove the key from the ignition
lock, the electronic immobilizer is automatically
activated once again.
(D Tips
- The vehicle cannot be started if an unau
thorized key is used. The veh icle may not
start if another radio device such as a key
fo r anot her vehicle o r a transponder is lo
cated on the key ring.
- F or Declara tion of Comp liance to Un ited
States FCC and Industry Ca nada regu lations
c::> page 283.
38
Central Locking
General description
The power locking system locks or unlocks all
doors and the rear lid simultaneously.
You can lock and unlock the vehicle centrally. You
have the following choices:
- Remote master key
c::> page 40
- Doo r hand les w ith Convenience key*
c::> page 40,
- Lock cy linder a t the d river's door c::> page 41,
or
- Power locking switch inside
c::> page 42.
Select ive unlocking
When yo u lock the vehicle, the power locki ng sys
tem will lock the doo rs and the rear lid. When
u nlocking, you ca n set in the radio or i n the
MM I*
whethe r only the driver's door or the ent ire vehi
cl e should be u nlocked
c::> page 39.
Automatic locking
The automatic locking feature locks all the veh i
cle doors and the rear lid when you drive faster
than 9 mp h (15 km/h).
The car is unlocked agai n once the ignition key is
removed . In addition, the ve hicle can be unlocked
i f the open ing funct ion in the power lock ing sys
tem switch or at o ne of the door leve rs is act uat
ed.
Additionally, in the event of a crash w ith airbag
deployment the doors a re automat ica lly un
l ocked to allow access to the vehicle.
Anti-theft alarm warning system
If the anti-theft alarm warning system detects a
break-in into the veh icle, aco ustic and vis ual
warning signals are triggered.
The anti-theft warning system is activated auto
matically when you lock the vehicle. It is deacti
vated when unlock ing us ing the remote k ey , with
the
me chan ical key , and when yo u sw itch on the
i gnition.
The alarm also turns off when the alarm cycle has
expi red . .,..
Page 41 of 300
,....,
N
co
er::
co
,....,
When you unlock the vehicle, the turn signa ls
flash twice. When you lock the vehicle, the turn
signals flash once. If they do not flash, one of the
doors, the rear lid or the hood is not locked .
Unintentionall y loc king your self out
In the following cases there safeguards to pre
vent you locking yo ur remote master key in the
veh icle:
- T he veh icle does not lock with the power lock
ing switch ~
page 42 if the dr iver's door is
open .
- On vehicles with Co nvenience key*, if the most
recently used master key is in the luggage com
partment, the rear lid is automatically un locked
again after it is closed.
Do not lock you r vehicle with the
remot e ma st e r
ke y or C onvenience key *
unti l all doors and the
r ear lid are closed . In t his way you avoid locking
yourse lf out accidentally.
& WARNING
- When you leave the vehicle, always remove
the ignition key and take it with you. This
will prevent passengers (children, for exam
ple) from accidentally being locked in the
vehicle should they acc identally press the
power locking switch in the front doors.
- Do not leave children inside the vehicle un
su perv ised. In an emergency it wou ld be im
poss ible to open the doors from the outs ide
withou t the key.
(D} Tips
- In the event of a crash with airbag deploy
ment all locked doors w ill be automatically
unlocked to give access to the veh icle occu
pants from the outside.
- If the power lock ing system should mal
funct ion, you can lock the dr iver's door us
i ng the me chanical key~
page 42.
- If the power lock ing system should fail, you
ca n still open the fuel tan k flap in an eme r
gency
~page 216.
-You are well adv ised not to keep valuables
:;;: inside an unattended vehicle, v is ible or not.
,....,
Op ening and cl osing
Even a properly locked vehicle cannot p ro
vide the security of a safe.
- If the LED in the upper edge of the driver's
door pane l comes on for about 30 seconds
after the vehicle is locked, there is a mal
function in the power locking or the anti
theft warning system. Have the malfunction
corrected by an authorized Aud i dealership
or qualified repair fac ility.
Setting power locking
The driver can determine the functions for power
locking in the radio or in the MMI* .
.. Select: !CAR I function button> Cent ral locki ng .
Or
.,. Select:
!CAR I function button > Car syst ems *
control button > Vehicl e setting s> (Ce ntr al
loc king )* .
Unloc king single door /Unloc k doo rs -
you can
specify which doors unlock when you open the ve
hicle .
-Select ing Off /All and pressing the IQ] button on
the remote control key unlocks the entire vehi
cle .
- Select ing
On /Dri ver and pressing the IQ] button
on the remote control key once unlocks only
the dr iver's door. In vehicles w ith a convenience
key*, only the door whose handle you pull will
un lock. If you press the
Im button tw ice, the en
tire veh icle w ill unlock.
If you press the I:@ but
ton, the entire ve hicl e w ill always lock .
Trunk lid/tailgate /lock e xterior trunk handle -if
you select
On , the rea r lid handle locks
c=> page 43, fig. 35 . In this case, the rear lid can
be opened with the
l asl bu tto n on the master key
c=> page 40, fig. 29 or with the~ button in the
driver's door
c:> page 43, fig . 34 .
Fold mirrors * -if you se lect On , the outside m ir
rors w ill fold i n autom atic ally when you press the
Im but ton on the remote control key c:> page 59.
Confirmation ton e/Tone wh en lo cking -if you
select
On , a tone w ill sound when you lock the ve
hicle.
39
Page 44 of 300
Opening and clo sin g
Locking and unlocking the vehicle from
inside
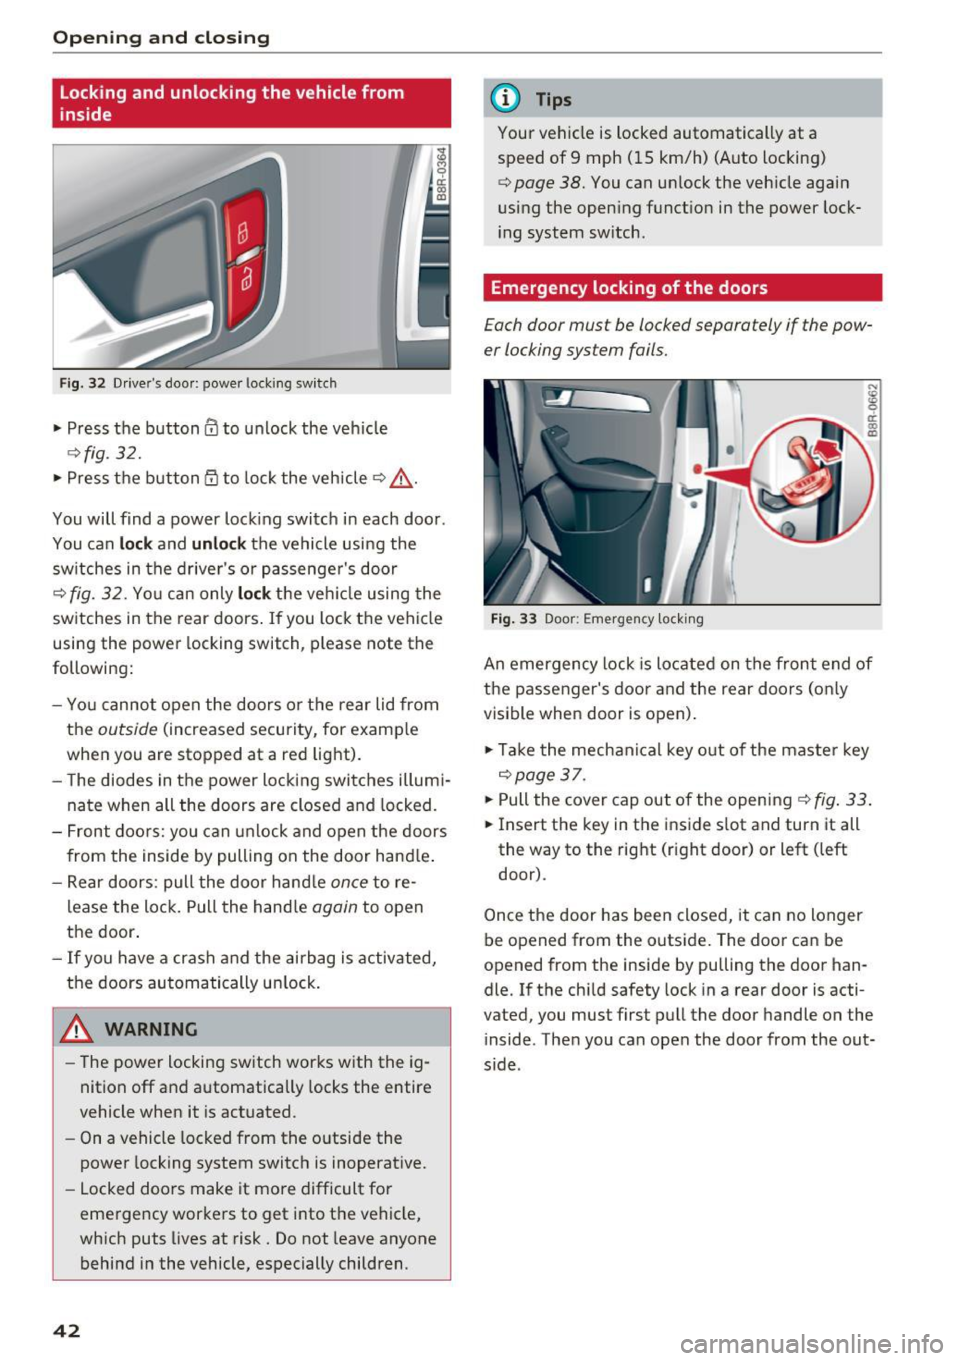
Fig. 32 Driver's doo r: powe r loc king sw itch
• Press the button@ to unlock the veh icle
¢ fig. 32.
• Press the b utton CD to lock the vehicle ¢ ,& .
You will find a power lock ing switch in each door.
You can
lo ck and unloc k the vehicle using the
sw itches in the drive r's or passenger's door
¢ fig. 32. Yo u can only lock the ve hicle using the
switches in the rear doors . If you lock the vehicle
using the power locking switch, please note the
following:
- You cannot open the doors or the rear lid from
the
outside (increased security, for examp le
when you are stopped at a red light).
- The diodes in the power locking switches illumi
nate when all the doors are closed and locked.
- Front doo rs: you can unlock and open the doors
from the inside by pulling on the door hand le .
- Rear doors: pull the door hand le
once to re
lease the lock. Pull the hand le
again to open
the door.
- If you have a crash and the airbag is activated,
the doors automatically un lock .
A WARNING
-The power locking sw itch works with the ig
nition off and automatically locks the entire
vehicle when it is actuated.
- On a vehicle locked from the outside the
power locking system switc h is inoperat ive.
- Locked doors make it mo re difficult for
emergency workers to get into the vehicle,
wh ich puts lives at risk. Do not leave anyone
behind i n the vehicle, especially children.
42
@ Tips
Your vehicle is locked automatically at a
speed of 9 mph ( 15 km/h) (Auto locking)
¢ page 38. You can un lock the veh icle again
using the open ing funct ion in the power lock
i ng system sw itch.
Emergency locking of the doors
Each door must be locked separately if the pow
er locking system fails.
Fi g. 33 Door: Em erge ncy lock ing
An emergency lock is located on the front end of
the passenger's door and the rear doors (on ly
visible when door is open) .
• Ta ke the mechani cal key out of the maste r key
¢page 37.
• Pull the cover cap out of the opening¢ fig . 33 .
• Insert the key in the inside s lot and turn it all
the way to the right (right door) or left (left
door).
Once the door has been closed, it can no longer
be opened from the outs ide. The doo r can be
opened from the inside by pulling the door han
dle. If the chi ld safety lock in a rear door is acti
vated, you must first pull the door handle on the
i nside . Then you can open the door from the out
s ide .
Page 65 of 300
..... N
co
er::
co
.....
General information
Why is your seat adjustment so important?
The safety belts and the airbag system can only
provide maximum protection if the front seats are corr ectly adjusted .
There are various ways of adjusting the front
seats to provide safe and comfortable support
for the driver and the front passenger . Adjust
your seat properly so that:
- you can easily and quickly reach all the switches
and controls in the instrument panel
- your body is properly supported thus reducing
physical stress and fatigue
- the safety belts and a irbag system can offer
maximum protection
<=:> page 151.
In the following sections, you will see exact ly
how you can best adjust your seats.
There are spec ial regulations and instr uctions for
installing a child safety seat on the front pas
senger's seat . Always fo llow the information re
garding child safety provided in
¢ page 171,
Child safety.
A WARNING
Incorrect seating position of the driver and all
other passengers can result in serious person
al injury .
- Always keep your feet on the floor when the
vehicle is in motion - never put your feet on
top of the instrument pane l, o ut of the win
dow or on top of the seat cushion. This ap
plies especially to the passengers.
If your
seating pos it ion is inco rrect, yo u increase
the risk of injury in the case of sudden brak
ing or an accident. If the ai rbag inf lates and
the seating position is incorrect, this cou ld
result in personal injury or even death.
- It is important for both the driver and front
passenger to keep a d istance o f at least
10 inches (25 cm) between themselves and
the steering wheel and/or instrument pan el. If you're s itting any closer than this, the
airbag system can not protect you properly .
Seat s and sto rage
In addition, the front seats and head re
stra ints must be adjusted to your body
he ight so that they can g ive you maximum
protection .
- Always try to keep as much distance as pos
sible between yourself and the steer ing
wheel or instrument panel.
- Do not adjust the driver's or front passeng
er's seat while the veh icle is moving . Your
seat may move unexpectedly, causing sud
den loss of vehicle contro l and personal in
jury.
If yo u ad just yo ur seat while the veh icle
is moving, you a re o ut of pos ition.
Driver's seat
The correct seat position is important for safe
and relaxed driving.
We recommend that you adjust the dr iver 's seat
i n the following manner:
.. Adjust the seat in fore and aft direction so that
you can eas ily push the pedals to the floor
while keeping yo ur knees slightly bent<=:>.&,
in
Why is your seat adjustment so important? on
page 63 .
.,. Adjust the seatback so that when yo u sit with
your back agains t the se atback , you can still
grasp the to p of the steering wheel.
.,. Adjust the head res traint so the uppe r edge is
as even as possib le with the top of you r head. If
that is not possible, try to adjust the head re
straint so that it is as close to this posit ion as
possible
<=:> page 67.
A WARNING
--
Neve r place any objects in the dr iver's foot
well. An object could ge t into the pedal a rea
and inte rfe re with pedal function. In case of
su dd en braking or an accident, you would no t
be ab le to br ake or accelera te.
63
Page 66 of 300
Sea ts and stor age
Front passenger 's seat
Always move the front passenger seat into the
rearmost position.
To avoid contact with the airbag wh ile it is de
ploying, do not sit any closer to the instrument
panel than necessary and always wear the three
point safety belt prov ided adjusted correctly. We
recommend that yo u adj ust the passenger's seat
i n t he following ma nner:
.. Move the front passenger seat into the rear
most position of the fore and aft adjustment
range
c:> .&. in Why is your seat adjustment so
important? on page 63.
.. Bring the back rest up to a n (a lmost) upright
position .
Do not ride with the seat recl ined.
.. Adjust the head restraint so the upper edge is
as even as possible with the top of your head . If
that is not possible, try to adjust the head re
straint so that it is as close to this position as
poss ible<=>
page 67 .
.. Place your feet on the floor in front of the pas
senger's seat .
Front seats
Power seat adjustment
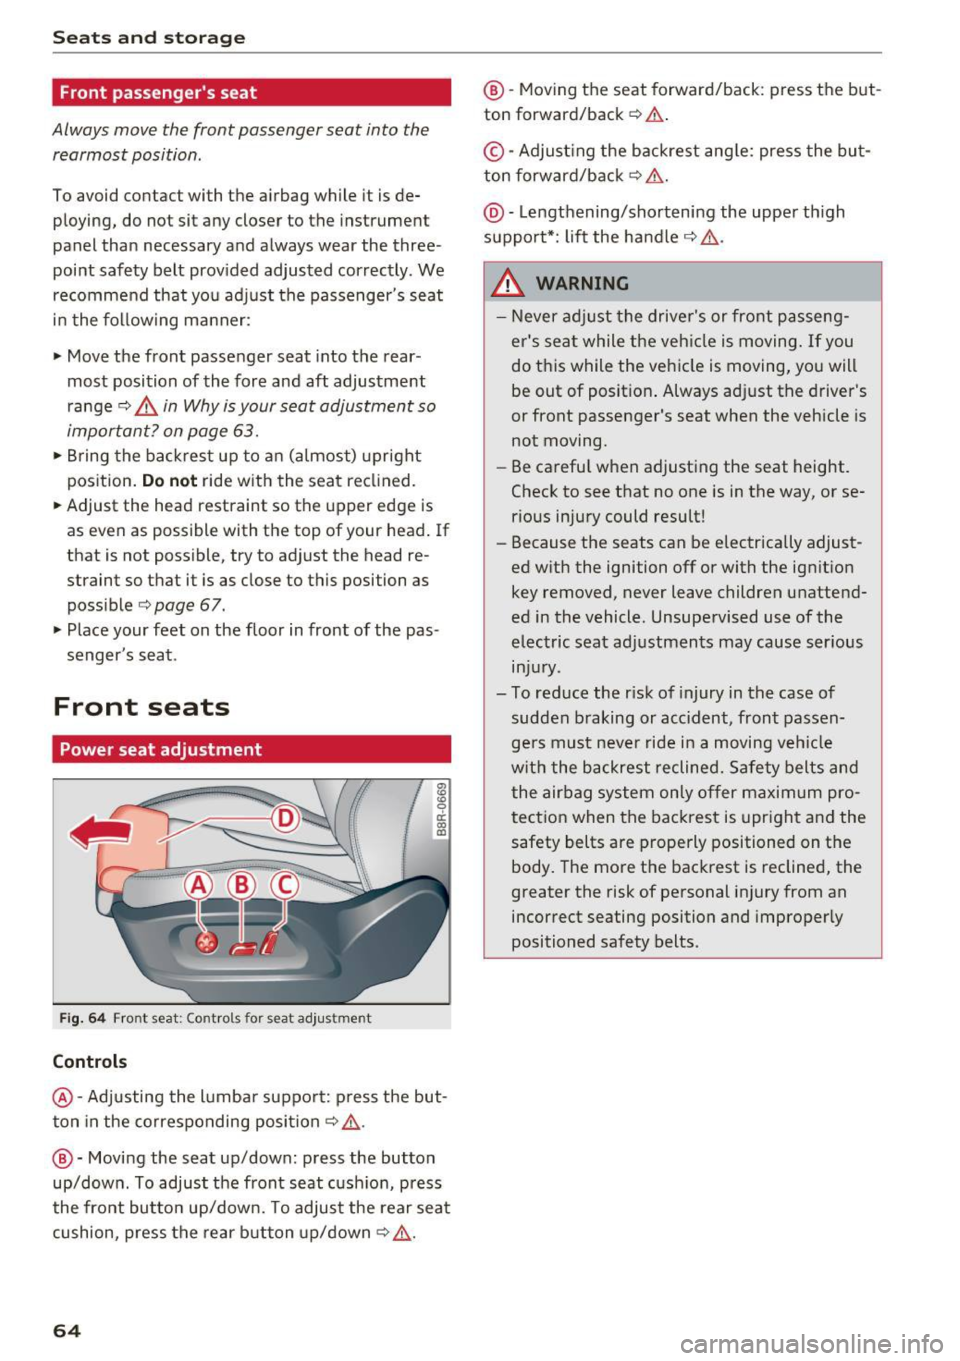
Fig. 64 Front seat: Cont rols for seat adju stment
Controls
~ a: a, a:,
@-Adjusting the l umba r suppo rt: p ress the but
ton in the correspo nding position
c:> ,& .
@ -Movi ng the seat up/down: p ress the button
up/down. To adjust the front seat c ush ion, press
the front bu tton up/ down. To adjus t the rear sea t
cushion, press the rear b utton up/down
c:> ,& .
64
@ -Moving the seat forward/back: press the but
ton forward/back
c:> .&..
©-Adjust ing the b ackrest ang le: press the bu t
ton forward/back
c:> &. .
@ -Lengthening/sho rteni ng the upper th igh
suppo rt*: lift the handle
c:> &,.
.&, WARNING
- Never adjust the drive r's or front p asseng
er 's sea t while t he veh icle is moving.
If you
do t his while the vehicle is moving, yo u will
be out of posit ion . Always ad just the driver 's
or front passenger's seat when the vehicle is
not moving .
- Be carefu l when adjusting the seat height.
Check to see that no one is in the way, or se
rious injury could resu lt!
- Because the seats can be electrically adjust
ed w ith the ignition off or with the ign ition
key removed, never leave children unattend
ed in the vehicle. Unsupe rvised use of the
electric seat ad justmen ts may cause serious
in ju ry.
- To reduce the r isk of injury in the case of
sudden b raking or accident, front passen
ge rs must neve r ride i n a moving ve hicle
w it h the backrest reclined. Safety belts a nd
the airbag system only o ffer maxim um pro
t ection when the bac krest is upr igh t and the
safety belts are properly positioned on the
body. The mo re the bac krest is reclined, the
greater the risk of personal injury from an
incorrect seating position and improperly
positioned safety belts.
-
Page 80 of 300
Sea ts and stor age
when accelerat ing or when app lying the
brakes or when driving around a corner.
- When you are driving make sure that any
thing you may have placed in the center con
so le or other storage locations cannot fall
out into the footwells. In case of sudden
braking you would not be able to brake or
acce le rate .
- Any pieces of cloth ing that you have hung
up must not interfere with the driver's view.
The coat hooks are designed only for light
weight cloth ing . Neve r hang any clothing
with hard , po inted or he avy objects in the
poc kets on the coat hooks . Dur ing s udden
braking or in an accident -especia lly i f the
airbag is dep loyed -these objects could in
jure any passengers inside the vehicle .
Glove compartment
The glov e comportm ent is illuminat ed and con
be locked.
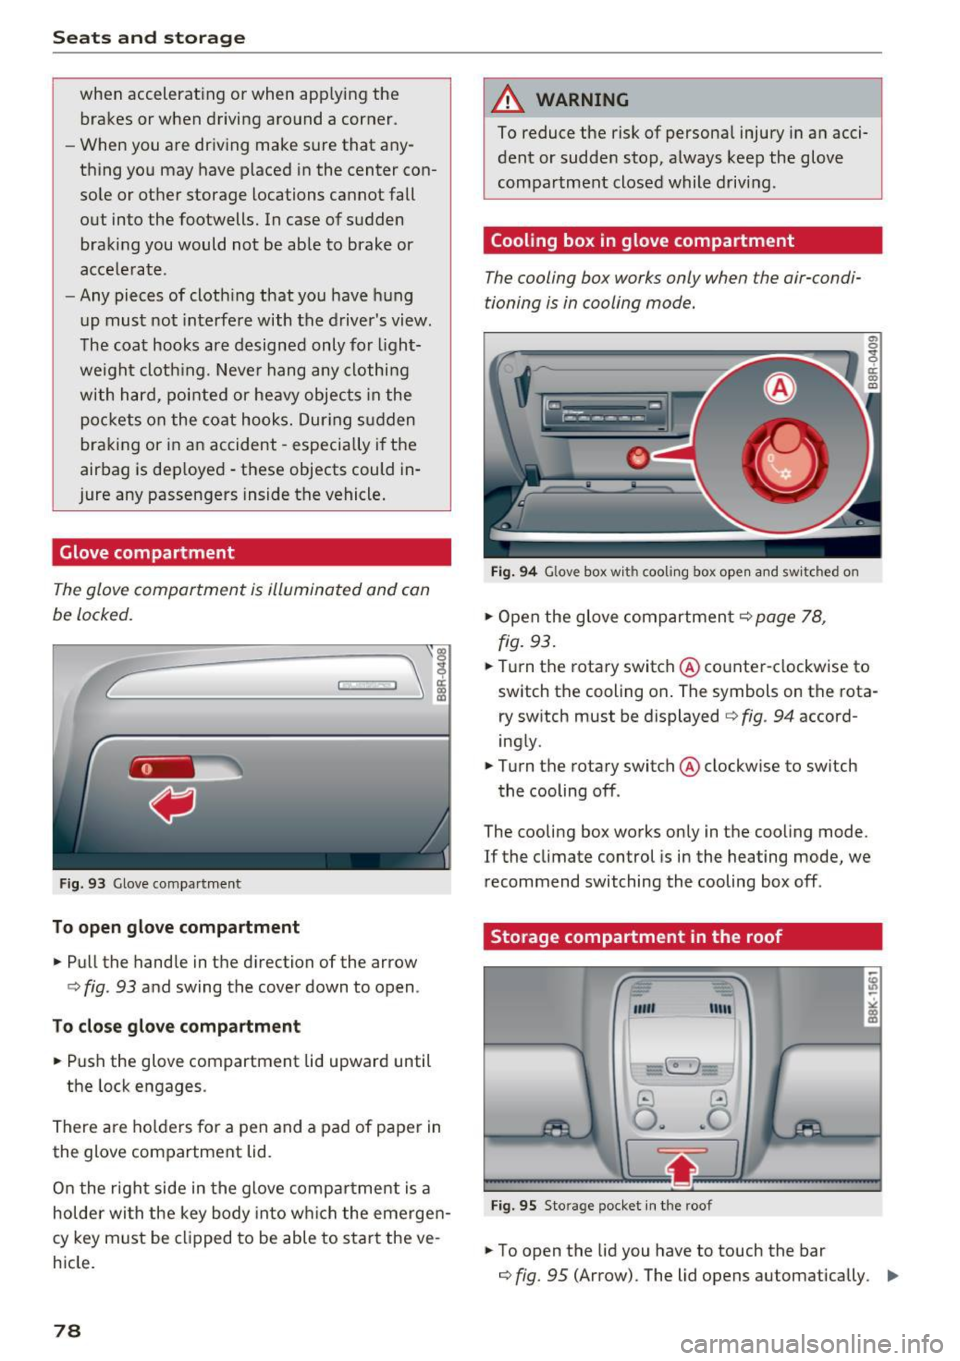
F ig . 93 Glove co mpa rt men t
To open glove compartment
.. Pull the handle in the d irection of the arrow
c> fig . 93 and swing the cover down to open .
To clo se glove c omp artm ent
.. Push the glove compartment lid upward until
the lock engages .
There are ho lders for a pen and a pad of paper in
the glove compartment lid.
On the r ight side in the glove compa rtment is a
hol der wi th the key body into w hich the emerge n
cy key must be clipped to be able to star t the ve
h icle.
78
A WARNING
To reduce the risk of persona l injury in a n acci
dent or sudde n stop, a lways keep the glove
compartment closed while driving .
Cooling box in glove compartment
The cooling box works only when the air-condi
tioning i s in cooling mode.
Fig . 94 Glove box w ith cooli ng box ope n and sw itc hed on
.. Open the glove compartmen t c> page 78,
fig. 93 .
.. Tu rn the rotary switch @ counte r-clockwise to
switch th e cooling on . The symbols on th e rota
ry sw it c h must be displayed c> fig . 94 accord
ing ly .
.. Turn the rotary switch @ clockwise to sw itch
the cooling off .
The cooling box works only in the cooling mode.
If the climate con trol is in the heating mode, we
recommend switching the cooling box off .
Storage compartment in the roof
""' "'"
-~
@ ..!J
O .. ~O
Fig. 95 Sto ra g e pocket in t he roof
.. To open the lid you have to touch the bar
c> fig. 95 (Arrow). The lid open s automatically . ..,.
Page 139 of 300
..... N
co
er::
co
.....
of the seat. Never rest them on the seat, in
strument panel, out of the window, etc. The
airbag system and safety belt will not be able to protect you properly and can even in
crease the risk of injury in a crash.
- Never drive with the backrest reclined or
tilted far back! The farther the backrests are
tilted back, the greater the risk of injury due
to incorrect positioning of the safety belt
and improper seating position .
- Children must always ride in child safety
seats¢
page 171 . Special precaut ions ap
ply when installing a ch ild safety seat on the
front passenger seat ¢
page 151.
Proper seating positions for passengers in
rear seats
Rear seat passengers must sit upright with both
feet on the floor consistent with their physical
size and be properly restrained whenever the ve hicle is in use.
To reduce the risk of injury caused by an incorrect
seating position in the event of a sudden braking
maneuver or an accident, your passengers on the
rear bench seat must always observe the follow
ing:
~ If there is a passenger on the rear center seat
ing position, slide the center head restraint up
ward at least to the next notch ¢
page 67.
~ Make sure that the seatback is securely latched
in the upright position
¢page 69.
~ Keep both feet flat in the footwell in front of
the rear seat .
~ Fasten and wear safety belts properly
¢page 146.
~ Make sure that children are always properly re
strained in a child restraint that is appropriate
for their size and age ¢
page 171.
A WARNING
Passengers who are improperly seated on the
rear seat can be seriously injured in a crash .
- Each passenger must always sit on a seat of
their own and properly fasten and wear the
safety belt belonging to that seat .
Driving safety
- Safety belts only offer maximum protection
when the seatback is securely latched in the
upright position and the safety belts are properly positioned on the body . By not sit
ting upright, a rear seat passenger increases
the risk of personal injury from improperly
positioned safety belts!
- Always adjust the head restraint properly so
that it can give maximum protection.
Proper adjustment of head restraints
Correctly adjusted head restraints are an impor
tant part of your vehicle's occupant restraint sys
tem and can help to reduce the risk of injuries in
accident situations.
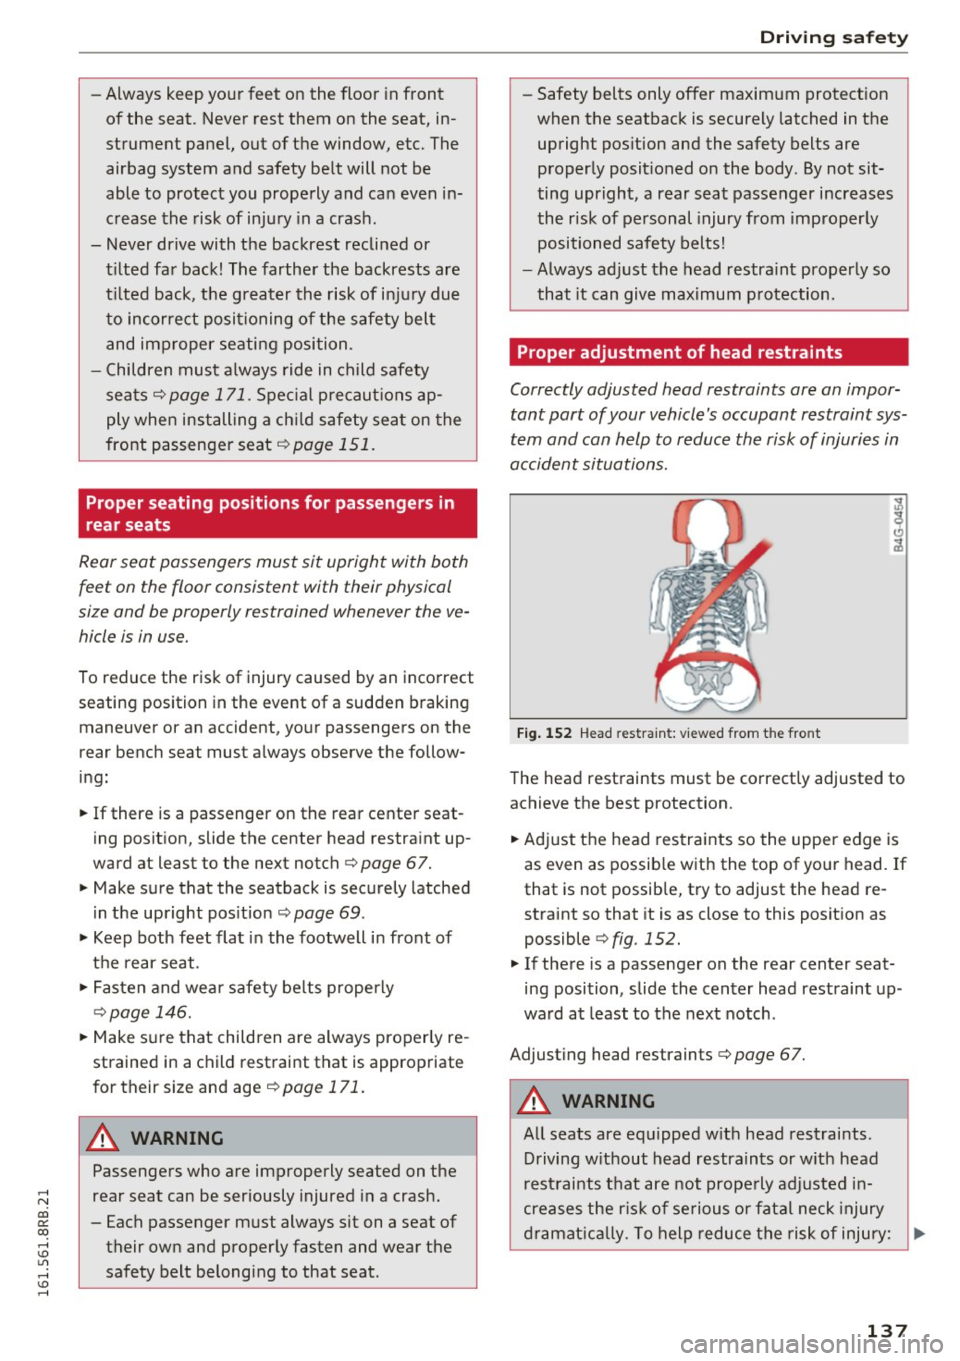
Fig. 1S2 Head restraint: vi ew ed from t he front
The head restraints must be correctly adjusted to
achieve the best protection.
~ Adjust the head restraints so the upper edge is
as even as possible with the top of your head. If
that is not possible, try to adjust the head re
straint so that it is as close to this position as
possible
¢ fig . 152.
~ If there is a passenger on the rear center seat
ing position, slide the center head restraint up
ward at least to the next notch .
Adjusting head restraints¢
page 67.
A WARNING
-All seats are equipped w ith head restraints.
Driving without head restraints or with head
restraints that are not properly adjusted in
creases the risk of serious or fata l neck injury
dramatically . To help reduce the risk of injury: ..,
137
Page 140 of 300
Driving sa fe ty
-Always drive with the head restraints i n
place and properly adjusted.
- Every person in the vehicle must have a
properly adjusted head restra int.
- Always make sure each person in the vehicle
properly adjusts their head restraint. Adjust
the head restra ints so the upper edge is as
even as possib le w ith the top of your head.
If that is not possib le, try to adjust the head
restra int so that it is as close to th is position
as possib le.
- Never attempt to adjust head restraint wh ile driving.
If you have dr iven off and
must adjust the driver headrest for any rea
son, fi rst stop the vehicle safely before at
tempting to ad just the head restr aint.
- Children must always be p roperly restrained
in a chi ld restrain t th at is appropria te fo r
their age and size~
page 171.
Examples of improper seating positions
The occupant restraint system can only reduce
the risk of injury if vehicle occupants are properly
seated.
I mp roper seating positions can cause se rious in
ju ry or deat h. Safety belts can only wo rk when
they are p roperly posi tioned o n the body . Im
p roper seating posi tions reduce t he effe ct iveness
of sa fety belts and w ill even increase the r isk o f
in jury and death by moving the safety be lt to crit
ical areas of the body . Improper seating posit ions
also increase the risk of ser ious injury and death
when an airbag deploys and strikes an occupant
who is not in the prope r seat ing position. A driver
is respo nsible for the safety of all vehicle occu
pants and especially fo r children. Therefo re:
~ Never allow anyone to assume an incorrect
seat ing pos ition w hen the veh icle is being used
~ .&. -
The follow ing bulletins list only some sample po
sitions that will inc rease the risk of serious inju ry
and death. Ou r hope is that these examples will
make you more aware of seat ing pos it io ns that
a re dangero us.
138
Therefore , whenever the vehicle is moving :
-neve r stand up in the vehicle
- neve r sta nd on the seats
- neve r kneel on the seats
- never ride w ith the seatback recl ined
- neve r lie down on the rear seat
- neve r lean up against the instrument panel
- never s it on the edge of the seat
- neve r sit sideways
- neve r lean out t he window
- neve r put your feet o ut the window
- never put your feet on the instrument panel
- neve r rest your feet on the seat cushion or back
of the seat
- never ride in the footwell
- never ride in the cargo area
'
A WARNING
Imp roper seating positions inc rease the risk
of ser ious personal injury and death whenever
a veh icle is being used.
- Always make sure that all veh icle occupants
stay in a proper seating posit ion and are
properly restrained whenever the vehicle is be ing used .
Pedal area
Pedals
The pedals must alway s be free to move and
must never be interfered with by a floor mat or
any o ther object.
Mak e su re t hat all pedals move free ly w ithout in
te rfe rence and t hat nothing prevents them from
r etur ning to their orig inal positions.
Only use floor mats that leave the pedal a rea free
and can be secured wi th floor ma t faste ne rs.
If a brake circuit fails, i ncreased brake pedal trav
el is requ ired to bring the vehicle to a fu ll stop.
A WARNING
Pedals that ca nnot move freely ca n cause loss
of vehicle contro l and increase the r is k of seri
ous injury.