stop start AUDI Q5 2021 Owner´s Manual
[x] Cancel search | Manufacturer: AUDI, Model Year: 2021, Model line: Q5, Model: AUDI Q5 2021Pages: 332, PDF Size: 118.86 MB
Page 150 of 332
Driving information
— The traffic signs on the road always take pri-
ority over the display. The driver is always
responsible for adhering to the regulations
applicable in the country where the vehicle
is being operated.
— Units of measurement and language set-
tings are displayed based on how they were
set in the MMI system settings > page 236.
Applies to: vehicles with traffic light information
Switching traffic light information on and
off
» Applies to: MMI: Select on the home screen:
VEHICLE > Driver assistance > Traffic light in-
formation.
Accessing traffic light information
> Select in the instrument cluster: vehicle func-
tions tab > Traffic signs.
@® Tips
If another tab or another function is selected
in the instrument cluster, the traffic light in-
formation will appear in the status bar on the
instrument cluster.
Messages
Applies to: vehicles with traffic light information
Malfunction! See owner's manual
The system could not be configured, for example
due to a network malfunction. Switch the igni-
tion off and shut down the vehicle to restart the
system. Wait several minutes until the vehicle
has shut down completely and then switch the
ignition back on.
Function currently unavailable. See owner's
manual
There is a temporary system malfunction. Check
if one or more of the following situations applies
and correct the issue if necessary:
— Traffic light information is switched off
— Data transmission is deactivated
148
— The vehicle is not equipped with traffic sign rec-
ognition.
— There is no valid license
— Traffic light information is not available in that
area
Lap timer
Introduction
Applies to: vehicles with lap timer
You can record and evaluate lap times with the
lap timer. You can operate the lap timer using the
multifunction steering wheel > page 13.
Opening the lap timer
> Select in the instrument cluster: Vehicle func-
tions tab > [| button > Lap times.
An additional indicator appears in the head-up
display*.
ZA\ WARNING
Your focus should always be on driving your
vehicle safely. As the driver, you have com-
plete responsibility for safety in traffic. To re-
duce the risk of an accident, only use the lap
timer functions in such a way that you always
maintain complete control over your vehicle in
all traffic situations.
G) Tips
You can retrieve information from the trip
computer while the lap timer stopwatch is
running.
ey sae |
Applies to: vehicles with lap timer
Requirement: the lap timer must be open
=> page 148.
Timing laps
> To start timing manually, select Start lap 1 in
the menu.
> To start timing automatically as soon as you be-
gin to drive, select Start lap 1 by driving off or
Start by driving off in the menu.
Page 151 of 332

80B012721BA
Driving information
> To start timing a new lap after driving a lap, se-
lect New lap in the menu. This starts timing
the next lap at the same time.
After completing a lap, the difference between
the last lap and the previous best lap time will be
won an indicated with a “~” or “+”.
Pausing timing and displaying a split time
> To insert a pause @ select Pause in the menu.
> To resume timing, select Resume in the menu.
> To display a split time, select Split time in the
menu. The split time appears for approxi-
mately ten seconds in the instrument cluster.
The current lap timing will continue running.
Canceling lap timing
The timing of the current lap will stop. The lap
time will be erased and will not be included in the
statistics.
> Select Cancel lap in the menu.
Resetting the time
> Select Reset lap times in the menu.
G) Tips
— A maximum of 99 lap times can be meas-
ured.
— If timing is paused, you can continue it later
even if you switch the ignition off.
— Saved lap times cannot be individually de-
leted from the total results.
— The saved lap timer values will remain after
switching the ignition off.
yo e-) a(t)
Applies to: vehicles with lap timer
Displaying lap statistics
You can display the number of laps driven
the fastest lap “+”, the slowest lap “-”, and the
average time “®” in the instrument cluster.
> Select in the instrument cluster: Vehicle func-
tions tab > E] button > Lap statistics.
> Turn the thumbwheel down or up to display the
individual lap times.
> To return to the lap timing that was started, se-
lect the [I button > Lap times.
Resetting lap statistics
Requirement: the lap statistics menu must be
displayed.
> To reset the lap statistics, press and hold the
left thumbwheel until the message No lap
times have been recorded yet. appears.
@) Tips
The lap statistics list the lap times for the last
30 laps. The fastest and slowest lap times out
of up to 99 measured laps are also displayed.
Integrated Toll Module
Applies to: vehicles with Integrated Toll Module
Depending on the region, you can pay toll fees in
certain countries using the Integrated Toll Mod-
ule (ITM). It replaces a separate transponder for
detecting toll fees. The system electronics are in-
tegrated in the rearview mirror housing.
Gi) Tips
The system complies with United States FCC
regulations and ISED regulations > page 311.
Applies to: vehicles with Integrated Toll Module
To use the ITM in toll zones, you must register
and activate it.
Registration
> Applies to MMI: Select on the home screen: VE-
HICLE > Settings & Service > Vehicle informa-
tion Toll module.
> Note the Integrated Toll Module ID.
> To register the ITM, go to the displayed web ad-
dress and follow the instructions.
Activation
> To activate the ITM, press CD in the MMI.
Entering the number of passengers
Depending on the number of passengers and the
region, a lower toll fee may be charged. You must
either enter the number of passengers or
149
>
Page 156 of 332
Driver assistance
switched on. The driver is always responsible
for assessing the traffic situation.
@ Tips
— The traffic signs on the road always take pri-
ority over the display. The driver is always
responsible for adhering to the regulations
applicable in the country where the vehicle
is being operated.
— When a route is planned using the naviga-
tion system*, then system displays messag-
es based on an assumed route. Without
route guidance, the system displays mes-
sages based on an assumed route.
— The wording of the message may vary de-
pending on the selected Audi drive select*
mode and the selected gear.
Audi adaptive cruise
control
General information
Applies to: vehicles with Audi adaptive cruise control
Depending on vehicle equipment, Audi adaptive
cruise control may consist of the following func-
tions:
Within the limits of the system, the adaptive
speed and distance control assists the driver in
controlling the speed and the set distance to the
vehicle driving ahead. If the system detects a ve-
hicle driving ahead, the adaptive cruise control
can brake and accelerate your vehicle within the
limits of the system. On open roads with no traf-
fic, it functions like a cruise control system. The
stored speed is maintained. When approaching a
vehicle driving ahead, the adaptive cruise control
system automatically brakes to match that vehi-
cle's speed and then maintains the set distance
as much as possible. As soon as the system does
not detect a vehicle driving ahead, adaptive
cruise control accelerates up to the stored speed.
In stop-and-go traffic, the vehicle may brake to a
full stop and then may also start driving again
automatically under certain conditions.
Applies to: vehicles with traffic jam assist: In
traffic jams or in stop-and-go traffic, the traffic
154
jam assist can assist the driver to stay within the
lane detected by the system > page 162.
Applies to: vehicles with efficiency assist: Predic-
tive control can adjust the set speed based on
traffic and road conditions > page 157.
Z\ WARNING
Observe the safety precautions and note the
limits of the assist systems, sensors, and
cameras > page 141.
@) Tips
The system complies with United States FCC
regulations and ISED regulations > page 311.
Applies to: vehicles with Audi adaptive cruise control
Fig. 117 Example: driving into a curve
In some situations, the adaptive cruise control
function is limited and you must assume control
of the vehicle when necessary, for example by ap-
plying the brakes.
— When driving into a curve > fig. 117 and out of
a curve, the system may react to a vehicle in the
neighboring lane and apply the brakes. You can
override the system by pressing the accelerator
pedal briefly.
— The system works with the various sensors and
cameras in the vehicle. Vehicles can only be de-
tected once they are within the area and range
covered by the sensors > page 142, fig. 110.
— When driving around tight curves, a vehicle
driving ahead that was previously detected may
no longer be detected, and the system may ac-
celerate unexpectedly.
Page 162 of 332
Driver assistance
Requirement: adaptive cruise control must be
switched on.
Overriding control
You can completely override the control, for ex-
ample when passing or if you would like to accel-
erate more quickly.
> To accelerate manually, pull the lever toward
you in the direction of the arrow and hold it
there, or press the accelerator pedal.
> To resume the usual cruise control, release the
lever or remove your foot from the accelerator
pedal.
When you are in the Driver assistance display,
the message Overridden will appear.
Decreasing the distance
The function decreases the set distance and pro-
vides assistance, for example when merging
when a lane is ending.
> To further reduce the distance to the vehicle
ahead temporarily, pull the lever toward your-
self in the direction of the arrow and hold it in
that position.
> To resume the system control, release the lever.
The adaptive cruise control reduces the distance
and, if necessary, accelerates the vehicle above
the set speed.
ZA WARNING
— Observe the safety precautions and note the
limits of the assist systems, sensors, and
cameras © page 141.
— Resting your foot on the accelerator pedal
could override the cruise control. Braking in-
terventions and corrective actions by the
system may not occur.
)) Depending on the engine
160
Driving in stop-and-go traffi
Applies to: vehicles with Audi adaptive cruise control
Applies to: vehicles with safe start monitor
Fig. 124 Instrument cluster: safe start monitor
Stopping with adaptive cruise control
The adaptive cruise control system also assists
you in stop-and-go traffic!). Within the limits of
the system, your vehicle may brake and remain at
a stop if a vehicle driving ahead stops.
Starting to drive with adaptive cruise control
As long as the message a ready to drive and A
is displayed, your vehicle will begin driving when
the vehicle ahead starts to move > /\.
If you are stopped for several seconds, your vehi-
cle will no longer drive autonomously for safety
reasons, and the message will turn off.
> To extend B ready to drive mode for several
seconds or reactivate, pull the lever briefly to-
wards you in the direction of the arrow
=> page 159, fig. 123.
> To resume manual control of the vehicle, tap
the accelerator pedal.
Safe start monitor
Applies to: vehicles with safe start monitor
The vehicle can still start to drive even if certain
obstacles are detected when starting to drive
=> /\. If the surrounding area detection detects
an obstacle, you will be alerted to the danger by
the A indicator light.
If you are in the Driver assistance display, the
display @) © fig. 124 and the message Warning!
will also appear. An audio signal will also sound.
Your vehicle will drive more slowly when starting. >
Page 163 of 332
80B012721BA
Driver assistance
This may also occur in some situations when
there is no apparent obstacle.
> Press the brake pedal to slow your vehicle
down.
ZA WARNING
— Observe the safety precautions and note the
limits of the assist systems, sensors, and
cameras > page 141.
— If the message B& ready to drive!) appears,
your vehicle will start driving even if there is
an obstacle between your vehicle and the ve-
hicle ahead. To reduce the risk of an acci-
dent, always make sure there are no obsta-
cles between your vehicle and the vehicle
driving ahead.
@ Tips
For safety reasons, the adaptive cruise control
will only be active if
—The driver's safety belt is fastened
— All doors and the hood are closed
— Your vehicle is not stopped for a long period
of time
Driver intervention request
Applies to: vehicles with Audi adaptive cruise control
al 3 3
S| | S| ee|
Fig. 125 Instrument cluster: request for driver interven-
tion
The request for driver intervention instructs you
to take over if the adaptive cruise control braking
function is not able to maintain a sufficient dis-
tance to the vehicle driving ahead. The system
will warn you of the hazard with the A indicator
light and the message Distance!. An audio signal
will also sound.
D_ This is not available in some countries.
The display @ only appears when the Driver as-
sistance display is open in the on-board comput-
er > page 17.
ZA WARNING
Observe the safety precautions and note the
limits of the assist systems, sensors, and
cameras > page 141.
Adjusting adaptive cruise control
Applies to: vehicles with Audi adaptive cruise control
You can adjust the system individually. The set-
tings depend on the vehicle equipment.
> Applies to: MMI: Select on the home screen:
VEHICLE > Driver assistance > Audi adaptive
cruise control.
Possible settings:
Applies to: vehicles without Audi drive select
Driving program - Depending on the selected
driving program and distance, the vehicle han-
dling will be adjusted from Sport to Moderate.
Applies to: vehicles with Audi drive select
Vehicle handling will be adjusted based on the
set distance and the selected Audi drive select
mode > page 115.
Store last distance - The last distance that was
set will be stored after the ignition is switched
off. If the distance is not stored, distance B
(time distance of approximately 1.8 seconds) is
automatically preset every time the ignition is
switched on.
Predictive control > Set speed limit - adaptation
to speed limits can be switched On or Off. Regu-
lation With tolerance can also be selected, if de-
sired. In this scenario, you may fall below or ex-
ceed the set speed in favor of increased efficien-
cy.
Predictive control > Adjustment to curves along
route - Adjustment based on the road ahead can
be adjusted. The setting influences vehicle
161
Page 186 of 332

Parking and maneuvering
ZA\ WARNING
— Observe the safety precautions and note the
limits of the assist systems, sensors, and
cameras > page 141.
— The driver is always responsible when enter-
ing or exiting a parking space and during
similar maneuvers.
— Do not use this function if the vehicle cannot
move freely, for example when on a vehicle
jack.
— Sensors and cameras have spots in which
the surrounding area cannot be detected.
Objects, animals, and people may only be
detected with limitations may not be detect-
ed at all. Always monitor the traffic and the
vehicle's surroundings directly and do not
become distracted.
@) Note
— Do not use the park assist systems when
transporting cargo that extends out of the
vehicle, when snow chains are mounted, or
when the parking space is on a hill or in-
cline.
— Park assist guides the vehicle either away
from curbs or onto them if other vehicles
are parked on the curb. Make sure that your
vehicle's tires and rims are not damaged.
Resume control of the vehicle in time or
stop the parking process if needed to pre-
vent damage.
G) Tips
Follow the legal regulations in the country
where you are located when using Park assist.
dem Re eee
Applies to: vehicles with park assist
Requirement: a suitable parking space must be
found and selected > page 181. The vehicle must
initially be stationary.
In the center display, arrows and symbols on the
vehicle roof @) > page 182, fig. 145 indicate
what action is needed, such as applying the
brakes or changing the direction. Park assist au-
184
tomatically steers the vehicle into the parking
space while the driver presses the pedals.
> After stopping the vehicle briefly, make sure
the actual direction the vehicle is traveling
matches the direction indicated by the park as-
sist.
> Remove your hands from the steering wheel.
>» Pay attention to the path of the vehicle. If the
traffic situation permits, accelerate carefully
> AX. The maximum parking speed is approxi-
mately 4 mph (7 km/h).
> Follow the visual instructions in the center dis-
play and the warning tones until the parking
process
has ended.
Z\ WARNING
— Observe the safety precautions and note the
limits of the assist systems, sensors, and
cameras > page 141.
— The park assist is an assist system. The driv-
er is still responsible for monitoring the ve-
hicle's surroundings and preventing colli-
sions when using the system.
— When using park assist to drive into or out
of a parking space, the steering wheel turns
quickly on its own. Reaching into the steer-
ing wheel spokes while this is happening can
result in injury.
G) Tips
You can also cancel the driving direction set
by the system by shifting between a forward
gear and reverse gear. Based on the position
of the vehicle, the system then calculates the
additional steering and driving directions for
maneuvering.
ten Lei ek ace
Applies to: vehicles with park assist
If you parked the vehicle in a parallel parking
space, park assist can help you drive out of it.
Park assist automatically steers the vehicle out of
the parking space while the driver presses the
pedals.
» Start the engine.
> Press the Pe button in the center console.
Page 210 of 332

Navigation
@) Tips
— Ifa contact is grayed out, there is no ad-
dress stored for that contact.
— Navigation to geographic coordinates for a
contact is not possible.
Loading received destinations and routes
Applies to: vehicles with a navigation system and Audi con-
nect Infotainment
You can search for destinations or routes in the
myAudi app and send to the vehicle.
Requirement: the MMI and the mobile device
must be connected to the Internet > page 197,
Audi connect. You must have the myAudi app in-
stalled on your mobile device.
> Send a destination or route in the myAudi app
to the vehicle.
» Applies to: MMI: Select on the home screen:
NAVIGATION > (5) > Received destns. &
routes.
> Make sure you are logged into the vehicle and
the myAudi app with the same myAudi account.
The received destination and routes will be
loaded automatically.
> Navigating to a destination: press on a desti-
nation.
> Deleting destinations: select: Z > one or more
entries or Select all > Delete > (Done).
Applies to: vehicles with navigation system
eee
ZeScu &
ene Orn rae
Fig. 153 Details
After you have selected a destination, the details
will be displayed. Route guidance is will not be
active yet.
The functions depend on the vehicle equipment
and the selected destination.
208
@ Map preview: to zoom in on the map pre-
view, press on the map.
@ Route criteria: see > page 216.
® More: additional functions.
@ Weather: Requirement: the MMI must be
connected to the Internet > page 197, Audi
connect. Also see > page 198.
© Applies to: MMI and telephone
Call: Requirement: a mobile device must be
connected to the MMI > page 186. You will
make a direct call to the phone number that
is stored for the destination.
© Start: starts navigation to the displayed des-
tination directly. The map will be displayed
=> page 210, Map operation.
@) Parking: press Parking to search for a park-
ing space at the destination. You can use the
parking space as the destination or stopover.
Details: Requirement: the MMI must be con-
nected to the Internet > page 197, Audi con-
nect.
©) Display of distance/driving time to the des-
tination
@® Weather at the destination: Requirement:
the MMI must be connected to the Internet
= page 197, Audi connect.
Selecting a destination from the map
Applies to: vehicles with navigation system
A point on the map can be used as the destina-
tion.
Opening the map
Applies to: MMI
> Press NAVIGATION on the home screen.
> If necessary, press A to display the map.
Adjusting the scale
> Select: 9/ > select a scale.
Marking the destination
> Press and hold a point on the map until a mark-
ing appears or the address for the selected des-
tination is shown.
Page 211 of 332

80B012721BA
Navigation
Selecting map content (such as POIs) as the
destination
Requirement: map content must be displayed
=>page 215.
> Press on map content on the map (for example,
ii).
Selecting the destination
> Select: 4 > Start.
Route guidance will be activated and the map will
be displayed > page 209, fig. 154.
ST) ee mee EL
Applies to: vehicles with navigation system
You can enter additional destinations during ac-
tive route guidance.
Entering a stopover
Requirement: route guidance must be active.
> Enter a destination > page 206.
Displaying stopovers or the route plan
All destinations are listed in the route plan.
> Press on Pin the side menu on the map
=> page 209, fig. 154.
Editing stopovers
> Press on Pin the side menu on the map
=> page 209, fig. 154.
> Adding a stopover: Select: Add destination >
select a destination > Add to route.
> Moving a stopover: press Z. Touch the > sym-
bol and move the entry to the desired position.
Press Done.
> Deleting a stopover: Select: Z > one or more
entries or Select all > Delete > (Done).
Stopping route guidance
Applies to: vehicles with navigation system
Requirement: route guidance must be active and
the map must be displayed.
> Applies to: MMI: Press BX 2 page 209, fig. 154.
> Applies to: multifunction steering wheel: Select
in the instrument cluster: Navigation tab >
button > Cancel route guidance.
Map
Map functions
Applies to: vehicles with navigation system
eee)
Pn ae
ie ie [Mena
Fig. 155 Marked map object
Opening the map
Applies to: MMI
> Press NAVIGATION on the home screen.
> If necessary, press /\ to display the map.
The following list gives an overview of the infor-
mation displayed on the map. Press on any func-
tion (for example, alternative routes) to show ad-
ditional options.
Select destination > page 207
Enter a destination using intelligent search
=> page 206
Cancel route guidance > page 209
Current route
Request spoken prompt
Alternative routes > page 211
COOH
OO
Display active destinations, stopovers, or
route plan > page 209. The distance to the
destination including the calculated arrival
time is displayed.
Online traffic information > page 214
Altitude ©®
209
Page 212 of 332
Navigation
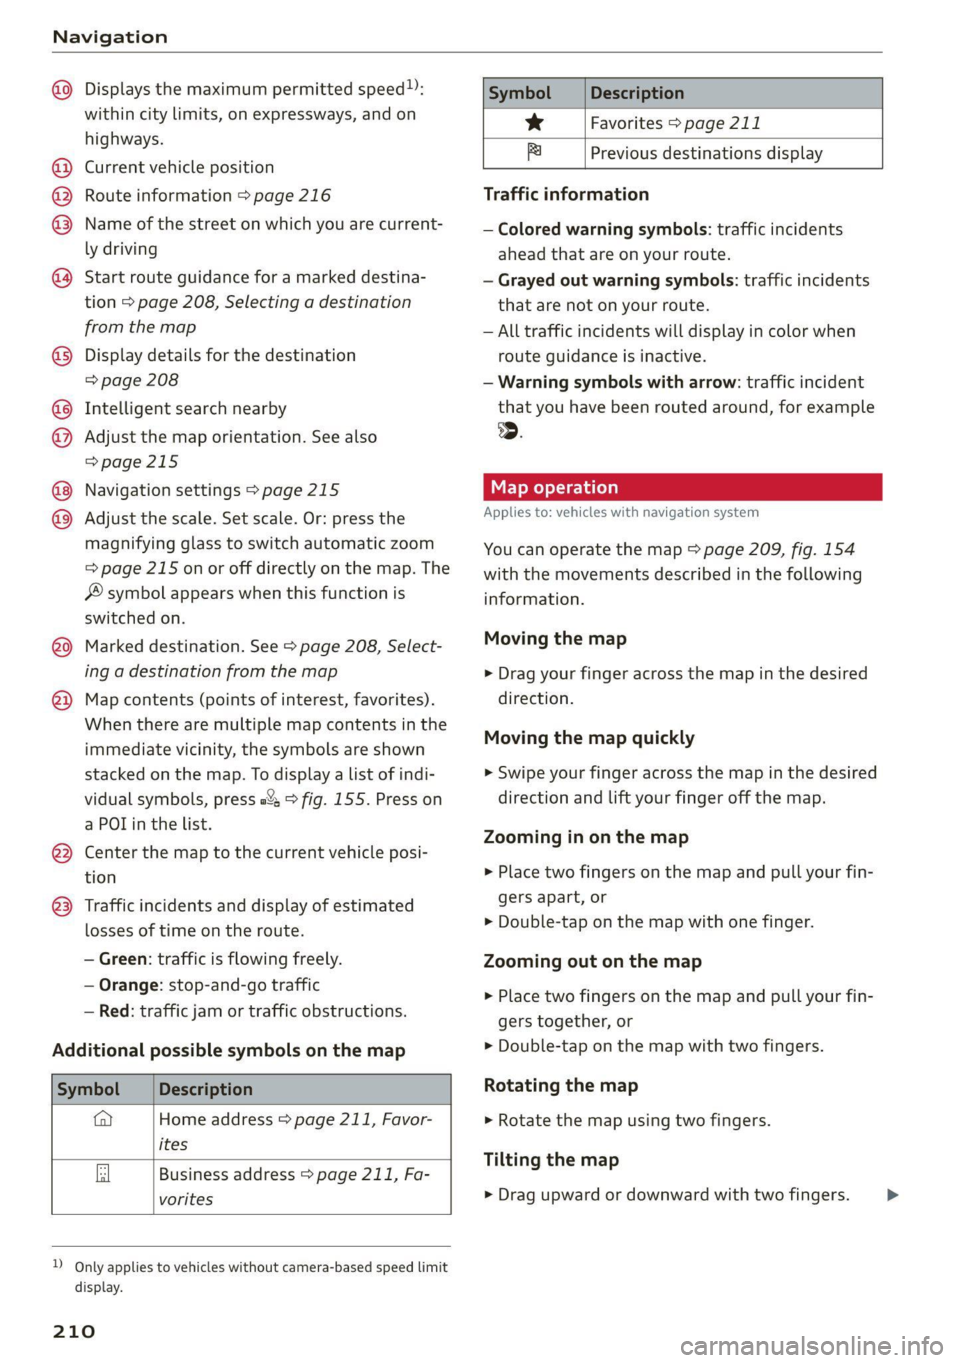
@) Displays the maximum permitted speed):
within city limits, on expressways, and on
highways.
Current vehicle position
Route information > page 216
Name of the street on which you are current-
ly driving
®
O88
Start route guidance for a marked destina-
tion > page 208, Selecting a destination
from the map
Display details for the destination
=> page 208
Intelligent search nearby
Adjust the map orientation. See also
=>page 215
Navigation settings > page 215
©®
OO
©
Adjust the scale. Set scale. Or: press the
magnifying glass to switch automatic zoom
=> page 215 on or off directly on the map. The
® symbol appears when this function is
switched on.
Marked destination. See > page 208, Select-
ing a destination from the map
® ® Map contents (points of interest, favorites).
When there are multiple map contents in the
immediate vicinity, the symbols are shown
stacked on the map. To display a list of indi-
vidual symbols, press #2; > fig. 155. Press on
a POI in the list.
Center the map to the current vehicle posi-
tion
Traffic incidents and display of estimated
losses of time on the route.
— Green: traffic is flowing freely.
— Orange: stop-and-go traffic
— Red: traffic jam or traffic obstructions.
Additional possible symbols on the map
Symbol Description
a Home address © page 211, Favor-
ites
Business address > page 211, Fa-
vorites
2) Only applies to vehicles without camera-based speed limit
display.
210
Symbol Description
* Favorites > page 211
x Previous destinations display
Traffic information
— Colored warning symbols: traffic incidents
ahead that are on your route.
— Grayed out warning symbols: traffic incidents
that are not on your route.
— All traffic incidents will display in color when
route guidance is inactive.
— Warning symbols with arrow: traffic incident
that you have been routed around, for example
@.
Map operation
Applies to: vehicles with navigation system
You can operate the map > page 209, fig. 154
with the movements described in the following
information.
Moving the map
> Drag your finger across the map in the desired
direction.
Moving the map quickly
> Swipe your finger across the map in the desired
direction and lift your finger off the map.
Zooming in on the map
>» Place two fingers on the map and pull your fin-
gers apart, or
> Double-tap on the map with one finger.
Zooming out on the map
> Place two fingers on the map and pull your fin-
gers together, or
> Double-tap on the map with two fingers.
Rotating the map
> Rotate the map using two fingers.
Tilting
the map
> Drag upward or downward with two fingers. >
Page 213 of 332
80B012721BA
Navigation
@) Tips
Certain gestures may not be available on all
touch displays or in every menu.
te guidance
Applies to: vehicles with navigation system and Audi virtual
cockpit
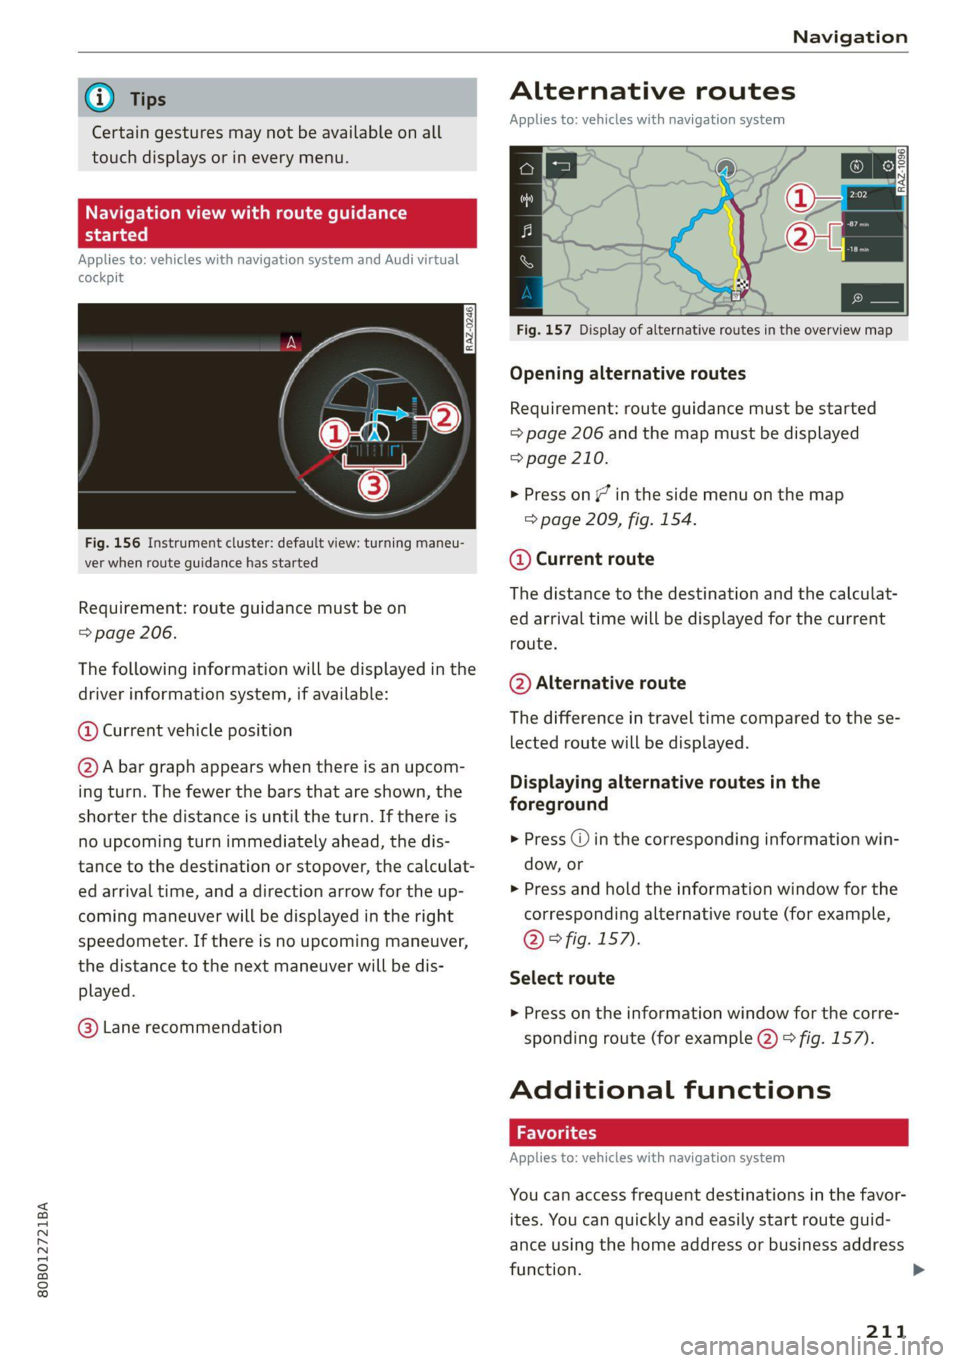
Fig. 156 Instrument cluster: default view: turning maneu-
ver when route guidance has started
Requirement: route guidance must be on
=> page 206.
The following information will be displayed in the
driver information system, if available:
@ Current vehicle position
@A bar graph appears when there is an upcom-
ing turn. The fewer the bars that are shown, the
shorter the distance is until the turn. If there is
no upcoming turn immediately ahead, the dis-
tance to the destination or stopover, the calculat-
ed arrival time, and a direction arrow for the up-
coming maneuver will be displayed in the right
speedometer. If there is no upcoming maneuver,
the distance to the next maneuver will be dis-
played.
@® Lane recommendation
Alternative routes
Applies to: vehicles with navigation system
3 S|
ny < &
Fig. 157 Display of alternative routes in the overview map
Opening alternative routes
Requirement: route guidance must be started
= page 206 and the map must be displayed
=> page 210.
> Press on (7 in the side menu on the map
=> page 209, fig. 154.
@ Current route
The distance to the destination and the calculat-
ed arrival time will be displayed for the current
route.
@ Alternative route
The difference in travel time compared to the se-
lected route will be displayed.
Displaying alternative routes in the
foreground
> Press @ in the corresponding information win-
dow, or
> Press and hold the information window for the
corresponding alternative route (for example,
@° fig. 157).
Select route
> Press on the information window for the corre-
sponding route (for example @) 9 fig. 157).
Additional functions
Favorites
Applies to: vehicles with navigation system
You can access frequent destinations in the favor-
ites. You can quickly and easily start route guid-
ance using the home address or business address
function.
211