check engine light AUDI Q7 2012 Owner´s Manual
[x] Cancel search | Manufacturer: AUDI, Model Year: 2012, Model line: Q7, Model: AUDI Q7 2012Pages: 342, PDF Size: 86.42 MB
Page 264 of 342
262 Checking and filling
VW 502 00 (vehicles with gasoline engine) or
VW 507 00 (vehicles with diese l engine).
C hanging the engine oil
The engine oil and o il fil te r must be changed
according to the m ileage (ki lomete rs) and
time inte rva ls spe cified in your vehicle 's War
ra nty
& Main ten ance booklet. Do not ex ceed
these in tervals - harmful depos its from ol d
engine o il can reduce engine performance an d
can lead to expensive engi ne re pairs.
C hanging the o il at th e recommen ded i nte r
v al s is so very impor tant because t he lub ric at
ing p roperties o f oi l decrease gra dually du ring
norma l vehicle use . If you are not sure when
you have yo ur oil changed, ask yo ur aut ho r
i z ed A udi Service Advisor.
Unde r some ci rc u ms tances the engine o il
should even be change d mo re frequently .
C hange o il more often if you drive mostly
short d istances, ope rate the vehicle in d usty
areas or mostly under stop-and-go traffic con
d it ions, or when you use your veh icle w he re
tem peratures stay below freez ing poin t fo r
l ong periods .
Detergent addit ives i n the o il w ill make fresh
oil look dark after the eng ine has been run
ni ng fo r a shor t time . This is no rma l and is not
a reason to change the o il mo re often tha n
r e co m men ded.
Damage or malfunctions due to lack of
maintenance
It is essential that yo u change your oil at the
recommended interva ls using only engine o il
that complies with Audi oi l standard
VW 502 00 (vehicles wi th gasoli ne e ngine) or
VW 507 00 (ve hicles with diese l engi ne) . Yo ur
Li m ite d N ew Vehicle Warranty does no t cove r
d am age or m alfu ncti ons due to f ailure to fol
l ow recommended main tenance and use re
q uir ements as set forth in the A udi Owne r's
M anual a nd Warra nty
& M aintenance book let.
Your dea ler will have to deny war ranty cover
age un less yo u present to the dea le r proof in
the f orm of Service or Repa ir Orders that a ll scheduled mai
ntenance was perfo rme d in a
t imely man ne r.
Engine oil consumption
To prov ide effective l ubr ication and cooling for
i nter na l eng ine parts, a ll interna l combustion
engi nes use some o il. Oil consumption va ries
from eng ine to engi ne and may cha nge over
t h e life of the engine. Engines tend to use
more o il du ring t he b reak-in pe riod tha n they
do afterwa rd, w hen oil c onsum ption ha s sta
b ilized. Dependi ng on the w ay the vehicle is
driven and the operati ng conditions, oil con
s u mption can be up to 1 q uart per 1, 200
miles (1 liter per 2,000 km) . Consumption
may be higher within the first 3,000 m iles
(5,000 km) .
Un der normal con ditions , the rate o f oi l con
s u mption depen ds on o il quality as well as vis
cosity, engine spee d (rpm), outs ide tempera
ture, road conditions, the amount of oil dil u
t io n caused by condensed water or fue l resi
du e, and ox ida tion of the o il. Oil co nsu mp tion
may incr eas e with eng ine w ear ov er time, un
t il repl acemen t of w orn en gine p arts may be
co me ne ce ssar y.
B eca use of all thes e var iables , there is no
sta nda rd o r "n orma l" ra te of o il cons umption .
We urge you to check the engine oil level at
regular intervals, preferably every time you
fill the fuel tank, and always before a long
trip.
The oil pressure warning light. i s not an
indicator of low engine oil level. If the warn
ing light does not go out after starting, or
flashes while driving (above 1500 rpm), a
buzzer will sound. It indicates that the oil
pressure is too low . Stop the engine immedi·
ately, check the engine oil level and add oil if
necessary. If the engine oil level is normal,
but the light continues to flash, do not keep
driving or let the engine idle, as damage may
occur .
II-
Page 268 of 342
266 Check ing and filling
For year-round driving, antifreeze is added at
the factory for temperatures down to:
- -31°F(-35°C)USA
- - 40 °F ( - 40 °C) Canada.
_& WARNING
-
Before you check anything in the engine
compartment, always read and heed all
WARN INGS
¢ .&. in Working in the engine
compartment on page 258.
(D Note
- Befo re winter se ts in, have the coolant
checked to see if t he coolant addit ive in
your vehicle is sufficient to meet the cli
mate conditions. This is especially impor
tant if you live in a region where the win
ter is extremely co ld. If necessary, in
crease the proport ion of coolant additive
to 60%.
- When adding coolant additive to your
cooling system, remember:
- We recommend using only coolant ad ditive G12++ or G13 for your vehicle.
Th is coo lant add itive is available at au
thorized Audi dealers. Other types of
antifreeze can significantly reduce cor
rosion protection. The resulting corro
sion can cause a loss of coo lant and se
r ious engine damage.
- Do not add any type of radiator leak sea l
ant to your vehicle's engine coolant.
Adding rad iator repair fluid may adve rse
ly affect the function and performance of
your cooling system and could result in
damage not covered by your New Vehicle Limited Wa rranty.
Checking the engine coolant level
The engine coolant level can be checked with
a quick glance .
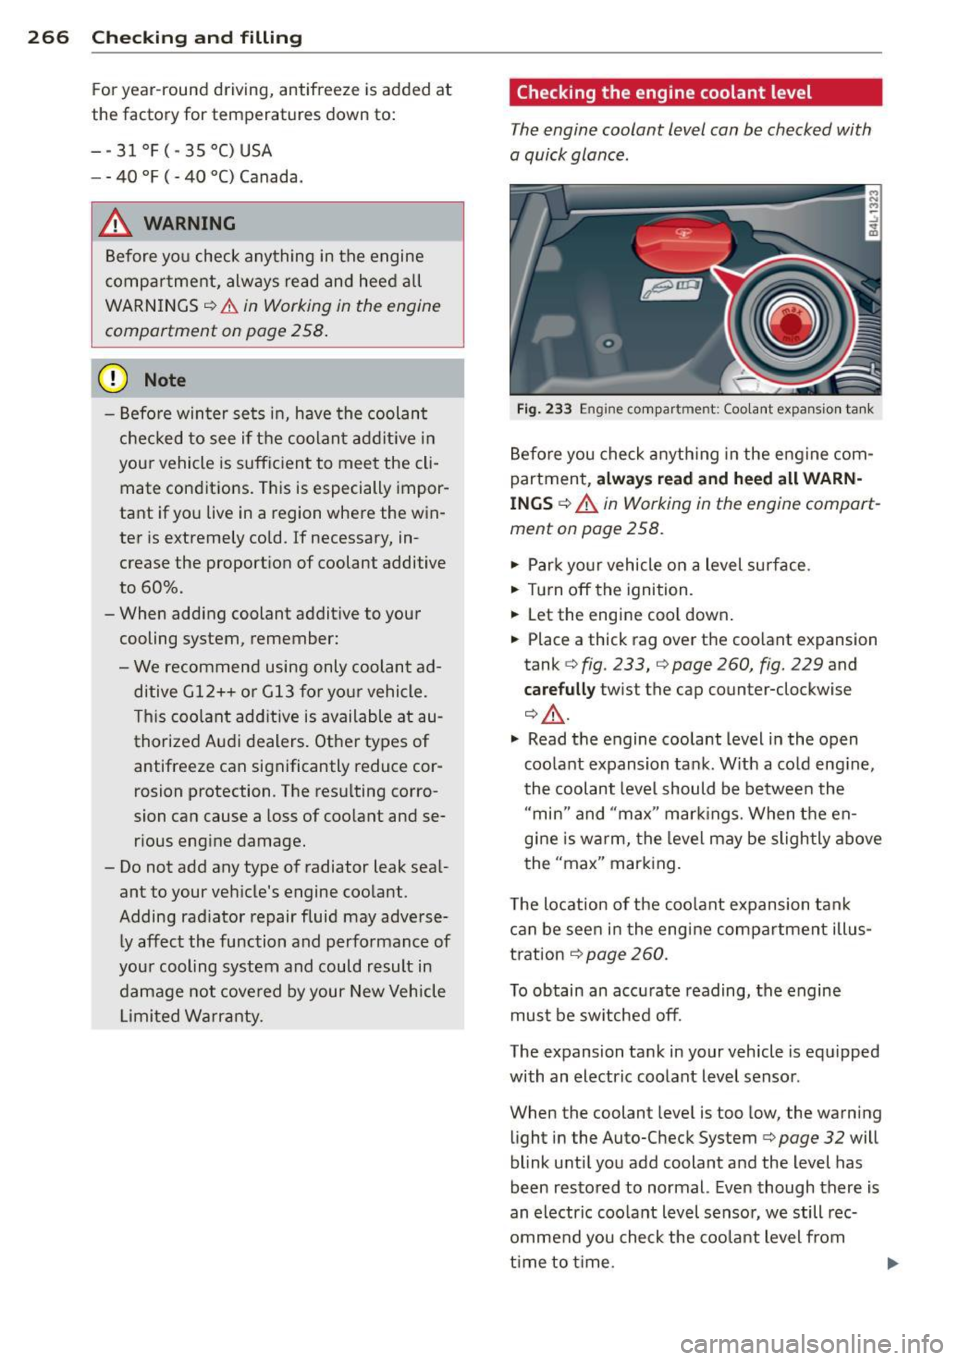
Fig . 233 Engine compartment : Coo lant expansio n ta nk
Before you check a nyth ing in the engine com
partment,
alw ays re ad and h eed all WARN
INGS ¢ A in Working in the engine compart
ment on page 258.
.,. Park yo ur vehicle on a level surface.
.,. Turn off the ignition.
.,. Let the engine cool down.
.,. Place a thick rag over the coolant expansion
tank ¢
fig. 233, c> page 260, fig. 229 and
care full y twist the cap counter-clockwise
¢,&. .
.,. Read the engine coolant level in the open
coolant expansion tank. W ith a cold eng ine,
the coolant level should be between the "min" and "max" markings. When the en
g ine is wa rm, the level may be slightly above
the "max" mark ing.
T he locat ion of the coolant expansion tank
can be seen in the engine compartment illus
tration
¢ page 260.
To obtain an accu rate reading, the engine
must be switched off.
The expansion tank in your vehicle is equipped
with an electric coolant level sensor.
When the coolant level is too low, the warning
light in the Auto-Check System¢
page 32 will
blink until you add coolant and the level has
been restored to normal. Even though there is
an electric coo lant level sensor, we still rec
ommend you check the coolant level from
time to t ime.
Page 269 of 342
Coolant loss
Coolant loss may indicate a leak in the cool ing
system . In the event of coolant loss, the cool
ing system should be inspected immediately
by your authorized Audi d ealer. It is not
enough merely to add coolant.
I n a
sea led system, losses can occur only if
the boiling point of the coolant is exceeded as
a result of overheating.
A WARNING
The cooling system is under pressure and can get very hot. Reduce the risk of scald
ing from hot coolant by following these
steps.
- Turn off the engine and allow it to coo l
down.
- Protect your face, hands and arms from
escaping fluid and steam by covering the
cap with a large, thick rag .
- Turn the cap slowly and very carefully in
a counter -clockwise direction wh ile ap
plying light, downward pressure on the
top of the cap .
- To avoid be ing burned, do not spill ant i
freeze or coolant on the exhaust system
o r hot eng ine parts. Under certai n condi
t ions, the ethy lene g lycol i n engine cool
an t ca n ca tch fire.
(D Note
Do not add any type of rad iator leak seal
ant to you r vehicle's eng ine coolant. Add
ing radiator repair f luid may adversely af
fec t the function and pe rformance of your
cooling system and could res ult in damage
not covered by your New Vehicle Limited
Warranty .
Adding coolant
Be very careful when adding engine coolant.
Before you check anything in the engi ne com
partment ,
alwa ys read and heed all WARN
INGS c:> A in Working in the engine compart
ment on page 258 .
Checking and fillin g 267
.. Turn off the engine .
.. Let the engine coo l down .
.. Place a thick rag over the coo lant expansion
tank
c:> page 266 , fig . 233 and carefully
twis t the cap coun ter-clockwise c:> &, .
.. Add coo lant .
.. Twist the cap on aga in
tightly.
Rep lacemen t engine coolant must conform to
exact spec ificat ions
c:> page 265, Coolant . We
recommend us ing on ly coo lant additive G12+
+, G 13 or in an eme rgency G12 +. Do
not use a
different additive. In an emergency use pla in
water until you can ge t the co rrect addi tive
and can restore the correc t ratio. This sho uld
be done as soon as possible.
If you have lost a cons iderab le amount of
coolant , the n you sho uld add cold ant ifree ze
and cold wate r on ly when the engine is cold.
Always use
n ew engine coolant when refilling .
Do not f ill coolant above the "MAX" mark. Ex
cess coola nt will be forced out through the
pressure relief valve in the cap when the en
gine becomes hot .
A WARNING
- The cooling system is under pressure and
can get ve ry hot. Reduce the risk of
scalding from hot coolan t by following
these steps.
- Turn off the engine and allow it to coo l
down .
- Protect your face, hands and arms from
escaping fluid and steam by covering
the cap w ith a large, th ick rag .
- Turn the cap s lowly and very carefully
i n a counter-clockwise direction while
applying light, downward pressure on
the top of the cap.
- To avoid being burned, do not spill a n
tifreeze o r coolant on the exhaust sys
tem or hot engi ne pa rts. Under certain
c ond it ions, the ethy lene glycol in en
gine coolant c an catch fire .
- Antifree ze is po isonous. Always s to re an
tifree ze in its o rigina l container and well
ou t of the rea ch of child ren. .,.
•
•
Page 270 of 342
268 Checking and filling
-If you drain the coolant, it must be
caught and safely stored in a proper con
tainer clearly marked "poison".
(D Note
- Coolant pollutes the environment and
could cause an engine fire . Excess cool-
ant will be forced out through the pres
sure relief valve in the cap when the en
gine becomes hot.
- If, in an emergency, only water can be
added , the correct ratio between water
and antifreeze
c:::> page 265 must be re
stored as soon as possible .
@ For the sake of the environment
Drained coolant should not be reused. Al
ways dispose of used coolant while observ ing all environmental regulations.
Radiator fan
The radiator fan switches on automatically by
itself
The radiator fan is driven by the engine via the
V-belt . The viscous clutch regulates the speed
of the fan accord ing to the temperature of the
coolant.
An auxiliary electric radiator fan* switches on
and off depending on coolant temperature
and other vehicle operating conditions.
After you switch the engine off, the aux iliary
fan can continue running for up to 10 minutes
- even with the ignition off. It can even switch
on again later by itself
c:::> &. , if
- the temperature of the engine coolant rises
due to the heat build-up from the engine in
t he engine compartment, or
- the engine compartment heats up because
the vehicle is parked in intense sunligh t.
_&. WARNING
- To reduce the risk of personal injury nev
er touch the radiator fan. -
The auxiliary electric fan is temperature
controlled and can switch on suddenly
even when the engine is not running.
- The auxiliary radiator fan switches on au
tomatically when the engine coolant reaches a certain temperature and will
continue to run until the coolant temper
ature drops.
Brake fluid
Checking brake fluid level
The brake fluid level can be checked with a
quick glance.
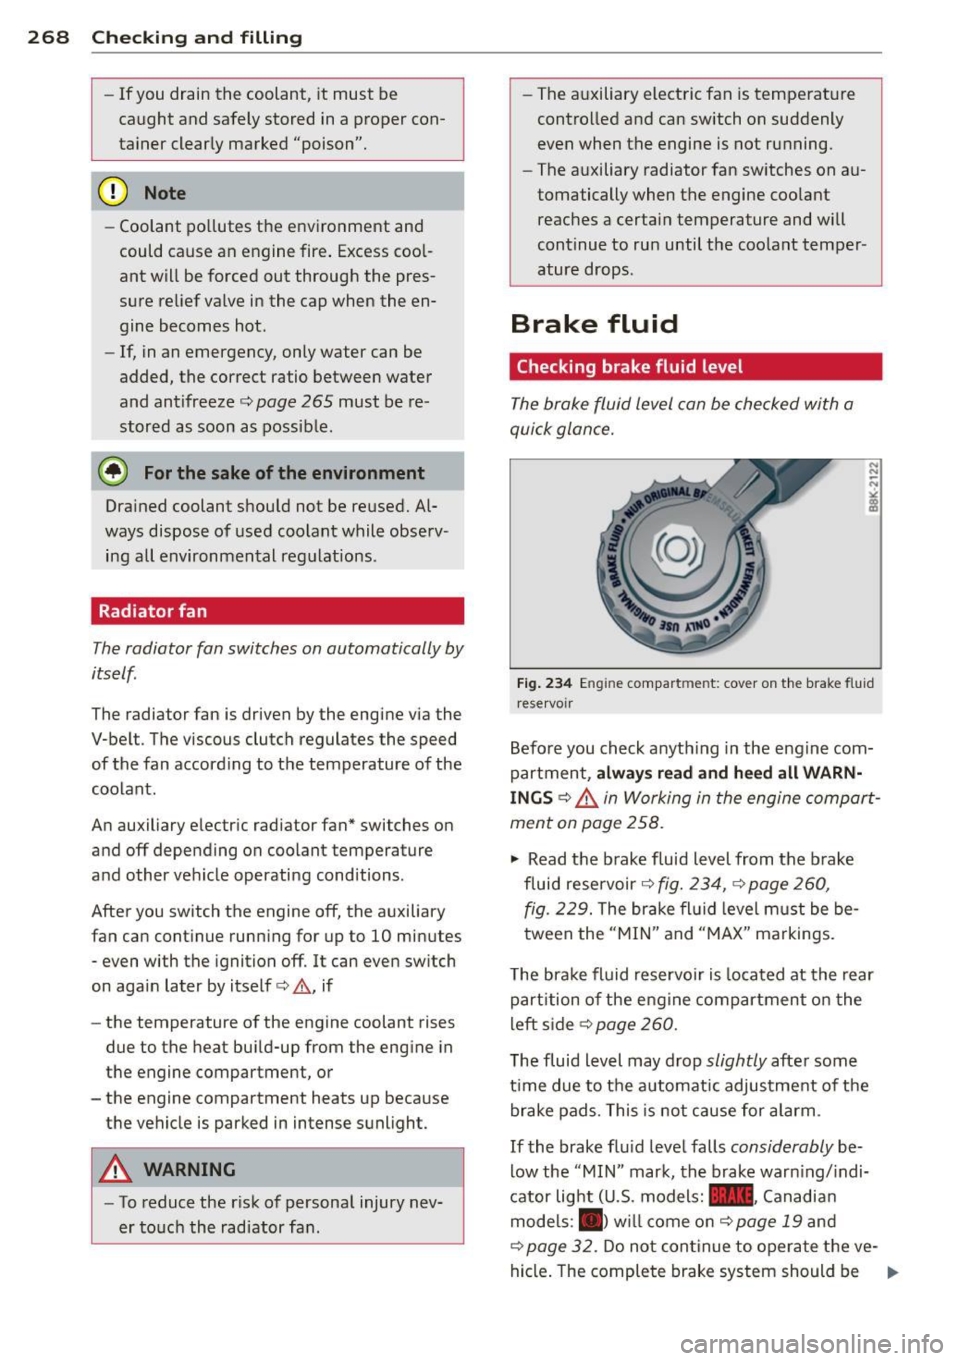
Fig. 234 E ngine compart men t: cove r on the brake fluid
reserv oir
Before you check anyth ing in the engine com
partment,
always read and heed all WARN
INGS c:::> _&. in Working in the engine compart
ment on page 258.
.,. Read the brake fluid level from the brake
fluid reservoir
c:::> fig. 234, c:::> page 260,
fig.
229. The brake fluid level m ust be be
tween the "MIN" and "MAX" markings.
The brake fluid reservoir is located at the rear
partition of the engine compartment on the
left side
c:::> page 260.
The fluid level may drop slightly after some
time due to the automatic adjustment of the
brake pads. This is not cause for alarm.
If the brake flu id level falls
considerably be
low the
"MIN " mark, the brake warning/indi
cator light ( U.S. models: -· Canadian
models :. ) w ill come on
c:::>page 19 and
c:::>page 32. Do not continue to operate the ve-
hicle. The compl ete brake system should be ..,.
Page 272 of 342
2 70 Chec king and filling
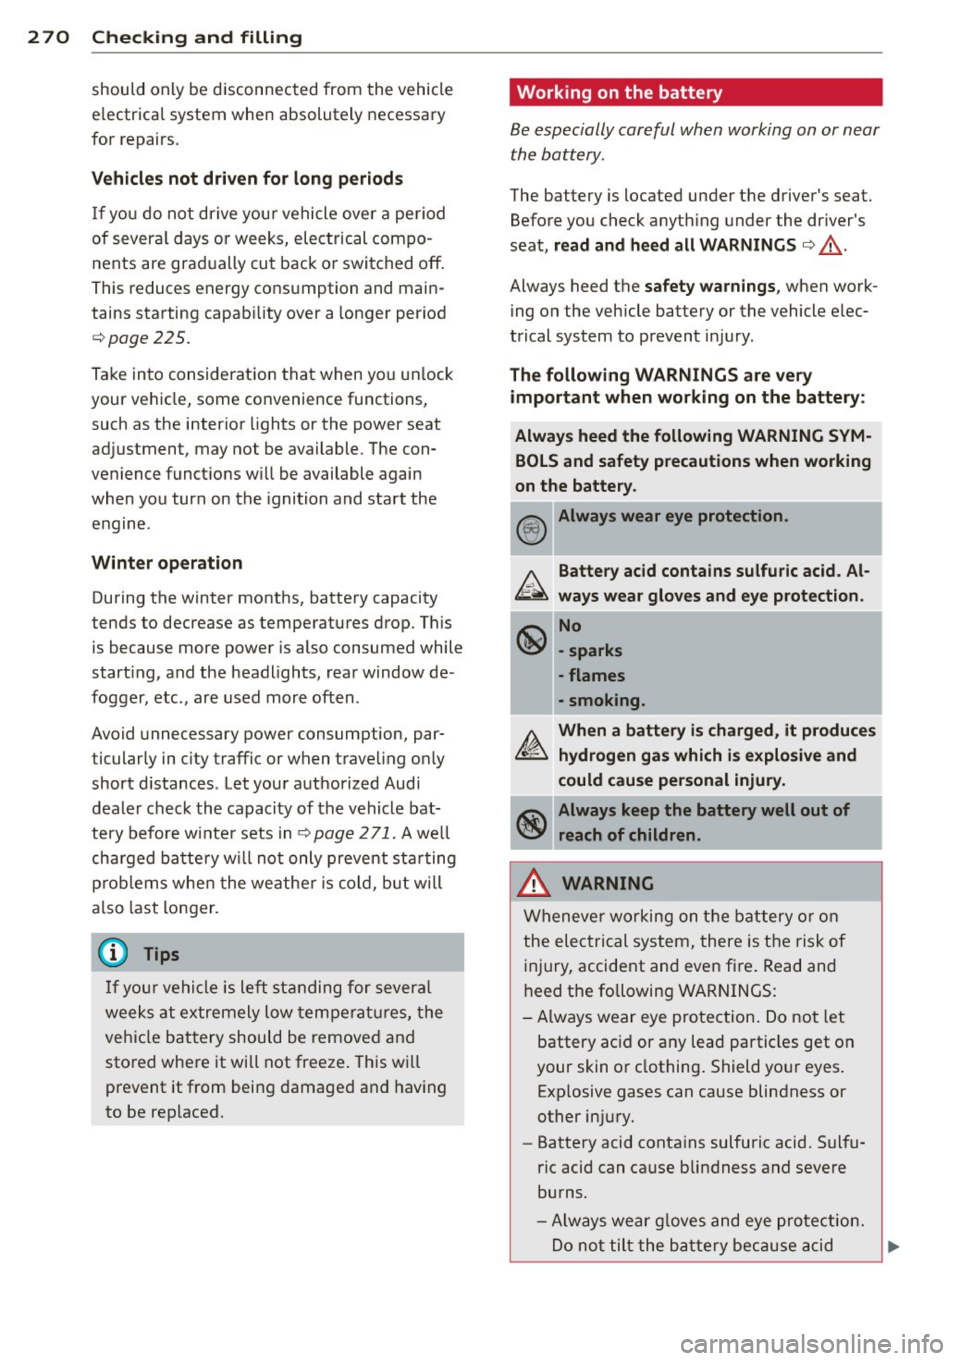
should only be disconnected from the vehicle
e lectrical system when absolutely necessary
for repairs.
Vehicles not driven for long periods
If you do not drive your vehicle over a pe riod
of several days or weeks, electrical compo
nents are gradually cut back or switched off.
This reduces energy consumption and main
tains starting capab ility over a longer period
c;, page225.
Take into consideration that when you un lock
your vehicle, some convenience functions, such as the interior lights or the power seat
adjustment, may not be available. The con
venience functions will be available again
when you turn on the ignition and start the
engine .
Winter operation
During the winter months, battery capacity
tends to decrease as temperatures drop . This
is because more power is also consumed while
starting, and the headlights, rear window de
fogger, etc., are used more often .
Avoid unnecessary power consumption, par
ticularly in city traffic or when traveling only
short d istances . Let your authorized Audi
dealer check the capacity of the vehicle bat
tery before w inte r sets in
¢ page 271. A well
cha rged battery w ill not only prevent starting
p rob lems when the weather is cold, but will
a lso last longer.
(D Tips
If your vehicle is left standing for several
weeks at extremely low temperatures, the
vehicle battery should be removed and
stored where it will not freeze . This wi ll
prevent it from being damaged and having
to be replaced.
Working on the battery
Be especially careful when working on or near
the battery.
The battery is located under the driver 's seat.
Before you check anyth ing under the driver 's
seat,
read and heed all WARNINGS c:;, _&.
Always heed the safety warnings, when work
ing on the vehicle battery or the vehicle elec
trical system to prevent injury.
The following WARNINGS are very
important when working on the battery:
Always heed the following WARNING SYM BOLS and safety precautions when working
on the battery.
@!) Always wear eye protection .
b.. Battery acid contains sulfuric acid . Al
~ ways wear gloves and eye protection.
~ No
\!:51 -sparks
- flames
- smoking.
A. When a battery is charged, it produces
~ hydrogen gas which is explosive and
could cause personal injury.
~ Always keep the battery well out of
~ reach of children.
,&. WARNING
Whenever working on the battery or on
the electrical system, there is the risk of
injury, accident and even fire . Read and
heed the following WARNINGS:
- Always wear eye protection. Do not let
battery ac id or any lead particles get on
your skin or clothing. Shield your eyes .
Exp losive gases can cause blindness or
other injury.
- Battery acid contains sulfuric acid. Sulfu
ric acid can cause blindness and severe
burns.
- Always wear g loves and eye protection.
-
Do not tilt the battery because acid ~
Page 273 of 342
could leak out of the ventilation open
ings.
- If you get battery acid in your eyes or
on your skin, immediately rinse with
cold water for several minutes and get
medical attention.
- If you should ingest any battery acid,
seek medical attention immediately.
- Do not expose the battery to an open
flame, electric sparks or an open light.
- Do not smoke.
- Do not interchange the positive and neg-
ative cables.
- When working on the battery, be sure
not to short-circuit the terminals with
tools or other metal objects. This would cause the battery to heat up very quickly,
which could lead to damage or explosion
and personal injury.
- When a battery is charged, it produces hydrogen gas which is explosive and
could cause personal injury.
- Always keep the battery well out of the
reach of children.
- Before work is done on the electrical sys tem, disconnect the negative ground ca
ble .
- Before performing any work on the elec
trical system, switch off the engine and
ignition as well as any electrical equip
ment . The negative cable on the battery
must be disconnected. If you are just go
ing to rep lace a light bulb, then it is
enough to switch off the lights.
- Before disconnecting the battery, switch
off the anti-theft alarm system! Other
wise you will set off the alarm.
- When disconnecting the battery, first
disconnect the negative cable and then
the positive cable.
- Before reconnecting the battery, make
sure all electrical consumers are switch
ed off. Reconnect the positive cable first
and then the negative cable. Never inter
change the cables -this could start a fire!
- Never charge a frozen or a thawed-out
battery. It could explode! If a battery has
frozen, then it must be replaced. A dis-
Checking and filling 2 71
charged battery can freeze over at 32 °F
(0 oc) .
-Make sure the vent hose is always attach
ed to the opening on the side of the bat
tery .
- Never use batteries which are damaged.
There is the danger of an explosion! Al
ways replace a damaged battery.
A WARNING
California Proposition 65 Warning:
- Battery posts, terminals and related ac
cessories contain lead and lead com pounds, chemicals known to the State of
California to cause cancer and reproduc
tive problems . Wash hands after han
dling.
(D Note
- Do not disconnect the vehicle battery
when the ignition is switched on or when the engine is running, otherwise, you will
damage electron ic components in the
electrical system.
- If your vehicle is going to stand for a
long period of time without being driven,
protect the battery from "freezing", oth
erwise it will be damaged and will then
have to be replaced.
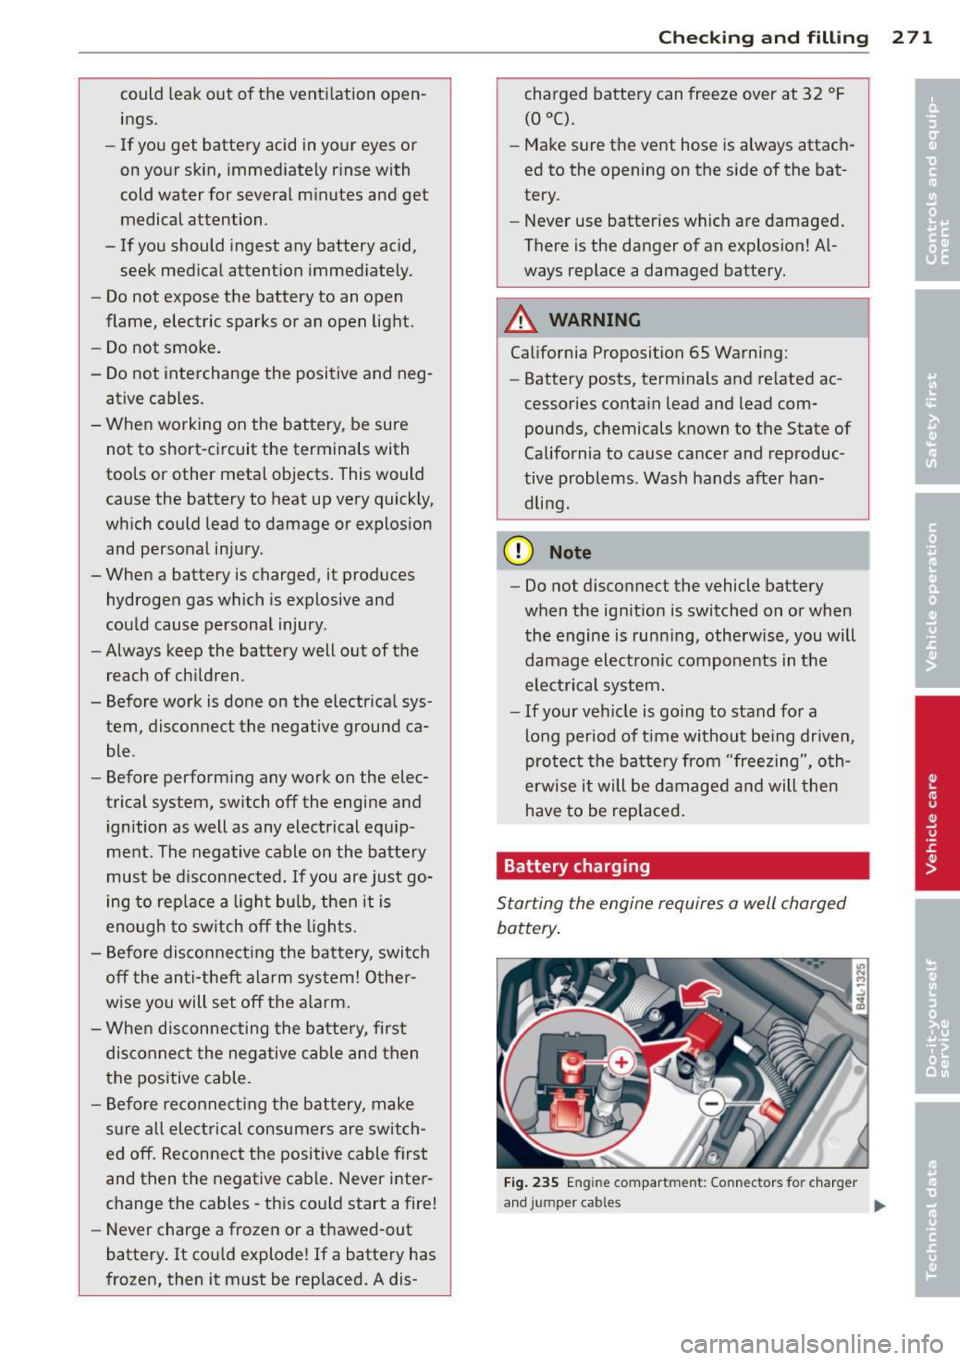
Battery charging
Starting the engine requires a well charged
battery.
Fig. 235 E n gin e compart men t: Co nnectors fo r charger
and j umper ca bles ..,_
Page 275 of 342
Battery replacement
The new battery must have th e sam e specifi
cations and dim ensions as the original equip
ment battery.
Intell igent energy management in your vehi
cle is respons ible for d istr ibuting the e lectr i
cal energy throughout your vehicle
¢
page 225. The intel ligent e nergy ma nage
men t system w ill keep the eng ine ba tte ry
ch arged be tte r th en vehicles w ithout t his sys
tem . To make sure the additional e lectrica l en
e rgy is available once again after you have
changed the battery, we recommend that you install batteries of the same type and man u
facture only (the same as those installed at
the time your vehicle was delivered). Specifi
cations a re listed on the battery hous ing . Your
author ized dealer must code the battery in
the energy manageme nt system to enable yo u
to use the energy managemen t fu nctions co r
rectly after rep lac ing the b attery .
If it is not poss ible to use a battery of this
type, the new battery must have the same ca
paci ty, voltage ( 12 volts) , a mpe rage , con
s truc tion and pl ug sea ling.
W hen insta lli ng the battery, make sure the ig
ni tion and all e lectr ical c ons umers a re turned
off.
CD Note
Ma ke s ure the venti lation hose on the s ide
of the bat tery is connected, ot he rwise
fumes or ba ttery a cid c an leak out.
@, For the sake of the environment
Because of the probl em of proper d isposa l
of a batte ry, we recommend your autho r
i z e d Au di d ealer change the batt ery f or
you. Batter ies co ntain s ulfu ric ac id and
lead and m ust always be dis posed of prop
erly i n complia nce w ith all environmenta l
reg ulations. D isposin g of vehicle batteries
improper ly is very dangerous to the envi
ronment.
Checkin g and fillin g 273
Windshield/headlight
washer container
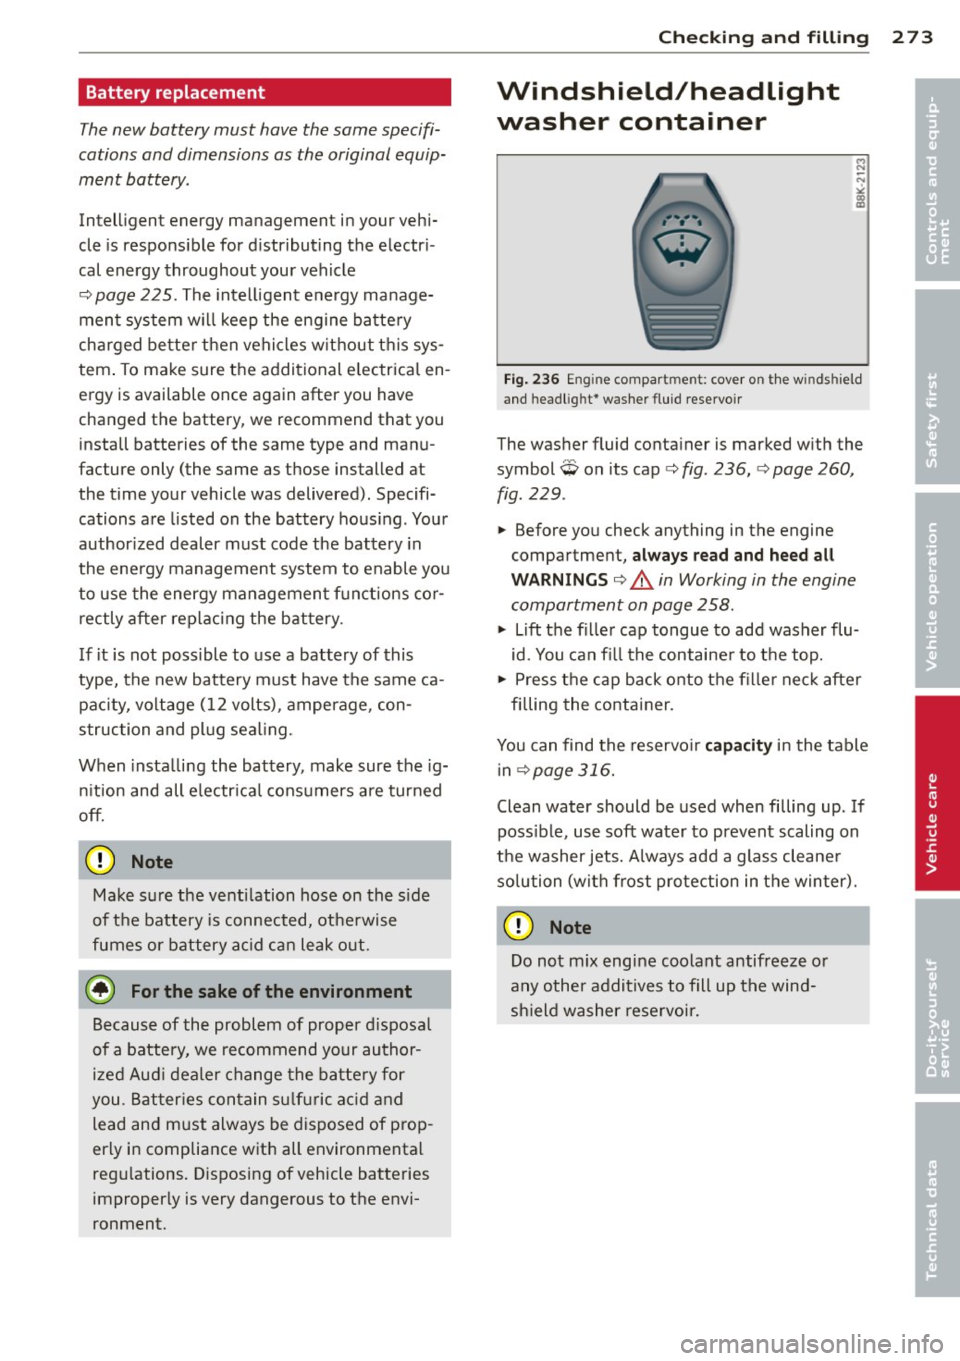
Fig. 2 36 En gin e compart ment: cover on t he w inds hield
a n d head lig ht* was her fl ui d reservo ir
The washer fluid conta iner is marked w ith the
symbol Won its cap ¢
fig. 236, ¢ page 260,
fig . 229 .
.. Before yo u check anything in the engine
compartment,
always read and heed all
WARNINGS ¢ &. in Working in the engine
compartment on page 258 .
.. Lift t he fi ller cap tongue to add washer flu
id. You can fi ll the containe r to t he top .
.. Press the cap back o nto the fi lle r ne ck afte r
filling the container.
You can find the reservo ir
capacity in t he table
in
¢ page 316.
Clean water should be used when filling up . If
poss ible , use soft water to prevent scaling on
the washer jets. A lways add a glass cleane r
solution (with frost pro te ction in t he winter).
CD Note
Do not mix engine coo lant antifreez e or
a ny other addit ives to f ill up t he win d
sh ield washer rese rvo ir.
•
•
Page 310 of 342
308 Emergency situations
Emergency situations
General
This chapter is intended for trained emer
gency crews and working personnel who
have the necessary tools and equipment to perform these operations.
Starting by pushing or
towing
Q;) Note
Your vehicle is equipped with an automatic
transmission. Consequently, the engine
cannot be started by pushing or towing.
Starting with jumper
cables
If necessary, the engine can be started by
connecting it to the battery of another vehi
cle.
If the engine should fail to start because of a
discharged or weak battery, the battery can be
connected to the battery of
another vehicle,
using a
pair of jumper cables to start the en
gine .
Jumper cables
Use only jumper cables of sufficiently large
cross section to carry the starter current safe
ly. Refer to the manufacturer's specifications.
Use only jumper cables with
insulated termi
nal clamps which are distinctly marked:
plus(+) cable in most cases colored red
minus(-) cable
in most cases colored black .
A WARNING
Batteries contain electricity, acid, and gas.
Any of these can cause very serious or fatal
injury. Follow the instructions below for
safe handling of your vehicle's battery.
- Always shield your eyes and avoid lean
ing over the battery whenever possible. -
A discharged battery can freeze at tem
peratures just below 32 °F (0 °C). Before
connecting a jumper cable, you must
thaw the frozen battery completely, oth
erwise it could explode.
- Do not allow battery acid to contact eyes
or skin . Flush any contacted area with
water immediately .
- Improper use of a booster battery to
start a vehicle may cause an explosion.
- Vehicle batteries generate explosive gas
es . Keep sparks, flame and lighted ciga
rettes away from batteries.
- Do not try to jump start any vehicle with
a low acid level in the battery .
- The voltage of the booster battery must
also have a 12-Volt rating. The capacity
(Ah) of the booster battery should not be
lower than that of the discharged bat
tery . Use of batteries of different voltage
or substantially different "Ah" rating
may cause an explosion and personal in
jury.
- Never charge a frozen battery. Gas trap
ped in the ice may cause an explosion.
- Never charge or use a battery that has
been frozen. The battery case may have
be weakened.
- Use of batteries of different voltage or
substantially different capacity (Ah) rat
ing may cause an explosion and injury.
The capacity (Ah) of the booster battery
should not be lower than that of the dis
charged battery.
- Before you check anything in the engine
compartment, always read and heed all
WARNINGS¢
page 248, Engine com
partment.
@ Note
- Applying a higher voltage booster bat
tery will cause expensive damage to sen
sitive electronic components, such as
control units, relays, radio, etc.
- There must be no electrical contact be
tween the vehicles as otherwise current
could already start to flow as soon as the
positive(+) terminals are connected. ..,.
Page 327 of 342
Alternator Malfunction . . . . . . . . . . . . . . . . . . . . . . . 31
Ambience lighting Lighting p rofiles .......... .. .. .. .... 62
Anti-freeze
refer to Engine coolant system .. ... .. 265
Anti-lock brake system How the ABS system works . .. .. .. .. . 223
War ning/ indicator lights ... .. .. .. .. .. 18
Anti-Slip Regulation System (ASR) How t he system works .. ... .. .. .. .. . 22 1
Anti-theft systems Anti- theft alarm system . . . . . . . . . . . . . SO
E lect ronic immobilize r ..... .. .. .. .. .. 40
App roach/departure angle . ......... .. 232
Ashtray ..... ... .. .. ..... ... .. .. .... 86
ASR How t he A nti-Sli p Regula tion System
works ... .. ................. .. ... 22 1
Aster isk
What does it mean whe n someth ing is
marked with an aste risk? . . . . . . . . . . . . . . 6
Aud i brak ing guard ......... .. .. .. .. . 126
Error messages .......... .... .. ... 128
Sett ings ................... ... ... 128
Stat us messages .... ..... .. .. .. .. . 128
Sw itching on and off ...... .. .. .. .. . 128
Aud i parking system plus with rearv iew
camera ... .. ................. .. ... 144
Adjusting the display ......... .... .. 148
Adjusting the warni ng tones .. .. .. .. . 14 8
Rearview camera - pa rking mode 1 ... . 147
Rearview camera - pa rk ing mode 2 . .. . 14 7
Safety precau tions ........ .. .. .. .. . 14 4
Sw itch ing on and off ... ... .. .. .. .. . 146
Trailer hitch . . . . . . . . . . . . . . . . . . . . . . 14 9
Aud i Servic e Repa ir Manuals and Litera-
ture .. .. .. .. ................. .. .. . 319
Auto-Check Control . . . . . . . . . . . . . . . . . . 30
Automatic belt retrac to r . . . . . . . . . . . . . 17 4
Automatic ca r wash
refer to Was hing ......... .. .. .. .. . 24 0
Automatic mode Four- zone automatic comfort a ir cond i-
tioning .. ............ ...... .... ... 98
Automatic S hift Lock (ASL) . ... .. .. ... 139
Inde x 325
Automat ic transm iss ion .. ..... ... .. .. 137
Automatic Shift Lock (ASL) ... ... .. .. 139
Driving ... .. .. .. .. . .. ... .... ... .. 137
Dynam ic shift program ............. 140
Emergency mode . ................. 141
Emergency re lease for selecto r lever .. 142
Ig nition key safety lock . .. .. ... ... .. 105
Ki ck-down . . . . . . . . . . . . . . . . . . . . . . . . 140
Manua l shift prog ram .......... .... 140
Se lector lever .. .. .... ........... .. 138
S hi ft buttons . . . . . . . . . . . . . . . . . . . . . 141
Steering wheel with tiptronic ®
A UTO mode 141
AC climate cont ro ls . . . . . . . . . . . . . . . . . 94
Auto Safety Hotline ............. .... 167
Ave rage speed . . . . . . . . . . . . . . . . . . . . . . . 24
Avoid damaging the vehicle .......... . 230
B
Bass box . .. .. .. .. ... ... ... .. .. .. .. 296
Battery . ... .. .... .. . .. .. ..... ... .. 269
Battery location .. .. . ... .... ... .. .. 270
Charg ing .. .. .. .. ................. 271
Important warnings when working on
the battery .. .. .. .. . .. .. ..... ... .. 270
Jump start ing .. .. .. ............... 308
Low .. .. .. .. .. .. .. . .. .... .... .... 225
Rep lac ing the battery .......... .. .. 273
State of cha rge . .. ................. 225
Voltage ... .. .. .. .... ........... .. . 36
Win ter operation ... . .. ..... ... .. .. 269
Working on the battery . ..... ... .. .. 270
Befo re d rivi ng . .. .. .. ............... 160
B lended gasoline .. ............. .. .. 2SO
Body cavity sealing ... . .. ..... ... .. .. 244
Boos ter seats ..... .. ............... 208
B rake assistant .. .... . ... ...... ... .. 224
B ra ke booste r ... .. .... ............. 223
Brake fluid Changi ng the brake fluid . .......... . 269
Checking the brake fluid level ....... . 268
Rese rvoir . .. .. .. .. . ....... ..... .. 268
What is the correct bra ke fluid level? .. 268
Wha t should I do i f the brake fluid w arn-
ing light comes on? .. .. ..... ... .. .. 2 68
B rake light
Defec tive . . . . . . . . . . . . . . . . . . . . . . . . . 23
•
•
Page 328 of 342
326 Index
Brake system .. .... ..... ... .. .. .... . 268
Anti-lock brake system . ... .. ... ... .. 1 8
Bra ke fl uid .... ... .... ... .. .. .... . 268
Brake fl uid spec ificat ions for refill and re-
p lacement ... ............. .. .... . 269
Brake pads . .............. ... .. ... 228
Ge ne ral informat ion ... ... .. .. .. .. . 222
H ow does mo isture or road salt affect the
b rakes? .. .. ............. .... .. .. . 22 2
M alfunct io n ............. .. .. .... .. 3 2
P ark ing brake ... ...... ... .. .. .... . 109
Warning/indicator lights ... .. .. .... . . 19
Worn brake pads symbol ... .. ... ... .. 36
B raki ng gua rd
refer to Audi br aking gua rd . .. .. .. .. . 126
Break- in period . .. ...... .... ... .. .. . 228
Brake pads ... .. ...... .... ... .. .. . 228
Tir es .. .. .. ................ ... ... 228
Breakover ang le ........... .... .... . 232
B ulbs . .. .. ... ............ .. .. .. .. . 30 6
Bumper cover Ca ution w hen parki ng nea r a parking ba r-
ri er or curb . ... .. ..... ... .. .. .. .. . 110
C
Ca lifo rnia Proposit ion 65 Wa rning .. ... 259
B attery spec ific .... ...... .. .. .. .. . 27 1
Capac it ies . .. ............. .. .. .. ... 316
C ar -Systems
Ambience lighting . . . . . . . . . . . . . . . . . . 62
Lighting profi les .. ..... ... .. .. .... .. 62
Ca r ca re . .. .. ................ ... .. . 239
I n ter ior . . . . . . . . . . . . . . . . . . . . . . . . . . 24 4
Pl asti c and v inyl .......... .. .. .. .. . 24 2
Care of exte rior .. .... .... .. .. .. .. .. . 239
Cargo area
refer to loading the luggage compart-
ment .. .. ................. .. .... . 166
C ar go floor ............... .. .. ...... 8 2
Cargo net .... .. ........ .... ... .. .. .. 80
Cata lytic converter . ..... ... .. .. .... . 229
Cente r arm rest
Cup holder . . . . . . . . . . . . . . . . . . . . . . . . 77
S to rage compartment . . . . . . . . . . . . . . . 7 7
Center console in rear ........ ... .. .... 78 Cen
tral lock ing
Emergency locking . .... ..... ... .. .. . 45
Pano ram ic s liding s unroo f . . . . . . . . . . . . 55
Certification .. .. .. ............. .. .. 3 22
Chang ing a flat t ire . .. .. ...... ... .. .. 298
Chang ing a wheel . .... .. ..... ... .. .. 298
Chang ing engine oil 264
Chassis Undercoating .... ............. .... 244
also refer to Adaptive Air Suspen-
s io n . . . . . . . . . . . . . . . . . . . . . . . . 150, 152
CHECK button ..... ... .. ..... ... .. .. . 12
Checking En gine coolant level ............ .. .. 266
Checking t ire pressure ........ ...... . 280
Child rest raints
Danger of using child restraints in the
front seat . ................... .... 181
Where can I get additional informat io n
about child rest raints and the ir use? .. 218
Child rest raint system anchors . ... .. .. 212
Child safe ty . ...... ............. .... 200
Co nvertib le lo cking retractor ... .. .. .. 209
G ui dance fixtures for lower ancho rages 214
Important sa fe ty instru ctions for using
child safety seats .... .. ..... ... .. .. 203
Important things to know when driving
with children .. .. ... .......... .. .. 200
Installing a c hild restra int using the
LATCH system .. .. .......... ...... . 215
Mounting and releasing the anchorage
hook ........ ... .. .............. . 215
T e ther anchors ... ............. .... 216
T e ther s traps .... ............. .... 216
Child safety lock
r ear doors (powe r) . . . . . . . . . . . . . . . . . . 48
Child safety seats . ... .... .... ... .. .. 205
Booster seats .... ............. .... 208
Co nvertib le child seats ......... .. .. 206
Co nvertib le locking retractor ... .. .. .. 209
Danger of using child restraints i n the
front seat ..... .. .......... ... ... . 181
How do I properly i nstall a chi ld safe ty
seat in my ve hicle? ............. .. .. 203
Infan t seats ... .. .. .... .... ... .. .. 205
Installing ..... .. .. ... ..... ... .. .. 209