warning light AUDI Q7 2012 Owner´s Manual
[x] Cancel search | Manufacturer: AUDI, Model Year: 2012, Model line: Q7, Model: AUDI Q7 2012Pages: 342, PDF Size: 86.42 MB
Page 35 of 342
~ Contact your authorized Audi dea ler fo r as -
sistance if necessary.
If the engine coolant level is co rrect, then the
radiato r fan may be the cause of the malfunc
tion.
If the . warning symbo l (alternator mal
f u nction) a lso l ights up on the instr ument
panel ¢
page 31, then the fan belt may be
damaged .
A WARNING
- If your vehicle should break down for
mechanica l or other reasons, park at a
safe distance from moving traffic, turn off the engine and turn on the hazard
warning lights¢
page 60, Emergency
flasher.
-
- Never open the hood if you see or hear
steam o r coolant escap ing from the en
gine compartment - you risk being scald
ed. Wait until you can no longe r see or
hear steam or coo lant escaping.
- The e ngine compartment of any ve hicle
is a da ngerous a rea. Before you perform
any wor k in the engine compar tment,
t ur n o f the eng ine and allow it to cool.
Follow the warning stickers¢
page 248,
Engine compartment .
(D Note
Do not cont in ue d riving if the . symbol
illuminates. There is a malf unct ion in the
engine cooling system -you co uld damage
your eng ine.
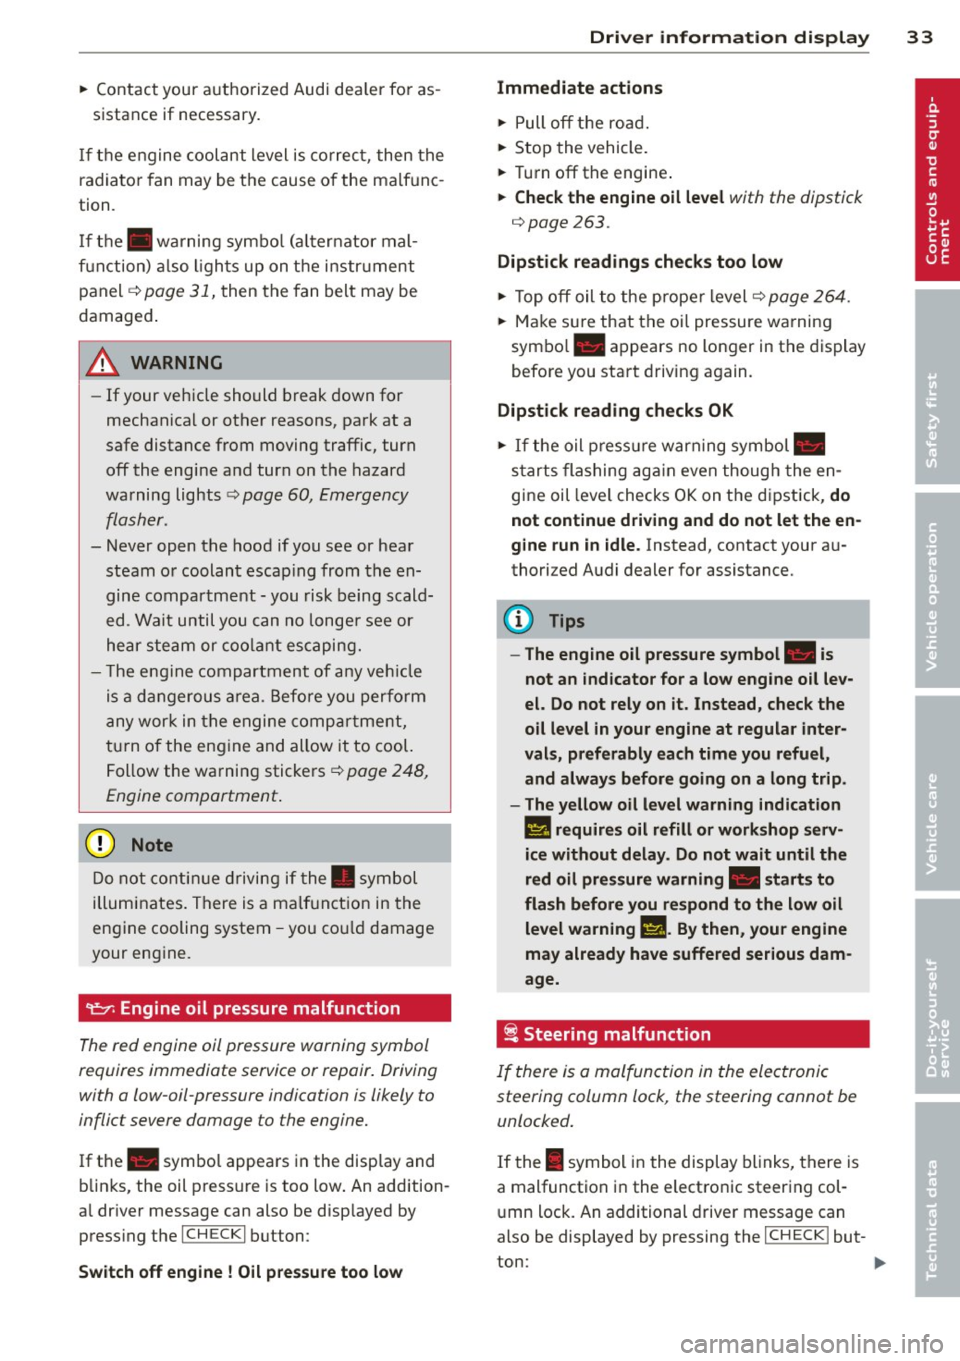
9=:7-Engine oil pressure malfunction
The red engine oil pressure warning symbol
requires immediate service or repair. Driving
with a low-oil -pressure indication is likely to
inflict severe damage to the engine.
If the . symbo l appears in the disp lay and
b links, the oil press ure is too low . An addition
a l dr iver message can also be disp layed by
press ing the
I CH ECKi button:
Switch off engine! Oil p ressure too low
Dri ver information di spla y 33
Immediate act ions
~ Pull off the road.
~ Stop the vehicle.
~ T ur n off the engine .
~ Check the engine oil le vel with the dipstick
¢ page 263.
Dipstick readings check s too low
~ Top off oil to the proper level¢ page 264.
~ Make s ure that the oil pressure wa rning
symbo l. appears no longer in the display
before you start driving again.
Dipstick read ing checks OK
~ If the oil p ress ure warn ing symbol .
s t arts flashing aga in even though the en
gine oil level checks OK on t he d ipstick,
do
not continue d riving and do not let the en
gine run in idle .
Instead, contact your au
thorized Audi dealer for assistance.
(D Tips
- The engine oil pressure symbol. is
not an indic ator for a low engine oil lev
el. Do not rely on it . Instead, check the
oil level in your engine at regular inter
vals, preferably each time you refuel,
and always before going on a long trip .
- The yellow oil lev el warn ing indication
1111 requires oil refill or workshop s erv
ice without delay . Do not wait until th e
red oil pre ssure warning . start s to
flash before you r espond to the low oil
level warning
Ill . By then , your engine
may already have suffered serious dam
age.
i Steering malfunction
If there is a malfunction in the electronic
steering column lock, the steering cannot be
unlocked .
If the I symbol i n the display blinks, there is
a malfunction in the electronic steering col
u mn lock. An additional driver message can
a lso be displayed by pressing the
ICHECK I but-
ton:
~
Page 36 of 342

34 Driver information display
Do not drive vehicle: steering defective
• Contact you r nearest authorized Audi dea le r
or qualified workshop.
• Do
not tow yo ur vehicle .
& WARNING
-
Your vehicle must not be towed in the
event of a malfunction in the electronic
steering column lock because it cannot be
steered due to the locked steering. If it is
towed w ith the steering locked, there is
the risk of an accident .
~ Ignition lock malfunction
A malfunction in the ignition lock must be re
paired immediately.
If the . symbo l in the display blinks, there is
a ma lfunction in the electronic ignition lock.
An addit ional driver message ca n also be d is
played by pressing the
! CHECK I button:
Ignition lock defective. Contact workshop !
• Do not turn the eng ine off.
• Drive immediately to an authorized Audi
dealer to have the ma lf u nction corrected.
If there is a ma lfunction in the e lectronic igni
tion lock, the ignition cannot be turned off.
Drive immediately to an authorized Audi dea l
er to have the cause of the ma lfunction cor
rected.
On vehicles with Convenience key*, the engine
should not be switched off using the
! STOP !
button beca use the engine ca nnot be sta rted
again after the ignition is switched off.
' Yellow symbols
A yellow symbol means WARNING.
Fig . 26 Display: low fuel level warning (priority 2)
Yellow symbo ls indicate a priority 2 malfunc
t ion - Warning!
When a yellow war ning symbol appears,
one
warning tone sounds . A driver message ap
pears as well to explain the malfunction in
more de tail. The driver warning goes out after
about 5 seconds, but it can be brought up
again at any time by pressing the
! CHECK I but
ton .
Check the displayed function as soon as possi
ble. If
more than one priority 2 ma lf u nction is
detected, all symbols will appear one after
the other for about 2 seconds .
Yellow symbols mean:
"
Convenience key"
Key not in vehicle
c> page 108
•
USA models: Defective
brake light
c>pa ge 23
[fl
Canada models: Defective
brake light
c> page 23
~:)
Defective light bulb
c>page 23
raa
light/rain sensor defective
c> page35
~
Windshield washer fluid Lev-
el low
c>page3 5 1 ...
Page 38 of 342

36 Driver in formation d isplay
When this symbo l (I illuminates for the f irst
time, the fuel reserve in your vehicle is sti ll
between 2 .6 and 3 .2 gallons (10- 12 liters) .
Refue l as soon as possib le
¢ page 252.
If the symbol lights up, even when there is
ample fuel in the tank, and the text
T a nk sys
tem malfunct ion! Cont act wor kshop
appears
in the display, there is a fault in the system.
Contact a qualified workshop to have the fau lt
rectified.
t::l Battery voltage
If the battery's state of charge is not in the
optimal range, the
f• ) symbol is shown in the
d isplay and the dr iver message
Low battery
c harge : battery will be charg ed while driving
appears.
Wh ile this dr iver not ificat io n is displayed, you
have to be p repared for lim ited start ing capa
b ili ty.
Driv er m essage appears and goes out
again
I f t his driver message appears after the igni
tion is turned o n or wh ile driving and it goes
out again after a while, the battery has been
adequately recharged .
Driver message app ears and does not go
out again
If th is driver notification appears after the ig
nition is turned on or while driving and does
not go out again, the battery's state of charge
is not in the opt imal range. Starting capability
is restricted. Have the battery checked by an
author ized Audi dealer as soon as poss ible .
{0 : Worn brake pads
El Brake pads !
If the warn ing light illum inates, immediately
contact your authorized Audi dealer or quali
fied workshop to have all brake pads inspect
ed . On USA models the wa rning light
El
l ) - : USA mod els only
comes on together with the warning light
- · Both sets of bra ke pads on an ax le
must a lways be rep laced at the same time.
A WARNING
=
Driving w it h bad brakes can cause a colli-
sion and ser ious personal in jury.
- If the warn ing light
El and the warning
light
11111> with the message Brake
pads!
comes o n in the inst rument cluster
d isp lay, immediately contact your au
thor ized Audi dealer or qualified wo rk
shop to have all b rake pads checked or
re placed if ne cessa ry.
~(i) Headlight range control
II He adlight range control defective !
-
If the symbol illuminates, the dynamic head
li ght rang e control is no longer work ing prop
erly. Have the system checked and repa ired at
yo ur aut horized Aud i dea le r.
~ -Engine oil level
l!I Plea se check oil level
When the symbol illuminates, check the en
gine o il leve l as soon as possible
¢ page 263.
T op off t he oil at your ear liest opportu nity
¢ page 264 .
't::r.~ Engine oil sensor defective
II Oil level ! Sensor defective
If the symbol illum ina tes, contact yo ur au
thorized Aud i dea le r and have the oil sensor
inspected. Unti l yo u have this done, check t he
oi l level each time you refue l just to be on the
safe s ide
¢ page 263.
!?) Engine speed limitation
Applies to vehicles: wit h engine speed limitatio n
II! Do not e xceed ma x. engine speed of X XXX
rpm .,,.
Page 39 of 342
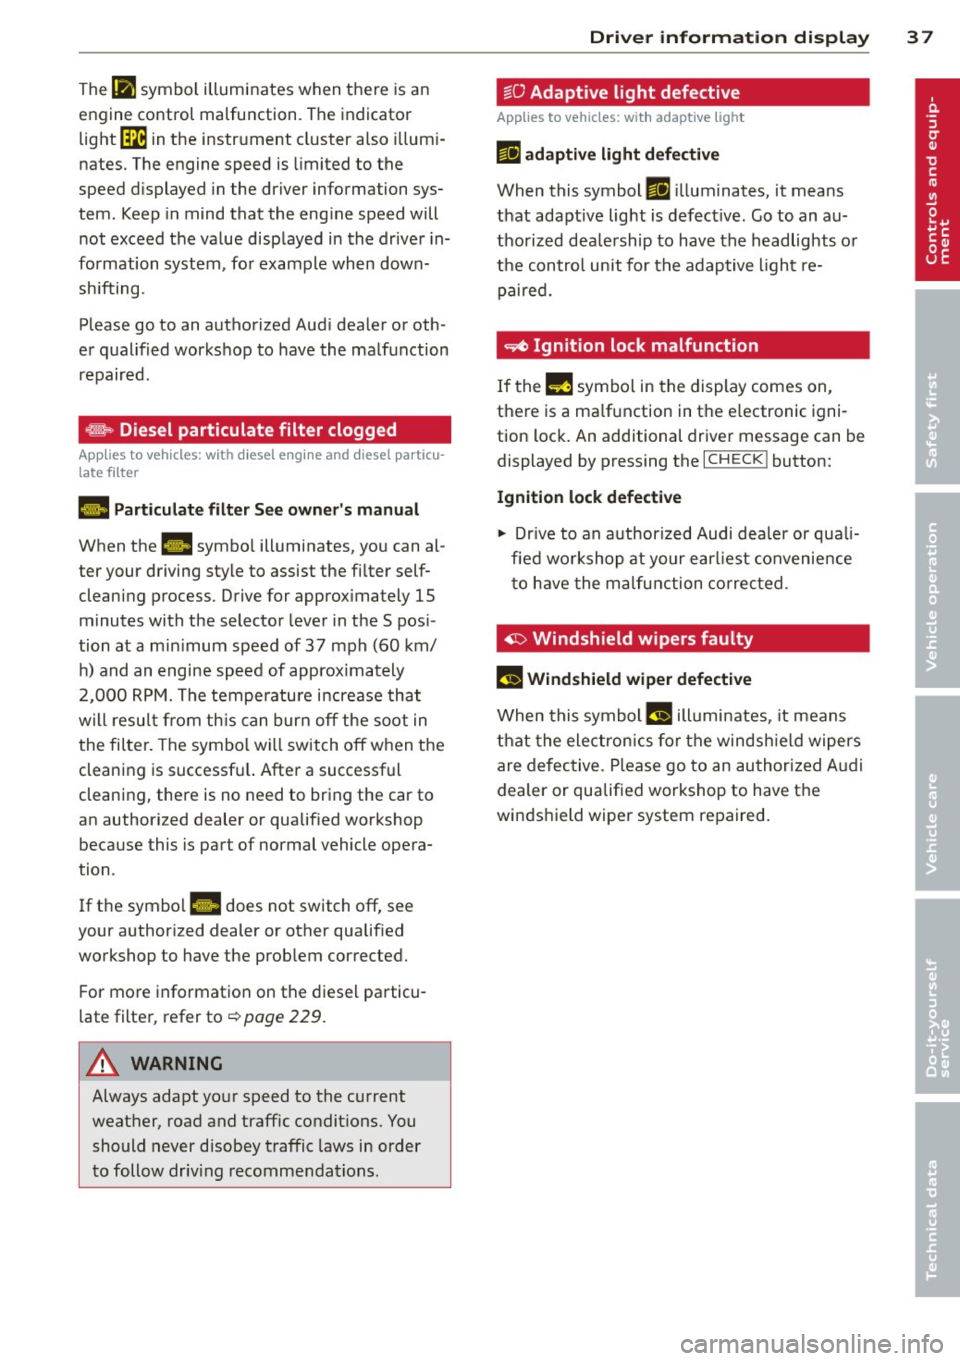
The IPJ symbol illuminates when there is an
engine control malfunction. The indicator
light ~ in the instrument cluster also illum i
nates. The engine speed is limited to the
speed d isplayed in the driver information sys
tem. Keep in mind that the eng ine speed will
not exceed the value displayed in the drive r in
formation system, for example when down
shifting.
Please go to an authorized Aud i dealer or oth
e r qualified workshop to have the malfunction
repaired.
~ Diesel particulate filter clogged
Applies to vehicles: with diesel engine and diesel part icu
late filter
1,1 Particulate filter See owner's manual
When the. symbo l illuminates, you can al
ter your driving style to assist the filter self
cleaning process. Drive for approx imately
15
minutes with the selector lever in the S pos i
tion at a min imum speed of 37 mph (60 km/
h) and an engine speed of approx imately
2,000 RPM. The temperature increase that
w ill result from this can burn
off the soot in
the filter. The symbol wi ll switch
off when the
cleaning is successf ul. After a successful
cleaning, there is no need to bring the car to
an author ized dealer or qualified workshop
because this is part of normal vehicle opera
tion .
If the symbo l
II does not switch off, see
your authorized dealer or other qualified
workshop to have the prob lem corrected.
F or more information on the diesel particu
late filter, refer to¢
page 229.
A WARNING
Always adapt yo ur speed to the current
weather, road and traffic condit ions. You
should never disobey traffic laws in order
to follow driv ing recommendations.
-
Driver information display 37
~O Adapt ive light defective
Applies to vehicles: with adaptive light
ml adaptive light defective
When this symbol ml ill uminates, it means
that adaptive light is defective. Go to an au
thorized deale rship to have the headlights or
the control unit for the adaptive light re
paired.
~ Ignition lock malfunction
If the!! symbol in the display comes on,
there is a ma lfunction in the e lectronic igni
tion lock. An additional driver message can be
displayed by pressing the
I CHECK! button:
Ignition lock defective
11> Drive to an authorized Audi dealer or quali
fied workshop at your earl iest convenience
t o have the malfunction corrected .
~ Windshield wipers faulty
fl Windshield wiper defective
When this symbo1 (.j illuminates, it means
that the electronics for the windsh ield wipers
are defective. Please go to an authorized Audi
dealer or qualified workshop to have the
winds hield wiper system repaired.
Page 44 of 342
42 Openin g and clo sing
readiness light, located in the upper part of
the driver's door panel, will start to blink.
- T he vehicle interior lights turn off.
Unlocking and l ocking with Conven ience
k ey*
On vehicles which a re equipped w ith the C o n
ve nience k ey*
authorization system, the
doors are unlocked without a key by means of
a proximity sensor in the door handle. The
doors are simi larly locked without a key using
the locking button. Each door has a proximity
sensor and a locking button .
Automatic l ock ing
The automatic locking feature locks all the ve
hicle doors and the rear lid when you drive
faster than 9 mph (15 km/h). This function can be turned on and off in the MMI
C entr al
lo cking
Menu c:> page 44.
You can un lock the vehicle from the inside by :
- removing the key from the ign it ion sw itch
(the vehicle will automat ica lly unlock itself)
or
- pressing the unlock part of the power lock
switch @or
- pull ing the door handle (twice to open the
rear doors).
Unintent ionall y locking yourself out
In the following cases there safeguards to
prevent you locking your remote master key in
the vehicle :
- The veh icle does not lock with the power
locking sw itch
c:> page 44 if the driver's
door is open.
- On vehicles with Convenience key* , if the
most recently used master key is in the lug
gage compartment, the rear lid is automati
cal ly unloc ked aga in after it is closed.
Do not lock your vehicle with the
r e mot e m as
t e r k ey or Convenienc e key*
until all doors
and the rea r lid are closed. In t his way you
avoid locking yourse lf out accidenta lly.
A WARNING
- When you lock your vehicle from outside,
nobody- espec ially children -should re
main inside the vehicle . Remember,
when you lock the vehicle from the out
side the windows cannot be opened from
the inside.
- When you leave the veh icle, always re
move the ignition key and take it with
you . This will prevent passengers (chil
dren, for example) from accidentally be
ing locked in the vehicle should they acci
dentally press the power locking switch
in the front doors.
- Do not leave children inside the vehicle
unsupervised. In an emergency it would
be imposs ible to open the doors from
the outside without the key.
(D Tips
- In the event of a crash with airbag de
ployment all locked doors will be auto
matically unlocked to give access to the
vehicle occupants from the outside.
- If the power locking system sho uld mal
function, you can lock each door individ
ually using the vehicle key
c:> page 45 .
-If the power locking system shou ld fa il,
you can still open the fuel tank flap in an
emergency
c:> page 2 55 .
-You are well advised not to keep va lua
bles inside an unattended vehicle, v is ible
or not. Even a properly locked vehicle
cannot p rov ide the secur ity of a safe .
Page 45 of 342
Unlocking and locking the vehicle with
the remote control
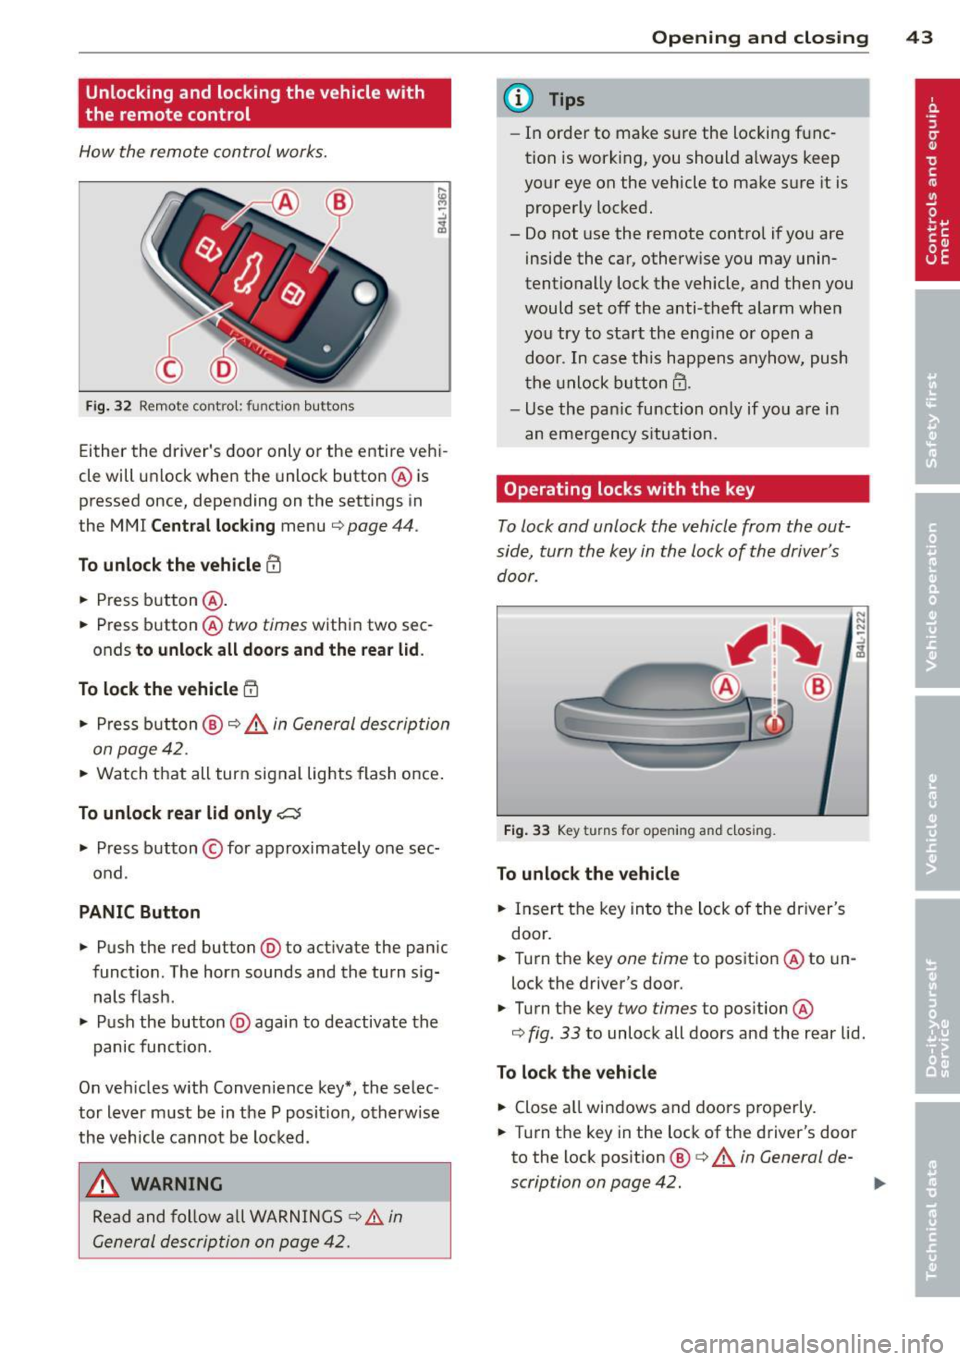
How the remote control works.
Fig. 32 Remot e contr ol: fun ctio n but ton s
Either the driver 's door only or the entire vehi
cle will unlock when the unlock button @ is
pressed once, depending on the settings in
the MMI
Central locking menu ¢ page 44 .
To unlock the vehicle ffi
.. Press button @.
.. Press button @two
times within two sec
onds
to unlock all doors and the rear lid .
To lock the vehicle 5'.l
.. Press button @¢.&. in General description
on page 42 .
.. Watch that all turn signal lights flash once.
To unlock rear lid only~
.. Press button © for app roximately one sec
ond .
PANIC Button
.. Push the red button@) to act ivate the panic
function. The horn sounds and the turn sig nals flash .
.. Push the button @again to deactivate the
panic function.
On vehicles w ith Convenience key*, the selec
tor lever must be in the P posit ion, otherwise
the vehicle cannot be locked.
_& WARNING
Read and follow all WARNINGS ¢&. in
General description on page 42.
-
Opening and closing 43
@ Tips
-In order to make sure the locking func
tion is working, you should a lways keep
your eye on the vehicle to make s ure it is
properly locked.
- Do not use the remote control if you are
inside the car, otherwise you may unin
tentionally lock the vehicle, and then you
would set off the anti-theft alarm when
you try to start the eng ine or open a
door . In case this happens anyhow, push
the unlock button@.
- Use the pan ic function on ly if you are in
an emergency s ituation.
Operating locks with the key
To lock and unlock the vehicle from the out
side, turn the key in the lock of the driver's door .
Fig. 33 Key turns fo r open in g and clos ing .
To unlock the vehicle
.. Insert the key into the lock of the driver's
door .
N N N :;
~
.. Turn the key one time to position @to un
lock the driver's door.
.. Turn the key
two times to position @
¢
fig . 33 to unlock all doors and the rear lid .
To lock the vehicle
.. Close all windows and doors properly.
.. Turn the key in the lock of the driver's door
to the lock pos ition @ ¢
A in General de-
scription on page 42. ..,.
Page 46 of 342
44 Opening and clo sing
& WARNING
Read and follow all WARNINGS c> .&. in
General description on page 42.
Settings in the MMI
The driver can determine the functions for
power locking in the MMI.
• Se lect : Function button ICARI > Contro l but
ton
Sy stems *> Central loc king . Or
• Se lect : Funct ion button
ICARI > Contro l but
ton
C a r system s* > Vehicle settings > Cen
tr al lo cking .
Passenger 's d oor *, Left rea r door *, Right re ar
door *, Trunk lid /tailgate *
-You can specify
which doors should unlock when you unlock
the vehicle .
- If you se lect
On and then press the[@) but
ton on the remote control key, the corre
sponding door will unlock .
- If you select
Off and then press the[@] but
ton on the remote control key, the corre
sponding door will not unlock. If you press
the
Im button twice, all doors and the lug
gage compartment will unlock. When lock
ing the ve hicle, all of the doors and the lug
gage comp artme nt lock automa tica lly.
Unlock doors * -You can spec ify if all doors o r
only the d river's doo r shou ld un lock wh en un
l ock ing t he ve hicl e.
- If you select
All and press the l@J button on
the remote control key, a ll of the doors and
the luggag e compartment will un lock .
- If you select
Driver and then press the Im
button on the remote control key, only the
dr ive r's door w ill unlock. If you press the
l@J
button twice, all doors and the luggage
compartment will u nlock. When lo cking the
vehicle, a ll of the doors and the luggage
compartment lock a utomatically. In vehicles
with a convenience key*, on ly t he door
whose hand le you pu ll w ill unlock.
Auto locking /Lock when d riv ing -If you se
lect
On , the doors and the luggage compart
ment will lock automatically.
(D Tips
The central locking settings are stored in
the remote control key .
locking and unlocking the vehicle from
inside
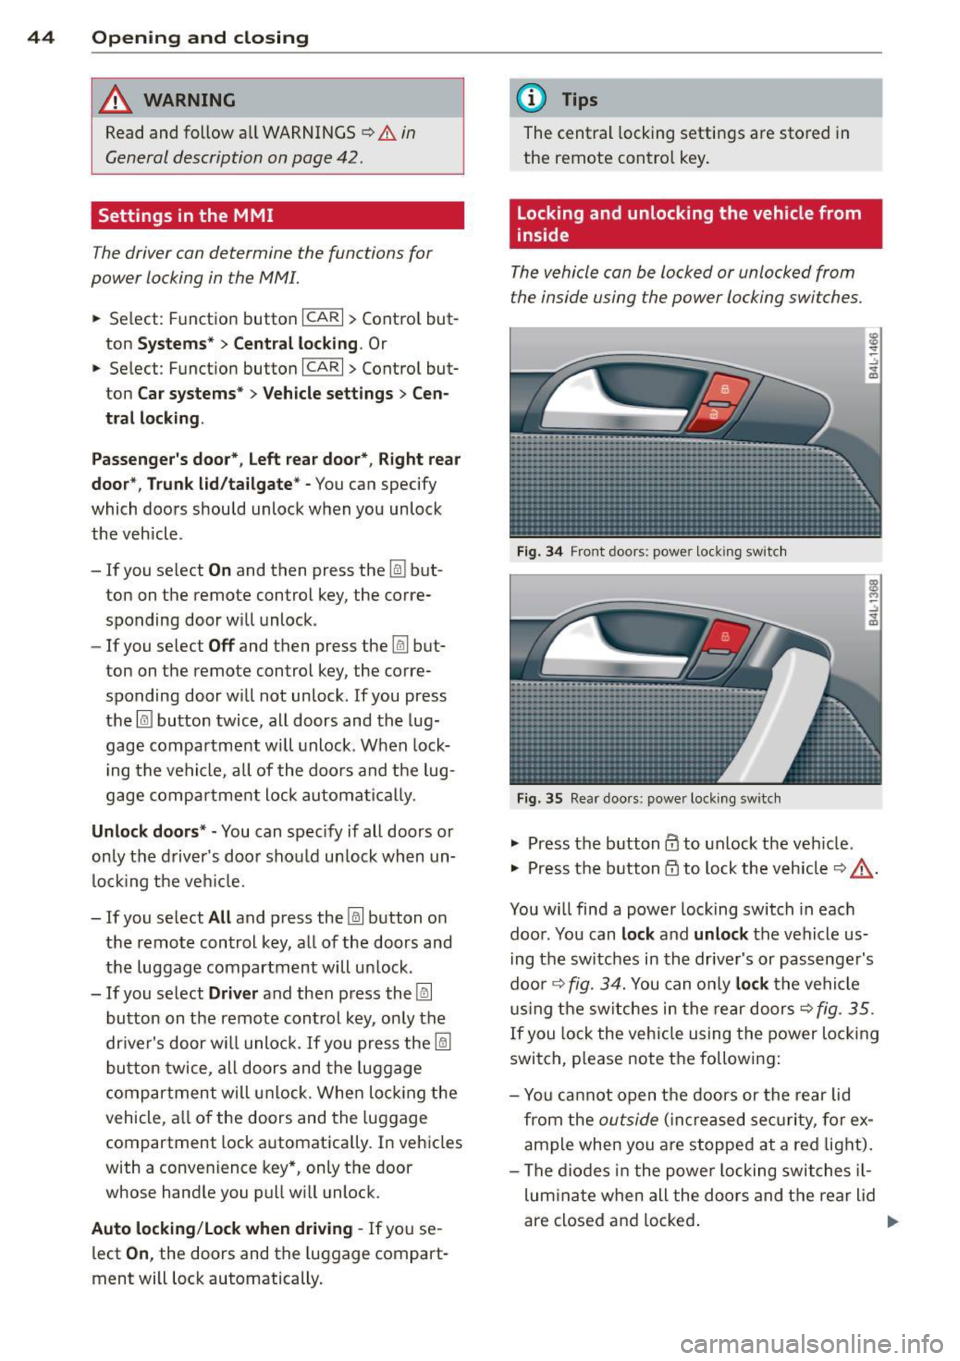
The vehicle can be locked or unlocked from
the inside using the power locking switches .
Fig. 34 Front doors: power lock ing switc h
Fig. 35 Rear doors : powe r locking switch
• Press the b utton CD to unlock the veh icle .
• Press the b utton
tfJ to lock the veh icle c> & -
You w ill find a power locking switch in eac h
doo r. You can
lock and unlock the vehicle us
i ng the switches in the drive r's or passenger's
doo r¢
fig. 3 4. You can o nly lock the vehicle
u sing the sw itches in the rear doors
c>fig . 35.
If you lock the veh icle using the power locking
switch, p lease note the following:
- Yo u ca nnot open the doors or the rear lid
from the
outside ( in cr eased se cur it y, for ex
ample when you are stopped at a red light).
- The diodes in the powe r locking switches il-
lum ina te when all the doors and the rear lid
are close d and locked .
Page 48 of 342
46 Opening and clo sing
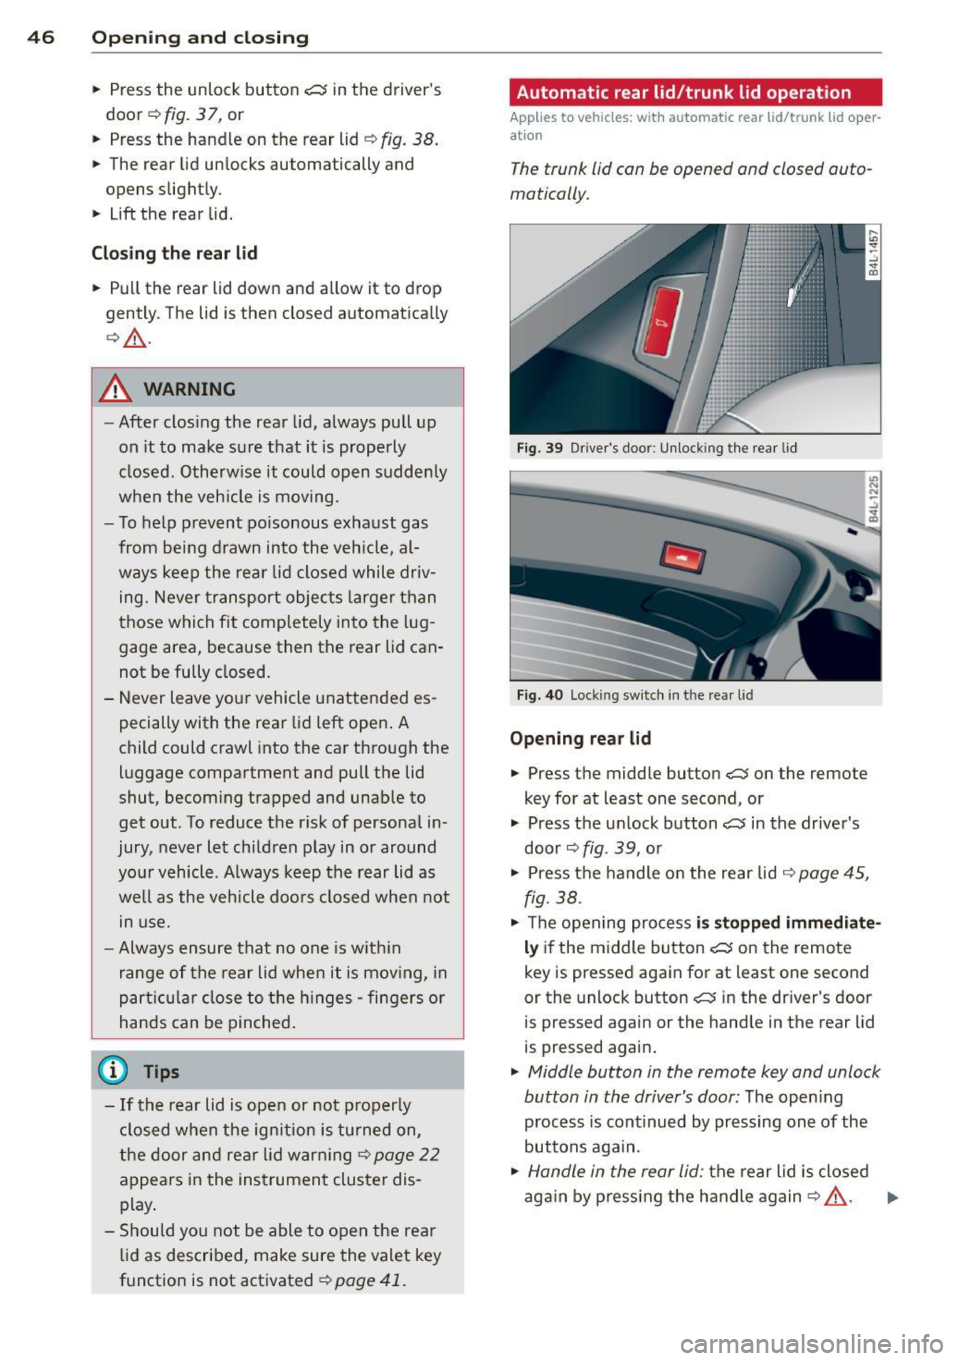
• Press the unlock button ,c::j in the driver 's
door ¢
fig. 3 7, or
• Press the handle on the rear lid¢
fig. 38.
• The rear lid un locks automatically and
opens slight ly.
• Lift the rear lid .
Cl os ing th e rear lid
• Pu ll the rear lid down and allow it to drop
gently . The lid is then closed automatica lly
c:> ,&. .
A WARNING ,.
- After clos ing the rear lid, always pull up
on it to ma ke s ure that it is properly
closed . Otherw ise it cou ld open sudde nly
when the veh icle is moving.
- T o help p revent po isonous exha ust gas
from being drawn into the veh icl e, al
ways keep the rear lid cl osed while driv
ing. Never transport objec ts larger t han
those whi ch fit completely into the lug
gage area, because then the rear Lid can
not be fully closed.
- Never leave yo ur vehicle u nattended es
pecially with the rea r lid left ope n. A
child could crawl into the car through the
luggage compartment and pull the Lid
shut, becom ing trapped and unab le to
get out . To reduce the risk of persona l in
jury, never let ch ildren play in or around
yo ur vehicl e. A lways ke ep th e rear Lid as
we ll as the vehicle doo rs closed when not
in use.
- Always ensure t hat no one is w it hi n
range of the rear lid whe n it is mov ing, in
p artic ula r clo se to t he h inges - fingers or
hands can be pinched .
(D Tips
-If the rear lid is ope n or not properly
closed when the ig nition is tu rned on,
the d oor an d rea r lid war ning<>
page 22
appears in the instrumen t cluster dis
p lay .
- Shou ld yo u not be able to open the rear
lid as described, make sure the valet key
funct ion is not activated ¢
page 41.
Automatic rear lid/trunk lid operation
Applies to vehicles: with automatic rear lid/trunk lid oper
ation
The trunk lid can be opened and closed auto
matically.
Fig. 39 D rive r's door: Unlock ing t he rea r lid
Fi g. 4 0 Lock ing sw itc h in t he rear l id
Opening rear lid
• Press t he middle button ,c::j on the remote
key for at least one second, or
• Press the u nlock button
,c::j in the drive r's
door
c:> fig . 39, or
• Press the handle o n the rear lid
c:> page 45 ,
fig. 38 .
• Th e open ing pro cess is stopped immediate
ly if the middle button ,c::j on the remo te
key is pressed again for at least one second
or the unlock button
,c::j in the dr iver's door
is pressed again or the hand le in the rear lid
is pressed aga in.
• Middle button in the remote key and unlock
button in the driver's door:
T he open ing
p roc ess is cont inued by pressing on e of the
buttons aga in.
• Handle in the rear lid: the rear l id is closed
a g ai n by p ress ing the handle again<>,&.. ..,.
Page 49 of 342
Clos ing re ar lid /trunk lid
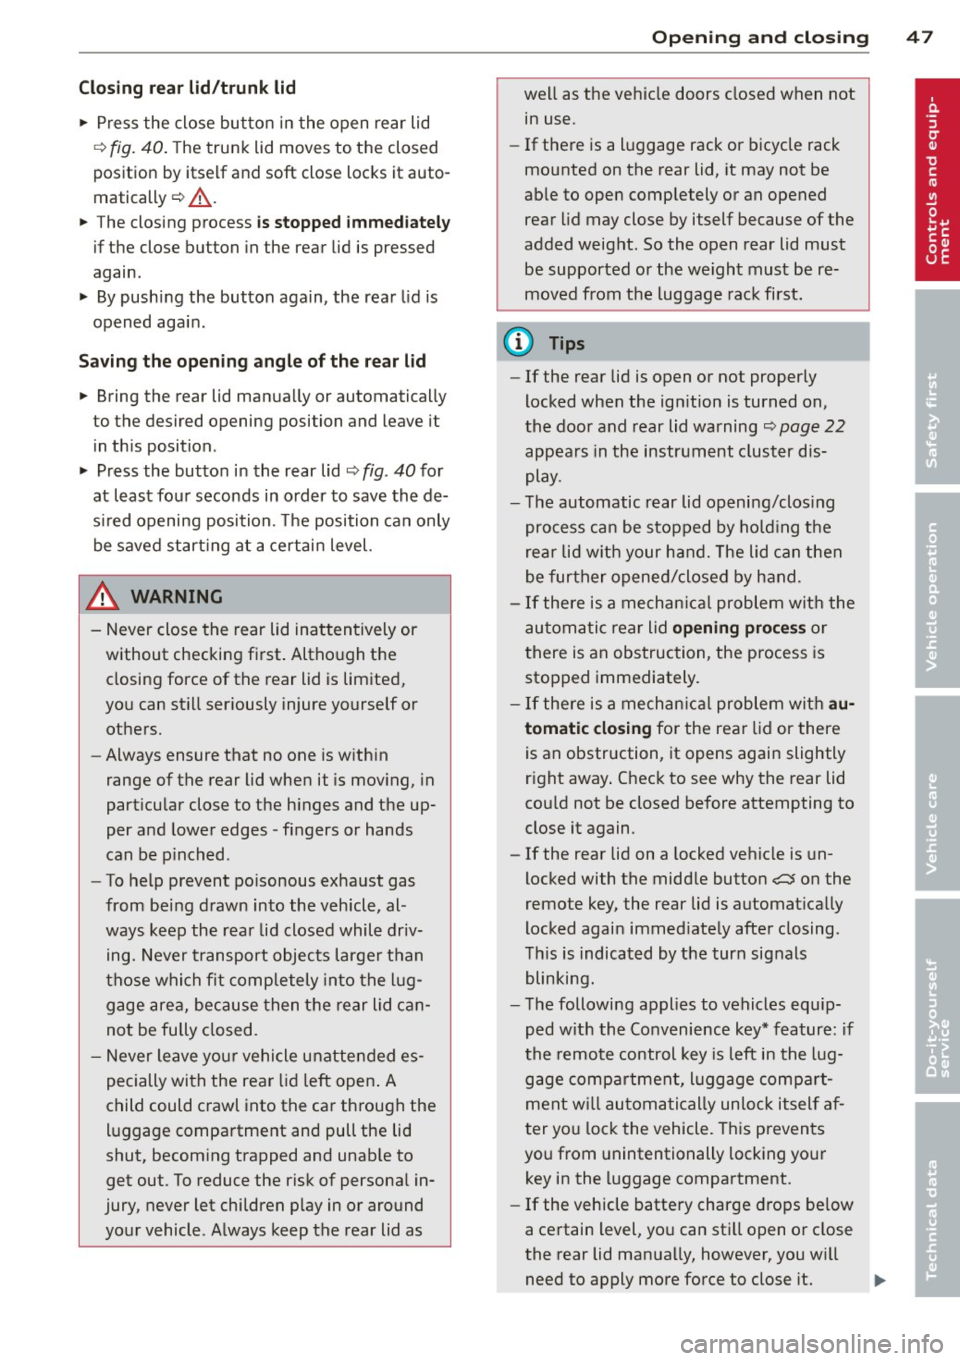
"' Press the close button in the open rear lid
~ fig. 40. T he trunk lid moves to the closed
posit ion by itself and soft close locks it auto
matically ~&_ .
"' The closing process
is stopped immedi atel y
if the clo se button in the rear lid is pressed
again.
"' By pushing the button again, the rear lid is
opened again .
Saving the open ing a ngle of the rear lid
"' Bring the rear lid manua lly or automatic ally
to the desired opening posi tion and leave it
i n th is position .
"' Press the button in the rear lid
~ fig . 40 for
at least four seconds in order to save the de
s ired opening position. The position ca n only
be saved start ing at a certain level.
A WARNING
- Never close the rear lid inattentively or
without checking fi rst . Altho ugh the
closing force of the rear lid is lim ited,
yo u can st ill ser iously injure yourself or
others.
- Always ensure that no one is w ith in
range of the rear lid when it is moving, in
part icu lar close to the hinges and the up
per and lower edges -fingers or hands
can be p inched .
- To help prevent po isonous exhaust gas
from being d rawn into the vehicle, al
ways keep the rear lid closed while driv ing. Never transport objects larger than
those which fit completely into the lug
gage area, because then the rear lid can
not be fully closed.
- Never leave you r vehicle unattended es
pecially with the rea r lid left open . A
child could crawl into the car through the
l u ggage compa rtment and pull the lid
shut, becom ing trapped and unab le to
get out. To reduce the risk of persona l in
jury , never let children p lay in or around
your vehicle . A lways keep the rear lid as
-
Opening and clo sin g 47
well as the vehicle doors closed when not
in use .
- If there is a l uggage rack or bicycle rack
mounted on the rear lid, it may not be
ab le to open completely or an opened
rear lid may close by itself because of the
added weight . So the open rear lid must
be supported or the weight must be re
moved from the luggage rac k first.
@ Tips
- If the rear lid is open or not properly
locked when the ign ition is turned on,
the door and rear lid warning ~
page 22
appears in the instrument cluster dis-
play .
- T he automatic rear lid opening/clos ing
process can be stopped by ho ld in g the
re ar lid w ith your hand. The lid can then
be f urther opened/closed by h and.
- I f there is a mechan ica l problem wit h the
automatic rear lid
opening proces s or
there is an obstruction, the process is
stop ped immediately.
- I f there is a mechan ica l problem wit h au
tomatic closing for the rea r lid or there
is an obstr uction, it opens again slightly
r ight away . Chec k to see why the rear lid
cou ld not be closed before attempting to
close it again .
- If the rear lid on a locked vehicle is un
locked with the midd le button~ on the
remote key, the rear lid is automat ically
locked again immed iate ly after closing .
T his is indicated by the turn signals
blinking.
- The followi ng applies to vehicles equ ip
ped w ith the Convenience key* feature: if
the remote control key is left in the lug
gage compa rtment, l uggage compa rt
ment w ill autom atic ally unlo ck itsel f af
ter yo u lock the vehicle. This preven ts
you from unintentionally locking you r
key in the luggage compartment.
- If the vehicle battery charge drops be low
a certain level, yo u can sti ll open o r close
the rear lid manually, however, you w ill
need to apply more force to close it. ..,.
Page 51 of 342
@ Tips
-In order to activate the chi ld safety lock
on the left and the right side, you have to press the two safety buttons in succes
sion.
- Make certain that the check light comes
on in the corresponding safety sw itch
when the child safety lock is activated.
Convenience key
Description
A pp lies to vehicles: with Convenie nce key
Access and vehicle operation based on: Mas
ter key remains in driver 's pocket .
The Convenience key veh icle authorization
system allows
keyless unlock ing , locking and
starting of the vehicle . You only have to carry
the master key on your pe rson.
It makes no d ifference whether the master
key is in your jacket pocket or in your brief
case . As soon as you approach your vehicle,
the Convenience key recognizes the request
for access, checks for a uthorization and ena
b les the fo llowing functions:
- Unlocking the vehicle~
page 49.
-Locking the vehicle~ page 50.
-Switching on ignition and starting the en -
gine by pressing the
I START! button; the
master key does not have to be in the igni
t ion switch
~page 107.
_& WARNING
-When you lock your vehicle from outside,
nobody- especially ch ildren -should re
main inside the vehicle. Remember,
when you lock the vehicle from the out
side the windows cannot be opened from
the ins ide .
- When you leave the vehicle, always re
move the ignition key and take it with
you. This will prevent passengers (chil
dren, for example) from accidentally be
ing locked in the veh icle should they acci-
Opening and clo sin g 49
dentally press the power locking switch
in the front doors.
- Do not leave chi ldren inside the vehicle
unsupervised. In an emergency it would
be imposs ible to open the doors from
the outside without the key.
(D Tips
- In order for the Convenience key to func
tion, you must a lways carry the master
key with you .
- In order to be able to unlock or lock the
vehicle, the author ized master key must
be within a range of about S feet (l.S
meters) from the door or the rear lid.
- Of course, you can still unlock and lock
your vehicle using the buttons on the
master key . The selector lever must be in
the P position .
- For Declaration of Compliance to United
States FCC and Industry Canada regula
tions ~
page 322.
Unlocking the vehicle
App lies to vehicles : wit h Co nve nience key
The doors and the rear lid can be unlocked
without operating the master key .
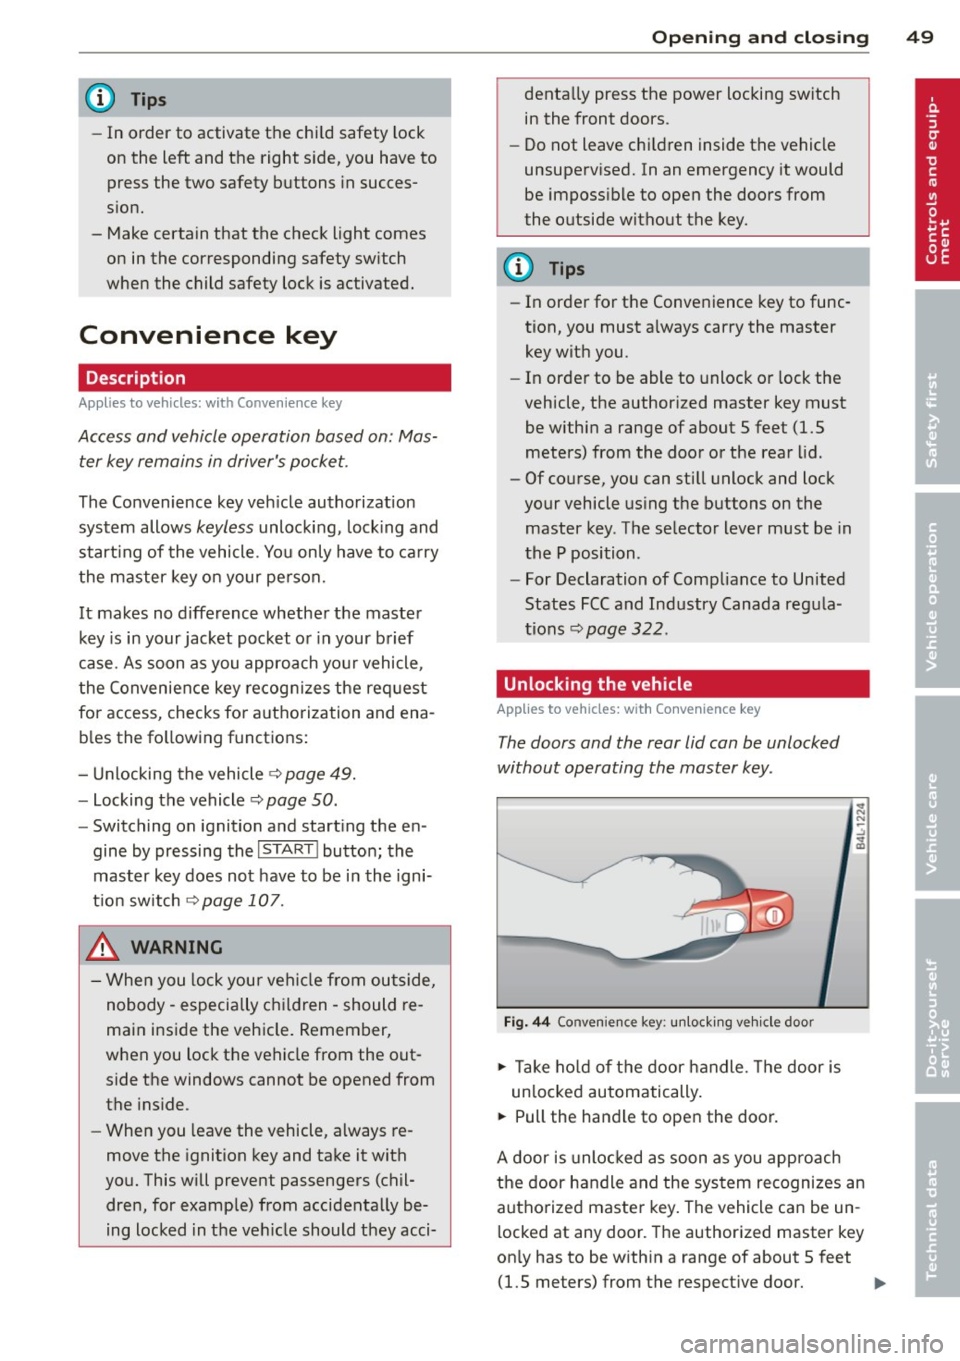
Fig. 44 Convenie nce key : unlocking vehicle door
.,. Ta ke hold of the door handle. The door is
un locked automatically.
.,. Pull the handle to open the door.
A door is unlocked as soon as you approach
the door handle and the system recognizes an
authorized master key. The vehicle can be un
locked at any door. The authorized master key
on ly has to be within a range of about 5 feet
(1.5 meters) from the respective doo r.
II>-