roof rack AUDI Q7 2012 Owner´s Manual
[x] Cancel search | Manufacturer: AUDI, Model Year: 2012, Model line: Q7, Model: AUDI Q7 2012Pages: 342, PDF Size: 86.42 MB
Page 4 of 342
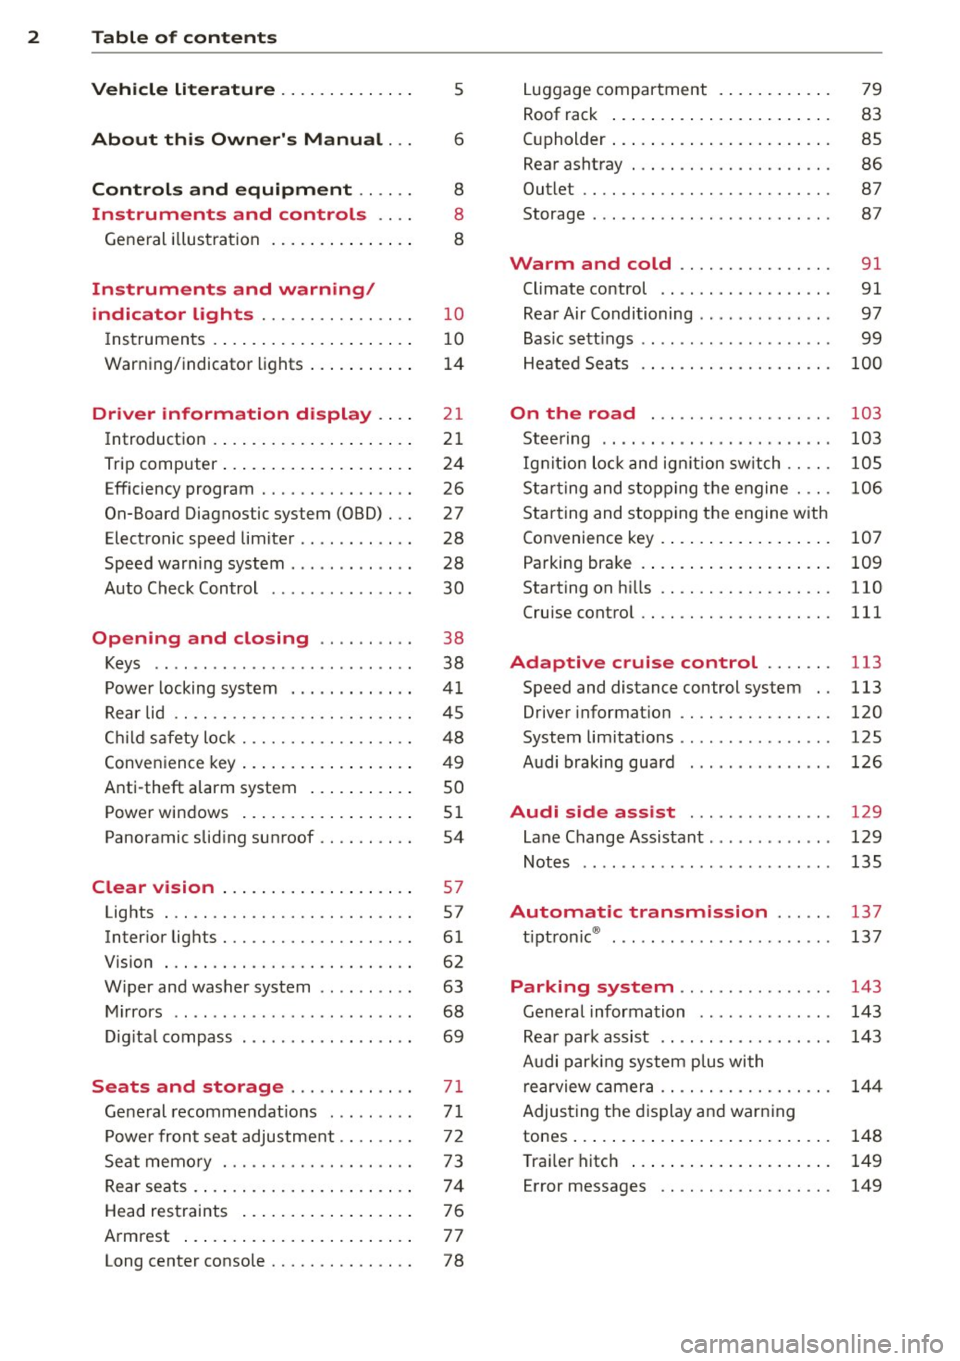
2 Table of contents Vehicle literature .. .. .. .. .. ... .
About this Owner's Manual ...
Controls and equipment .. ... .
Ins truments and controls .. . .
General illus tration .... ... .. .. ... .
Instruments and warning /
indicator lights ........ .. .. .. . .
Ins truments . .. .. ..... ... .. .. ... .
War ning/ indi cator lights ... .. ... .. .
Driver information d isplay .. . .
Introduct ion . .. .. ..... ... .. .. ... .
Trip computer .. .. ..... ... .. .. ... .
Efficiency program ........ .. .. ... .
On-Board Diagnostic system (OBD) . . .
Elect ronic speed limiter .. .. .. .. .. . .
Speed war ning system ...... ..... . .
Auto Check Control ........ ... .. . .
Opening and closing .. .. .. .. . .
Keys .. .. .. ................ ... . .
P owe r locking system . .. .. .. .. .. . .
R ear lid .. .. .. . .......... .. .. .. . .
C hild sa fety lo ck .......... .. .. .. . .
Conven ien ce key .. ..... ... .. .. ... .
Anti-theft alarm system ... .. ... .. .
Power win dows .. ..... ... .. .. ... .
Panoramic slid ing sun roof .. .. .. ... .
Clear vision .. .. ..... ... .. .. ... .
Lights . .. .. .. . .......... .. .. ... .
Inter ior lights ............. ... ... .
V 1s 1on . ...... ........... .... ... .
W iper and washer system . ... .. .. . .
M ir rors .. .. ................ ... . .
D ig ita l compass . ...... ... .. .. .. . .
Seats and storage ......... .. . .
G en eral recomme ndat ions ... .. .. . .
P owe r fron t seat adjus tment .. .. .. . .
Se at mem ory ............ .. .. ... .
Rear seats . ... . .. ..... ..... .. ... .
Head res traints .. ..... ... .. .. ... .
A rmrest .... .. .. ..... ... .. .. ... .
5
6
8
8
8
10
10
14
21
21
24
26
27
28
28
30
38
38
41
4 5
48
49
so
5 1
54
57
57
61
62
63
68
69
71
7 1
72
73
74
7 6
7 7
Long center conso le . . . . . . . . . . . . . . . 78 L
ugga ge compartment . ..... .... . .
Roof rack ..... .. .. ... ..... ... .. .
( upholder ... .. .. .. ... .. .. .. .. .. .
Rear asht ray ..... ............. .. .
Out let .... .... .. ............. .. .
Storage ...... ... .. ............. . 79
83
85
86
87
87
Warm and cold
. . . . . . . . . . . . . . . . 91
Climate control . . . . . . . . . . . . . . . . . . 91
Rea r Air Conditioning . . . . . . . . . . . . . . 97
Bas ic sett ings . . . . . . . . . . . . . . . . . . . . 99
Heated Sea ts . . . . . . . . . . . . . . . . . . . .
100
On the road . . . . . . . . . . . . . . . . . . . 103
Stee ring .. .. ... . .. ... .. ... ... .. . 103
Ig nition lo ck and ig nition sw itch . . . . . 105
St arti ng and sto pp ing t he engine . . . . 10 6
S tar ting and stopping the engine with
Co nvenience key . . . . . . . . . . . . . . . . . .
107
Pa rking bra ke . . . . . . . . . . . . . . . . . . . . 109
Starting on h ills . . . . . . . . . . . . . . . . . . 110
Cru ise contro l . . . . . . . . . . . . . . . . . . . . 111
Adaptive cruise control . . . . . . . 113
Speed and distance control system . . 113
Driver informat io n . . . . . . . . . . . . . . . . 120
System limitations . . . . . . . . . . . . . . . . 125
Audi braking gua rd . . . . . . . . . . . . . . . 126
Audi side assist . . . . . . . . . . . . . . . 129
Lane Change Assistant. . . . . . . . . . . . . 129
Not es . . . . . . . . . . . . . . . . . . . . . . . . . . 135
Automatic transmission ... .. .
t.
t . ® 1p ro ni c ..... .. .......... ... .. .
Parking system ... .. .. ... ..... .
General information ............. .
Rea r park assist .. ... ... .... ... .. .
Audi par king syste m plus with
re arview c amer a .. ............... .
Adjus ting the d is p lay a nd warning
tones ... .. .... .. ... .. ..... ... .. .
T ra ile r hitch ..... .. .... .... ... .. .
Error messages .. ... .......... .. .
137
137
143
143
143
14 4
148
149
149
Page 85 of 342
Lo adin g
"' Fo ld the center seatback forward
r=> page 79.
"' Remove the sack from the luggage com
partment and unfold it.
"' Place the empty sack over the lowered seat
back so that the end wi th the z ip fastener is
i n the luggage compartment.
"' Load objects from the luggage compart
ment into the sk i sack
r=> &, .
Securin g
"' Insert the ski sack strap @ r=> fig. 94 into
the center seat belt buckle @.
"' Pull the securing strap t ight by the free end
of the belt @.
"' Vehicles with 6 seats* : The ski sack has two
straps with hooks on the unders ide . Hang
the hooks into the luggage compartment by
the rear fastening eyes and pull the secur ing
strap tight by the free end @.
Storage
"' Re lease the securing strap for the sack .
"' Pull the sack to the rear over the folded
down seatback.
"' Raise the seatback unti l it is securely latch
ed .
"' Fo ld up the empty sack.
"' Stow the ski sack in the luggage compart
ment so that it cannot slide around.
_&. WARNING
-
- The ski sack is intended only for the
transportation of skis, snowboards and
other light objects. To reduce the risk of
serious persona l injury never transport
heavy or po inted ob jects in the ski sack .
- When bra king rapidly o r during an acci
dent the load cou ld be displaced and
ca use inj ury to occupants.
- Sharp edges on the load must be cove red
for protect ion. Always fas ten the belt
t igh tly around the sack and its contents
r=> fig. 94. S
eat s an d sto rage 8 3
(D Tips
Never stow the ski sack away if it's wet or
damp (for examp le, snow me lting from
skis). Let it dry complete ly before you stow
i t away.
Roof rack
First things first
A roof rack can be fitted to carry additional
luggage on the roof.
"' Always read and follow the instructions pro
vided by the roof rack manufacturer when the roof rack system must be installed .
If you are transporting luggage or other ob
jects on the roof, p lease note the following:
- Your vehicle has spec ially designed aerody-
namic roof rails. Only install a roof rack spe
cifically designed for your model. Contact
the nearest authorized Aud i dealer fo r infor
mation on approved modu lar roof racks for
your vehicle.
- These approved roof racks are the bas is for a
complete roof rack system. Additional at
t achments for the basic roof rack a re neces
sary to safely transpo rt luggage, bicycles,
surf boards, skis or sma ll boats. All necessa
ry hardware for these systems is available at
your authorized Audi dealer.
- We recommend that you keep the installa
tion instructions for your roof rack system
together with your Owner's literature in the
veh icle.
When sh ould the roof rac k be remov ed?
- Before going through an automatic car wash
(it is best to ask the car wash operator for
advice) .
- When not in use, to reduce fuel cons ump
tion, wind noise and to guard against theft.
_&. WARNING
- Use of an unapproved roof rack or incor
rect mounting of an approved roof rack
Page 86 of 342
84 Seats and storage
can cause the roof rack or the items at
tached to it to fall off the roof onto the
road.
- Objects falling from the roof of a vehicle
can cause a crash and personal injury.
- Only mount the system between the
markings shown in~
page 84, fig. 95 .
-The roof rack system must be installed
exactly according to the instructions pro
vided.
(D Note
- Your vehicle warranty does not cover any damages to the vehicle caused by using roof racks or mounting structures not
approved by Audi for your vehicle . The
same applies to damage resulting from incorrect roof rack installation .
- Always check the roof rack mountings
and hardware before each trip and dur
ing a trip to make sure everything is se
curely tightened . If necessary, retighten
the mountings and check the entire sys
tem from time to time.
- After mounting a roof rack system, or
when you transport objects on the roof
of your vehicle, the height of the vehicle
is naturally increased. Be careful when
driving under low bridges or in parking
garages for example. This could cause
damage to the load and even the vehicle
itself.
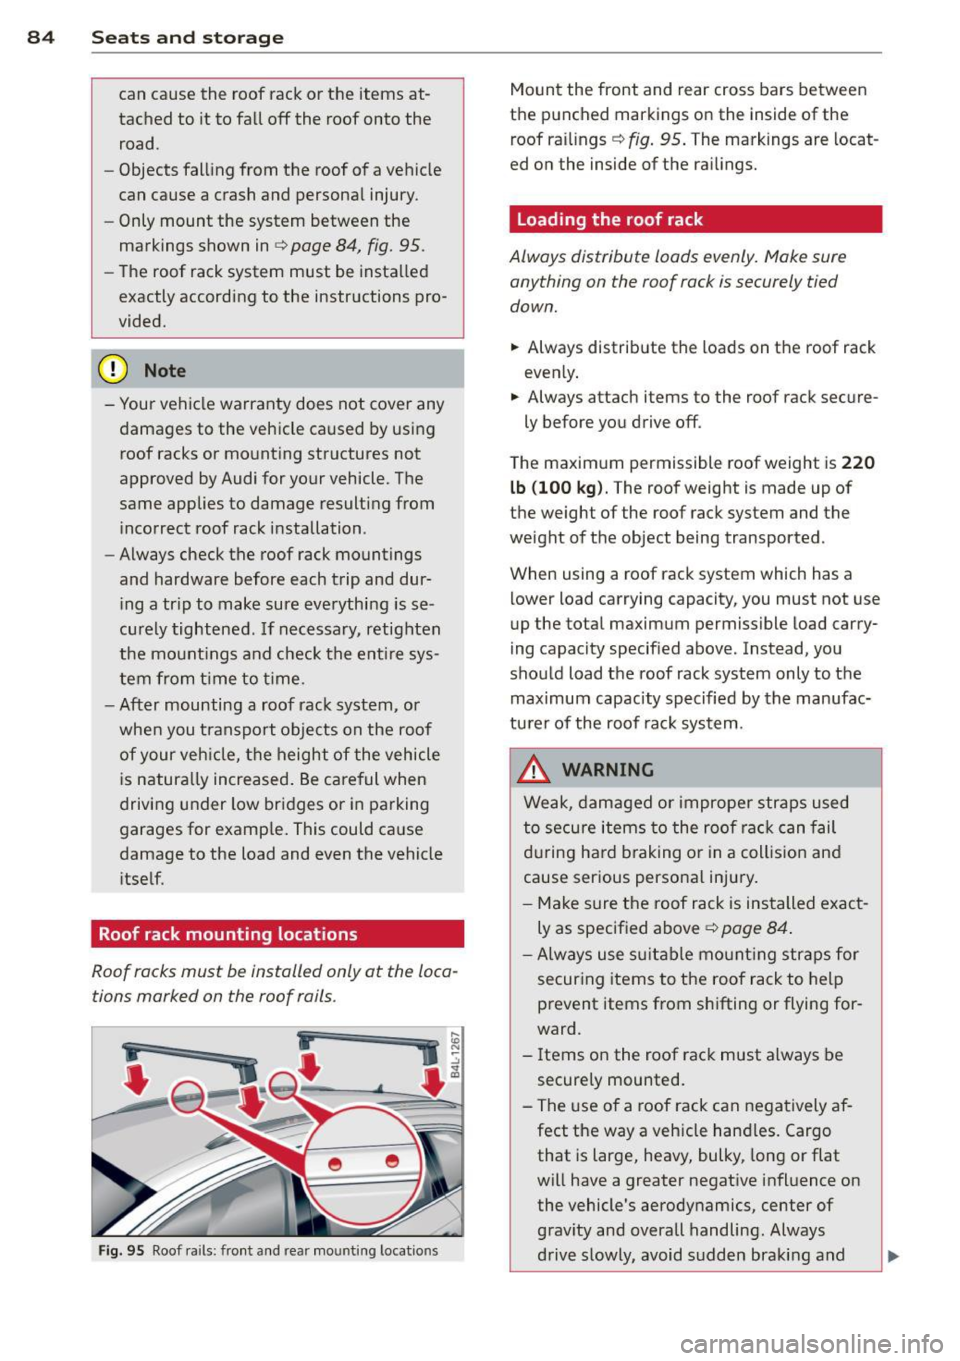
Roof rack mounting locations
Roof racks must be installed only at the loca
tions marked on the roof rails .
i
-
Fig. 95 Roof rails: front and rea r mo unting locatio ns
Mount the front and rear cross bars between
the punched markings on the inside of the
roof railings ~
fig. 95. The markings are locat
ed on the inside of the railings.
Loading the roof rack
Always distribute loads evenly. Make sure
anything on the roof rack is securely tied
down.
.,. Always distribute the loads on the roof rack
evenly .
.,. Always attach items to the roof rack secure -
ly before you drive off .
The max imum permissible roof weight is
220
lb (100 kg).
The roof weight is made up of
the weight of the roof rack system and the
weight of the object being transported .
When using a roof rack system wh ich has a
lower load carrying capacity, you must not use
up the total maximum permissible load carry
ing capacity specified above. Instead, you
should load the roof rack system only to the maximum capacity specified by the manufac
turer of the roof rack system .
.&_ WARNING
Weak, damaged or improper straps used
to secure items to the roof rack can fail
during hard braking or in a collision and
cause serious personal injury.
- Make sure the roof rack is installed exact
ly as specified above~
page 84.
-Always use suitable mounting straps for
securing items to the roof rack to help
prevent items from shifting or flying for
ward .
- Items on the roof rack must always be
securely mounted.
- The use of a roof rack can negatively af
fect the way a vehicle handles. Cargo that is large, heavy, bulky , long or flat
will have a greater negative influence on the vehicle's aerodynamics, center of
gravity and overall handling. Always
drive slowly, avoid sudden braking and .,,.
Page 87 of 342
maneuvers when transporting cargo on
the roof of your vehicle.
- Never exceed the maximum permissible
load carrying capacity of the roof of your
vehicle, the permissible axle weights and
the permissible total weight of your vehi cle¢
page 314, Weights.
CD Note
Make sure that the opened rear lid does
not come in contact with the cargo on the
roof.
@ For the sake of the environment
As a resu lt of the increased wind resist
ance created by a roof rack, your vehicle is
using fuel unnecessarily. So remove the
roof rack after using it.
Cupholder
Front cupholders
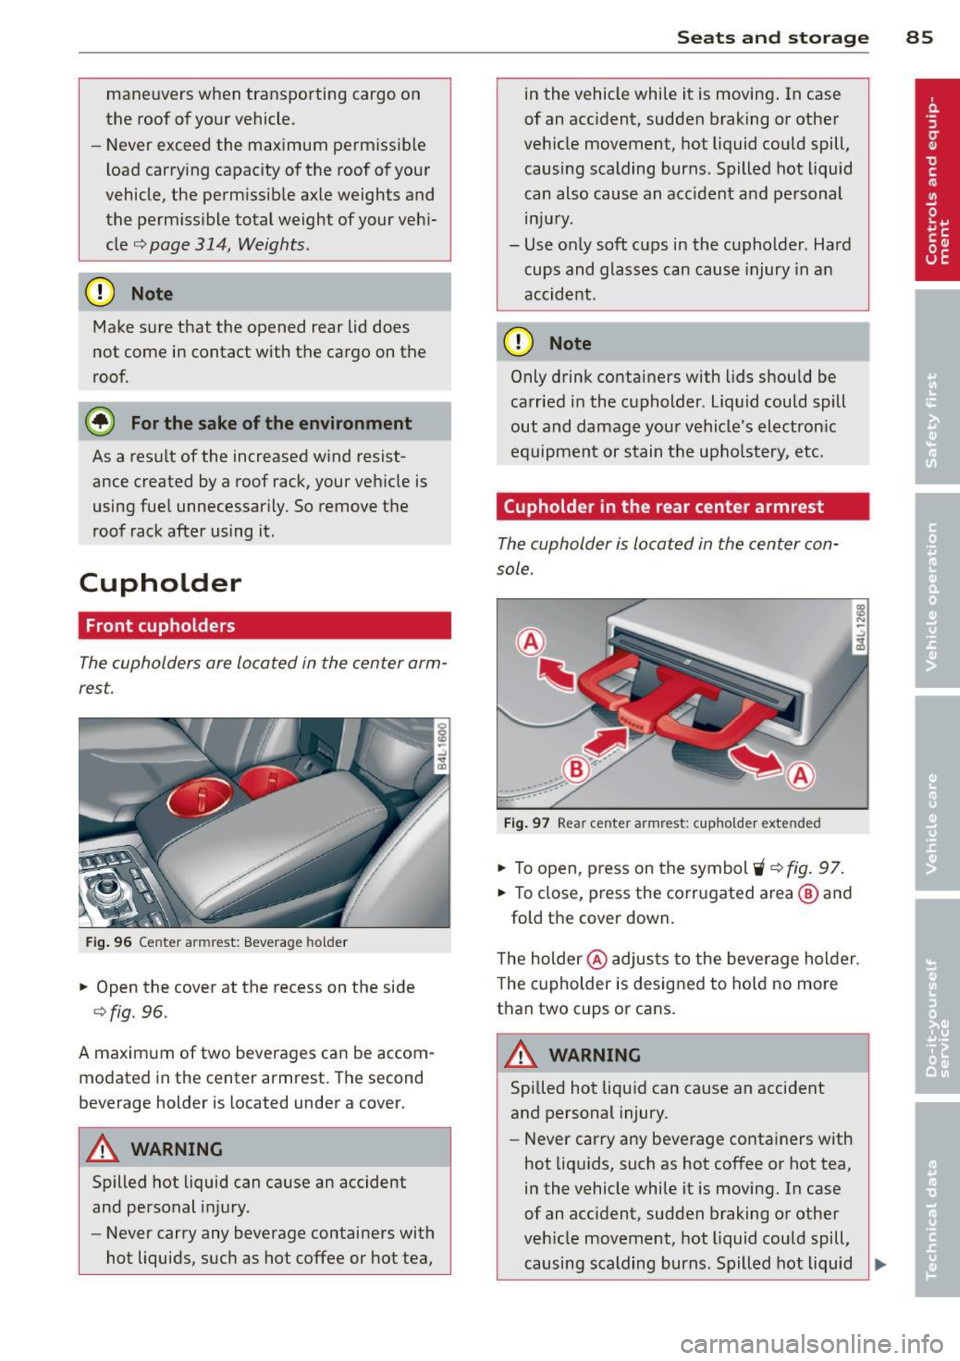
The cupholders are located in the center arm
rest.
Fig. 96 Center armrest: Beverage holder
.. Open the cover at the recess on the side
¢fig. 96.
A maximum of two beverages can be accom
modated in the center armrest. The second
beverage holder is located under a cover.
A WARNING
Spilled hot liquid can cause an accident
and personal injury.
- Never carry any beverage containers with
hot liquids, such as hot coffee or hot tea,
Seats and storage 85
in the vehicle while it is moving . In case
of an acc ident, sudden braking or other
vehicle movement, hot liquid could spill,
causing scalding burns. Spilled hot liquid
can also cause an accident and personal injury.
- Use only soft cups in the cupholder. Hard cups and glasses can cause injury in an
accident.
CD Note
Only drink containers with lids should be
carried in the cupholder. liquid could spill
out and damage your vehicle's electron ic
equipment or stain the upholstery, etc.
(upholder in the rear center armrest
The cupholder is located in the center con
sole.
Fig. 97 Rear center armrest: cupholder extended
.. To open, press on the symbol 'i ¢fig. 97 .
.. To close, press the corrugated area @ and
fold the cover down.
The holder @adjusts to the beverage holder.
T he cupholder is designed to hold no more
than two cups or cans.
A WARNING
Spilled hot liqu id can cause an accident
and personal injury.
-
-Never carry any beverage containers with
hot liquids, such as hot coffee or hot tea,
in the vehicle while it is moving. In case
of an acc ident, sudden braking or other
veh icle movement, hot liquid could spill,
causing scalding burns. Spilled hot liquid ..,.
Page 191 of 342
-when the weight on the front passenger
seat as sensed by the Advanced Airbag Sys
tem indicates that the front airbag on the
passenger side has to be turned off by the
electronic control unit (the
PASSENGER AIR
BAG OFF
light comes on and stays on)
A WARNING
Sitting in the wrong position can increase
the risk of serious injury in crashes.
- To reduce the risk of injury when the air
bags inflate, the driver and passengers
must always sit in an upright position,
must not lean against or place any part
of their body too close to the area where
the airbags are located.
- Occupants who are unbelted, out of posi
tion or too close to the airbag can be se
riously injured by an airbag as it unfolds
with great force in the blink of an eye
c> page 181.
A WARNING -
A child in a rearward-facing child safety
seat installed on the front passenger seat
will be seriously injured and can be killed if
the front airbag inflates -even with an Ad
vanced Airbag System.
- The inflating airbag will hit the child
safety seat or infant carrier with great
force and will smash the child safety seat
and child against the backrest, center
armrest, door or roof.
- Always install rear-facing child safety
seats on the rear seat.
- If you must install a rearward-facing
child safety seat on the front passenger
seat because of exceptional circumstan
ces and the
PASSENGER AIR BAG OFF
light does not come on and stay on, im
mediately install the rear-facing child
safety seat in a rear seating position and
have the airbag system inspected by your
authorized Audi dealer .
Airbag system 189
A WARNING
Objects between you and the airbag will
increase the risk of injury in a crash by in
terfering with the way the airbag unfolds
or by being pushed into you as the airbag inflates .
- Never hold things in your hands or on
your lap when the vehicle is in use.
- Never transport items on or in the area
of the front passenger seat . Objects
could move into the area of the front air
bags during braking or other sudden ma
neuvers and become dangerous projec
tiles that can cause serious personal in
jury if the airbags inflate.
- Never place or attach accessories or oth
er objects (such as cupholders, tele
phone brackets, large, heavy or bulky ob
jects) on the doors, over or near the area marked "AIRBAG" on the steering wheel,
instrument panel, seat backrests or be
tween those areas and yourself . These
objects could cause injury in a crash, es
pecially when the airbags inflate.
- Never recline the front passenger's seat
to transport objects. Items can also
move into the area of the side airbag or
the front airbag during braking or in a sudden maneuver. Objects near the air
bags can become projectiles and cause
injury, particularly when the seat is re
clined.
- Never tilt the front passenger seat back
rest forward when the vehicle is moving.
An inflating airbag will force the back
rest backward and can injure rear seat oc
cupants.
A WARNING
The fine dust created when airbags deploy
can cause breathing problems for people
with a history of asthma or other breath ing conditions.
-
- To reduce the risk of breathing problems,
those with asthma or other respiratory
.___ c_ o_ n_ d_ it_ i_o _ ns_ sh_o_ u_ l_ d _:g:_ e_ t _f_re _s_ h_ a_ i_r _ri ..:::g :....h _t __
_J ~
•
•
Page 199 of 342

-Objects between you and the airbag can
increase the risk of injury in an accident
by interfering with the way the airbag
unfolds or by being pushed into you as
the airbag inflates .
- Never place or attach accessories or
other objects (such as cupholders, tele
phone brackets, or even large, bulky
objects) on the doors, over or near the
area marked "AIRBAG" on the seat
backrests.
- Such objects and accessories can be
come dangerous projectiles and cause
injury when the supplemental side air
bag deploys .
- Never carry any objects or pets in the
deployment space between them and
the airbags or allow children or other
passengers to travel in this position .
- Always use the built -in coat hooks only
for lightweight clothing . Never leave any
heavy or sharp-edged objects in the
pockets that may interfere with side air
bag dep loyment and can cause personal
injury in an accident.
- Always prevent the side airbags from be
ing damaged by heavy objects knocking
against or hitting the sides of the seat
backs.
- The airbag system can only be triggered
once.
If the airbag has been triggered,
the system must be replaced by an au
thorized Audi dealership .
- Damage (cracks, deep scratches etc .) to
the original seat covers or to the seam in
the area of the side airbag module must
always be repaired immediately by an au
thorized Audi dealer .
- If children are seated improperly, their
risk of injury increases in the case of an
accident ~ page 200, Child Safety .
- Never attempt to modify any compo
nents of the airbag system in any way .
- In a side collision, side airbags will not
function properly if sensors cannot cor rectly measure increasing air pressure in
side the doors when air escapes through
Airbag system 197
larger, unclosed openings in the door
panel.
- Never drive with interior door trim pan
els removed .
- Never drive when parts have been re
moved from the inside door panel and
the open ings they leave have not been
properly closed.
- Never drive when loudspeakers in the
doors have been removed unless the
speaker holes have been properly
closed.
- Always make certain that openings are
covered or filled if additional speakers
or other equipment is installed in the inside door panels.
- Always have work on the doors done by
an authorized Audi dealer or qualified
workshop.
Side curtain airbags
Description of side curtain airbags
The side curtain airbags can provide supple
mental protection to properly restrained oc
cupants .
Fig. 202 Side curta in a irbags, driver's s ide: locatio n
The side c urtain airbags are located on both
sides of the interior above the front and rear
side windows ~ fig. 202 . They ar e identified
by the word "AIRBAG" on the windshield
frame and the center roof pillar .
The side curtain airbag system supplements
the safety belts and can help to reduce the risk of injury for occupants' heads and upper
torso on the side of the vehicle that is struck
in a side collision. The side cur tain airbag ..,.
Page 242 of 342
24 0 Cl eaning and protec tio n
Automatic car wash
The vehicle can be washed in almost any
modern automatic car wash .
The vehicle paint is so durable that the vehicle
can normally be washed without problems in
an automatic car wash. However, the effect on
the paint depends to a large extent on the de
sign of the facility, the filte ring of the wash
water, the type of wash and care mater ial , etc.
I f the pa int has a dull appearance afte r going
through the car wash or is scratched, bring
this to the attention of the operator immedi
ately. If necessary, use a different car wash.
Before going through a car wash, be sure to
take the usual precautions such as closing the
windows and the Panoramic sliding s unroof.
Factory installed antennas must not be re
moved.
I f you have installed additional accessories on
the vehicle - such as spoilers, roof rack, etc. -
it is best to ask the car wash operator if these
should be removed.
A WARNING
Please take note of the following po ints
before going through an automatic car
wash with your vehicle, so that you can avoid damage to your vehicle .
- Compare the track of your vehicle with the distance between the gu ide rails of
the fac ility- there is a risk of damage to
the whee ls and t ires.
- Compare the height and w idth of your
vehicle with the height and width of the
t u nnel at the facility.
- Fold the exte rior mirrors flat - t here is a
risk of damag ing the exte rior m irrors.
Power folding exterior mirrors* mus t not
be folded in or out by hand. Use the pow
er function!
- Do not al low the wiper blade to fall onto
the windshield after the vehicle is dried -
there is a r isk of damag ing the paint on
the hood .
- Always read and heed all WARNI NGS and
other information ¢
page 239.
Washing the vehicle by hand
A lot of water is needed when washing a vehi
cle by hand .
.,. Before you start washing, make sure you
have read and understood the WARNINGS
¢ .&. in General information on page 239 .
.,. First soak all dried d irt unt il it is soft, then
r inse it off .
.,. As you clean you r vehicle , start w it h the
roof and work your way dow n to the bo ttom,
using a sponge, a sponge g love or a clean
brush.
.,. Rinse the sponge or the sponge glove often,
flushing it clean each time.
.,. Use spec ial car shampoo only for very per
sistent d irt .
.,. Rinse the car thoroughly wit h water .
.,. Use a chamo is leather to gently w ipe the ex-
ter io r d ry.
Use a separate sponge for cleaning the
wheels, door s ills and other regions exposed
to road dirt . In this way, you will not scratch
the pa int with coarse pa rticles imbedded in
the sponge the next time you wash the car.
A WARNING ~ -
- Do not clean the underside of the chas
sis, fenders, wheel covers , or other ha rd
to reach pa rts without protect ing your
hands and arms . You may cut yourself on
sharp-edged metal parts.
- Always read and heed a ll WARNINGS and
other information ¢
page 239.
(D Note
- Never try to remove dirt, mud or dust if
the surface of the ve hicle is dry . Never
use a dry cloth or sponge, s ince this
co uld scratch your vehicle's paint or win
dows .
- Never wash your car in bright s unlight.
Drops of water act as magn ifying lenses
and may damage your paint .
- When you wash your car in the winter: if you rinse your vehicle with a hose, be careful not to aim the stream of water
Page 317 of 342

designated seating position) and luggage
weight~&. .
Gros s Axle W eight Rating
The G ross Axle Weight Rating is the maximum
l oad that can be applied at each axle of the
vehicle
q .&. .
Vehicle capacit y weight
The vehicle capac ity we ight (max. load) is list
ed on the driver 's side B-p illar.
Roof weight
The maximum permissible roof weight is 220
lb (100 kg ).
The roof weight is made up of
the we ight of the roof rack system and the
weight of the object be ing transported
q page 84, Loading the roof rack.
..&, WARNING
- The Gross Vehicle Weight Rat ing for yo ur
Audi Q7 vehicle, found on the safety compliance label on the driver's side B
pillar, must never be exceeded under any
circumstances. Exceed ing the Gross Vehi
cle Weight Rating of your vehicle is like ly
to damage your vehicle, and such dam
age will not be covered by your Limited
New Vehicle Warranty . Exceeding the
Gross Vehicle We ight Rating will also
change the performance and handling
characteristics of your vehicle, which
cou ld cause a crash result ing in serious
injury o r death.
- The Gross Vehicle Weight Rat ing for your
Audi Q7 wo uld be exceeded if your vehi
cle is s imultaneously equ ipped with Pan
oramic sliding sunroof; third-row seat
ing; trailer towing equipment (factory or
dealer-installed), and running boards
(dealer-installed). UNDER NO CIRCUM
STANCES MAY ALL SUCH ITEMS BE IN
STALLED ON T HE SAME VEHICLE .
- The actual Gross Axle Weight Rat ing at
the front and rear axles should not ex
ceed the perm iss ible weights, and their
c ombination must not exceed the Gross
Vehicle Weight Rat ing.
G ene ral in formation 315
-Exceeding perm iss ible weight ratings can
result in veh icle damage, acc idents and
personal injury.
([) Note
-The ve hicle capacity weight figures apply
when the load is d istr ibuted evenly in the
vehicle (passengers and luggage). When
transport ing a heavy load in the luggage
compartment, carry the load as near to
the rear axle as poss ible so that the vehi
cle's handling is not impaired.
- Do not exceed the maximum permissible
axle loads or the maximum gross veh icle
we ight. Always remember that the vehi
cle's handling w ill be affected by the ex
tra load. Therefore, ad just yo ur speed ac
co rding ly.
- Always observe local regulat ions .
Dimensions
T he specifications refer to the basic model.
D ifferences may occur depending on the mod
el type and op tions ordered, fo r example, tire
sizes .
Q) Note
When dr iv ing up steep ramps, on rough
r oads, over c urbs, etc. it is important to re
member that some parts of your vehicle,
such as spoi lers or exhaust system compo
nents, may be close to the ground. Be
careful not to damage them.
•
•
I
Page 334 of 342
332 Index
Light Exterior lighting in the mirror housing ..
59
leaving home . . . . . . . . . . . . . . . . . . . . . . 59
also refer to Ambience lighting . . . . . . . 62
Lighting
refer to Ambience lighting ........... 62
Lighting in the mirror housing . . . . . . . . . .
59
Lights .. ...... ................... .. 57
Coming home ............ .. .. .. .. .. 58
Daytime running lights . . . . . . . . . . . . . . 58
Emergency flashers . . . . . . . . . . . . . . . . .
60
Exterior lights . . . . . . . . . . . . . . . . . . . . . 58
Front fog lights . . . . . . . . . . . . . . . . . . . . 58
Headlights ............ .. .. .. .. .. ..
57
High beam . . . . . . . . . . . . . . . . . . . . 57, 60
High beam warning/indicator light ... .. 18
Leaving home . . . . . . . . . . . . . . . . . . . . . . 58
Rear fog lights . . . . . . . . . . . . . . . . . . . . .
59
Side marker lights ........ .... .... .. 57
Turn signals ............. .. .. .. .. .. 60
Xenon headlights ..... .... .. .. .. .. .. 57
Light sensor defective ......... ... .. ..
35
Loading the luggage compartment .. ... 166
Loading the roof rack . . . . . . . . . . . . . . . . . 84
Locking
Power locking switch . . . . . . . . . . . . . . . .
44
Rear lid/trunk lid ............ ..... .. 45
Remote control key . . . . . . . . . . . . . . . . . 43
Using the key . . . . . . . . . . . . . . . . . . . . . . 43
Lower universal anchorage bars (Canada) 212
Lower universal anchorages (Canada) 212
Luggage Stowing . ................... .... . 166
luggage compartment Tie-down rings ............ ... .... .. 80
Luggage compartment ....... ..... .. .. 79
Cargo net . . . . . . . . . . . . . . . . . . . . . . . . . 80
Expanding . . . . . . . . . . . . . . . . . . . . . . . . 79
Retractable cover ........... .. .. .. .. 81
Ski sack . ... ................ ..... .. 82
also refer to Loading the luggage com-
partment . ................. ..... . 166
M
Maintenance ................. ..... . 319
Malfunction Indicator Lamp (MIL) . . 17, 27 Master key .
..... .. ................ .. 38
Battery replacement . . . . . . . . . . . . 39,
40
Check light . ... .. ................ .. 39
Mileage Average ... .... ................... . 24
Instantaneous ... ................ .. 24
Mirrors Activating the dig ital compass ..... .. .
69
Adjust ing the exterior mirrors .... .... . 68
dimming .. .. ................. .. .. .
69
Recalling position of outside mirrors . .. 73
Storing position of outside mirrors . ... . 73
Monitoring the Advanced Airbag System 190
N
Natural leather .. .. ... .. ..... ... .. .. 246
New tires and wheels
NHTSA 285
Contacting ...... ... .......... .... 167
Nitrogen oxide (NOx) catalytic converter
refer to Ad Blue ... ....... ...... .... 255
Number of seats .................... 170
0
Occupant seating positions ........... 161
Octane rating ... .. ... .. ..... ... .. .. 250
Odometer . . . . . . . . . . . . . . . . . . . . . . . . . . 12
Offroad mode . .. .. ... .......... .... 219
Oil
refer to Engine oil ....... ...... .... 260
On-Board Diagnostic System (OBD) Data Link Connector (DLC) ........... . 28
Electronic speed limiter ............. . 28
Malfunction Indicator Lamp (MIL) .. .. . 27
Open door or rear lid warning .......... 22
open sky system
refer to Panoramic sliding sunroof .... . 54
Operate your vehicle economically and
minimize pollution . ... ....... ... .. .. 230
Optional equipment Marked with an asterisk . . . . . . . . . . . . . . . 6
Other equipment (efficiency program) .. . 27
Outlets .. .. .. .. .. ....... ...... .... . 87
Page 336 of 342
334 Index
Rain sensor defective ....... .. .. .... .. 35
Read ing lights
Fr ont .. .. .... ........... .... .... .. 61
Rear .. .. .. ............. .. .. .. .. .. 6 1
Rear ashtray . . . . . . . . . . . . . . . . . . . . . . . . 86
Rear fog lights . . . . . . . . . . . . . . . . . . . . . . 59
Rear lid Automatic opera tion . . . . . . . . . . . . . . . . 46
E mergency unloc king .... .. .. .. .. .. . . 48
Opening and closing . ... .. .. .. .... . . 45
Valet key function ..... ... .. .. .... .. 41
R ear light
D efective .. ............. .. .. .. .. .. 23
Rear operation Four-zone automatic comfort a ir condi-
tioning .. .. ... .... .... .. .. .. .. .. . 100
Rear park assist .. .. ..... ... .. .. .... . 143
Ad justing the disp lay ...... .. .. .. .. . 148
Ad justing the wa rning tones .. .. ..... 148
Trailer hitch .............. ... .. .. . 149
Rear seats Adjusting seat . ....... ... .. .. .... .. 75
Entry ass ist . . . . . . . . . . . . . . . . . . . . . . . . 7 5
Folding seatba ck up and down .. .. .... 76
Rearview camera Park ing mode 1
Park ing mode 2 147
147
Rear v iew mir ro r . . . . . . . . . . . . . . . . . . . . . 69
Rear window defogger . . . . . . . . . . . . . . . . 95
Red symbols .... .. ..... ... .. .. .... .. 31
Refue lling . .. ................ ... .. . 253
Gasoline inh ib itor flap ... .. .. .. .. .. . 253
Release lever for hood ...... .. .. .... . 258
Remote control garage door opene r
(Homelink ®) .. .. .. ..... ... .. .. .... . 156
Remote control key . . . . . . . . . . . . . . . . . . . 38
Unlo cking and locking ..... .... .... .. 43
Remote rear lid release ....... .. .... .. 45
Repai r manua ls .. . ...... ... .. .. .... . 319
Repa irs
A irbag system ........... .. .. .... . 193
Replacing a fuse ........... .. .. .... . 303
Replacing light bul bs .. ... .. .. .. .. .. . 306
Replacing tires and wheels . ........ .. . 286
Report ing Safety Defects . . . . . . . . 167, 168
R eset b utton ... ......... .. .. .. .. .. .. 12 Resid
ual heat ..... ... .. ..... .... . .. . 92
Retractor . . . . . . . . . . . . . . . . . . . . . . . . . . 17 4
Rims Cast alloy . .... .. ............. .... 243
Roof rack . . . . . . . . . . . . . . . . . . . . . . . . . . . 83
Load ing ... .... .. .. ... ..... ... .. .. . 84
Mounting locations .... ..... ... .. .. . 84
Roof weigh t ..... .. ............. .... . 84
Rule of behavior offroad .......... .... 232
s
Safe driving habits . ............. .... 160
Safety be lt height adjus tment ... .. .. .. 176
Safety be lt pos ition ..... ........... . 175
Safety be lt height adjustment ....... 176
Safety be lts wo rn by pregnant women . 175
Safety be lt pretensioner . . . . . . . . . . . . . . 177
Service and disposa l ........... .. .. 177
Safety be lts . . . . . . . . . . . . . . . . . . . . . . . . 17 4
cleaning . ..... .. .. .... .... ... .. .. 248
Danger to passengers who do not wear a
safety belt . . . . . . . . . . . . . . . . . . . . . . . 172
Fastening . ... ... ................ . 174
Improperly wo rn . . . . . . . . . . . . . . . . . . 177
Not wor n .... ... ................ . 172
Safety belt pos it ion .... ........... . 175
Safety instructions ............. .... 173
Secu ring child safe ty seats .... .. .... 209
Spe cial considerations for pregnan t
women ... .... .. ... .. .. ..... ... .. 17S
U nfastening ..... .. .... .... ... .. .. 176
Warning/ind icator light . ..... ... .. .. 170
Why YOU MUST wear them . . . . . . . . . . 170
Worn properly . .. ............. .... 172
Safety be lt warning light . . . . . . . . . 18, 170
Safety compliance sticker .. ... ..... .. 314
Safety eq uipment .. ............. .... 160
S afe ty featu res for occ upant rest ra in t and
protection .. .. .. .. .. .... .... ... .. .. 160
Safety gu idelines
Seat adjustment .. ..... ....... .... .. 71
Safety instr uctions
Engine compartment ........... .... 258
for side curtain airbags ............ . 199
for us ing child safety seats .......... 203