interior lights AUDI Q7 2017 Owner´s Manual
[x] Cancel search | Manufacturer: AUDI, Model Year: 2017, Model line: Q7, Model: AUDI Q7 2017Pages: 402, PDF Size: 100.39 MB
Page 4 of 402
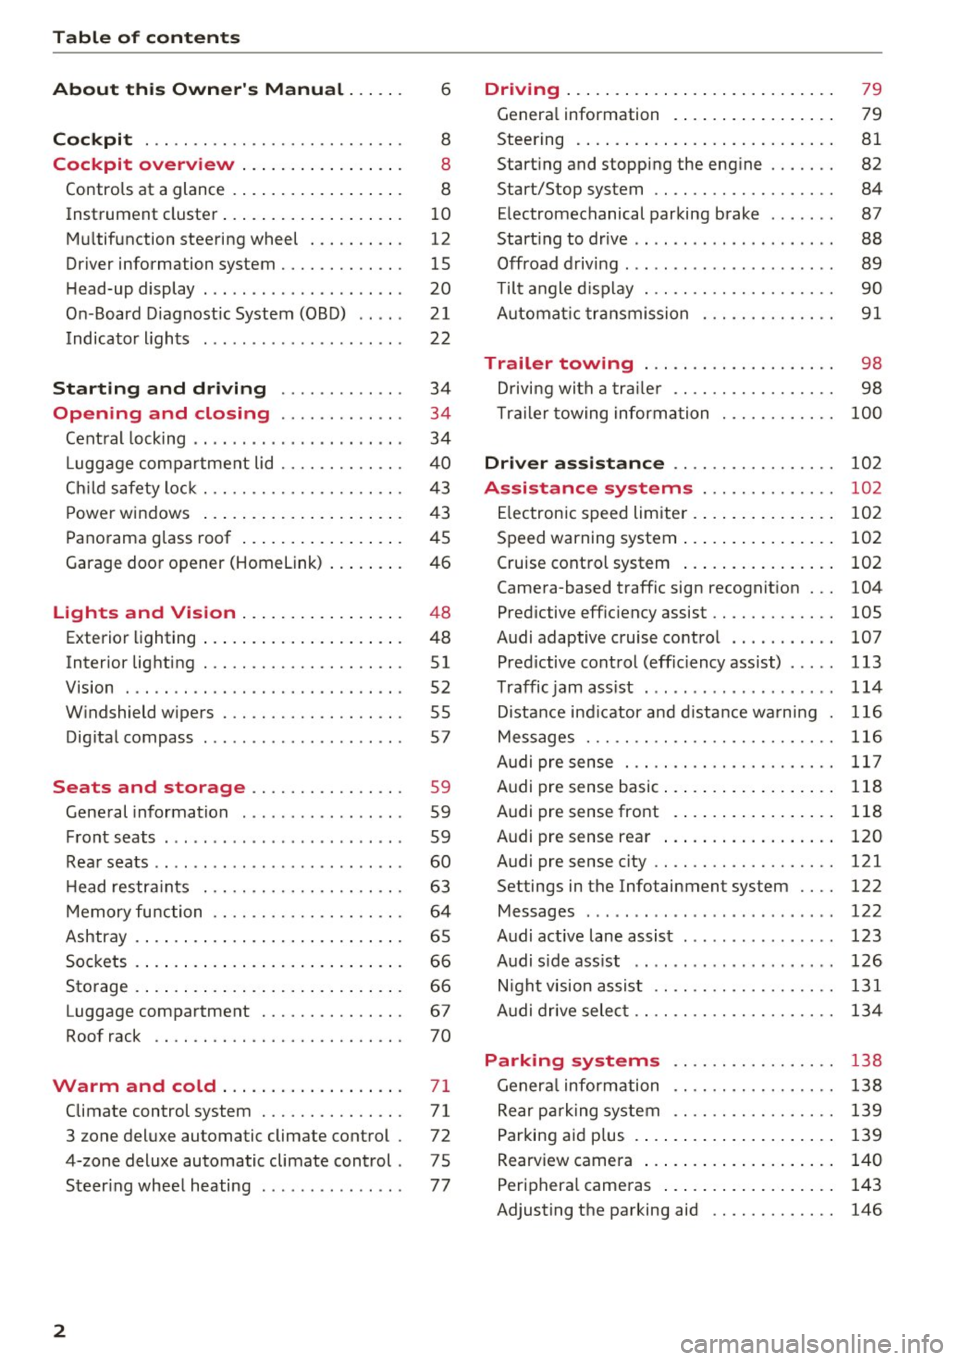
Table of contents
About this Owner's Manual ... .. .
Cockpit ... .. ............... .... .. .
Cockpit overview ................ .
Controls at a glance ... .......... .. .. .
Instrument cluster .. .......... .. .. .. .
Multifunction steering wheel ... .. .. .. .
Driver information system ............ .
H ead-up display .... .. ..... ... .. .... .
On -Board Diagnostic System (OBD) .. .. .
Indicato r lights . ................ ... .
Starting and driving ......... ... .
6
8
8
8
10
12
15
20
21
22
34
Opening and closing . . . . . . . . . . . . . 34
Central lock ing . . . . . . . . . . . . . . . . . . . . . . 34
L uggage compartment lid . . . . . . . . . . . . . 40
Ch ild safety lock . . . . . . . . . . . . . . . . . . . . . 43
Power windows . . . . . . . . . . . . . . . . . . . . . 43
Panorama glass roof . . . . . . . . . . . . . . . . . 45
Garage door opener (Homelink) . . . . . . . . 46
Lights and Vision . . . . . . . . . . . . . . . . . 48
Exterior lighting . . . . . . . . . . . . . . . . . . . . . 48
Interior lighting . . . . . . . . . . . . . . . . . . . . . 51
V1s1on . . . . . . . . . . . . . . . . . . . . . . . . . . . . . 52
Windshield wipers . . . . . . . . . . . . . . . . . . . 55
Dig ital compass . . . . . . . . . . . . . . . . . . . . . 57
Seats and storage . . . . . . . . . . . . . . . . 59
General information . . . . . . . . . . . . . . . . . 59
Front seats . . . . . . . . . . . . . . . . . . . . . . . . . 59
Rear seats . . . . . . . . . . . . . . . . . . . . . . . . . . 60
H ead restraints . . . . . . . . . . . . . . . . . . . . . 63
M emory function . . . . . . . . . . . . . . . . . . . . 64
Ashtray . . . . . . . . . . . . . . . . . . . . . . . . . . . . 65
Sockets . . . . . . . . . . . . . . . . . . . . . . . . . . . . 66
Sto rage . . . . . . . . . . . . . . . . . . . . . . . . . . . . 66
Luggage compartment . . . . . . . . . . . . . . . 67
Roof rack . . . . . . . . . . . . . . . . . . . . . . . . . . 70
Warm and cold .. .......... .. .. .. . 71
Climate control system . . . . . . . . . . . . . . . 71
3 zone deluxe automatic climate control . 72
4-zone deluxe automatic climate control . 7 5
Steer ing wheel heating . . . . . . . . . . . . . . . 77
2
Driving ..... .. .. .. .. ... .......... . .
General information . ... ........... . .
Steering .......... .. .. . .......... . .
Start ing and stopping the eng ine ..... . .
Start/Stop system .. .. ............. . .
E le ctromechanical parking brake ...... .
Start ing to drive .. .. .. ........ ..... . .
Offroad driving ... ... ...... ....... .. .
T ilt angle display . .. .. ... .......... . .
Automat ic transmission
Trailer towing ... .. ............. . .
Driving with a trail er .. .. ........... . .
T railer towing information
79
79
81
82
84
87
88
89
90
91
98
98
100
Driver assistance . . . . . . . . . . . . . . . . . 102
Assistance systems . . . . . . . . . . . . . . 102
Electronic speed limiter . . . . . . . . . . . . . . . 102
Speed warning system . . . . . . . . . . . . . . . . 102
Cruise control system . . . . . . . . . . . . . . . . 102
Camera-based traffic sign recognit ion . . . 104
Pred ictive efficiency assist. . . . . . . . . . . . . 105
Audi adaptive cruise contro l . . . . . . . . . . . 107
Pred ictive control (eff ic ie ncy assist) . . . . . 113
Traffic jam assist . . . . . . . . . . . . . . . . . . . . 114
Distance indicat or and distance warnin g 116
Messages . . . . . . . . . . . . . . . . . . . . . . . . . . 116
Audi pre sense . . . . . . . . . . . . . . . . . . . . . . 117
Audi pre sense basic . . . . . . . . . . . . . . . . . . 118
Audi pre sense front . . . . . . . . . . . . . . . . . 118
Audi pre sense rea r . . . . . . . . . . . . . . . . . . 120
Audi pre sense city . . . . . . . . . . . . . . . . . . . 121
Settings in the Infotainment system . . . . 122
Messages . . . . . . . . . . . . . . . . . . . . . . . . . . 122
Audi active lane assist . . . . . . . . . . . . . . . . 123
Audi s ide assist . . . . . . . . . . . . . . . . . . . . . 126
Night vision assist . . . . . . . . . . . . . . . . . . . 131
Audi drive select . . . . . . . . . . . . . . . . . . . . . 134
Parking systems 138
General information . . . . . . . . . . . . . . . . . 138
Rear parking system . . . . . . . . . . . . . . . . . 139
Parking aid plus . . . . . . . . . . . . . . . . . . . . . 139
Rearview camera . . . . . . . . . . . . . . . . . . . . 140
Periphera l cameras . . . . . . . . . . . . . . . . . . 143
Adjusting the parking aid . . . . . . . . . . . . . 146
Page 37 of 402
-The LE D in the drive r's door rai l blinks when
you lock the vehicle . If t he LED lights up for
approximately 30 seconds after locking,
there is a malfunct ion in the cent ral locking
system. Have the p roblem corrected by an
a uth orized Audi dea ler or authorized Audi
Se rvice Fac ility.
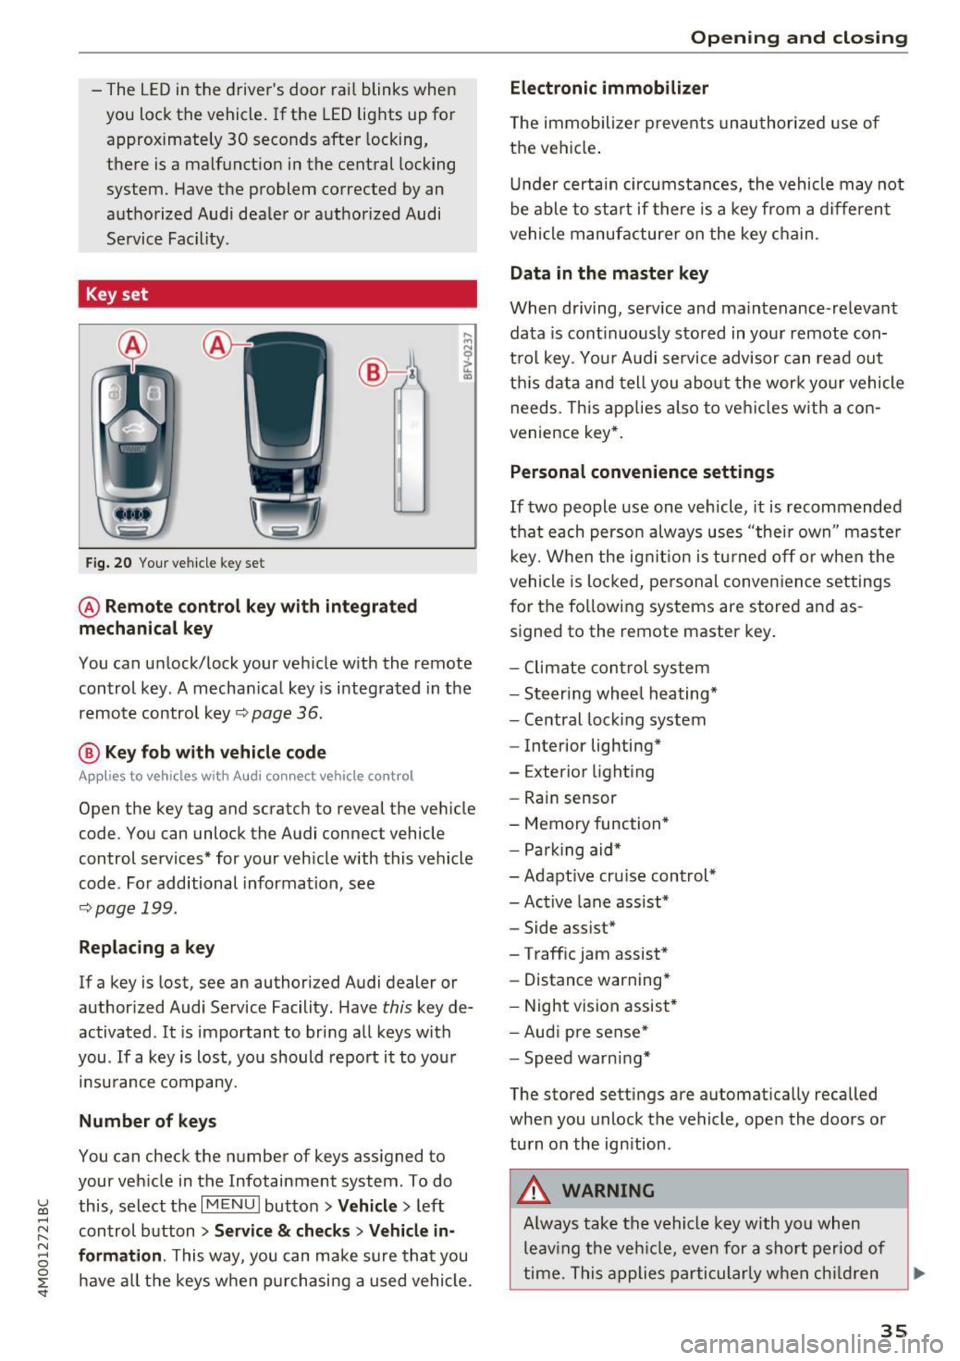
Key set
Fig. 20 You r ve hicle key set
@ Remote control key with integrated
mechanical key
You can unlock/ lock your veh icle w ith the remote
control key . A mecha nica l key is integ rated in the
remo te contro l key ~
page 36.
@ Key fob with vehicle code
Appl ies to vehicles w ith Audi connect vehicle control
Open the key tag and scratch to reveal the veh icle
code. You can unlock the Audi connect vehicle
control services* for your veh icle with this vehicle
code . For additional informat ion, see
~ pag e 199.
Replacing a key
If a key is lost, see an authorized A udi dealer or
author ized Audi Service Facility. Have
this key de
activated .
It is important to bring a ll keys with
you . If a key is lost, you should report it to you r
in sura nce company.
Number of keys
You can check the number of keys ass igned to
your veh icle in the Infotainment system . To do
~ this, select the I M ENU I butto n >Vehicl e> left ......
~ control b utton > Service & checks > Vehicle in-
N 8 formation . This way, you can m ake sure th at you
0 :E ha ve all th e keys when p urch asing a used vehicle .
Electronic immobilizer
T he immobilizer preve nts unau thori zed use of
t h e vehi cle.
Un der certai n circumstan ces, the vehicle may not
be able to start if there is a key from a diffe ren t
vehicle manufa cture r on the key c hain .
Data in the master key
When driving, service and ma intenance-re levant
da ta is cont inuo usly stored in you r remote con
t rol key . Yo ur Audi se rvice advisor can rea d ou t
t hi s data and tell you abo ut the w ork yo ur vehicle
needs. This app lies also to ve hicles w ith a con
ven ience key* .
Personal co nvenience settings
If two people use one vehicle, it is recommended
th at each perso n always u ses "thei r own " maste r
k ey. W hen the ig nitio n is t urne d off or when the
vehicle is lo cked , pe rsonal conve nien ce settings
for the follow in g systems are stored and as
s igned to the remote master key .
- Climate con trol sys te m
- Steer ing whee l heating *
- Ce ntral loc king system
- Interior lighting*
- Exterior light ing
- Rain sensor
- Memory function *
- Par king aid*
- Adapt ive cr uise con trol*
- Ac tive lane assist*
- Side assist*
- Traff ic jam assist *
- Distance warning*
- Night visio n assis t*
- Aud i p re sense *
- Spe ed wa rn in g*
The stored settings are automat ica lly recalled
whe n you unlock the vehicle, ope n the doo rs or
tu rn on th e ign ition .
_&. WARNING
-Always tak e t he ve hicle key w ith yo u wh en
l e av ing t he veh icle, eve n for a shor t per io d of
ti m e. Th is app lies par tic ularly w he n c hildr en
-
35
Page 52 of 402
Lights and Vision
Ir.a Head light a ssista nt: malf unction! See own
er' s manual
Drive to an a utho rized Aud i de aler or authorized
Aud i Serv ice Facility immediately to have the
malfunction corrected . You can still switch the
high beams on or off manually .
II Headlight assi stant : currently unavail able .
Camera view re stricted due to surroundings .
See owner's manual
The camera view is b lo cked , fo r example by a
s t icker o r debr is.
The sensor is located between the interior rear
view mir ror and the windshield . Do not p lace any
stickers in th is area on the windshield .
_& WARNING
High beam assistant is only i ntended to assist
t he driver. The dr iver is still res ponsible for
cont ro lling the headlights and may need to
switch them on and off manually depend ing
on light and visib ility co nditions . It may be
necessary to ope rate them manua lly in s itua
tions such as:
- In adve rse weathe r cond itions such as fog,
heavy ra in, b low ing snow or sp raying water .
- On roads where oncoming traffic may be
partia lly obscured, s uch as exp ressways .
- When there a re road users that do not have
s uf ficient lighting, s uch as bicyclers o r
vehicles with dirty ta il lamps.
- In tight curves and o n steep hills .
- In poorly lit areas .
- Wi th stro ng reflecto rs, such as s igns.
- If the area of the windsh ield near the senso r
is fogged ove r, dirty, i cy or covere d with a
st icker .
Adjusting the exterior lighting
The functions ar e adjust ed in the Infotainm ent
system.
• Se lect in the Infotainment system: I M ENU I but
ton
> Vehi cle > left contro l button > Vehicle
setting s
> Exterior lighting .
50
Automatic headlights
You can adjus t the following se ttings in the Au
to-dimming high beam s
menu:
Activation time -you can adjust if the headlights
swi tch on
Early , Medium or Late accor ding to t he
sens itivity of t he lig ht sen sor .
Headlight assistant * -you can switch the high
bea m assis tant* on and off.
Entry/exit lighting
When it is dark, the Ent ry /exit lighting ill umi
nates the area a round the vehicle when unlocking
the veh icle and after switch ing off the ig nition
and opening the dr ive r's door .
The
Entry /e xit lighting only works when it is
dark and the light sw itch is in the
AUTO posit ion.
Daytime running lights
USA models :
the daytime r unning lights can be
switch ed on/off . S elect
On or Off.
Canada models: this f unction canno t be sw itched
off. They activate automatically each time the ig
nit ion is switched on.
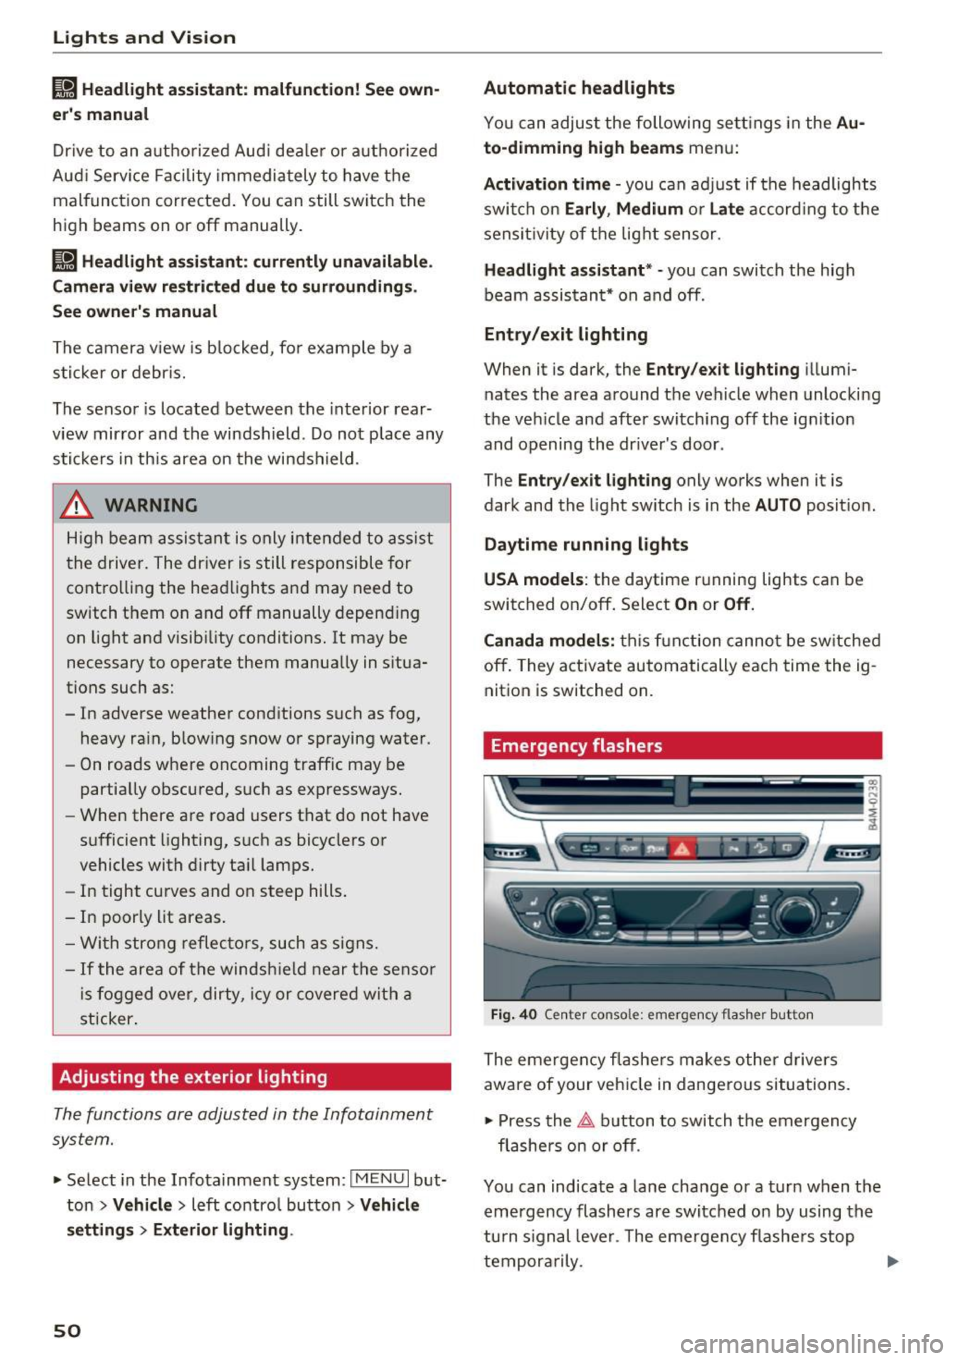
Emergency flas hers
--- ---~
·--~~ ~-~-~
·----- -- --___ , ~ - ::..- -- ,,.. A .. 'l-"'.A - - -~
Fig. 4 0 Center conso le: emerge ncy flashe r bu tt o n
The emergen cy fl ashe rs m akes ot her d rivers
aware of your veh icle in dangerous situations.
• Press the
~ button to switch the emergency
flashe rs on or off .
Yo u can indicate a la ne change or a turn when the
eme rgency flashers are switched o n by using the
turn s ignal leve r. T he eme rgency f lashe rs stop
tempor arily .
ll-
Page 53 of 402
u (0 ...... N r--. N ...... 0
0
:E
tion is turned off.
@ Tips
You should switch the emergency flashers on
if:
- you are the last car in a traffic jam so that
all other vehicles approaching from behind
can see you, or if
-your vehicle has broken down or you are
having an emergency, or if
-your vehicle is being towed or if you are tow
ing another vehicle
Interior Lighting
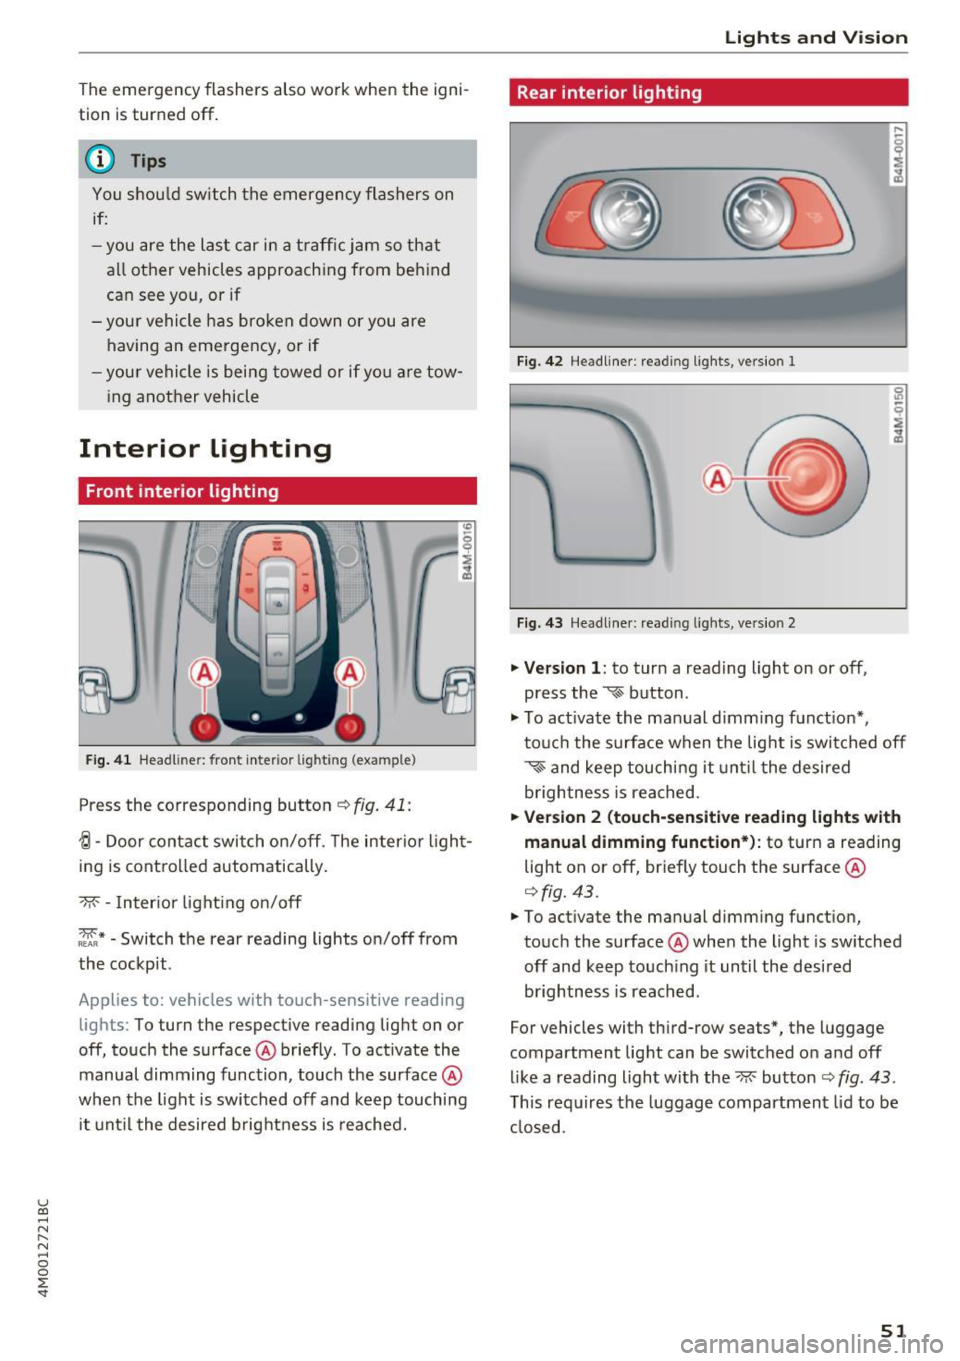
Front interior lighting
~ 0 9
!
Fig. 41 Headl iner: front interior lighting (example)
Press the corresponding button c:-:> fig. 41:
-!;I -Door contact switch on/off. The interior light
ing is controlled automatically.
-M- -Interior lighting on/off
~* -Switch the rear reading lights on/off from
the cockpit.
Applies to: vehicles with touch-sensitive reading lights : To turn the respective reading light on or
off, touch the surface @briefly. To activate the
manual dimming function, touch the surface @
when the light is switched off and keep touching
it until the desired brightness is reached.
Lights and Vision
Rear interior lighting
Fig. 42 Headliner: reading lights, version 1
Fig. 43 Headliner: reading lights, version 2
.,. Version 1: to turn a reading light on or off,
press the
~ button .
.,. To activate the manual dimming function*,
touch the surface when the light is switched off
~~ and keep touching it until the desired
brightness is reached.
.,. Version 2 (touch-sensitive reading lights with
manual dimming function*):
to turn a reading
light on or off, briefly touch the surface @
¢fig. 43.
.,. To activate the manual dimming function,
touch the surface @when the light is switched
off and keep touching it until the desired
brightness is reached.
For vehicles with third-row seats*, the luggage
compartment light can be switched on and off
like a reading light with the~ button
c:-:> fig. 43.
This requires the luggage compartment lid to be
closed .
51
Page 54 of 402
Lights and Vision
Interior lighting
Applies to : ve hicles w it h inte rior lig htin g
~ Select in the Infotainment system: IMENU I but
ton
> Vehi cle> left contro l bu tton > Vehicle
settings > Interior lighting.
The interior lighting turns on when you switch
the head ligh ts on while the igni tion is on .
The storage compartment in the door is illumi
nated when yo u reach your hand into the storage
compartment.
Ver sion 1
To adjust the brightness of individua l zones, se
lect
Front brightness *, Door b rightne ss or Foot
well brightnes s.
Turn the control knob to the left
or to the right. Press the control knob to co nfirm
the br ightness .
Version 2
Select and confirm one of the displayed profiles
by press ing the control knob.
Individual: you can customize the brightness and
color of individual zones. Press the r ight control
button. Press the control knob again to confirm
the settings.
Audi drive select: the interior and conto ur light
ing color changes depending on the driving mode
selected in drive select*
<=> page 134.
(D Tips
The setting is a utomat ica lly stored and as
signed to the remote control key that is be ing
used.
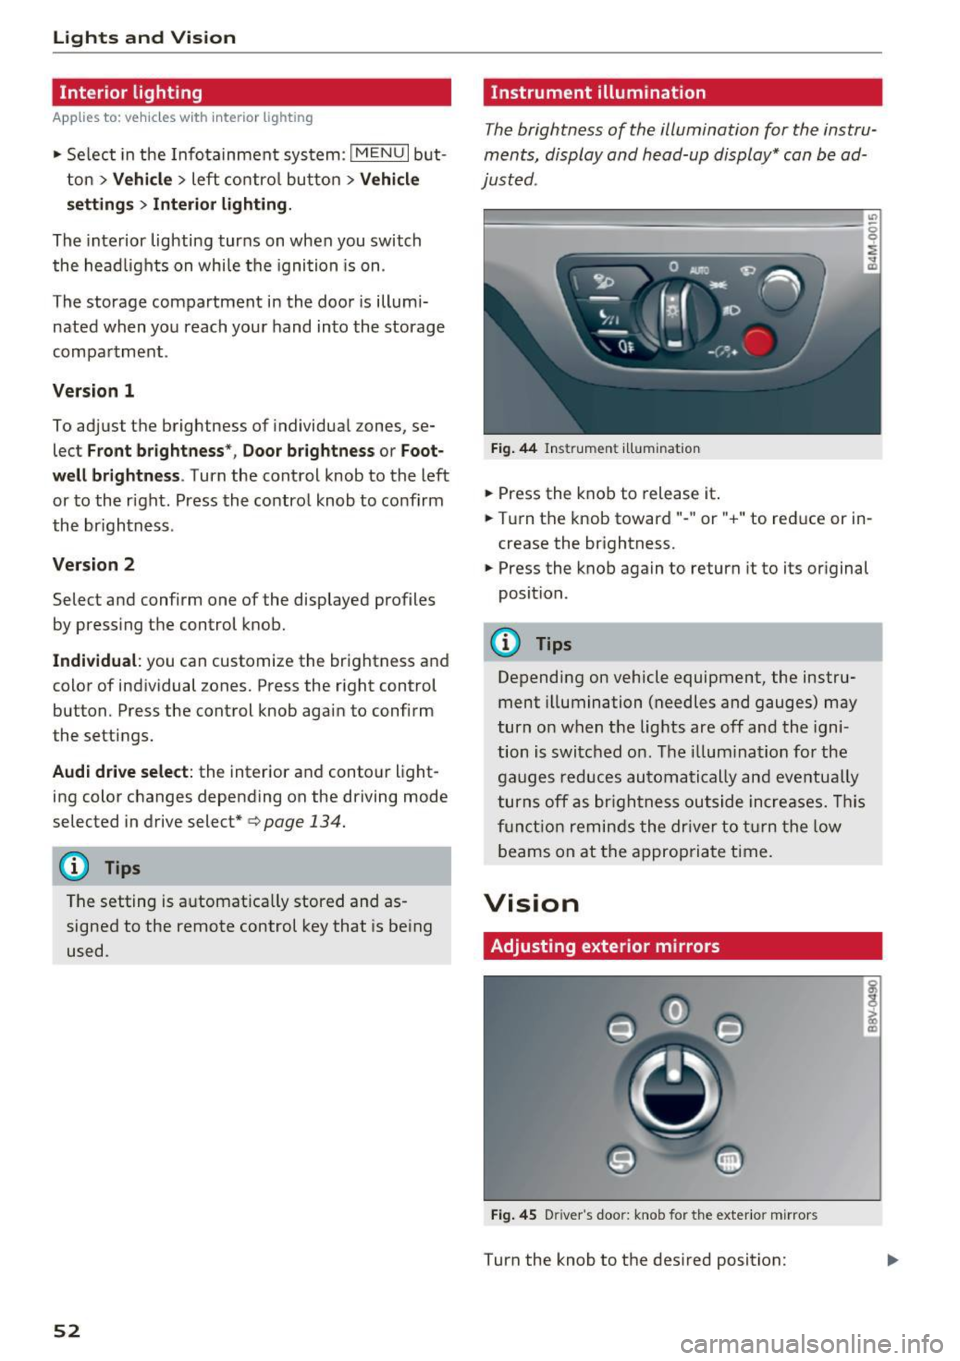
52
Instrument illumination
The brightness of the illumination for the instru
ments, display and head-up display* can be ad
justed .
"' t==~====== =-===~=:::::::=====~ ~~
~
Fig. 44 Ins trumen t ill uminat ion
~ Press the knob to release it .
~ Turn the knob toward" -" or" +" to reduce or in
crease the br ightness.
~ Press the knob again to return it to its original
position.
(!) Tips
Depending on vehicle equipment, the instru
ment illumination (needles and gauges) may
turn on when t he lig hts are off and the igni
tion is switched o n. The i llum ination for the
gaug es reduces automatically and eve ntua lly
turn s off a s br igh tne ss ou tside incre ases. This
f u nct io n remin ds the dr ive r to tur n the low
b eams on at the a ppropriate t ime.
Vision
Adjusting exterior mirrors
Fi g. 4 5 D river 's doo r: knob for the exter io r mirrors
Turn the knob to the des ired position:
Page 56 of 402
Lights and Vision
-If electrolyte fluid enters the eyes, flush
them thoroughly with a large amount of
clean water for at least 15 minutes and then
seek medical attention .
- If electrolyte fluid comes into contact with
the skin, flush the affected area with clean
water for at least 15 minutes and then clean
with soap and water and seek medical at
tention. Clean affected clothing and shoes
thoroughly before wearing again .
- If the fluid was swallowed and the person is
conscious, flush the mouth with water for at
least 15 minutes. Do not induce vomiting
unless this is recommended by medical pro
fessionals. Seek medical attenti .on immedi
ately.
(D Note
If the glass on an automatic dimming mirror
breaks, electrolyte can leak out . This liquid
damages plastic surfaces and paint. Clean
this liquid as quickly as possible, for example
with a wet sponge .
@ Tips
-If the light reaching the rearview mirror is
obstructed, the automatic dimming mirror
will not function correctly,
- The automatic dimming mirrors do not dim
when the interior lighting is turned on or
the reverse gear is selected .
Sun visors
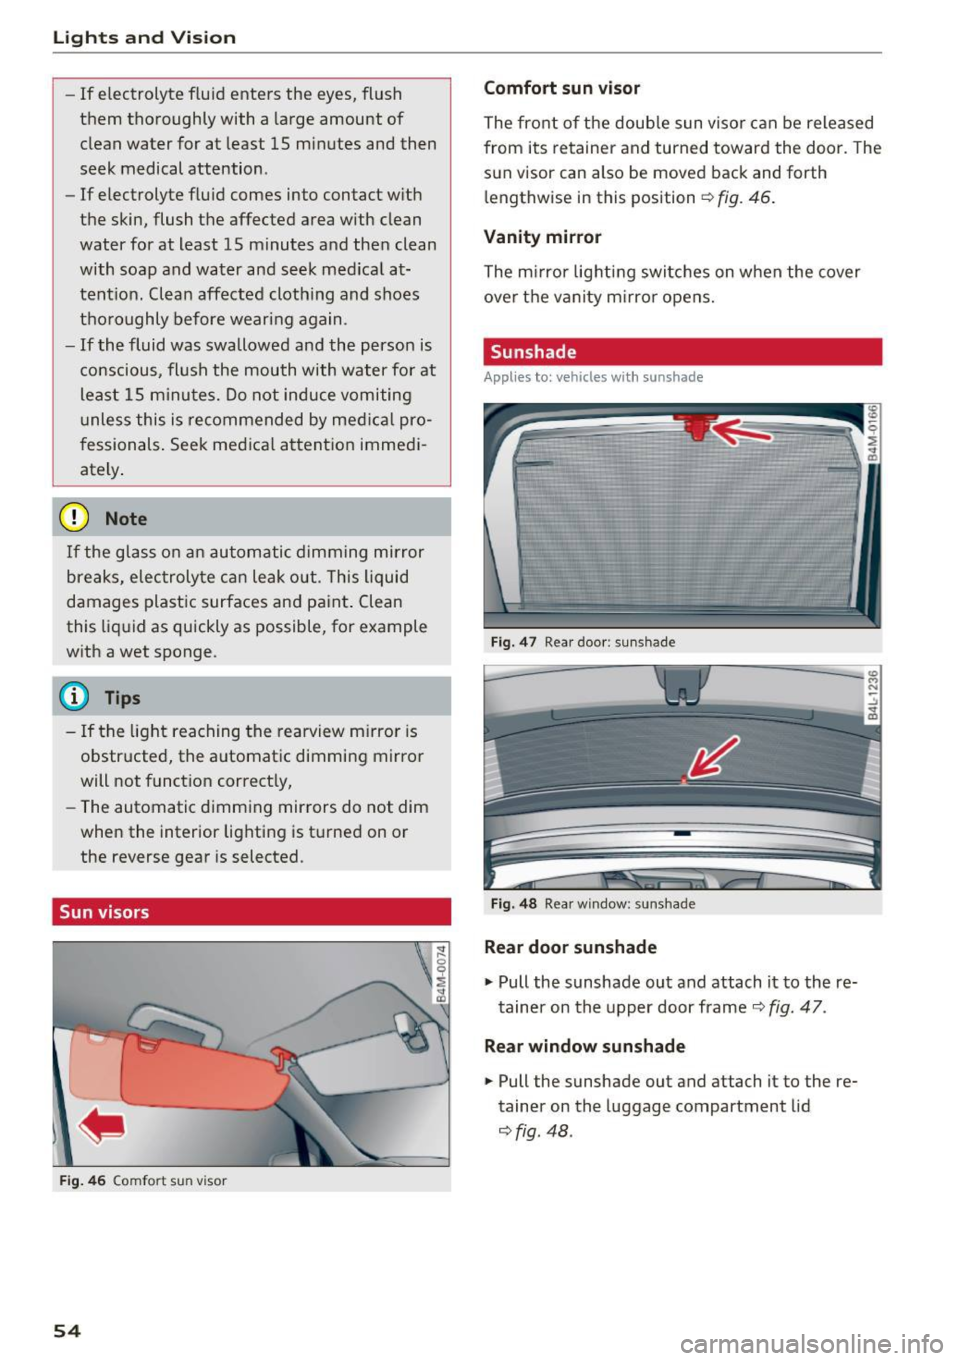
Fig. 46 Comfort sun visor
54
Comfort sun visor
The front of the double sun visor can be released
from its retainer and turned toward the door . The
sun visor can also be moved back and forth l e ngthwise in this position
Q fig . 46.
Vanity mirror
The mirror lighting switches on when the cover
over the vanity mirror opens.
Sunshade
Appl ies to: vehicles with sunshade
Fig. 47 Rear door : sun shade
Fig. 48 Rear window : sunshade
Rear door sunshade
"'Pull the sunshade out and attach it to the re
tainer on the upper door frame
Q fig. 47.
Rear window sunshade
"' Pull the sunshade out and attach it to the re
tainer on the luggage compartment lid
~fig. 48 .
Page 375 of 402
u (0 ...... N r--. N ...... 0
0
:E
The discharged battery must be properly con
nected to the vehicle's electrical system .
When jump starting or charg ing the battery,
never connect the negative ground cable to
the battery negative post because the battery
manager system must be able to detect the
battery's state of charge. Always connect the
negative ground cable to the negative ground
post of the battery manager control unit.
Using the jump start
cable
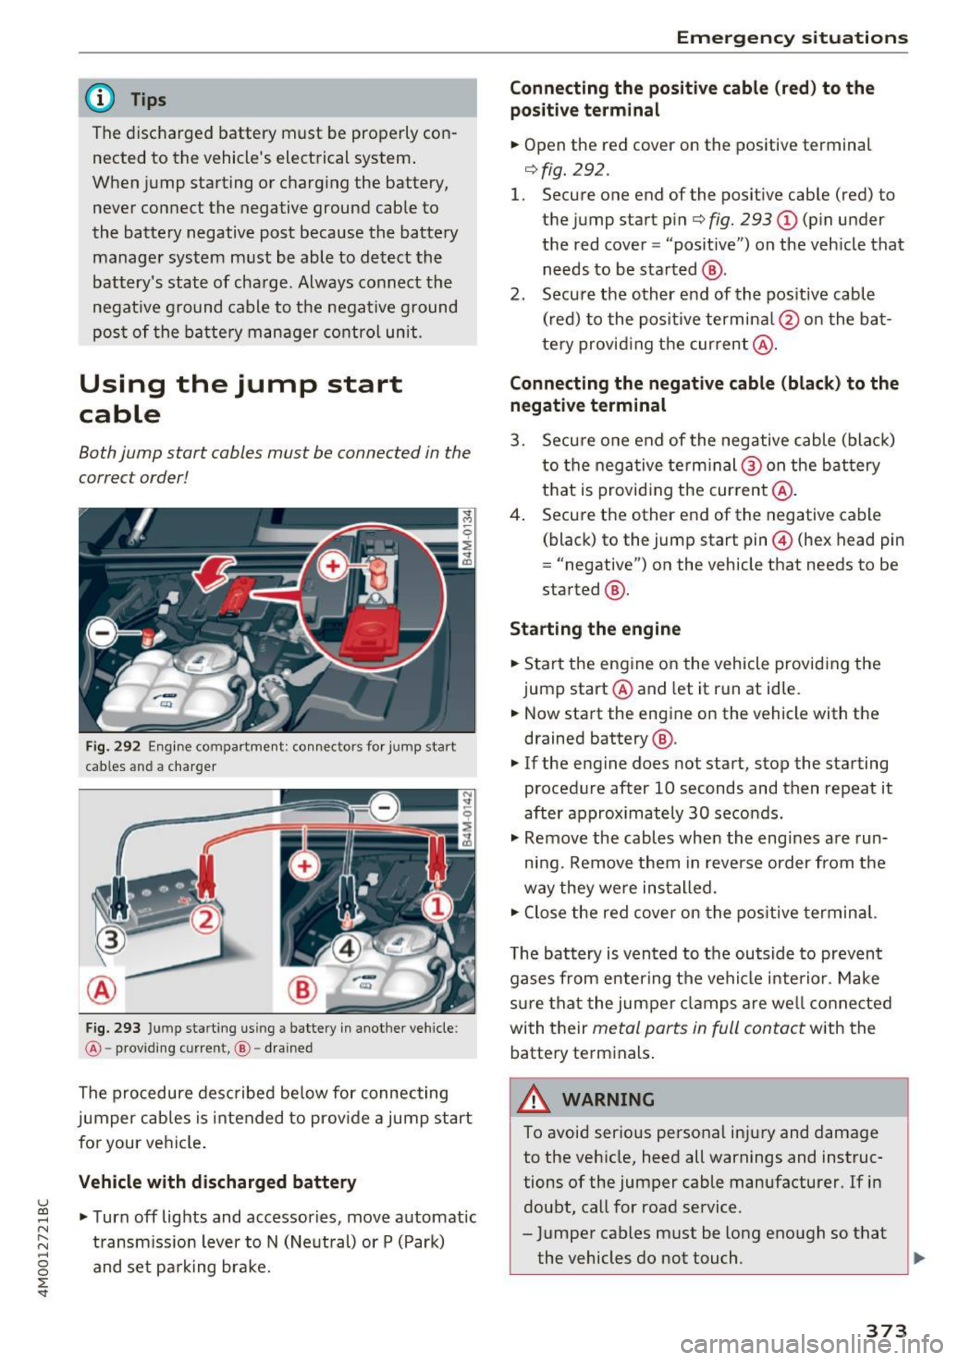
Both jump start cables must be connected in the
correct order!
Fig. 292 Engine compartment: connect ors for jump start
cables and a charger
Fig. 293 Ju mp starting us ing a battery in another vehicle:
@ -providing current, @-drained
The procedure described below for connecting
jumper cables is intended to prov ide a jump start
for your vehicle .
Vehicle with discharged battery
•Turnoff lights and accessories, move automatic
transmission lever to N (Neutral) or P (Park)
and set parking brake.
Emergency situations
Connecting the positive cable (red) to the
positive terminal
• Open the red cover on the positive terminal
r=>fig. 292 .
1. Secure one end of the positive cable (red) to
the jump start pin
r=> fig. 293 (D (pin under
the red cover = "posit ive") on the vehicle that
needs to be started @.
2. Secure the other end of the positive cable
(red) to the positive termina l@ on the bat
tery provid ing the current @.
Connecting the negative cable (black) to the
negative terminal
3. Secure one end of the negative cable (black)
to the nega tive term inal @ on the battery
that is providing the current @.
4. Secure the other end of the negative cable
(black) to the jump start pin@ (hex head pin
= "negative") on the vehicle that needs to be
started @.
Starting the engine
• Start the engine on the vehicle providing the
jump start @and let it run at idle.
• Now start the engine on the vehicle with the
drained battery @.
• If the engine does not start, stop the starting
procedure after 10 seconds and then repeat it
after approx imately 30 seconds.
• Remove the cables when the engines are run
ning. Remove them in reverse order from the
way they were installed.
• Close the red cover on the positive terminal.
T he battery is vented to the outside to prevent
gases from enter ing the vehicle interior . Make
sure that the jumper clamps are well connected
with their
metal parts in full contact with the
battery terminals.
_& WARNING
-To avoid serious personal injury and damage to the vehicle, heed all warnings and instruc
tions of the jumper cable manufacturer. If in
doubt, call for road service.
- Jumper cables must be long enough so that
the vehicles do not touch . ..,_
373
Page 392 of 402
Index
Gasoline 314
Gasoline additives . . . . . . . . . . . . . . . . . . . 3 15
Octane rating . . . . . . . . . . . . . . . . . . . . . . . 3 14
Recommendation ............. .... ... 314
Saving fue l . . . . . . . . . . . . . . . . . . . . . . 79, 134
Fue ling
F ue l gauge . . . . . . . . . . . . . . . . . . . . . . . . . .
12
Fue l tank capac ity . . . . . . . . . . . . . . . . . . . 379
Opening the fuel fille r door..... .. .. ... 316
Fuses
Assignment . . . . . . . . . . . . . . . . . . . . . . . .
36 8
Replacing . . . . . . . . . . . . . . . . . . . . . . . . . . 367
G
Garage doo r opener
refer to Home link . . . . . . . . . . . . . . . . . . . . 4 6
Garment hoo ks . . . . . . . . . . . . . . . . . . . . . . . . 67
Gas discharge lamps................ ... 371
Gloss ary of tire and lo ad in g te rmi nology . . 335
Glove compartment . . . . . . . . . . . . . . . . . . . . 67
Gross Vehicle Weight Rating (GVWR) . . . . . 379
Groun d clearan ce . . . . . . . . . . . . . . . . . . . . . . 89
H
H andsfree . . . . . . . . . . . . . . . . . . . . . . . . . . . 176
Head -up display . . . . . . . . . . . . . . . . . . . . . . . 20
H eadlight ra nge control system . . . . . . . . . . 4 8
H eadlights . . . . . . . . . . . . . . . . . . . . . . . . . . . 48
Clea ning . . . . . . . . . . . . . . . . . . . . . . . . . . . 355
H eadlig ht ra nge contro l system . . . . . . . . . 4 8
Was her system . . . . . . . . . . . . . . . . . . . . . . 55
Head restra ints . . . . . . . . . . . . . . . . . . . . 63, 259
Ad justing . . . . . . . . . . . . . . . . . . . . . . . . . . 259
Heating . . . . . . . . . . . . . . . . . . . . . . . . . . . . . . 7 1
H eavy clothing and safety belts . . . . . . . . . . 268
H igh beams . . . . . . . . . . . . . . . . . . . . . . . . . . . 49
Assistant . . . . . . . . . . . . . . . . . . . . . . . . . . . . 49
H ill descent ass ist . . . . . . . . . . . . . . . . . . . . . 150
Hi ll descent contro l . . . . . . . . . . . . . . . . . . . . 94
Hill hold ass ist . . . . . . . . . . . . . . . . . . . . . . . . 88
also refer to Hill hold ass ist . . . . . . . . . . . . 88
H ome address . ... .. .. ...... ... .. . 207, 2 13
H omelink . . . . . . . . . . . . . . . . . . . . . . . . . . . . 46
Horn . . . . . . . . . . . . . . . . . . . . . . . . . . . . . . . . . 8
390
How are chi ld restraint system anchors relat -
ed to c hild safety . . . . . . . . . . . . . . . . . . . . .
309
How many a irbags does my vehicle have? . . 2 80
How safety belt pretensioners work . . . . . . 271
I
Imbalance (whee ls) . . . . . . . . . . . . . . . . . . . 341
Immobili ze r . . . . . . . . . . . . . . . . . . . . . . . . . . 35
Impo rtant things to do before driv ing . . . . 256
Impo rting and expo rting (contacts) . . . . . . 18 6
Imprope rly wo rn safety belts . . . . . . . . . . . 271
Incline angle . . . . . . . . . . . . . . . . . . . . . . . . . . 89
In di cator lig hts . . . . . . . . . . . . . . . . . . . . . . . . 22
Airbag system . . . . . . . . . . . . . . . . . . . . . . 28 5
PASSENGER A IR BAG . . . . . . . . . . . . . . . . . 285
Infan t seats . . . . . . . . . . . . . . . . . . . . . . . . . 301
Input
Using the M MI touch . . . . . . . . . . . . . . . . .
160
U sing the speller . . . . . . . . . . . . . . . . . . . . 164
Inp ut level (media) . . . . . . . . . . . . . . . . . . . . 240
Inspection interva l . . . . . . . . . . . . . . . . . . . . 332
Installing the upper tether strap on the an
ch orage . . . . . . . . . . . . . . . . . . . . . . . . . . . . . 312
I nstr ument cluster . . . . . . . . . . . . . . . . . . . . .
10
Cleaning . . . . . . . . . . . . . . . . . . . . . . . . . . . 356
Messages . . . . . . . . . . . . . . . . . . . . . . . . . . . 22
Instr ument illumin ation . . . . . . . . . . . . . . . . 52
Interior lighting . . . . . . . . . . . . . . . . . . . . 51, 52
Internet
refer to Aud i connect (Infotainment) . . . . 189
Interne t radio . . . . . . . . . . . . . . . . . . . . . . . . 2 33
Interval mode (wipers) . . . . . . . . . . . . . . . . . . 55
iPhone
refer to Audi m usic interface . . . . . . . 234, 235
J
Jukebox 230
Jump-start ing .. ... .. .. ... ..... ..... .. 372
Jump start cable 373
K
Key ..... ... .. .. .. .. .. .. . ... .... ... .. . 35
Key not recognized . . . . . . . . . . . . . . . . . . . 84
Key replacement . . . . . . . . . . . . . . . . . . . . . 35
Mechan ica l key . . . . . . . . . . . . . . . . . . . . 35, 36
Page 393 of 402
Replacing the battery . . . . . . . . . . . . . . . . . 36
Unlocking/ locking . . . . . . . . . . . . . . . . . 37, 39
Veh icle code . . . . . . . . . . . . . . . . . . . . . . . . . 35
Kick-down (automatic transmission) . . . . . . . 95
L
Lane assist
refer to Audi act ive lane assist . . . . . . . . . 123
LATCH . . . . . . . . . . . . . . . . . . . . . . . . . . . . . . 309
Description ........ ....... ...... ... . 310
Installing a child restraint ......... ... . 311
Location . . . . . . . . . . . . . . . . . . . . . . . . . . . 310
Mounting and releasing the anchorage
hook . . . . . . . . . . . . . . . . . . . . . . . . . . . . . . 311
Leather care/clean ing . . . . . . . . . . . . . . . . . 357
Left contro l button . . . . . . . . . . . . . . . . . . . . . 13
License agreement (MMI) . . . . . . . . . . . . . . 254
Lifting points (vehicle jack) . . . . . . . . . . . . . 363
Light/rain sensor Headlights . . . . . . . . . . . . . . . . . . . . . . . . . . 48
Interva l mode (wipers) . . . . . . . . . . . . . . . . 55
Light functions . . . . . . . . . . . . . . . . . . . . . . . . 48
H igh beam assistant . . . . . . . . . . . . . . . . . . 49
I nstrument illumination . . . . . . . . . . . . . . . 52
Interior lighting . . . . . . . . . . . . . . . . . . . . . . 51
Lighting Exterior . . . . . . . . . . . . . . . . . . . . . . . . . . . . . 48
I nterior . . . . . . . . . . . . . . . . . . . . . . . . . . . . . 51
Lights Headlight range control system . . . . . . . . . 48
Listening to music
refer to Media .. ............. .. . 228, 237
L oading the luggage compartment . . . . . . . 261
Locking/unlocking By remote control . . . . . . . . . . . . . . . . . . . . 3 7
W ith the central locking switch . . . . . . . . . 38
W ith the convenience key . . . . . . . . . . . . . . 37
W ith the lock cylinder . . . . . . . . . . . . . . . . . 39
Low beam headlights . . . . . . . . . . . . . . . . . . . 48
Lowering the rear of the vehicle . . . . . . . . . 13 7
L uggage compartment. . . . . . . . . . . . . . . . . . 67
Cover.. .. .. .. .. ........... .. .. .. .... 68
Socket. .. .. .. ............... .. ...... 66
u ~ Storing cargo correctly . . . . . . . . . . . . . . . 261
N r-... N .... 0
0
:E: '
Tie-downs . . . . . . . . . . . . . . . . . . . . . . . . . . . 69
also refer to Loading the luggage compart-
ment...... ... .. .. ................. 261
Luggage compartment lid . . . . . . . . . . . . . . . 40
Emergency release . . . . . . . . . . . . . . . . . . . . 43
Lumbar support . . . . . . . . . . . . . . . . . . . . . . . 59
M
Maintenance . . . . . . . . . . . . . . . . . . . . . . . . . 381
Maintenance intervals . . . . . . . . . . . . . . . . . 332
Making an emergency call . . . . . . . . . . . . . . 181
Malfunction indicator lamp (MIL) . . . . . . . . . 21
Map Changing the scale . . . . . . . . . . . . . . . . . . . 207
Display . . . . . . . . . . . . . . . . . . . . . . . . . . . . 220
Operating . . . . . . . . . . . . . . . . . . . . . . . . . . 215
Settings . . . . . . . . . . . . . . . . . . . . . . . . . . . 216
Setting the destination . . . . . . . . . . . . . . . 207
Update ....... ................... .. 205
Map update . . . . . . . . . . . . . . . . . . . . . . . . . . 218
Mechanica l key . . . . . . . . . . . . . . . . . . . . . 35, 36
Media ..... .... ................. 228, 237
Drives . . . . . . . . . . . . . . . . . . . . . . . . . . . . . 229
Supported formats . . . . . . . . . . . . . . . . . . 243
Media center . . . . . . . . . . . . . . . . . . . . . . . . . 238
Memory buttons
refer to Shortcut keys . . . . . . . . . . . . 156, 163
Memory capacity Directory . . . . . . . . . . . . . . . . . . . . . . . . . . . 186
Jukebox . . . . . . . . . . . . . . . . . . . . . . . . . . . . 230
Memory card SD card reader (MMI) . . . . . . . . . . . . . . . . . 229 Supported types/formats . . . . . . . . . . . . . 243
Memory funct ion . . . . . . . . . . . . . . . . . . . . . . 64
MENU button . . . . . . . . . . . . . . . . . . . . . . . . 156
Menu language
refer to Setting the language . . . . . . . . . . 249
Menus/symbols . . . . . . . . . . . . . . . . . . . . . . 166
Messages . . . . . . . . . . . . . . . . . . . . . . . . . . . 181
Mirrors Adjusting exterior mirrors . . . . . . . . . . . . . . 52
Compass.. .... ..................... . 57
Dimming .. .. .. .. .. ...... ....... .. .. . 53
Vanity mirror . . . . . . . . . . . . . . . . . . . . . . . . 54
MMI
refer to Multi Media Interface . . . . . . . . . . 156
391