window AUDI Q7 2017 Owner´s Manual
[x] Cancel search | Manufacturer: AUDI, Model Year: 2017, Model line: Q7, Model: AUDI Q7 2017Pages: 402, PDF Size: 100.39 MB
Page 4 of 402
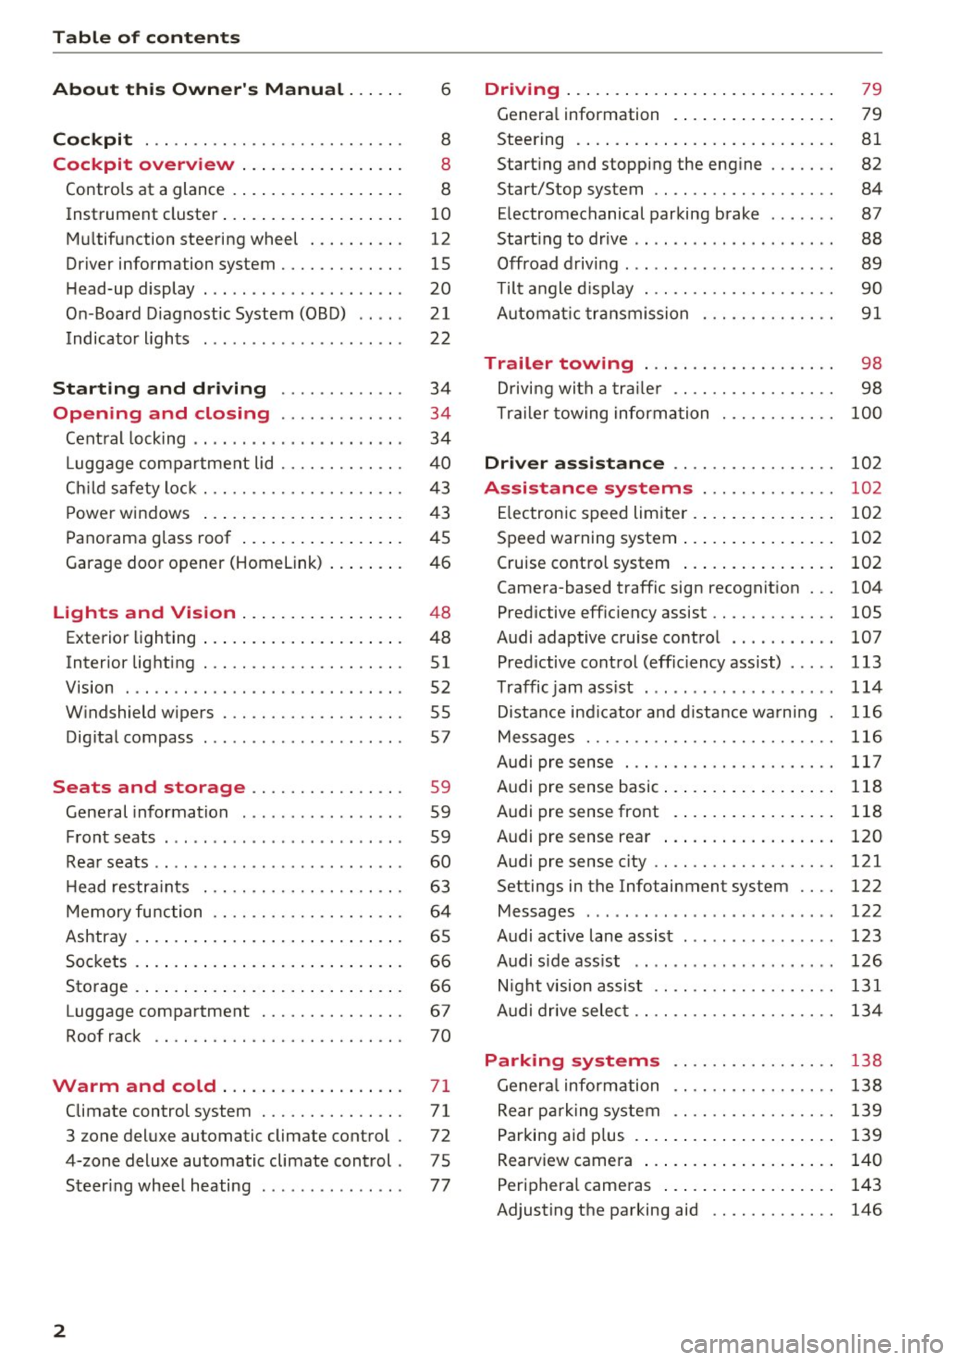
Table of contents
About this Owner's Manual ... .. .
Cockpit ... .. ............... .... .. .
Cockpit overview ................ .
Controls at a glance ... .......... .. .. .
Instrument cluster .. .......... .. .. .. .
Multifunction steering wheel ... .. .. .. .
Driver information system ............ .
H ead-up display .... .. ..... ... .. .... .
On -Board Diagnostic System (OBD) .. .. .
Indicato r lights . ................ ... .
Starting and driving ......... ... .
6
8
8
8
10
12
15
20
21
22
34
Opening and closing . . . . . . . . . . . . . 34
Central lock ing . . . . . . . . . . . . . . . . . . . . . . 34
L uggage compartment lid . . . . . . . . . . . . . 40
Ch ild safety lock . . . . . . . . . . . . . . . . . . . . . 43
Power windows . . . . . . . . . . . . . . . . . . . . . 43
Panorama glass roof . . . . . . . . . . . . . . . . . 45
Garage door opener (Homelink) . . . . . . . . 46
Lights and Vision . . . . . . . . . . . . . . . . . 48
Exterior lighting . . . . . . . . . . . . . . . . . . . . . 48
Interior lighting . . . . . . . . . . . . . . . . . . . . . 51
V1s1on . . . . . . . . . . . . . . . . . . . . . . . . . . . . . 52
Windshield wipers . . . . . . . . . . . . . . . . . . . 55
Dig ital compass . . . . . . . . . . . . . . . . . . . . . 57
Seats and storage . . . . . . . . . . . . . . . . 59
General information . . . . . . . . . . . . . . . . . 59
Front seats . . . . . . . . . . . . . . . . . . . . . . . . . 59
Rear seats . . . . . . . . . . . . . . . . . . . . . . . . . . 60
H ead restraints . . . . . . . . . . . . . . . . . . . . . 63
M emory function . . . . . . . . . . . . . . . . . . . . 64
Ashtray . . . . . . . . . . . . . . . . . . . . . . . . . . . . 65
Sockets . . . . . . . . . . . . . . . . . . . . . . . . . . . . 66
Sto rage . . . . . . . . . . . . . . . . . . . . . . . . . . . . 66
Luggage compartment . . . . . . . . . . . . . . . 67
Roof rack . . . . . . . . . . . . . . . . . . . . . . . . . . 70
Warm and cold .. .......... .. .. .. . 71
Climate control system . . . . . . . . . . . . . . . 71
3 zone deluxe automatic climate control . 72
4-zone deluxe automatic climate control . 7 5
Steer ing wheel heating . . . . . . . . . . . . . . . 77
2
Driving ..... .. .. .. .. ... .......... . .
General information . ... ........... . .
Steering .......... .. .. . .......... . .
Start ing and stopping the eng ine ..... . .
Start/Stop system .. .. ............. . .
E le ctromechanical parking brake ...... .
Start ing to drive .. .. .. ........ ..... . .
Offroad driving ... ... ...... ....... .. .
T ilt angle display . .. .. ... .......... . .
Automat ic transmission
Trailer towing ... .. ............. . .
Driving with a trail er .. .. ........... . .
T railer towing information
79
79
81
82
84
87
88
89
90
91
98
98
100
Driver assistance . . . . . . . . . . . . . . . . . 102
Assistance systems . . . . . . . . . . . . . . 102
Electronic speed limiter . . . . . . . . . . . . . . . 102
Speed warning system . . . . . . . . . . . . . . . . 102
Cruise control system . . . . . . . . . . . . . . . . 102
Camera-based traffic sign recognit ion . . . 104
Pred ictive efficiency assist. . . . . . . . . . . . . 105
Audi adaptive cruise contro l . . . . . . . . . . . 107
Pred ictive control (eff ic ie ncy assist) . . . . . 113
Traffic jam assist . . . . . . . . . . . . . . . . . . . . 114
Distance indicat or and distance warnin g 116
Messages . . . . . . . . . . . . . . . . . . . . . . . . . . 116
Audi pre sense . . . . . . . . . . . . . . . . . . . . . . 117
Audi pre sense basic . . . . . . . . . . . . . . . . . . 118
Audi pre sense front . . . . . . . . . . . . . . . . . 118
Audi pre sense rea r . . . . . . . . . . . . . . . . . . 120
Audi pre sense city . . . . . . . . . . . . . . . . . . . 121
Settings in the Infotainment system . . . . 122
Messages . . . . . . . . . . . . . . . . . . . . . . . . . . 122
Audi active lane assist . . . . . . . . . . . . . . . . 123
Audi s ide assist . . . . . . . . . . . . . . . . . . . . . 126
Night vision assist . . . . . . . . . . . . . . . . . . . 131
Audi drive select . . . . . . . . . . . . . . . . . . . . . 134
Parking systems 138
General information . . . . . . . . . . . . . . . . . 138
Rear parking system . . . . . . . . . . . . . . . . . 139
Parking aid plus . . . . . . . . . . . . . . . . . . . . . 139
Rearview camera . . . . . . . . . . . . . . . . . . . . 140
Periphera l cameras . . . . . . . . . . . . . . . . . . 143
Adjusting the parking aid . . . . . . . . . . . . . 146
Page 11 of 402
u co ...... N r-... N ...... 0
0
:E: '
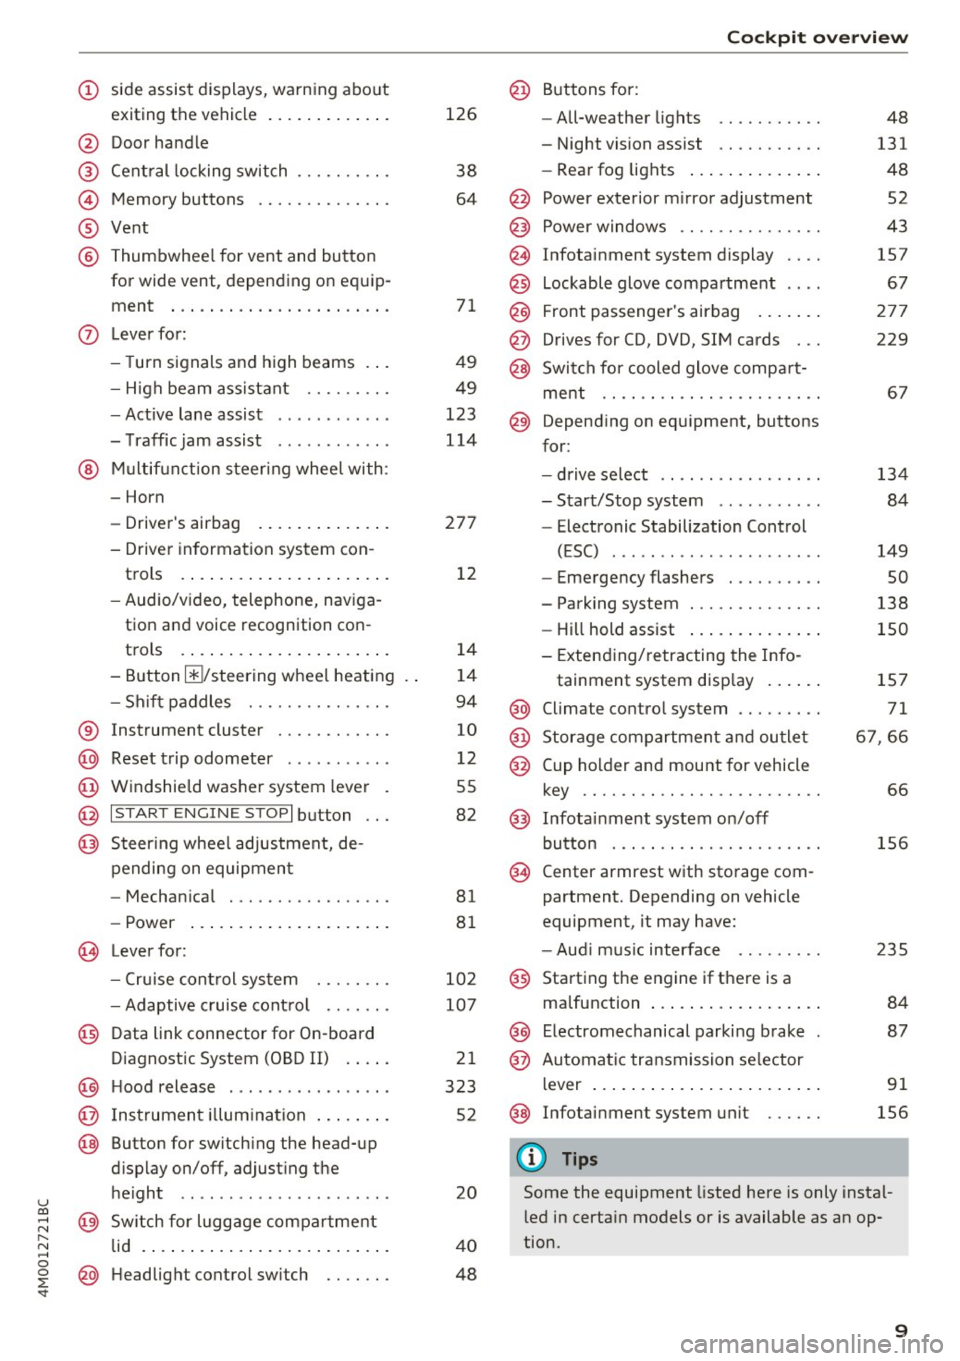
exiting the vehicle ..... ... .. .. .
@ Door handle
@ Cent ral locking switch ....... .. .
@ Memory buttons ........... .. .
® Vent
® Thumbwhee l for vent and button
for wide vent, depending on equip-
ment ... .. .... .. .... ... ... . .
0 Lever for:
- T urn s ignals and high beams . . .
- High beam assistant .... .. .. .
- Active lane assist ........... .
- T raffic jam assist ........... .
@ Mu lt if unction steer ing whee l with:
- Horn
- Drive r's airbag . ..... ... .. .. .
- Drive r informat ion system con -
trols . ... .... .. .... ... .. .. .
- Audio/v ideo, telephone, nav iga
tion and voice recognition con -
t rols .. .. ... .. ..... ... .. .. .
- Button @/steering wheel heating
- Sh if t paddles .......... .. .. .
® Instrument cluster ........... .
@ Reset t rip odometer ...... .. .. .
@ W indshield washe r system lever
@ I STAR T ENGINE ST OPI button .. .
@ Steer ing whee l adjustment, de -
pending on equipmen t
- Mechan ica l .............. .. .
- Power .... .. .. ..... ... .. .. .
@ Leverfo r:
- C ruise cont rol sys tem
- Adaptive cruise cont rol ...... .
@ Data link connector for On-board
Diagnostic System (OBD II) . ... .
@ H ood release .... . .... .... ... .
@ Ins trumen t illum ination ... .. .. .
@ Button for switch ing the head-up
d isplay on/off, adjust ing the
height .. .. ........ ..... .. .. .
@ Sw itch for lugg age compa rtment
lid . ... .. .. .. .. .. .... ... .. .. .
@ H eadlight control sw itch .... .. .
126
38
64
7 1
49
49
123
114
27 7
1 2
14
1 4
94
10
12
55
82
81
8 1
10 2
107
2 1
323
52
20
4 0
48
Coc kpit o ve rv iew
@ Buttons fo r:
- All-weather lights
- Night vision assist .......... .
- Rea r fog lights ..... . ..... .. .
@ Power exte rior m irror adjustment
@ Power windows .............. .
@ Infotainment system display
@ Lockable glove compa rtme nt
@) Front passenger 's airbag .... .. .
@ Drives for CD, DVD, SI M cards .. .
@ Swi tch for cooled glove compa rt-
me nt ...... ................ .
@ Depend ing on equ ipment, buttons
for :
- drive select ................ .
- Sta rt/Stop system ... ..... .. .
- Electronic Stabilization Control
(ESC) . .. .. .. .. ... ....... .. -
- Emergency flashers ......... .
- Parking system ............. .
- Hill hold ass ist .. .. .. ..... .. .
- Extend ing/retracting the Info-
tainment system disp lay ... .. .
@ Climate contro l system .... ... . .
@) Storage compartment and outlet
@ Cup holder and mount for vehicle
key .... .... .. .. ............ .
@ Infotai nment system on/off
button . .. .. . ............... .
@ Center armrest w ith sto rage com
partment. Depending on vehicle
equipment, it may have:
- Aud i m usic interface ........ .
@ Starting the engine if the re is a
malfunction ... .. ... .. ..... .. .
@ E lectromechanical parking brake
@ Automa tic tr ansmission se lector
lever ... .. .. .. ... .. .. ..... .. .
@ Infotainment system unit
(D Tips
48
131
48
52
43
157
67
27 7
229
6 7
134 84
149
so
138
150
1S7
71
6 7,66
66
156
2 35
84
87
91
156
Some the equipment listed here is only instal
l ed in certa in models or is available as an op
tion.
9
Page 38 of 402
Opening and clo sin g
remain in the vehicle. Otherw ise the children
cou ld start the engine or operate electrical
equipment such as power windows.
@ Tips
- The operation of the remote contro l key can
be temporarily disrupted by interfe rence
from transmitters near the vehicle working i n the same frequency range (such as a cell
phone or radio equipment) . A lways check i f
your vehicle is locked!
- For an explanation on conformity with the
FCC regulations in the United States and the
Industry Canada regulations, see
¢ page 384 .
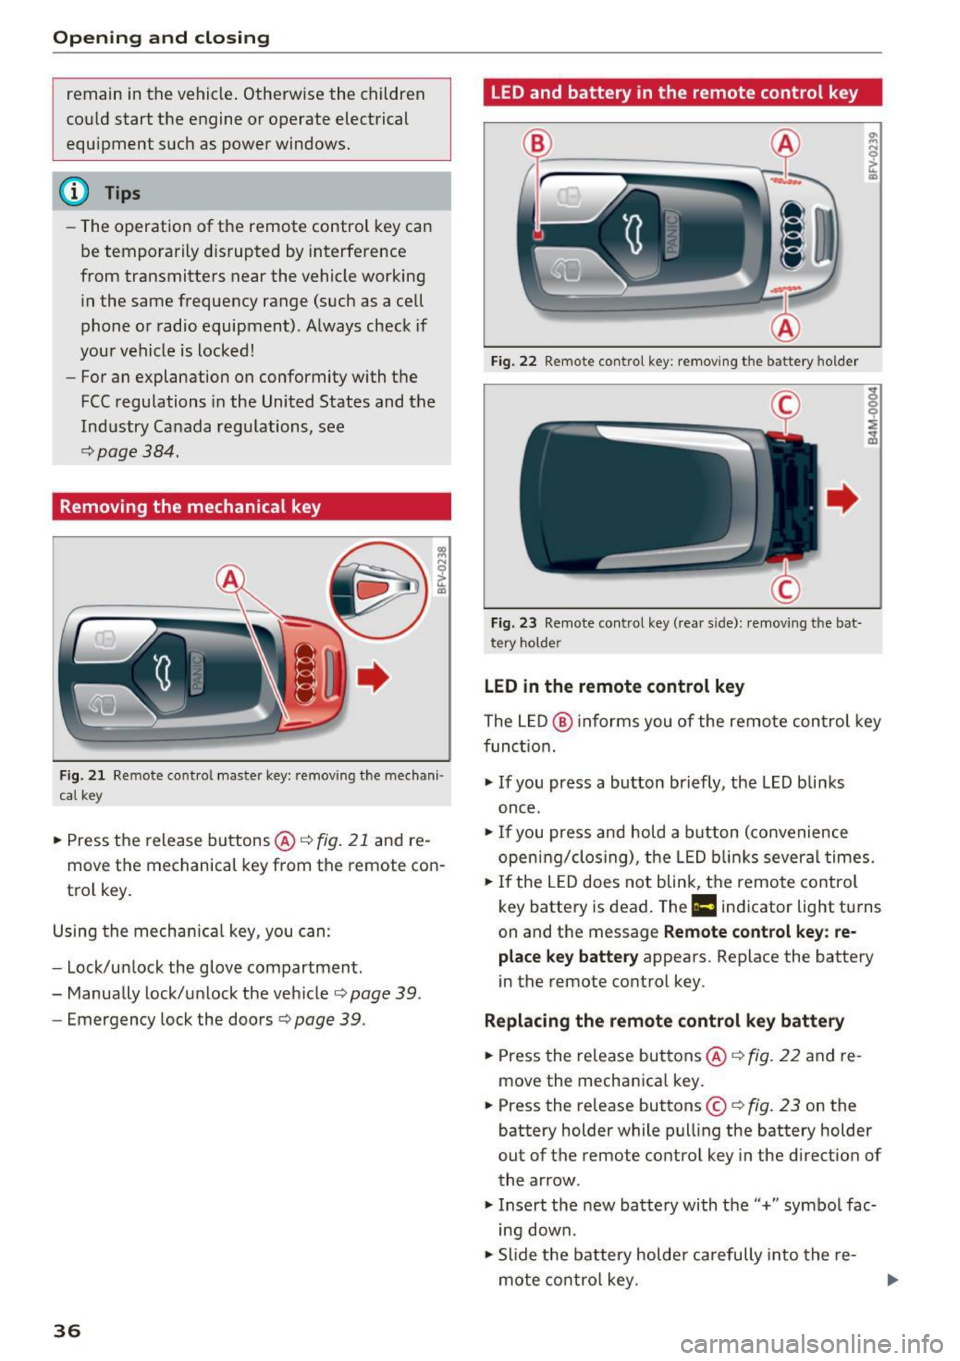
Removing the mechanical key
Fig. 2 1 Remote cont ro l ma ster key: remov ing t he mec han i·
cal ke y
.. Press the release buttons@¢ fig. 21 and re
move the mechanical key from the remote con
trol key .
Using the mecha nica l key , you can:
- Lock/un lock the glove compartment.
- Manually lock/u nlock the veh icle
c::;, page 39.
- Emergency lock the doors c::;, page 39 .
36
LED and battery in the remote control key
Fig. 22 Remote con tro l key : remo ving t he ba tte ry h olde r
Fig. 23 Remo te control key (rea r sid e): remov ing t he b at·
t ery ho lde r
LED in the remote control key
The L ED @ informs you of the remote con trol key
func tion.
"' If you press a bu tton briefly, the LED blinks
once .
"'If you press and hold a b utton (co nvenience
open ing/clos ing), the LED b links several times.
"' If the LED does not blink, the remote contro l
key battery is dead. The
Ill indicator light tu rns
on and the message
Remote control key : re
place key battery
appears. Replace the battery
i n the remote control key.
Replacing the remote control k ey batte ry
"'Press the release buttons @¢ fig. 22 and re
move the mechan ica l key.
"' Press the release buttons ©
c::;, fig. 23 on the
battery holder while pull ing the battery holder
out of the remote control key in the direction of
the arrow .
"' Insert the new battery with the'' +" symbo l fac·
ing down.
"' Slide the battery holde r carefully into the re·
mote co ntro l key .
Page 39 of 402
u (0 ...... N r--. N ...... 0
0
:E
@J For the sake of the environment
Discharged batteries must be disposed of us
ing methods that will not harm the environ
ment . Do not dispose of them in household
trash .
(D Tips
The replacement battery must meet the same
specifications as the original battery in the re
mote control key.
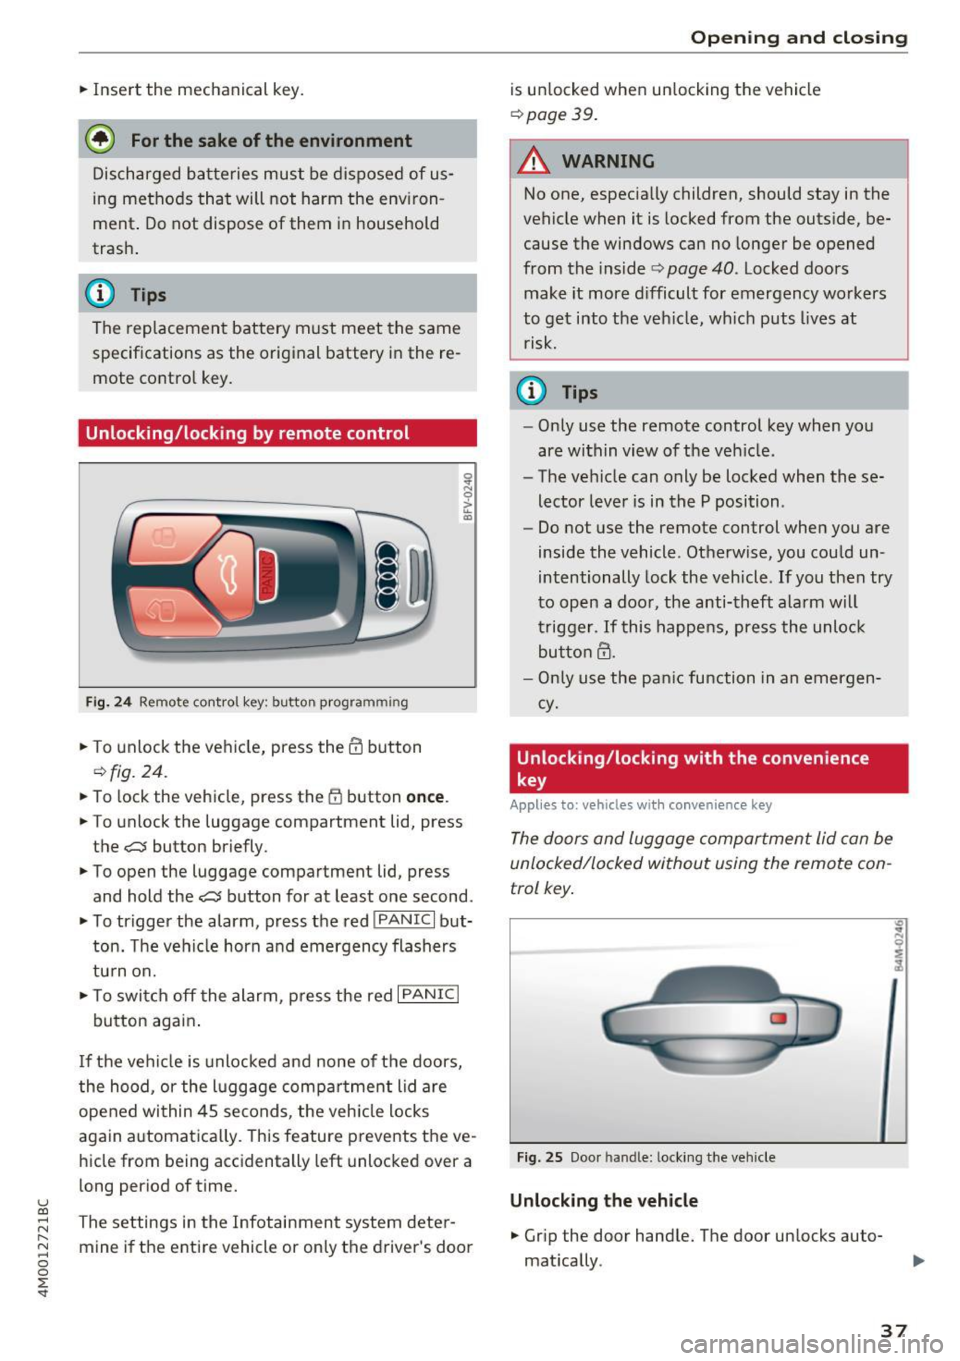
Unlocking/locking by remote control
Fig . 24 Remote control key : button programm ing
.. To unlock the vehicle, press the@ button
¢fig. 24.
.. To lock the vehicle, press the {fJ button once.
.. To unlo ck the luggage compartment lid, press
the
c::::J button briefly .
.. To open the luggage compartment lid, press
and hold the
C:$ button for at least one second .
.. To trigger the alarm, press the red
I PANIC I but
ton. The vehicle horn and emergency flashers
turn on .
.. To switch off the alarm, press the red
I PANIC I
button again .
If the vehicle is unlocked and none of the doors,
the hood, or the luggage compa rtment lid are
opened within 45 seconds, the veh icle locks
again automatically. This feature prevents the ve
hicle from being accidentally left unlocked over a
long period of time.
The settings in the Infotainment system deter
mine if the entire vehicle or only the driver's door
Open ing and closing
is un locked when unlocking the vehicle
¢ page 39.
.&_ WARNING
-No one, especially children, should stay in the
vehicle when it is locked from the outside, be
cause the windows can no longer be opened
from the inside ¢
page 40. Locked doors
make it more difficult for emergency workers
to get into the veh icle, wh ich puts lives at
r isk.
@ Tips
- Only use the remote control key when you
are within view of the veh icle.
- The vehicle can only be locked when these
lector lever is in the P position .
- Do not use the remote control when you are
inside the vehicle . Otherwise, you could un
intentionally lock the vehicle . If you then try
to open a door, the anti-theft alarm will
trigger. If this happens, press the unloc k
button@.
- Only use the panic function in an emergen
cy .
Unlocking/locking with the convenience
key
App lies to: vehicles with convenience key
The doors and luggage compartment lid can be
unlocked/locked without using the remote con
trol key .
Fig. 25 Door handle: locking the vehicle
Unlocking the vehicle
.. Gr ip the door hand le. The door un locks auto
mat ically .
37
Page 45 of 402
u (0 ...... N r--. N ...... 0
0
:E
release
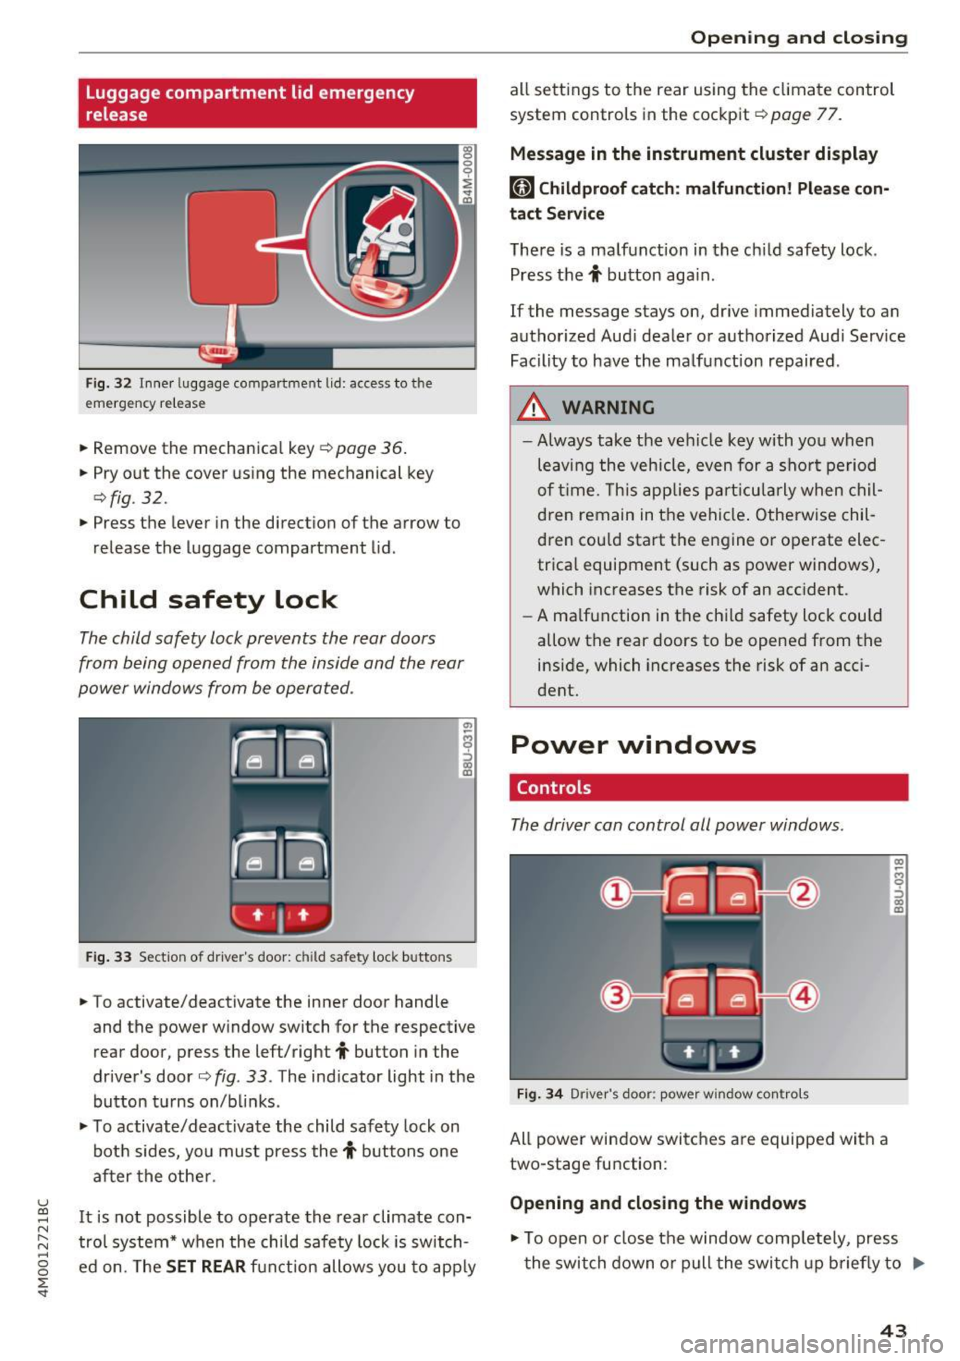
Fig . 32 Inner luggage co mpartme nt lid : access to the
emerge ncy re le ase
• Remove the mechanica l key ~ page 36 .
• Pry o ut the cover us ing the mechanical key
¢ fig . 32 .
• Press the lever in the direct io n of the arrow to
release the luggage compartment lid .
Child safety lock
The child safety lock prevents the rear doors
from being opened from the inside and the rear
power windows from be operated .
Fig. 33 Sect io n of dr ive r's door : chil d sa fety lock b utto ns
• To activate/deactivate the inner door handle
and the power w indow switch for the respective
rear door , press the left/right
t button in the
driver 's door ¢
fig. 33 . The ind icator light in the
bu tton turns on/b links .
• To activate/d eact ivate the child safety lock on
bot h sides, yo u must press the
t buttons one
a fter the othe r.
It is not possible to operate the rear climate con
tro l system* w hen the child safe ty lock is switch
e d on. The
SET REAR fu nction allows y ou to app ly
Open ing and closing
all sett ing s to the rear using the cl imate control
system controls in the cockpit ¢
page 77.
Message in the instrument cluster display
[81 Childproof catch : malfun ction! Please con·
tact Service
The re is a ma lfunction in the ch ild safety lock .
Press the
t button aga in .
If the message stays on, dr ive immediately to an
authorized Aud i dealer o r a uthorized Aud i Serv ice
Facility to have the ma lf u nction repaired .
A WARNING
=
-Always take the ve hicl e key with yo u when
leav ing the vehicle, even for a s hort pe riod
o f ti me. This applie s pa rtic ula rly w hen chil
dren remain in t he vehi cle. O therwise chil
d ren cou ld sta rt the en gine or operate elec
trica l equipment (such as power windows),
which increases the risk of an acc ident.
- A ma lf u nction in the ch ild safety loc k could
allow the rear doors to be opened from t he
inside, which increases the risk of an acci
dent.
Power windows
Controls
The driver can control all power windows.
F ig . 34 Dr iver 's doo r: pow er w indow co ntro ls
All power win dow switc hes are equipped wit h a
two-stage fu nction :
Opening and closing the windows
-
CX) ~ M 0
::'> CX) (D
• To open o r close the window comp letely, press
t he swi tch down or pull the swi tch up briefly to
IJi,,-
43
Page 46 of 402
Opening and closin g
the second level. The operation will stop if the
switch is pressed/pu lled again.
~ To se lect a position in between opened and
closed, press/pull the switch to the first leve l
until the desired window position is reached.
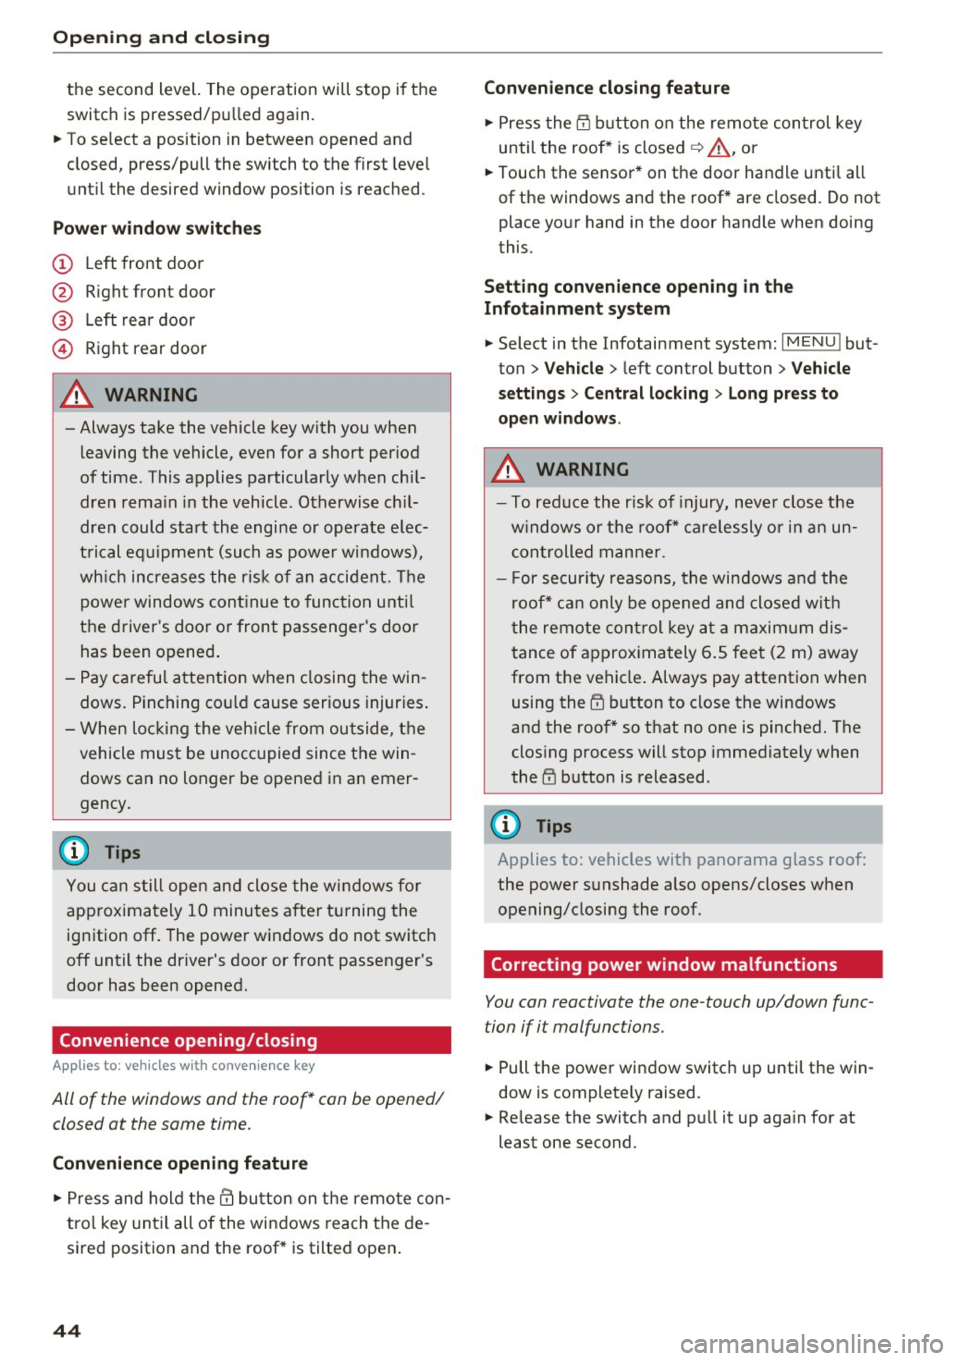
P owe r w ind ow sw itches
(D Left front door
@ Right front door
@ Left rear door
@ Right rear door
A WARNING
- Always take the vehicle key with you when
leaving the vehicle, even for a short period
of time. This applies particularly when chil
dren rema in in the vehicle . Otherwise ch il
dren could start the engi ne or operate e lec
trical equipment (such as power windows),
wh ich increases the r isk of an accident. The
power windows cont inue to function unti l
the driver's door or front passenger's door
has been opened.
-
- Pay careful attention when closing the win
dows. Pinching cou ld cause serious injuries .
- When loc king the vehicle from outside, the
vehicle must be unoccupied since the win
dows can no longer be opened in an emer
gency.
(D Tips
You can still open and close the windows for
approximately 10 minutes after turning the
ignition off. The power windows do not switch
off until the driver's door or front passenger's
door has been opened.
Convenience opening/closing
Applies to: ve hicles w ith conve nien ce key
All of the windows and the roof* can be opened/
closed at the same time .
Convenience opening feature
~ Press and hold the III button on the remote con
trol key until all of the windows reach the de
sired position and the roof* is tilted open .
44
Convenience closing fe atur e
~ Press the {D b utton on the remote control key
until the roof* is closed
c::> .&., , or
~ Touch the sensor * on the door handle until all
of the windows and the roof * are closed. Do not
place your hand in the door handle when doing
this.
Setting conv en ie nc e opening in th e
Infota inment s ystem
~ Select in the Infotainment system: IMENU ! but
ton
> V eh icle > left control button > V ehicle
s etting s
> Centr al lo ck ing > Lon g press to
op en window s.
A WARNING
- To reduce the r isk of injury, never close the
w indows or the roof* carelessly or in an un
controlled manner.
- For secur ity reasons, the windows and the
roof* can only be opened and closed with
the remote control key at a maxim um dis
tance of approx imately 6.5 feet (2 m) away
from the vehicle . Always pay attention when
using the~ button to close the windows
and the roof* so that no one is pinched. The
clos ing process will stop immediately when
the ~ button is released.
(D Tips
Applies to: vehicles wit h panorama g lass roof:
the power sunshade also opens/closes when
opening/closing the roof.
' Correcting power window malfunctions
You can reactivate the one-touch up/down func
tion if it malfunctions.
~ Pull the power window switc h up until the win
dow is completely raised.
~ Release the switch and pull it up aga in for at
least one second .
Page 55 of 402
u co ...... N r-... N ...... 0
0
:E: '
Q/ P -adjusting the left/right exter io r mir ror.
Move the knob in the desired direction .
®-Heating* the mirror glass depending on the
outside temperature .
8 - Folding exterior mirrors* . To fold the mirrors
out, turn the knob to one of the other pos itions .
In the Infotainment system, you can select if the mirrors fo ld in automatically when you lock the
ve hicle
9 page 39.
Front pa ssenger' s exterio r mirror tilt
function*
To help you see the curb when back ing into a
pa rking space, the surface of the mirror tilts
slightly . Fo r th is to happen, the knob m ust be in
the posit io n for the front passenger's exterior
mirror.
You can adjust the t ilted m irror surface by turn
ing the knob in the desi red direction. When you
move ou t of reverse and into another gear, the
new mirror position is stored and assigned to the
key you are using.
The mir ror goes back into its orig inal position
once yo u drive forward faster than 9 mph
(15 km/h) or turn the ignition off .
A WARNING
Curved mirror surfaces (for examp le convex)
enlarge the f ield of vision . However, they
make objects in the mirror appear sma ller
and farther away. Your may estimate incor
rectly whe n you use these m irrors to gauge
your distance from the vehicles behind you
when changing lanes, wh ich increases the r is k
of an accident.
(D Note
- Applies to vehicles with power folding exte
rior mirrors: if the mirror housing was
moved by outside forces (such as an impact
whe n maneuvering), yo u m ust use the pow
e r folding func tion to fo ld the mi rror all the
way o ut. The mirro rs will make a loud no ise
when they latch into place . The mir ror hous
ing must not be moved back into place by
Light s and Vision
hand because this would impai r the func
tion of the mirror mechanism.
- Applies to vehicles without power folding
exterior mirrors: if the mirror housing was
moved by outside forces (such as an impact
when maneuvering), you must move it back
in place by hand .
- If you wash the vehicle in an automatic car
wash, you must fold the exter ior mirrors in
to reduce the r isk of damage to the m irrors.
Never fold power fo ld ing exter ior mirrors*
by hand . On ly fold them in and out us ing
the power controls.
(D Tips
- If the power adjusting function malfunc
tions, the glass in both mirrors can be ad
justed by p ressing on the edge of it by hand .
- The exterior m irror settings are stored w ith
the memory funct io n*
9 page 64 .
Dimming the mirrors
Your vehicle is equipped with a manual or auto
matic* dimming rearview mirror .
Manual dimming rearview m irror
.. Pull the lever on the bottom of the m irror back.
Automat ic dimming rearview mirror*
.. The inte rior and exte rior m irrors d im a utomat i
cally when light s hines on them, for examp le
from headlights on a veh icle beh ind you.
A WARNING
=
If the g lass on an a utomatic dimming m irro r
b reaks, electro lyte can leak out. This liquid
can irritate the skin, eyes and respiratory sys
tem. If there is contact w ith the fluid, flush
immediately w ith p lenty of water. Consult a
physic ian if necessa ry .
- Repeated or long-term exposure to e lectro
lyte fl uid can lead to ir ritation of the air
ways, especia lly in peopl e with ast hma o r
o ther respiratory condi tions. Take deep
b rea ths immedi ately afte r leaving the vehi
cle or, if this is not poss ible, open all of the
doors and windows as wide as possib le .
53
Page 56 of 402
Lights and Vision
-If electrolyte fluid enters the eyes, flush
them thoroughly with a large amount of
clean water for at least 15 minutes and then
seek medical attention .
- If electrolyte fluid comes into contact with
the skin, flush the affected area with clean
water for at least 15 minutes and then clean
with soap and water and seek medical at
tention. Clean affected clothing and shoes
thoroughly before wearing again .
- If the fluid was swallowed and the person is
conscious, flush the mouth with water for at
least 15 minutes. Do not induce vomiting
unless this is recommended by medical pro
fessionals. Seek medical attenti .on immedi
ately.
(D Note
If the glass on an automatic dimming mirror
breaks, electrolyte can leak out . This liquid
damages plastic surfaces and paint. Clean
this liquid as quickly as possible, for example
with a wet sponge .
@ Tips
-If the light reaching the rearview mirror is
obstructed, the automatic dimming mirror
will not function correctly,
- The automatic dimming mirrors do not dim
when the interior lighting is turned on or
the reverse gear is selected .
Sun visors
Fig. 46 Comfort sun visor
54
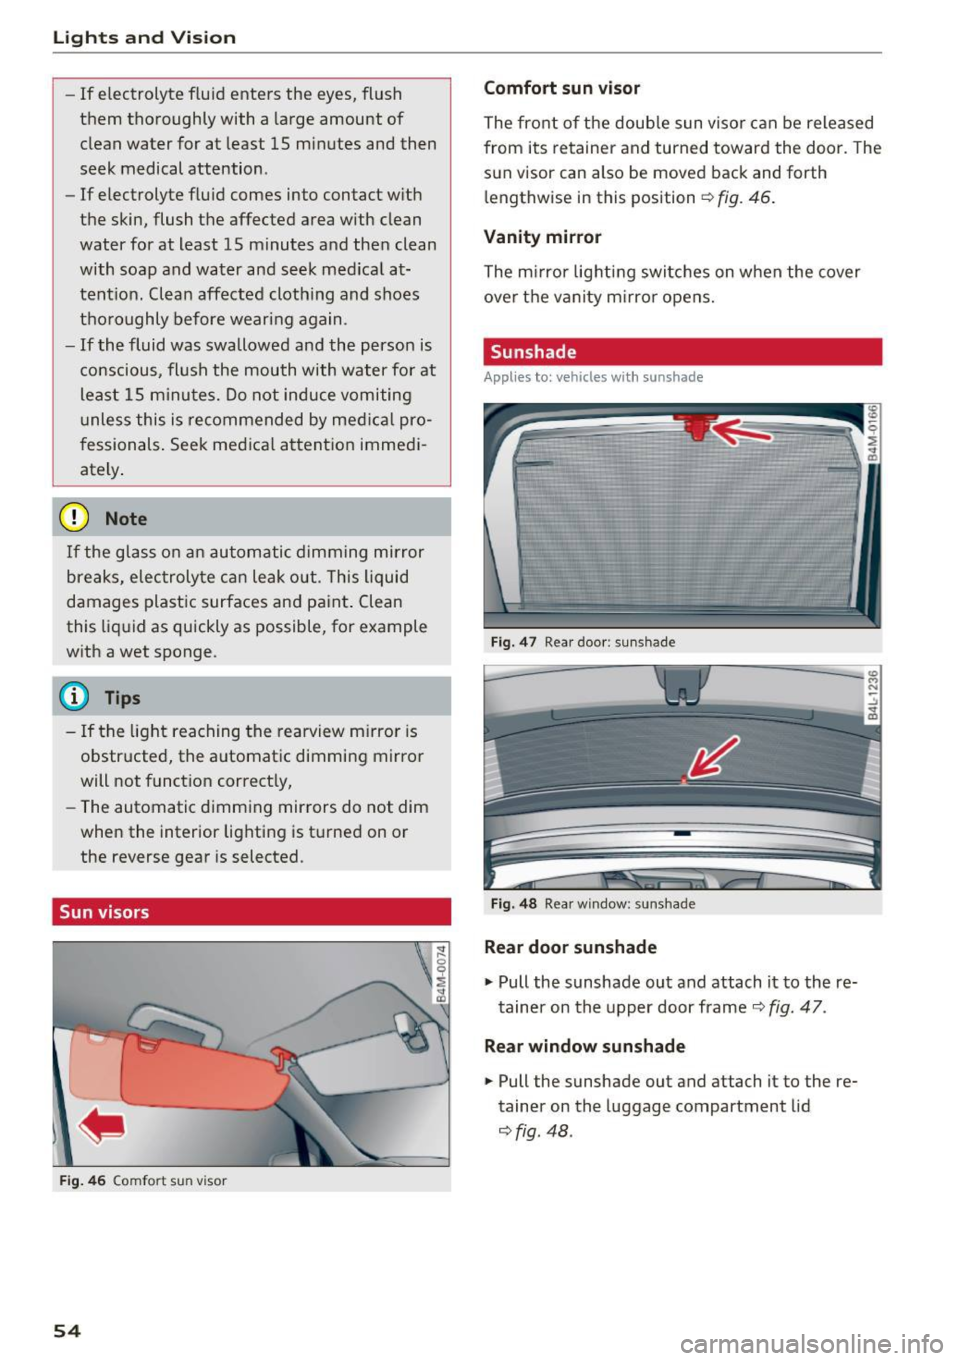
Comfort sun visor
The front of the double sun visor can be released
from its retainer and turned toward the door . The
sun visor can also be moved back and forth l e ngthwise in this position
Q fig . 46.
Vanity mirror
The mirror lighting switches on when the cover
over the vanity mirror opens.
Sunshade
Appl ies to: vehicles with sunshade
Fig. 47 Rear door : sun shade
Fig. 48 Rear window : sunshade
Rear door sunshade
"'Pull the sunshade out and attach it to the re
tainer on the upper door frame
Q fig. 47.
Rear window sunshade
"' Pull the sunshade out and attach it to the re
tainer on the luggage compartment lid
~fig. 48 .
Page 57 of 402

Windshield wipers
Switching the wipers on
•® !
• @ cb
Fig. 49 Windshield wiper lever
Fig. SO Rea r w indow wiper operat ion
• @
• @
•®
Move the windshield wiper lever to the corre·
spond ing pos ition:
@ · Windshield wipers off
en
-0 9 :i
cb
(D -Rain sensor mode. The winds hield wipers
switch on once the vehicle speed exceeds app rox
imately 2 mph (4 km/h) and it is raining. The
h igher the sensitivity of the rain sensor that is set
(switch ® to the right), the earlier the wind·
shie ld wipers react to moisture on the wind
shield . You ca n deactivate the rain sensor mode
in the Infota inment system, which switches the
intermittent mode on. To do th is, select :
!MENU !
button > Vehicle > lef t con trol b utton > Driver
a ssistan ce
> Rain sensor . In intermittent mode ,
you can adjust the interva l time using the switch
® ·
@ · Slow wip ing
@ -Fast wip ing
u
~ @ -Single wipe. If you hold the lever in th is posi-
~ tion longer, the wipers switch from slow wiping ~ g to fast w iping.
:E
® -Clean the w indshield . The wipers w ipe one
time after several seconds of d riv ing to remove
water droplets . Yo u can sw itch this funct ion off
by moving the lever to posit ion ® within 10 sec
onds of the afterwipe . The afterwipe function is
reactivated the next time you switch the ignit ion
o n .
Clean the headlights*. The headlight washer sys
tem* operates only when the low beam head lights are o n. If you move t he lever to posit io n
® · the headlights and the night v is io n assist
camera* are cleaned at inte rva ls .
® -Wipe t he rear window. The number of w ipes
depe nds on the windsh ield wiper movement .
The rear wiper automat ica lly switches on when
the reverse gear is selected and the front wind
shield wipers are on and running.
(J) -Clean the rear window . The number of wipes
depends on how long the lever is held in pos ition
(J) .
A WARNING
-The rain sensor is on ly intended to ass ist the
d river. The drive r may still be responsib le
for manually switching the wipers on based on visibili ty cond itions .
- The winds hield may not be t reated w ith wa
ter- repelling w indshield coating agents. Un
f a vorable co ndit io ns, su ch as wet ness, da rk
ness o r low su n, can resu lt in increased
g la re, which increases the risk of an acci
dent . Wiper blade chatter is also possib le.
- P roperly func tioning w indshield wiper
b lad es are requ ired for a clear view and safe
driving<:::>
page 56, Replacing wiper
blades .
(D Note
-If there is frost, m ake sure the win dsh ield
w iper bl ades are not froze n to the wind
shield. Switching on the w indshie ld w ipers
w hen the b lades are frozen to the wind
shield can damage the wiper blades.
- The windshie ld wiper system must be
switched off (lever in position 0) before us
ing a car wash. Th is prevents the w ipers
55
Page 58 of 402

Lights and Vi sion
from switching on unintentionally and ca us
ing damage to the windshield wiper system.
@ Tips
- The windshield wipers switch off when the
ignition is switched off. You can activate the
windshield wipers after the ignition is
switched back on by moving the windshield
wiper lever to any pos it ion.
- Worn or dirty windshield wiper blades result
in streaking. This can affect the rain sensor
funct ion. Check your windshield wiper
blades regularly.
- The washer fluid nozzles for the windshield
washer system are heated at low tempera
tures when the ignition is on .
- When stopp ing temporarily, such as at a
traffic light, the speed of the windshield
wipers automatically reduces by one level.
Cleaning the wiper blades
Clean the wiper blades when you see wiper
streaks. Use a soft cloth and a glass clea ne r.
Windshield wiper
"' Place the windshield wiper arms in the service
pos ition
¢ page 56 .
"'Fold the windshield wiper arms away from the
winds hield.
Rear window wiper
"' Fo ld the wiper arm away from the rear window.
A WARNING
Dirty windshield wiper blades can impair vi
sion, which increases the risk of an accident.
56
-
· Replacing wiper blades
Fig. 51 Removing windshie ld wiper blades
Windshield wiper service position/blade
replacement position
"'T o br ing the windshield w ipers into the serv ice
position, turn the ign ition off and move the
w indshie ld wiper lever into position@
¢page 55, fig. 49.
"'To bring the wip ers into the starting position ,
turn the ignition on and move the windshield
wiper lever into position @for at least two sec
onds
¢ page 55, fig. 49.
You can also turn the service position on or off in
the Infotainment system:
"' Switch the windshie ld wipers off (position @
¢page 55, fig . 49).
"' Select: the IM ENU I button > Vehicle > left con
trol button
> Service & checks > Wiper change
position .
Removing the wiper blade
"'Fold the windshie ld wiper arm away from the
windshield.
"' Press the locking knob
(D ¢ fig. 51 on the w iper
blade. Hold the wiper blade firmly.
"' Remove the wiper blade in the direction of the
arrow.
Installing the wiper blade
"' Insert the new wiper blade into the mount on
the wiper arm @until it clicks into place.
"' Place the wiper arm back on the windsh ield.
"' Turn the service position off.
1111>