infotainment AUDI Q7 2018 Owner´s Manual
[x] Cancel search | Manufacturer: AUDI, Model Year: 2018, Model line: Q7, Model: AUDI Q7 2018Pages: 398, PDF Size: 185.58 MB
Page 5 of 398
Cl a:, ...... N
" N ...... 0
0
::r '
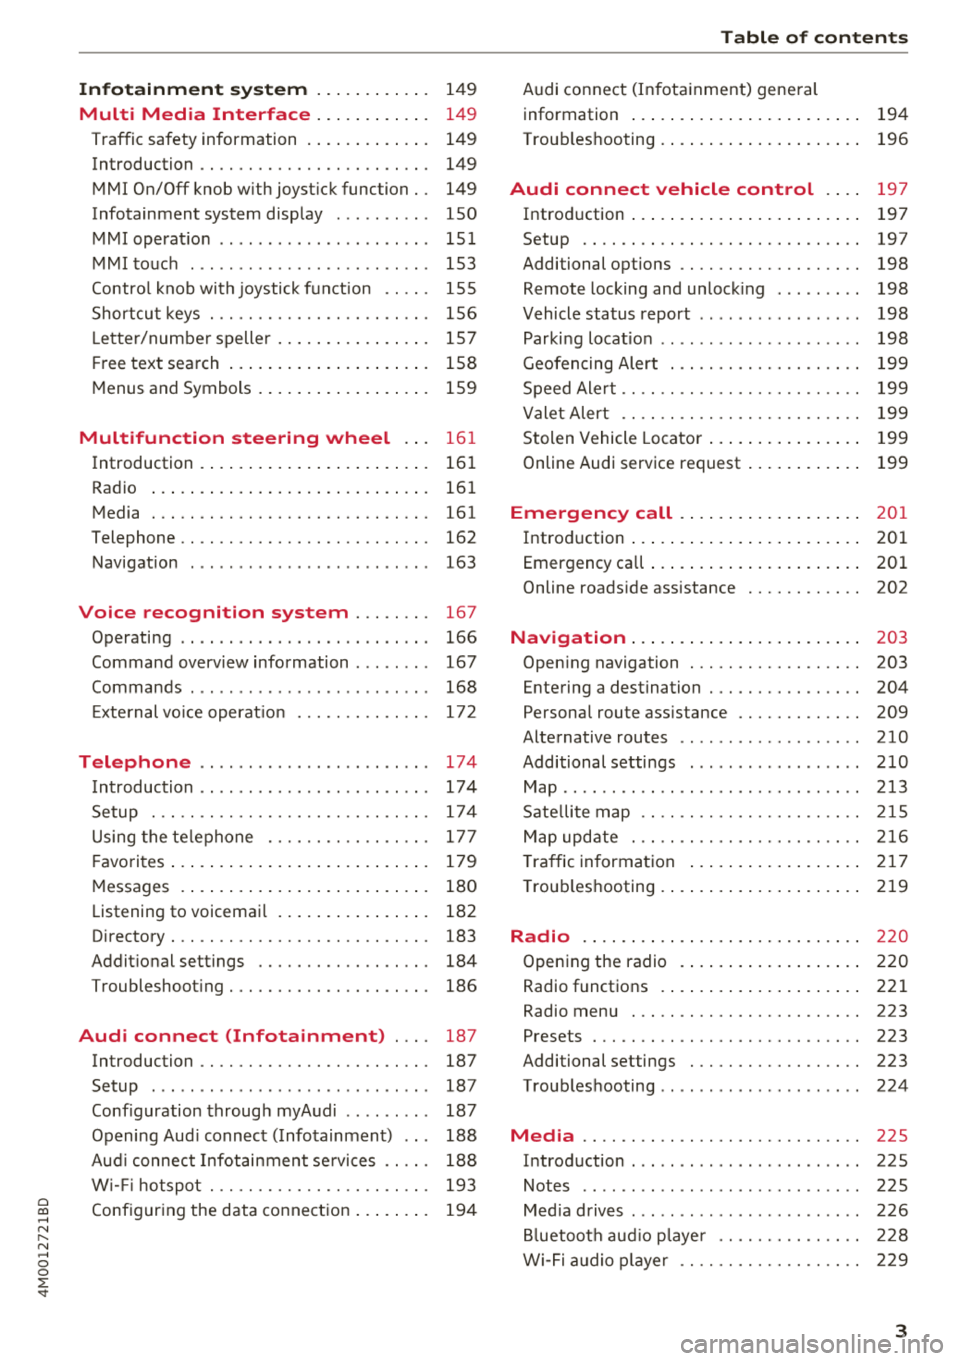
Multi Media Interface . . . . . . . . . . . . 14 9
Traffic safety information . . . . . . . . . . . . . 149
Introduction . . . . . . . . . . . . . . . . . . . . . . . . 149
MMI On/Off knob w ith joyst ick function . . 149
Infotainment system display . . . . . . . . . . 150
MMI operat ion . . . . . . . . . . . . . . . . . . . . . . 151
MMI touch . . . . . . . . . . . . . . . . . . . . . . . . . 153
Contro l knob with joystick funct ion . . . . . 155
Shortcut keys . . . . . . . . . . . . . . . . . . . . . . . 156
L ette r/number speller . . . . . . . . . . . . . . . . 157
F ree text search . . . . . . . . . . . . . . . . . . . . . 158
Menus and Symbols . . . . . . . . . . . . . . . . . . 159
Multifunction steering wheel . . . 16 1
Introduction . . . . . . . . . . . . . . . . . . . . . . . . 16 1
Radio . . . . . . . . . . . . . . . . . . . . . . . . . . . . . 16 1
Media . . . . . . . . . . . . . . . . . . . . . . . . . . . . . 161
Telephone . . . . . . . . . . . . . . . . . . . . . . . . . . 162
Navigation . . . . . . . . . . . . . . . . . . . . . . . . . 163
Voice recognition system . . . . . . . . 167
Operating . . . . . . . . . . . . . . . . . . . . . . . . . . 166
Command overv iew information . . . . . . . . 167
Commands . . . . . . . . . . . . . . . . . . . . . . . . . 168
E xternal vo ice operat ion 172
Telephone . . . . . . . . . . . . . . . . . . . . . . . . 174
I ntroduction . . . . . . . . . . . . . . . . . . . . . . . . 17 4
Setup . . . . . . . . . . . . . . . . . . . . . . . . . . . . . 174
Using the te lephone . . . . . . . . . . . . . . . . . 177
F avorites . . . . . . . . . . . . . . . . . . . . . . . . . . . 179
M essages . . . . . . . . . . . . . . . . . . . . . . . . . . 180
Listening to voicemai l . . . . . . . . . . . . . . . . 182
Directory . . . . . . . . . . . . . . . . . . . . . . . . . . . 183
Addit ional settings . . . . . . . . . . . . . . . . . . 184
Troubleshoot ing . . . . . . . . . . . . . . . . . . . . . 186
Audi connect (Infotainment) . . . . 187
Introduction . . . . . . . . . . . . . . . . . . . . . . . . 187
Setup . . . . . . . . . . . . . . . . . . . . . . . . . . . . . 187
Conf iguration through myAudi . . . . . . . . . 187
Opening Aud i connect ( Infotainment) . . . 188
Aud i connect Infotainment se rvices . . . . . 188
W i-Fi hotspot . . . . . . . . . . . . . . . . . . . . . . . 193
Conf igur ing the data connect ion . . . . . . . . 194
Table of content s
Audi connect (Infota inment) gene ral
information . . . . . . . . . . . . . . . . . . . . . . . . 194
Troub les hooting . . . . . . . . . . . . . . . . . . . . . 196
Audi connect vehicle control . . . . 19 7
Introduction ..... .. ... .. ..... ... .. .. 197
Setup . . . . . . . . . . . . . . . . . . . . . . . . . . . . . 197
Additional options . . . . . . . . . . . . . . . . . . . 198
Remote locking and un lock ing . . . . . . . . . 198
Vehicle status report . . . . . . . . . . . . . . . . . 198
Parking locat io n . . . . . . . . . . . . . . . . . . . . . 198
Geofencing Alert . . . . . . . . . . . . . . . . . . . . 1 99
Speed Ale rt . . . . . . . . . . . . . . . . . . . . . . . . . 199
Valet Alert . . . . . . . . . . . . . . . . . . . . . . . . . 199
Stolen Vehicle Lo cator . . . . . . . . . . . . . . . . 199
Online Audi service request ..... ... .. .. 199
Emergency call .. ... .. ..... ... .. .. 20 1
Introd uction . . . . . . . . . . . . . . . . . . . . . . . . 201
Emergency call . . . . . . . . . . . . . . . . . . . . . . 201
Online roads ide assistance . . . . . . . . . . . . 202
Navigation . . . . . . . . . . . . . . . . . . . . . . . . 2 03
Open ing navigation . . . . . . . . . . . . . . . . . . 203
Entering a destination . . . . . . . . . . . . . . . . 204
Persona l route ass istance . . . . . . . . . . . . . 209
Alternative routes . . . . . . . . . . . . . . . . . . . 210
Additional settings ................. . 210
Map .. .. .. .. .. .. .. ... .. ..... ... .. .. 213
Sate llite map . . . . . . . . . . . . . . . . . . . . . . . 215
Map upd ate . . . . . . . . . . . . . . . . . . . . . . . . 216
T raffic information .... .. ..... ... .. .. 21 7
T roub leshooting .... ... .. ..... ... .. .. 219
Radio .. .. .. .... .. ... .. ..... ... .. .. 220
Opening the radio . . . . . . . . . . . . . . . . . . . 2 20
Radio functions . . . . . . . . . . . . . . . . . . . . . 221
Radio menu . . . . . . . . . . . . . . . . . . . . . . . . 223
Presets . . . . . . . . . . . . . . . . . . . . . . . . . . . . 223
Additional settings . . . . . . . . . . . . . . . . . . 223
Troubleshooting . . . . . . . . . . . . . . . . . . . . . 224
Media ...... .. .. ................. .. 225
Introduction . . . . . . . . . . . . . . . . . . . . . . . . 225
Notes . . . . . . . . . . . . . . . . . . . . . . . . . . . . . 225
Med ia drives . . . . . . . . . . . . . . . . . . . . . . . . 226
B luetooth aud io p laye r . . . . . . . . . . . . . . . 228
Wi-Fi a udio p laye r . . . . . . . . . . . . . . . . . . . 229
3
Page 11 of 398
Cl a:, ...... N
" N ...... 0
0
::r '
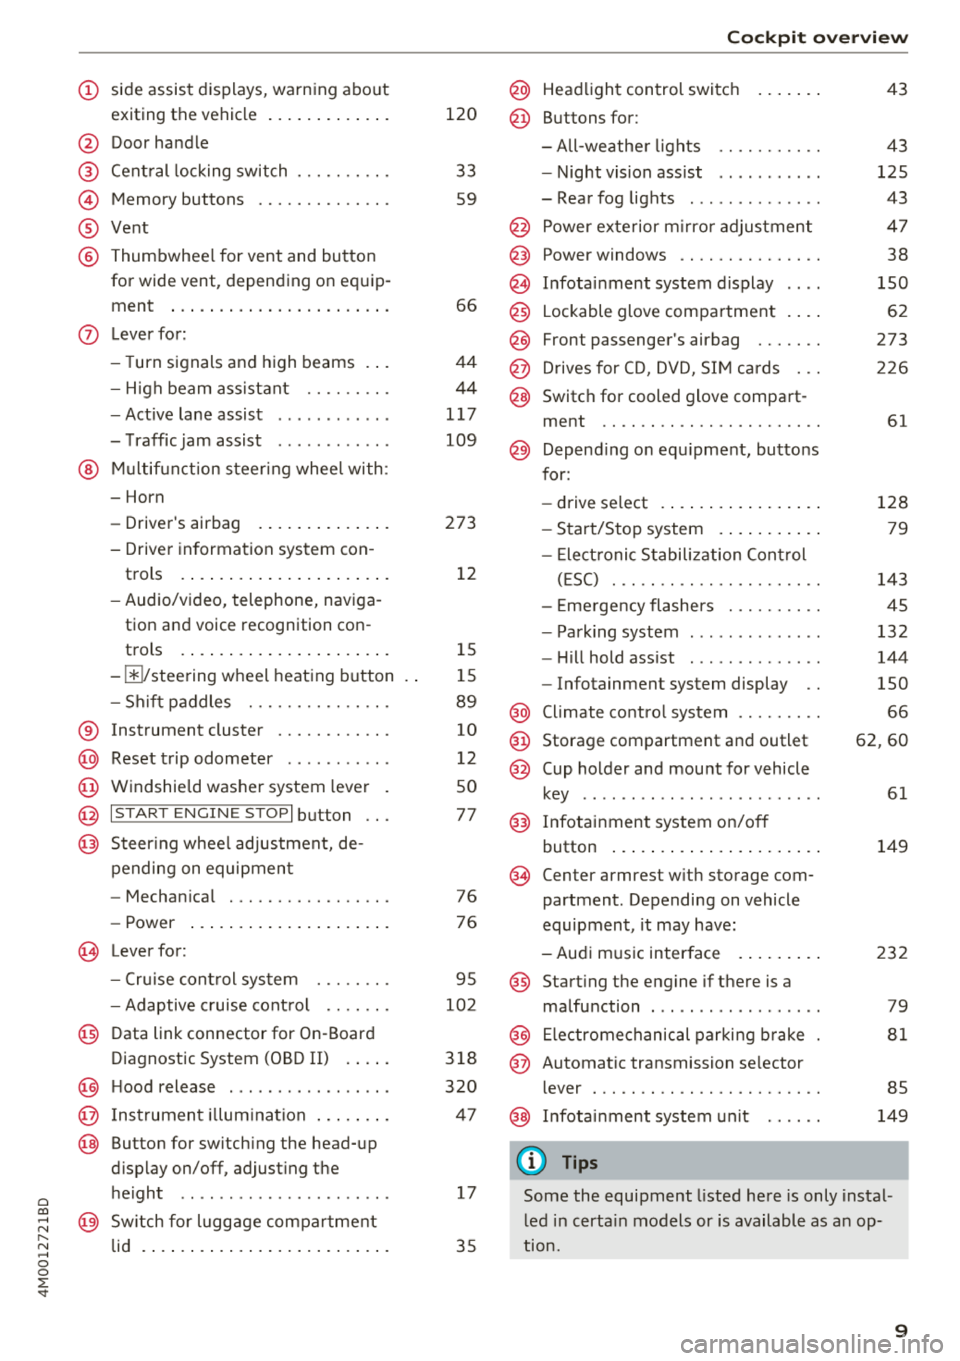
exiting the vehicle ..... ... .. .. .
@ Door handle
@ Cen tral locking swit ch ....... .. .
@ Memory buttons ........... .. .
® Vent
@ Thumbwhee l for vent and button
for wide vent, depending on eq uip -
ment ..... ... .. ..... ... .. .. .
- High beam assistant .... .. .. .
- Active lane assist ........... .
- T raffic jam assist ........... .
@ Mul tifunct ion steer ing whee l with:
- Horn
- Driver's airbag . ..... ... .. .. .
- Driver in formation sys tem con -
trols .... ... .. ..... ... .. .. .
- Audio/v ideo, telephone, nav iga
tion and voice recognition con -
trols .... ... .. ..... ... .. .. .
- III/ steering wheel heat ing b utton
- Sh ift paddles .......... .. .. .
® Instrument cluster ......... .. .
@ Reset t rip odometer .......... .
@ W indshie ld was her system lever
@ !S TAR T ENGIN E ST OPI button .. .
@ Steer ing whee l adjustment, de-
pending on equipmen t
- Mechan ica l .............. .. .
- Power ... ... .. ..... ... .. .. .
~ Lever for:
- Cru ise cont rol sys tem ... .. .. .
- Adaptive c ruise cont rol .. .. .. .
@ Data link connector for On -Board
Diagnostic System (OBD II) . ... .
@) H ood release ............... . .
@ Ins trumen t il lum ina tion ... .. .. .
@ Button for switch ing the head-up
d isplay on/off, adjust ing the
h eight .. .. ................ . .
@ Sw itch for lugg age compar tment
lid . ..... .. ... .. ..... ... .. .. .
120
33
59
66
4 4
44
1 17
109
273 12
1 5
1 5
89
10
12
50
77
76 76
95
102
3 18
320
4 7
17
35
Coc kpit o ver view
@ Head light control switc h
@ Buttons for:
- All-weathe r lights
- Night vis ion ass ist .......... .
- Rear fog lights ............. .
@ Power exte rior m irro r adjustment
@) Power windows .............. .
@ In fota inment system display
@ Lockable glove compa rtment . .. .
@ Front passenger's airbag ...... .
@ D rives for CD, DVD, S IM cards .. .
@ Switch for cooled glove compa rt-
ment .. .. .. .. .............. .
@ Depend ing o n equ ipment, butto ns
for:
- drive select .... ... .. ..... .. .
- Start/Stop system . .. ..... .. .
- Ele ct ronic S tabiliz ation Con trol
( E SC) . .. .. .. .............. .
- E me rgency flashers ......... .
- Park ing system ............. .
- Hi ll hold ass ist ............. .
- Infotainment system display ..
@ Climate cont ro l system ........ .
@ Storage compartment and outlet
@ Cup holder and mount for vehicle
key ..... ... .. .. ............ .
@) Infotainment system on/off
button ... .... .. ... .. ..... .. .
(§ Cen ter armrest w ith storage com
partment . Depending on vehicle
equipment , it may have:
- Aud i m usic interface . ..... .. .
@ Start ing t he engine if there is a
malfunction ... .. ............ .
@ Electromechanical parki ng b rake
@ Automatic transmission se lector
lever ... .. .. .. .. ............ .
@ In fota inment system un it
(D Tips
43
43
125
43
4 7
38
150
62
273
2 26
61
128 79
143
45
132
144
150
66
62 ,60
61
149
232
79
81
85
149
Some the equipment listed here is only insta l
l ed in certa in models or is available as a n op
t ion.
9
Page 13 of 398
Cl a:, ...... N
" N ...... 0
0
::r '
displayed in the head-up display*
¢page 17.
A WARNING
Do not assume the roads are free of ice based
on the outside temperature display . Be aware
that there may be ice on roads even when the
outside temperature is around 41 °F (+5 °C)
and that ice can increase the risk of accidents .
(D Tips
- Depending on vehicle equipment, the in
strument illumination (needles and gauges) may turn on when the lights are
off and the
ignition is switched on . The illumination for
the gauges reduces automatically and even
tually turns off as brightness outside in
creases. This function reminds the driver to
turn the low beams on at the appropriate
time.
- You can select the units used for tempera
ture, speed and other measurements in the
Infotainment system¢
page 245.
-If your vehicle is stationary or if you are driv
ing at very low speeds, the temperature dis
played may be slightly higher than the ac
tual temperature outside due to the heat ra
diating from the engine.
- At temperatures below 41 °F (+5 °C), a
snowflake symbol appears in front of the
temperature display¢,&. .
Coolant temperature indicator
The coolant temperature display@¢ page 10,
fig . 3
or ¢ page 10, fig . 4 only functions when
the ignition is switched on. To prevent engine
damage, please observe the following notes
about the temperature ranges.
Cold range
If only the LEDs at the bottom of the gauge turn
on, the engine has not reached operating tem perature yet . Avoid high engine speeds, full ac
celeration and heavy engine loads.
Cockpit overview
Normal range
The engine has reached its operating tempera
ture once the LEDs up to the center of the gauge
turn on. If the. indicator light in the instru
ment cluster display turns on, the coolant tem
perature is too high ¢
page 22.
@ Note
-Auxiliary headlights and other accessories in
front of the cooling-air intake impair the
cooling effect of the coolant. This increases
the risk of the engine overheating during
high outside temperatures and heavy en
gine load .
- The front spoiler also helps to distribute
cooling air correctly while driving. If the
spoiler is damaged, the cooling effect will
be impaired and the risk of the engine over
heating will increase. See an authorized
Audi dealer or authorized Audi Service Fa
cility for assistance.
{D Tips
Applies to: vehicles with diesel engines
Due to the high efficiency of these engines,
the engine may not always reach operating
temperature in cold outside temperatures.
This is normal and not a cause for concern.
Tachometer
The tachometer displays the engine speed in rev
olutions per minute (RPM).
The beginning of the red zone in the tachometer
indicates the maximum permissible engine speed
for all gears once the engine has been broken in.
Before reaching this zone, you should shift into
the next highest gear, select the "D/S" selector
lever position, or remove your foot from the ac
celerator pedal.
@ Note
The needle in the tachometer@¢ page 10,
fig. 3
or ¢ page 10, fig. 4 may only be in the
red area of the gauge for a short time or there
is a risk of engine damage . The location where .,.
11
Page 14 of 398
Cockpit overv iew
the red zone beg ins varies depending on the
engine.
@ For the sake of the environment
Upshifting early helps you to save fuel and re
duces operating noise.
© Tips
Depending on t he e ngine : the engine speed
may be lim ited when the engine is cold -the
full engine ou tput wi ll not be avai lable . When
the engine is at operating temperat ure, the
red area in the tachomete r moves to a h igher
RPM range.
Fuel level
The display (J) ¢ page 10 , fig. 3 or ¢ page 10,
fig . 4 only functions when the ign ition is switch
ed on . When the display has reached the reserve
mark, a red L ED t urns on a nd the
tD in dicator
light turns on ¢
page 27. The red L ED w ill blink
when the f uel leve l is very low.
For the tank capac ity in you r vehicle, refer to the
Technical Data
r=v page 375.
(D Note
Never d rive until the tank is completely emp
ty . The irregular supp ly of f uel that results
from that can ca use engine misfi res . Uncom
busted fuel will the n ente r the exhaust sys
t em. This can ca use overheating and damage
t o the cata lytic conver ter.
Odometer
F ig . 5 In st ru m ent cluster: odometer a nd re se t bu tton
12
Tr ip odometer and odometer
The trip odometer shows the dis tan ce driven
s ince it was last reset. It can be used to measure
short d istances.
The trip odometer ca n be reset to zero by press
i ng th e ~ reset but ton.
The odometer shows the total distance that the
vehicle has been drive n.
Malfunction indicator
If there is a malfunction in the instrument clus
ter,
DEF will appear in the trip odometer display.
Have the malfu nction corrected as soon as possi
ble .
(D Tips
The units of measu rement can be set in the
Infotainment system~
page 245.
Multifunction steering
wheel
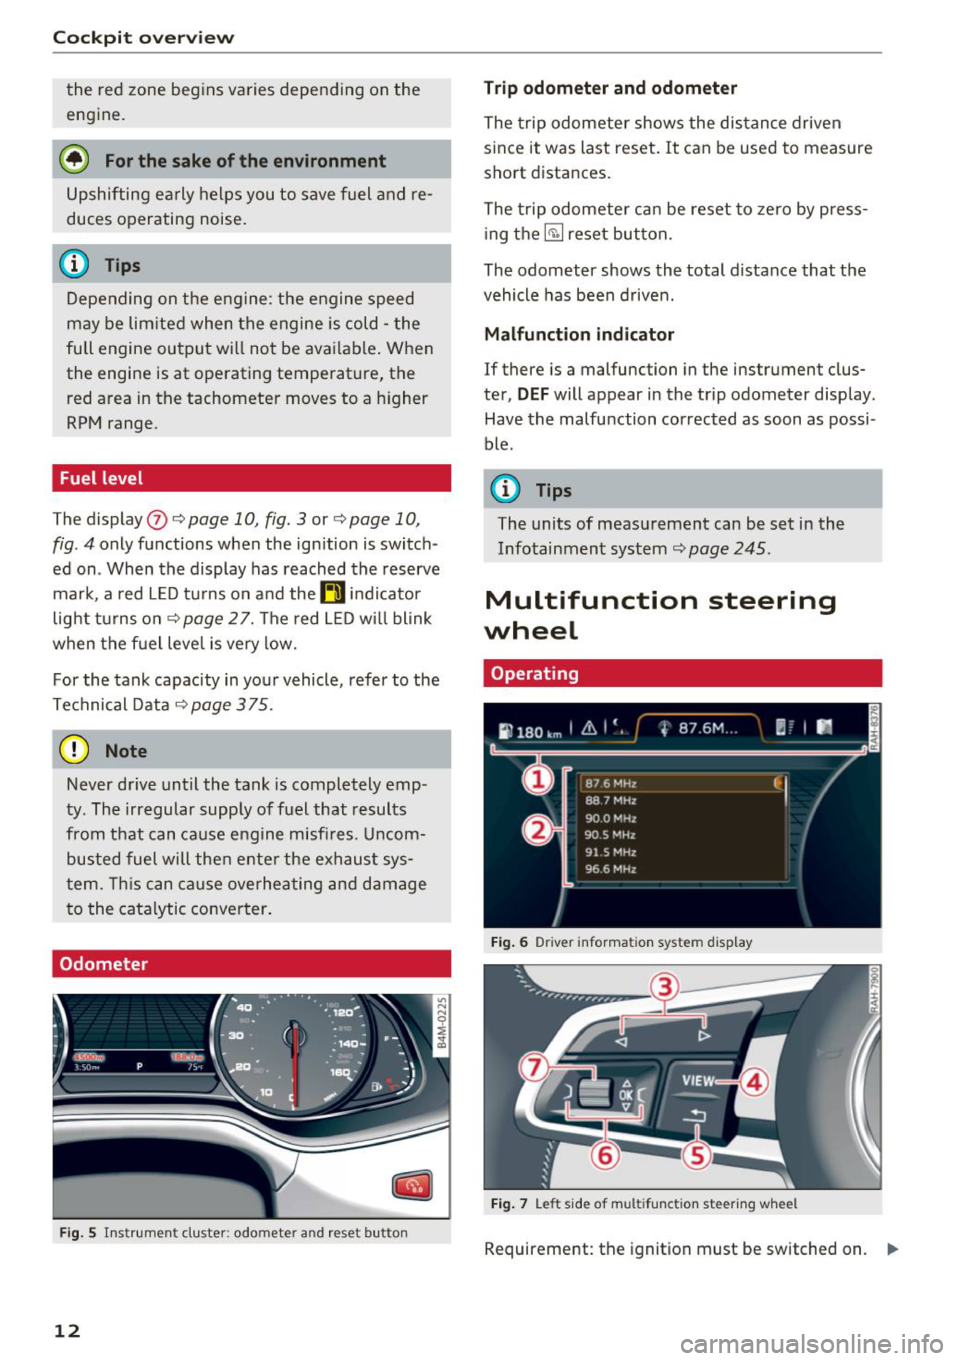
Operating
Fi g. 6 D river informa tion sys te m disp lay
Fi g. 7 L eft sid e of m ultifun ction steer ing wh eel
Requirement: th e ignition must be switched on. .,.
Page 19 of 398
a co ...... N r--. N ...... 0
0
:E -
indicator
Applies to: vehicles with engine oil temperature display/boost
indicator
Applies to: vehicles with analog instrument cluster
The engine oil temperature and boost indicator
are only show n in the lap timer disp lay
~ page 98 .
Engine oil temperature indicator
Applies to: vehicles with Audi virtual cockpit
The engine oil temperatu re is only shown in t he
e nhanced view or in the spo rt view ~
page 14.
When engine oil temperatures are low, the dis
p lay -- -°F ( ---
0
() appears in the inst rumen t clus
ter .
The engine has reached its operating tempera
ture when the engine oil temperature is between
176 °F (80 °() and 248 °F (120 °() under normal
d riving conditions . The eng ine oil temperatu re
may be hi gher if there is heavy eng ine load and
hi gh temperat ures outside. This is not a ca use for
concer n as long as the . ~
page 23 or II
~ page 24 ind icator lights do no t tu rn o n.
Boost indicator
Applies to: vehicles with Audi virtual cockpit
The boost indica to r is only displayed in the sport
v iew ~
page 14.
The current engine load (meaning the c urrent
boost p ressure) is indicated by a ba r.
Head-up display
Applies to: vehicles with head-up display
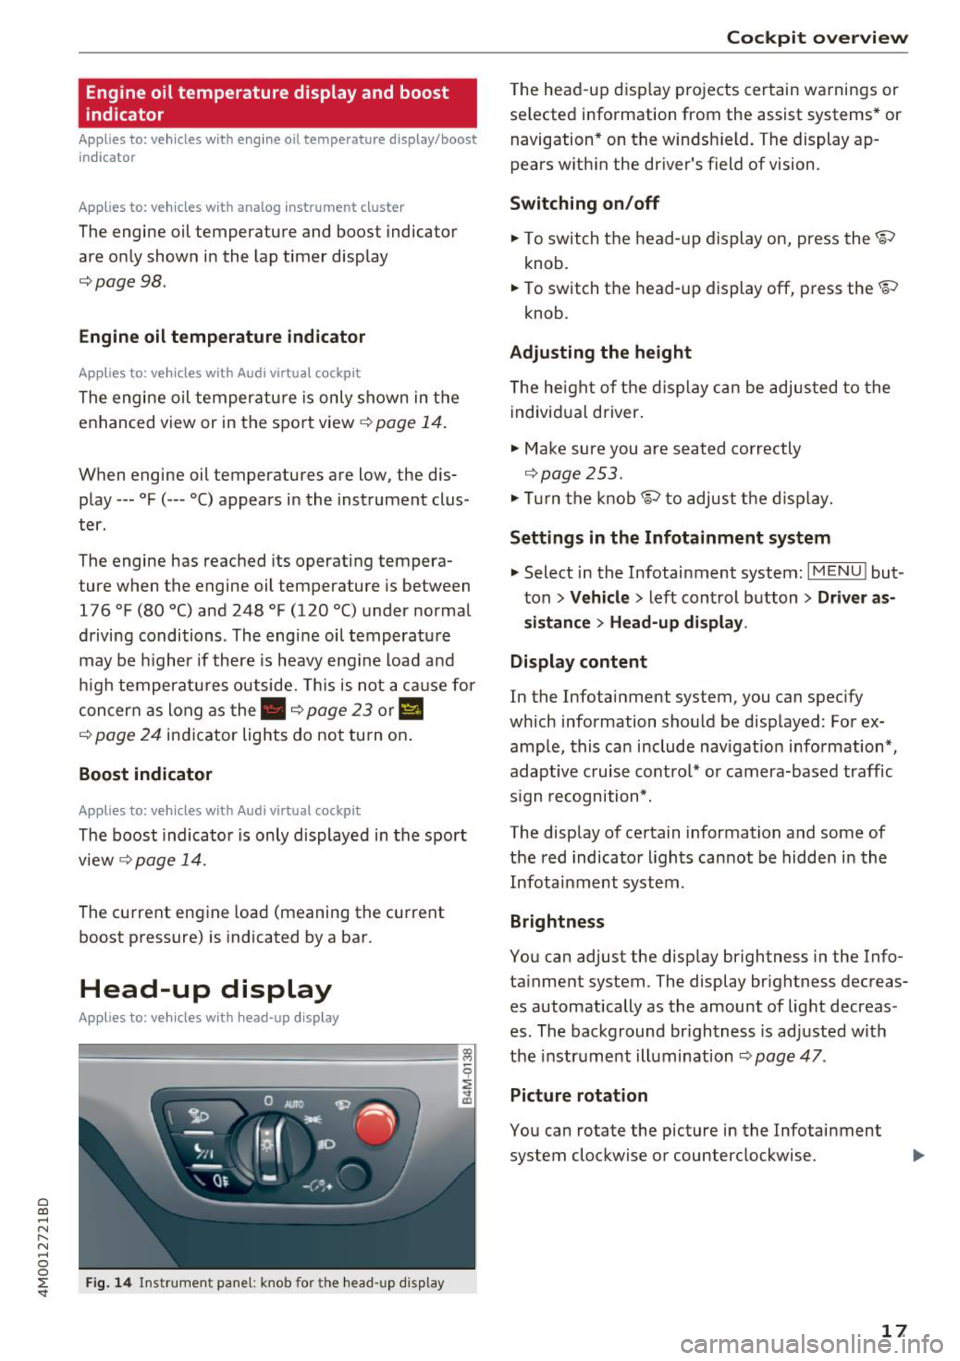
Fig . 14 In st rum ent pa ne l: kn ob for the hea d-up d is pl ay
Cockpit overview
T he head -up d isp lay pro jects certain wa rnings or
se lected information from the assist systems* or
navigation* on the windsh ield . The display ap
pears w ith in the driver's field of vision .
Switching on/off
"" To switch t he head- up display on, press the~
knob.
.. To switch t he head -up display off, press the~
knob .
Adjusting the height
The he igh t of t he d isplay can be adjus ted to the
individ ual d river .
"" Ma ke sure you are seat ed co rrectly
~ page 253.
""Tur n the knob~ to adjus t the disp lay.
Settings in the Infotainment system
"" Select in the Infotainment system: I MENU ! but
ton
> Vehicle > left control b utton > Driver as
sistance > Head-up display .
Display content
In the Infotainment system, you can specify
which information should be d isp layed: For ex
amp le , this ca n include navigatio n information *,
adaptive c ruise co ntro l* or camera-based traffic
s ign recognition*.
The display o f ce rtain information and some of
the red indicator l igh ts can not be hidden in the
Infota inment system.
Brightness
You can adjust the disp lay br ightness in the Info
ta inment system . The display br ightness decreas
es automatically as the amount of light decreas
es. The backg round br ightness is ad justed w ith
the instr ument illumination ~
page 47.
Picture rotation
You can rotate the picture in the Infotainment
system clockwise or counterclockwise.
17
Page 31 of 398
Opening and closing
Central locking
Description
You can lock and un lock the veh icle centrally . You
h ave the following options:
- Remote control key
c> page 32,
-Sensors in the door hand les* c> page 32,
- Lock cylinder on the driver's door c:> page 34,
or
- Interior central locking switch
c:> page 33.
Turn signals
The turn s ignals flas h tw ice when yo u unloc k the
ve hicl e and flash once when you lock the veh icle.
If they do not flas h, then one of the doors, the
l uggage compartment lid or the hood is not
closed.
Automatic locking (Auto Lock )
The Auto Lock f unct io n loc ks all doors and the
l uggage compartment lid on ce the speed has ex
ceeded approximately 9 mph (15 km/ h).
The vehicle ca n be un loc ked if the open ing f unc
tion in t he centra l lock ing system sw itch is used
or one of the door handles is pulled.
I n t he event of a crash with a irbag deployment,
the doo rs will a lso automat ica lly unloc k to allow
access to t he ve hicle.
Selective door unlocking
The doors and luggage compartment lid w ill lock
when they close . You can set in the Infotainment
system whether
only the driver's door or the en
tire ve hicle should be unlocked w hen unlocking
c:>page 34.
Unintentionally locking yourself out
Only lock your veh icle when all of the doors and
the luggage compa rtme nt lid a re closed and the
r emote control key is not in the vehicle. This
h e lps to p revent yo u from locking yourse lf out
o a ccident ally. a:, ......
~ The follow ing cond it io ns prevent you from lock-
"' 8 in g your remote contro l key in the veh icle: 0 ::r '
-If the driver's door is open, the vehi cle cannot
be locked by pressing the
l'.D button on the re
mote contro l key o r by touching the locking
sensor* on a door.
- If the most recently used convenience key* is
detected in the luggage compartment, the lug
gage compartment lid automatica lly unlocks
aga in after closing it.
- If the convenience key* that was last used is de
tected ins ide the veh icle, then the vehicle can
not be locked from the outside .
Closing aid on the do ors *
T he vehicle doors a re equipped with closing aids.
When closing a door, yo u on ly have to let it fall
li ghtly into the latch. It then closes automatically
¢ ,&. .
A WARNING
-
-If you leave the vehicle, sw itch the ignition
off and take the veh icle key with you . This
applies pa rtic ula rly when children remain in
the vehicle. Ot herwise, ch ildren cou ld start
the engine or opera te e lectr ical equipme nt
(such as power w indows), which increases
the risk of an accident.
- No one, especi ally children, should stay in
the vehicle when it is locked from the out
side, because the windows can no longer be
opened from the inside
c:> page 35. Locked
doors make it more diffic ult for eme rgency
workers to get into the vehicle, which puts
lives at risk .
A WARNING
Applies to: vehicles with closing aids on the doors
-To reduce the r is k of injury, m ake sure that
the area where the d oor is closing is cle ar
du ring the closing process.
- Th e closing process ca n be stopped at any
time by pulling on the ou ter or inne r door
handle.
(D Tips
- Do not leave valuables unattended in the ve-
hicle. A lo cked ve hicl e is not a sa fe! ..,
29
Page 32 of 398
Opening and closing
-The LED in the driver's door rail blinks when
you lock the vehicle . If the LED lights up for
approximately 30 seconds after locking,
there is a malfunction in the central locking
system. Have the problem corrected by an
authorized Audi dealer or authorized Audi
Service Fac ility.
Key set
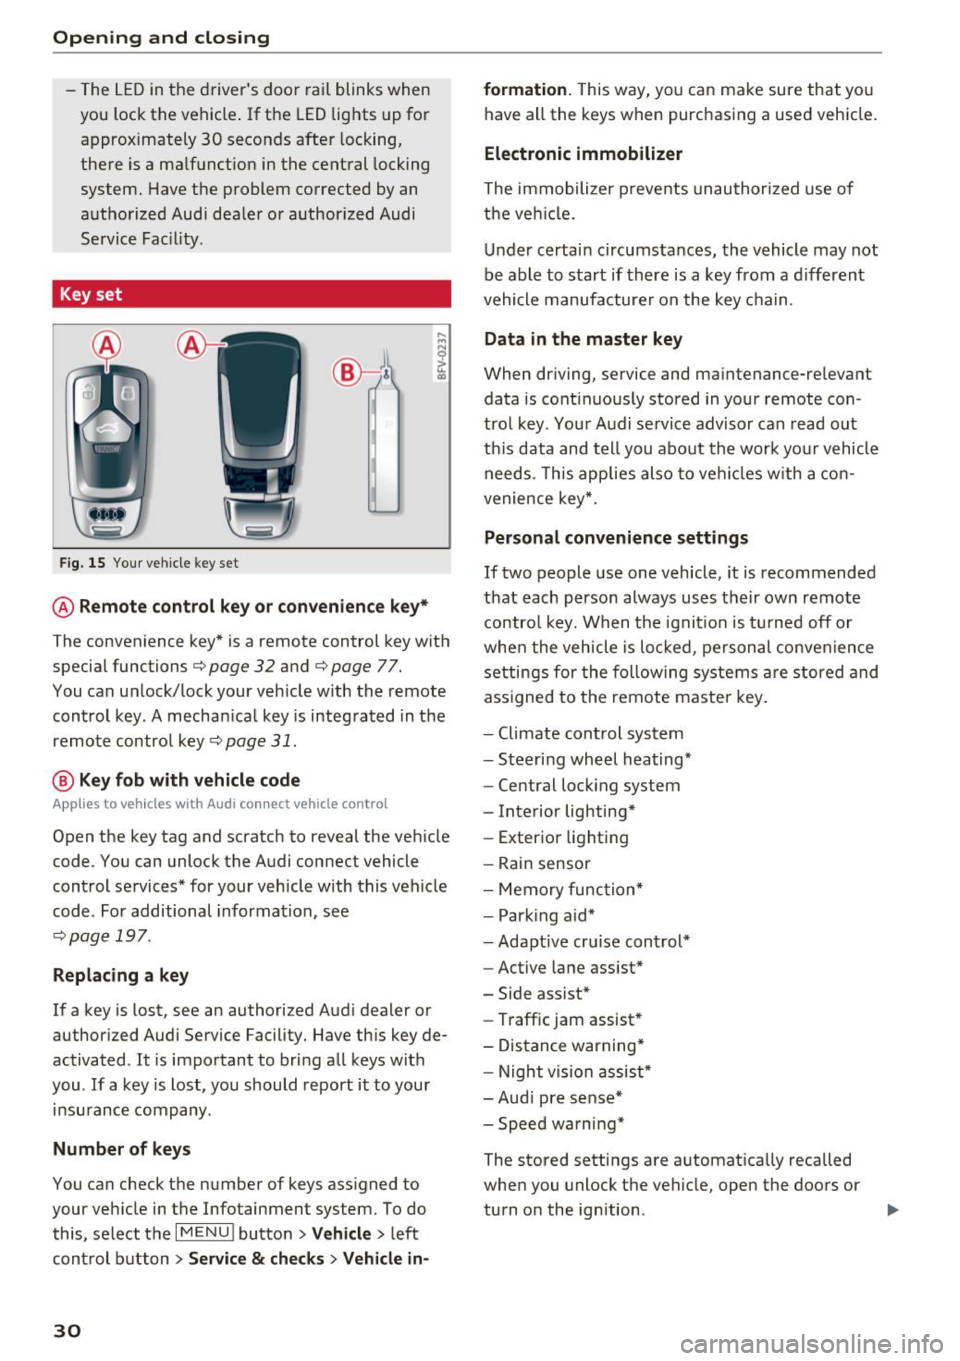
Fig . 15 Your vehicle key set
@ Remote control key or convenience key*
The convenience key* is a remote control key with
special functions
c:> page 32 and c:> page 77.
You can unlock/lock your vehicle with the remote
control key. A mechan ical key is integrated in the
remote control key
c:> page 31.
@ Key fob with vehicle code
Applies to vehicles with Audi connect vehicle control
Open the key tag and scratch to reveal the vehicle
code. You can unlock the Audi connect vehicle
control services* for your vehicle with this vehicle
code . For additional information, see
c:> page 19 7 .
Replacing a key
If a key is lost, see an authorized Audi dealer or
author ized Audi Service Facility. Have this key de
activated . It is important to bring all keys wit h
you . If a key is lost, you should report it to your
insu rance company .
Number of keys
You can check the number of keys ass igned to
your vehicle in the Infotainment system. To do this, select the
I MENU ! button> Vehicle> left
control button >
Service & checks > Vehicle in-
30
formation . This way, you can make sure that you
have all the keys when purchasing a used vehicle.
Electronic immobilizer
The immobilizer p revents unauthorized use of
the vehicl e.
Under certain circumstances, the vehicle may not
be able to start if there is a key from a different
vehicle manufacturer on the key chain .
Data in the master key
When driving, service and maintenance-relevant
data is cont inuous ly stored in your remote con
trol key. Your Audi se rvice advisor can read out
th is data and tell you about the work your vehicle
needs . T his applies also to veh icles w ith a con
venience key*.
Personal convenience settings
If two people use one vehicle, it is recommended
that each person always uses their own remote
control key. When the ignition is turned off or
when the vehicle is locked, pe rsonal convenience
settings for the following systems are stored and
ass igned to the remote master key.
- Climate cont rol system
- Steeri ng wheel heating*
- Central lock ing system
- Interior lighting*
- Exter ior lighting
- Rain sensor
- Memory function*
- Park ing aid*
- Adapt ive cru ise control*
- Active lane assist*
- Side assist*
- Traffic jam assist*
- Distance warning*
- Night vision assist*
- Audi pre sense*
- Speed warning*
The stored settings are automatically recalled
when you unlock the vehicle, open the doors or
turn o n the ignition . .,..
Page 34 of 398
Opening and closing
,.. Slide the battery holder carefully into the re
mote control key .
,.. Insert the mechanica l key.
@ For the sake of the environment
Discharged batteries must be disposed of us
ing methods that will not harm the environ
ment. Do not dispose of them in household
trash.
@ Tips
The replacement battery must meet the same
specifications as the original battery in the re
mote control key.
Unlocking /locking by remote control
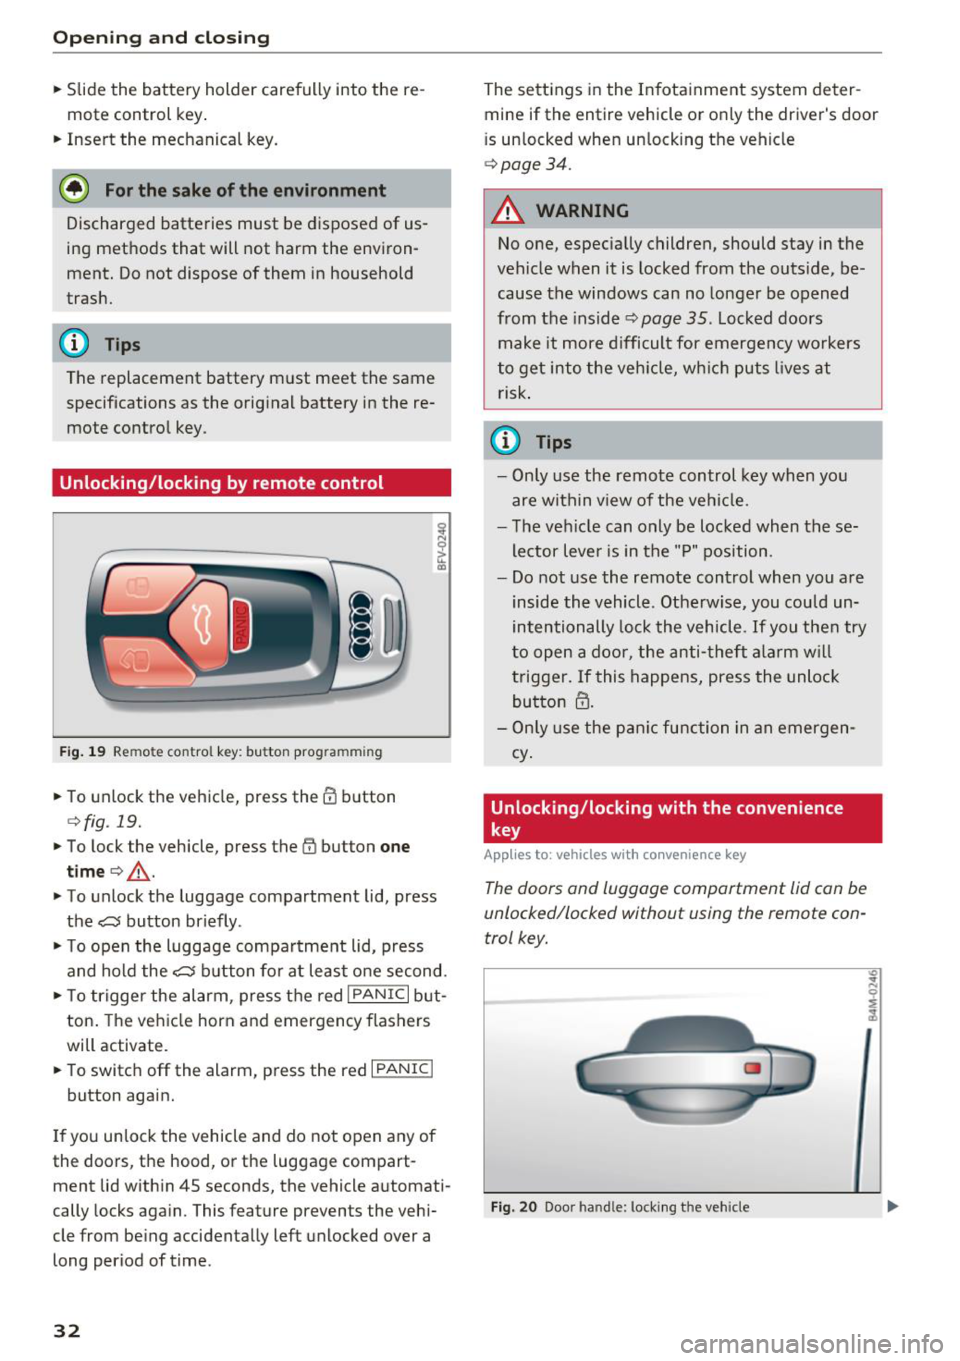
F ig . 19 Remote control key: button prog ramming
,.. To unlock the vehicle, press the CD button
¢fig . 19.
,.. To lock the vehicle, press the (I) button one
time
c> _& .
,.. To unlock the luggage compartment lid, press
the~ button briefly .
,.. To open the luggage compartment lid, press
and hold the~ button for at least one second.
,.. To trigger the alarm , press the red
I PANIC I but
ton. The vehicle horn and emergency flashers
will activate.
,.. To switch off the alarm, press the red
I PANIC I
button again.
If you unlock the vehicle and do not open any of
the doors, the hood, or the luggage compart
ment lid within 4S seconds, the vehicle automati
cally locks again. This feature prevents the vehi
cle from being accidentally left unlocked over a
long period of time.
32
The settings in the Infotainment system deter
mine if the entire vehicle or only the driver's door
i s unlocked when unlocking the vehicle
c> page34.
A WARNING
No one, especially children, should stay in the
vehicle when it is locked from the outside, be
cause the windows can no longer be opened
from the inside
c> page 35. Locked doors
make it more difficult for emergency workers
to get into the vehicle, wh ich puts lives at
risk.
(D Tips
- Only use the remote control key when you
are within v iew of the vehicle.
- The vehicle can only be locked when these
lector lever is in the "P" position .
- Do not use the remote control when you are
inside the vehicle . Otherwise, you could un
intentionally lock the vehicle. If you then try
to open a door, the anti-theft alarm will
trigger. If this happens, press the unlock
button
m.
- Only use the panic function in an emergen
cy .
Unlocking /locking with the convenience
key
App lies to: vehicles with co nvenience key
The doors and luggage compartment lid can be
unlocked/locked without using the remote con
trol key.
Fig. 20 Door handle: locki ng t he veh icle
"' .. N 0 :;
:1,
Page 35 of 398
a co ...... N r--. N ...... 0
0
:E '
.,. Grip the door handle . The door unlocks auto-
matically.
... Pull on the door handle to open the door.
Locking the v ehicl e
.,. Se lect the "P" position. The vehicle cannot be
locked if "P" is not se lected .
.,. To lock the veh icle, close the door and touch
the sensor in the door hand le
once c:> fig. 20 . Do
not hold the door handl e while doing this .
You can u nlock/lock the vehicle at eve ry door.
The remote cont rol key cannot be more than ap
proximately 4 f eet (1.S m) away from the door
handle. It makes no difference whether the mas
ter key is in you r jacket pocket or in your brief
case, for example .
If you hold the door handle while locking, this
can impair th e lock ing funct ion.
The door ca nnot be opened for a br ief per iod di
rect ly after locking it. Th is way you have the op
portunity to check if the doors locked correctly.
The settings in the Infotainment system deter mine i f the entire vehicle or only one of the doors
is unlocked when unlocking the vehicle
c:> page34 .
_& WARNING
Read and following all WARNINGS<=>&. in De
scription on page
29.
(D Tips
I f your vehicle is left standing fo r a long peri
od of time, note the following:
- The energy management system gradually
turns off unnecessary convenience functions
to prevent the vehicle battery from draining
and to maintain the vehicle 's abi lity to start
for as long as possib le. You may not be able
to unlock your vehicle us ing the convenience
key .
Op eni ng and clos ing
(D Tips
Unlocking with the convenience key (keyless
access) can be deactivated in the Infotain-
ment system
<=> page 34.
Central locking switch
Fig . 2 1 D rive r's doo r: centra l lock ing swi tc h
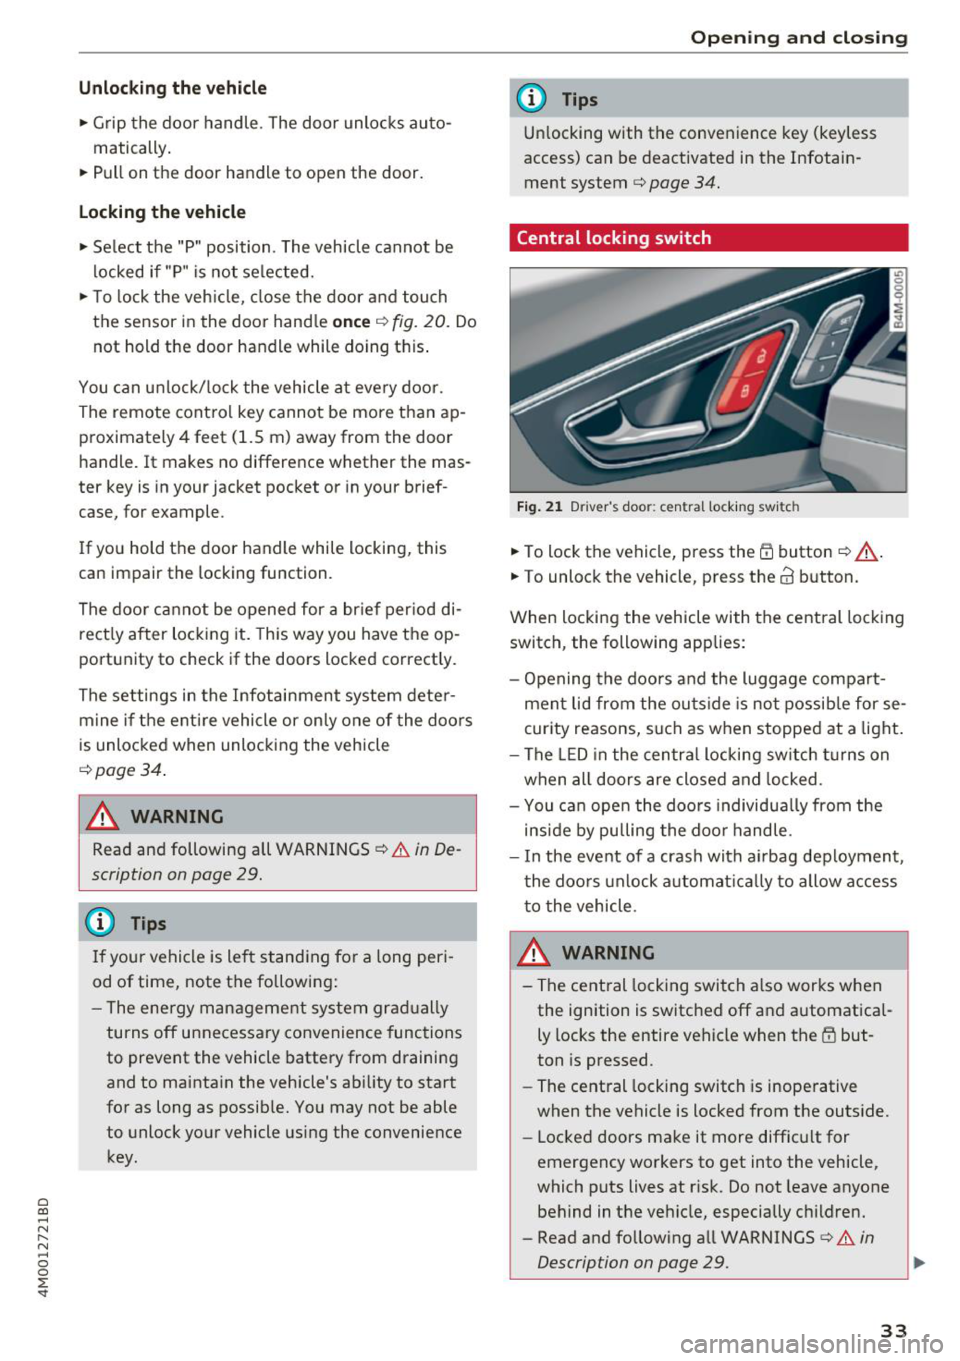
... To lock the vehicle, press the Efi button <=> A-
.. To unlock th e vehicl e, pr ess the @ button.
When locking the vehicle with the central locking switch , the following app lies:
- Opening the doors and the luggage compart ment lid from the outside is no t possib le for se
curity reasons, such as when stopped at a light .
- The LED in the centra l locking sw itch turns on
when all doors are closed and locked .
- You ca n open the doo rs individua lly from the
inside by pulling the doo r handle .
- I n the event of a crash with ai rbag deployment ,
the doo rs unlock a utoma tically to allow access
to the vehicle .
.&_ WARNING ~ -
- The central locking switch a lso works when
the ignition is switched off and automatica l
ly locks the entire vehicle when the
Efi but
ton is pressed .
- The central locking switch is inoperative
when the vehicle is locked from the outs ide.
- Locked doors make it more difficult for
emergency workers to get into the vehicle,
which puts lives at risk. Do not leave anyone
behind in the vehicle, especially children.
- Read and following all WARNINGS
c:> &. in
Description on page
29 . ..,.
33
Page 36 of 398
Opening and closing
@ Tips
Your vehicle locks automat ica lly when it
reac hes a spee d of 9 m ph (15 km/ h) (Aut o
Loc k)
¢ page 29. You can unlock the vehicle
aga in us ing the
63 button i n the central lock-
ing sw itch.
Setting the central locking system
You can set which functions are controlled by the
central locking system .
.,. Se lect in the Infotainment sys tem: IMEN UI but
ton
> Vehicle > left contro l button > Vehicle
settings
> Central locking .
Door unlocking -
you can decide if All doors or
only the
Driver's door should unlock . The lug
gage compartment lid also un locks w hen
All is
selected . If yo u se lect D river's door* in a vehicle
w ith a
convenience key , onl y the dr iver's door
w ill unloc k w hen you grab t he d river 's doo r han
d le. If you gra b anothe r door handle, t he e ntir e
ve hicl e w ill be unl ock ed.
If you select
Driver's door , all the doors and l ug
gage com part men t lid w ill u nlock if yo u press th e
m bu tton on the remote co ntrol key tw ice.
Applies to: vehicles w ith convenience key:
Open
with convenience key -
you ca n deactivate t he
f u nction for unloc king v ia the sensor . T he f unc
tion fo r locking via the se nso r will s till be e nabled
¢ page 32.
Disable rear lid handle -if you select On , the lug
gage com part men t lid ha ndl e is locked . In t his
case, t he lugg age co mpartme nt lid c an be
ope ned wi th the
cs button on the rem ote c on
t rol key or w ith the unlo ck butto n in th e drive r's
door. In ve hicles wit h a co nvenience key *, yo u can
still ope n the l uggage compa rtme nt lid usin g the
handle if a n author ized remote cont rol key is
nea r the p rox imity se nsor *.
Fold mirrors * -if yo u selec t On, th e exterio r re ar
view mir rors fold in automat ically whe n you press
the ~ button on the remo te control key or to uch
the sensor * in the han dle.
ll Thi s fun ctio n is not ava ilab le in all c oun tries.
34
Tone when locking1
) -if yo u se lec t On , a tone
will sound w hen yo u loc k the vehicle.
Mechanically locking/unlocking the doors
If the central locking fails, y ou must unlock/lock
the doors separately .
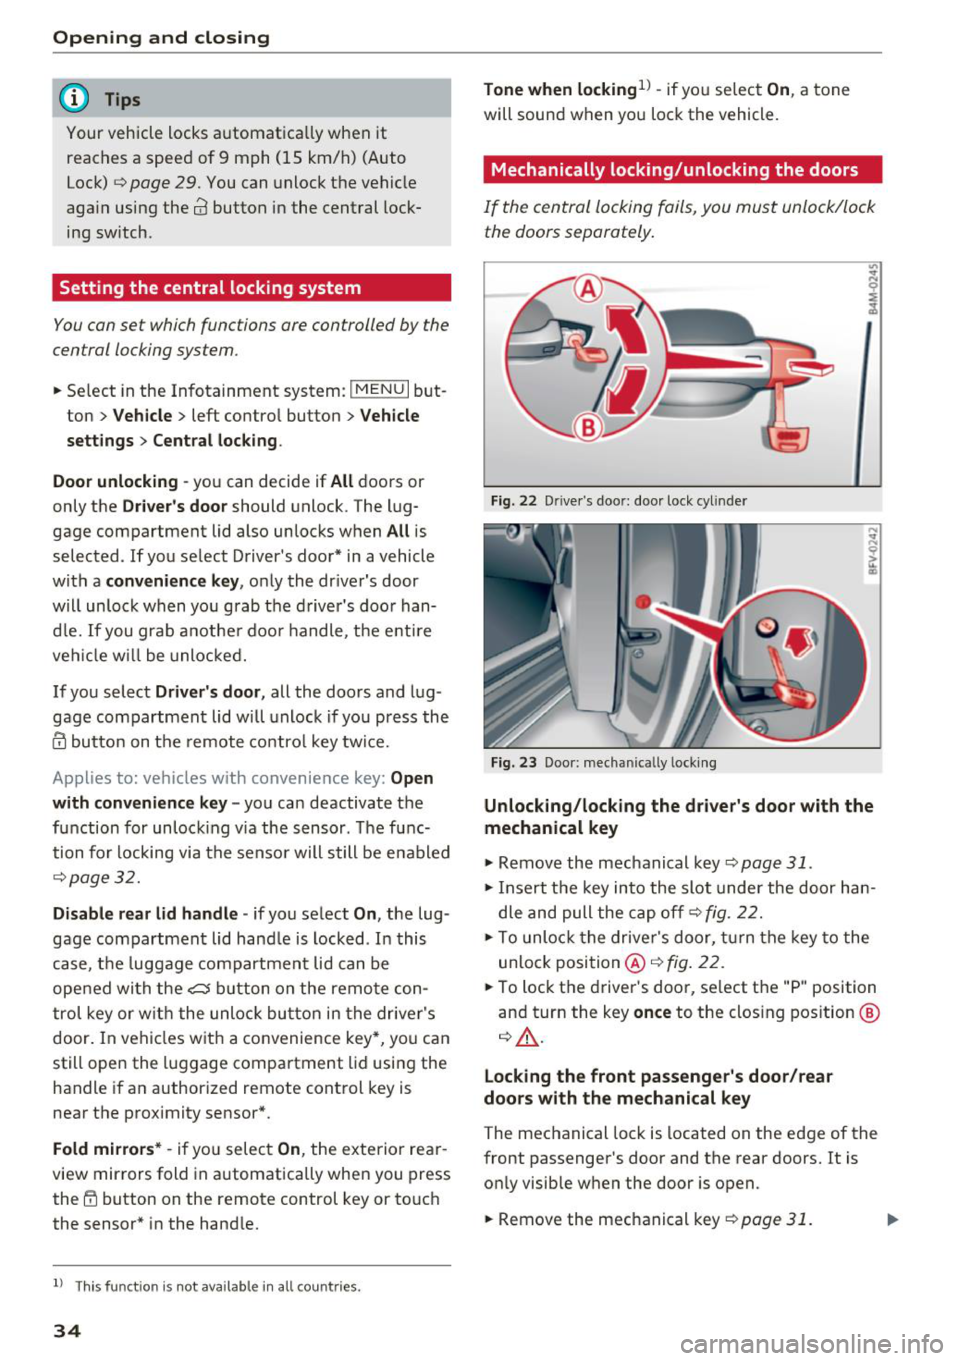
Fig. 22 D rive r's doo r: doo r lock cy li nder
Fig. 23 Door: mech anically lock ing
Unlocking/locking the driver's door with the
mechanical key
.,. Rem ove the mec hanical key ¢ page 31.
.,. In ser t th e key in to the slot unde r the door han
d le and pull the cap off ¢
fig. 22.
.,. To unlo ck the drive r's door, turn th e key to t he
unlo ck posi tio n@ ¢
fig. 22 .
.,. To loc k the driver 's doo r, se lect t he "P" position
an d turn the key
once to the clos ing pos ition @
q &.
Locking the front passenger's door/rear
doors with the mechanical key
The mec hanical lock is located on the edge of the
front passenger 's doo r and the rear doors. It is
o nl y visib le w hen the door is o pen .
.,. Remove the mec hanical key
q page 31.