heating AUDI Q7 2020 Owner´s Manual
[x] Cancel search | Manufacturer: AUDI, Model Year: 2020, Model line: Q7, Model: AUDI Q7 2020Pages: 316, PDF Size: 113.87 MB
Page 4 of 316
Table of contents
About this Owner's Manual......
SUMIMALY: ; « ss6% : osen ss sean cs poe s
QC CCeS Skis: si esis a 6 ores os ewe
Cockpit... 2... ee eee eee eee
Indicator lights overview...........0.
Display and operation............
Instrument cluster...............
Instrument cluster overview...........
Loading a personal profile.............
Operating. ........ 20.00. cece eee eee
Adjusting the display.................
Coolant temperature display...........
Tachometer............. eee eee eee
OdOMELEF as + 2 ams < gay & = pemE se ROR «
Outside temperature display...........
Engine oil temperature indicator.......
Vehicle’ TuNCtiONS « ssc. ss sees be eee ee
Touch displays....................
General touch display operation........
Multi Media Interface................
Head-up display..................
DeSériptlonis ss wees « x wees so eee + ee
Voice recognition system........
Generalinformation.................
Operating’ « esses ss assur wx aeuew sv ewe &
External voice operation..............
Global FuUNCtiONS:. icc: 6 6 ese. 6 6 ces
Additional function buttons...........
Starting and driving.............
Personalization..................
Opening and closing.............
Central locking........-.....00-e eee
Child safety lock.............00.-0 08
Power Wind OwWSics «seus ys sms 5 4 wee
Panoramic glass roof.................
Garage door opener..................
NOD
OO
14
16
16 18
24 24
25 25 25
26 27 27 28 28 28 30 30
34
36
40 40
41
Lights and Vision................. 45
Exterior lighting. ...............000ee AS
Interior lightinGisws « 2 wove + ¢ wees os ewe 50
ViSIOM iss +o sea « 5 wore oo semen W armen © oi 51
Windshield wipers................45- 53
Digital compass: s : sees s sees sz wees se 56
Sitting correctly and safely...... 58
Correct passenger seating position...... 58
Frontse@ats's « sews ¢ ¢ asia & 3 saws @ o wars = 58
Rearseat worse a sens + « semi oa axereee nw oie 61
Steering wheel............2..200005. 64
Head restraintsts: « » sae x 2 oawa a s gm o 8 64
Safety belts..............00..00000. 66
Memory function..............-000 eee 70
Airbag system .:2 ss secs ee eee tees 70
Child
safety seats coc « 4 seven © wreuese te © vase 75
Stowing and using............... 81
POWOr SOURCES wisn 5 6 eer ve oes wv eon 81
Cup holders......... 2... e eee eee eee 81
Storage and compartments............ 82
Luggage compartment............... 82
Roof rack... 0.0... 2... e eee eee eee 87
Warn and Cold ic: ss cies ss eee os ve 89
Climate control system............... 89
Steering wheel heating............... 92
Fluids in the A/C system. ............. 92
Driving...................0 0.000005 94
Starting'the vehicle ccc. so eves ee ceed ee 94
Whenidrivingye. sexe os cece 2 oem ves 95
Drive system... 0... 2. ee eee eee eee 100
Start/Stop System « ecw. ss ewes ae ees de 101
Brakes, 2s sii 2 wien a 2 oem ao mame 3 o eee 102
Electromechanical parking brake....... 104
Special driving situations.............. 106
Driving dynamic.................. 108
Audi drive select...............00000. 108
SUSPENSION es « & scues y & seis 5 & aie se ae 109
SECOFING
« ccexses 5 © soewome « % enemas 6 a mens 4 0s 110
All wheel drive (quattro) .............. art
Electronic Stabilization Control......... 112
Trailer towing.................... 115
Driving with atrailer................. 115
Page 15 of 316
4M1012721BA
Instrument cluster
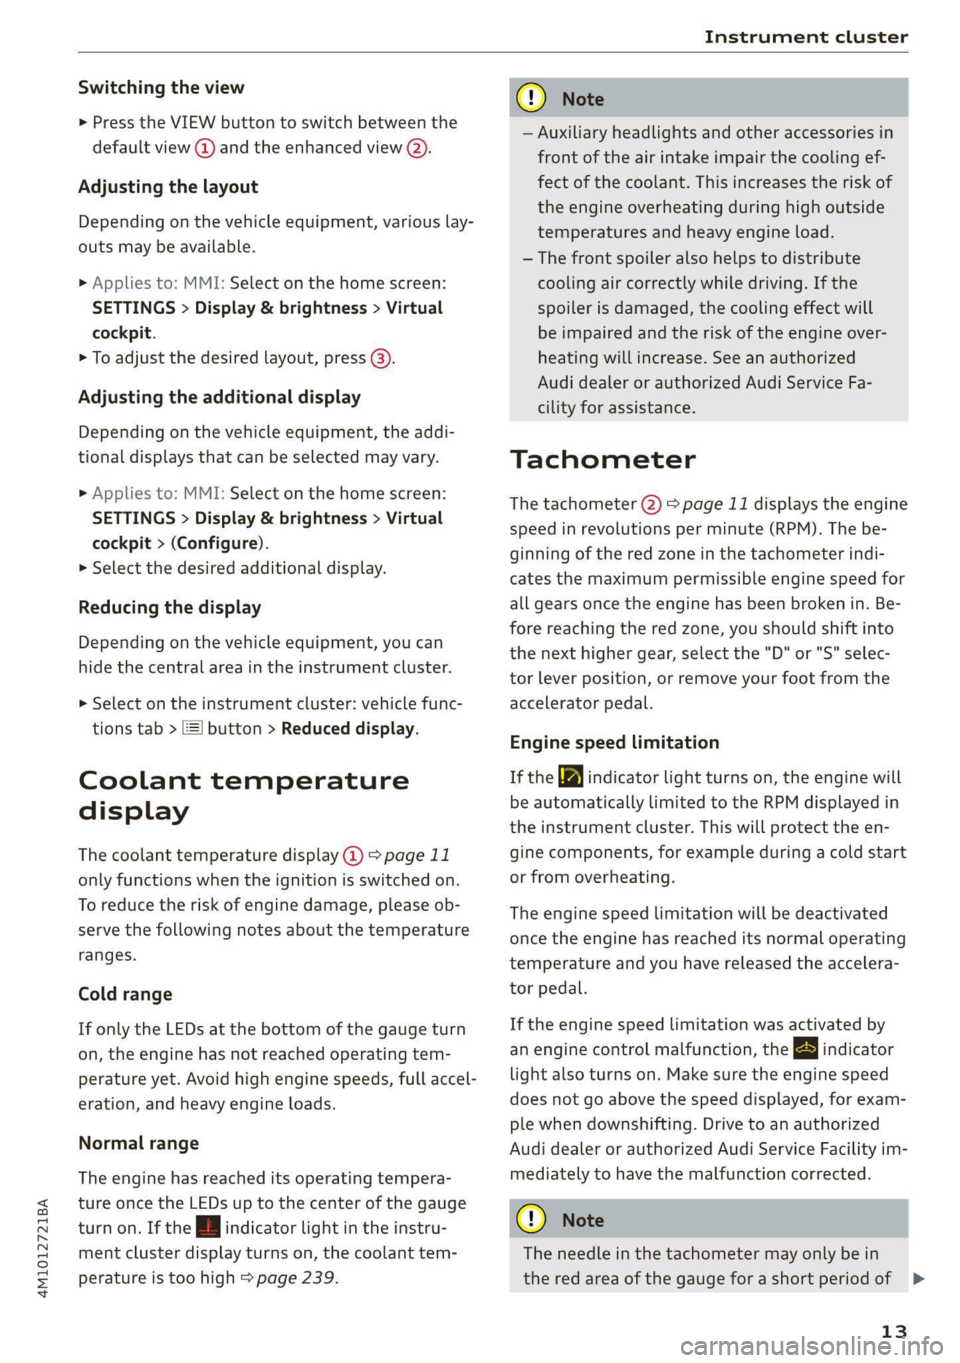
Switching the view
> Press the VIEW button to switch between the
default view @ and the enhanced view (2).
Adjusting the layout
Depending on the vehicle equipment, various lay-
outs may be available.
> Applies to: MMI: Select on the home screen:
SETTINGS > Display & brightness > Virtual
cockpit.
> To adjust the desired layout, press @).
Adjusting the additional display
Depending on the vehicle equipment, the addi-
tional displays that can be selected may vary.
> Applies to: MMI: Select on the home screen:
SETTINGS > Display & brightness > Virtual
cockpit > (Configure).
> Select the desired additional display.
Reducing the display
Depending on the vehicle equipment, you can
hide the central area in the instrument cluster.
> Select on the instrument cluster: vehicle func-
tions tab > EE] button > Reduced display.
Coolant temperature
display
The coolant temperature display @) > page 11
only functions when the ignition is switched on.
To reduce the risk of engine damage, please ob-
serve the following notes about the temperature
ranges.
Cold range
If only the LEDs at the bottom of the gauge turn
on, the engine has not reached operating tem-
perature yet. Avoid high engine speeds, full accel-
eration, and heavy engine loads.
Normal range
The engine has reached its operating tempera-
ture once the LEDs up to the center of the gauge
turn on. If the || indicator light in the instru-
ment cluster display turns on, the coolant tem-
perature is too high > page 239.
CG) Note
— Auxiliary headlights and other accessories in
front of the air intake impair the cooling ef-
fect of the coolant. This increases the risk of
the engine overheating during high outside
temperatures and heavy engine load.
—The front spoiler also helps to distribute
cooling air correctly while driving. If the
spoiler is damaged, the cooling effect will
be impaired and the risk of the engine over-
heating will increase. See an authorized
Audi dealer or authorized Audi Service Fa-
cility for assistance.
Tachometer
The tachometer 2) > page 11 displays the engine
speed in revolutions per minute (RPM). The be-
ginning of the red zone in the tachometer indi-
cates the maximum permissible engine speed for
all gears once the engine has been broken in. Be-
fore reaching the red zone, you should shift into
the next higher gear, select the "D" or "S" selec-
tor lever position, or remove your foot from the
accelerator pedal.
Engine speed limitation
If the Ay indicator light turns on, the engine will
be automatically limited to the RPM displayed in
the instrument cluster. This will protect the en-
gine components, for example during a cold start
or from overheating.
The engine speed limitation will be deactivated
once the engine has reached its normal operating
temperature and you have released the accelera-
tor pedal.
If the engine speed limitation was activated by
an engine control malfunction, the By indicator
light also turns on. Make sure the engine speed
does not go above the speed displayed, for exam-
ple when downshifting. Drive to an authorized
Audi dealer or authorized Audi Service Facility im-
mediately to have the malfunction corrected.
() Note
The needle in the tachometer may only be in
the red area of the gauge for a short period of >
13
Page 62 of 316
Sitting correctly and safely
> To adjust the seat upward or downward, push
the rear section of the button @) upward or
downward.
> To adjust the seat surface, press the front part
of the button @ upward or downward.
Adjusting the backrests
> To move the backrest forward or backward,
press the button @) forward or backward.
Adjusting the lumbar support
> To adjust the lumbar support, press the button
@ at the applicable location.
Massage function
Switch the massage function on or off @). Setting
the massage type and intensity > page 60.
ZA\ WARNING
The power front seats can also be adjusted
when the ignition is switched off. To reduce
the risk of injury, children should never be left
unattended in the vehicle.
Neem a Rice D
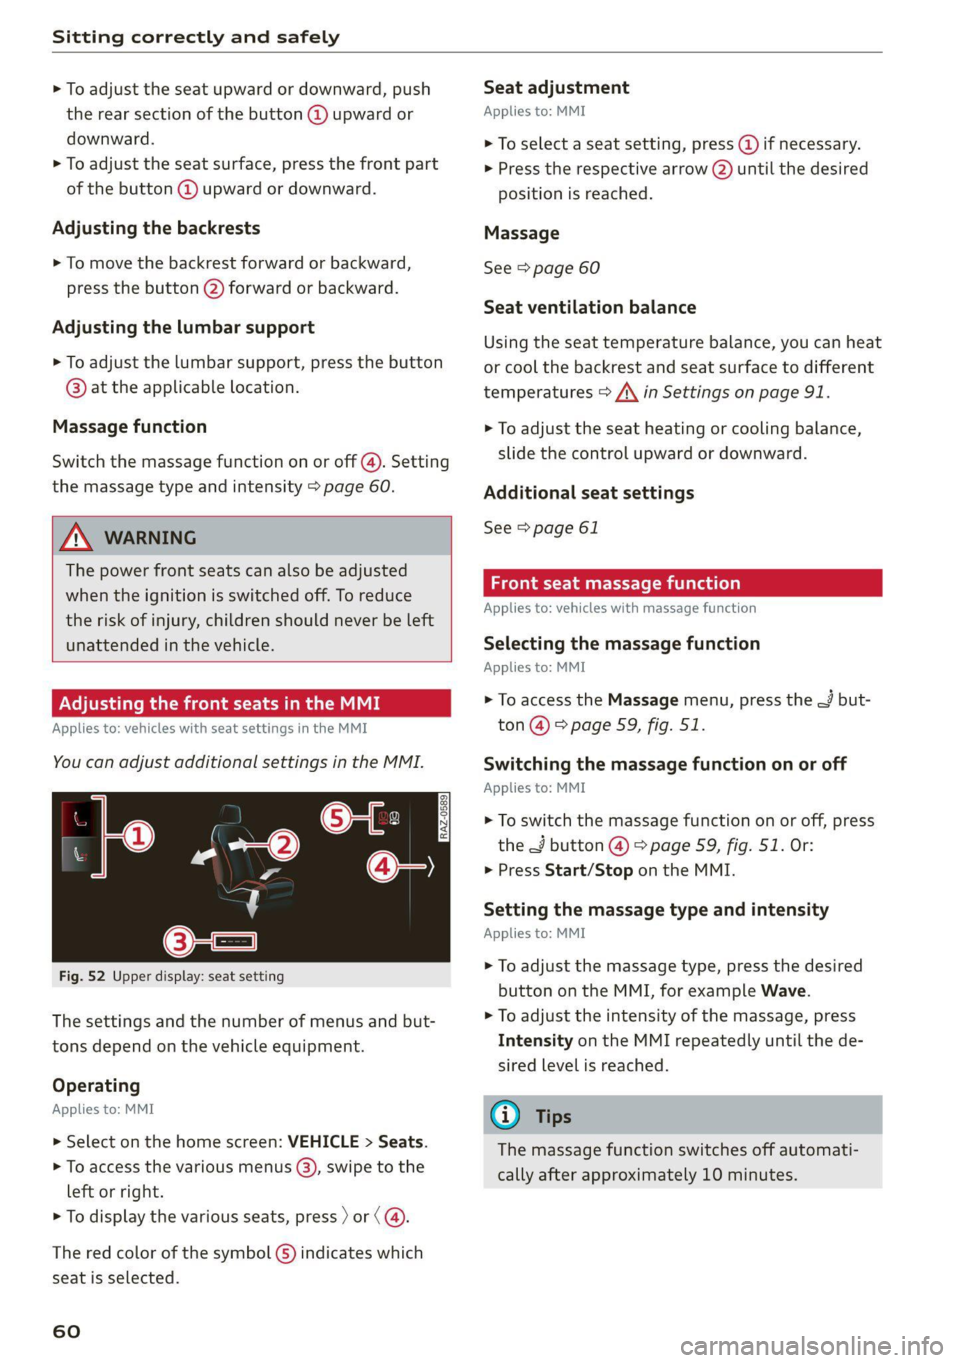
Applies to: vehicles with seat settings in the MMI
You can adjust additional settings in the MMI.
Cre
@—
RAZ-0589)
—O
©=-c
Fig. 52 Upper display: seat setting
The settings and the number of menus and but-
tons depend on the vehicle equipment.
Operating
Applies to: MMI
> Select on the home screen: VEHICLE > Seats.
> To access the various menus (3), swipe to the
left or right.
> To display the various seats, press ) or ¢ @®.
The red color of the symbol () indicates which
seat is selected.
60
Seat adjustment
Applies to: MMI
> To select a seat setting, press (@ if necessary.
> Press the respective arrow (@) until the desired
position is reached.
Massage
See > page 60
Seat ventilation balance
Using the seat temperature balance, you can heat
or cool the backrest and seat surface to different
temperatures > /\ in Settings on page 91.
> To adjust the seat heating or cooling balance,
slide the control upward or downward.
Additional seat settings
See > page 61
Front seat massage function
Applies to: vehicles with massage function
Selecting the massage function
Applies to: MMI
> To access the Massage menu, press the — but-
ton @) > page 59, fig. 51.
Switching the massage function on or off
Applies to: MMI
> To switch the massage function on or off, press
the J button @ © page 59, fig. 51. Or:
> Press Start/Stop on the MMI.
Setting the massage type and intensity
Applies to: MMI
> To adjust the massage type, press the desired
button on the MMI, for example Wave.
> To adjust the intensity of the massage, press
Intensity on the MMI repeatedly until the de-
sired level is reached.
G) Tips
The massage function switches off automati-
cally after approximately 10 minutes.
Page 85 of 316
4M1012721BA
Stowing and using
— Never exceed the permitted axle and load
and vehicle weight > page 298.
— Never secure a child safety seat to the tie-
downs.
— Never leave your vehicle unattended, espe-
cially if the luggage compartment lid is
open. Children could enter the luggage com-
partment and close the luggage compart-
ment lid from the inside. This creates the
risk of fatal injury, since the children would
be locked in and may not be able to escape
by themselves.
— Do not allow children to play in or on the ve-
hicle. Close and lock the luggage compart-
ment lid as well as all other doors when you
leave the vehicle.
— Never transport passengers in the luggage
compartment. Every passenger must be cor-
rectly secured with the safety belts in the
vehicle > page 66.
— Be careful when releasing the backrest and
folding
it forward. To reduce the risk of be-
ing pinched, pay attention and check when
folding backrests forward.
— The backrest must be securely latched so
objects cannot slide forward out of the lug-
gage compartment during sudden braking.
— The backrest must be latched securely to en-
sure that the safety belt is protecting the
center seating position.
— Always pull forward on the backrest to make
sure it is check if it is correctly locked in
place.
— Applies to: vehicles with third row seats: To
reduce the risk of injury, the backrest on the
second row seats must be in the upright po-
sition and locked in place if there are pas-
sengers riding in the third row.
— Applies to: vehicles with third row seats:
When there are passengers riding in the
third row seats, remove the adjustable tie-
downs* and place the rail covers on the rails
to
reduce the risk of injuries.
CG) Note
—To reduce the risk of damage, move the rear
head restraints down > page 65 before fold-
ing the rear backrests forward.
— When folding the backrest forward, make
sure the outer safety belts are in the belt
guide recess so that they do not get pinched
in the backrest lock and damaged. Other ob-
jects should be removed from the rear
bench seat to protect the backrest from
damage.
— If you move the front seat back when the
rear seat backrest is folded forward, you
could damage the head restraints on the
rear seat.
— Make sure that the heating grid strips for
the rear window defogger are not damaged
by abrasive objects.
— Let the luggage compartment cover roll up
slowly to reduce the risk of damage.
@) Tips
— The tire pressure must be adapted to the
load > page 256.
— You can purchase straps at specialty stores.
83
Page 91 of 316
4M1012721BA
Warm and cold
Warm and cold
Climate control system
One of the following options may be available,
depending on vehicle equipment:
— A deluxe automatic climate control system with
3 zones where the temperature, air distribu-
tion, and air supply can be set separately on the
left front side, the right front side, and in the
rear
— A deluxe automatic climate control system with
4 zones to individually adjust the temperature,
air distribution, and amount of ventilation at all
of the seats
The climate control system warms, cools, dehu-
midifies, and filters the air in the vehicle interior.
It is the most effective when the windows and
panoramic glass roof* are closed. If there is a
build-up of heat inside the vehicle, ventilation
can help to speed up the cooling process.
The climate control system automatically main-
tains a temperature once it has been set. In all
heating mode functions except defrost, the blow-
er only switches to a higher speed once the en-
gine coolant has reached a certain temperature.
@ For the sake of the environment
Energy can be saved by switching off the A/C
mode.
@) Tips
—To prevent interference with the heating or
cooling output and to prevent the windows
from fogging over, the air intake in front of
the windshield must be free of ice, snow,
and leaves.
— Condensation from the cooling system can
drip and form a puddle of water under the
vehicle. This is normal and does not mean
there is a leak.
— The energy management system may tem-
porarily switch off certain functions, such as
the seat heating” or rear window defogger.
These systems are available again as soon as
the energy supply has been restored.
— Certain settings are stored automatically in
the active personal profile.
zB BI
2 19
Ig e
AUTO AUTO
Vel “ rae
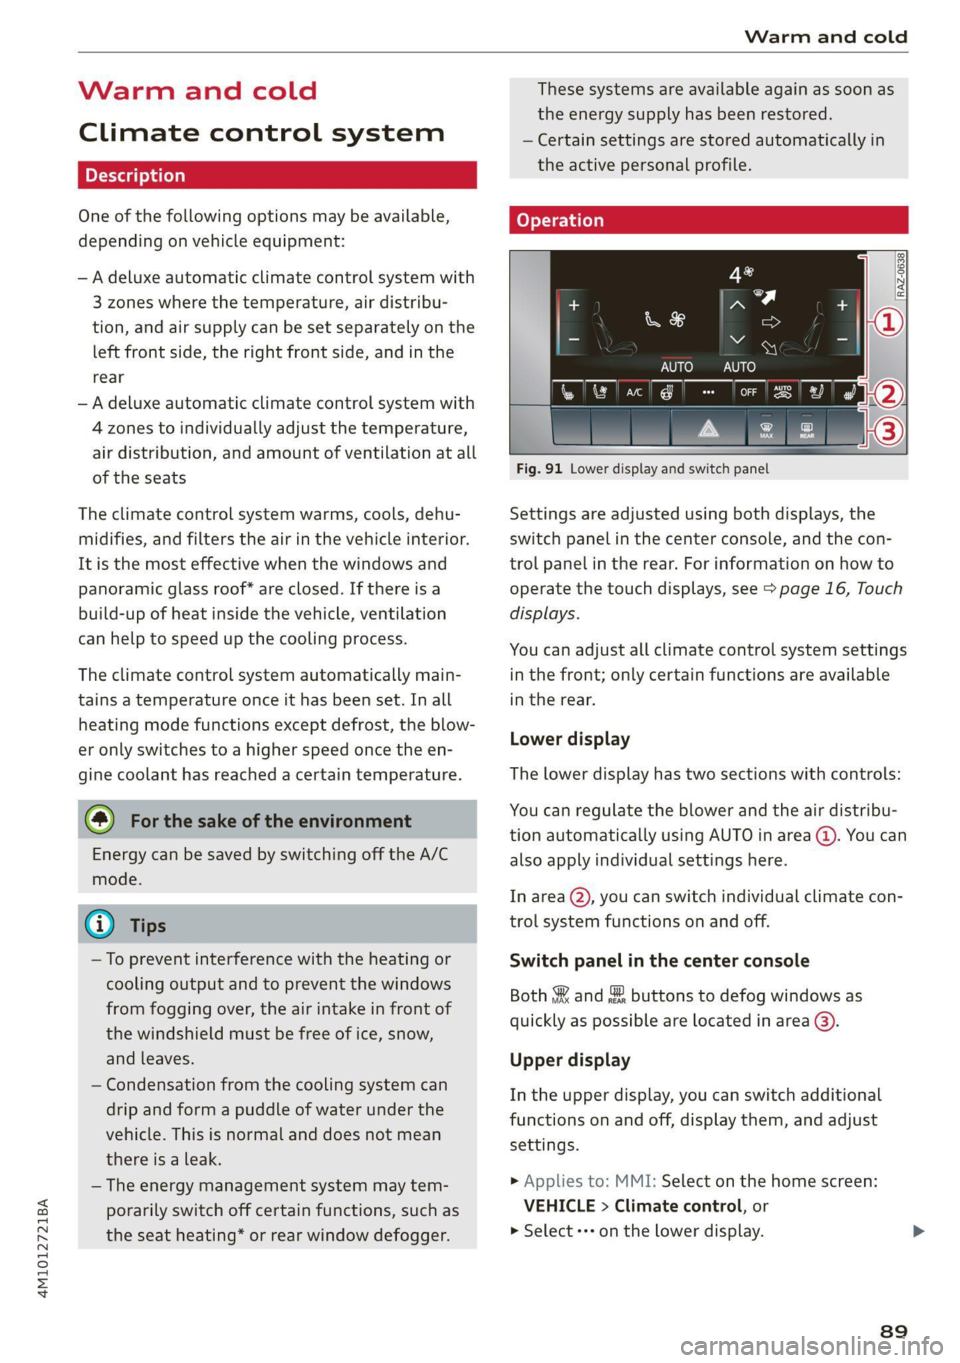
Fig. 91 Lower display and switch panel
Settings are adjusted using both displays, the
switch panel in the center console, and the con-
trol panel in the rear. For information on how to
operate the touch displays, see > page 16, Touch
displays.
You can adjust all climate control system settings
in the front; only certain functions are available
in the rear.
Lower display
The lower display has two sections with controls:
You can regulate the blower and the air distribu-
tion automatically using AUTO in area (@). You can
also apply individual settings here.
In area @ you can switch individual climate con-
trol system functions on and off.
Switch panel in the center console
Both §& and & buttons to defog windows as
quickly as possible are located in area @).
Upper display
In the upper display, you can switch additional
functions on and off, display them, and adjust
settings.
> Applies to: MMI: Select on the home screen:
VEHICLE > Climate control, or
> Select «++ on the lower display.
89
Page 92 of 316
Warm and cold
Control panel in rear
You can operate certain climate control functions
in the rear using the control panel.
Customizing
A climate control function from the upper display
can be assigned to each button to the left and
right of +++ in area @).
> Press and hold the symbol for the desired func-
tion on the upper display for at least three sec-
onds. A menu that consists of two sections ap-
pears.
> If you pull the symbol toward the left section,
the button to the left of «++ will be assigned.
> If you pull the symbol toward the right section,
the button to the right of -*- will be assigned.
Press the buttons to turn the functions on or off.
One bar in the button or the LED in the button
will light up when the function is switched on.
Some buttons can have several functions as-
signed to them. The various functions can be ac-
tivated by pressing the button multiple times.
AUTO Automatic mode
The automatic mode regulates the amount of air
and air distribution automatically, so that the set
temperature is reached is quickly as possible.
REAR Rear climate control system
Applies to: vehicles with rear climate control system
To enable operation of the climate control sys-
tem from the rear of the vehicle, press REAR.
To exit this mode again, press REAR or
REAR MODE EXIT.
SYNC Synchronization
When synchronization is switched on, the tem-
perature, air distribution, and blower strength on
the driver's side is applied to all seat positions.
You can also control the synchronization directly
using a gesture. Pull two fingers together on the
lower display > page 16.
90
OFF Switching off
The climate control system is switched off. Air
supply from the outside is blocked. If you press
OFF in the front, the front and rear climate con-
trol system will switch off. If you press OFF in the
rear, the rear climate control system will switch
off. To switch the climate control system back on,
press on any button in the respective display.
A/C / ME Cooling mode
The cooling mode only functions with the blower
turned on. The air is not cooled and humidity is
not removed when cooling mode is switched off.
This can cause fog on the windows. The cooling
mode switches off automatically at low outside
temperatures.
If you activate the A/C, the cooling mode will be
automatically regulated.
If you activate A/C, the cooling mode will run with
maximum cooling output and maximum blower
speed. To reduce unnecessary energy usage, only
use this function briefly.
+ /- Temperature
Temperatures between 60 °F (+16 °C) and 84 °F
(+28 °C) can be set. If outside of this range,
LOW / LO or HIGH / HI will appear in the display.
In both settings, the climate control runs con-
stantly at the maximum cooling or heating level.
The temperature is not regulated.
S8 Blower
With \/ / A, you can manually adjust the vol-
ume of air generated by the blower to your pref-
erences. The blower should always run at a low
setting to prevent the windows from fogging and
to ensure a continuous exchange of air inside the
vehicle. To have the blower regulated automati-
cally, press AUTO.
2 Air distribution
With °/=>/%, you can select the vents where
the air will flow from. To have the air distribution
controlled automatically, press the AUTO button
or deactivate all three arrows. With “, the air
will be directed toward the windshield.
Page 93 of 316
4M1012721BA
Warm and cold
Applies to: vehicles with 4-zone automatic cli-
mate control: You can press J in the rear control
panel multiple times to adjust the air distribution
based on the direction of the arrow.
® Defrosting
The windshield and side windows are defrosted
or cleared of condensation as quickly as possible.
Align the outer air vents with the side windows.
The maximum amount of air flows mainly from
the vents below the windshield. The windshield
defogger* is also switched on at low outside tem-
peratures. The ® button will flash. Recirculation
mode switches off. The temperature should be
set at +72°F (22°C) or higher. Depending on the
outside temperature, the A/C cooling mode may
automatically switch on.
& Rear window defogger
The rear window defogger only operates when
the engine is running. It switches off automati-
cally after 10 to 20 minutes, depending on the
outside temperature.
To prevent the rear window defogger from
switching off automatically, press and hold the
& button for more than three seconds. This is
stored until the ignition is switched off.
AUTO
<>/&S Recirculation mode
In recirculation mode, the air inside the vehicle is
circulated and filtered. This prevents the unfil-
tered air outside the vehicle from entering the
vehicle interior > A\.
Pressing the <> button switches recirculation
mode on or off manually.
‘AUTO
When switched on, automatic recirculation
controls the recirculation mode automatically.
You must press the {% button if fog forms on the
windows.
« Seat heating
Applies to: vehicles with heated seats
The seat heating temperature can be set at mul-
tiple levels. Press «/ once to switch on the highest
level. Press «) again to decrease the temperature
one level at a time. The seat heating is switched
off if the button is not illuminated.
*) Seat ventilation
Applies to: vehicles with seat ventilation
The seat ventilation intensity can be set to multi-
ple levels. Press ©) once to switch on the highest
level. Press 2) again to decrease the intensity one
level at a time. The seat ventilation is switched
off if the button is not illuminated.
@ Child safety lock*
If 8 turns on in the control panel in the rear*, the
child safety lock is active and operation is blocked
=> page 40.
Ionizer
Applies to: vehicles with ionizer
Hazardous particles and germs in the air may be
reduced through ionization. This helps to im-
prove the air quality for individuals in the passen-
ger compartment.
&* Fragrance
Applies to: vehicles with fragrance function
The fragrance function will dispense a scent in
the vehicle interior. It is dispensed through the
front outer vents. This will produce a pleasant
scent. The fragrance is time-delayed, especially
at low or high temperatures. You can adjust the
fragrance function > page 92.
Residual heat
The residual heat from the coolant is used to
heat the vehicle interior. To use this function,
press and hold the & button for more than two
seconds while the ignition is switched off. The
function switches off automatically after about
15 minutes.
ZX WARNING
— You should not use the recirculation mode
for an extended period of time, because no
fresh air is drawn in and the windows can
fog when cooling mode is switched off. This
increases the risk of an accident.
— Individuals with reduced sensitivity to pain
or temperature could develop burns when
using the seat heating* function. To reduce
the risk of injury, these individuals should
not use seat heating*.
91
Page 94 of 316
Warm and cold
@) Note
To reduce the risk of damage to the seat heat-
ing* elements, do not kneel on the seats or
place heavy pressure on one area of the seat.
@ Tips
— If the front passenger's seat heating” is
turned on, it will not turn on again automat-
ically if more than 10 minutes have passed
between switching the ignition off and on
again.
— Only use the fragrance function* in modera-
tion and take any other passengers and ani-
mals into consideration when using the
function. An overlap of different scents or
odors could cause discomfort. If there is
discomfort, reduce the intensity or switch
the fragrance function* off. Only use fra-
grances that are approved by Audi.
Adjusting the vents
You can open and close the vents using the
thumbwheels. The levers adjust the direction of
the airflow from the vents.
Add
nal settings
You can adjust additional settings.
» Applies to: MMI: Select on the home screen:
VEHICLE > Climate control > ©.
Fragrance
Applies to: vehicles with fragrance function
Using Fragrance selection, you can select the fra-
grance and see the fill level of the fragrance.
You can select the strength of the scent with Fra-
grance level.
Footwell temperature*
You can adjust the footwell temperature for the
driver and front passenger.
92
Steering wheel heating
Scale Rie mela
Applies to: vehicles with steering wheel heating
> Press @ to switch steering wheel heating on or
off.
You can also operate the steering wheel heating
using the multifunction steering wheel
= page 27.
G) Tips
The steering wheel heating setting will be au-
tomatically stored in the active personal pro-
file.
Applies to: vehicles with steering wheel heating
@ Steering wheel heating: on / Steering wheel
heating: off
This message appears if you have switched the
steering wheel heating on or off.
Steering wheel heating: malfunction! See own-
er's manual
If this message appears, there is a malfunction.
Drive immediately to an authorized Audi dealer
or authorized Audi Service Facility to have the
malfunction repaired.
Fluids in the A/C system
Refrigerant in the A/C system
The sticker in the engine compartment provides
information about the type and amount of refrig-
erant used in the vehicle’s A/C system. The stick-
er is located in the front section of the engine
compartment or at the front or back of the hood.
Symbol | Meaning
Warning: the A/C system must only
be serviced by qualified technicians. A
Refrigerant type
Lubricant type >
we
ott
Page 102 of 316
Driving
mode. If you turn the engine off, you will not be
able to select any other gears after restarting the
engine. Drive to an authorized Audi dealer or au-
thorized Audi Service Facility immediately to have
the malfunction corrected.
fi Selector lever: malfunction! You can contin-
ue driving. Please contact Service
There is a system malfunction in the selector lev-
er. Drive immediately to an authorized Audi deal-
er or authorized Audi Service Facility to have the
malfunction repaired.
| Selector lever: malfunction! Gear change on-
ly possible if using both shift paddles.
There is a system malfunction in the selector lev-
er. You can continue driving with restricted func-
tion. The selector lever is not working. Gears can
only be selected by tapping both shift paddles at
the same time when the vehicle is stationary. The
“P” gear is automatically engaged when you turn
off the engine. Drive to an authorized Audi dealer
or authorized Audi Service Facility immediately to
have the malfunction corrected.
fs} P button: malfunction! Auto P when engine
off. Please contact Service
There is a malfunction in the "P" button on the
selector lever. The “P” gear is automatically en-
gaged when you turn off the engine. Drive to an
authorized Audi dealer or authorized Audi Service
Facility immediately to have the malfunction cor-
rected.
fs} Danger of rolling away! P not possible.
Please apply parking brake
The parking lock was released using the emer-
gency release > page 98 or can no longer be en-
gaged. Drive to an authorized Audi dealer or au-
thorized Audi Service Facility immediately to have
the malfunction corrected.
Move selector lever to automatic position
The transmission has switched out of tiptronic
mode. Switch back to automatic mode with the
selector lever > page 98.
100
Drive system
A new vehicle must be broken in within the first
1,000 miles (1,500 km) so that all moving parts
work smoothly together, which helps to increase
the service life of the engine and other drive com-
ponents.
Do not drive higher than two-thirds of the maxi-
mum permitted engine RPM during the first 600
miles (1,000 km) and do not use full accelera-
tion. The engine can be increased RPM gradually
during the next 300 miles (500 km).
(eT eee LL Maal Meas Ms LENS Alla)
Applies to: vehicles with a conventional drive system or a mild
hybrid drive system
Vehicles with a conventional or mild hybrid drive
system are powered by a combustion engine. It
uses fuel to recover energy.
Vehicles with a mild hybrid drive system have ad-
ditional battery technology.
airless Ned e(aeLN
driving
Your driving style greatly influences the amount
of fuel and energy consumed, the environmental
impact, and the wear on the engine, brakes, and
tires. Note the following information for efficient
and environmentally-conscious driving:
— Turn off electrical equipment that is not need-
ed, for example seat heating*.
— Anticipate upcoming traffic situations while
driving to avoid unnecessary acceleration and
braking.
— Avoid driving at high speeds.
— Avoid adding extra weight to the vehicle if pos-
sible, for example by not leaving roof racks or
bike racks installed when they are not needed.
— Make sure the tire pressure is correct.
— Have maintenance performed regularly on the
vehicle.
— Do not drive with winter tires during the summ-
er.
Page 114 of 316
![AUDI Q7 2020 Owner´s Manual Driving dynamic
on curves. The vehicle is very responsive to steer-
ing. The settings depend on the selected Audi
drive select* mode.
Messages
+3] Sport differential: malfunction! Please con- AUDI Q7 2020 Owner´s Manual Driving dynamic
on curves. The vehicle is very responsive to steer-
ing. The settings depend on the selected Audi
drive select* mode.
Messages
+3] Sport differential: malfunction! Please con-](/img/6/40284/w960_40284-113.png)
Driving dynamic
on curves. The vehicle is very responsive to steer-
ing. The settings depend on the selected Audi
drive select* mode.
Messages
+3] Sport differential: malfunction! Please con-
tact Service
Drive immediately to an authorized Audi dealer
or authorized Audi Service Facility to have the
malfunction repaired.
3] Sport differential: temperature too high.
Please adapt driving style
The transmission temperature has increased sig-
nificantly due to the sporty driving manner. Drive
in a less sporty manner until the temperature re-
turns to the normal range and the indicator light
switches of.
ZA WARNING
Contact an authorized Audi dealer or author-
ized Audi Service Facility if the sport differen-
tial is faulty or malfunctioning. The repair
must be performed by trained personnel us-
ing
the correct oil in order to ensure safety.
Electronic Stabilization
Control
Electronic Stabilization Control (ESC) supports
driver safety. It reduces the risk of slipping and
improves driving stability. ESC detects critical sit-
uations, such oversteering and understeering of
the vehicle, the drive wheels spinning, or the risk
of the vehicle tipping. The brakes are applied or
the engine torque is reduced in order to stabilize
the vehicle.
If the B indicator light blinks while driving, the
ESC is actively regulating.
If the B indicator light turns on, the system has
switched the ESC off. In this case, you can switch
the ignition off and then on to switch the ESC on
again. The indicator light turns off when the sys-
tem is fully functional.
112
If the B indicator light turns on, ESC was limit-
ed or switched off manually > page 113.
The following systems are integrated in the ESC:
Anti-lock braking system (ABS)
ABS prevents the wheels from locking when brak-
ing. The vehicle can still be steered even during
hard braking. Apply steady pressure to the brake
pedal. Do not pump the pedal.
A pulsing in the brake pedal indicates that the
system is acting to stabilize the vehicle.
Brake assist
The brake assist system can decrease braking dis-
tance. It increases braking power when the driver
presses the brake pedal quickly in emergency sit-
uations. You must press and hold the brake pedal
until the dangerous situation is over. Depending
on the activated driver assistance systems, the
brake assist system may react with increased sen-
sitivity.
Anti-Slip Regulation (ASR)
ASR reduces drive power when the wheels begin
spinning and adapts the power to the road condi-
tions. This will increase the driving stability.
Electronic Differential Lock (EDL)
The EDL applies the brakes to wheels that are
slipping and transfers the drive power to the oth-
er wheels. This function is not available at higher
speeds.
In extreme cases, EDL automatically switches off
to keep the brake on the braked wheel from over-
heating. The vehicle is still functioning correctly.
EDL will switch on again automatically when con-
ditions have returned to normal.
Power steering
The ESC can also support vehicle stability
through steering.
Selective wheel torque control
Selective wheel torque control is used when driv-
ing on curves. Braking is targeted toward the
wheels on the inside of the curve as needed. This
allows more precise driving in curves.