power steering AUDI R8 2007 Owners Manual
[x] Cancel search | Manufacturer: AUDI, Model Year: 2007, Model line: R8, Model: AUDI R8 2007Pages: 210, PDF Size: 8.1 MB
Page 5 of 210
Contents3
Controls
Safety
Driving tips
General maintenance
Self-help
Technical data Child safety
. . . . . . . . . . . . . . . . . . . .
Points to remember if children are
travelling in the car . . . . . . . . . . . . .
Child safety seats . . . . . . . . . . . . . .
Fitting child safety seats . . . . . . . .
Driving tips
. . . . . . . . . . . . . . . .
Intelligent technology
. . . . . . . . . .
Electronic stabilisation program
(ESP) . . . . . . . . . . . . . . . . . . . . . . . . . .
Rear spoiler . . . . . . . . . . . . . . . . . . .
Brakes . . . . . . . . . . . . . . . . . . . . . . . .
Power steering . . . . . . . . . . . . . . . . .
Four-wheel drive (quattro®) . . . . . .
Dry sump lubrication system . . . .
Your vehicle and the
environment
. . . . . . . . . . . . . . . . . . .
Running in . . . . . . . . . . . . . . . . . . . .
Emission control systems . . . . . . .
Driving abroad . . . . . . . . . . . . . . . . .
Sporty driving . . . . . . . . . . . . . . . . .
Environmental compatibility . . . . .
General maintenance
. .
Care of vehicle and cleaning
. . .
General notes . . . . . . . . . . . . . . . . . .
Care of exterior . . . . . . . . . . . . . . . . .
Care of interior . . . . . . . . . . . . . . . . .
Fuel and filling the tank
. . . . . . . .
Petrol . . . . . . . . . . . . . . . . . . . . . . . . .
Filling the tank . . . . . . . . . . . . . . . . .
Checking and topping up fluidsEngine lid . . . . . . . . . . . . . . . . . . . . . .
Engine oil . . . . . . . . . . . . . . . . . . . . . .
Cooling system . . . . . . . . . . . . . . . . .
Brake fluid . . . . . . . . . . . . . . . . . . . . .
Battery . . . . . . . . . . . . . . . . . . . . . . . .
Windscreen washer . . . . . . . . . . . . . Wheels and tyres
. . . . . . . . . . . . . . .
Wheels . . . . . . . . . . . . . . . . . . . . . . . .
Tyre pressure monitoring system .
Accessories and modifications
to the vehicle
. . . . . . . . . . . . . . . . . .
Accessories, replacement parts and
repairs . . . . . . . . . . . . . . . . . . . . . . . .
Modifications . . . . . . . . . . . . . . . . . .
Radio transmitters and business
equipment . . . . . . . . . . . . . . . . . . . . .
Self-help
. . . . . . . . . . . . . . . . . . . . .
Self-help
. . . . . . . . . . . . . . . . . . . . . . . .
Breakdown kit . . . . . . . . . . . . . . . . . .
Repairing a tyre . . . . . . . . . . . . . . . . .
Changing a wheel . . . . . . . . . . . . . .
Jump-starting . . . . . . . . . . . . . . . . . .
Tow-starting and towing away . . .
Fuses and bulbs
. . . . . . . . . . . . . . . .
Fuses . . . . . . . . . . . . . . . . . . . . . . . . . .
Bulbs . . . . . . . . . . . . . . . . . . . . . . . . . .
Technical data
. . . . . . . . . . . .
General notes
. . . . . . . . . . . . . . . . . .
Notes . . . . . . . . . . . . . . . . . . . . . . . . . .
Vehicle identification data . . . . . . .
Performance, weights and
dimensions
. . . . . . . . . . . . . . . . . . . . .
R8 4.2 quattro . . . . . . . . . . . . . . . . . .
Dimensions . . . . . . . . . . . . . . . . . . . .
Capacities . . . . . . . . . . . . . . . . . . . . . 122
122
123
126
131
132
132
134
134
136
136
137
138
138
138
138
139
139143
144
144
144
147
152
152
152
155
155
157
159
161
162
164
166
166
172
174
174
174
175177
178
178
178
182
185
187
190
190
193
195
196
196
196
198
198
198
199
document_0900452a816e6cc9.book Seite 3 Mittwoch, 21. Februar 2007 1:32 13
Page 42 of 210
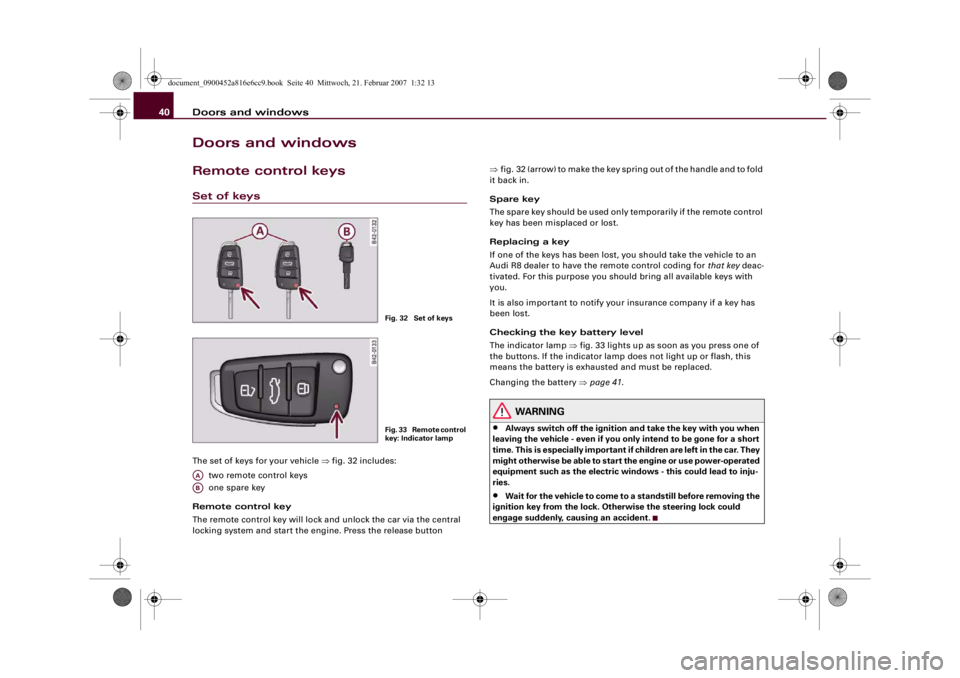
Doors and windows 40Doors and windowsRemote control keysSet of keysThe set of keys for your vehicle ⇒fig. 32 includes:
two remote control keys
one spare key
Remote control key
The remote control key will lock and unlock the car via the central
locking system and start the engine. Press the release button ⇒fig. 32 (arrow) to make the key spring out of the handle and to fold
it back in.
Spare key
The spare key should be used only temporarily if the remote control
key has been misplaced or lost.
Replacing a key
If one of the keys has been lost, you should take the vehicle to an
Audi R8 dealer to have the remote control coding for that key deac-
tivated. For this purpose you should bring all available keys with
you.
It is also important to notify your insurance company if a key has
been lost.
Checking the key battery level
The indicator lamp ⇒fig. 33 lights up as soon as you press one of
the buttons. If the indicator lamp does not light up or flash, this
means the battery is exhausted and must be replaced.
Changing the battery ⇒page 41.
WARNING
•
Always switch off the ignition and take the key with you when
leaving the vehicle - even if you only intend to be gone for a short
time. This is especially important if children are left in the car. They
might otherwise be able to start the engine or use power-operated
equipment such as the electric windows - this could lead to inju-
ries.
•
Wait for the vehicle to come to a standstill before removing the
ignition key from the lock. Otherwise the steering lock could
engage suddenly, causing an accident.
Fig. 32 Set of keysF i g . 3 3 R e m o t e c o n t r o l
key: Indicator lamp
AAAB
document_0900452a816e6cc9.book Seite 40 Mittwoch, 21. Februar 2007 1:32 13
Page 84 of 210
Driving 82Starting the engine
Turn the key to this position to start the engine. While the engine is
being started the headlights are switched back to side lights and
other major electrical equipment is switched off. After the engine
has started the ignition key returns to position by itself.
The ignition key has to be turned back to position before re-
starting the engine. The starter inhibitor in the ignition lock
prevents the starter motor from engaging when the engine is
running, as this could cause damage.
WARNING
•
Wait for the vehicle to come to a standstill before removing the
ignition key from the lock. Otherwise the steering lock could
engage suddenly, which could cause an accident.
•
Always take the key with you when leaving the vehicle – even
if you only intend to be gone for a short time. This is especially
important if children are left in the car. They might otherwise be
able to start the engine or use power-operated equipment such as
the electric windows - this could lead to injuries.Note
If the battery has been disconnected and then reconnected it will be
necessary to leave the key in position for about 5 seconds before
starting the engine.Starting the engineThe engine can only be started with an original Audi key.On vehicles with R tronic, the engine can be started in
neutral (N) or in any gear (1 - 6 or R).
– Apply the handbrake firmly ⇒.– Push the clutch pedal all the way down (vehicles with
manual gearbox).
– Press and hold the brake pedal.
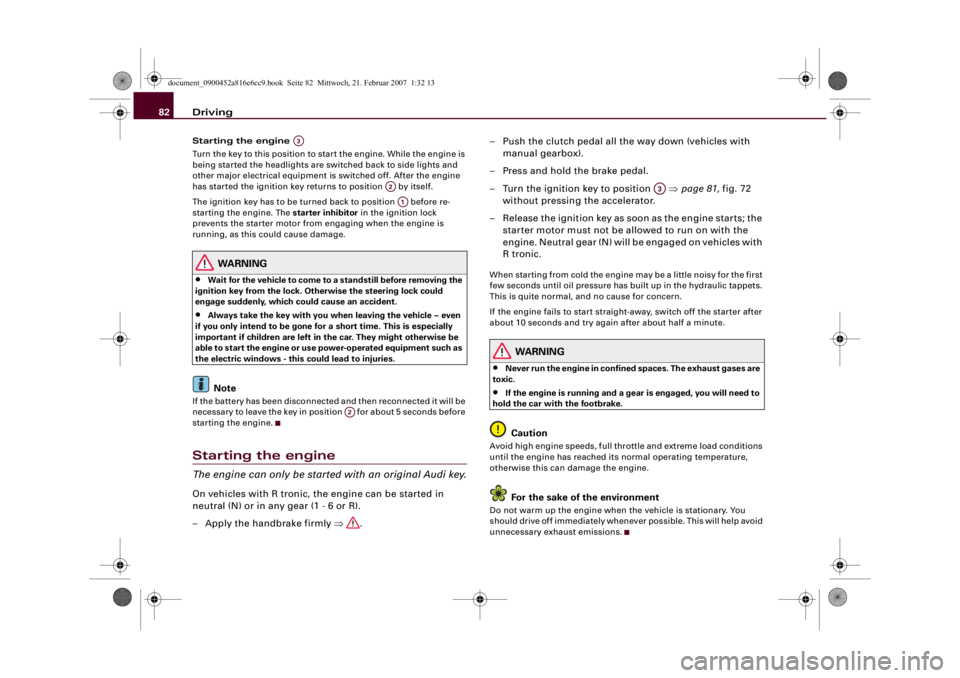
– Turn the ignition key to position ⇒page 81, fig. 72
without pressing the accelerator.
– Release the ignition key as soon as the engine starts; the
starter motor must not be allowed to run on with the
engine. Neutral gear (N) will be engaged on vehicles with
Rtronic.
When starting from cold the engine may be a little noisy for the first
few seconds until oil pressure has built up in the hydraulic tappets.
This is quite normal, and no cause for concern.
If the engine fails to start straight-away, switch off the starter after
about 10 seconds and try again after about half a minute.
WARNING
•
Never run the engine in confined spaces. The exhaust gases are
toxic.
•
If the engine is running and a gear is engaged, you will need to
hold the car with the footbrake.Caution
Avoid high engine speeds, full throttle and extreme load conditions
until the engine has reached its normal operating temperature,
otherwise this can damage the engine.
For the sake of the environment
Do not warm up the engine when the vehicle is stationary. You
should drive off immediately whenever possible. This will help avoid
unnecessary exhaust emissions.
A3
A2A1
A2
A3
document_0900452a816e6cc9.book Seite 82 Mittwoch, 21. Februar 2007 1:32 13
Page 85 of 210
Driving83
Controls
Safety
Driving tips
General maintenance
Self-help
Technical data
Switching off the engineOn vehicles with R tronic, the engine can be switched off in
neutral (N) or in any gear (1 - 6 or R).
– Turn the ignition key to position ⇒page 81, fig. 72.
WARNING
•
Never switch off the engine until the vehicle is stationary.
•
The brake servo and the power steering system work only
when the engine is running. You need more strength to steer and
brake the vehicle when the engine is switched off. This would
mean a greater risk of accidents and serious injury, because you
cannot steer and brake in the normal manner.Caution
•
If the engine has been working hard for a long time, there is a risk
of heat building up in the engine compartment after the engine has
been switched off; this could cause engine damage. For this reason,
you should leave the engine idling for a few minutes or drive at a
moderate speed to let the engine cool down before switching it off
⇒page 139.
•
Because the engine can get very hot after working hard, do not
park the vehicle on surfaces which could catch fire (e.g. on grass or
at the forest edge).Note
After the engine is stopped the radiator fan may run on for up to
10 minutes, even if the ignition is switched off. The fan may also
start running again after some time if the coolant temperature rises
due to a build-up of heat, or if the engine is hot and the engine
compartment is heated up further by direct sunlight.
HandbrakeHandbrake
The handbrake should be applied firmly to prevent the
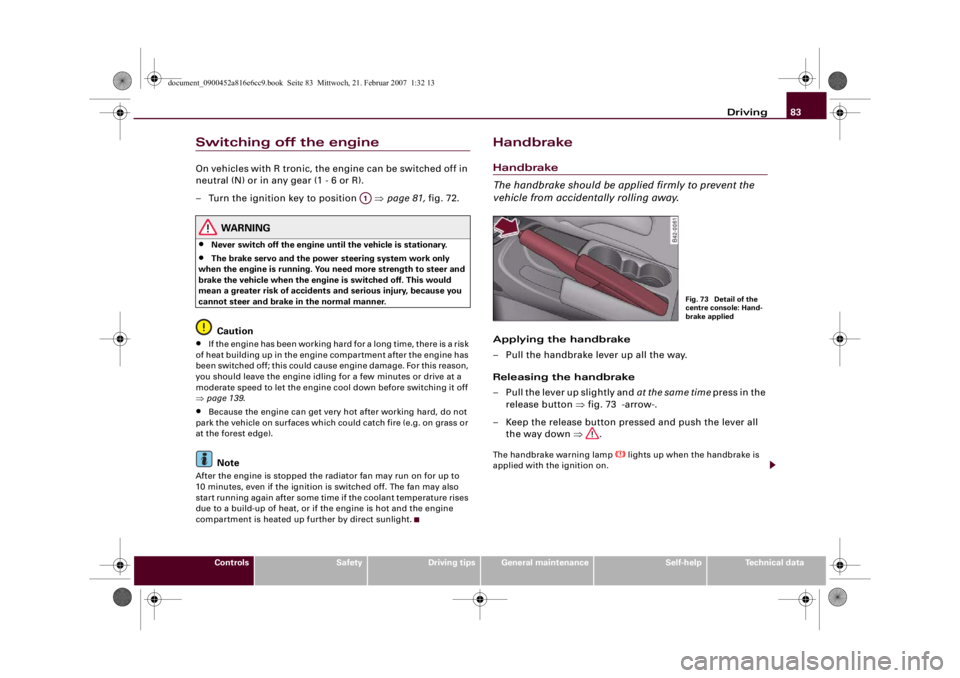
vehicle from accidentally rolling away.Applying the handbrake
– Pull the handbrake lever up all the way.
Releasing the handbrake
– Pull the lever up slightly and at the same time press in the
release button ⇒fig. 73 -arrow-.
– Keep the release button pressed and push the lever all
the way down ⇒.The handbrake warning lamp
lights up when the handbrake is
applied with the ignition on.
A1
Fig. 73 Detail of the
centre console: Hand-
brake applied
document_0900452a816e6cc9.book Seite 83 Mittwoch, 21. Februar 2007 1:32 13
Page 92 of 210
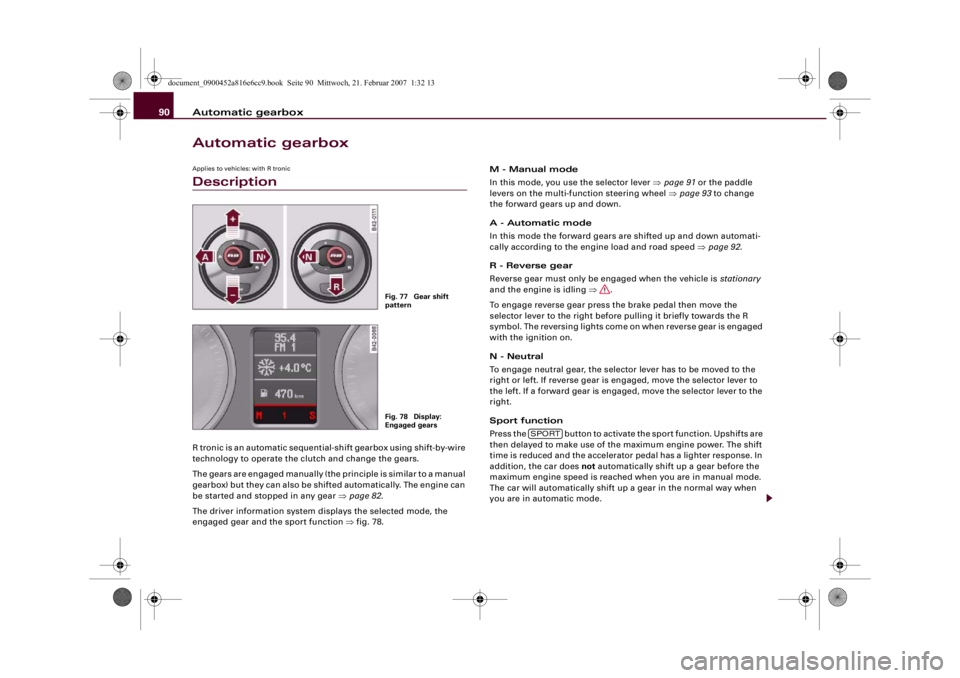
Automatic gearbox 90Automatic gearboxApplies to vehicles: with R tronicDescriptionR tronic is an automatic sequential-shift gearbox using shift-by-wire
technology to operate the clutch and change the gears.
The gears are engaged manually (the principle is similar to a manual
gearbox) but they can also be shifted automatically. The engine can
be started and stopped in any gear ⇒page 82.
The driver information system displays the selected mode, the
engaged gear and the sport function ⇒fig. 78.M - Manual mode
In this mode, you use the selector lever ⇒page 91 or the paddle
levers on the multi-function steering wheel ⇒page 93 to change
the forward gears up and down.
A - Automatic mode
In this mode the forward gears are shifted up and down automati-
cally according to the engine load and road speed ⇒page 92.
R - Reverse gear
Reverse gear must only be engaged when the vehicle is stationary
and the engine is idling ⇒.
To engage reverse gear press the brake pedal then move the
selector lever to the right before pulling it briefly towards the R
symbol. The reversing lights come on when reverse gear is engaged
with the ignition on.
N - Neutral
To engage neutral gear, the selector lever has to be moved to the
right or left. If reverse gear is engaged, move the selector lever to
the left. If a forward gear is engaged, move the selector lever to the
right.
Sport function
Press the button to activate the sport function. Upshifts are
then delayed to make use of the maximum engine power. The shift
time is reduced and the accelerator pedal has a lighter response. In
addition, the car does not automatically shift up a gear before the
maximum engine speed is reached when you are in manual mode.
The car will automatically shift up a gear in the normal way when
you are in automatic mode.
Fig. 77 Gear shift
patternFig. 78 Display:
Engaged gears
SPORT
document_0900452a816e6cc9.book Seite 90 Mittwoch, 21. Februar 2007 1:32 13
Page 134 of 210
Intelligent technology 132Intelligent technologyElectronic stabilisation program (ESP)The Electronic Stabilisation Program increases the car's
stability.Description
The anti-lock brake system (ABS), the electronic differential lock
(EDL) and the traction control system (ASR) are all integrated into
the electronic stabilisation program (ESP). The ESP is designed to
enhance the control over the vehicle in critical handling situations,
such as when accelerating and cornering. It reduces the tendency to
skid at all speeds under all road conditions and improves the
stability and roadholding of the vehicle. ESP helps the car to start
moving, accelerate and climb a gradient in slippery conditions
where this may otherwise be difficult or even impossible. The ESP is
switched on automatically when the engine is started. It should
normally be left switched on at all times for optimum car stability.
Driving situations
If the car is oversteering (rear wheels losing grip first) the ESP
mainly brakes the outside front wheel; if the car is understeering
(front wheels losing grip first), the ESP brakes the inside rear wheel
and possibly also other wheels. This automatic brake application is
accompanied by characteristic noises.If, when braking, one of the wheels is turning too slowly in relation
to the road speed and is close to locking up, the system will reduce
the pressure in the brake line to this wheel. The driver is made aware
of this control process by a pulsating of the brake pedal and accom-
panying noise. In this situation it is important to keep the brake
pedal fully depressed so the ABS can regulate the brake application
- do not “pump” the brake pedal. However, the ABS will not neces-
sarily guarantee shorter stopping distances in all conditions. For
instance, on loose gravel or fresh snow on top of an icy surface the
stopping distance with ABS may even be slightly longer.
Whenever it detects a significant difference in the speed of the driven
wheels of one axle (for example, if the road is slippery on one side)
the electronic differential lock (EDL) applies the brake to slow down
the spinning wheel so that more of the power is directed to the
other wheels. This function is active up to about 100 km/h. The brake
system will make noises while it is working.
If one wheel has less grip and starts spinning (for instance, if one of
the driven wheels is on ice), press the accelerator hard until the car
starts moving.
If the wheels start to spin, the traction control system (ASR) auto-
matically reduces the engine torque to match the amount of grip
available.
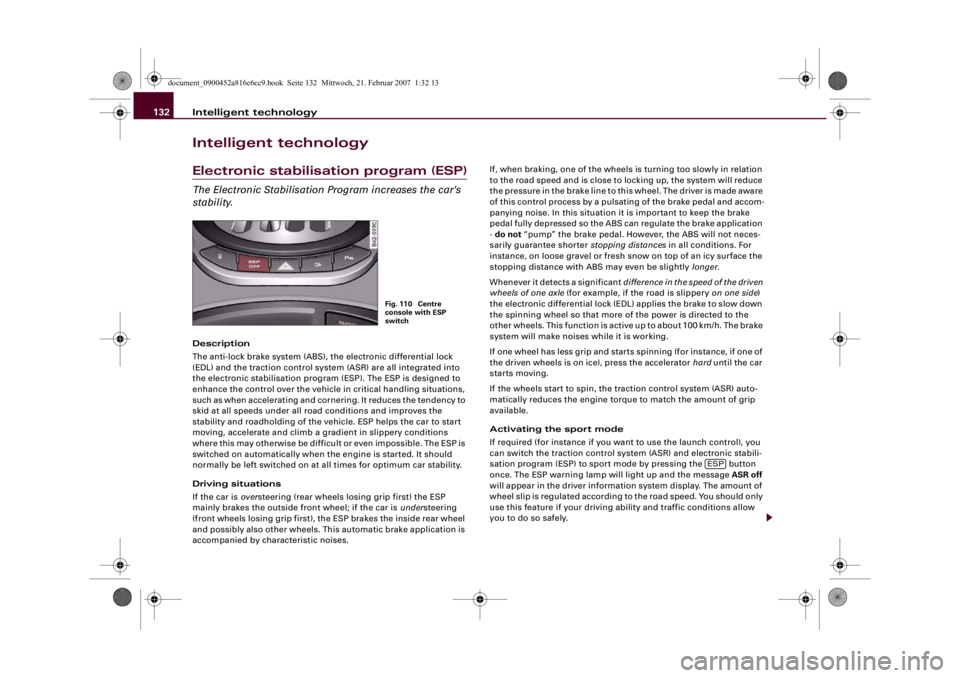
Activating the sport mode
If required (for instance if you want to use the launch control), you
can switch the traction control system (ASR) and electronic stabili-
sation program (ESP) to sport mode by pressing the button
once. The ESP warning lamp will light up and the message ASR off
will appear in the driver information system display. The amount of
wheel slip is regulated according to the road speed. You should only
use this feature if your driving ability and traffic conditions allow
you to do so safely.
Fig. 110 Centre
console with ESP
switch
ESP
document_0900452a816e6cc9.book Seite 132 Mittwoch, 21. Februar 2007 1:32 13
Page 138 of 210
Intelligent technology 136front wheels is not obstructed, otherwise the brakes can overheat. Power steeringThe power steering assists the driver when turning the
steering wheel (with the engine running).The power steering assists the driver by reducing the force needed
to turn the steering wheel.
The power steering does not function when the engine is switched
off. In this case the steering wheel is very hard to turn.
If the steering is held at its turning limit when the car is stationary,
this will place an excessive load on the power steering system. In
this case, the power steering system will make noises. It will also
reduce the idling speed of the engine.
Caution
Do not keep the steering in the full-lock position for longer than
15 seconds when the engine is running – this could cause damage
to the power steering system.
Note
•
If the power steering should fail at any time or the engine is
switched off (for instance when being towed), the car can still be
steered. However, more effort will be required to turn the steering
wheel.
•
If the system is leaking or malfunctioning, please take the car to
a qualified workshop as soon as possible.
•
The power steering requires a special hydraulic fluid. The
container for the fluid is located in the engine compartment. The
correct fluid level in the reservoir is important for the power
steering to function properly. The hydraulic fluid level is checked at
the Inspection Service.
Four-wheel drive (quattro®)On quattro models the engine power is distributed to all
four wheelsGeneral notes
On four-wheel drive vehicles, the engine power is distributed to all
four wheels. The distribution of power is controlled automatically
according to your driving style and the road conditions. Also refer
to ⇒page 132.
Winter tyres
Thanks to its four-wheel drive, your car will have plenty of traction
in winter conditions, even with the standard tyres. Nevertheless, we
still recommend that winter tyres should be fitted on all four wheels
when winter road conditions are expected, mainly because this will
give a better braking response.
Snow chains
On roads where snow chains are mandatory, this also applies to cars
with four-wheel drive ⇒page 171, “Snow chains”.
Replacing tyres
The dimensions of the wheels and tyres used on four-wheel drive
vehicles must comply with the manufacturer's specifications
⇒page 168, “Replacing wheels and tyres”.
WARNING
•
Even with four-wheel drive, you should always adjust your
speed to suit the conditions. Do not let the extra safety provided
tempt you into taking any risks when driving – this can cause acci-
dents.
•
The braking ability of your car is limited by the grip of the tyres.
In this respect, your car is no different from a car without four-
wheel drive. So do not be tempted to drive too fast on icy or slip-
document_0900452a816e6cc9.book Seite 136 Mittwoch, 21. Februar 2007 1:32 13
Page 158 of 210
Checking and topping up fluids 156drive belts and alternator, etc., and from the high-voltage ignition
system. •
Observe the following additional warnings if work on the fuel
system or the electrical system is necessary:
−Always disconnect the battery
−Do not smoke
−Never work near open flames
−Always keep an approved fire extinguisher immediately
available.Caution
When topping up fluids make sure the correct fluid is put into the
correct filler opening. This can otherwise cause serious malfunc-
tions or engine damage.
For the sake of the environment
Inspect the ground underneath your vehicle regularly so that any
leaks are detected at an early stage. If you find oil spots or other
fluids, have your vehicle inspected by a qualified workshop.
Note
On right-hand drive vehicles* some of the containers/ reservoirs
mentioned below are located on the other side of the engine
compartment.Closing the engine lid– Make sure that the rear spoiler is retracted ⇒page 134.
– To close the engine lid, pull it down to overcome the
spring pressure.– Then let it drop into the catches; do not press down ⇒.
WARNING
For safety reasons the engine lid must always be completely
closed when the vehicle is moving. After closing it always check
that it is properly secured. The engine lid must be flush with the
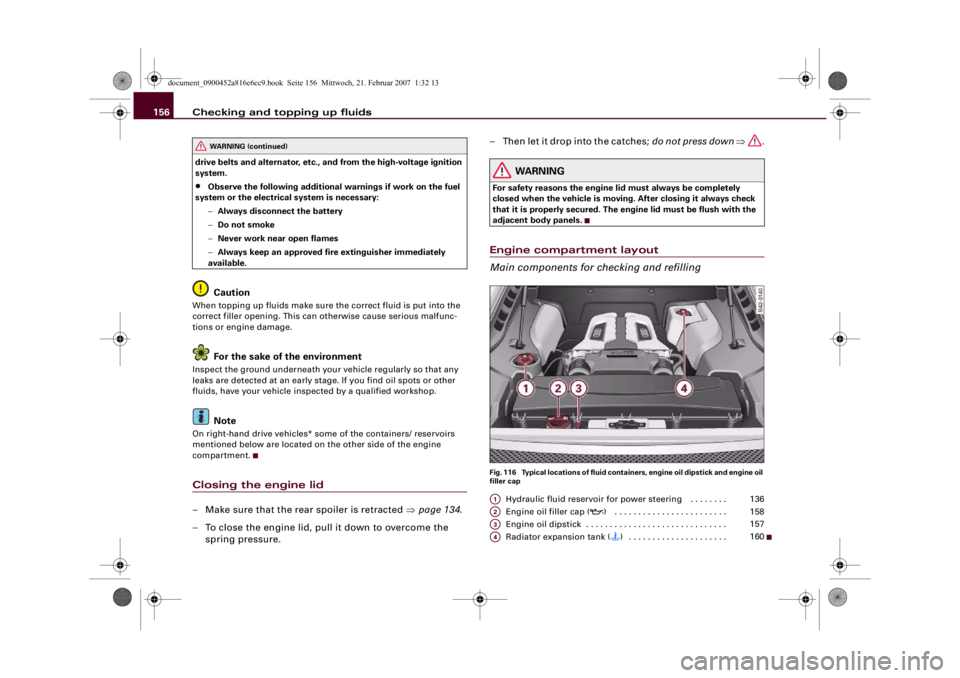
adjacent body panels.Engine compartment layout
Main components for checking and refillingFig. 116 Typical locations of fluid containers, engine oil dipstick and engine oil
filler cap
Hydraulic fluid reservoir for power steering . . . . . . . .
Engine oil filler cap (
) . . . . . . . . . . . . . . . . . . . . . . . .
Engine oil dipstick . . . . . . . . . . . . . . . . . . . . . . . . . . . . . .
Radiator expansion tank () . . . . . . . . . . . . . . . . . . . . .
WARNING (continued)
A1
136
A2
158
A3
157
A4
160
document_0900452a816e6cc9.book Seite 156 Mittwoch, 21. Februar 2007 1:32 13
Page 189 of 210
Self-help187
Controls
Safety
Driving tips
General maintenance
Self-help
Technical data
Caution
Please note that the described method of connecting the leads is
meant for jump-starting your vehicle. If jump-starting another
vehicle, you should not connect the negative lead (–) to the negative
terminal of the discharged battery ⇒page 186, fig. 131 , but
directly to the engine block or a solid metal part bolted to the engine
block. If the battery of the other vehicle does not have a gas vent,
there is a risk that a mixture of oxygen and hydrogen gas can accu-
mulate and cause an explosion.Tow-starting and towing awayGeneral notes
Points to observe when tow-starting or towing awayIf you use a towrope:
Notes for the driver of the towing vehicle
– The towrope must be taut before driving off.
– Engage the clutch very gently when starting to move
(press the accelerator slowly if you have R tronic).
Notes for the driver of the towed vehicle
– The ignition should be switched on so that the turn
signals, horn, windscreen wipers and washers can be
used. Please ensure that the steering wheel is unlocked
when you switch on the ignition and that it moves freely.
– Put the gear lever in neutral or move the selector lever to
position N.– The brake servo and power steering only work when the
engine is running. Considerably more effort is required
on the brake pedal and steering wheel when the engine
is switched off.
– Ensure that the towrope remains taut at all times when
towing.
Towrope or towbar
It is easier and safer to tow a vehicle with a towbar. You should only
use a towrope if you do not have a towbar.
A towrope should be slightly elastic to reduce the loading on both
vehicles. It is advisable to use a towrope made of synthetic fibre or
similar material.
Attach the towrope or the towbar only to the towing anchorages
provided for this purpose ⇒page 188.
Driving technique
Towing requires some experience – especially when using a
towrope. Both drivers should be familiar with the technique required
for towing. Inexperienced drivers should not attempt to tow-start or
tow away another vehicle.
Do not pull too hard with the towing vehicle and take care to avoid
jerking the towrope. When towing on a loose surface there is always
a risk of overloading and damaging the anchorage points.
Caution
If there is no oil in the gearbox or no lubricant in the automatic
transmission the car may only be towed with the driven wheels
lifted clear of the road, or transported on a special car transporter
or trailer.
Note
•
Note the regulations concerning towing.
A4
document_0900452a816e6cc9.book Seite 187 Mittwoch, 21. Februar 2007 1:32 13
Page 208 of 210
Index 206Lights . . . . . . . . . . . . . . . . . . . . . . . . . . . . . . 52
Switching on and off . . . . . . . . . . . . . . 52
Locking . . . . . . . . . . . . . . . . . . . . . . . . . . . . 43
Central locking system . . . . . . . . . . . . . 44
Locking and unlocking the vehicle from in-
side
Central locking system . . . . . . . . . . . . . 45
Locking passenger's door manually . . . . . 46
Long periods of non-use
Battery . . . . . . . . . . . . . . . . . . . . . . . . . 162
LongLife Service . . . . . . . . . . . . . . . . . . . . 157
Luggage compartment . . . . . . . . . . . . . . . 58
Light . . . . . . . . . . . . . . . . . . . . . . . . . . . . 58
Luggage lid
Central locking system . . . . . . . . . . . . . 47
Manual release . . . . . . . . . . . . . . . . . . . 48MMain beam headlights . . . . . . . . . . . . . 52, 56
Make-up mirrors . . . . . . . . . . . . . . . . . . . . . 58
Manual operation
Fuel tank flap . . . . . . . . . . . . . . . . . . . . 154
Luggage lid . . . . . . . . . . . . . . . . . . . . . . 48
Maximum speed
SeePerformance, weights and
dimensions . . . . . . . . . . . . . . . . . . . . 198
Menu button . . . . . . . . . . . . . . . . . . . . . . . . 25
Menu display . . . . . . . . . . . . . . . . . . . . . . . 24
Menu, changing settings . . . . . . . . . . . . . . 26
Mileage recorder . . . . . . . . . . . . . . . . . . . . 13Mirrors
Anti-dazzle setting . . . . . . . . . . . . . . . . 63
Automatic anti-dazzle exterior mirrors 64
Automatic anti-dazzle interior mirror . 63
Exterior mirrors . . . . . . . . . . . . . . . . . . . 64
Interior mirror . . . . . . . . . . . . . . . . . . . . 63
Make-up mirrors . . . . . . . . . . . . . . . . . . 58
Mobile phones . . . . . . . . . . . . . . . . . . . . . 175
Modifications . . . . . . . . . . . . . . . . . . . . . . 174
NNatural leather . . . . . . . . . . . . . . . . . . . . . 148
No R gear . . . . . . . . . . . . . . . . . . . . . . . . . . . 38OOctane rating . . . . . . . . . . . . . . . . . . . . . . 152
Oil
SeeEngine oil . . . . . . . . . . . . . . . . . . . 157
Oil consumption . . . . . . . . . . . . . . . . . . . . 157
Oil dipstick . . . . . . . . . . . . . . . . . . . . . . . . . 157
Oil level . . . . . . . . . . . . . . . . . . . . . . . . . . . . 37
On-board computer . . . . . . . . . . . . . . . . . . 22
Opening
Engine lid . . . . . . . . . . . . . . . . . . . . . . . 155
Outside temperature display . . . . . . . . . . . 20
Overview . . . . . . . . . . . . . . . . . . . . . . . . . . . . 9PPaint damage . . . . . . . . . . . . . . . . . . . . . . 146
Paint No. . . . . . . . . . . . . . . . . . . . . . . . . . . 196Parking
R tronic . . . . . . . . . . . . . . . . . . . . . . . . . . 91
Parking aid . . . . . . . . . . . . . . . . . . . . . . . . . . 85
Parking lights . . . . . . . . . . . . . . . . . . . . . . . 57
Parking the car . . . . . . . . . . . . . . . . . . . . . . 84
Pedals . . . . . . . . . . . . . . . . . . . . . . . . . . . . . 107
Performance figures
SeePerformance, weights and
dimensions . . . . . . . . . . . . . . . . . . . . 198
Performance, weights and dimensions . 198
Personalised remote control key . . . . . . . 41
Petrol . . . . . . . . . . . . . . . . . . . . . . . . . . . . . 152
Polishing . . . . . . . . . . . . . . . . . . . . . . . . . . 144
Pollen filter . . . . . . . . . . . . . . . . . . . . . . . . . 76
Pollution filter . . . . . . . . . . . . . . . . . . . . . . . 76
Power steering . . . . . . . . . . . . . . . . . . . . . 136
Pressure (tyres) . . . . . . . . . . . . . . . . . . . . . 172
QQuartz clock . . . . . . . . . . . . . . . . . . . . . . . . . 12
quattro
SeeFour-wheel drive . . . . . . . . . . . . . . 136RR tronic . . . . . . . . . . . . . . . . . . . . . . . . . . . . . 90
Backup programme . . . . . . . . . . . . . . . . 94
Description . . . . . . . . . . . . . . . . . . . . . . . 90
Kick-down feature . . . . . . . . . . . . . . . . . 92
Launch control programme . . . . . . . . . 93
Manual mode . . . . . . . . . . . . . . . . . . . . . 91
Steering wheel with paddle levers . . . 93
document_0900452a816e6cc9.book Seite 206 Mittwoch, 21. Februar 2007 1:32 13