radio AUDI R8 2007 Owners Manual
[x] Cancel search | Manufacturer: AUDI, Model Year: 2007, Model line: R8, Model: AUDI R8 2007Pages: 210, PDF Size: 8.1 MB
Page 5 of 210
Contents3
Controls
Safety
Driving tips
General maintenance
Self-help
Technical data Child safety
. . . . . . . . . . . . . . . . . . . .
Points to remember if children are
travelling in the car . . . . . . . . . . . . .
Child safety seats . . . . . . . . . . . . . .
Fitting child safety seats . . . . . . . .
Driving tips
. . . . . . . . . . . . . . . .
Intelligent technology
. . . . . . . . . .
Electronic stabilisation program
(ESP) . . . . . . . . . . . . . . . . . . . . . . . . . .
Rear spoiler . . . . . . . . . . . . . . . . . . .
Brakes . . . . . . . . . . . . . . . . . . . . . . . .
Power steering . . . . . . . . . . . . . . . . .
Four-wheel drive (quattro®) . . . . . .
Dry sump lubrication system . . . .
Your vehicle and the
environment
. . . . . . . . . . . . . . . . . . .
Running in . . . . . . . . . . . . . . . . . . . .
Emission control systems . . . . . . .
Driving abroad . . . . . . . . . . . . . . . . .
Sporty driving . . . . . . . . . . . . . . . . .
Environmental compatibility . . . . .
General maintenance
. .
Care of vehicle and cleaning
. . .
General notes . . . . . . . . . . . . . . . . . .
Care of exterior . . . . . . . . . . . . . . . . .
Care of interior . . . . . . . . . . . . . . . . .
Fuel and filling the tank
. . . . . . . .
Petrol . . . . . . . . . . . . . . . . . . . . . . . . .
Filling the tank . . . . . . . . . . . . . . . . .
Checking and topping up fluidsEngine lid . . . . . . . . . . . . . . . . . . . . . .
Engine oil . . . . . . . . . . . . . . . . . . . . . .
Cooling system . . . . . . . . . . . . . . . . .
Brake fluid . . . . . . . . . . . . . . . . . . . . .
Battery . . . . . . . . . . . . . . . . . . . . . . . .
Windscreen washer . . . . . . . . . . . . . Wheels and tyres
. . . . . . . . . . . . . . .
Wheels . . . . . . . . . . . . . . . . . . . . . . . .
Tyre pressure monitoring system .
Accessories and modifications
to the vehicle
. . . . . . . . . . . . . . . . . .
Accessories, replacement parts and
repairs . . . . . . . . . . . . . . . . . . . . . . . .
Modifications . . . . . . . . . . . . . . . . . .
Radio transmitters and business
equipment . . . . . . . . . . . . . . . . . . . . .
Self-help
. . . . . . . . . . . . . . . . . . . . .
Self-help
. . . . . . . . . . . . . . . . . . . . . . . .
Breakdown kit . . . . . . . . . . . . . . . . . .
Repairing a tyre . . . . . . . . . . . . . . . . .
Changing a wheel . . . . . . . . . . . . . .
Jump-starting . . . . . . . . . . . . . . . . . .
Tow-starting and towing away . . .
Fuses and bulbs
. . . . . . . . . . . . . . . .
Fuses . . . . . . . . . . . . . . . . . . . . . . . . . .
Bulbs . . . . . . . . . . . . . . . . . . . . . . . . . .
Technical data
. . . . . . . . . . . .
General notes
. . . . . . . . . . . . . . . . . .
Notes . . . . . . . . . . . . . . . . . . . . . . . . . .
Vehicle identification data . . . . . . .
Performance, weights and
dimensions
. . . . . . . . . . . . . . . . . . . . .
R8 4.2 quattro . . . . . . . . . . . . . . . . . .
Dimensions . . . . . . . . . . . . . . . . . . . .
Capacities . . . . . . . . . . . . . . . . . . . . . 122
122
123
126
131
132
132
134
134
136
136
137
138
138
138
138
139
139143
144
144
144
147
152
152
152
155
155
157
159
161
162
164
166
166
172
174
174
174
175177
178
178
178
182
185
187
190
190
193
195
196
196
196
198
198
198
199
document_0900452a816e6cc9.book Seite 3 Mittwoch, 21. Februar 2007 1:32 13
Page 13 of 210

Instruments and warning/indicator lamps11
Controls
Safety
Driving tips
General maintenance
Self-help
Technical data
Rev counter
The rev counter indicates the number of engine revolu-
tions per minute.You should select a lower gear if the engine speed drops below
1500 rpm. The start of the red zone on the dial indicates the
maximum engine speed which may be used briefly when the engine
is warm and after it has been run in properly. However, it is advisable
to change up a gear or lift your foot off the accelerator (or shift out
of the R tronic sport mode) before the needle reaches the red zone.
Caution
Never allow the rev counter needle ⇒page 10, fig. 2 to go into
the red zone on the scale for more than a very brief period: there is
a risk of damaging the engine. The start of the red zone on the dial
is different for some engine versions.Radio-controlled clockWhen the clock is in “radio-control” mode the signal recep-
tion symbol (a radio tower with radio waves) appears in the
display ⇒fig. 3. It is then not possible to change the
minutes or the date manually. If you take your vehicle into a different time zone, the hour display will need to be
adjusted manually to local time using the adjuster button.
Setting the time zone
– Keep pulling the button ⇒fig. 3 briefly until the time
zone display flashes (select setting “0” if you do not wish
to change the time zone).
– Then turn the button to the left (to set an earlier time
zone: -1/-2) or to the right (to set a later time zone: +1/+2).
Switching date display on and off
– Keep pulling the button briefly until the date display
flashes.
– Then turn the button to the left or right.
When the display stops flashing, this means the setting you are
performing is completed and the time zone has been successfully
stored.
If the clock does not receive a radio signal for three consecutive
days, it will automatically switch to “quartz” mode. The signal recep-
tion symbol will then disappear. If you need to reset the time and
date, proceed as described on ⇒page 12.
A2
Fig. 3 Detail of the
instrument cluster:
Display with signal
reception symbol, time
and date
document_0900452a816e6cc9.book Seite 11 Mittwoch, 21. Februar 2007 1:32 13
Page 14 of 210
Instruments and warning/indicator lamps 12Digital clock with date display
The vehicle is equipped with either a radio-controlled
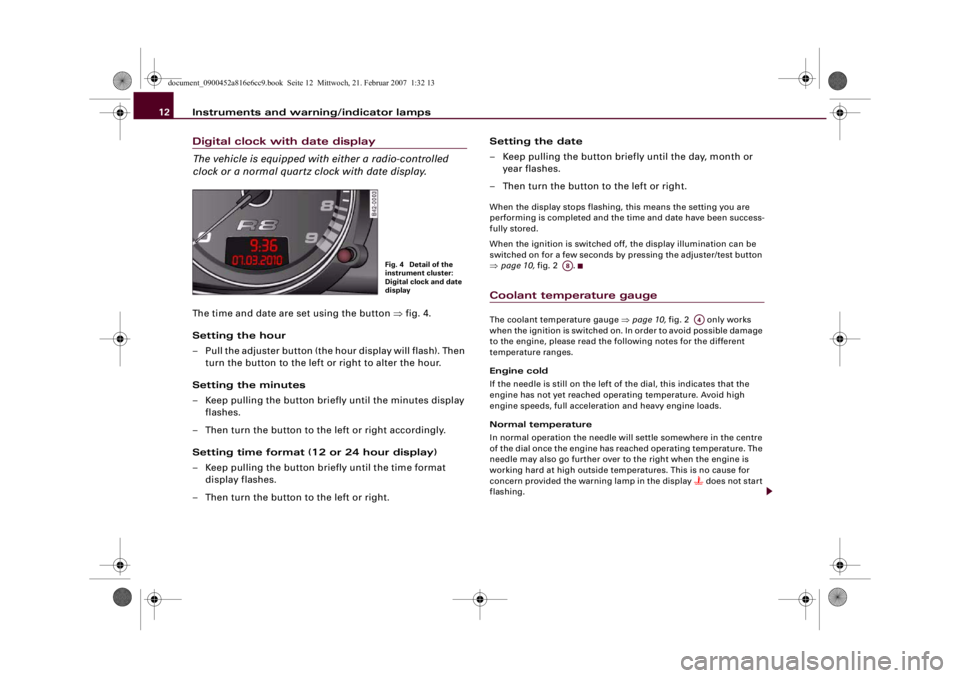
clock or a normal quartz clock with date display.The time and date are set using the button ⇒fig. 4.
Setting the hour
– Pull the adjuster button (the hour display will flash). Then
turn the button to the left or right to alter the hour.
Setting the minutes
– Keep pulling the button briefly until the minutes display
flashes.
– Then turn the button to the left or right accordingly.
Setting time format (12 or 24 hour display)
– Keep pulling the button briefly until the time format
display flashes.
– Then turn the button to the left or right.Setting the date
– Keep pulling the button briefly until the day, month or
year flashes.
– Then turn the button to the left or right.
When the display stops flashing, this means the setting you are
performing is completed and the time and date have been success-
fully stored.
When the ignition is switched off, the display illumination can be
switched on for a few seconds by pressing the adjuster/test button
⇒page 10, fig. 2 .Coolant temperature gaugeThe coolant temperature gauge ⇒page 10, fig. 2 only works
when the ignition is switched on. In order to avoid possible damage
to the engine, please read the following notes for the different
temperature ranges.
Engine cold
If the needle is still on the left of the dial, this indicates that the
engine has not yet reached operating temperature. Avoid high
engine speeds, full acceleration and heavy engine loads.
Normal temperature
In normal operation the needle will settle somewhere in the centre
of the dial once the engine has reached operating temperature. The
needle may also go further over to the right when the engine is
working hard at high outside temperatures. This is no cause for
concern provided the warning lamp in the display
does not start
flashing.
Fig. 4 Detail of the
instrument cluster:
Digital clock and date
display
A8
A4
document_0900452a816e6cc9.book Seite 12 Mittwoch, 21. Februar 2007 1:32 13
Page 22 of 210
Driver information system 20Driver information systemIntroductionThe driver information system in the instrument cluster
shows you the status of various on-board systems at a
glance.Standard display
The following information is shown in the driver information system
display when the ignition is on:•
CD* in the CD player or current radio* station
•
Outside temperature*: At temperatures below +5°C a snowflake
symbol appears next to the temperature display ⇒.
•
Door catches, engine lid and front lid warning: The warning lamp
comes on if the door, engine lid or front lid is open.
Further functions
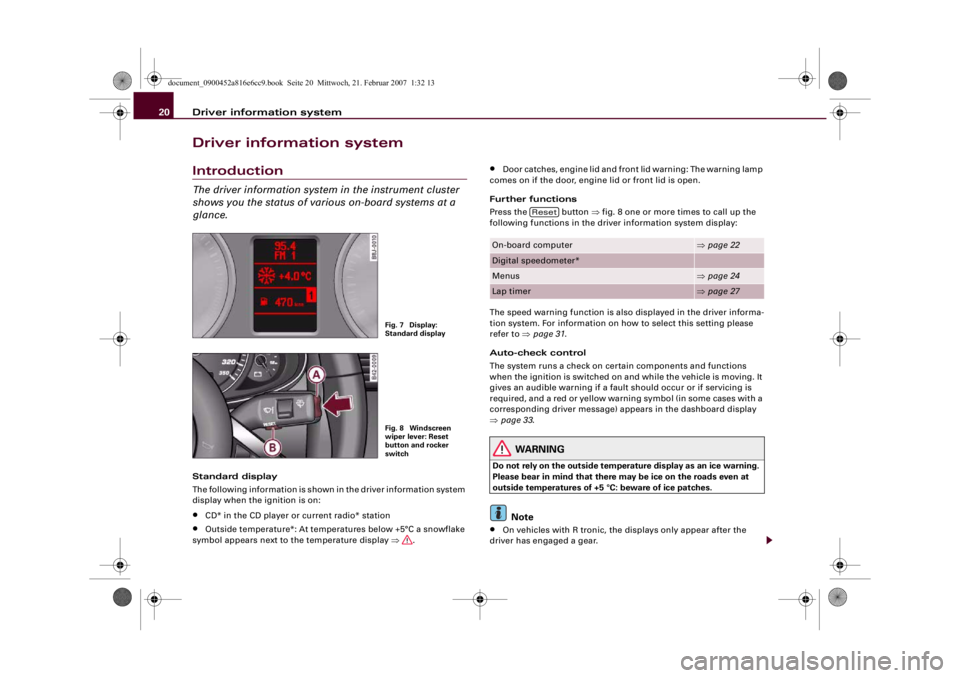
Press the button ⇒fig. 8 one or more times to call up the
following functions in the driver information system display:
The speed warning function is also displayed in the driver informa-
tion system. For information on how to select this setting please
refer to ⇒page 31.
Auto-check control
The system runs a check on certain components and functions
when the ignition is switched on and while the vehicle is moving. It
gives an audible warning if a fault should occur or if servicing is
required, and a red or yellow warning symbol (in some cases with a
corresponding driver message) appears in the dashboard display
⇒page 33.
WARNING
Do not rely on the outside temperature display as an ice warning.
Please bear in mind that there may be ice on the roads even at
outside temperatures of +5 °C: beware of ice patches.
Note
•
On vehicles with R tronic, the displays only appear after the
driver has engaged a gear.
Fig. 7 Display:
Standard displayFig. 8 Windscreen
wiper lever: Reset
button and rocker
switch
On-board computer
⇒page 22
Digital speedometer*Menus
⇒page 24
Lap timer
⇒page 27
Reset
document_0900452a816e6cc9.book Seite 20 Mittwoch, 21. Februar 2007 1:32 13
Page 43 of 210
Doors and windows41
Controls
Safety
Driving tips
General maintenance
Self-help
Technical data
Remote control key
The remote control will lock and unlock the vehicle
without having to insert the key in the lock.The remote control transmitter and the battery are integrated in the
handle of the key. The receiver is in the interior of the vehicle. The
maximum range of the remote control depends on various factors.
The range is reduced when the battery starts to lose power.
If the receiver has been repaired or replaced, or if a replacement key
is used, the system will need re-programming by a qualified work-
shop. This is necessary so that the receiver can recognise your
remote control key.
The remote control keys (which are radio-operated) conform with all
relevant requirements for Germany and have been approved by the
Federal Approvals Office for Telecommunications of the Federal
Republic of Germany. All components are marked in accordance
with the current legal requirements. This certification forms the
basis for approval for use in other countries.
Personalised remote control key
When you switch off the ignition or lock the vehicle, the settings of
various convenience features are automatically stored and assigned
individually to the remote control key that is currently in use. The
settings stored for the remote control key are then recalled auto-
matically the next time the vehicle is unlocked, the door is opened
or the ignition is switched on.
Note
•
The remote control key is automatically deactivated when the
ignition is switched on.
•
The function of the remote control key may be impaired by inter-
ference from other nearby radio signals (for example from a mobile
telephone or TV transmitter) if these are in the same frequency
range.
Synchronisation
If the remote control fails to unlock the vehicle, it will be
necessary to re-synchronise the system.– Press the unlock button
on the remote control.
– Use the key to manually unlock the driver's door within
30 seconds.
– Press the unlock
or the lock button
.
Replacing the battery for the remote control key
Each remote control key contains a battery which is
located in the cover of the key.We recommend having the battery changed by a qualified
workshop if required. However, if you decide to change the
used battery yourself:
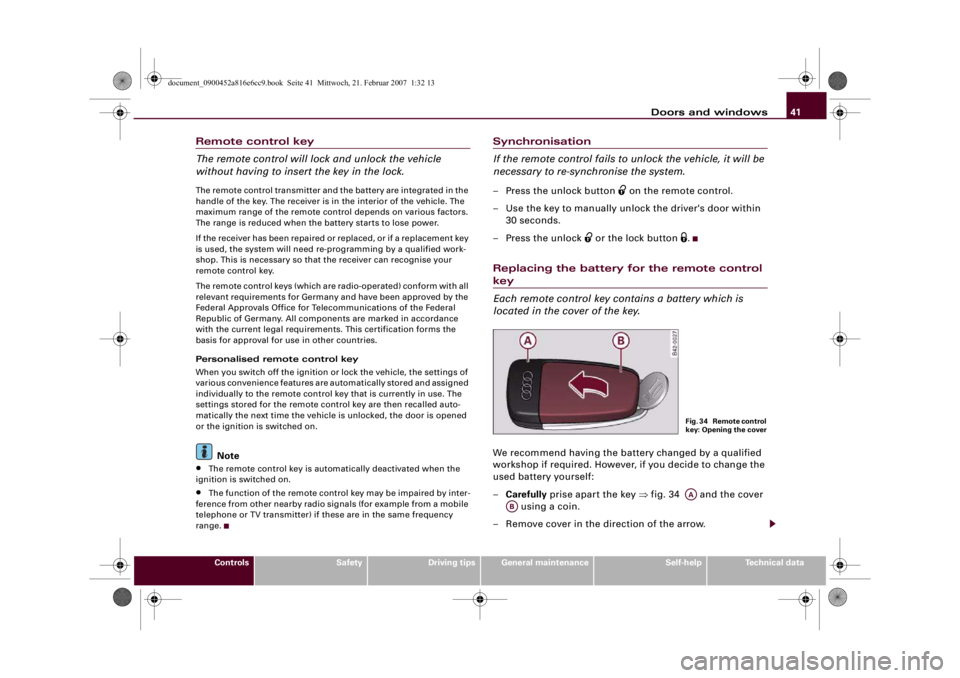
–Carefully prise apart the key ⇒fig. 34 and the cover
using a coin.
– Remove cover in the direction of the arrow.
F i g . 3 4 R e m o t e c o n t r o l
key: Opening the coverAA
AB
document_0900452a816e6cc9.book Seite 41 Mittwoch, 21. Februar 2007 1:32 13
Page 44 of 210

Doors and windows 42
– Take the used battery out of the cover.
– Insert the new battery. Make sure that the “+” symbol on
the battery is facing downwards. The correct polarity is
indicated on the cover.
– After inserting the battery, align the cover and key and
press the two parts together.
For the sake of the environmentUsed batteries must be disposed of appropriately and must not be
discarded with ordinary household waste.
Note
The new battery must be of the same type as the original one.Electronic immobiliser
The immobiliser is designed to prevent unauthorised
persons from driving the vehicle.An electronic chip inside the key automatically deactivates the
immobiliser when the ignition is switched on. When the ignition is
switched off after coming to a stop the electronic immobiliser is
activated automatically.
If an uncoded key is used, SAFE will appear continuously in the
mileage recorder display.
Note
•
The engine can only be started using an original Audi key with
the correct code.
•
It may not be possible to start the engine with the key if there is
another ignition key from a different make of vehicle on the same
key ring.
Central locking systemDescription
The central locking system allows both doors to be locked
and unlocked simultaneously.The central locking system on your vehicle locks and unlocks both
doors simultaneously.
The remote control key locks and unlocks the vehicle by means of a
radio signal ⇒page 43.
Locking and unlocking the vehicle using the key
In addition to the other functions, you can lock and unlock the
vehicle in the normal way by turning the key in the driver's door lock.
However, please note that when you unlock the vehicle with the key,
this only unlocks the mechanical lock on the doors set in the menu
display ⇒page 24. In order to switch off the anti-theft alarm, you
must insert the key in the ignition lock and switch on the ignition
within 15 seconds after opening the driver's door. The alarm will be
set off if the ignition is not switched on within 15 seconds.
When you lock the vehicle, this automatically locks both of the doors
and activates the anti-theft alarm.
Windows
The windows can be opened or closed together via the central
locking system ⇒page 43.
Deadlock mechanism
The central locking system is combined with a deadlock mecha-
nism. Once the vehicle has been locked from the outside, the door
handles on the inside are deactivated. This makes it more difficult
to break into the vehicle.
However, it is also possible to lock the vehicle without activating the
deadlock mechanism.
document_0900452a816e6cc9.book Seite 42 Mittwoch, 21. Februar 2007 1:32 13
Page 146 of 210
Care of vehicle and cleaning 144Care of vehicle and cleaningGeneral notesRegular care helps to maintain the value of the vehicle.Regular and careful care helps to maintain the value of the vehicle.
This may also be one of the requirements for upholding any
warranty claims in the event of corrosion or paint defects.
Audi R8 dealers and specialist retailers carry stocks of suitable car
care products. Please follow the instructions for use on the pack-
aging.
WARNING
•
Cleaning products and other materials used for car care can
damage health if misused.
•
Car care materials can contain toxic substances and must
always be kept in a safe place out of reach of children.For the sake of the environment
•
When purchasing car care products, try to select ones which are
not harmful to the environment.
•
Surplus cleaning materials should not be disposed of together
with ordinary household waste.
Care of exteriorWa s hi ng t he c a rThe longer substances like insects, bird droppings, resinous tree
sap, road dirt, industrial deposits, tar, soot or road salt and other
aggressive materials remain on the vehicle, the more damage they do to the paintwork. High temperatures (for instance in strong
sunlight) further intensify the corrosive effect.
After the period when salt is put on the roads it is important to have
the underside of the vehicle washed thoroughly.
Automatic car washes
Before going through a car wash, be sure to take the usual precau-
tions such as closing the windows. If the vehicle is fitted with
special accessories such as spoilers or a two-way radio aerial, etc.,
it is advisable to consult the car wash operator ⇒.
It is best to use a car wash without revolving bristles if possible.
Washing your car with a high-pressure cleaner
When cleaning the vehicle with a high-pressure cleaner, always
follow the operating instructions for the equipment. This applies
particularly to the operating pressure and the spraying distance. Do
not hold the spray nozzle too close to soft materials, such as rubber
hoses or seals.
Do not use a nozzle that sprays the water out in a direct stream or
one that has a rotating jet for forcing off dirt.
Washing the car by hand
When washing the car by hand, use plenty of water to soften the dirt
first, and rinse off as well as possible.
Then clean the vehicle with a soft sponge, glove or brush, using only
slight pressure. You should start on the roof and work down. Special
car shampoo should only be used for very persistent dirt.
Rinse the sponge or glove thoroughly and often.
Wheels, sills and similar should be cleaned last. Use a second
sponge for this.
document_0900452a816e6cc9.book Seite 144 Mittwoch, 21. Februar 2007 1:32 13
Page 174 of 210
Wheels and tyres 172Remove wheel covers (if fitted) and trim rings before attaching
snow chains. For safety reasons cover caps must then be fitted over
the wheel bolts. These are available from Audi R8 dealers.
Remove the chains when roads are free of snow. Otherwise they will
impair handling, damage the tyres and wear out very quickly.
Four-wheel drive: Where snow chains are compulsory on certain
roads, this normally also applies to cars with four-wheel drive. Snow
chains may only be fitted to the rear wheels (also on vehicles with
four-wheel drive).Tyre pressure monitoring systemApplies to vehicles: with tyre pressure monitoring systemIntroduction
The tyre pressure monitoring system keeps a check on the
inflation pressures of the four road wheels while you are
driving.The system warns the driver in the event of a loss of pressure by
means of symbols and messages in the instrument cluster display.
The system employs sensors on the wheels. The radio signals from
these sensors are transmitted to the tyre pressure monitoring
system.
Please bear in mind that the tyre inflation pressure is also influ-
enced by the temperature of the tyre. For every 10°C increase in the
tyre temperature the pressure will normally increase by about
0.1 bar. The tyre heats up while the vehicle is being driven and the
tyre pressure will rise accordingly. For this reason, you should only
adjust the tyre pressures when they are cold (i.e. approximately at
ambient temperature).
To ensure that the tyre pressure monitoring system works reliably,
you should check and, if necessary, adjust the tyre pressures at
regular intervals.The tyre pressures recommended for your vehicle are given on the
sticker attached to the driver's door pillar.
Initialising the tyre pressure monitoring system
The inflation pressures for two sets of wheels (e.g. with winter and
summer tyres) are stored on your vehicle. You can change between
these two sets of wheels any number of times without re-initialising
the system.
The tyre pressure monitoring system must be re-initialised by your
Audi R8 dealer if a new set of wheels is used or the electronic
sensors are renewed.
Warning lamp
lit
If the tyre pressure is more than 0.5 bar below the reference value,
the display will show the tyre symbol
with a corresponding
message, such as Tyre pressures too low ⇒.
WARNING
•
If the warning lamp
lights up you must slow down immedi-
ately and avoid any severe braking or steering manoeuvres. As
soon as you can do so safely, stop and check the tyres and the tyre
pressures.
•
Never re-adjust the tyre inflation pressure when the tyre is hot.
This can cause serious damage to the tyre or even a blow-out,
which could result in an accident.
•
Under-inflated tyres flex more and can overheat at continuous
high speeds. This can cause tread separation and tyre blow-out,
which could result in an accident.For the sake of the environment
Under-inflated tyres lead to increased fuel consumption and tyre
wear.
document_0900452a816e6cc9.book Seite 172 Mittwoch, 21. Februar 2007 1:32 13
Page 175 of 210
Wheels and tyres173
Controls
Safety
Driving tips
General maintenance
Self-help
Technical data
Note
•
Responsibility for ensuring that the tyres are correctly inflated
remains with the driver; the system can only provide assistance.
•
Only adjust the inflation pressure of the tyres when they are at
approximately ambient temperature.
•
The sensors and valves do not have to be detached or changed
round when fitting new tyres. Only the valve core needs to be
replaced, and if necessary the valve and the electronic components
in the wheel.
•
After using the Tyre Mobility System* the tyre pressure moni-
toring system may malfunction. The sensor for the tyre pressure
monitoring system must therefore be renewed by a qualified
workshop.
Applies to vehicles: with tyre pressure monitoring systemMalfunctionsIf the tyre pressure monitoring system is inoperative, the tyre
symbol or “TPMS” will appear on the display. This can have various
causes:•
One of the wheel sensors or other related components may not
be working.
•
Snow chains can interfere with the signals emitted by the
sensors so that the system cannot function properly.
•
The tyre pressure monitoring system may be inoperative due to
radio interference.
•
Radio systems operating on the same frequency, such as radio
headphones or two-way radios inside the vehicle, produce strong
electromagnetic fields which can cause temporary interference.
•
If the fault persists, take the vehicle to a qualified workshop.
document_0900452a816e6cc9.book Seite 173 Mittwoch, 21. Februar 2007 1:32 13
Page 177 of 210
Accessories and modifications to the vehicle175
Controls
Safety
Driving tips
General maintenance
Self-help
Technical data You will appreciate that your Audi R8 dealer cannot be held liable
for any damage caused by modifications and/or work performed
incorrectly.
We recommend that all work should be performed by an Audi R8
workshop using Audi Genuine Parts®.
WARNING
Incorrectly performed modifications or other work on your vehicle
can lead to malfunctions and cause accidents.Radio transmitters and business equipmentRadio transmitters (fixed installation)
Retrofit installations of radio transmitters in the vehicle are subject
to official approval. Audi generally authorises in-vehicle installa-
tions of approved types of radio transmitters provided that:•
the aerial is installed correctly,
•
the aerial is not installed in the interior of the vehicle (and
screened cables are used together with non-reflective aerial trim-
ming),
•
the effective transmitting power does not exceed 10 Watts at the
aerial base.
Audi R8 dealers and specialist retailers will be able to inform you
about options for installing and operating radio transmitters with a
higher transmitting power.
Mobile radio transmitters
When using commercial mobile telephones or radio equipment it is
possible that they might interfere with the electronics of your
vehicle and cause malfunctions. The reasons could be:
•
no external aerial
•
external aerial incorrectly installed
•
transmitting power more than 10 W.
Therefore you must not operate portable mobile telephones or radio
equipment inside the vehicle without a correctly installed external
aerial ⇒.
Please note also that the maximum range of the equipment can only
be achieved with an external aerial.
Business equipment
Retrofit installation of business or other equipment in the vehicle is
permitted, provided the equipment cannot interfere with the
driver's immediate control of the vehicle. Any such equipment must
carry the CE mark. Any retrofit equipment that could influence the
driver's control of the vehicle must have a type approval for your
vehicle and must carry the e mark.
WARNING
Mobile telephones or radio equipment which are operated inside
the vehicle without a correctly installed external aerial can create
excessive magnetic fields that could cause a health hazard.
Note
•
Any retrofit installation of electrical or electronic equipment in
the vehicle will affect its type approval. In extreme cases this could
mean that you might lose the type approval for your vehicle.
•
Please refer to the mobile telephone/radio operating
instructions.
document_0900452a816e6cc9.book Seite 175 Mittwoch, 21. Februar 2007 1:32 13