stop start AUDI R8 SPYDER 2011 User Guide
[x] Cancel search | Manufacturer: AUDI, Model Year: 2011, Model line: R8 SPYDER, Model: AUDI R8 SPYDER 2011Pages: 244, PDF Size: 59.74 MB
Page 82 of 244
80 On the road
The parking brake warning light_
(USA)/ . (CON) illuminates when the parking
brake is set and you switch on the ignition.
A WARNING
-
Always release the parking brake com
pletely. A partially engaged brake will
overheat the rear brakes, reduce their ef
fectiveness and cause excessive wear. This could lead to brake failure and an accident .
(D Note
Only after the vehicle has come to com
plete stop, should you firmly set the park
ing brake and
move the gearshift lever into
a gear.
Parking
To prevent a parked vehicle from rolling
away, there are a few things you should do .
.. Stop the vehicle using the brake pedal.
.. Set the parking brake firmly .
.. Switch off the engine.
.. Engage a gear
q ,&. .
What else you should do when parking
your vehicle on an incline or decline
Turn the steering wheel so that if the vehicle
should start to roll, it will roll into the curb.
A WARNING
This is how you can reduce the risk of in
jury when leaving your vehicle.
- Never park the vehicle where it can come
in contact with dry grass, spilled fuel or
any other flammable materials.
- Never allow anyone - especially small
children - to remain in the vehicle when
it is locked. Locked doors make it more
difficult for rescuers to access the pas
senger compartment in the event of an
emergency. Danger to life!
- Never leave children unsupervised in the
vehicle. Children could release the park
ing brake or
move the gearshift lever out
-
of gear. The vehicle could start to roll
away and cause an accident.
- No matter what the season is, the tem
perature in a parked vehicle can reach
dangerous levels.
Starting on hills
Applies to vehicles: with hill hold assist
Hill hold assist makes it easier to start on
hills .
The system is activated when the brake pedal
is depressed
for a few seconds.
After releasing the brake pedal, the brake
power is held for a
brief moment to prevent
the vehicle from rolling back when starting.
During this time, you can easily begin to
move
your vehicle.
A WARNING
-- If you did not begin moving immediately
after releasing the brake pedal, the vehi
cle could begin to roll backward under
certain circumstances. Depress the brake
pedal immediately or engage the parking
brake.
- If the engine stalls, depress the brake
pedal immediately or engage the parking
brake.
- To prevent the vehicle from rolling back
unintentionally when starting in stop
and-go traffic, keep the brake pedal de
pressed for a few seconds before driving
off.
(D Tips
You can find out if your vehicle is equipped
with "hill hold assist" at an authorized Au
di dealer.
Page 88 of 244
86 Automated manual transmi ssion
Manual operation
Appl ies to vehicles: with R tronic
R tronic allows the driver to shift gears man
ually.
Starting from a s top
,,. Press and ho ld the brake pedal.
,,. Move the selector lever to the left.
,,. Tap the se lector lever forward
G) .
,,. Re lease the brake pedal and accelerate
c:> & .
Shifting
,,. To shift up, tap the selector lever forward
G) .
,,. To shift down, tap the selector lever to the
rear Q.
Stopping t empor arily
,,. Prevent the vehicle from moving by using
the foot brake, e.g. at traffic signals .
,,. Do not acce lerate. If you do not press either
the brake pedal or the acce lerator pedal for
some time when stationary, neutra l position
N is engaged automatically and a chime
sounds.
P ark ing
,,. Press and ho ld the brake pedal c:> A .
,,. Apply the hand brake firm ly.
,,. Engage a gear.
,,. Switch the ignition
off.
St opping on an incline
,,. Always keep the veh icle stationary using the
foot brake to prevent it from "rolling back"
c:> A . Do not try to prevent the vehicle from
"rolling back" when a gear is engaged by in
creasing engine speed.
,,. Apply the hand brake firmly.
St arting on a h ill
,,. With a gear engaged, remove your foot from
the brake, accelerate and s low ly release the
hand brake.
When acce lerating, R tronic shifts into the
next gear in gears 1, 2, 3, 4 and 5 shortly be- fore the maximum permissible engine speed
is reached. Exception: You have activated the
sport funct ion
r::!) page 85 .
If you have se lected a lower gear than the c ur
rent one, R tronic will shift down only when
the engine wi ll not be over-revved .
You can swi tch to a utoma tic operation at any
t ime
<:!)page 87.
& WARNING ~
- Never leave your vehicle with the engine
r u nning while in gear. If you must leave
your vehicle with the engine running, set the park ing brake f irm ly and engage neu
tral N.
- With the engine r unning and a gear en
gaged, you have to hold the veh icle w ith
the foot brake .
- Do not accelerate when you sh ift gears
with the vehicle stationary and the en
g ine runn ing.
- Before driving down a steep slope, re
duce your speed and shift into a lower
gear with R tronic .
- Do not ride the brakes or apply the brake
pedal too often or too long . Constant
brak ing causes the brakes to overheat
and substantially reduces braking per
formance, increases braking d istance or
causes complete failure of the brake sys
tem .
(D Note
If you must stop on an incline, always ho ld
the veh icle in place with the foot b rake to
prevent it from rolling back. Neve r ho ld
the veh icle on an incline with a slipping
clutch. The clutch was overloaded if
C lutch
overheat ing! If po ssible ple ase stop vehi
cle appears in the Driver Informat ion Sys
tem d isplay.
Page 89 of 244
Automatic operation
Applies to vehicles: with R tronic
The forward gears are shi~ed up or down au
tomatically.
S tartin g from a stop
.. Press and hold the brake pedal.
.. Tap the se lector lever towards A.
.. Release the brake pedal and acce lerate
c::, A.
in Manual operation on page 86.
Under certain circumstances (driving in the
mounta ins for example), it can be beneficial
to switch temporarily to the manua l shift pro
gram
c::> page 86 in order to adjust the gear ra
tios to driving conditions manually.
Kick-down
Applies to vehicles : with R tronic
When you depress the accelerator pedal be
yond the resistance point, R tronic downshifts
into a lower gear, depending on vehicle speed
and engine rpm . The ups hift into the next
h igher gear takes place once the max imum
specified engine speed is reached. Exception:
You have activated the sport funct ion.
A WARNING
Please note that the d rive whee ls can spin
if kick -down is used on a smooth slippery
road - there is a risk of skidding .
Launch Control
Program
Applies to vehicles : with R tronic
The Launch Control Program enables maxi
mum acceleration.
Requirement: The engine must be at operat
ing temperature and the steering wheel must
not be turned .
.. With the engine running, press the
[!I but
ton one t ime. The ESP indicator light
fi in
the Driver Information System display illu minates and the message
ESP sp ort -W arn
in g! Re str icte d s tab ility
appears .
Autom ated manual tr an sm iss ion 8 7
.. Press the brake pedal with your left foot and
hold it down.
.. Engage a gear.
.. Press the
ISPORT I button on the selector lev
er cover.
.. Press the accelerator pedal w ith your right
foot simultaneously unt il the eng ine has
reached a constant speed .
.,. Remove your left foot from the brake
c::, ,& .
A WARNING
-Always adapt your dr iv ing to the traffic
f low.
- On ly use La unch Control when road and
traffic conditions allow it and other driv
ers will not be endangered or annoyed by
your driving and the vehicle's accelera
tion.
- Please note that t he driving wheels can
spin and the vehicle can break away
when ESP is switched off, especially
when the road is slippery .
- Once the starting procedure is complete,
you should sw itch ESP on again by press
ing the
[!I switch.
(D Tips
When accelerat ing using the Launch Con
trol program, all vehicle parts are sub ject
to heavy loads. This can result in increased
wear.
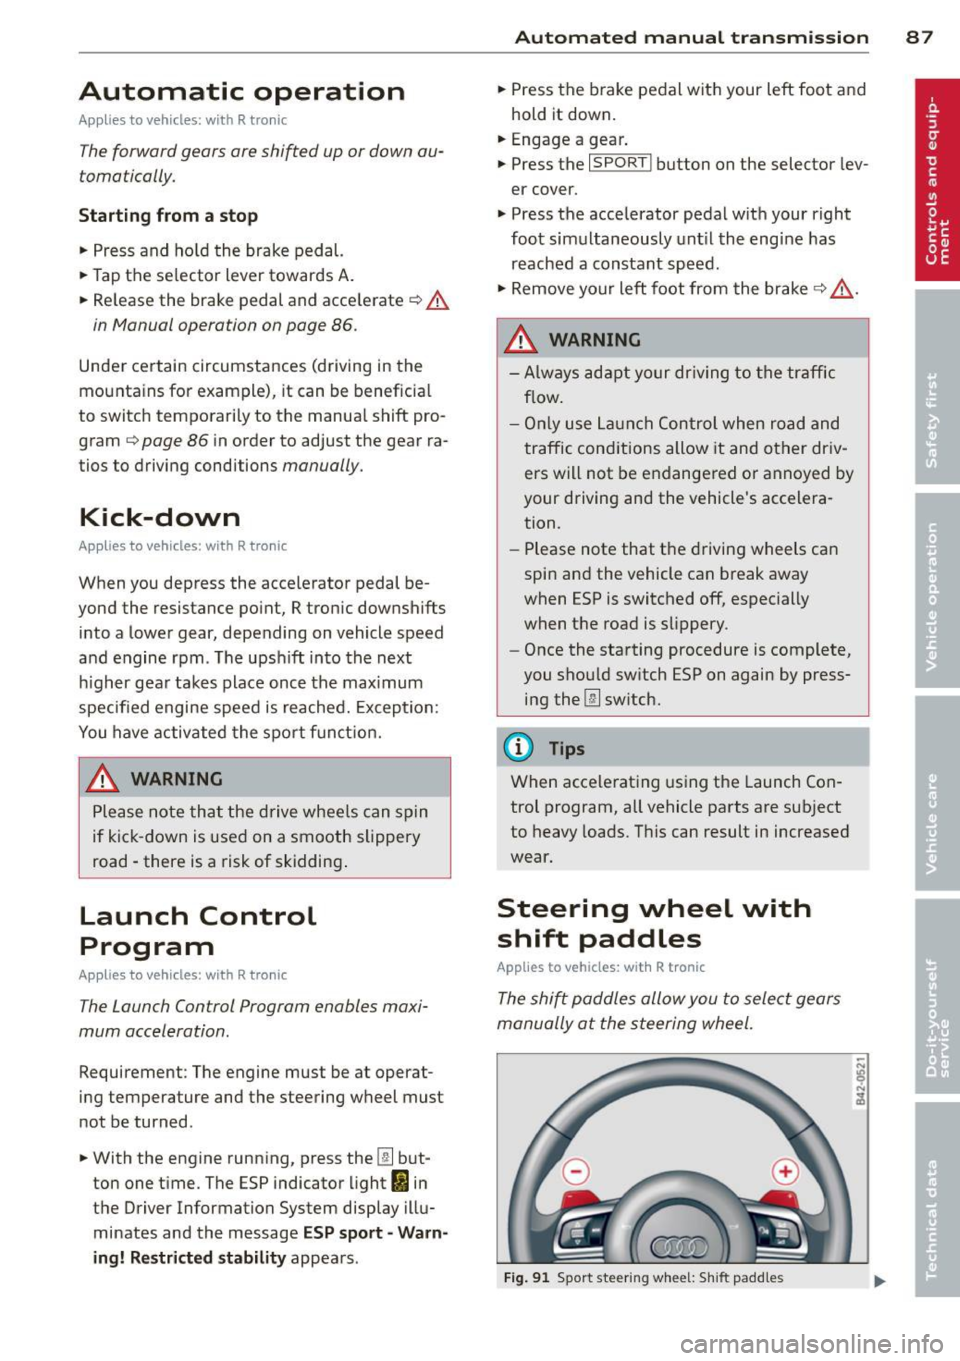
Steering wheel with
shift paddles
Applies to veh icles: with R tronic
The shi~ paddles allow you to select gears
manually at the steering wheel.
F ig . 91 Sport steering wheel: S hift padd les
Page 95 of 244
The following steps apply only when there is
no obstacle such as a wall near the parking
spot. Otherwise, please read the information
prov ided in the "Parking Next to Obstacles"
section.
~ Activate the turn signal.
~ Position yo ur vehicle parallel to the edge of
the street, approximately 3 ft. (1 m) from a parked vehicle .
~ Switch the navigation system and the nav i
gat ion system display on.
~ Se lect reverse gear . The parking aid tu rns on
and par king mode 1 appears on the display .
~ Press the control bu tto n 1 on the nav igat io n
system ¢
fig. 100. Parking mode 2 appea rs .
~ Backup and align yo ur vehicle so the b lue
area @ borders on the rear end of the vehi
cle or on the parking spot line. The bl ue area
represents an extension of the veh icle's out
line by approximate ly 16 ft (5 meters) to the
rear . The long side of the blue area should
be o n the curb . The entire blue area must fit
i nto the parking spot .
~ With the veh icle s topped, tu rn the s teer ing
whee l to the r ight as far as it w ill go.
~ Back into the park ing spot until the blue
cu rve to uches the curb¢
fig. 101. Stop the
vehicle.
~ With the veh icle stopped, turn the steer ing
wheel to the left as far as it will go .
~ Continue to back into the parking spot un til
the vehicle is parked para llel to the curb .@
marks the rear bumper. Stop the vehicle
when the red orientation line@ borde rs an
object ¢.&, . Keep an eye o n the fron t of
yo ur vehicle while do ing this ¢Ci) .
Parking next to obstacles
When t here is an obstacle (such as a wall)
next to the pa rking spot, choose a spot w it h
mo re space on t he sides. Position the long
side of the b lue a rea so that there is sufficient
space from the curb. The a rea m ust no t be on
the c urb. You w ill also need to start turn ing
the steeri ng wheel much earlie r. T he re should
be a s uffic ient amo unt of space between the
curb and the blue c urve, and the blue c urve
¢
fig. 101 must not touch the curb.
Par king system 93
A WARNING
-The rearview camera does not show the
entire area behind the vehicle¢
page 89,
fig. 95 . Watch out especially for small
children and anima ls . The rea r view cam
e ra can no t always de tect t hem, pos ing
ris k of an accident!
- P lease note that objects not touching the
g rou nd can appear to be far ther away
than they really are (for example, the
bumper of a vehicle or the rea r of a
truck) . In this case , you sho uld not use
the o rientation lines to help with park
ing, which poses danger of an accident!
(D Note
In the navigation system disp lay, the direc
tion of trave l of the vehicle rear is repre
sented depend ing on the stee ring wheel
angle. T he veh icle front swings out more
than the vehicle rear. Ma inta in p lenty of
distance so that you r o utside m irror or a
corner of you r vehicle does no t coll ide with
any obstacles. This can damage to your ve hicle.
(0 Tips
The left o r right o rientation lines and su r
faces will be disp layed, depending on the
turn s ignal being used .
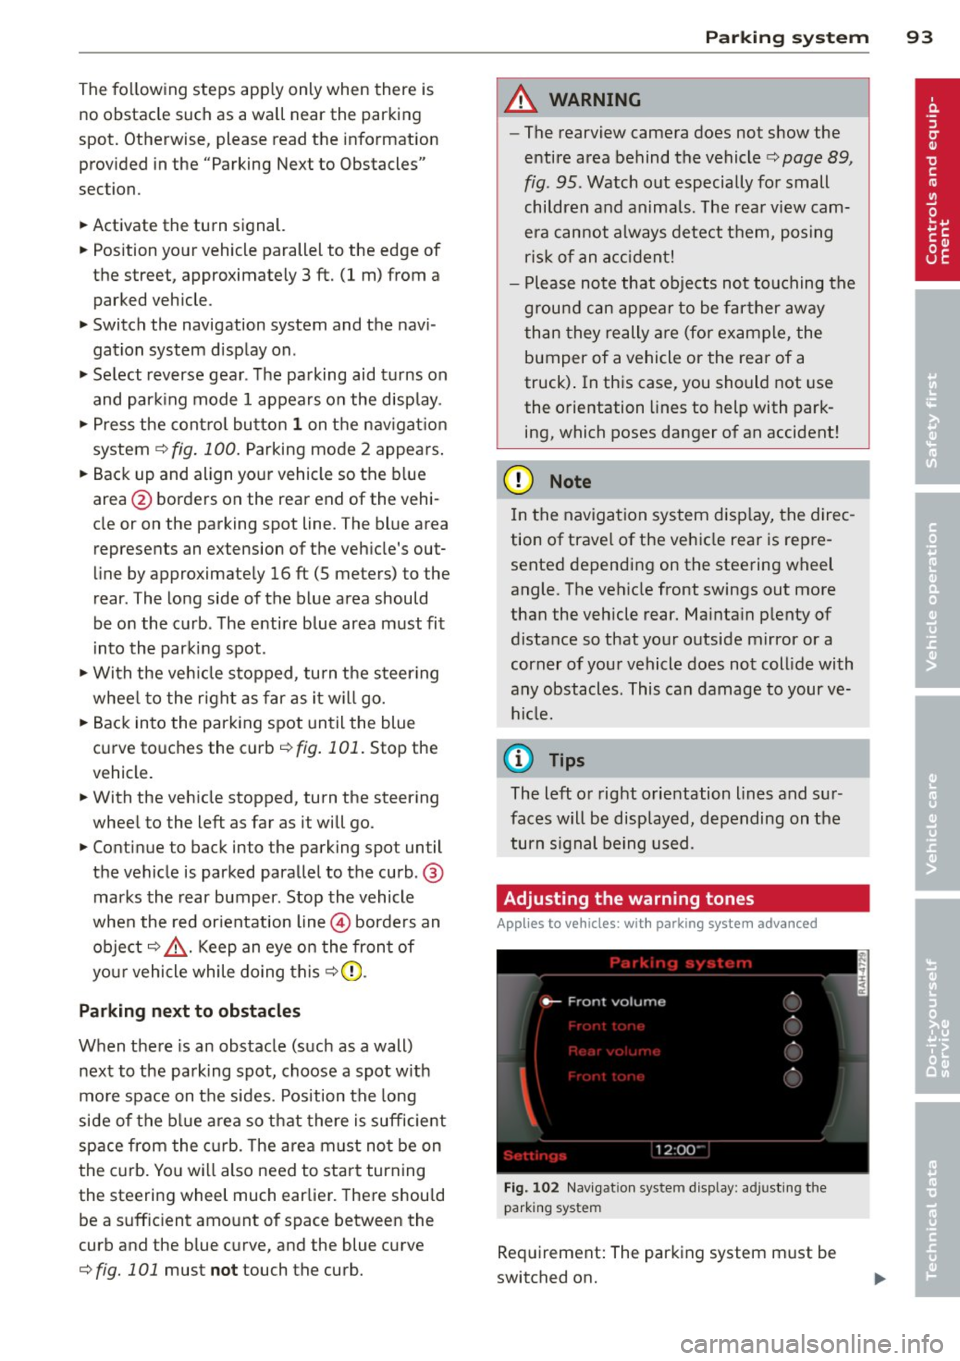
Adjusting the warning tones
Applies to vehicles: wi th parking sys tem adva nced
Fi g. 102 Nav igat io n system d isplay: a djusting t he
park ing s yste m
Req uirement: The parking system m ust be
switched on.
Page 97 of 244
Homelink®
Universal remote
control
General information
Appl ies to vehicles: with Horne Link® universal rem ote
control
The Homelink ® feature can learn up to three
radio frequency codes for most current trans
mitters used for operating garage doors, es tate gates, home or outdoor lighting sys
tems, and other devices.
You must first program the Homelink ® trans
mitter before you can use the system
¢ page 96, Programming the HomeLink ®
transmitter.
In order to program the Home link ® transmit
ter for devices utilizing rolling code, a second
person on a ladder who can safe ly reach the
garage door opener motor is recommended.
I t is also necessary to locate the "learn" but
ton on your garage door opener motor . Refer
to the operat ing instruct ions for the opener,
as the location and color of this button may
vary by manufacturer.
You can still use the origina l remote control
for the device at any time.
A WARNING
-
- Never use the Homelink ® transmitter
with any garage door opener that does
have not the safety stop and reverse fea
tu re as requ ired by federa l safety stand
ards . Th is includes any garage door open
er mode l manufact ured before April 1,
1982.
- A garage door opener which cannot de
te ct an object, signaling the door to stop
and rever se does no t mee t current feder
al safety standards. Using a ga rage doo r
opener witho ut these features increases
risk of serious inj ury or death.
- F or sa fety reasons never release the
par king brake or start the engine while
anyone is stand ing in front of the vehicle .
Hom elin k® 95
-A garage door or an estate gate may
sometimes be set in mot ion when the
Homelink ® remote control is being pro
grammed . If the device is repeatedly ac
tivated, th is can overstrain motor and
damage its e lectrical components -an
overheated moto r is a fire hazard!
- To avo id possib le injuries or property
damage, please always make abso lutely
certain that no persons o r objects are lo
ca ted in the range of motion of any
equ ipment being ope rated .
(D Tips
-If you would li ke more information on
Homel ink ®, w here to purchase the
Homel ink ® compatib le produc ts, or
would like to purchase the Homelink ®
Home Lighting Package, please ca ll toll
free: 1-800-355-3515 .
- For Declaration of Compliance to United States FCC and Ind ustry Canada reg ula
tions ¢
page 212 .
Page 152 of 244
150 Intelligent te chn olog y
Intelligent technology
Notice about data
recorded by vehicle
control modules
Your veh icle is not equipped with an Event Da
ta Recorder (EDR), installed by some manu
facture rs fo r the express p urpose o f capturing
data for retrieval after an accident or cras h
event. EDR's are sometimes called "crash re
corders".
Some state laws restrict the retrieval or down loading of data stored by EDR 's that were in
stalled in a vehicle for the express purpose of retrieving data after an accident or crash
event without the owner's consent.
A lthough yo ur vehicle is not equ ipped wit h an
EDR, it is equipped with a number of elect ron
ic control modules for various v ehicl e systems
such as, for examp le, eng ine function, emis
sion control, as well as for the airbags and
sa fety belts .
These electron ic co ntrol modules also record
vehicle-re lated data du ring norma l vehicle op
er ation for diagno stic and repa ir purposes .
T he recording capacity of the elec tronic con
trol modules is limited to data (no sound is re
corded) and only a small amount of data is ac
tually recorded ove r a ve ry limited pe riod of
time and stored when a system fault or other condition is sensed by a cont ro l u nit. Some of
the data t hen stored may re late to vehicle
speed, direction, braking as we ll as restraint
syst em use and performanc e in the event of a
c rash or other condition. Stored data can only
be read and downloaded w ith special equip
ment .
Electronic Stabilization
Program (ESP)
The Electronic Stabilization Program increas
es driving stability .
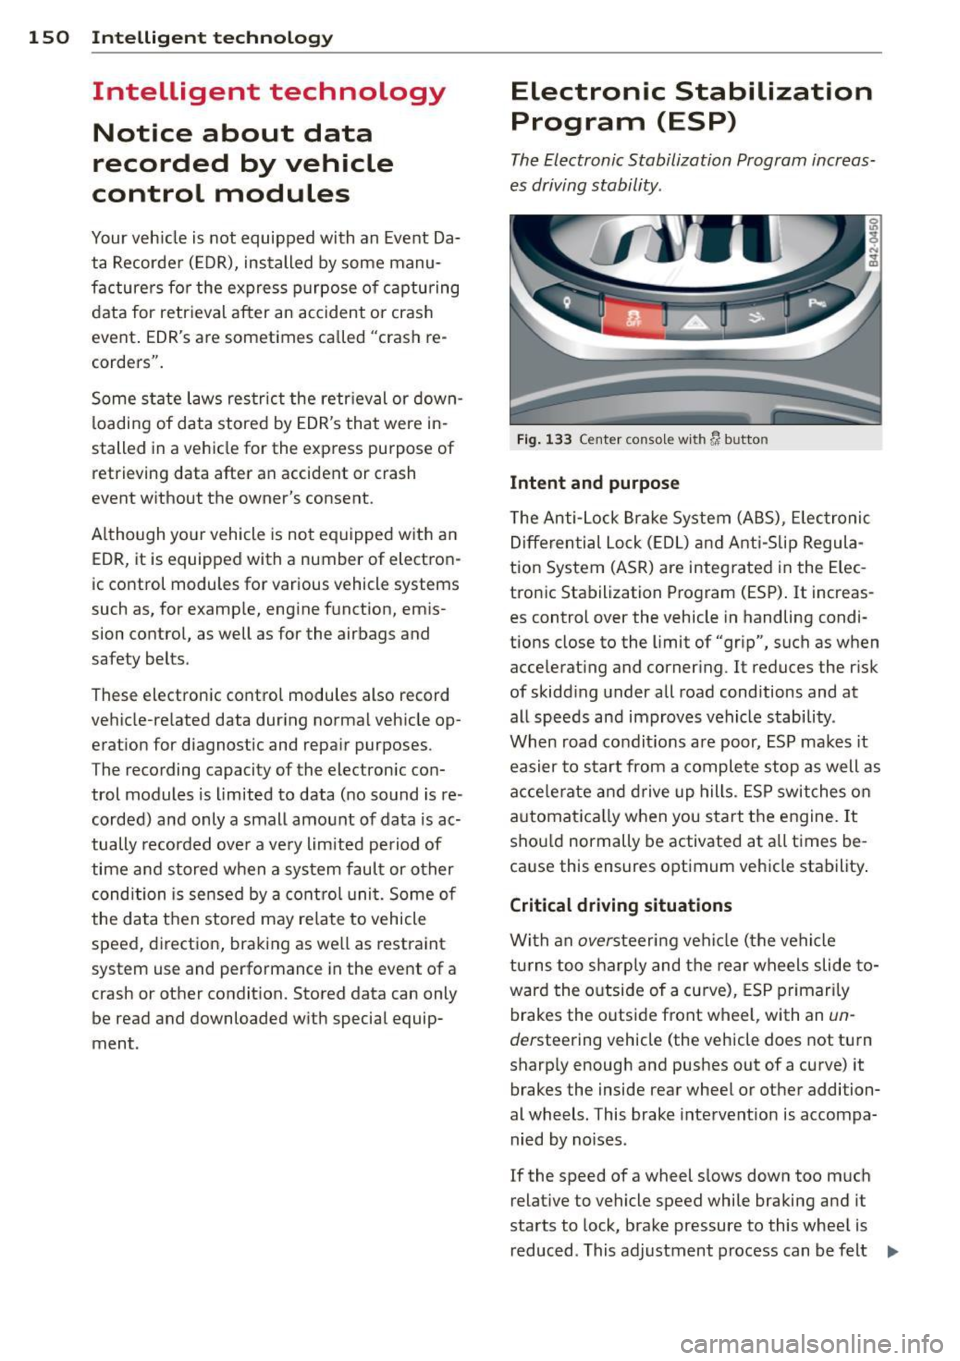
Fig . 1 33 Ce nt er conso le wi th~ bu tto n
Intent and purpose
T he Anti-Lock Brake System (ABS), Elec tronic
D ifferential Lock (EDL) a nd Anti-Slip Regula
tion System (ASR) are integrated i n the Elec
tronic Stabilization Program (ES P).
It increas
es control over the vehicle in handling condi
tions close to the limit of "grip", such as when
acce lerat ing and cornering .
It reduces the r isk
of skidd ing under all road conditions and at
all speeds and improves vehicle stability .
When road condit ions are poor, ES P makes it
easier to start from a complete stop as well as
acce le rate a nd d rive up hills . E S P s witches o n
automatica lly when you start the engine. It
shou ld normally be activated at a ll t imes be
cause this ensures optimum veh icle stability .
Critical driving situations
Wi th an oversteering vehi cle ( the vehicle
tu rns too sharply and the rear wheels slide to
ward the o utside of a cu rve), ESP primari ly
brakes the o utside front wheel, with an
un
dersteering vehicle (the vehicle does not turn
sharp ly enough and pushes out of a curve) it
brakes the inside rear whee l or other addition
al wheels. This brake inte rvent ion is accompa
nied by noises .
If the speed of a wheel s lows down too m uch
rela tive to vehicle speed while braking and i t
starts to lock, brake pressure to this whee l is
reduced . This adjustment process can be felt ..,.
Page 153 of 244
as a pulsing motion of the brake pedal, ac
companied by some noises. In order for ABS
to be able to operate optimally in th is range,
you must keep the brake pedal depressed -
never "pump the brakes" . You should not ex
pect that braking d istances w ill be
shortened
under all circumstances with ABS . Braking dis
tance may even be slightly
longer, for exam
p le on gravel or wi th fresh snow on a slippery
surface .
If a sign ificant
speed differential between the
d rive wheels on one axle is determined (for
examp le, on a su rface that is s lippery
on one
side),
the EDS brakes the spinn ing whee l and
transfers power to the other drive whee ls.
This is done up to a speed of about 60 mph (100 km/h) . Noises from the brake system
signal that whee l spin is being controlled.
I f one whee l spins when starting from a com
p lete stop because o f a different grip (for ex
ample , one wheel o n ice), keep your foot
hard
on the accelerator until the veh icle starts to
move.
If the wheels spin , ASR wi ll automatically re
duce engine torque and match power to road
surface conditions .
Switching on Sport mod e
In specific driving situations (e.g. Launch Con
trol), you swi tch ASR and ESP to Sport mode
by pressing the
[!I button once . The indicator
light
11 illuminates and ESP sport -Wa rni ng!
Restric ted stab ility
appears . "Slip" is matched
to the speed. You should do this only if your
driving skill and traffic cond it ions permit .
Switching ASR /ESP off
In certain sit uations (e .g . in deep snow, on a
l oose surface, o r when rocking the vehicle
free), switch ASR and ESP off by pressing the
[ill button for more than 3 seconds. The ind ica
tor light
I) illuminates and ES P sw itc hed off -
Warning! R estricted stability
appears . You
should do th is only if your driving skill and
traffic cond itions pe rmit .
Int ellig ent technolog y 151
Switching ASR /ESP on
Activate ASR/ ESP by p ressing the [!I button
again. The message
ESP on appears in the d is
play briefly.
Brake overheating
So that the disc b rake on a b raked wheel does
not overheat, the EDS switches off automati
ca lly if there is un usua lly severe loa ding at
th is wheel. The vehicle is st ill drivable and has
the same properties as a vehicle wit hout EDS .
As soon as the brake has cooled down, EDS
swi tches on aga in automatically.
A WARNING
- Even ESP, ABS, EDS and ASR cannot over
come the laws of physics . You should
keep this in m ind in particular on an icy
or wet road. If the systems intervene,
you shou ld adjust your speed immediate
ly to road and traff ic conditions . Do not
be tempted by the increased safety pro
vided to take risks -you risk having an
accident.
- Please keep in mind that the r isk of an
accident is i ncreased by driving too fast,
pa rti cularly in corners and on icy or wet
ro ads, and by drivi ng too close to the ve
hicle ahead . Even ES P, ABS, E DS and ASR
cannot eliminate the increased risk of
having an accident.
-Apply the throttle ca re fully when accel
erating on a consistently s lippery sur
face, e.g. on ice and snow . The drive
wheels can spin in spite of the EDS and thereby affect vehicle stability -you risk
having an accident .
- Please note that when ASR or ESP/ASR is
deactivated, the drive wheels can spin on
icy and slippery roads and the veh icle can
break away -the re is a risk of skidd ing!
(D Tips
- In the event of a defect in the rear spoil-
er system or in Audi magnet ic ride, it can
happen that ASR and ASR/ESP cannot be .,.
•
•
Page 178 of 244
176 Checking and filling
thick rag over the cap when you open the coolant reservoir .
-If work on the fuel system or the electri
cal system is necessary:
- Always disconnect the battery .
- Never smoke or work near heaters or
open flames. Fluids in the engine com partment could start a fire .
- Keep an approved fire extinguisher im
mediately available.
- To avoid electrical shock and personal in
jury while the engine is running or being
started, never touch:
- Ignition cables
- Other components of the high voltage
electronic ignition system.
- If you must perform a check or repair
with the engine running:
- First, fully apply the parking brake,
move selector lever of R tronic to "N"
(Neutral); put manual transmission in
Neutral.
- Always use extreme caution to prevent
clothing, jewelry, or long hair from get
ting caught in the radiator fan, V-belts
or other moving parts, or from contact
ing hot parts . Tie back hair before
starting, and wear no clothing that will
hang or droop into the engine.
- Minimize exposure to emission and
chemical hazards~&. .
.&_ WARNING
California Proposition 65 Warning:
- Engine exhaust, some of its constituents,
and certain vehicle components contain
or emit chemicals known to the State of
California to cause cancer and birth de
fects and reproductive harm. In addition,
certain fluids contained in vehicles and
certain products of component wear con
tain or emit chemicals known to the
State of California to cause cancer and
birth defects or other reproductive harm .
- Battery posts, terminals and related ac cessories contain lead and lead com
pounds, chemicals known to the State of California to cause cancer and
reproduc
tive harms. Wash hands after handling.
@ Note
When adding fluids, always make sure that
they are poured into the proper container
or filler opening, otherwise serious dam
age to vehicle systems will occur.
@ For the sake of the environment
To detect leaks in time, inspect the vehicle
floor pan from underneath regularly. If
you see spots from oil or other vehicle flu
ids, have your vehicle inspected by an au
thorized Audi dealer.
Closing the engine compartment lid
... Make sure that the rear spoiler is retracted
~page 152.
""Pull the engine compartment lid down until
the pressure from the struts is reduced.
.., Press the engine compartment lid closed
c::>& .
A WARNING ,_
A engine compartment lid that is not com
pletely latched could fly up and block your
view while driving.
- When you close the engine compartment lid, check it to make sure the safety catch
has properly engaged . The engine com
partment lid should be flush with the
surrounding vehicle body parts .
- If you notice while driving that the en
gine compartment lid is not secured properly, stop at once and close it.
Page 209 of 244
soon as possible, and inflate them to the
proper pressure. Driving on a significant ly un
der-inflated tire causes the tire to overheat
and can lead to tire failure. Under-inflation a l
so reduces fuel efficiency and tire tread l ife,
and may affect the veh icle 's handling and
stopping ab ility.
Please note that the TPMS is not a substitute
for proper t ire maintenance, and it is the dr iv
er's responsib ility to ma inta in correct t ire
p ress ure , even if under- inflation has not
reached the leve l to t rigger illumination of the
TPMS low tire pressure telltale .
Your veh icle has also been equ ipped with a
TPMS malfunction indicato r to indicate when
the system is not ope rating properly. The
TPMS malfunc tion indica to r i s combined wi th
the low t ire p ressu re tell ta le. When the sys
tem detec ts a malf unct ion, the te lltale will
flash for approximately one minute and then remain continuo usly ill uminated . This se
q uence will cont inue upon subsequent vehicle
start-ups as long as the ma lfunction ex ists.
When the malfunction indicator is ill uminat
ed, the system may not be able to detect or
signa l low t ire pressure as intended . TPMS
malfunct ions may occ ur for a variety of rea
sons, including the ins talla tion of replace
ment or alternate tires o r whee ls on the veh i
cle that prevent the TPMS from funct io ni ng
p roperly . Always check the TPMS malfunct ion
t ellta le afte r replacing one o r more t ires or
wheels o n your veh icle to ensure tha t the re
p lacemen t or a lternate tires and wheels allow
the TPMS to continue to function properly .
Introduction
The tire pressure monitoring system monitors
air pressure in all four road wheels while the
vehicle is moving .
As soon as the tire pressu re mo nitor ing sys
tem senses a s ignificant loss o f air pressure in
one or severa l ti res, text messages and yellow
symbo ls appear in the instr ument cluster dis
p lay to alert the driver. The
[al warning light
Tire s an d wheel s 207
in the instrument cluster comes on when the
ti re is significant ly underinflated
Q page 34.
The wa rni ng lig ht [al also illu minates i n the
case of a system mal fun ct io n.
Be aware that t ire pressure is a lso dependent
o n the tempe ratu re of the t ire. For eve ry 18 ° F
(10 °C) incre ase in tir e te mper ature, tire pres
s u re inc reases by about 1.5 psi (0 .1 bar). The
ti re warms up while the vehicle is moving and
ti re p ress ure rises . So you sho uld ad just tire
pressure only when they a re
cold, when the
temperature of the tires is roughly the same
as the ambient a ir temperature.
In order to keep the tire press ure monitoring
system p roperly ca librated, t ire press ure on
all four tires sho uld be checked at regu lar in
terva ls.
The tire pressure is shown on the label located
on the dr iver's side B-pillar (v is ib le when the
door is open) .
A WARNING
When the tire pressure mo nitoring system
war ning light is lit , one o r more of your
tires is s ignificantly under-infla ted . You
shou ld stop and check your tires as soon as
pos sib le, and in flate t hem to the proper
p ress ure a s in dic ate d on the ve hicle's ti re
p ress ure lab el
¢page 19 3. D riving on a
significantly under -inflated ti re causes t he
tire to over heat and can lead to tire failure .
Under-inflat ion also is like ly to impair the
vehicle's handling and stopping ab ility.
@ For the sake of the environment
D riving wit h un der -inflated tires red uces
fuel efficiency an d tire t read life.
(D Tips
- E ach tire should be chec ked monthly
w hen the tem perature of the tires is
about the same as amb ient a ir tempera
t u re and set to the recommended infla
tion pressure as specified on the tire
pressure label
¢ pag e 193.
•
•
Page 218 of 244
216 What do I do now?
• Switch the electric air pump off - switch in
position
0. If the required tire pressure of at
l east 1.8 bar has not been reached, it is not
poss ible to make a repa ir with the tire seal
ant. Seek professional ass istance.
Di sas sembling T ire Mobilit y Sy stem
• Remove the hose from the valve and pull the
plug out of the socket.
• Screw the dust cap onto the valve.
• Place the empty sealant bottle back in the
original packaging and clip it in place under
the floor so that no tire sealant can run out into the vehicle .
• Start driving right away so that the sealant
is d istr ibuted in the tire.
.&_ WARNING
- Follow the manufacturer's safety instruc
tions on the deca l for the air pump and
the sea lant bott le .
- If a tire pressure of 1.8 bar cannot be
achieved after pumping for S minutes,
the tire is too severely damaged. Do not continue to drive.
- Seek professional assistance if it is not
poss ible to repair the tire with the tire
sealant.
(D Tips
- Do not operate the electric ai r pump for
more than 8 min utes without stopping,
otherwise it can overheat. When the air
pump has cooled down, you can continue
to use it.
- If sealant has escaped, allow it to dry, then you can peel it off.
Final check
After driving for a short distance, t ire pressure
must be checked .
• After driving for about 10 minutes, stop and
check the t ire pressure.
• If tire pressure is still at least 1.3 bar, in
flate the t ire to specified pressure (see driv
er's side B-pillar), dr ive to the next repair shop and have the tire and the sealant bot
tle replaced.
• If tire pressure is less than 1.3 bar, the t ire
is too severely damaged. Do not continue to
drive . Seek professional assistance.
.&_ WARNING
If t ire pressure is less than 1.3 bar after
d riving for 10 minutes, the t ire is too se
ve rely damaged. Do not cont inue to drive.
See k professional ass istance.
(D Tips
After a tire repair, have the sealant bottle
r eplaced at a dealership. This restores full
funct ionality to the T ire Mobility System .
What should I be
aware of when
changing a tire?
Tires with unidirectional tread design
-
Tires with unidirectional tread design mu.st be
mounted with their tread pattern pointed the
right direction.
A un idirectional tire can be identified by ar
row s on the sid ewall , which point in the di rec
t ion of the rota tion. Yo u m ust follow the
speci fied direction o f rotation. This is necessa
ry in order for these tires to develop t heir op
timum characteristics regarding grip, road
noise, wear, and hydrop lan ing .
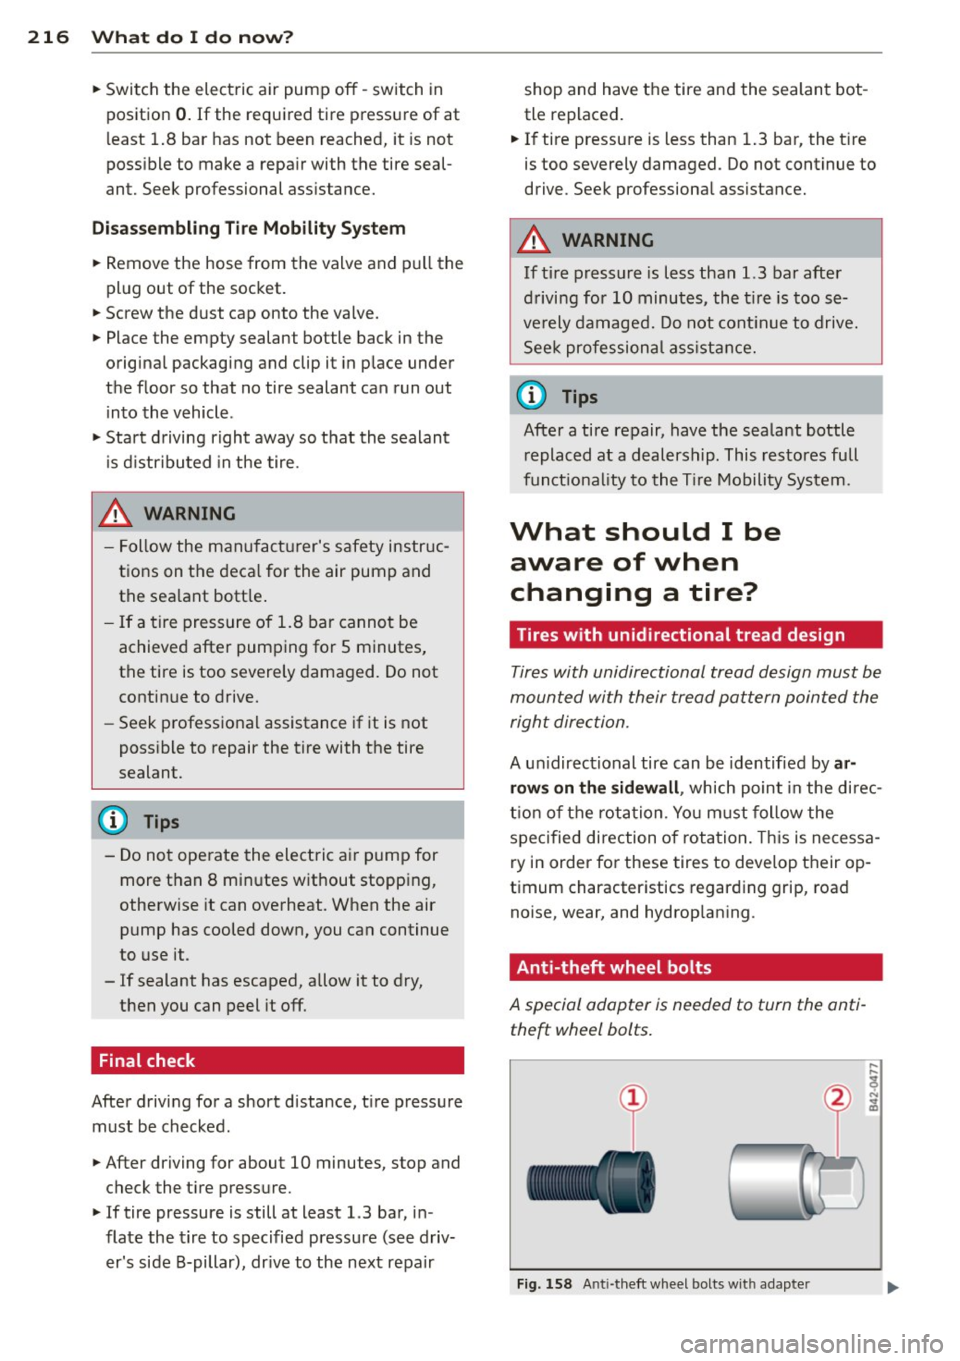
· Anti-theft wheel bolts
A special adopter is needed to turn the anti
theft wheel bolts.
Fi g. 158 Anti-theft wheel bolts w it h adapte r