service AUDI R8 SPYDER 2011 Owners Manual
[x] Cancel search | Manufacturer: AUDI, Model Year: 2011, Model line: R8 SPYDER, Model: AUDI R8 SPYDER 2011Pages: 244, PDF Size: 59.74 MB
Page 4 of 244
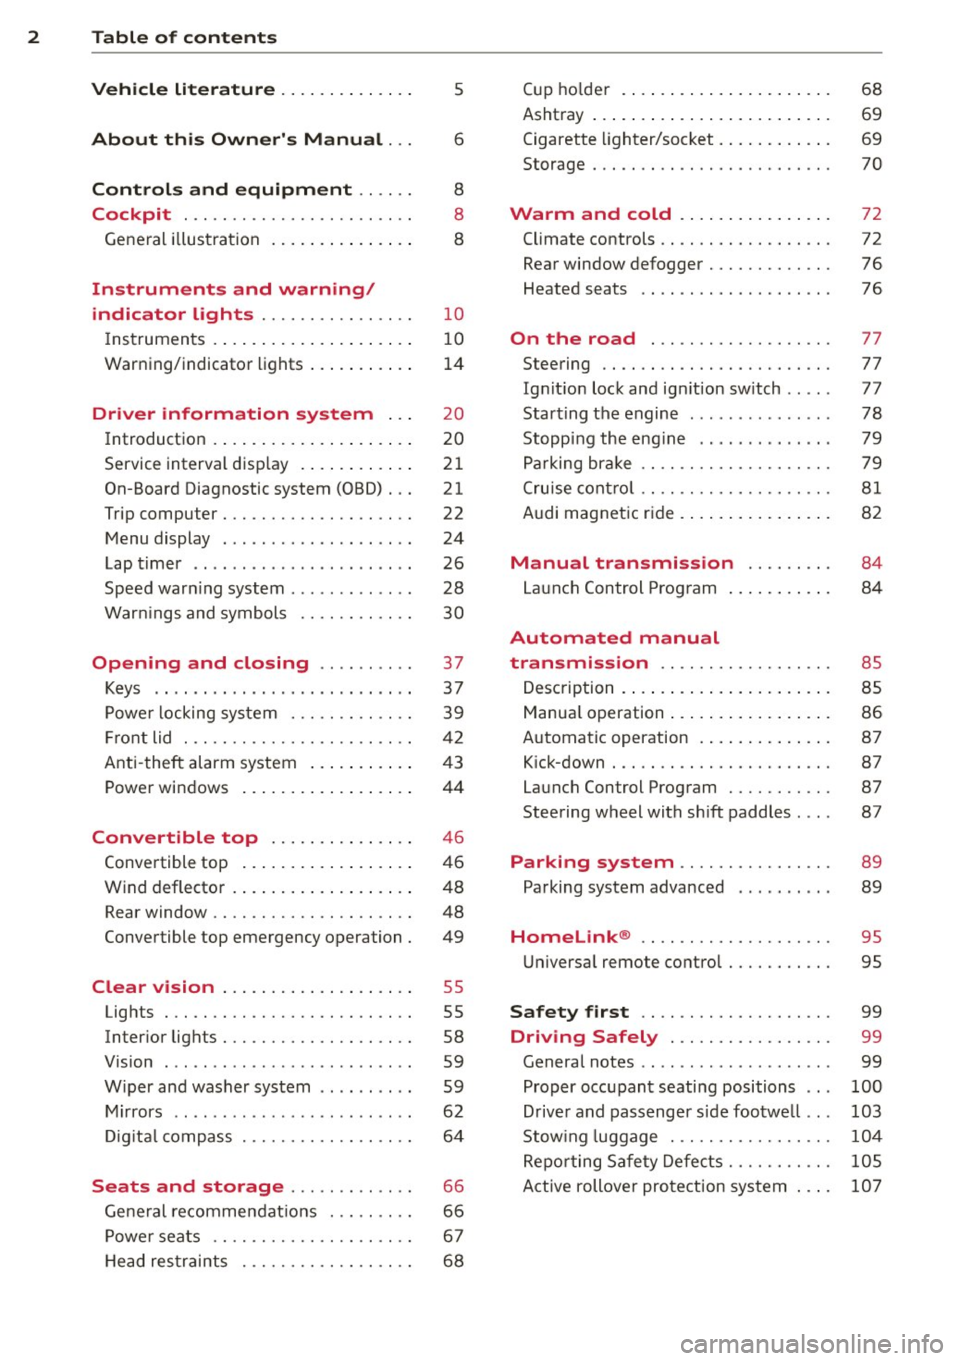
2 Table of contents Vehicle literature ............. .
About this Owner's Manual ...
Controls and equipment .. ... .
Cockpit ................... ... . .
General illustrat ion .............. .
Instruments and warning/
indicator lights ............... .
Instruments . .. ........ .. .. .. ... .
Warning/indicator lights ... .. ... .. .
Driver information system .. .
Introduction . .. ........ .. .. .. ... .
Service interval disp lay ........ .. . .
On-Board Diagnostic system (OBD) .. .
Trip computer ................... .
Menu display ................... .
Lap timer .. .................. .. .
Speed warning system .......... .. .
5
6
8
8
8
10
10
14
20
20
21
21
22
24
26
28
Warnings and symbols . . . . . . . . . . . .
30
Opening and closing ......... .
Keys .. ........................ .
Pow er locking system ............ .
Front lid ... ................ ... . .
Anti -theft alarm system ... .. .. ... .
Power windows .......... .. .. ... .
Convertible top .............. .
Convertible top ........ .. .. .. ... .
Wind deflector ......... .. .. .. ... .
Rear window .................... .
Convertible top emergency operation .
Clear vision .. ........ .. .. .. ... .
Lights ... ................. .. ... .
Inter ior lights ................... .
V1s1on .... ................... .. .
Wiper and washer system ...... .. . .
Mir rors .. .. ... .. ..... ......... . .
Digital compass ................. .
Seats and storage ..... .. .. .. . .
37
37
39
42
43
44
46
46
48
48
49
55
55
58
59
59
62
64
66
General recomme ndation s . . . . . . . . . 66
Po wer seats . . . . . . . . . . . . . . . . . . . . . 67
H ead restraints . . . . . . . . . . . . . . . . . . 68 Cup
holder .... .. ... .......... .. .
Ashtray ... .... .. .. ........... .. .
Cigarette lighter/socket ........... .
68
69
69
Storage . . . . . . . . . . . . . . . . . . . . . . . . .
70
Warm and cold .. ........... .. .
Climate controls .. ............... .
Rear window defogger ............ .
Heated seats .... ............... .
On the road ... .............. . .
Steering ....................... .
Ig nition lock and ign ition sw itch .... .
Starting the engine .............. .
Stopping the engine .... .... .... . .
Parking brake ................... .
Crui se control ................. .. .
Audi magnet ic rid e . ............ .. .
Manual transmission ........ .
Launch Control Prog ram ...... .. .. .
Automated manual
transmission ................. .
Description .... .. .. ........... .. .
Manual operation ... ........... .. .
Automatic operation ........... .. .
K ick-down ..... ............... .. .
La un ch Control Program .......... .
Steering wheel with sh ift paddles ... .
Parking system ............. .. .
Parking system advanced ......... .
Homelink® ................... .
72
72
76
76
77
77
77
78
79
79
81
82
84
84
85
85
86
87
87 87
87
89
89
95
Universal remote control . . . . . . . . . . . 95
Safety first . . . . . . . . . . . . . . . . . . . . 99
Driving Safely . . . . . . . . . . . . . . . . . 99
General notes . . . . . . . . . . . . . . . . . . . . 99
Proper occupant seating positions . . .
100
Driver and passenger side footwell . . . 103
Stowing luggage ................. 104
Reporting Safety Defects. . . . . . . . . . . 105
Active rollover protection system . . . . 107
Page 5 of 244
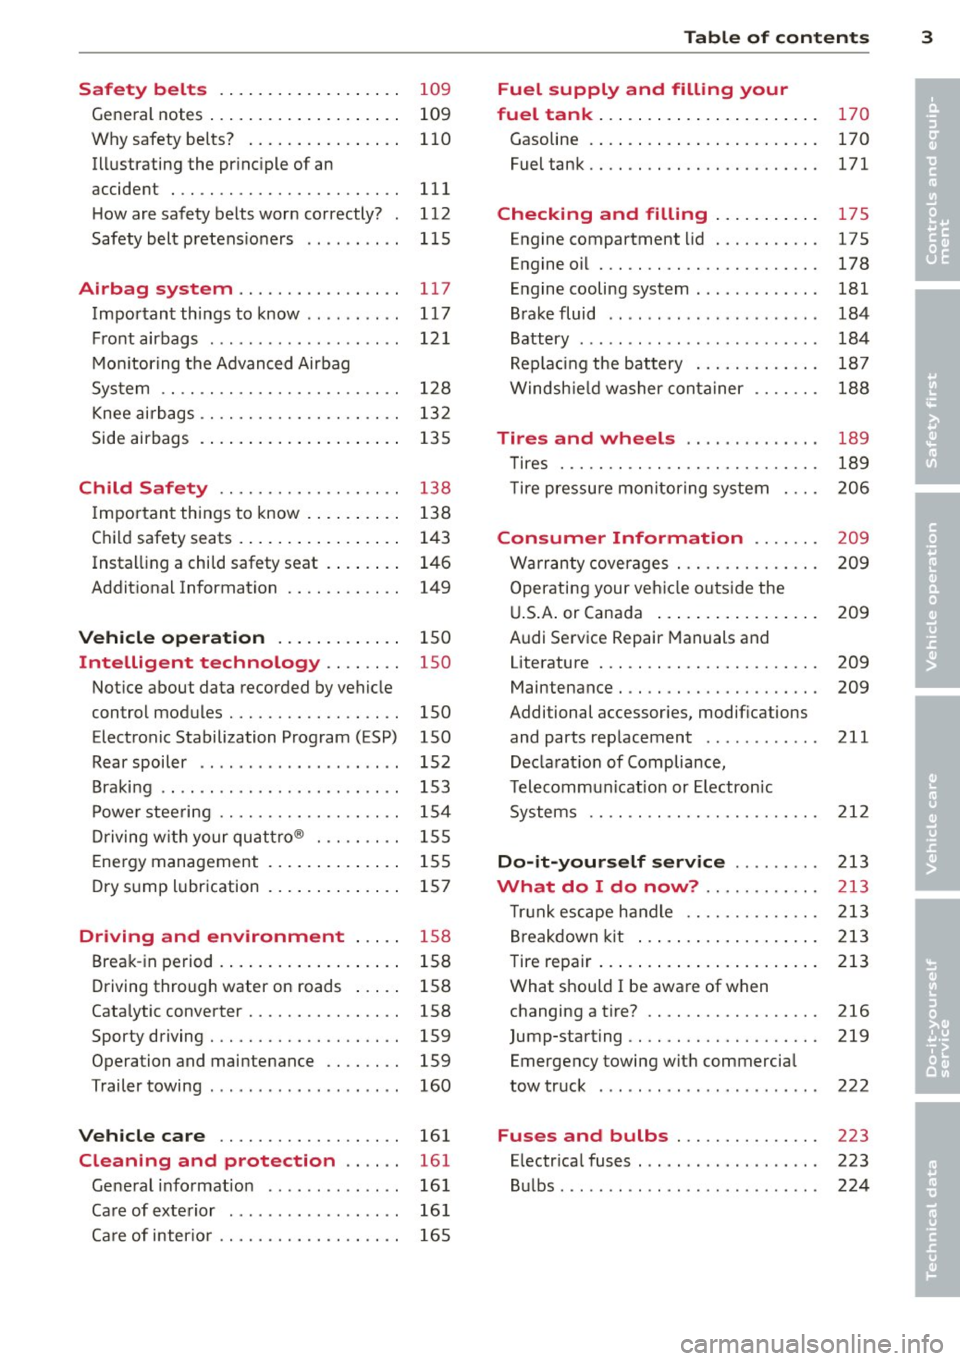
Safety belts . . . . . . . . . . . . . . . . . . . 109
General notes . . . . . . . . . . . . . . . . . . . . 109
Why safety be lts? . . . . . . . . . . . . . . . . 110
Ill ustrating the princ iple of an
accident . . . . . . . . . . . . . . . . . . . . . . . . 111
H ow are safety belts worn correctly? 112
Safety belt pretens ioners . . . . . . . . . . 115
Airbag system ........ .... ... .. 117
Important th ings to know . . . . . . . . . . 117
F ront airbags . . . . . . . . . . . . . . . . . . . . 121
M oni toring the Advanced Airbag
Sys tem . . . . . . . . . . . . . . . . . . . . . . . . . 128
Knee air bags . . . . . . . . . . . . . . . . . . . . . 132
Side airbags . . . . . . . . . . . . . . . . . . . . . 135
Child Safety ............. .. .. . .
Important things to know . ... .. .. . .
C hild safety seats . ..... ... .. .. .. . .
Instal ling a child safety seat . ... .. . .
Addit ional Information ........... .
Vehicle operat ion ..... .. .. .. . .
Intelligent technology .. .. .. . .
Not ice about data recorded by vehicle
control modules .......... .... .. . .
Electronic Stabilization Program ( ESP)
Rear spoiler .................... .
Braking .. .. .. ... ....... .... ... . .
P owe r stee ring .................. .
Driving w ith your qu attro ® ... .. .. . .
E ne rgy management ... ... .. .. .. . .
D ry s ump lubr ication ... ... .. .. .. . .
Driving and environment .... .
Break -in period . .. ..... ... .. .. .. . .
Driving through water on roads ... . .
Cata lytic converter ............ .. . .
Sporty driving . ........... .. .. .. . .
Operation and maintenance .. .. .. . .
Trailer towing ................... .
Vehicle care .................. .
Cleaning and protection ..... .
General information ...... .. .. .. . . 138
13
8
143
1 4 6
149
150
150
150
150
152
153
154
155
1 5 5
157
158 158
158
158
159
159 160
161
161
16 1
Ca re of exte rior . . . . . . . . . . . . . . . . . . 16 1
Ca re of inter io r . . . . . . . . . . . . . . . . . . . 165
Table of contents 3
Fuel supply and filling your
fuel tank ... .. .... . ... ...... ... .
170
Gasoline . . . . . . . . . . . . . . . . . . . . . . . . 170
Fuel tank. . . . . . . . . . . . . . . . . . . . . . . . 171
Checking and filling ..... ... .. .
Engine compartment lid .......... .
Engine oil ... .. .. .. . ............ .
E n gine cooling system ............ .
Brake fluid .. .. .. .. . .. .... ...... .
Battery ......... .. ............. .
Rep lacing the battery ............ .
Windsh ie ld washer container
Tires and wheels ... ..... ... .. .
175
175
178
181
184
184
18 7
188
189
T ires . . . . . . . . . . . . . . . . . . . . . . . . . . . 189
T ire pressure mo nitoring system
Consumer Information ...... .
Warranty coverages .............. .
Operating your veh icle outs ide the
U .S .A . or Canada ... . .. .. ..... ... .
A udi Se rvice Repair Manuals and
Literature . .. .. .. .... ........... .
Maintenance . .. .. .. ............. .
Additional accessories, modif ications
and parts rep lacement ........... .
Decla rat io n of Compliance,
T elecommunication or Electron ic
Systems .. .. .. .. .. ............. .
Do-it-yourself service ........ .
What do I do now? ........... .
Tru nk escape handle ........... .. .
B reakdown kit ... .. . .. ... .... ... .
Tire repa ir ... .... .. . .. .. ..... ... .
What shou ld I be awa re of when
h . t
' ? c anging a ,re. . . ............... .
Jump-starting .. ...... ........... .
Emergency towing with commercial
tow truck ....... .. ............. .
Fuses and bulbs .............. .
Electr ica l fuses .... .............. .
Bu lbs ... .. .. .. .. .. . .. .... ...... . 206
209
2
09
209
209
209
211
2 12
213
213
2 13
213
213
216
219
222
223
223
224
•
•
Page 7 of 244
In addition to t his Owner's Ma nual, your A udi
comes w ith a Warranty & Maintena nce book
l et.
Mor eover , d ep en ding on the mode l and t he
e quip ment, there may be additiona l ins truc
tion boo klets delivered w ith your vehicle (for
e x amp le, Ope rat ing Instr uctions fo r yo ur
Sound System, Navigation System etc .).
If yo u are m iss ing one of these p ublicat ions,
or if you believe that the inf ormation is not
comp lete, contact you r auth orized Audi dea le r
for assistance.
The Warranty & Maintenance booklet
explains how yo u ca n kee p your A udi in top
d riving condition by hav ing it serviced regular
l y and conta ins deta iled info rmat ion about
the wa rranties covering your Aud i. Always
h ave the book let with yo u when yo u take your
ve hicle to an auth orized Audi dealer for serv
i ce . Y our Aud i Service Adviser w ill reco rd each
sche duled servic e and can answer any ques
tions you may have r ega rding how to ma intain
your ve hicle.
In Canada,
the vehicle lite ratu re is also avai lab le in
Fr ench . T o obtai n a co py, c ontact your dea ler
or w rit e to :
Au Canada, on peut se procure r un e xempla ire
e n fran~ais de ce doc ument aupres du conces
sionna ire ou de :
Volkswagen Canada, Inc.
Client Assistance
Assistance a la Clientele
7 7 7 Bayly Str eet, West,
A jax, On tario LIS 7G 7
If you sell your Audi
all literature should be left in the veh icle to
make the Warranty terms as we ll as a ll oper
ating, safety and ma intenance information
ava ilab le to the ne xt ow ne r.
Vehicle literature 5
If you change your address or if you
bought this Audi used
b e s ure to send in a "Notice of Addr ess
Change"/ " Notice of Used Car Purchase" post
ca rd. T his card can be fo und in the War ranty&
M aint enance booklet or obtained from your
a utho rized Aud i dea le r.
It is in your own interest that we are able to
contact you should the need arise .
•
•
Page 22 of 244
20 Driver information system
Driver information
system
Introduction
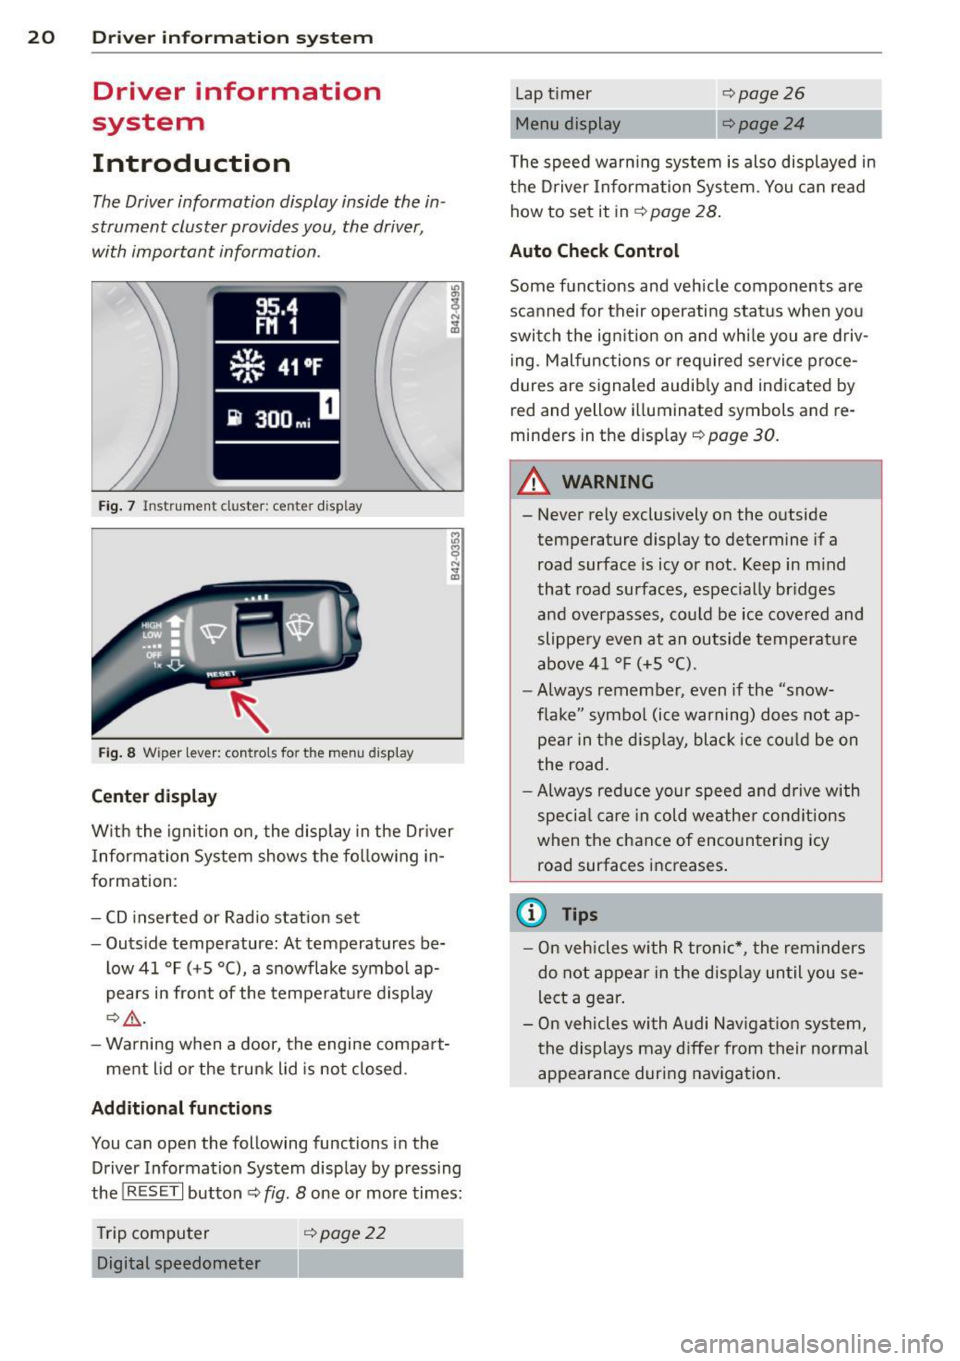
The Driver information display inside the in
strument cluster provides you, the driver ,
with important information.
Fig. 7 In strum en t cl ust er: center display
Fig. 8 Wiper le ver: c on trols fo r the menu display
Center display
With the ignition on, the display in the Driver
Information System shows the following in
formation :
- CD inserted or Radio station set
- Outside temperature: At temperatures be-
low 41 °F ( +S °C), a snowflake symbol ap
pears in front of the temperature display
¢.&_ .
-Warning when a door, the engine compart-
ment lid or the trunk lid is not closed .
Additional functions
You can open the following function s in the
Driver Information System display by pressing
the
! R ESE T I button ¢ fig. 8 one or more times:
Trip computer
¢poge22
Digital speedometer
Lap timer
Menu display 9 page26
¢page24
The speed warning system is also displayed in
the Driver Information System. You can read
how to set it in¢
page 28.
Auto Check Control
Some functions and vehicle components are
scanned for the ir operating status when you
switch the ignition on and while you are driv
ing. Malfunctions or required service proce
dures are signaled audibly and indicated by
red and yellow illuminated symbols and re
minders in the display ¢
page 30.
A WARNING
--
- Never rely exclusively on the outside
temperature display to determine if a
road surface is icy or not. Keep in mind
that road surfaces , especially bridges
and overpasses, could be ice covered and
slippery even at an outside temperature
above 41 °F (+S °C).
- Always remember, even if the "snow
flake " symbol (ice warning) does not ap
pear in the display, black ice could be on
the road.
-Always reduce your speed and drive with
special care in cold weather conditions
when the chance of encountering icy
road surfaces increases.
(0 Tips
- On vehicles with R tronic*, the reminders
do not appear in the display until you se
lect a gear.
- On vehicles with Audi Navigation system,
the displays may differ from their normal
appearance during navigation.
Page 23 of 244
Service interval display
The service in terval display reminds you when
your next service
is due.
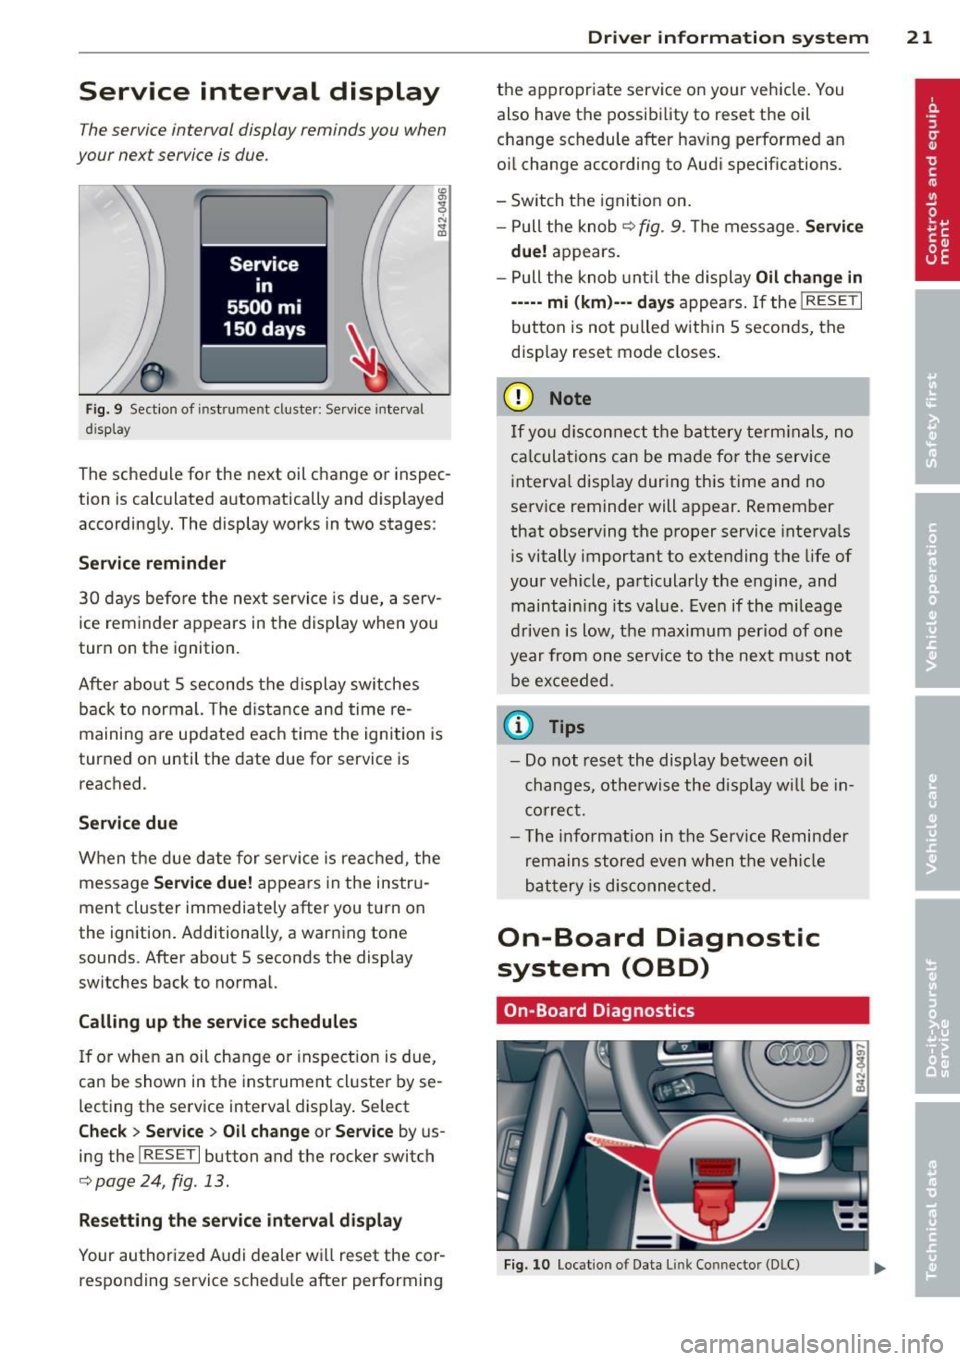
F ig . 9 Sectio n of i nst rum ent cluste r: Serv ice inte rva l
d is p lay
The schedule for the next oil change or inspec
tion is calc ulated automatically and displayed
according ly. The display works in two stages :
Service reminder
30 days before the next service is due, a se rv
ice reminder appears in the display when yo u
turn on the ignition.
Afte r abo ut
5 seconds the display sw itches
back to normal. The d ista nce and time re
maining are updated each time the ignition is
turned o n until the date due for service is
reached .
Service due
W hen the due d ate for service is reached , the
message
Ser vice due! appears in the instr u
ment cluster immediately after you tu rn on
the ignition. Additionally, a warning tone
sounds. After about
5 seconds the display
sw itches back to normal.
Calling up the serv ice schedules
I f o r when an oil change or inspect ion is due,
can be shown in the instrument cl uster by se
l ecting the service interval display . Select
Check > Se rvice > Oil change or Ser vice by us
ing the
I R ESET I button and the rocker switch
c:;, page 24, fig . 13.
Re setting the service interval di splay
Your authorized A udi dealer wi ll reset the cor
responding service sched ule after performing
Dr iver in formation system 21
the appropriate service on your vehicle. You
also have the possibility to reset the o il
change schedule after hav ing performed a n
o il change according to Audi specifications.
- Switch the ignit ion on.
- Pull the knob
c:;, fig . 9 . Th e message. Servic e
due!
appears .
- Pull the knob unt il t he display
Oil change in
----· mi (km)--· d ay s
appea rs. If the I RESE T I
button is not pu lled w ith in 5 secon ds, the
disp lay reset mode closes .
(D Note
If you discon nect the battery te rm inals, no
ca lcula tions can be ma de fo r the service
i nte rva l disp lay dur ing this time and no
se rvice reminder will appear. Remember
that observing the proper service interva ls
i s vitally important to extending the life of
your vehicle, particularly the engine, and maintain ing its value. Even if the mileage
d rive n is low, t he maximum per iod of one
year fro m one serv ice to the ne xt m ust not
be ex ceeded .
@ Tips
-Do not rese t the display between oil
c hanges, othe rwise the d isp lay w ill be in
co rrec t.
- Th e info rmat ion in the Se rv ice Reminder
remains stored eve n w hen t he ve hicl e
ba ttery is dis connec ted.
On-Board Diagnostic
system (OBD)
On -Boa rd Diagnostics
Fi g. 10 Locatio n of Data Li nk Conn ector (DLC)
Page 24 of 244
22 Driver in formation system
On-Board Diagnostics monito rs the compo
nents of your emiss ion control system . Each
mon itored component in your eng ine system
has been assigned a code. In case of a mal
f unction, the component will be identified
and the fault stored as a code in the control module memory .
In order to make an accurate d iagnosis, the
stored data can only be displayed us ing spe
cial diagnostic equipment (gener ic scan tool
for OBD) .
In order to connect the special diagnostic
equ ipment, push the plug into the Data L ink
Connector (D LC). The DLC is located to the
right of the engine compartment lid release
c::,;, fig. 10 .
Your author ized Audi dealer or a qualified
service station can interpret the code a nd per
form the necessary repa ir .
S?. Malfunction Indicator Lamp (MIL)
The Malfunction Ind icator Lamp (M IL) 1\1 is
pa rt of the On-Board Diagnostic (OBD II) sys
tem.
The warning light illuminates when there is a
malfunction in the eng ine e lectronic system.
A ma lf u nction may have var ious causes:
- The fue l filler cap may be imp roperly closed
c::,;, page 172.
-There is a leak in the fuel vapor recovery sys
tem .
- The eng ine control receives faulty vehicle
roadspeed signals .
Contact your nearest authorized A udi dealer
for assistance.
If the lig ht ill uminates, the catalyt ic converter
could be damaged. Continue driving
with re
duced power
(avo iding s usta ined high speeds
and/or rapid accelerat ions) and have the con
d it ion corrected.
An improperly closed f ue l fi ller cap may also
cause the M IL light to illum inate ¢
page 172.
Trip computer
Introduction
The trip computer gives you information on
current and average fuel mileage, average
speed, fuel range and driving time .
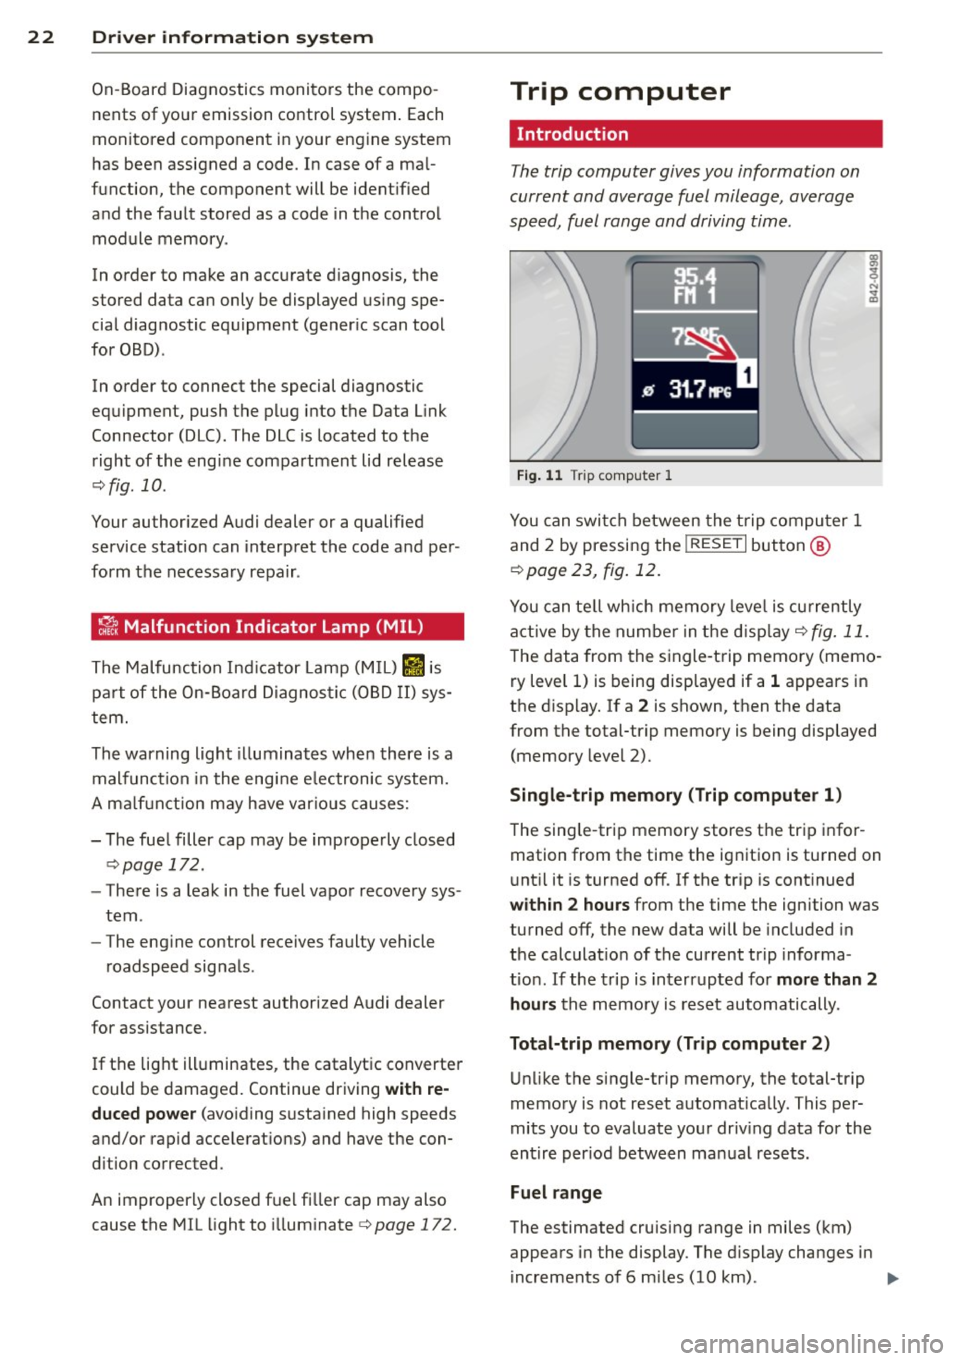
Fig . 1 1 Trip computer 1
You can swi tch between the trip compu ter 1
and 2 by pressing the
! RESE T I button @
c:>page 23, fig. 12.
You can te ll wh ich memory leve l is currently
active by the number in the d isp lay
c:> fig. 11.
The data from the single -trip memory (memo
ry level 1) is be ing d isplayed if a 1 appears in
the d isp lay. If a 2 is shown, then the data
from the total-trip memory is being displayed (memory level 2).
Single -trip memory (Trip compute r 1)
T he sing le -trip memory stores t he trip infor
mation from the time the ig nition is turned on
u nt il it is turned off.
If the t rip is cont inued
within 2 hours from the time the ignition was
turned off, the new data will be included in
the calculat io n of the current tr ip informa
t io n. If the trip is interrupted fo r
more than 2
hours
the memo ry is reset automatically .
Total-trip memory (Trip computer 2)
Unlike the single-trip memory, the total-trip
memory is not reset automat ically . This per
mits you to evaluate your driv ing data for the
entire per iod between ma nual resets.
Fuel range
The estimated cruising range in miles (km)
appears in the display . The d isplay changes in
increments of 6 m iles (10 km) . ..,.
Page 26 of 244
24 Driver information system
Menu display
Introduction
.____ __ ®
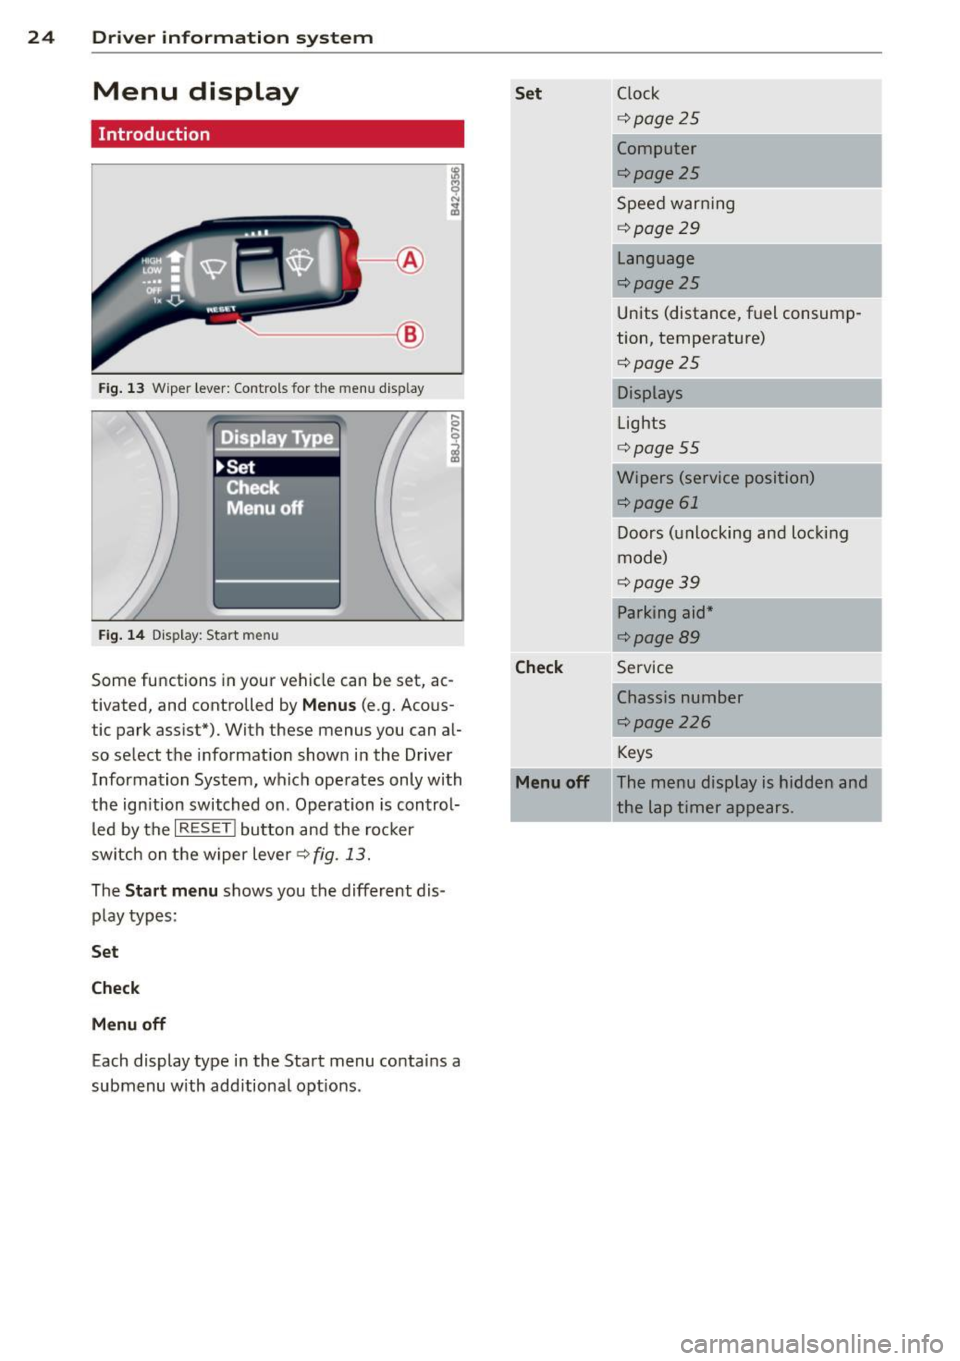
Fig. 13 Wiper lever: Controls for the men u disp lay
. Displa Type
~Set
!: Cfiecl< --,
Menu off
Fig. 14 Display: Start me nu
Some functions in your vehicle can be set, ac
tivated, and controlled by
Menus (e.g. Acous
tic park assist*). With these menus you can al
so select the information shown in the Driver
Information System, which operates only with
the ign ition switched on . Operation is control
led by the
I RESET ! button and the rocker
switch on the wiper lever¢ fig. 13.
The
Start menu shows you the different dis
play types:
Set
Check
Menu off
Each display type in the Start menu contains a
submenu with additiona l opt ions .
Set Clock
¢page25
Computer
¢page25
Speed warning
¢ page29
Language
¢page25
Units (distance, fuel consump
tion, temperature)
¢page25
Displays
Lights
¢ page55
Wipers (service position)
¢page 61
Doors (unlocking and locking
mode)
¢page39
Parking aid*
¢page89
Check Service
Chassis number
r::;, page 226
Keys
Menu off The menu display is hidden and
the lap timer appears.
Page 35 of 244
no longer see or hear steam or coolant
escaping.
- The engine compartment of any vehicle
is a dangerous area. Before you perform
any work in the engine compartment,
turn off the engine and allow it to cool. Follow the warning stickers
c:> page 175,
Working in the engine compartment.
([) Note
Do not contin ue driving if the. symbol
illuminates. There is a malfunct ion in the
engine cooling system -you could damage
your eng ine .
9::::r: Engine oil pressure malfunction
The red engine oil pressure warning symbol
requires immediate service or repair .
If the . symbol appears in the display and
flashes, the oil pressure is too low. In addi tion
to the symbol, the following message also ap
pears in the d isp lay:
Sw itch off engine and check oil le vel
~ Pull off the road and stop the vehicle.
~ S hu t the engine down .
~ Check the engine oi l level c:> page 180.
~ Contact your a uthori zed Audi dea ler for as-
s istance if necessary .
Engine oil level too low
If the engine oil level is too low, top off oi l to
the proper leve l
i::>poge 180.
Engine oil level OK
If the . symbo l sta rts flas hing again even
though the engine oil leve l checks O K on the
d ipstick,
do not sta rt driv ing again and do
not let the engine run at idle .
Instead, con
tact your author ized A udi dealer for assis
tance.
l ) - : US A mod els on ly
Dr iver in formati on sys tem 33
Bu Fuel supply too low
When the fD1 symbol illum inates, t his means
there are abo ut 2.6 gallons (10 liters) o f fuel
left in the fue l tank . Time to re fuel!
c:> page 171 .
If the symbol lights up, even when there is
amp le fue l in the t ank, and the text
TANK
SYSTEM MALFUNCTION
! CONTACT WORK
SHOP
appears in the disp lay, there is a fa ult in
the system . Contact a qualified works hop to
have the fa ult rectif ied .
~,,., Checking the engine oil level
II Please add ma x. 1 qt of engine o il!
If the II symbol comes on , add 1 quart (1 li
ter) of oil at the n ext opportunity
i::> page 180.
~tt, Engine oil sensor defective
If the II symbol illuminates, contac t your
authorized Aud i dea le r and have t he oil sensor
inspected .
(0) Worn brake pads
EiJ Brake pad s!
If the warning light illuminates, immed iate ly
contact your authorized Audi dealer or quali
fied wor kshop to have all brake pads i nspect
ed. On USA models the war ning light
EiJ
comes on together w ith the w arning ligh t
1111. Both se ts of brake pads on an ax le
must a lways be rep laced at the same time.
A WARNING
-=
Driving with ba d brakes can cause a colli
sion and ser ious personal in jury.
- If the warn ing light
EiJ and the warning
light
11111> with the message Brake
-
pads! comes on in the instrument cluster ~
Page 62 of 244
60 Clear v is ion
Moving w iper blades to the service
posit ion
.. Do not lift the wiper arms away from the
glass when they are in their parked position;
this would damage the paint on the front
lid .
.. When there is a risk of frost, make sure that
the wiper b lades are not frozen to the wind
shield .
.. Move wipe r blades to the se rvice posit ion
¢page 61.
The windshield wipers and washer on ly work
when the ignition is turned on.
To reduce the sensit iv ity of the sensor, move
switch @down . To increase the sens itiv ity,
move the switch up. The higher you adjust the
sens itivity, the faste r th e sensor will react
when it senses moisture on the w indshield.
The pauses between w iper turns depend not
on ly on the sensitivity setting, but on the ve
hicle speed as well.
Du ring a temporary stop, e.g . at a t raff ic sig
na l, the set wipe r speed is automatically re
duced by one stage.
When the igni tion is tu rned on, the washer
jets are heated.
_& WARNING
- Wipe r blades a re cruc ial for safe driving!
Only when they are in good cond ition are
they able to clear the windows properly
to provide uncompromising visibility.
Worn or damaged wiper blades are a safety hazard ¢
page 61, Replacing
front wiper blades!
- The light/ra in sensor is only des igned to
assist and support the dr iver .
It remains
entirely the d river 's responsibility to
mon itor outs ide weather conditions and
to manually activate the w ipers as soon
as rain o r dri zzle red uces visibi lity
thro ugh t he windshie ld.
- T he windshie ld must not be treated with
water-repe llent materials. They can in
crease glare under poor visib ility condi
tions such as wetness, darkness, or when the s
un is low on the horizon . In addi
tion, they can cause the w indshield w ip
ers to chatter .
(D Note
In freezing or near freezing conditions:
- Always check that the w iper b lades are
not frozen to the g lass before you turn
the wipers on . Loosen a wiper blade
wh ich is frozen in place before operating
the wipers to prevent damage to the
w iper blade or the wiper motor.
- Do not use the w ipers to clear a frosted
window. Us ing the wipers as a conven
ient ice scraper will destroy the wiper
blades .
- Before you take your veh icle to an auto
matic car wash, make sure you have the
w indshield w iper system switched off
(lever in position 0), otherwise the w ind
shield w iper system could get damaged
in the car wash if it should suddenly
come on .
(D Tips
-The windshie ld w ipers are switched off
w hen the ignit ion is turned off. Act ivate
t he winds hield wipers after the igni tion
is switched back on by moving the wind
shield wiper lever to any position.
- Worn or d irty windshield wipe r blades
cause smearing, which can affect the op
eration of the light/rain sensor . Check
the cond ition of your windsh ield wiper
blades regularly.
- When the wipers are switched on man
ually and in ra in cond itions, the auto
matic headlights turn on
¢ page 55 or
off during the day when the wipers are
no longer operating . The automat ic
head lights fu nction is avai lab le in this
case on ly w hen the light switch is in the
"A UTO" posit ion ¢
page 55, fig. 63.
-Make su re the washer fluid reservoir is
t opped off before goi ng on a long tr ip.
Look up ¢
page 188 for checking and
filling the washe r containe r.
Page 63 of 244
-If you switch off the ignition w ith the
windshield wiper lever still in the inter
val w ipe pos ition and then come back a
while later and dr ive off , the rain sensor
will reactivate itself after the vehicle
speed has exceeded 4 mph (6 km/h) .
Service position
It is only possible to change wiper blades if
you move the wiper arms to the service posi
tion .
In order to use the windshield wipers, the
front lid must be comp letely closed.
Moving w ipe r blade s to the service
position
.. When there is a risk of frost, make sure that
the wiper b lades are no t frozen to the wind
shield .
.. Switch the ign ition on .
.. Move the wiper lever to pos ition
0
c::> page 59, fig. 69 .
.. Press the I RESE T I button unt il the Display
type
menu appears in the Driver Informa
tion System display .
.. Using the rocker switch and the
!RESET I b ut
ton, select the
Set > Wiper s > Front > Serv
ic e position on
function . The wind sh ield
wiper arms move to the service pos it ion.
Moving w ipe r blade s to park po siti on
.. Make certain that the wiper arms are ly ing
against the w indshie ld .
.. Switch the ignition on and move the wipe r
lever from position
O to 4 c::> page 59 ,
fig. 69. The wiper arms will move back to
t h e park pos ition .
(D Note
Never drive your vehicle when the wind
shield w iper arms are in the service pos i
tion and pulled away from the windshie ld.
When you dr ive faster than
4 mp h (6 km/
h), the w iper arms a utomat ica lly re turn to
t he par k position and could ca use pa int
d amage to the front lid!
Clear vi sion 61
@ Tips
- Yo u can also turn on t he service position,
for example, if yo u want to protect the
w indshield from icing by using a cover.
- Th e service posit io n moves to
off auto
matically when you operate the wind
shield wiper lever, or speed exceeds
4 mph (6 km/h).
Replacing front wiper blades
Wiper blades in good condition help keep the
windshield clear.
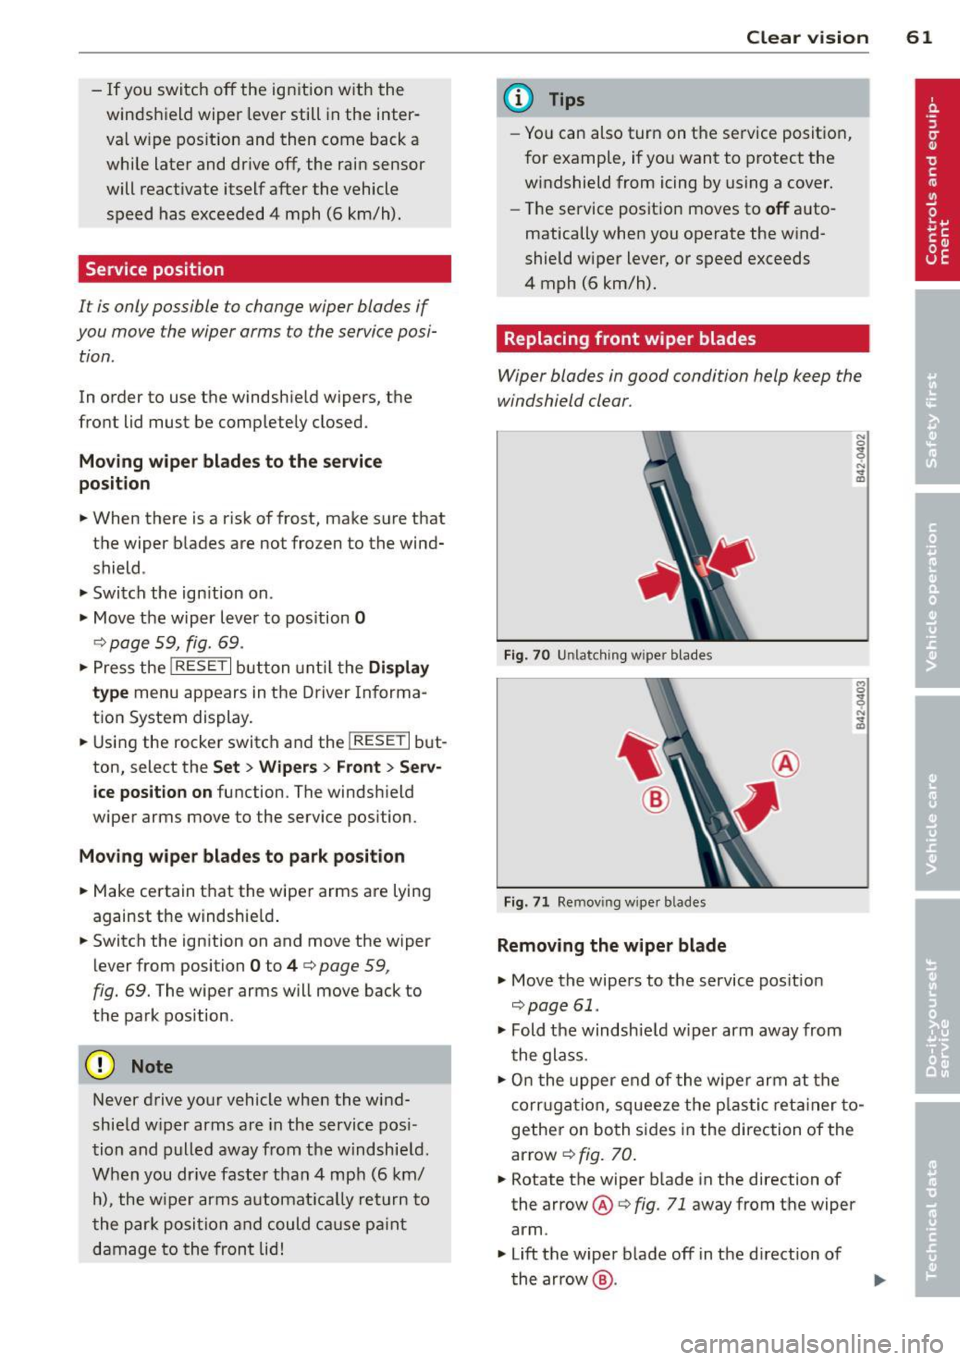
Fi g. 70 Unl atching w ipe r blade s
Fig. 71 Re mov ing w iper b lades
Removing the wiper blade
.. Move the wipers to the service pos it ion
c::> page 61.
.. Fold the windsh ie ld w iper arm away from
the glass .
N 0
i ,:. .., m
.. On the upper end of the wiper arm at the
corr uga tion, squeeze the p lastic ret ainer to
gethe r on both s ides in the direction of the
arrow
c::> fig. 70.
.. Rotate the w iper b lade in the direction of
the arrow @
c::> fig. 71 away from the wiper
arm .
.. Lift the wiper b lade off in the d irection of
t he arrow @.