instrument cluster AUDI R8 SPYDER 2012 User Guide
[x] Cancel search | Manufacturer: AUDI, Model Year: 2012, Model line: R8 SPYDER, Model: AUDI R8 SPYDER 2012Pages: 236, PDF Size: 59.24 MB
Page 43 of 236
(D Note
To p reve nt damage t o the conve rtible top:
- do no t s tore any objects in the converti
ble top storage bay .
- make sure there is enough space above
the veh icle when opening or closing the
convertible top.
@ Tips
- When the indica to r l amp iii blinks,
there is a system malfunc tion
c> page 15 .
-The one-touch openi ng fun ction is not
ava ilable when the vehicle is traveling
below 4 mph (6 km/h) or above 31 mph
(SO km/h).
If this is the case, a wa rning
tone w ill sound and a message will ap
pear in the instrument cluster
c> page 41.
Error message in the instrument cluster
display
An error message appears if the convertible
top cannot open or close.
Severa l conditions must be met for the con
ve rtible top to open or close automatically .
An error message in the inst rument cluste r
d isp lay ind icates if one of the condit ions is not
met or there is a malfunct ion.
Soft top: Please clo se engine lid!
The engine compa rtment lid must be closed
when opening or closing the convertible top .
T his message appears in the instrument clus
ter d isp lay if the engine compartment lid is
not closed.
Soft top : Cannot be used!
This error message appears if the convertib le
cannot open or close because of safety rea
sons or if there is a malfunction . The follow
ing causes are poss ible:
- The vehicle is t ra veling too fa st: Converti
ble top operation is deactivated for safety
reasons if the vehicle is traveling too fast . A
message w ill appear . Reduce the vehicle
Con vertible top 41
speed and pu ll or press the sw itch again to
open or close the convertible top.
- The battery voltage i s too low: Th e conver
tible top cannot open or close if the battery
voltage is too low. This ens ures there will be
enough battery vo ltage left to start the ve
hicle . The convertible top can be operated
aga in after the engi ne is started.
- Ove rload protect ion is acti ve: Operating the
convert ible top continuously for a long peri
od of time p laces stress on the hydraulic
un it. Over load protect io n is act ivated to p re
vent damage to the system . This protective
fu nction preve nts t he conver tible top from
open ing or close fo r approximate ly 15 to 30
m inu tes.
It will f unct io n a gain a fter tha t
c:::> &..
-Malfun ction : Failure of system components
is one possib le cause fo r malfunction. If this
happens, you can a lso operate the converti
ble top by hand
c:> page 43 .
-The exterior temperature is too low: The
converti ble top will not o pen in tempera
t u res below (S °F) (-15 QC).
Soft top not secure
If the conve rtib le to p is not complet ely open
or closed and the vehi cle is t raveling too fast,
the error message above appears and a warn
ing tone sounds. Reduce the vehicle speed
and pull or press the switch again to open or close t he convertible top.
A WARNING
N eve r drive when the c onvertible top is not
locked correctly . The wind from driving
could cause the co nvertib le top to open.
T his ca n resu lt in i nju ries and damage to
the vehicle.
Page 53 of 236
When the emergency flasher is on, all four
turn signal blink at the same time . The turn
signal ind icator lights
R II in the instrument
cluster, as well as the light in the emergency
flasher switch~ blink likewise . The emergen
cy flasher also works when the ignition is
switched off.
The emergency flasher wi ll automatically
sw itch on if you are in an acc ident where the
a irbag has deployed .
(D Tips
You should switch on the emergency flash
er when:
-you are the last vehicle standing in a traf
fic jam so that any other vehicles coming
can see you, or when
-your vehicle has broken down or yo u are
in an emergency situation , or when
- your vehicle is being towed by a tow
truck or if yo u are towing another vehicle
behind you.
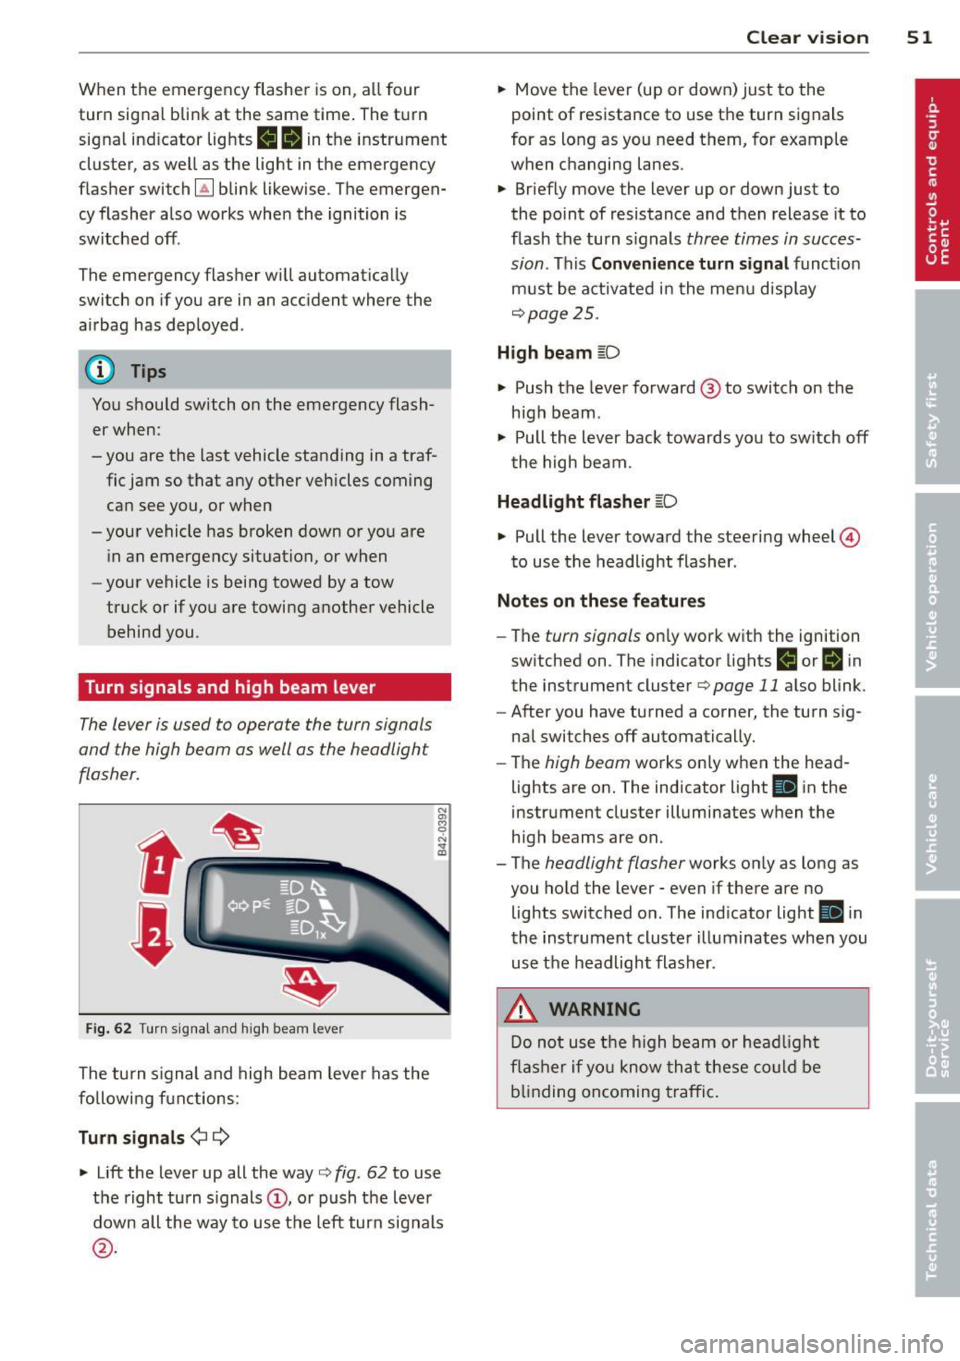
Turn signals and high beam lever
The lever is used to operate the turn signals
and the high beam as well as the headlight
flasher .
t
t
F ig . 6 2 Turn signa l an d h igh beam lever
The turn s ignal and high beam leve r has the
followi ng functions:
Turn sign als ¢ 9
N
"' 8
"' ... a,
~ Lift the lever up all the way c:> fig . 62 to use
the right turn s ignals
(D , or push the lever
down all the way to use the left turn signals
@ .
Clear vi sion 51
~ Move the lever (up or down) just to the
point of resistance to use the turn signals
for as long as you need them, for example
when changing lanes .
~ Briefly move the lever up or down just to
the point of resistance and t hen release it to
flash the turn s ignals three times in succes
sion . This
C o nveni ence turn signal funct ion
must be activated in the menu disp lay
c:> page25 .
High beam ~D
~ Push the lever forward @to switch on the
high beam .
~ Pull the lever back towards you to sw itch off
the high beam.
Headlight flasher ~D
~ Pull the lever toward the steering wheel ©
to use the headlight flasher .
Notes on the se feature s
-The turn signals only work with the ignition
switched on . T he indicator lights
IJ or Bi n
the instrument cluster c:> page 11 also blink.
- After you have turned a corner, the turn s ig-
nal switches off automatically.
- The high beam works only when the head
lights are on. The indicator light
II i n the
instrument cluster illuminates when the
high beams are on .
- The headlight flasher works only as long as
you ho ld the lever - even if there are no
lights switched o n. The ind icator light
II i n
the instrument cluste r illuminates whe n you
use the headlight flasher .
.&, WARNING
Do not use t he h igh beam or hea dligh t
fl ashe r if yo u know th at these could be
b lin ding oncoming t raffic .
Page 54 of 236
52 Clear vis ion
Interior lights
Interior lights
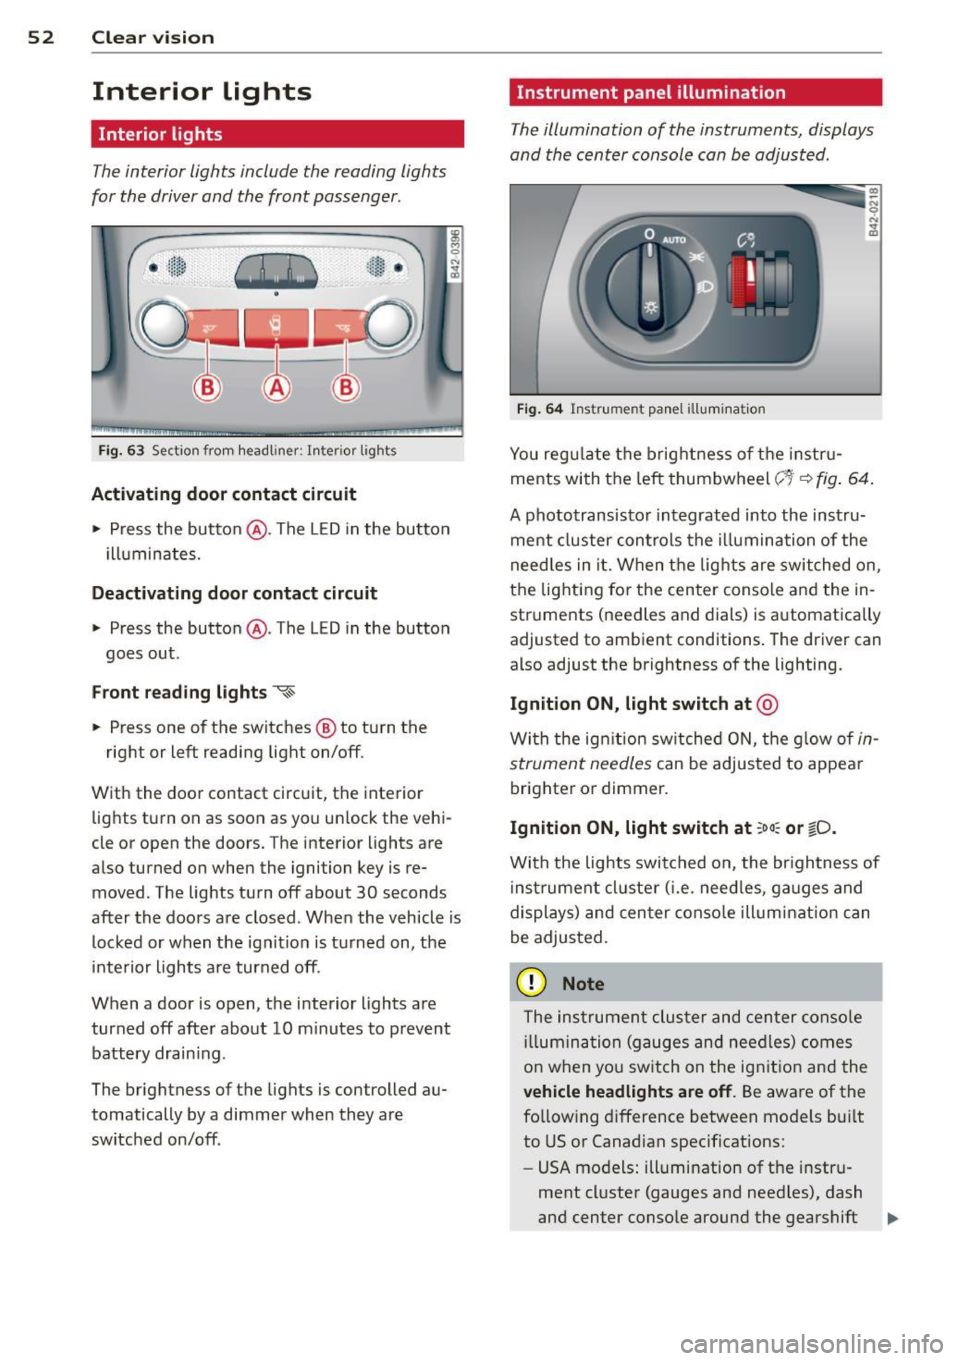
The interior lights include the reading lights
for the driver and the front passenger .
-
,-i.-,-,n--;)
"' "' "' 0
•
Fi g. 63 Section from headliner: I nterior l ights
Acti vating door contact circuit
• Press the button @. The LED in the button
i lluminates.
Deactivating door c ontact circu it
• Press the button @. The LED in the button
goes out .
Front re ad ing lights ~
• Press one of the switches @ to turn the
right or left reading light on/off.
With the door contact circuit, the interior lights turn on as soon as you unlock the vehi
cle or open the doors. The interior lights are
also turned on when the ignition key is re moved. The lights turn off about 30 seconds
after the doors are closed . When the vehicle is
locked or when the ignit io n is tu rned on, the
inte rior lights a re turned off.
When a door is open, the interior lights are
turned off after about 10 m inutes to prevent
battery drain ing.
The brightness of the lights is controlled au
tomatically by a dimmer when they are
switched on/off .
Instrument panel illumination
The illumination of the instruments, displays
and the center console can be adjusted .
Fig . 6 4 Instrument pa nel illuminat ion
You reg ulate the brightness of t he instr u
ments with the left thumbwheel
c;~-~ fig . 64 .
A phototransisto r integrated into the instru
ment cluster controls the illumina tion of the
need les in it. When the lights are switched on,
the lighting for the center conso le and the in
struments (needles and dials) is automatically
adjusted to ambient conditions . The driver can
also adjust the brightness of the lighting.
Ignition ON, light switch at @
With the ign ition sw itched O N, the g low of in
strument needles
can be adjusted to appear
brighter or dimmer.
Ignition ON, light switch at ;oo : or ~D.
With the lights switched o n, the br ightness of
instrumen t cluster ( i.e . need les, ga uges and
displays) and cen ter conso le illum inat ion can
be adjusted.
(D Note
The instrumen t cluster and cen ter conso le
ill umin ation (gauges and nee dles) comes
o n when yo u sw itch on the ignit io n and the
veh icle headlights are off . Be aware of the
fo llowing difference between models bui lt
to US or Canadian specifications:
- USA models: illumination of the instru
ment cl uster (gauges and need les), dash
and center conso le around the gearshift .,.
Page 76 of 236
7 4 On the road
Cruise control
Introduction
The cruise control system keeps the speed
constant.
The cruise control system makes it possible to
drive at a constant speed over 20 mph (US
model) or 30 km/h (Canadian model) . This is
true only to the extent that engine power or
engine braking effect allow . Using the system
takes the strain off the "gas pedal foot" - es
pecially on long trips.
In the control mode, the indicator light in the
instrument cluster is lit
aijj(1)~1~ (US model);II
(Canadian model).
The cruise control system automatically
switches itself off immediately under the fol
lowing conditions:
- Pressing the brake pedal.
- Pressing the clutch pedal.
A WARNING
-Always pay attention to traffic even when
the cruise control system is switched on.
You are always responsible for your speed and the distance between your ve
hicle and other vehicles.
- For safety reasons, the cruise control sys
tem should not be used in the city, in
stop-and-go traffic, on twisting roads
and when road conditions are poor (such
as ice, fog, gravel, heavy rain and hydro
planing) -risk of accident.
- Turn off the cruise control system tem
porarily when entering turn lanes, high
way exit lanes or in construction zones.
- Please note that inadvertently "resting"
your foot on the accelerator pedal causes
the cruise control system not to brake.
This is because the cruise control system
is overridden by the driver's acceleration.
(D Note
On manual transmission vehicles: If you
shift into neutral with the cruise control system switched on, always depress the
clutch
pedal! Otherwise the engine will
race and could be damaged as a result.
(D Tips
When driving on steep downward grades,
the cruise control system cannot keep the
speed constant. The vehicle's own weight increases the speed. Shift into a lower gear
in plenty of time or brake the vehicle with
the foot brake.
Saving the speed
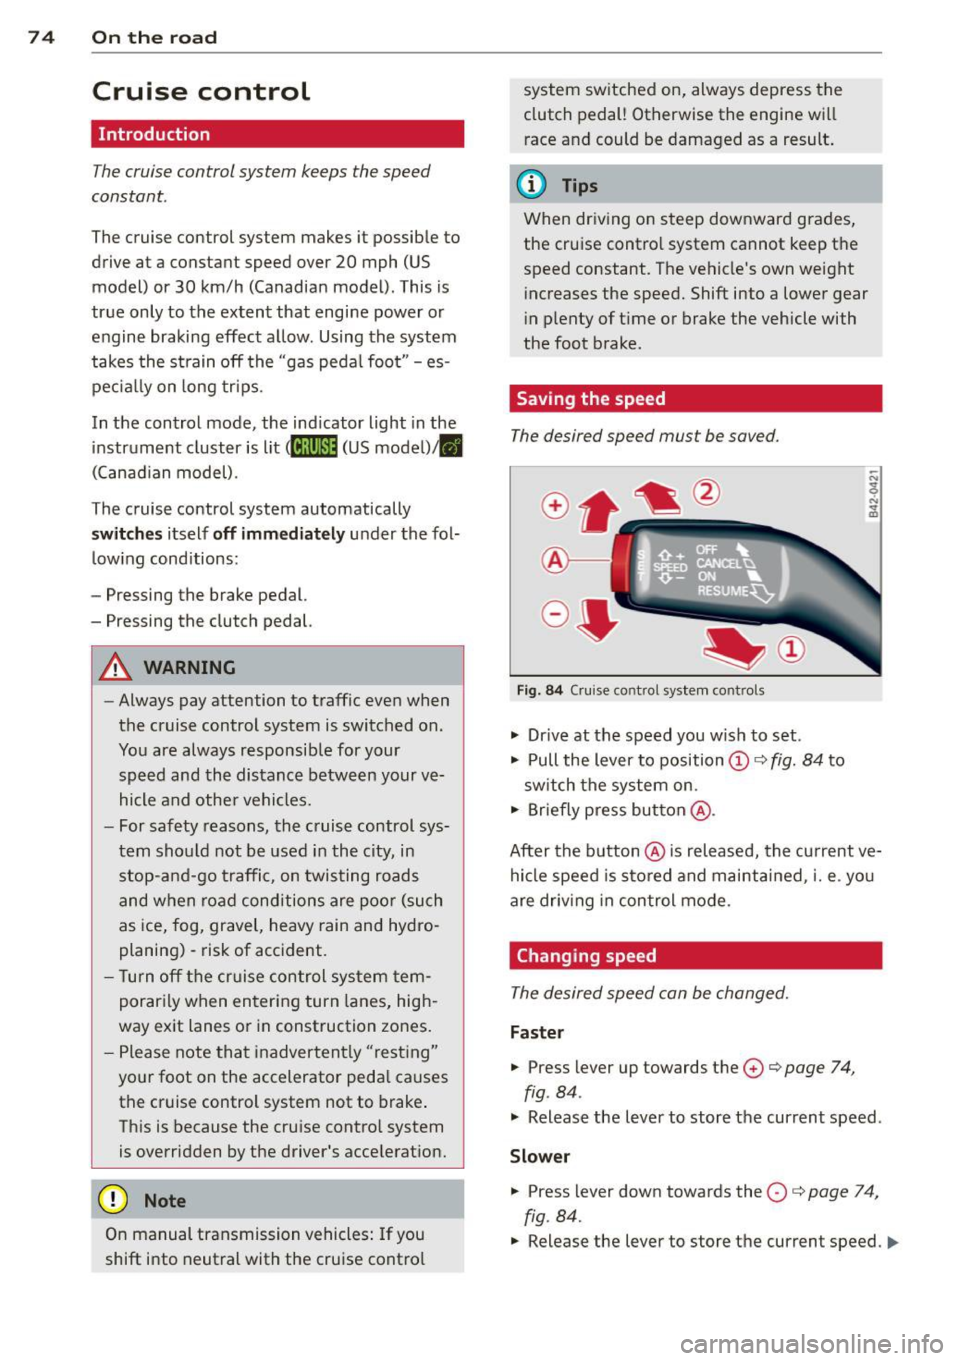
The desired speed must be saved.
®-
Fig. 84 Cruise control system cont rols
.,. Drive at the speed you wish to set.
.,. Pull the lever to position@¢
fig. 84 to
switch the system on.
.,. Briefly press button @.
After the button @is released, the current ve
hicle speed is stored and maintained,
i. e. you
are driving in control mode .
Changing speed
The desired speed can be changed.
Faster
.,. Press lever up towards the 0 ¢ page 7 4,
fig . 84 .
.,. Release the lever to store the current speed .
Slower
.. Press lever down towards the O ¢ page 74,
fig . 84.
.,. Release the lever to store the current speed. IJ,,,
Page 103 of 236
Safety belts
General notes
Always wear safety belts!
Wearing safety belts correctly saves lives!
This chapte r exp lains why safety be lts a re nec
essary, how they work and how to adjust and
wear them correctly.
~ Read all the information that fo llows and
heed all of the inst ruct ions and WARNINGS.
A WARNING
Not wearing safety belts or wearing them
improperly increases the risk of ser ious
personal in jury and death .
- Safety belts are the sing le most effective
means availab le to red uce the r isk of se
rious injury and death in a utomob ile acci
de nts . For your prot ecti on and that of
yo ur passenge rs, always co rrec tly wear
sa fe ty bel ts when the ve hicle is mov ing.
- P re g nant women, injured, or physically
imp aired perso ns must also use safe ty
belts. L ike a ll vehicle occup ants, they are
more like ly to be ser ious ly injure d if they
do not wea r safety be lts . The best way to
protect a fet us is to protect the mother -
thro ughout the entire pregnancy.
Number of seats
Your Audi R8 has two seating posit ions in the
front. Each seating position has a safety belt.
A WARNING
Not wearing safety belts or wearing them
im proper ly increases the risk of ser ious
personal in ju ry and death.
- Never st rap more than one person, in
clu ding small ch ild ren, into any belt. It is
especially dangerous to place a safety
belt over a child s itting on yo ur lap.
- Never let mo re people ride in t he ve hicle
t h an t he re are safety be lts ava ilable.
Sa fety belts 1 O 1
- Be s ure everyone riding in the vehicle is
properly restrained w ith a separate sa fe
ty belt or child restra int.
4 Safety belt warning light
Your vehicle has a warning system for the
driver and front seat passenger to remind you
about the importance of buckling up .
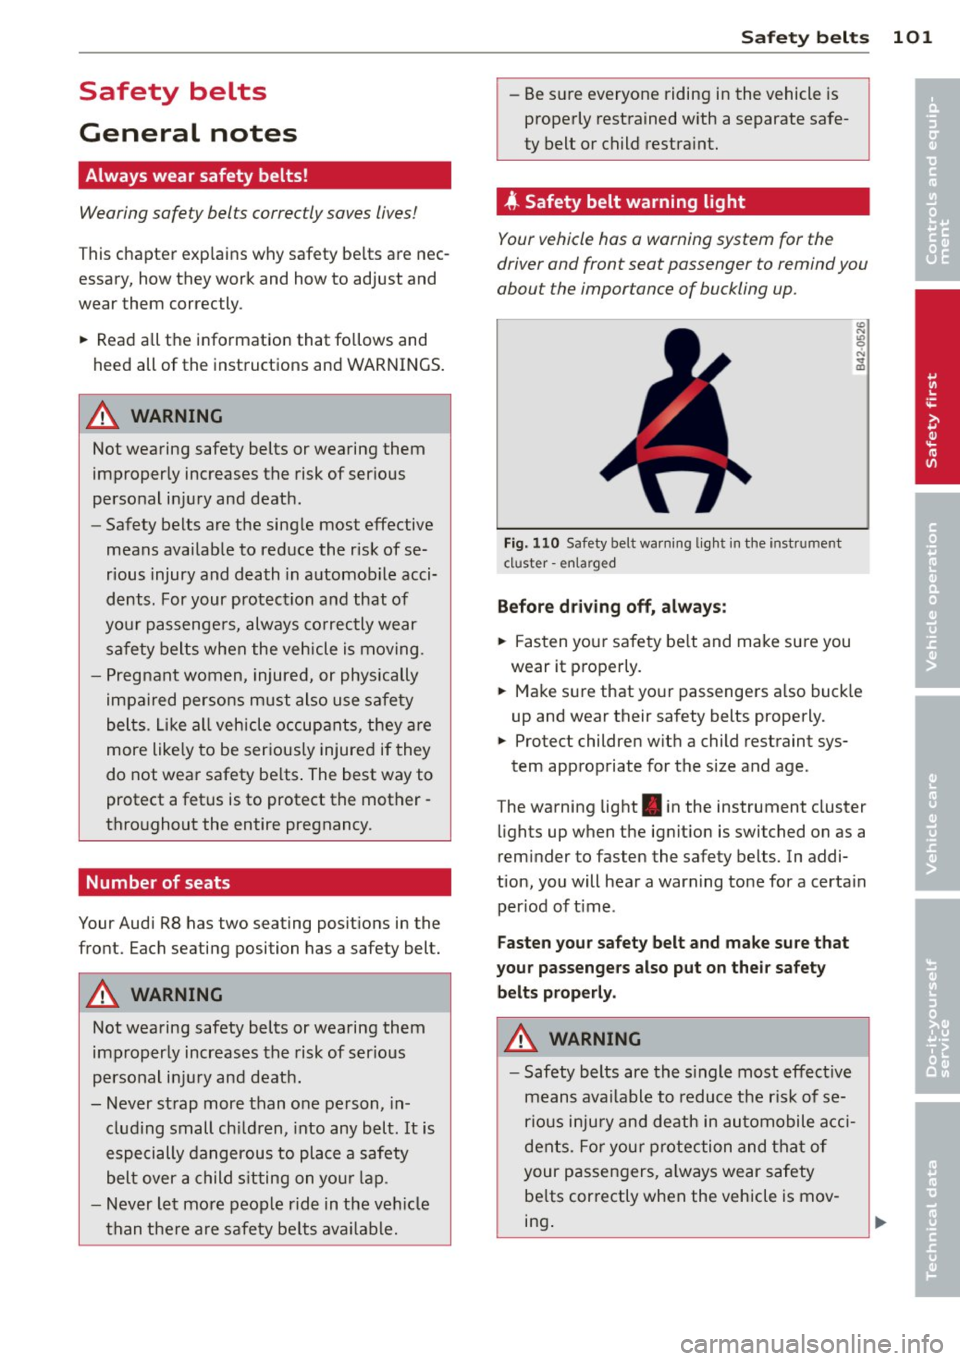
Fig. 1 10 Safety be lt warn ing lig ht in the instr ume nt
cl uster -enla rged
Before driv ing off, always :
~ Fasten your safe ty be lt and make su re you
wear it p roperly.
~ Ma ke s ure that yo ur passengers a lso buck le
up and wear their safety belts properly.
~ Protect children w it h a child restraint sys-
tem app ropriate for the size and age .
The wa rning light . in the instrument cluster
li ghts up w hen t he ig nit ion is switched on as a
rem inder to fasten the safety belts. In addi
tion , you will hear a warning tone for a certa in
per iod of t ime .
Fasten your safety belt and make sure that
your passengers also put on the ir safety
belts properly .
A WARNING
-Safety belts are the s ingle most effect ive
means ava ilable to reduce t he risk of se
rio us i nju ry and death in au tomobile a cci
dents. Fo r yo ur pro tection and tha t of
your passen gers, a lways wear safety
be lts cor rectly when the vehicle is mov
ing . •
•
Page 118 of 236
116 Airbag sys te m
- Always move the passenger seat into its
rearmost position in the seat's fore and
aft adjustment range, as far away from
the a irbag as poss ible, before insta lling
the forward-facing child restraint. The backrest must be adjusted to an upr ight
posit ion.
- Make sure that the
PASSENGER AIR BAG
OFF
light comes on and stays on all the
t ime w henever the ignition is switched
on.
Advanced Airbag System components
The fron t passenger sea t in your vehicle h as a
lot of very important par ts of the Advanced
Airbag System in it. These parts include t he
weight -sensing mat, sensors, wiring, brack
ets, and more. The function of the system in
the front passenger seat is checked by the
e lectronic control un it when the ignit ion is on.
The control unit mon itors the Advanced Air
bag System and turns the airbag indicator
l ight on when a ma lfunction in t he system
components is detected. The func tion of the
a ir bag ind icator light is described in greater
detai l be low . Because the front passenger
seat contains important parts of the Ad
vanced A irbag System, you m ust take care to
prevent it from be ing damaged. Damage to
the seat may prevent the Advanced Airbag for
the front passenger seat from doing its job in
a crash .
The front Advanced Airb ag Sy stem
consists of the following:
- Crash sensors in the front of the veh icle that
measure veh icle acceleration/deceleration
to provide information to the Advanced Air
bag System abou t the seve rity of the crash.
- An electron ic co ntrol unit, with integ rated
crash sensors for front and side impacts .
T he cont ro l unit "dec ides " w het her to fire
the front airbags based on the information
received from the crash senso rs . The contro l
unit a lso "decides" whethe r the safety be lt
pretensioners should be activated . -
An Advanced A irbag w ith gas generator for
the driver inside the steering w heel hub.
- An Advanced A irbag w ith gas generato r in
side the inst rument panel for the front pas
senger.
- A we ight -sensing mat unde r th e upho ls tery
pa dding of the front passenger seat cushion
that measures the total weight on the seat .
The informat ion registered is sent continu
ously to the electronic control unit to regu late deployment of the front Advanced Air
bag on the passenger side .
- An airbag monitoring sys tem and indicator
light in t he instrument cluster
c::> page 120.
- The PASSENGER AIR BAG OFF light comes
on and stays on in the center of the instru
ment panel
c::> page 120, fig. 123 and tells
you when the front Advanced Airbag on the passe nger side has been tu rned off.
- A senso r below the safety be lt latch fo r the
front seat passenger to measure the tension on t he safety be lt. The tension on the safety
be lt a nd the weight regis tered by the
weight-sensing mat he lp the cont rol uni t
"decide" whether the front airbag fo r the
front passenger seat should be turned off or
not
c> page 111, Child restraints on the
fron t seat -some important things to
know.
-A sensor in the safety belt latch fo r the driv
er and for the front seat passenger that
senses whether t hat safety belt is latched or
not and transmits this information to t he
elect ronic control un it .
,&. WARNING
D amage to the fron t passenger seat can
p revent the fro nt airbag from wor king
properly.
- I mp roper repai r or d isassembly of the
front passenge r and dr ive r sea t will pre
vent the Advanced Air bag System from
functioning p roperly.
- Repairs to the front passenge r seat m ust
be pe rformed by qualifie d and p roperly
trained workshop personnel.
- Never remove the front passenger o r
d river seat from t he vehicle .
-
Page 123 of 236
Vehicle Safety Standard 208 with which the
Advanced Airbag System in your vehicle was
certified.
I f the front passenger seat is not occ upied,
the front airbag will not deploy, and the
PA S
SENGER A IR BAG OF F
light will stay on. Nev
er insta ll a rearward-fac ing ch ild restra int on
the front passenger seat
c:> page 111, Child
restraints on the front seat -some important
things to know
and c:> page 130, Child Safety .
If the PASSENGER AIR BAG O FF light c omes
on
when one of the conditions listed above is
met, be sure to check the light regularly to
make certa in that the
PA SS ENG ER AIR BA G
OFF
light stays on cont inuously whenever the
i gn it ion is on. If the
PASSENGER AIR BAG
OFF
l ight does not appear on and stay on a ll
the t ime, stop as soon as it is safe to do so
and
- r eact ivate the system by turning the ignition
off and then turning it on again;
- remove and re install the child restraint .
Make sure that the child restraint is properly
installed and that the safety be lt fo r the
front passenger seat has been correct ly
ro uted through the child restraint as descri
bed in the chi ld restraint man ufacturer's in
structions;
- make su re that the convertible locking fea
ture on the safety be lt for the front passen
ger seat has been activated and that the
safety belt has been pulled tight. The belt must not be loose or have loops of slack so
that the sensor below the safety belt latch on the seat can do its job
c:> page 138;
- make sure that th ings that may increase the
weight of the ch ild and child safety seat are
not being transported on the front passen
ger seat;
- make sure that the safety belt tension sen
sor is not b locked. Shake the safety belt
latch on t he front passenge r seatbac k and
forth;
- If a st rap or tether is being used to tie the
c hild safety seat to the front passenger
seat, make s ure t hat i t is no t so tight tha t it
A irbag system 12 1
causes the weight -sensing mat to measure
more weight than is act ually on the seat.
If th e PASSENGER AIR BAG OFF light still
d oes not come on
and does not stay on con
tin uous ly (when the ignition is switched on),
- take the child rest ra int off the front passen-
ge r seat and have the a irb ag sys tem inspect
ed by yo ur authori zed Aud i dealer . Do not
transport children witho ut a c hil d safety
seat.
T he
PASSENGER AIR BAG OFF lig ht sho uld
NOT come on when the ignit ion is on and an
adult is s itting in a proper seating position on
the front passenger seat . If the
PASSENGER
AIR BAG OFF
light comes on and stays on or
flashes for about 5 seconds wh ile driving, un
der these c ircumstances, make sure that:
- the adult on the front passenger seat is
properly seated on the center of the seat
cushion with his or her back up aga inst the
backrest and the backrest is not recl ined
c:> page 92, Proper occupant seating posi
tions,
- the adult is not tak ing weight off the seat by
holding on to the passenger assist handle
above the front passenger door or support
ing their weight on the armrest,
- the safety belt is be ing properly worn and
that the re is not a lot of s lack in the safety
be lt webbing,
- accesso ry seat covers or cushions or other
things that may cause an inco rrect reading
or impression on the weight-sensing m at
under t he upho ls tery of the seat have been
removed from the front passenger sea t,
- a safety belt extender h as not been left in
t he sa fe ty belt latch for the fron t passenger
seat.
In add ition to the
PASSENGER AIR BAG OFF
l igh t in the center of the instrument panel,
t h e message
PASSENGER AIR BAG OFF or
PASSENGER AIR BAG ON wi ll briefly appear
i n the instrument cluster disp lay. This is to in
form the dr iver of the current front passenger
airbag status.
•
•
Page 129 of 236
Side airbags
Description of side airbags
The airbag system can provide supplemental
protection to properly restrained front seat occupants .
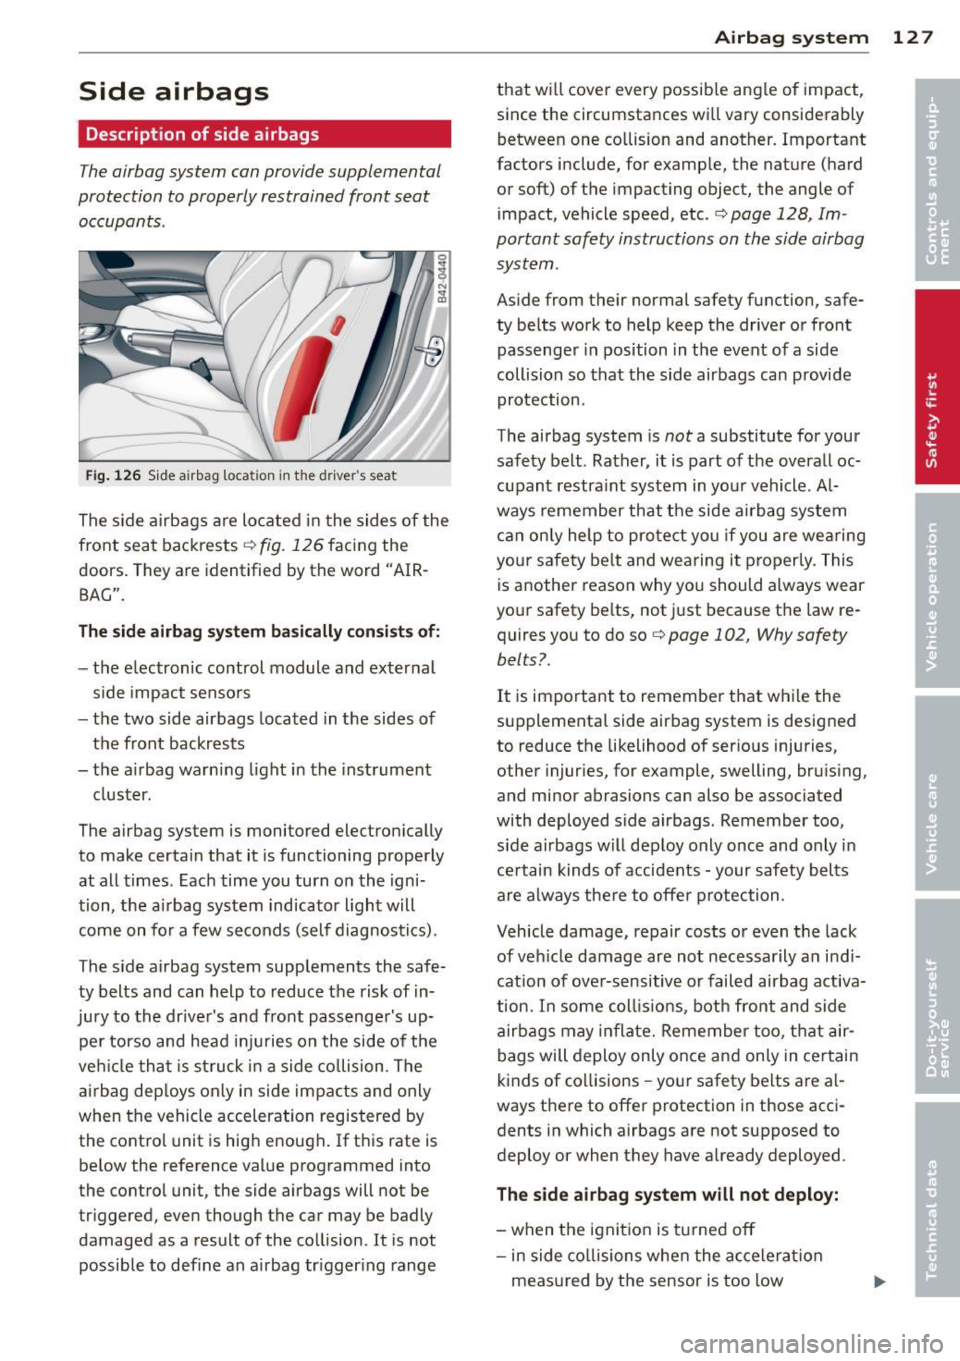
Fig. 12 6 Side a irbag locat ion in t he d river 's seat
The s ide a irbags are located in the sides of the
front sea t backrests ¢
fig. 126 facing the
doors. They are identified by the word "AIR
BAG".
The side airbag sy stem ba sic ally con sis ts of:
- th e e lectronic control module and exter nal
s ide impact senso rs
- the two side airbags located in the sides of
the front backrests
- the a irbag warning light in the instrument
cluster .
The airbag system is monitored electron ically
to make certain that it is functioning properly
at all times . Each time you turn on the igni
tion, the airbag system indicato r light will
come on fo r a few seconds (self diagnosti cs) .
The s ide airbag system supplements the safe
ty belts and can help to reduce the risk of in
jury to the dr iver's and front passenger's up
pe r torso and head inj uries on the side of the
veh icle tha t is s truck i n a side collision . The
ai rbag dep loys only in side impacts and only
when the vehicle acceleration registered by
the cont rol unit is high e nough . If t his rate is
be low the reference va lue programmed into
the control unit, the side airbags will not be
tr iggered, even though the car may be badly
damaged as a result of the co llision .
It is not
possible to def ine an a irbag tr igger ing range
A irba g sy stem 12 7
that will cove r every possib le ang le of impact,
since the circumstances wi ll vary cons iderably
between one co llision and another. Important
factors include, for examp le, the nature (hard
or soft) of the impacting object, the angle of i mpact, vehicle speed, etc. ¢
page 128, Im
portant safety instructions on the side airbag system .
Aside from their normal safety function, safe
ty belts work to help keep the drive r or front
passenger in position in t he event of a side
collision so that the side airbags ca n provide
protection .
The airbag system is
not a substitute for your
safety belt . Rather, it is part of the overall oc
cupant restra int system in your vehicle . A l
ways remember that the side airbag system
c an on ly help to pro te ct yo u if you are wearing
your safe ty be lt and wea ring i t properly. This
is another reason why you should always wear
your safety be lts, not just because the law re
quires you to do so¢
page 102, Why safety
belts? .
It is important to remember that wh ile the
supplementa l side airbag system is designed
to reduce the likelihood of ser ious injuries,
other injur ies, for example, swelling, bru ising,
and minor abrasions can also be associated
with deployed side airbags . Remember too ,
s ide a irbags will deploy only once and only in
ce rtain kinds of accidents -your safety belts
a re a lways the re to offer p rotection .
Vehicle damage, repair costs o r even t he lack
of ve hicle damage are not necessa rily a n in d i
cation of ove r-s ensitive o r failed airbag activa
t ion. In some col lisio ns, both front and side
airbags may in flate. Remember too, that air
bags will deploy only once and on ly in ce rtain
k inds of co llisions -yo ur safety belts are a l
ways the re to offer protection in those acci
dents in which airbags are not supposed to
deploy or when they have a lready deployed .
The side airbag sy ste m will not deploy:
- when the ignit ion is turned off
- in side co llisions whe n the a ccelera tion
meas ured by t he sensor is too low
Page 150 of 236
148 Intelligent technology
Dynamic energy management
While th e veh icle is be ing dr iven , dynamic en
e rgy management distributes the energy gen
erated according to the needs of the individu
a l components . It reg ulates cons umption, so
that more electrical energy is not being used
t han is being generated and ensures an opti
mal state of charge for the battery .
(D Tips
- But even energy management cannot
negate the limits of physics. Consider
that the power and life of a battery are li mited .
- If starting ab ility is threatened, you are
i nformed by a warn ing
<=> page 148,
Driver notification in the instrument
cluster display .
What you should know
The highest priority is given to maintaining
starting capability.
The battery is severely taxed in short-distance
d riving, in city traffic and duri ng the co ld time
of year. Abu ndant e lectr ica l energy is re
qu ired, but only a little is g ene rated . It is also
cr itica l if t he engine is not run ning and ele ct ri
cal componen ts ar e turned on. In th is in
stance energy is being consumed but none is
being generate d.
It is in precisely these si tua tions that you w ill
notice energy management actively regula t
ing the distrib ution o f energy .
Vehicle stands for an extended period
If you do not drive you r vehicle over a period
of severa l days or weeks, elect rical compo
n ents are grad ually cu t back o r swi tched off .
This redu ce s energy cons umption and mai n
tains s ta rting cap abili ty over a longer period .
T a ke into considerat ion tha t when you u nlock
your ve hicle, some co nvenience func tions,
such as the remote key or power sea t adj ust
men t, may not be available. The convenience
f u nctions will be avai lable again when you
turn on th e ignition and start the engine. With the engine turned off
If you
listen to the radio, for examp le, w it h
t h e engine t urned off, the battery is being dis
c h arged .
If starti ng capab il ity is jeopard ized d ue to en
ergy consu mptio n, a mess age a ppea rs in the
drive r informa tion d isplay .
You have to start t he engine to charge the
ba tte ry.
With the engine running
Althoug h electrical energy is generated when
the vehicle is being d riven, the battery can be
come discharged. This happens mostly when
li ttle energy is being ge ne rated and a g reat
deal consumed a nd t he battery's state of
c h arge is not opt imal.
To b ring the energy bala nce back into equ ili
br iu m , consume rs wh ich req uire espe cially
l ar ge amounts of ene rgy a re temporar ily cu t
ba ck or sw itched o ff. H ea ting systems in par
t icu lar require a grea t deal of energy . If you
not ice, for examp le, that the heated seatsat or
the heated rear window are not heating, they have been temporarily cut back or switched
off . These systems w ill be available again as
soon as the e ne rgy balance has been restored.
You w ill also notice that engine id le speed has
been increased slightly . T hi s is normal and not
a cause for concern. By increasing engine id le
speed the additional energy required is gener
ated and the battery is charged .
Driver notification in the instrument
cluster display
If bat tery power drops in to the range where i t
can limit the ability of the engi ne to start, this
is shown in the instrument cluster display
with the following driver message:
(•] Low battery charge: battery will be
charged while driving
T h is not ifi cat io n r eminds yo u that t he start ing
ca pabili ty of the engi ne may be lim ite d. As
soon as you s tart dr iv ing again, the battery .,..
Page 175 of 236
The engine oil and oil filter must be changed
according to the mi leage (kilometers) and
time interva ls specified in your vehicle's War
ranty
& Maintenance booklet. Do not exceed
t hese intervals -harmful deposits from old
engine o il can reduce engine performance and
can lead to expensive engine repairs .
Changing the o il at the recommended inter
vals is so very important because the lubricat
ing properties of oil decrease gradually during
norma l vehicle use . If you are not sure when
you have your oi l changed, ask your author
i zed A udi Service Advisor.
Under some circumstances the engine o il
should even be changed more frequently .
Change o il more often if you drive mostly
short distances, ope ra te the vehicle in dusty
areas or mostly under s top -and-go traffic con
d itions, or when yo u use your vehicle whe re
temperatures stay below freezing point for
l ong periods.
D etergen t additives i n the o il w il l make fresh
oil look dark after the eng ine has been run
ning for a short time . This is norma l and is not
a reason to change the oi l more often than
recommended.
Damage or malfunction s due t o lack of
m aintenance
It is essen tial that you change your oil at the
r ecommended inte rva ls using only engine o il
that complies with A udi oil standard
VW 502 00 . Your Limited New Vehicle War
ranty does not cover damage or malfunctions
d ue to fai lure to fo llow recommended mainte
nance and use req uirements as set forth in
t he Audi Owner's Manua l and Warranty
&
Ma intenance book let . Your authorized Aud i
deale r will have to deny warranty coverage un
l ess you present to the dealer p roof in the
fo rm of Se rvice o r Repair Orde rs t hat all
sched uled main tenance w as performed in a
time ly manner .
Checkin g and fillin g 173
Engine oil consumption
The engine in your vehicle depends on an ade
quate amount of oil to lubricate and cool all
of its moving parts .
In order to provide effective lubrication and
cooling of interna l eng ine components, all in
te rnal combust io n engines consume a certain
amount of oil. Oil consumpt io n va ries from
engine to engine and may change sig nifican tly
ove r the life of the engine. Typically, engines
with a spec ified break -in pe riod (see
¢
page 150) consume more oil duri ng the
break-in pe riod than they consume afte r oi l
consumption has stabili zed.
U nder normal cond itions , the rate of oi l con
s u mption depends on t he q uality and viscos ity
of the oil, the RP M (revolut ions per minute) at
which the engine is operated, the ambient
temperature and road conditions. Further fac
tors are the amount of oil dilut ion from water
condensa tion or fue l residue a nd the oxida
tion level of the oi l. As any eng ine is subject to
wear as mileage builds up, t he oil co nsump
t ion may incre ase over time until repla cement
of wo rn components may be come necessary.
With a ll these va riab les coming into p lay, no
standard rate of oil consumpt io n can be es
t a bl is h ed o r spe cified . There is no alte rnative
to regular an d frequent chec king of the o il lev
el , see
Note.
If the yellow engine o il level wa rning symbo l
i n the instrument cluster
Ill lights up, yo u
sho uld check the oil leve l as soon as possib le
¢
page 174 . Top off the oil at your ear liest
convenience
¢ page 174.
A WARNING
-Before you check anything in the engine
c o mpartment, always read and heed a ll
WARNINGS¢
& in Working in the engine
compartment on pag e 169 .
(D Note
Driving w ith an insufficient o il level is like-
-
ly to cause severe damage to the engine. Ill>-
•
•