lights AUDI R8 SPYDER 2012 User Guide
[x] Cancel search | Manufacturer: AUDI, Model Year: 2012, Model line: R8 SPYDER, Model: AUDI R8 SPYDER 2012Pages: 236, PDF Size: 59.24 MB
Page 20 of 236
18 Instruments and warning/indicator lights
(60 °C) and the engine is at operating tem
perature .
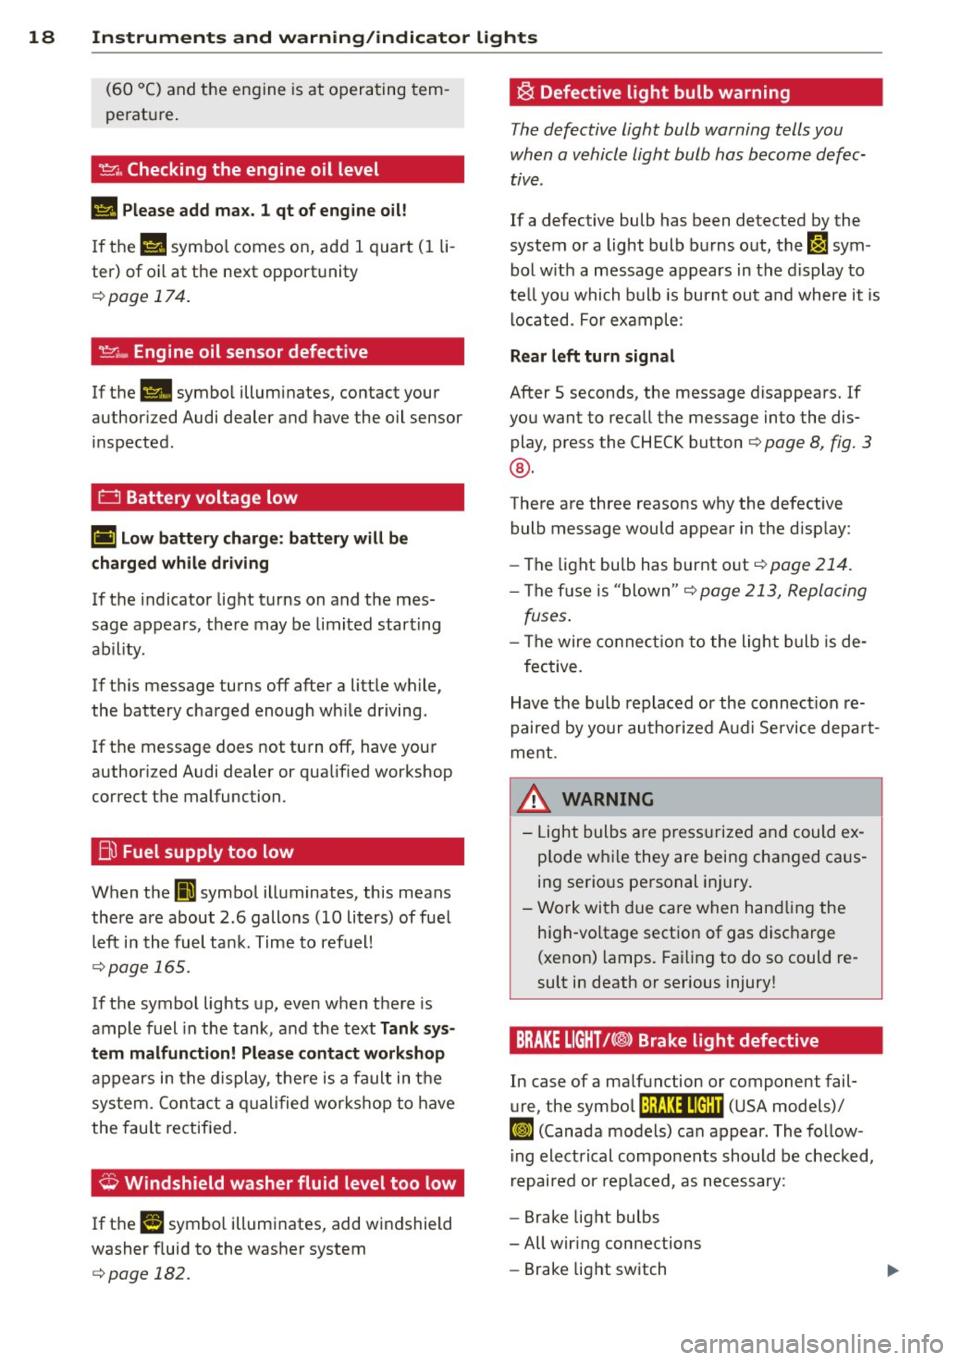
~. Checking the engine oil level
II! Please add max. 1 qt of engine oil!
If the 1\1 symbo l comes on, add 1 quart (1 li
ter) of oil at the next opportunity
¢page 174.
'.!:'.::: ... Engine oil sensor defective
If the II symbol illuminates, contact your
author ized Audi dealer and have the oil sensor
inspected.
t:::J Battery voltage low
(•i Low battery charge: battery will be
charged while driving
If the indicator light turns on and the mes
sage appears, there may be limited starting
ab ility.
If th is message turns off after a little while,
the battery charged enough wh ile driving.
If the message does not turn off, have your
author ized Audi dealer or qualif ied workshop
correct the malfunction.
Bu Fuel supply too low
When the II] symbol illuminates, this means
there are about 2.6 gallons (10 liters) of fuel l eft in the fuel tank. Time to refuel!
¢page 165.
If the symbol lights up, even when there is
ample fuel in the tank, and the text
Tank sys
tem malfunction! Please contact workshop
appears in the display, the re is a fault in the
system. Contact a qualified workshop to have
the fau lt rectified .
,;;, Windshield washer fluid level too low
If the I! symbol illuminates, add windshield
washer f luid to the washer system
¢ page 182.
~ Defective light bulb warning
The defective light bulb warning tells you
when a vehicle light bulb has become defec
tive.
If a defective bulb has been detected by the
system or a light bulb burns out, the~ sym
bol w ith a message appears in the display to
te ll you which bulb is burnt out and where it is
lo cated. For example :
Rear left turn signal
After 5 seconds, the message disappears. If
you want to recall the message into the dis play, press the CHECK button¢
page 8, fig. 3
®·
There are three reasons why the defective
bulb message would appear in the display:
- The light bu lb has burnt out
¢page 214.
-The fuse is "blown"¢ page 213, Replacing
fuses .
-The wire connection to the light bulb is de-
fective.
Have the bulb replaced or the connection re
paired by your authorized Aud i Service depart
ment .
A WARNING
-
-Light bulbs are pressurized and could ex
p lod e while they are being changed ca us
ing serious personal injury.
- Work with due care when handling the
high-vo ltage section of gas discharge
(xenon) lamps. Failing to do so could re
sult in death or serious injury!
BRAKE LIGHT!<®> Brake light defective
In case of a malfunction or component fail-
ure, the symbol (USA models)/
$fl (Canada models) can appear. The follow
ing electrical components should be checked,
repaired or replaced, as necessary:
- Brake light bulbs
- All wir ing connections
- Brake light switch
Page 21 of 236
Instruments and warning/indicator lights 19
Contact your authorized Audi dealer for assis
tance if necessary.
@ Tips
The brake light switch is only inspected as
pa rt of the functional check after the en
gine is started.
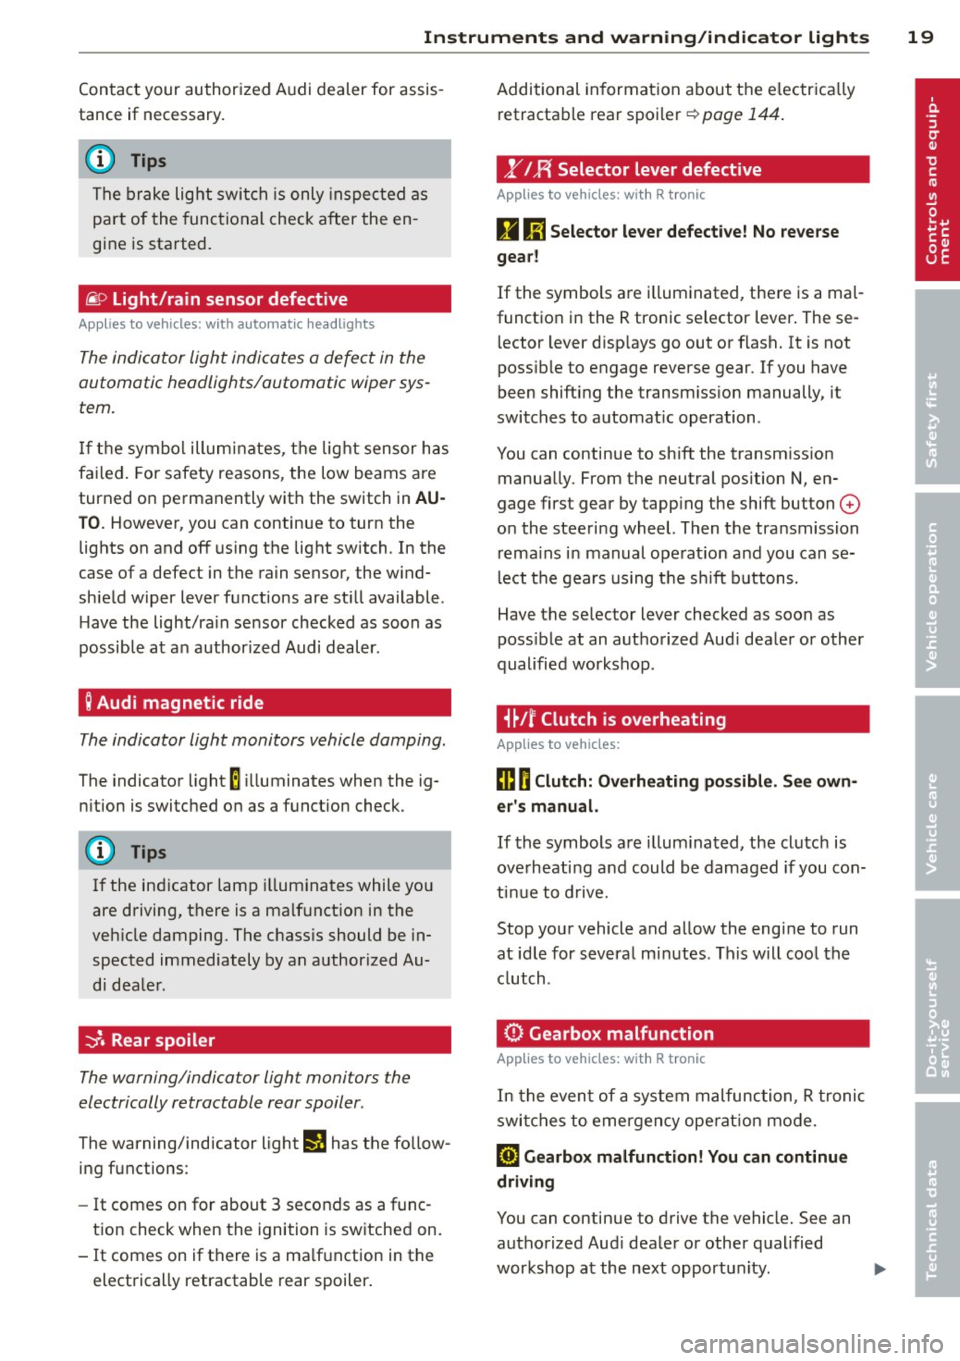
@ Light/rain sensor defective
Applies to vehicles: with automatic headlights
The indicator light indicates a defect in the
automatic headlights/automatic wiper sys
tem.
If the symbol illum inates, the light sensor has
failed. For safety reasons, the low beams are
turned on permanently with the switch in
AU
TO. However, you can continue to turn the
lights on and off using the light switch. In the
case of a defect in the rain sensor, the wind
shield wiper lever functions are still available .
H ave the light/ra in sensor checked as soon as
possible at an author ized Audi dealer.
; Audi magnetic ride
The indicator light monitors vehicle damping.
The indicator light E ill uminates when the ig
nition is switched on as
a function check.
(D Tips
If the ind icator lamp illuminates while you
are driving, there is a malfunct ion in the
veh icle damping. The chass is should be in
spected immediately by an authorized Au
di dealer.
-:;J. Rear spoiler
The warning/indicator light monitors the
electrically retractable rear spoiler .
The warning/indicator light Ii! has the follow
ing functions:
-It comes on for about 3 seconds as a func
t ion check when the ignition is switched on.
- It comes on if there is a ma lfunction in the
electrically retractable rear spoiler . Additional
information about the electr ica lly
retractable rear spoiler
r:;, page 144.
,.YI F{ Selector lever defective
Applies to vehicles : with R tronic
g Ii] Selector lever defective! No reverse
gear!
If the symbols are i lluminated, there is a mal
function in the R tronic selector lever . These
l ector lever d isp lays go out or flash. It is not
poss ible to engage reverse gear. If you have
been shifting the transm iss ion manually, it
switches to automat ic operation.
You can continue to shift the transmission manually. From the neutral position N, en
gage first gear by tapp ing the shift button
0
o n the steering wheel. Then the transmission
remains in manual operat ion and you can se
lect the gears using the s hift buttons.
Have the selector lever checked as soon as
poss ible at an authorized Aud i dealer or other
qualified workshop .
i~Jf Clutch is overheating
Applies to vehicles:
ffl O Clutch: Overheating possible. See own
er's manual.
If the symbols are i llum inated, the clutch is
ove rheating and could be damaged if you con
tinue to drive.
Stop your vehicle and allow the engine to run
at idle for several m inutes . This w ill cool the
clutch.
0 Gearbox malfunction
App lies to vehicles: wit h R tro nic
In the event of a system malfunction, R tronic
switches to emergency ope rat ion mode.
[O) Gearbox malfunction! You can continue
driving
You can continue to drive the vehicle. See an authorized Aud i dealer or other qualified
workshop at the next opportun ity . ..,.
Page 22 of 236
![AUDI R8 SPYDER 2012 User Guide 20 Instruments and warning/indicator lights
[O] Gearbo x malfunct ion! You can continue
dri ving but functions are rest ricted
There is a serio us sys tem ma lf u nction:
- The prog ram s AUDI R8 SPYDER 2012 User Guide 20 Instruments and warning/indicator lights
[O] Gearbo x malfunct ion! You can continue
dri ving but functions are rest ricted
There is a serio us sys tem ma lf u nction:
- The prog ram s](/img/6/57642/w960_57642-21.png)
20 Instruments and warning/indicator lights
[O] Gearbo x malfunct ion! You can continue
dri ving but functions are rest ricted
There is a serio us sys tem ma lf u nction:
- The prog ram shifts only i nto ce rtain gears.
- The eng ine may sta ll.
- It is not possib le to restart the eng ine if it
has been switched off.
- Contin uing to dr ive could result in s ubse
quent damage.
0 Note
If R tronic has switc hed to emergency op
erat ion mode, you s hou ld have the mal
function corrected as soon as possible .
(J.) Tire pressure monitoring system
Applies to vehicles: with tire pressure monitoring system
Tire pressure that is too low must be correct
ed as soon as possible .
The warning/ind icator light
[I] i ll uminates fo r
a few seconds afte r the ignit ion is t urned on
as a funct io n check. If t he (I] warning light
co mes on, pressu re in at least one tire is too
low .
.,. Stop driv ing as soon as possible without e n
dange ring yourse lf and other drivers on the
r oad.
• Inspect all tires.
• Correc t the t ire pressur e¢ page 189 .
Addit ional information about the
t ire pres
sure monitoring system
can be found
¢ page 201.
¢¢ Turn signals
The indicator light blinks when you use either
turn signal .
Whenever you use the left
R or the r ight II
turn signal , the ind icator light blinks. When
you use the emergency flasher, both indicator
lig hts flash .
If one of the tu rn s ignal light bu lbs burn out,
the t urn signa l wi ll blink tw ice as fast as n or
mal. Additional
in formation on the turn s ignals
¢ page 51.
CRUISE/ (,)" Cruise control
The (lj;(i)~i~ (USA mode ls)/ . (Canada models)
warning/indicator light illuminates whe n the
cruise control is activated .
Page 27 of 236

Menu display
Introduction
-----®
Fig . 12 W iper lever: Controls for the men u display
Display Ty e
~Set
• 1r
che c1<:----
Menu off
Fig. 13 D isplay: Start me nu
Some functions in your veh icle can be set, ac
tivated, and controlled by
Menus (e.g. Acous
tic park ass ist*). With these menus you can al
so se lect the info rmation show n in the Driver
Information System, which ope rates only with
the ignition switched on . Operation is cont rol
l ed by the
I RESET ! button and the rocker
sw itch on the w iper lever ¢ fig. 12.
The
Start menu shows you the different dis
play types:
Set
Che ck
Menu off
Each display type in the Start menu contains a
submenu with add itional opt io ns.
Set
Dr iver in formation system 25
C lock
¢ page
26
Tire pressure
¢page200
Computer
¢page 26
Speed warning
¢page30 L ang uage
q page26
Units (distance, fuel consump
tion, temperature) ¢page26
Disp lays (lap timer)
Lights
¢page49
W ipers (se rv ice position)
¢ page55
Doors (unlocking and locking
mode)
¢page34
Check Service
Chassis number
¢page 215
Keys
Menu off The menu display is hidden and
the lap timer appears.
Page 36 of 236
34 Openin g and clo sing
electronic immobilizer is automatica lly acti
vated once again.
I f an unauthorized key was used , SA FE is d is
p layed con tinuously in the odometer disp lay
field.
A WARNING
-
Always take the key with you when you
leave the vehicle. The key can disarm the
electronic engine immobilizer and permit
an unauthor ized person to start the engine
and enable operation of the vehicle sys
tems such as power window leading to se r ious personal in jury .
(D Tips
-The vehicle cannot be started if an unau
thorized key is used . The vehicle may not
start if another radio device such as a key
for another vehicle or a transponder is l ocated on the key ring.
- For Declarat ion of Compliance to United
States FCC and Industry Canada regu la
tions
~page 222.
Power locking system
General description
The power locking system locks or unlocks all
doors simultaneously.
When opening and closing the doors, the power locking system locks or unlocks
both
doors together.
The remote mas ter key locks and un locks the
doors using a radio signal
~ page 35.
Locking and unl ocking w ith the key
You can also lock and unlock your vehicle us
ing the key in the lock o n the dr iver's door.
The unlocking and lock ing mode can be
changed in the Driver Informat ion System
~ page 25.
Both doors are locked automatically when the
vehi cle is locked and the ant i-theft alarm sys
tem is act ivated.
Auto Loc k
The Auto Lock function locks a ll doors once
speed has exceeded approximately 9 mph (15
km/h).
T he car is unlocked automat ica lly once the ig
nition key is removed . In add ition, the vehicle
can be un locked if the power locking system
opening function
(l;;i) is activated or one of the
door levers is used .
Turn signals
All the tu rn s ignals flash to indicate when the
vehicle is locked and unloc ked. The t urn sig
nals flash twice when the vehicle is unlocked.
T he turn signa ls flash once when all the doors
and the front lid are locked. The interior lights
are also switched on or off automatica lly ac
cord ing to the position of the door contact
switch .
A WARNING "---
-When you lock your vehicle from outside,
nobody -espec ially children -shou ld re
main inside the vehicle. Remember,
when yo u lock the vehicle from the out
side the windows cannot be opened from
the inside .
- When you leave the veh icle, always re
move the ignition key and take it with
you. This will prevent passengers (chil dren, for example) from accidentally being locked in the vehicle should they acci
dentally press the power locking switch
in one of the doors.
- Do not leave ch ildren inside the vehicle
unsuperv ised. In an emergency it would
be imposs ible to open the doors from
the outside without the key.
(D Tips
- The driver's door can be locked and un
locked with the key if the power locking
system fails . The passenger's door can
be locked manually~
page 36 .
Page 38 of 236
36 Opening and clo sing
The turn signals brief ly flash once and the
horn sounds once when the doors and the
front lid are locked proper ly.
.&_ WARNING
Always read and heed WARNING <=> .& in
General description on page 34.
@ Tips
- However, note that which door is un
locked
mechanically when the vehicle is
opened depends on the settings in the menu display
c>page 25.
-Both doors are locked automatically
when the vehicle is locked.
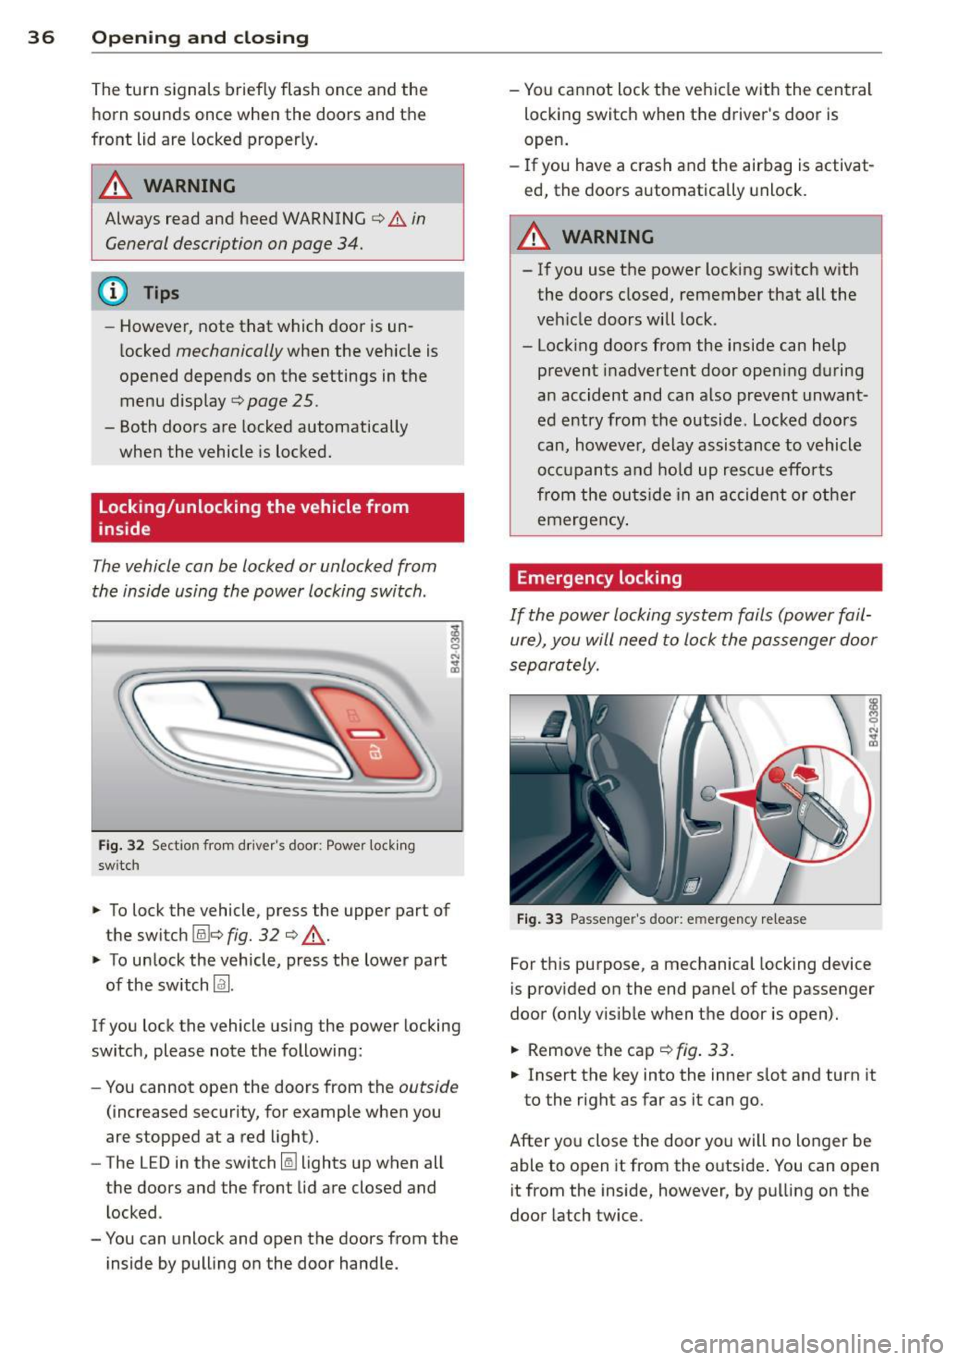
Locking/unlocking the vehicle from
inside
The vehicle can be locked or unlocked from
the inside using the power locking switch .
Fig. 32 Section from driver's door: Power locking
sw itch
-
;! M 0
"' .., m
~ To lock the vehicle, press the upper part of
the switch (illc>
fig. 32 c> ..&., .
~ To unlock the vehicle, press the lower part
of the switch
Im.
If you lock the vehicle using the power locking
switch, please note the following:
- You cannot open the doors from the
outside
(increased security, for example when you
are stopped at a red light).
- The LED in the switch
Iii lights up when all
the doors and the front lid are closed and
locked .
- You can unlock and open the doors from the inside by pulling on the door handle. -
You cannot lock the vehicle with the central
locking switch when the driver's door is
open.
- If you have a crash and the airbag is activat
ed, the doors automatically unlock.
A WARNING
-
-If you use the power locking switch with
the doors closed, remember that all the
vehicle doors will lock.
- Locking doors from the inside can help prevent inadvertent door opening during
an accident and can also prevent unwant
ed entry from the outside. Locked doors
can, however, delay assistance to vehicle
occupants and hold up rescue efforts
from the outside in an accident or other
emergency .
Emergency locking
If the power locking system fails (power fail
ure), you will need to lock the passenger door
separately .
Fig. 33 Passenger's door: emergency re lease
For this purpose, a mechanical locking device
is provided on the end panel of the passenger
door (only visib le when the door is open).
~ Removethecap c>fig.33.
~ Insert the key into the inner slot and turn it
to the right as far as it can go.
After you close the door you will no longer be able to open it from the outside . You can open
it from the inside, however, by pulling on the
door latch twice.
Page 51 of 236
Clear vision Lights
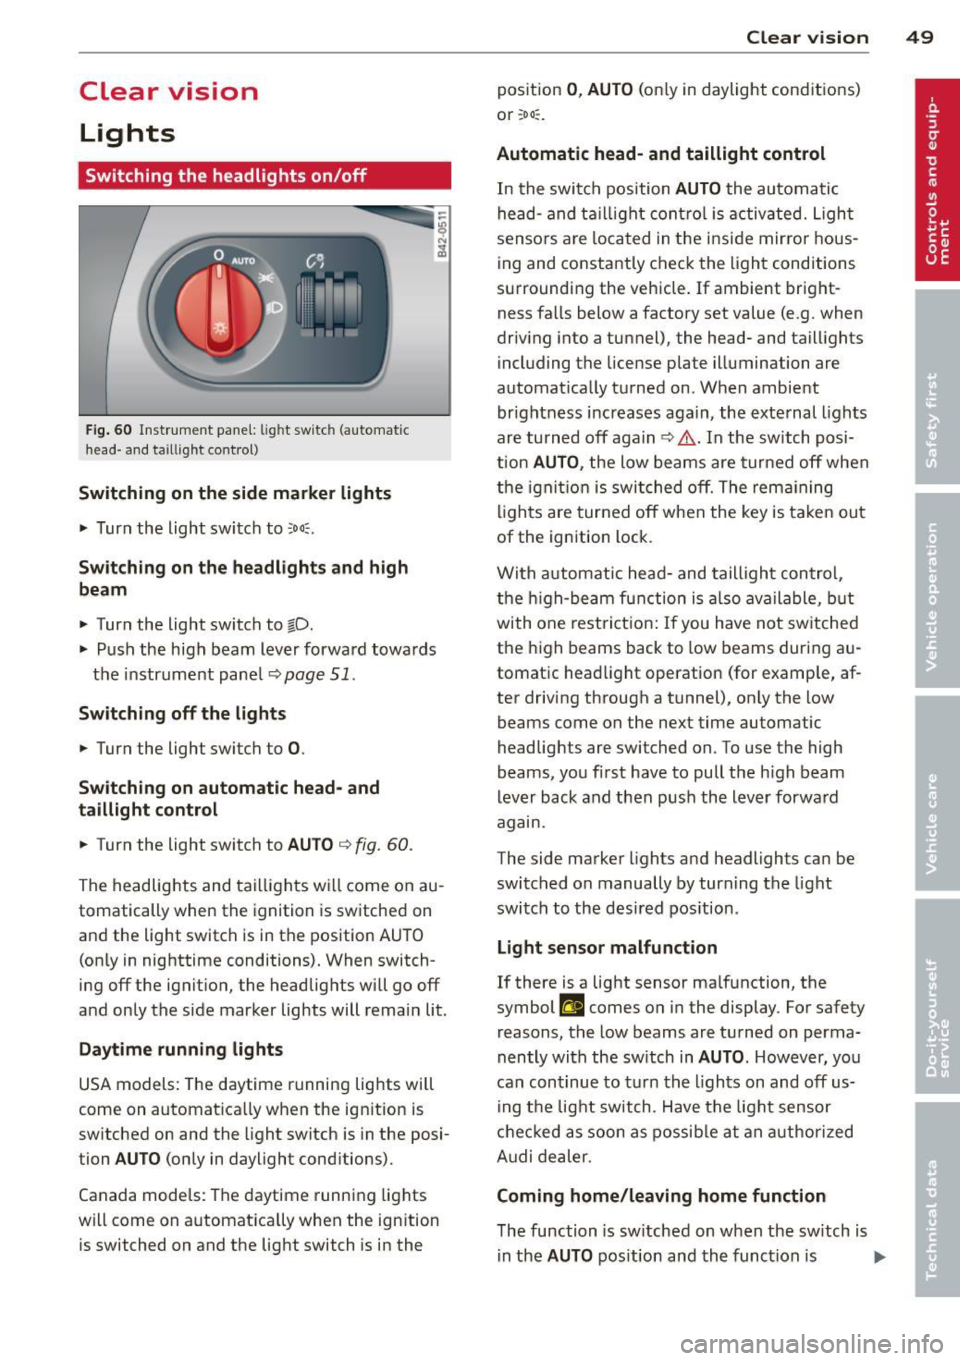
Switching the headlights on/off
Fig. 60 Instr ume nt pa nel: lig ht sw itc h (automat ic
head· a nd taill ig ht control)
Switching on the side marke r lights
"' Turn the light switch to ::oo:.
Switching on the headlights and high
beam
"' Turn the light switch to tD.
.,. Push the high beam lever forward towa rds
t h e instrument pane l
Q page 51.
Switching off the lights
.,. Turn the light switch to 0.
Switching on automatic head- and
taillight control
.,. Turn the light switch to AU TO Q fig . 60 .
The headlig hts and tai lligh ts w ill come on au
tomatically when the ignition is sw itche d on
and the light switch is in the position AU TO
(on ly in nig httime conditions). When switch·
ing off the ignit io n, the headlig hts wi ll go off
and only the side marker lights will remai n lit.
Daytime running lights
USA models: The daytime r unning lig hts will
come on a utomat ica lly when the ig nition is
sw itched on and the light switch is in the posi·
tion
AUTO (only in daylight conditions).
Canada models : Th e daytime runni ng lights
will come on a utomat ically when the ignition
is switched on and the light switch is in the
Clear vi sion 49
position 0 , AUTO (on ly in daylight cond itions)
o r ;oo :.
Automatic head- and taillight control
In the swi tc h p osition AUTO the au tomati c
he ad- and t aillight con tro l is activ ated. Ligh t
senso rs ar e lo cated in t he i nside mirro r hous
ing and co nstantly chec k the light cond itions
su rroundi ng the vehicle. If ambient bright
ness fa lls below a factory set value (e .g. when
dr iv ing into a tu nnel), the head- and taill ights
i ncl uding the license plate illuminati on are
automat ica lly t urned on . When ambient
brightness i ncreases aga in, the exte rnal ligh ts
ar e turned off aga in
q &. . In the switch posi
t ion
AUTO , the low beams are tur ned off when
t h e ign ition is swi tched o ff. Th e rem aining
li gh ts are turned off when the key is ta ke n out
of the ignition lock.
W it h a utomat ic head- and taill igh t con trol,
the h igh-be am fu nction is also ava ilable , bu t
with one rest ric t ion : If you have not sw itche d
the h igh beams back to low beams during a u
tomat ic head light operat ion (for examp le, af
ter driving through a tunnel), on ly the low
beams come on the next time automatic
headlig hts are switched on. To use the high
beams, yo u fi rst have to pull the h igh beam
lever back and then push the lever forwa rd
agam .
The side ma rke r lights a nd headlights ca n be
sw itc hed on manually by turn ing the light
swi tc h to the des ired pos ition .
Light sensor malfunction
If there is a light sensor ma lfunction, the
symbol
El comes on in the display . For safety
reasons, the low beams are tu rned on perma
nently with t he sw itch in
AUTO . However , you
can con tinue to tu rn the lights on and off us
in g t he light switch . Have t he ligh t sensor
c h eck ed as soon a s possib le a t an au thori zed
A udi dealer.
Coming home/leaving home function
The function is sw itched on w hen the sw itch is
i n the
AUTO pos ition and th e funct ion is liJJ,,
Page 52 of 236
50 Clear vision
shown as active in the driver information
system.
The
coming home function illuminates the
area around the vehicle when the ignition is
switched off and the driver 's door is opened.
The length of time the lights rema in on can be
set in the menu display
(Lights> Exterior
lights > coming home) .
The leaving home function illuminates the
area around the vehicle when unlocking it.
.&_ WARNING
-Never use daytime running lights to see
where you are going. They are not bright enough and will not let you see far
enough ahead for safety, especially at dusk or when it is dark . Be aware of
changes in outside light conditions when
you are driving and respond by switching on your low beams.
- Automatic head- and taillight control is
only intended to assist the driver. This
feature does not relieve the driver of his
responsibility to check the headlights
and to turn them on manually according
to the current light and visibility condi
tions. For example, fog and rain cannot
be detected by the light sensors. Conse
quently, always switch the headlights on
under these weather conditions and
when driving in the dark .
- Crashes can happen when you cannot see
the road ahead and when you cannot be
seen by other motorists .
-Always turn on the headlights so that you can see ahead and so that others can see your car from the back.
- Please observe legal regulations when
using the lighting systems described .
@ Tips
-Always observe the specific local regula
tions for your area when to use your lights .
- Turn on low beams as evening ap
proaches or in conditions of poor visibili
ty. -
Do not attach stickers to the windshield
in front of the sensors as this can disable
the automatic head- and taillight control
and the automatic glare-dimming of the
rearview mirror(s)*.
- If you remove the ignition from the igni
tion lock while the headlights are still
on, a buzzer will sound as long as the
driver's door is open to remind you to
turn off the lights .
- In the AUTO mode, the low beams are
turned off when the ignition is turned
off . The remaining lights are turned off
when the key is taken out of the ignition.
- In cool or damp weather conditions the
headlights may fog over temporarily on
the inside .
- The critical factor is the temperature
difference between the interior and the
exterior of the headlight lens.
- With the main beams switched on, the
light-emitting area will be free of con
densation after a short time , however
the edges of the glass may still be fog
ged .
- This physical phenomenon has no ef
fect on the life of your vehicle's l ight
ing system .
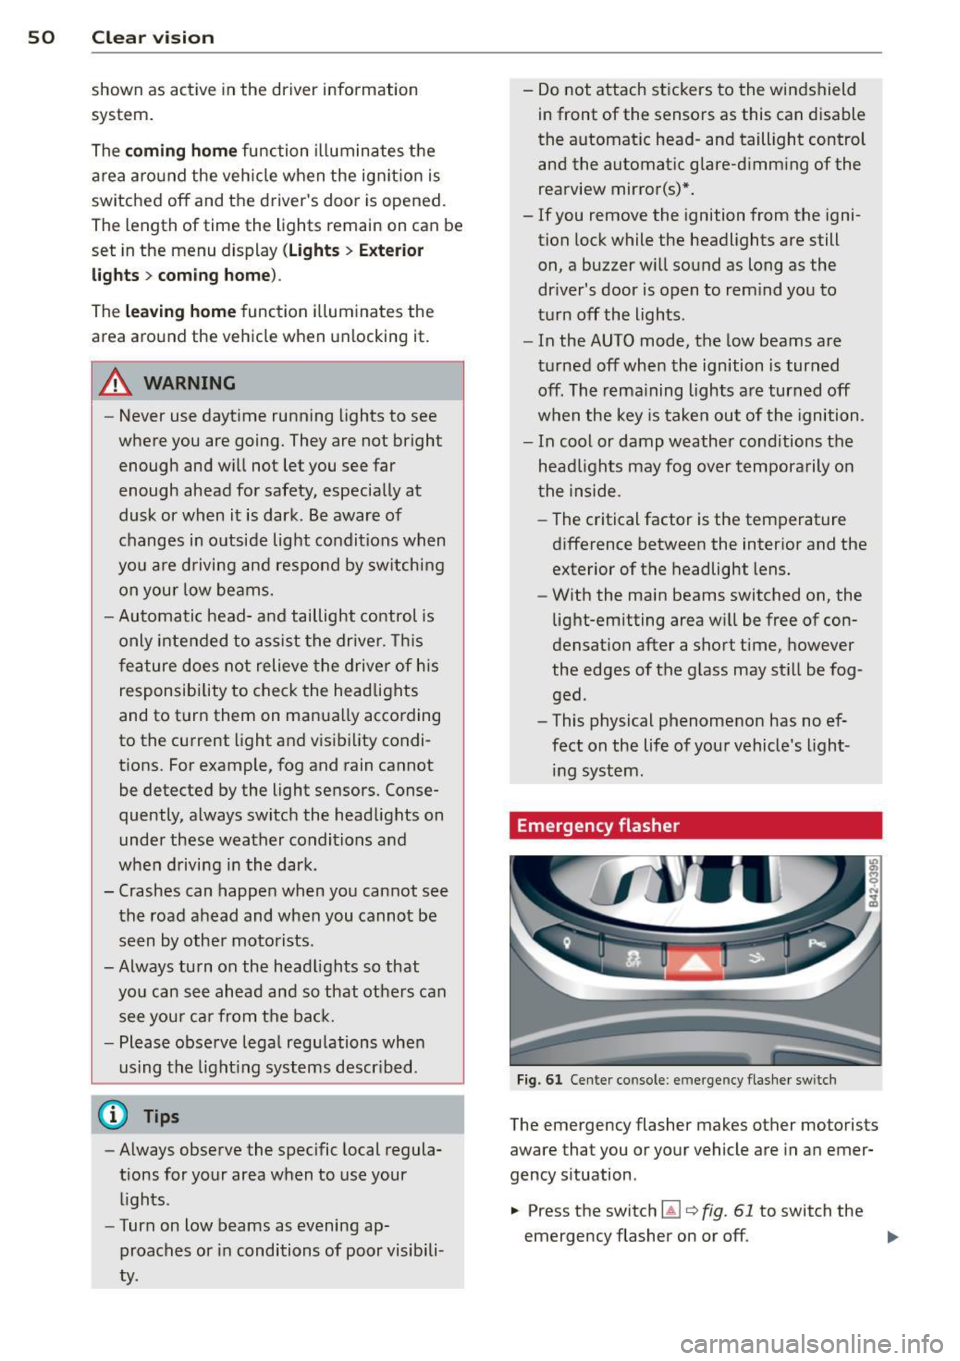
Emergency flasher
Fig. 61 Center console: em erge ncy flasher sw itc h
The emergency flasher makes other motorists
aware that you or your vehicle are in an emer
gency situa tion.
... Press the switch ~
Q fig. 61 to switch the
emergency flasher on or off .
ll>
Page 53 of 236
When the emergency flasher is on, all four
turn signal blink at the same time . The turn
signal ind icator lights
R II in the instrument
cluster, as well as the light in the emergency
flasher switch~ blink likewise . The emergen
cy flasher also works when the ignition is
switched off.
The emergency flasher wi ll automatically
sw itch on if you are in an acc ident where the
a irbag has deployed .
(D Tips
You should switch on the emergency flash
er when:
-you are the last vehicle standing in a traf
fic jam so that any other vehicles coming
can see you, or when
-your vehicle has broken down or yo u are
in an emergency situation , or when
- your vehicle is being towed by a tow
truck or if yo u are towing another vehicle
behind you.
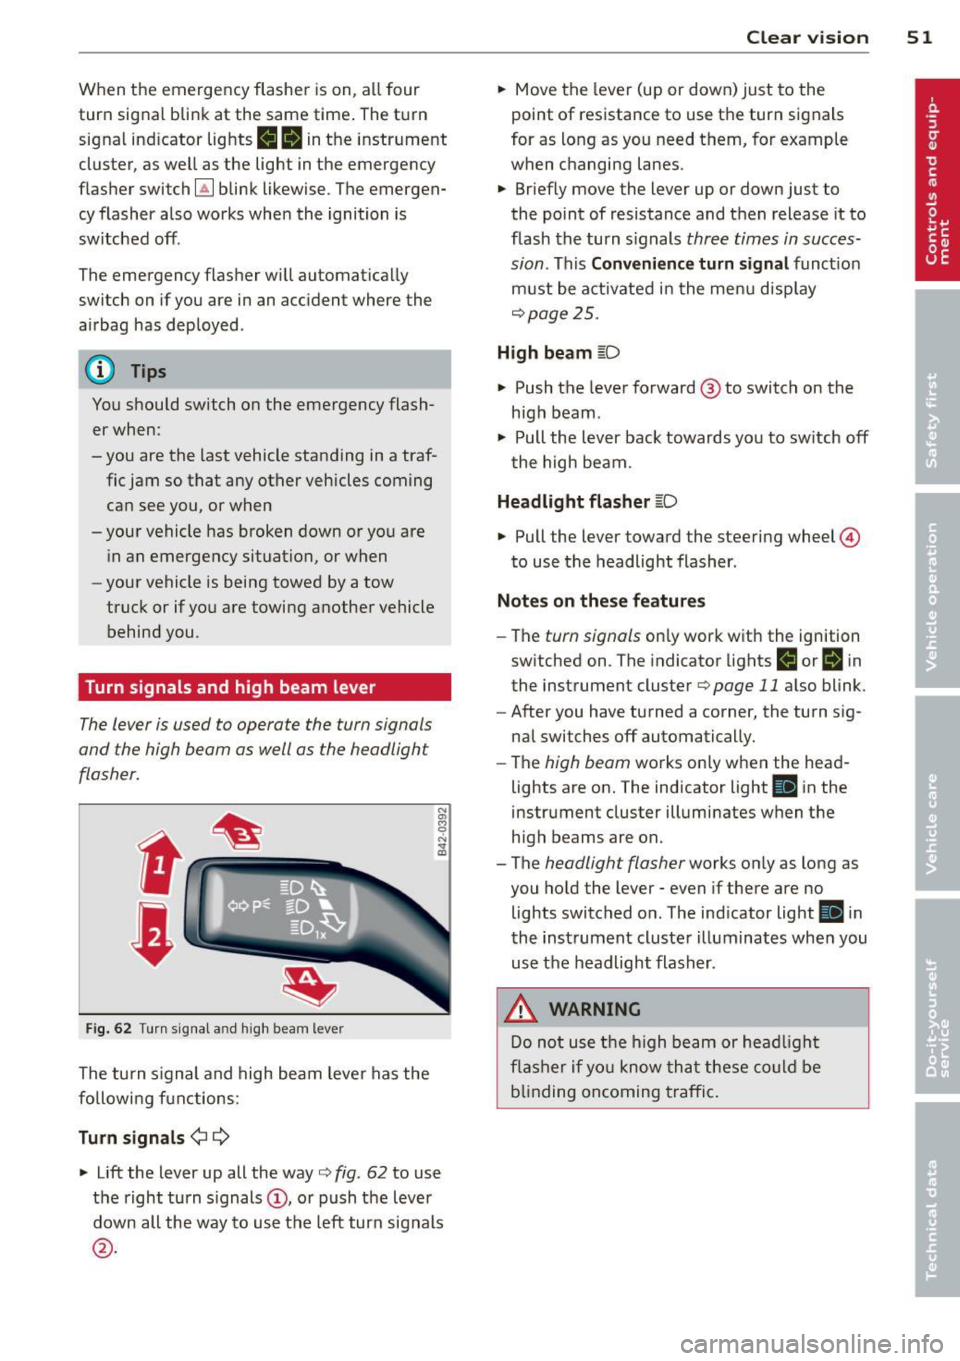
Turn signals and high beam lever
The lever is used to operate the turn signals
and the high beam as well as the headlight
flasher .
t
t
F ig . 6 2 Turn signa l an d h igh beam lever
The turn s ignal and high beam leve r has the
followi ng functions:
Turn sign als ¢ 9
N
"' 8
"' ... a,
~ Lift the lever up all the way c:> fig . 62 to use
the right turn s ignals
(D , or push the lever
down all the way to use the left turn signals
@ .
Clear vi sion 51
~ Move the lever (up or down) just to the
point of resistance to use the turn signals
for as long as you need them, for example
when changing lanes .
~ Briefly move the lever up or down just to
the point of resistance and t hen release it to
flash the turn s ignals three times in succes
sion . This
C o nveni ence turn signal funct ion
must be activated in the menu disp lay
c:> page25 .
High beam ~D
~ Push the lever forward @to switch on the
high beam .
~ Pull the lever back towards you to sw itch off
the high beam.
Headlight flasher ~D
~ Pull the lever toward the steering wheel ©
to use the headlight flasher .
Notes on the se feature s
-The turn signals only work with the ignition
switched on . T he indicator lights
IJ or Bi n
the instrument cluster c:> page 11 also blink.
- After you have turned a corner, the turn s ig-
nal switches off automatically.
- The high beam works only when the head
lights are on. The indicator light
II i n the
instrument cluster illuminates when the
high beams are on .
- The headlight flasher works only as long as
you ho ld the lever - even if there are no
lights switched o n. The ind icator light
II i n
the instrument cluste r illuminates whe n you
use the headlight flasher .
.&, WARNING
Do not use t he h igh beam or hea dligh t
fl ashe r if yo u know th at these could be
b lin ding oncoming t raffic .
Page 54 of 236
52 Clear vis ion
Interior lights
Interior lights
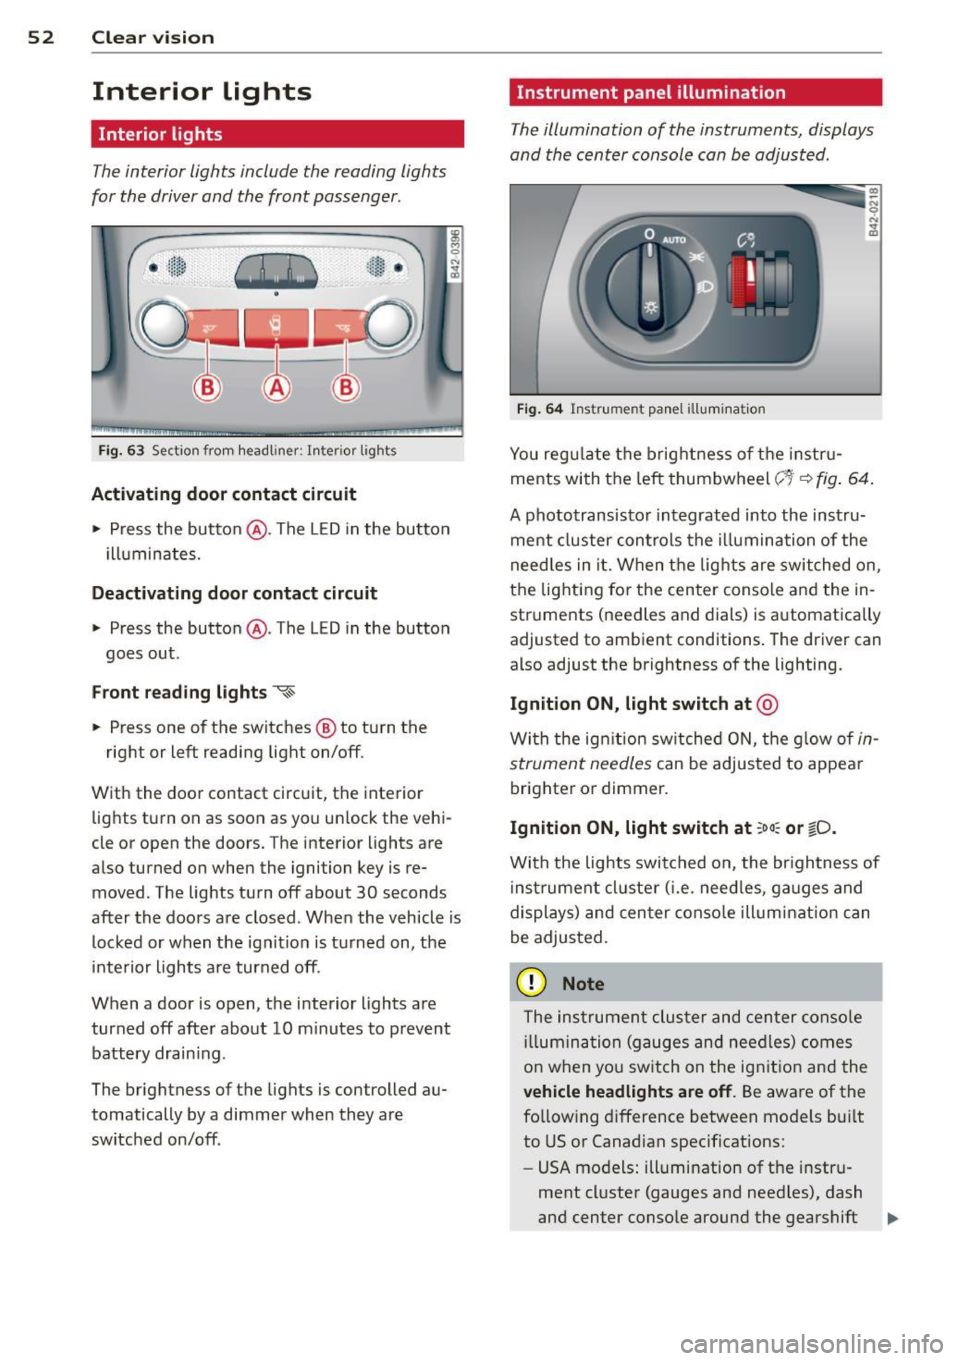
The interior lights include the reading lights
for the driver and the front passenger .
-
,-i.-,-,n--;)
"' "' "' 0
•
Fi g. 63 Section from headliner: I nterior l ights
Acti vating door contact circuit
• Press the button @. The LED in the button
i lluminates.
Deactivating door c ontact circu it
• Press the button @. The LED in the button
goes out .
Front re ad ing lights ~
• Press one of the switches @ to turn the
right or left reading light on/off.
With the door contact circuit, the interior lights turn on as soon as you unlock the vehi
cle or open the doors. The interior lights are
also turned on when the ignition key is re moved. The lights turn off about 30 seconds
after the doors are closed . When the vehicle is
locked or when the ignit io n is tu rned on, the
inte rior lights a re turned off.
When a door is open, the interior lights are
turned off after about 10 m inutes to prevent
battery drain ing.
The brightness of the lights is controlled au
tomatically by a dimmer when they are
switched on/off .
Instrument panel illumination
The illumination of the instruments, displays
and the center console can be adjusted .
Fig . 6 4 Instrument pa nel illuminat ion
You reg ulate the brightness of t he instr u
ments with the left thumbwheel
c;~-~ fig . 64 .
A phototransisto r integrated into the instru
ment cluster controls the illumina tion of the
need les in it. When the lights are switched on,
the lighting for the center conso le and the in
struments (needles and dials) is automatically
adjusted to ambient conditions . The driver can
also adjust the brightness of the lighting.
Ignition ON, light switch at @
With the ign ition sw itched O N, the g low of in
strument needles
can be adjusted to appear
brighter or dimmer.
Ignition ON, light switch at ;oo : or ~D.
With the lights switched o n, the br ightness of
instrumen t cluster ( i.e . need les, ga uges and
displays) and cen ter conso le illum inat ion can
be adjusted.
(D Note
The instrumen t cluster and cen ter conso le
ill umin ation (gauges and nee dles) comes
o n when yo u sw itch on the ignit io n and the
veh icle headlights are off . Be aware of the
fo llowing difference between models bui lt
to US or Canadian specifications:
- USA models: illumination of the instru
ment cl uster (gauges and need les), dash
and center conso le around the gearshift .,.